 1BarConnection
-
1Connect the Componentes
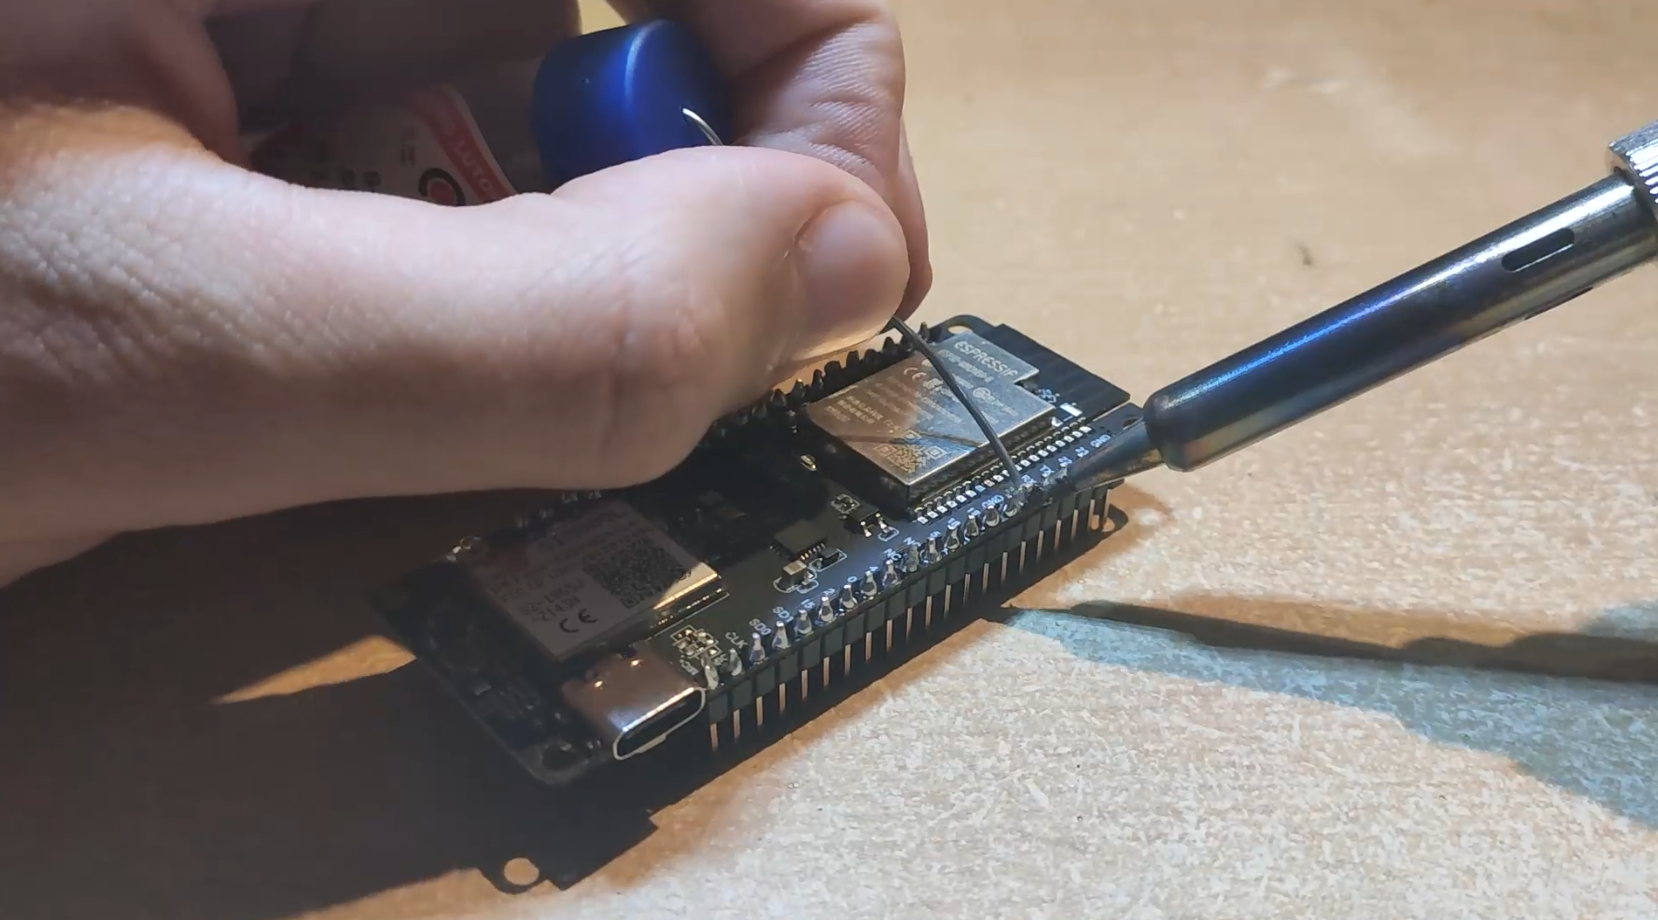
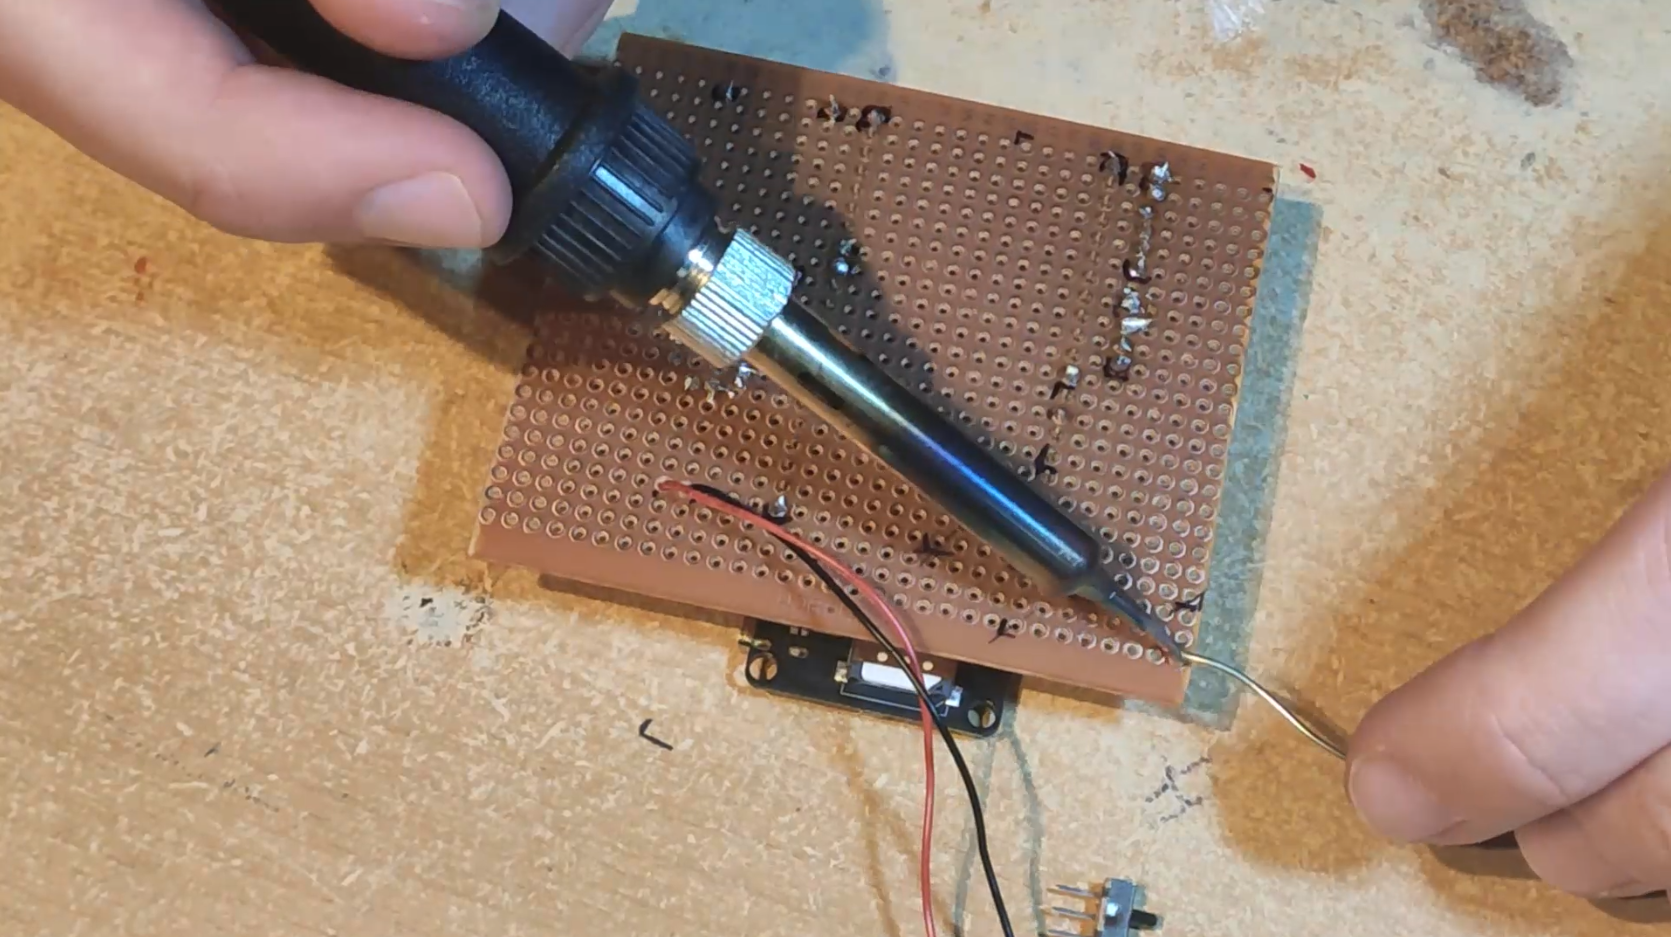
For start, I will solder pins to LILYGO board and sensors.
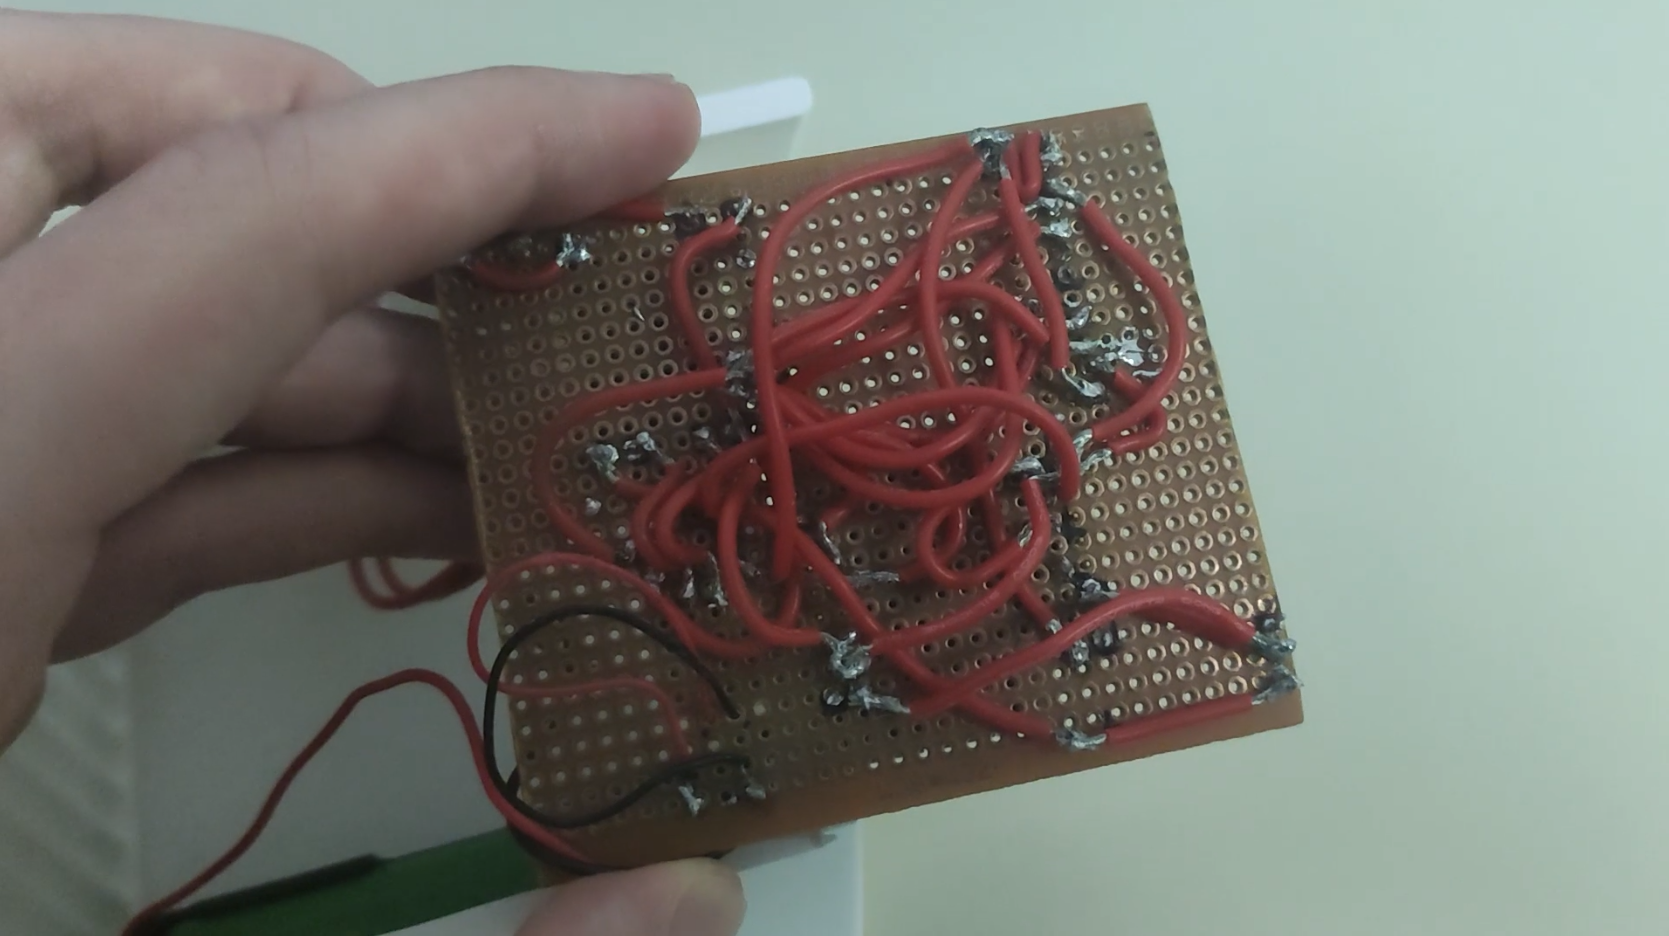
Once I saw sensor readings are working I've decided to transfer all this to perfboard, add all sensors that I mentioned before in this tutorial and let's connect everything to work as we want.
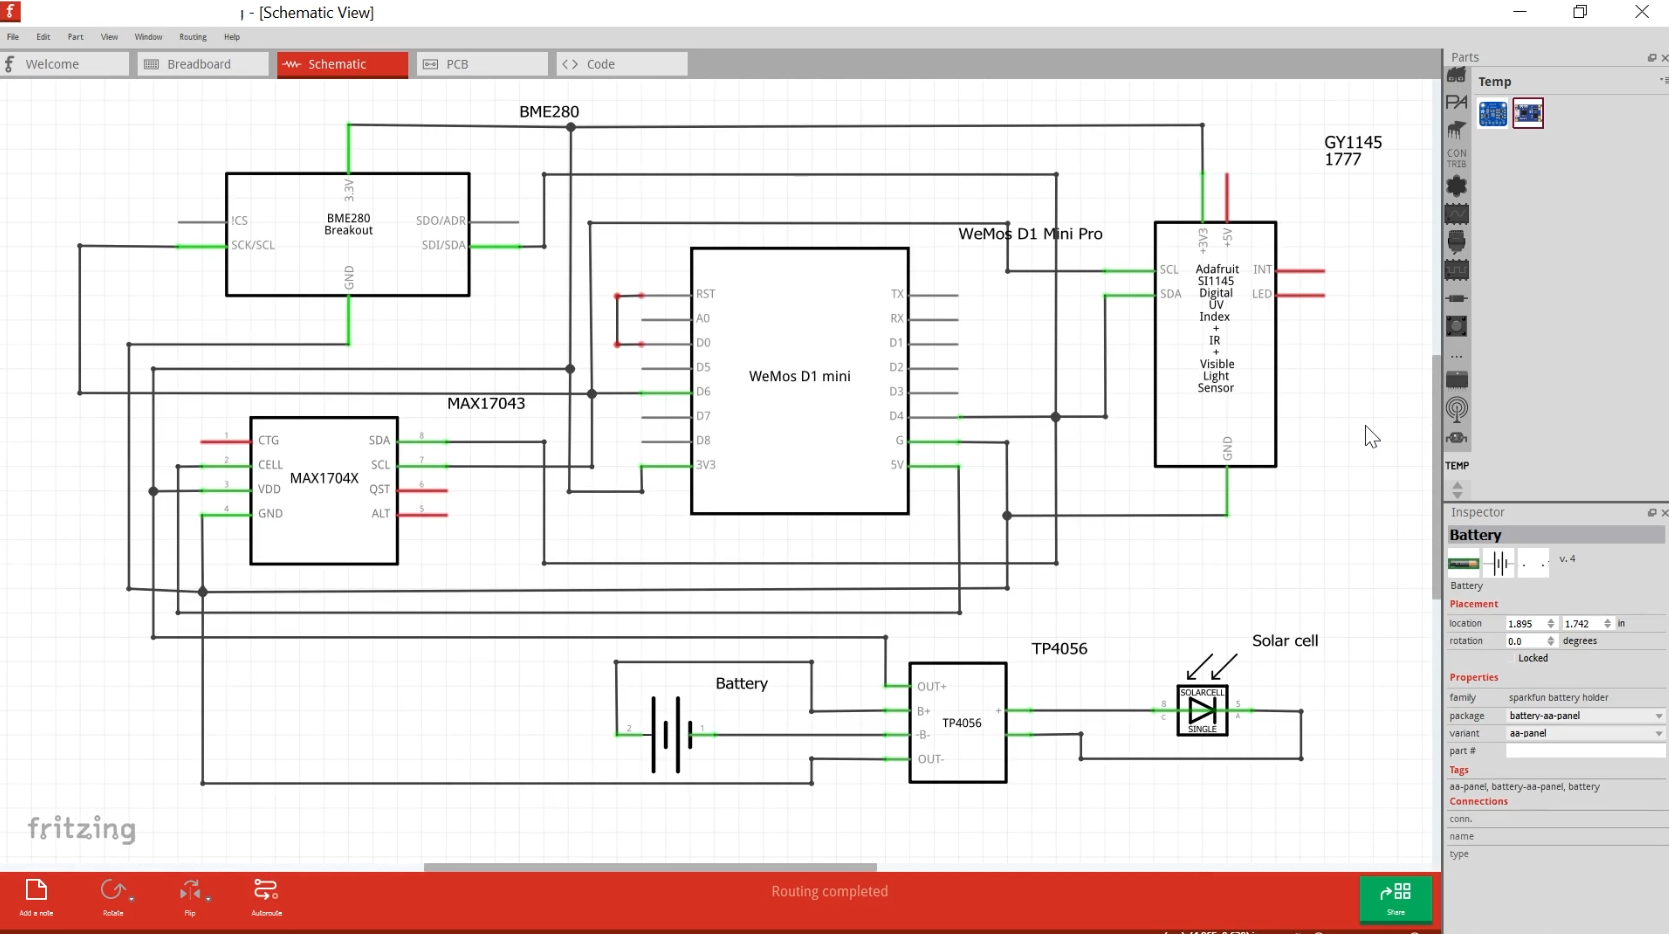
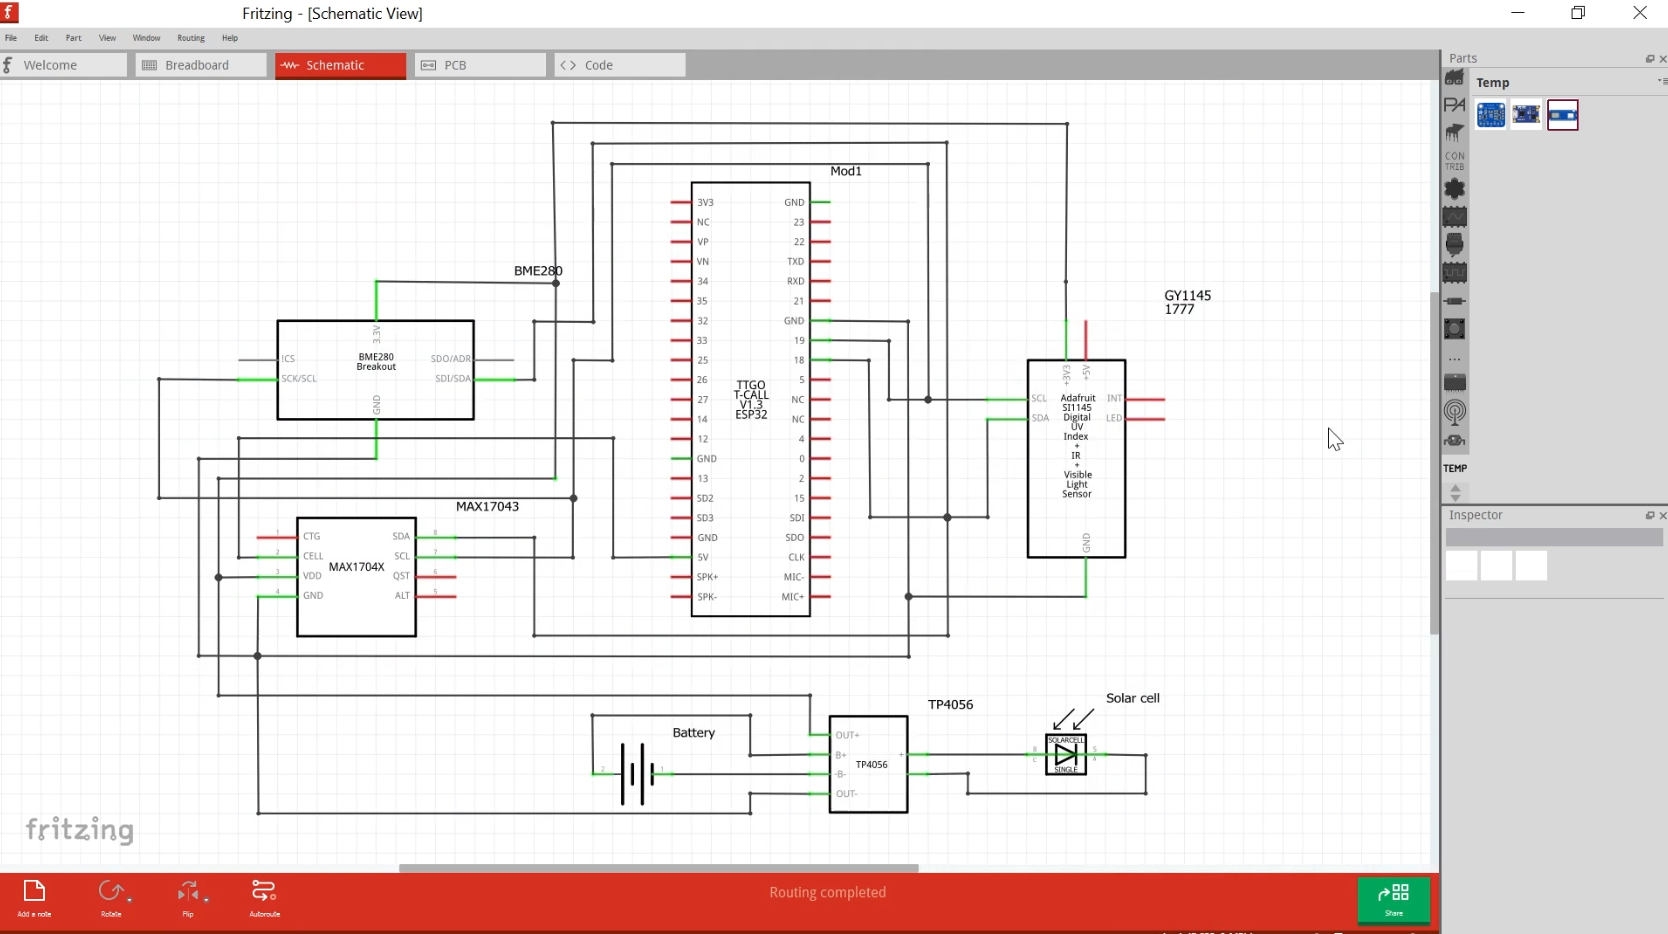
Get all the components and wire them like I did on this scheme. Working with perfboard was so messy and often I connected 2 or more pins I shouldn't connect because they were so close to each other.
Just to give you an example, I didn't see but I soldered SCL line of sensors to ground pin and I2C was not working. I spent day and a half looking and searching why I2C communication is not working until I saw those pins that should not be connected were connected. That was a reliving moment for me. :) So be careful if you are planning to use perfboard the same way I did. Other option, which would be better and cleaner, would be to make PCB board and then just solder pins that will hold module and sensors on it. Maybe I will make that in future. We will see.
One very bad thing that happened in this process of making this weather station. In one point of making I wasn't careful and burned LILYGO module. No problem. I've ordered another one. But, to arrive, it will need more than a month. That's why I decided to include Wemos D1 Mini Pro module with ESP8266 in this project. I've prepared the connections for it and was planning to use it until new LILYGO module don't arrive. But on the end I decided to leave all the pins for Wemos so now, I have a option to switch between the two modules.
With Wemos module, sending data to a web server was over Wi-Fi and not over GSM, as it is case with the LILYGO module.
This is more appropriate if you want to use weather station let's say inside your home. Inside your LAN, where you have Wi-Fi coverage and you do not need to pay extra costs for mobile data, like I need for SIM card. But it's not too much.I noticed that MAX17043 sensor for battery percentage is not working as I though it will.
Probably because of battery voltage that is sometimes higher than 3.7 volts, or some wrong connection. Somewhere I saw, it may be because of wrong resistor value on TP4056 module. I'm getting result over 100 percent which is not OK. This overcharging is not good for battery so I should find a solution for that. If you have an idea of how to fix that tell me in comments section bellow.![]()
![]()
![]()
![]()
![]()
-
2ESP32 and ESP8266 Program Code
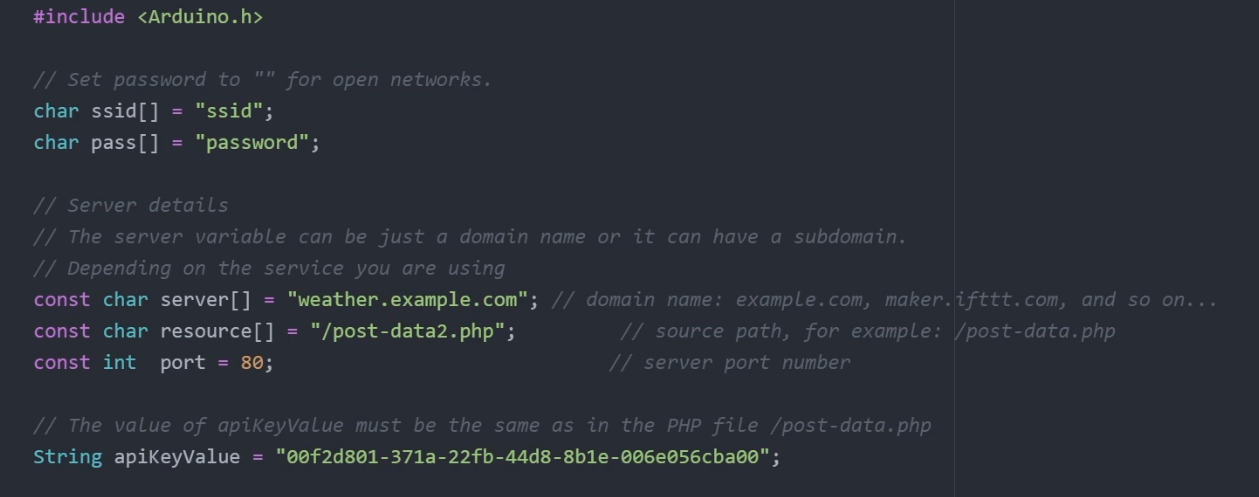
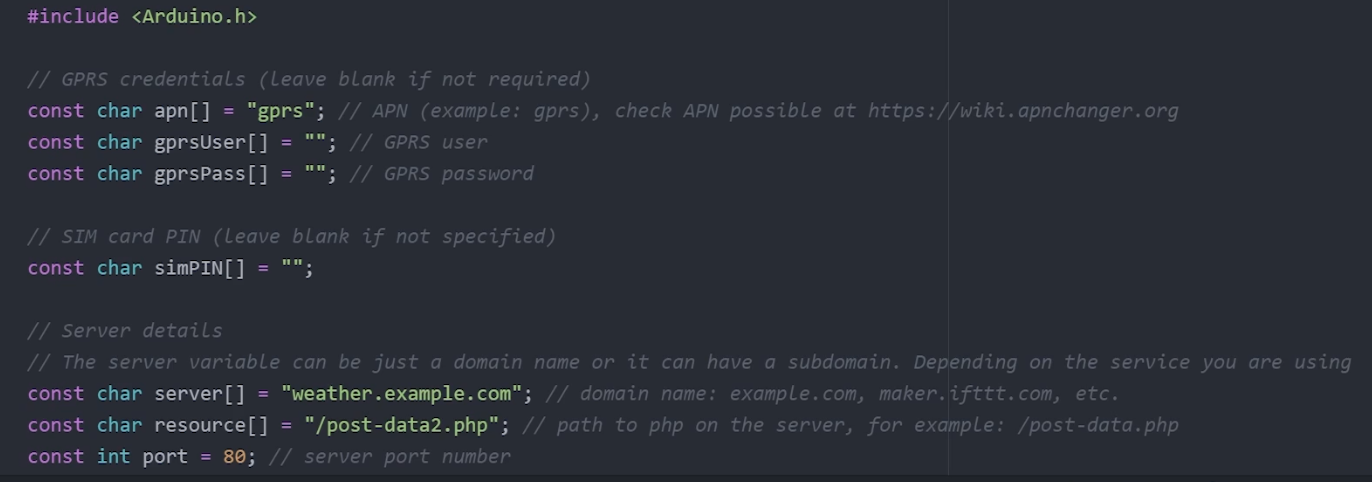
OK, anyway, let me add link to code.
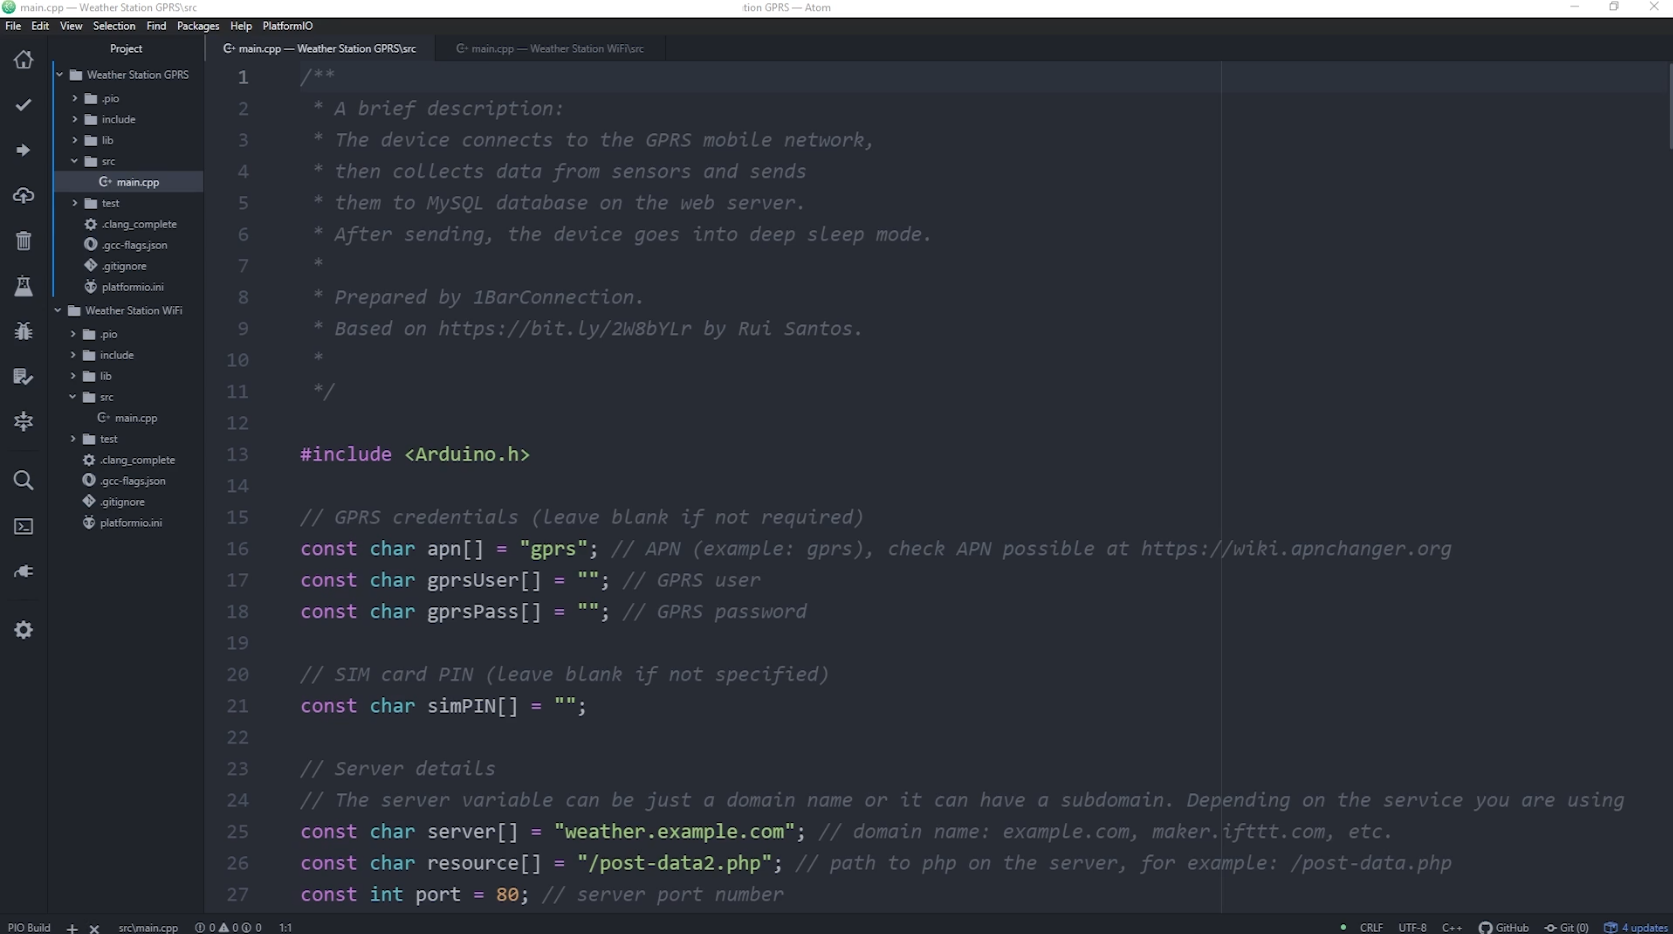
Again, in short, with this code we will connect to GPRS mobile station, send collected data from sensors to a WEB server and store it in MySQL database and then visualize data on a web app.
Code is based on one from RandomNerdTutorials and modified a little bit. Check out awesome RandomNerdTutorials YouTube channel to see a lot of great stuff, mainly with ESP based modules. Code is excellently written and commented, so you shouldn't have any problems understanding it.
Simply look for your mobile operator APN, GPRS info and fill them in and then also add your website domain or IP. If you don't have one, you can make a website locally, but then you will need to make it publicly available with some DynamicDNS solution or another option is, if you have static IP from your ISP you can try to port forward it. In case, that you know better ways of how to get website from local to public please add it in comments. This will maybe help someone. And that's basically everything to change about the code if you're following this project.
Code can also be found on GitHub.
![]()
![]()
![]()
-
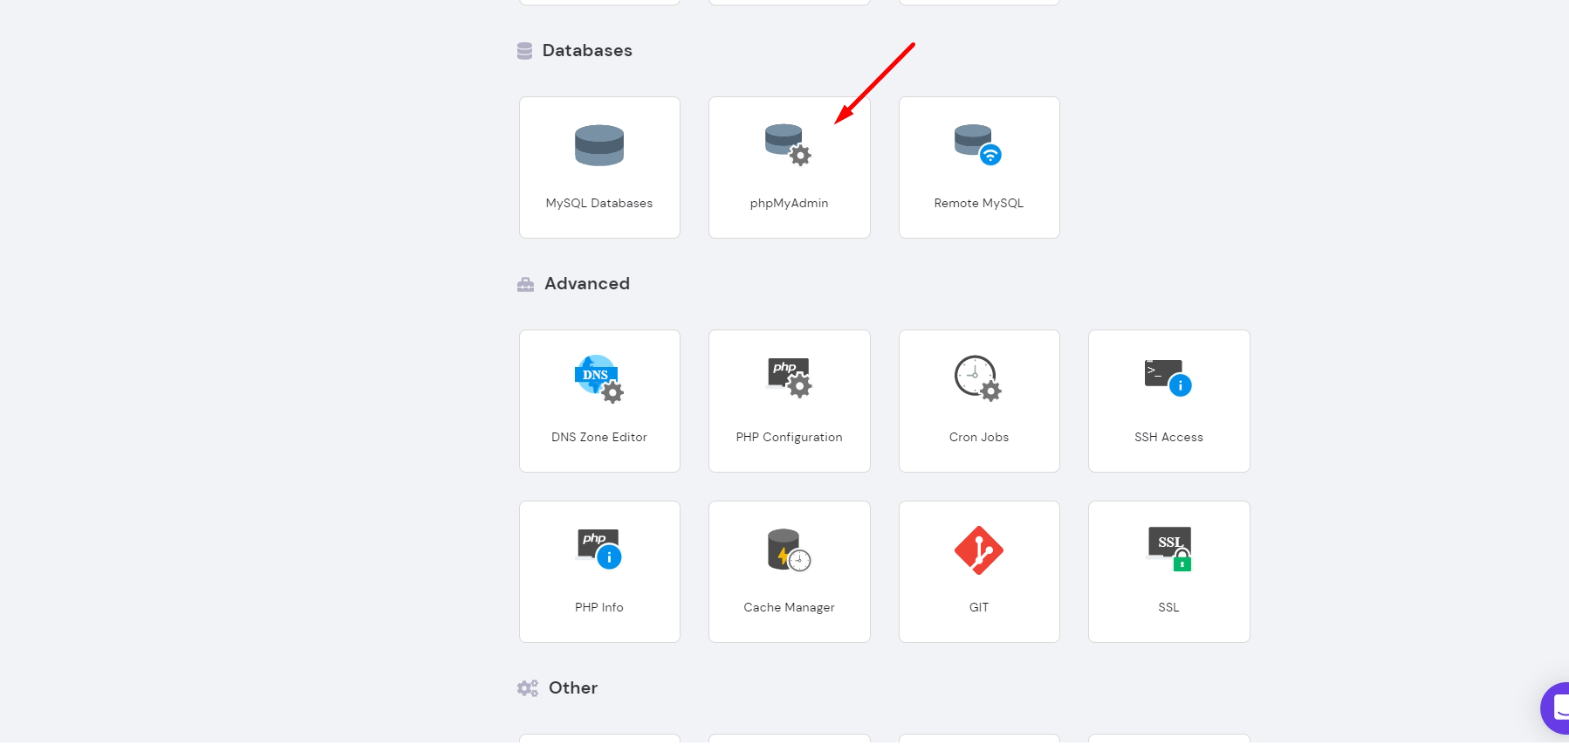
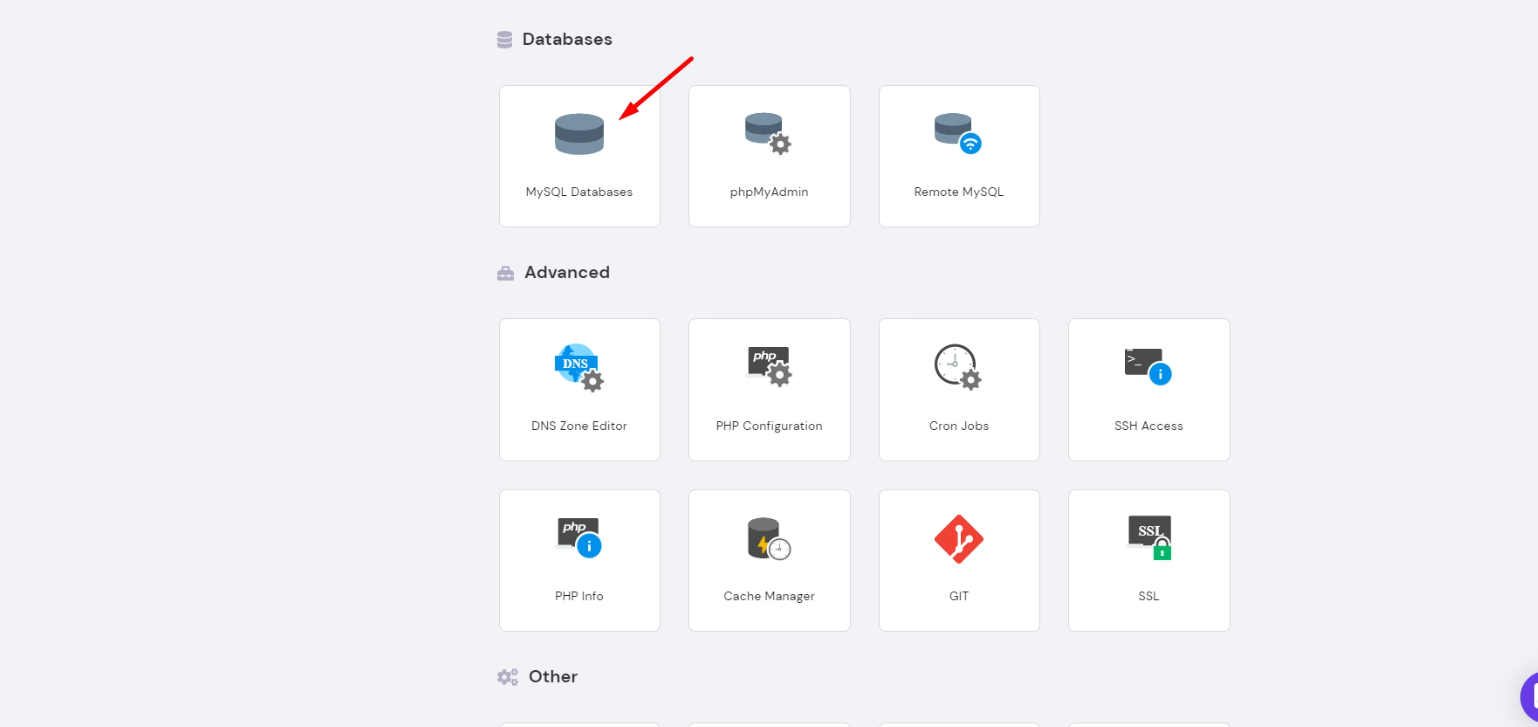
3Setup Web Server
Next to do. Setup your web server.
You can use development environment like XAMPP or WAMP to create web app locally or buy public web server and domain from some hosting. As I mentioned before you can't send sensors data to local web server unless you setup DynamicDNS for it, or you have a static IP that is publicly available from internet. I will work with public web server in this tutorial.
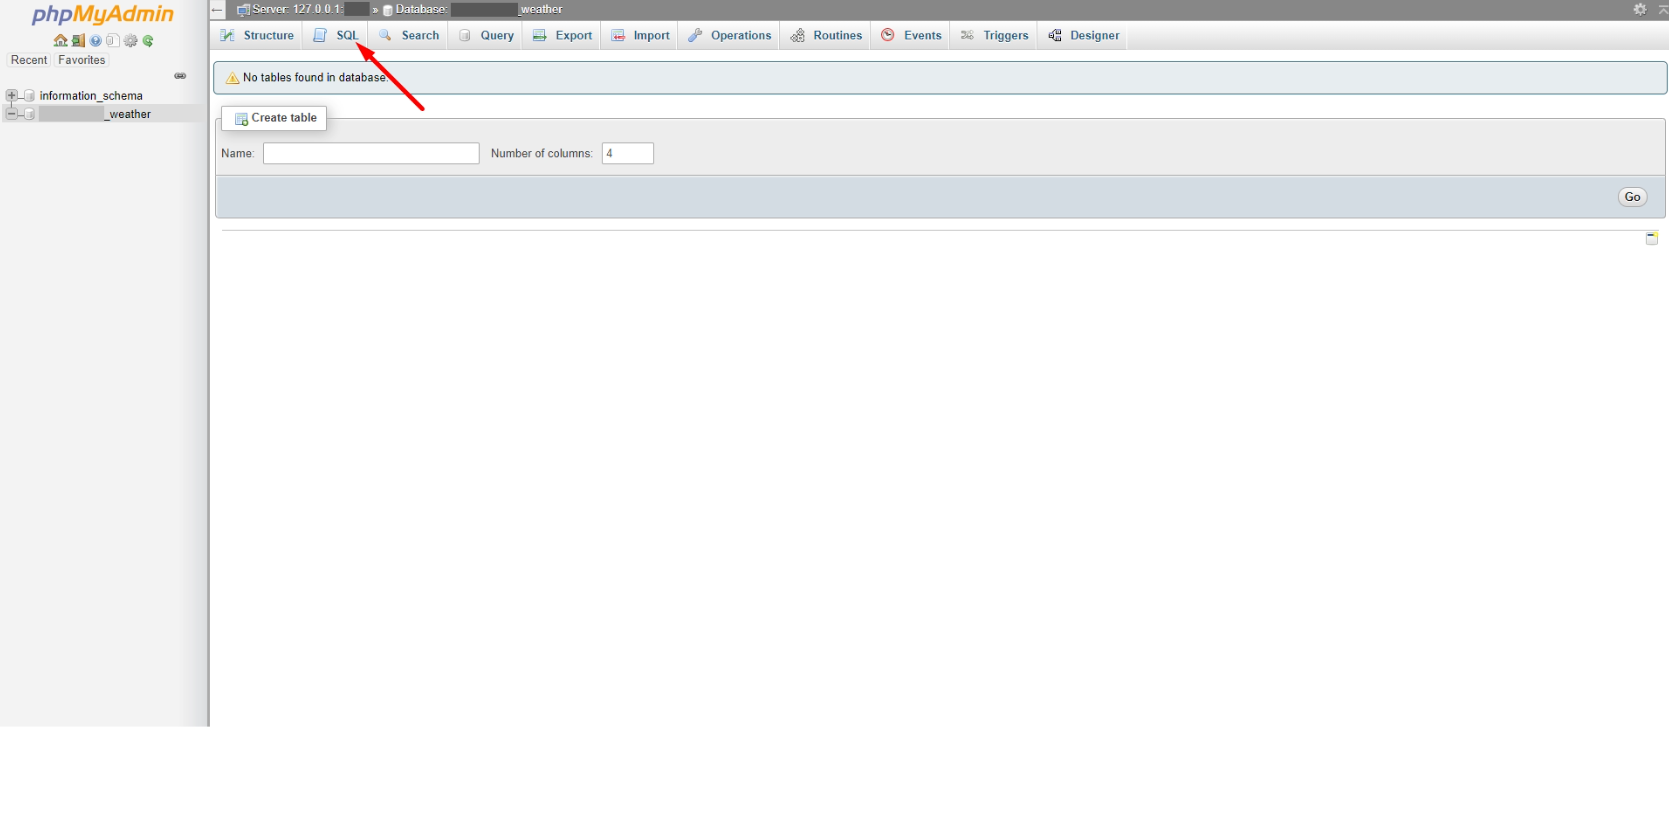
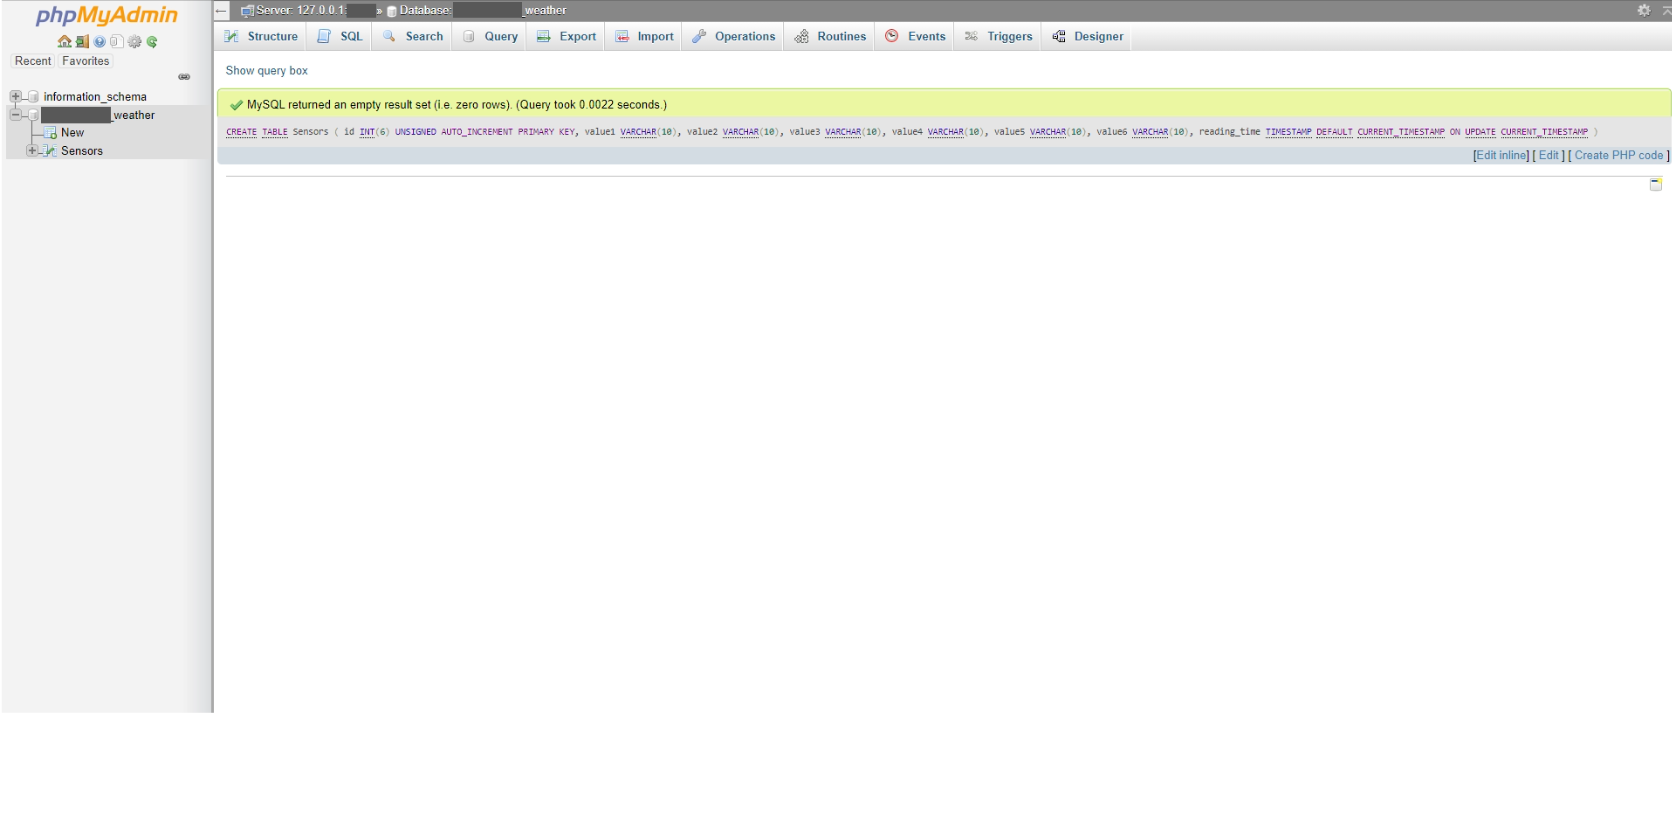
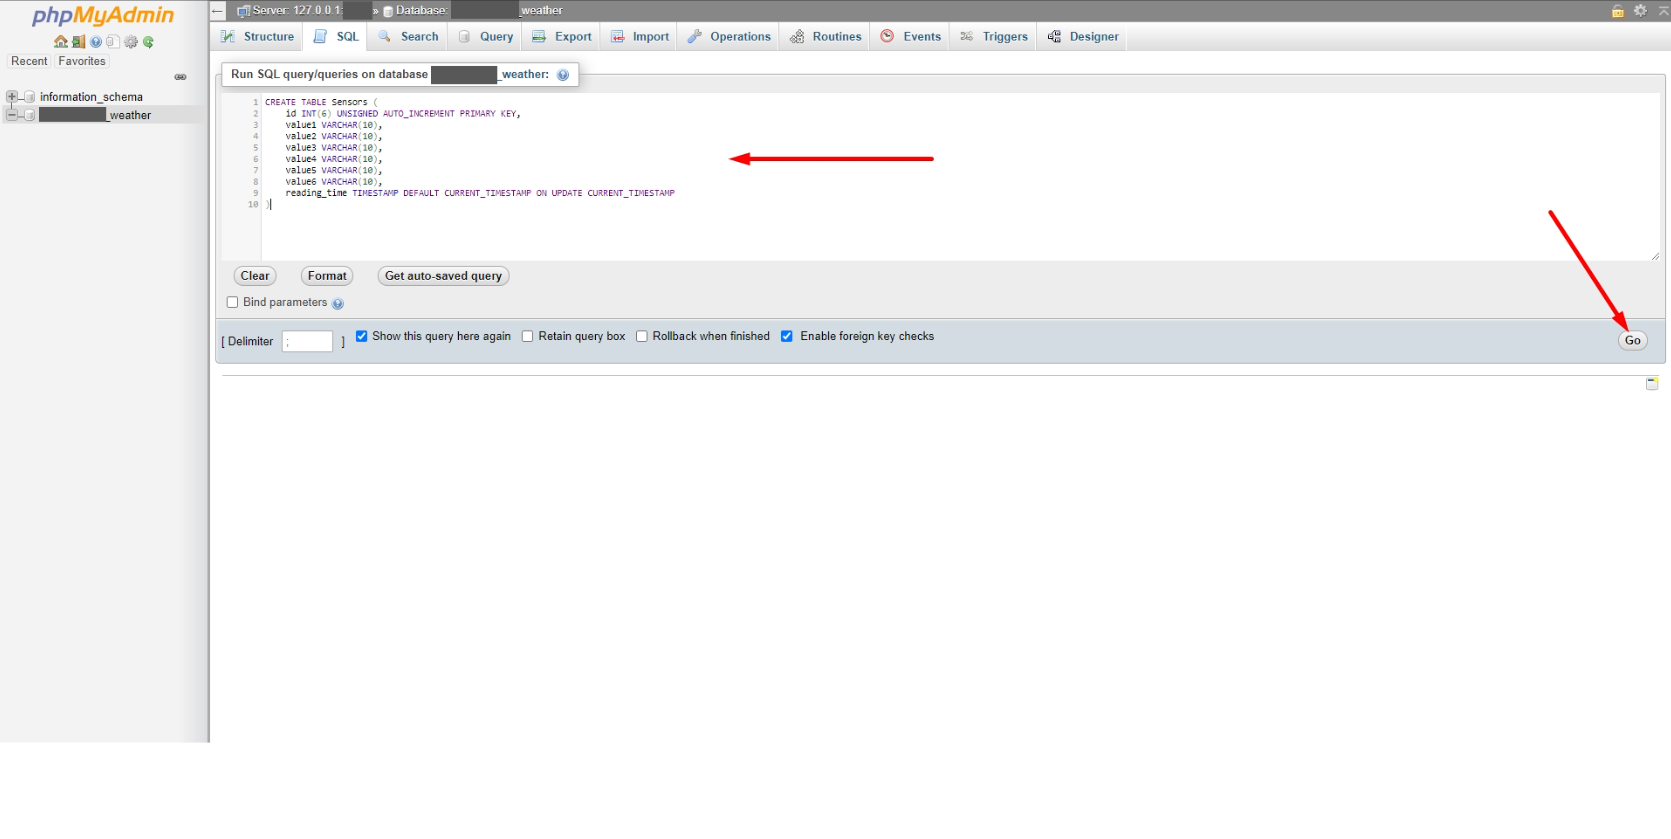
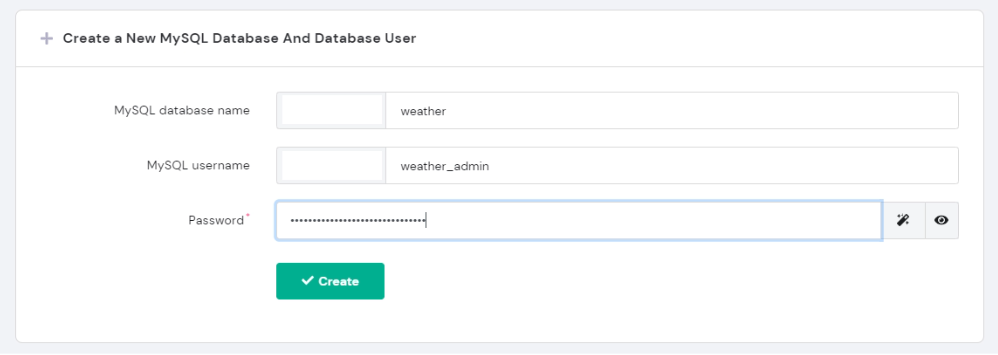
Let's prepare MySQL database and PHP files for web app. In database you want to create table with primary key, values for sensors and timestamp. Let me mention again that full code is available in tutorial description.
As a base we have this code here, again from RandomNerdTutorials project. I've just added few more fields for all sensors data. I created index.php and added some cool stuff in there. I wont go through the code. Just replace this and add yours database information and API key same you have in C++ code. Then we will need to add database information to post-data.php file. Let me just mention that data is sent from ESP32 and SIM800L module with a HTTP POST request to post-data.php.
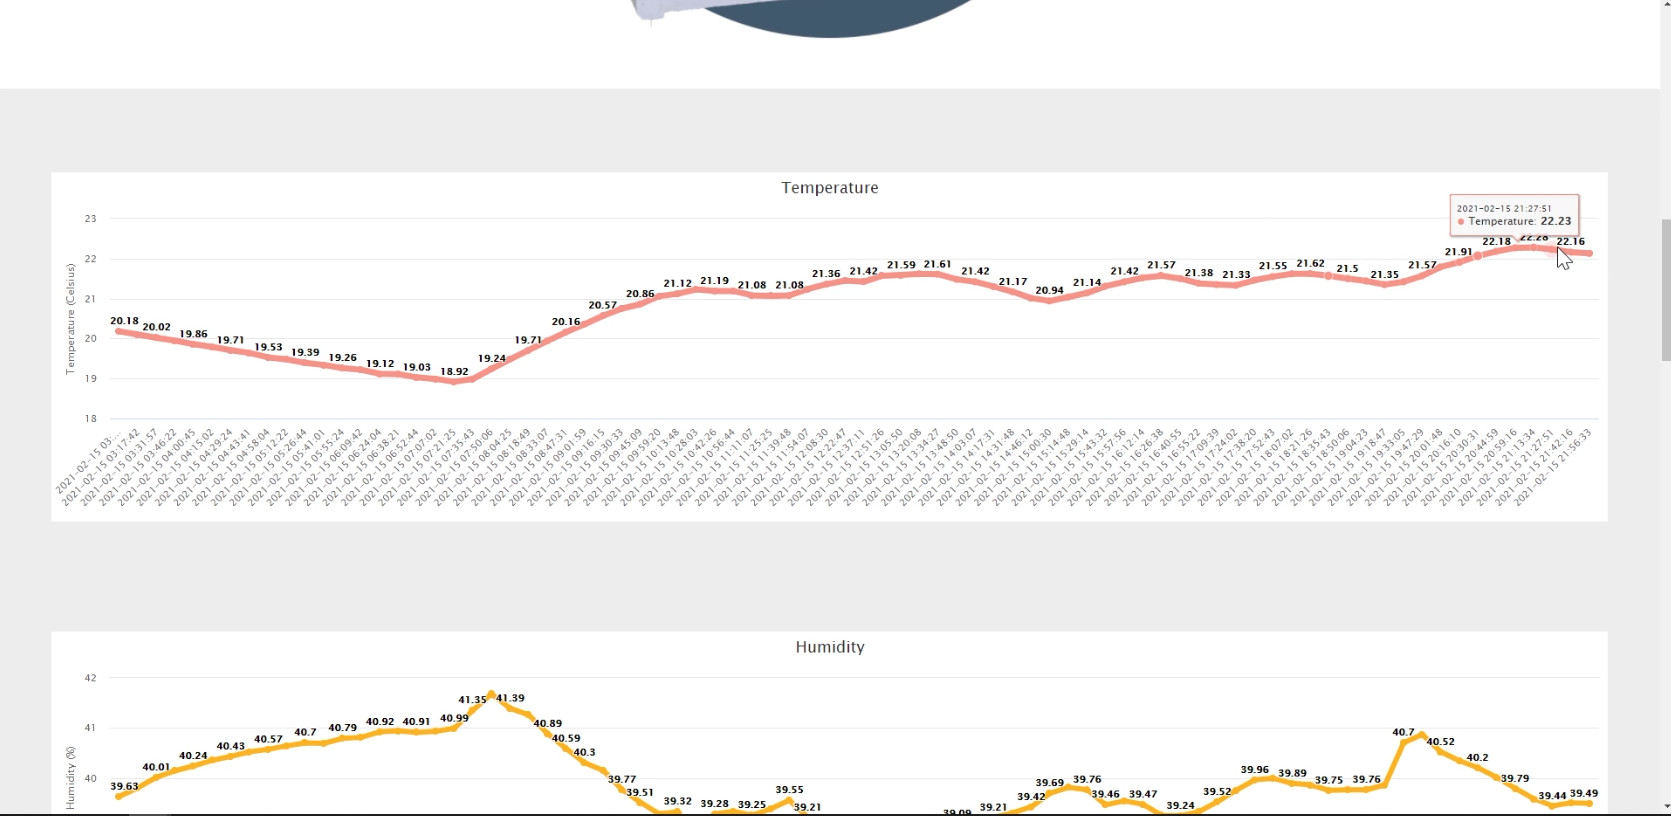
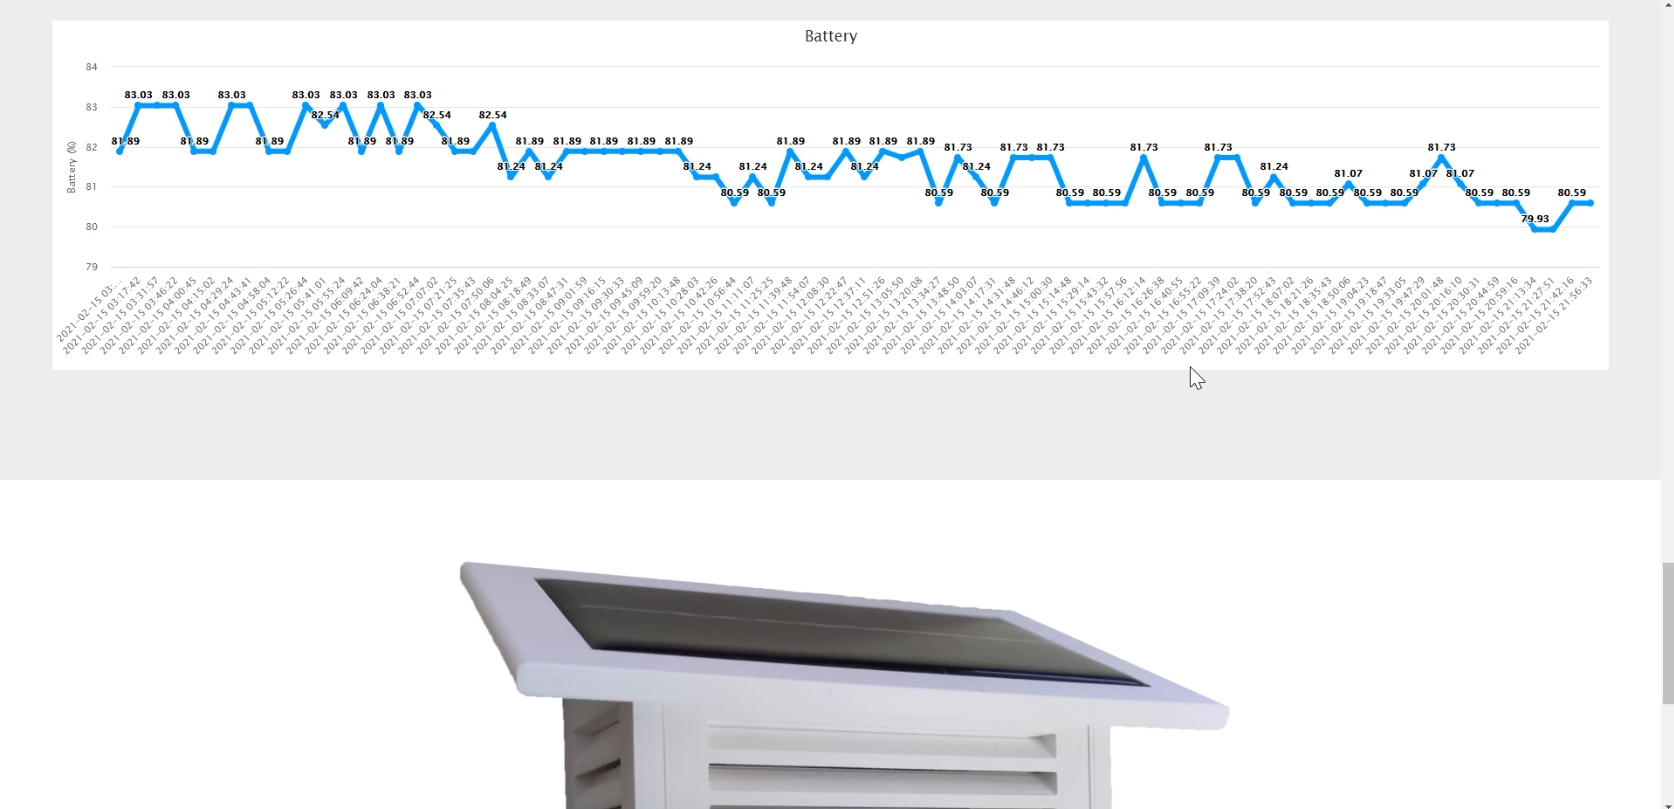
OK. Web app is now ready. Our weather station should now be able to send data to a web server and we should see data in web app.
If having website locally, check on localhost by typing 127.0.0.1 or IP of your PC which you can find in terminal by typing ipconfig. I can show you that for me, web app works just as planned. Nice. On the first visit we see data from all the sensors. Here are visible parts for LILYGO module based weather station and also Wemos based ones. Bellow are graphs with history readings of data that are quite interesting. I've used Bootstrap with already made HTML and JavaScript parts.
Code can also be found on GitHub.
![]()
![]()
![]()
![]()
![]()
![]()
![]()
![]()
![]()
-
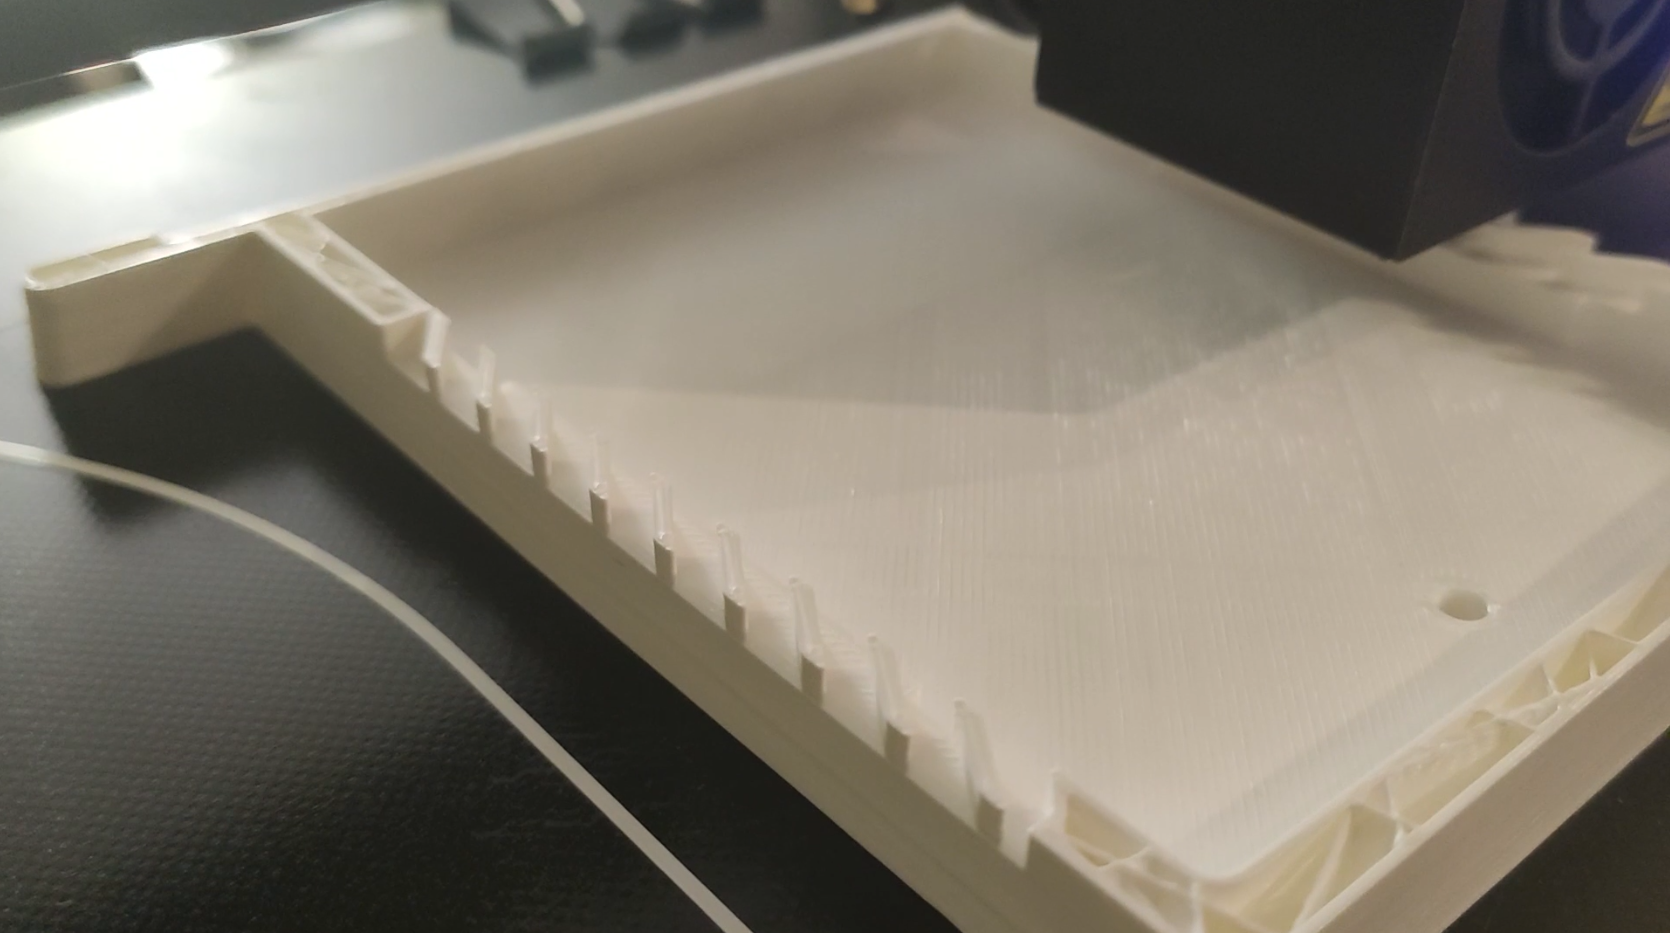
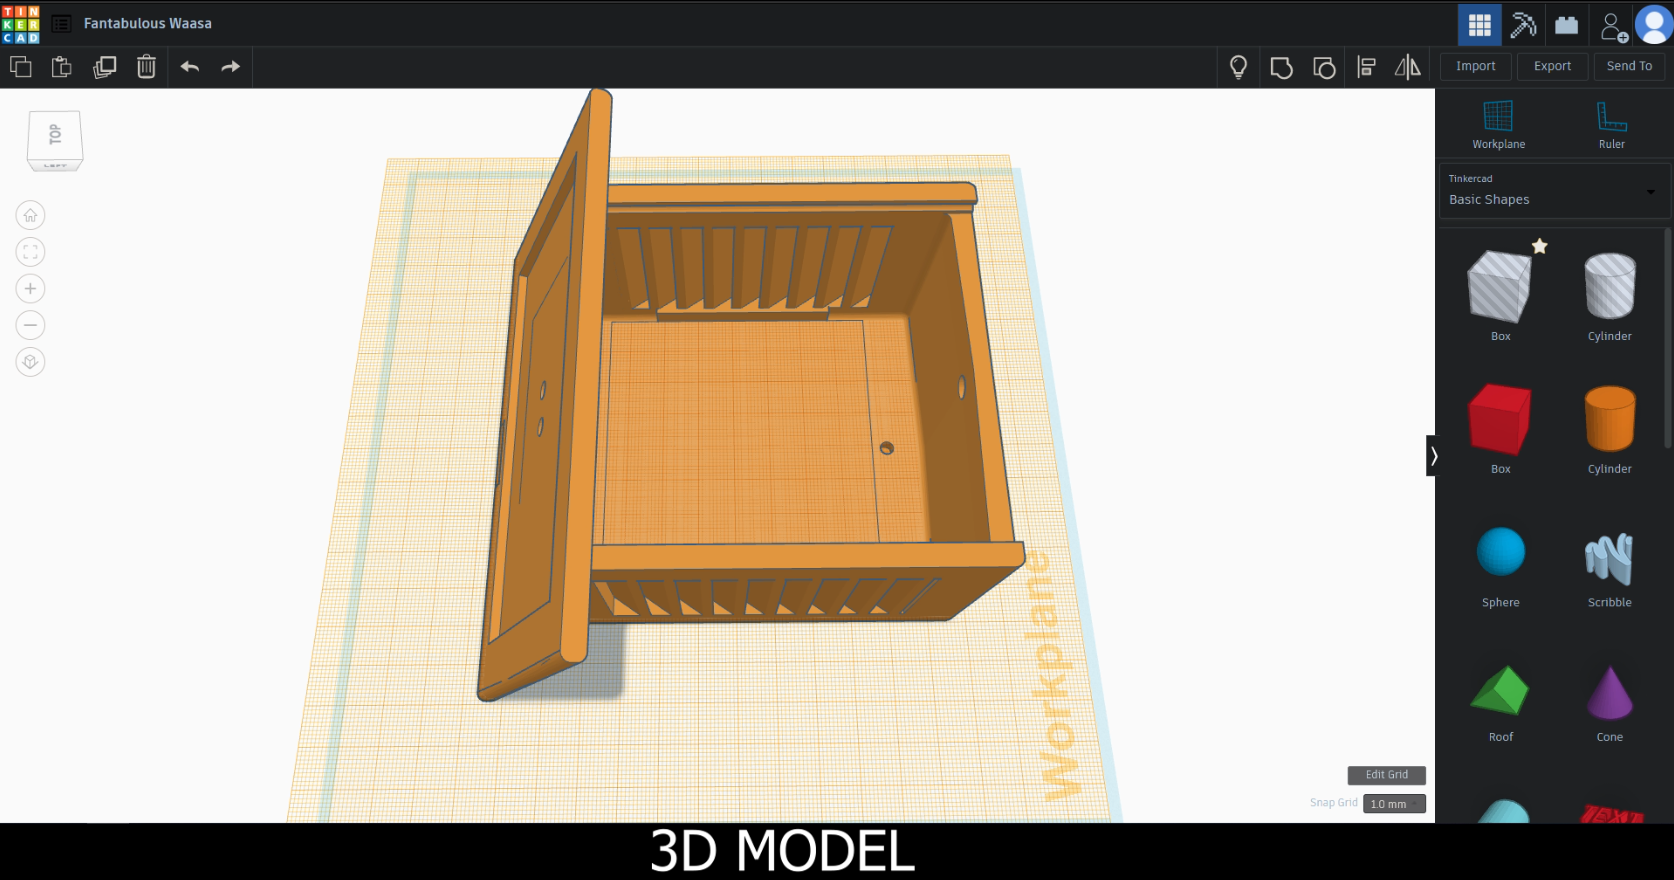
4House 3D Model and Pinting
For the end, let's make nice weather station case and print it.
I've found one 3D model in Thingiverse and modified it. I'll add it's link below. Also I'll add my version of model if you are planning to follow with the same components.
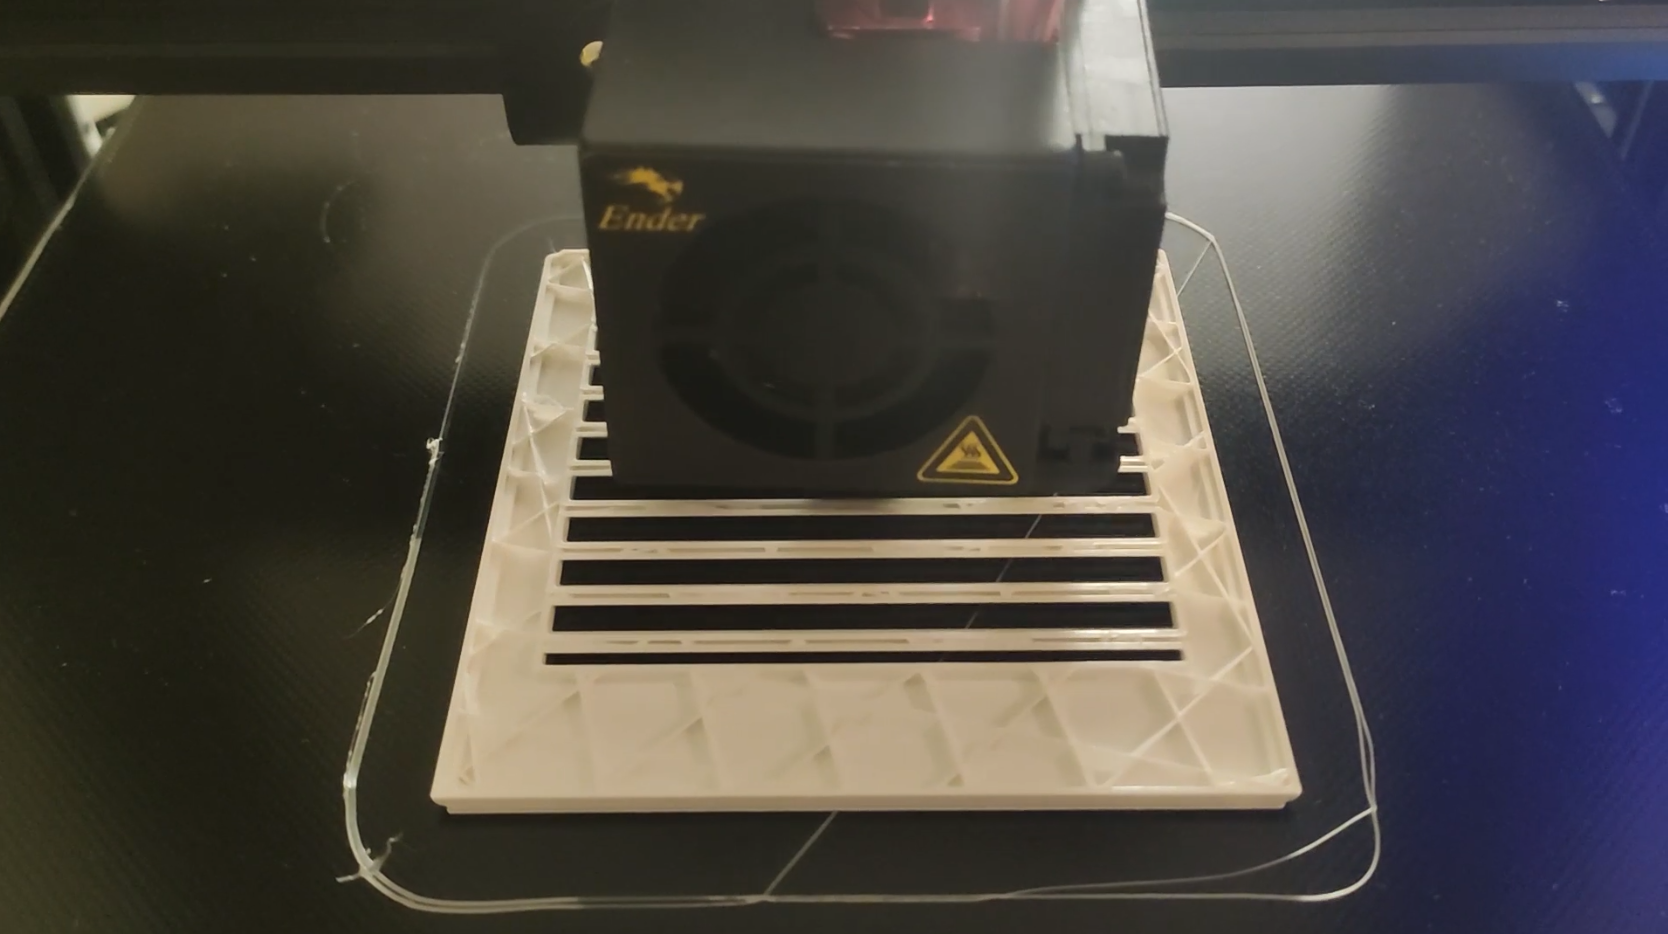
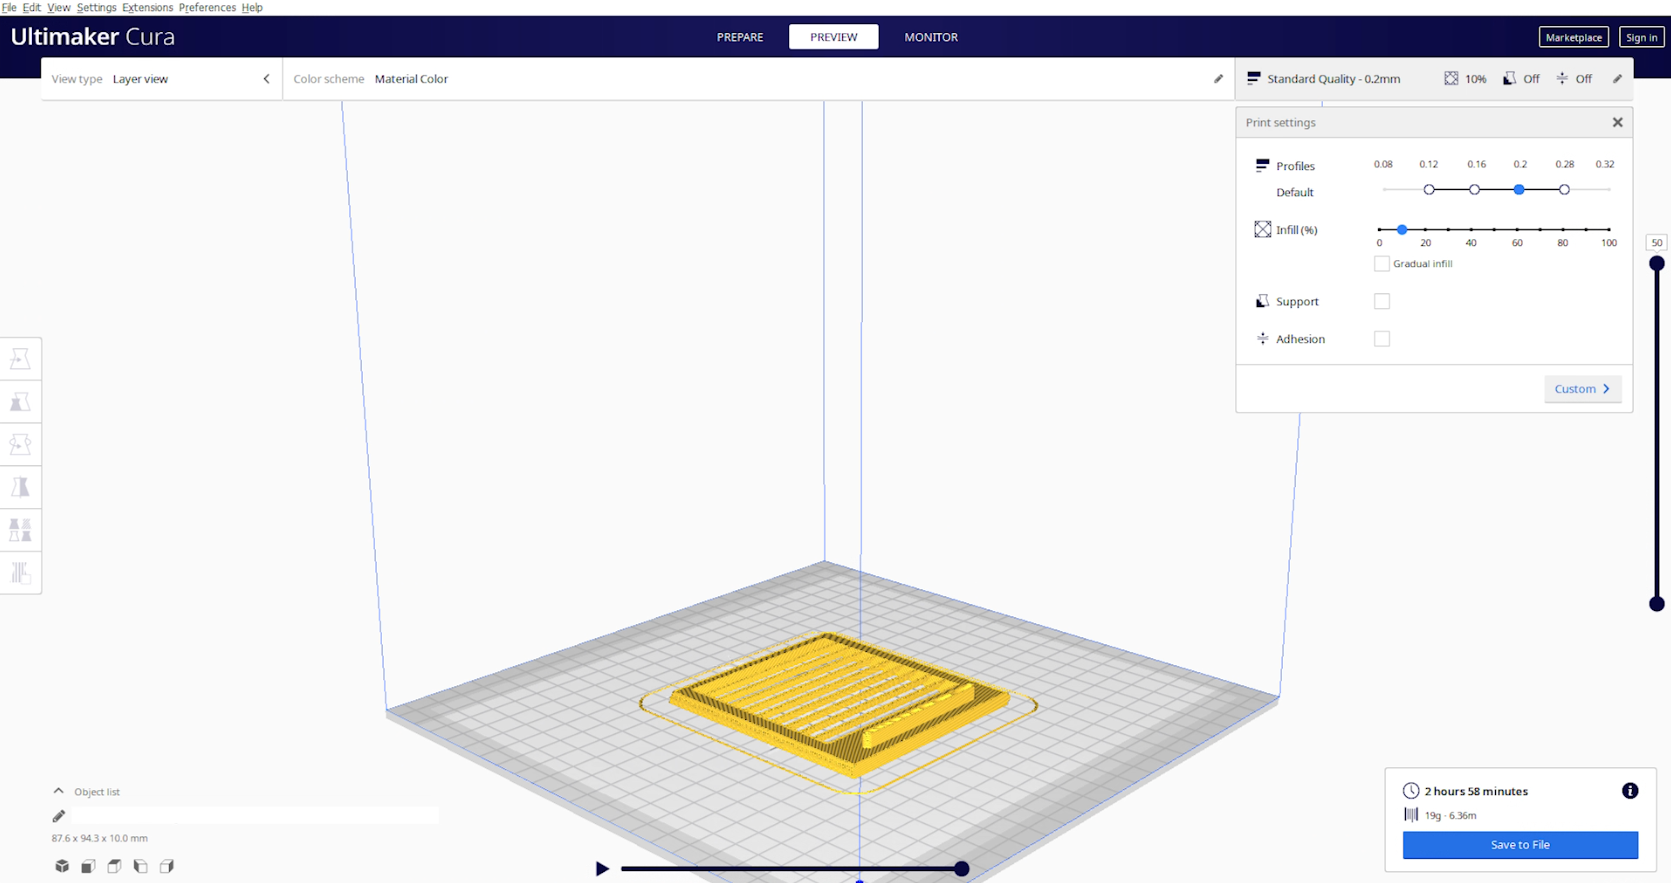
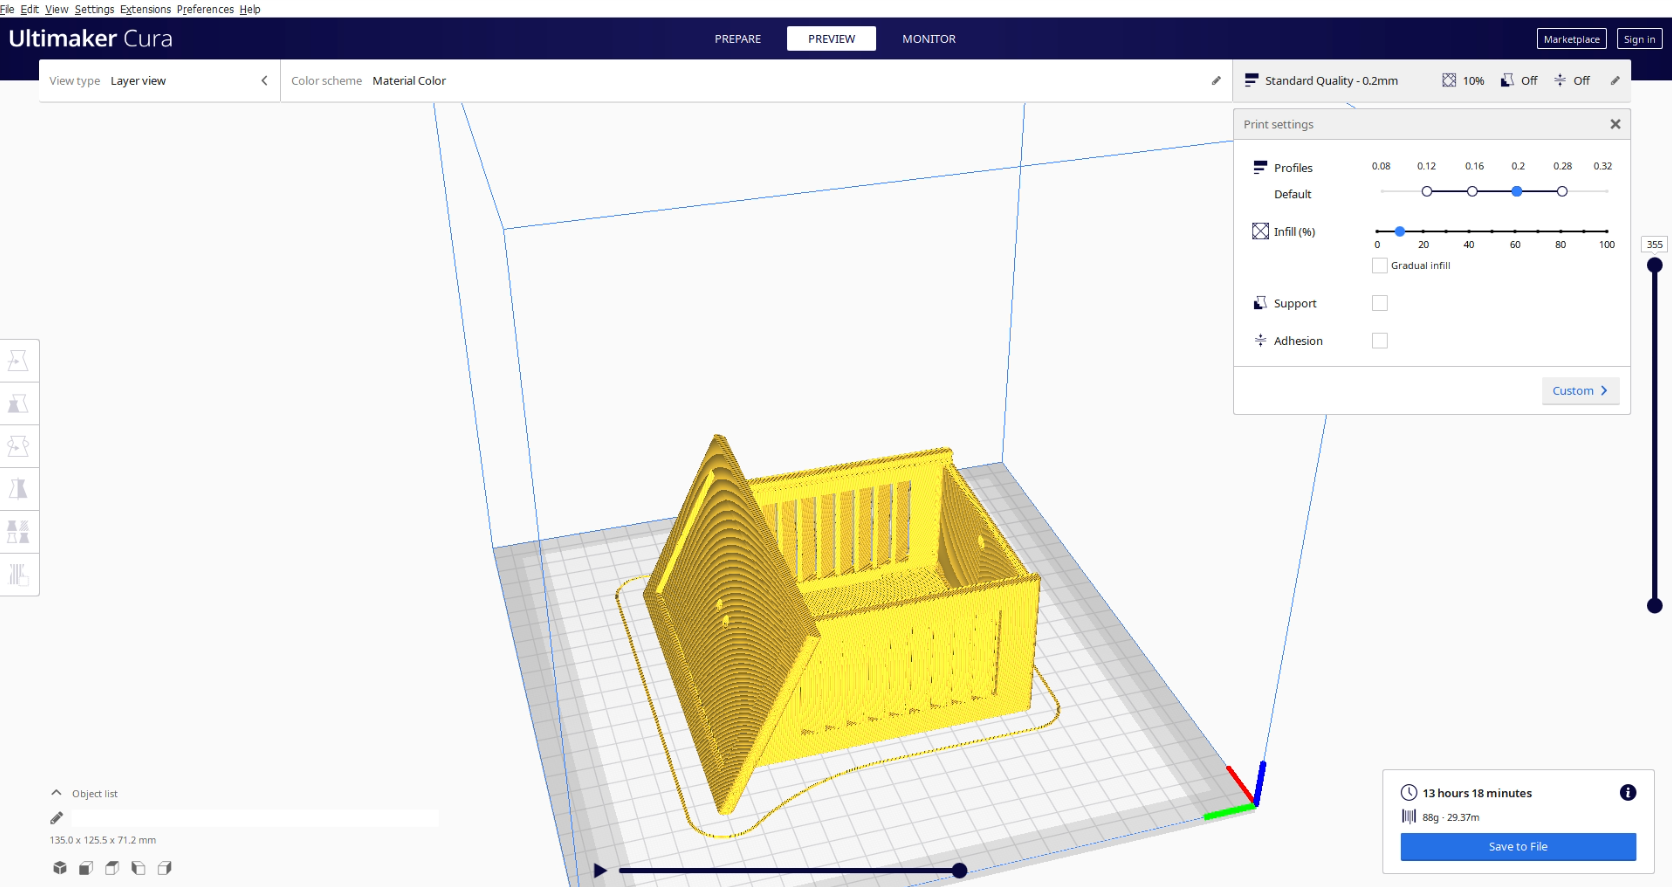
I've edited 3D model in Tinkercad. Then converted it to the right format in Ultimaker Cura. For printing doors of the case around 2 hours were needed. Printing of case was around 13 hours. Settings I've used are next. Temperature of printer head was 200 degrees Celsius, bed was at 60 degrees Celsius, printing speed 50 mm/s, infill was 10% and layer thickness was 0.2.
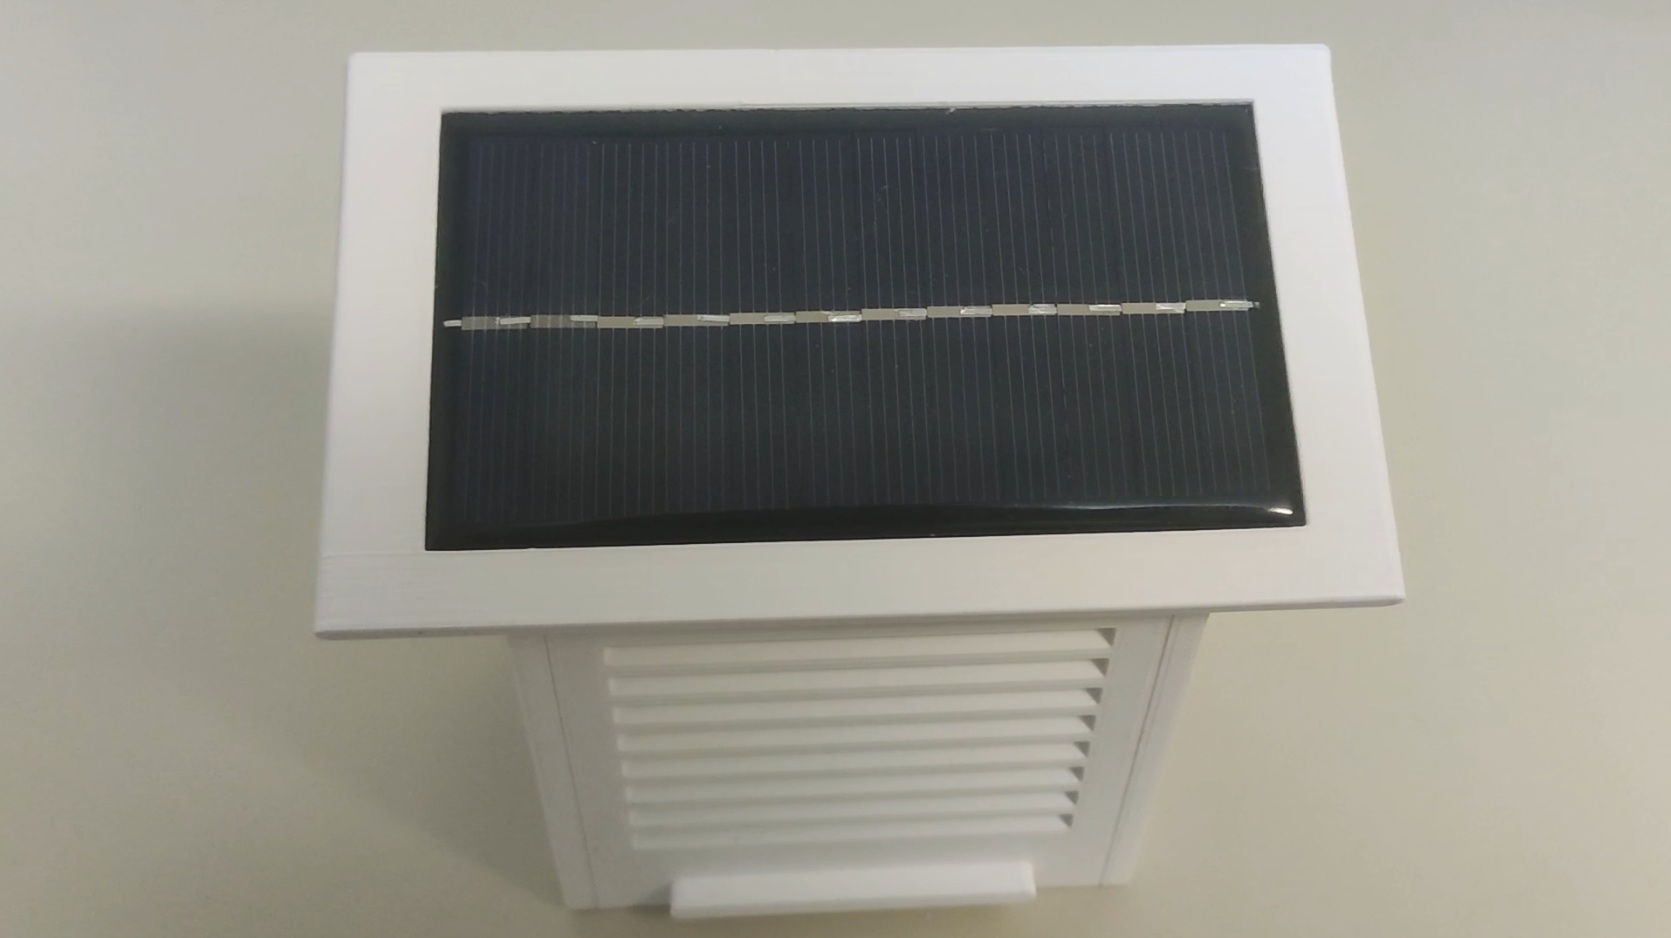
Final result is looking pretty good. If you are wondering what was total cost of this project, I can tell you that it was around 60 US dollars if not counting web site hosting.
I spent a lot of time working on that project but nevertheless it was the most awesome one for me.
And that's it. I hope you learned something new and found useful information in this tutorial. If you enjoyed it don't forget to like it, and if you want to see more content like this, follow. Good luck.
![]()
![]()
![]()
![]()
![]()
![]()
Solar Weather Station With ESP32, SIM800L, ESP8266
Let's make small weather station, collect sensor data, setup web server, send and display data.

Discussions
Become a Hackaday.io Member
Create an account to leave a comment. Already have an account? Log In.