 core weaver
# LC-Meter
Open Source LC-Meter. All documentation included.
This LC Meter Project is open source. All the documentation both hardware and software is provided without any warranty.
If you build one I would be glad to get a picture of your finished device. Subscribe to my Youtube channel and post your comments and questions about this project in the comment section of the series.
The video series is a full tutorial on how it works, how to build it and how to test it.
You can watch it here: https://www.youtube.com/playlist?list=PLkaYf9fE05ZFBNix39xXy-Ew_vBT5_2YM
Give this project a thumbs up if you liked it and subscribe, 'cause so much more is yet to come ;-)
About this project:
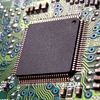
This design is based on Neil Hecht's idea. It uses an oscillator (LM311) to generate a frequency which can be then modified by adding a capacitance or an inductance on the measuring terminals. The frequency is measured by the microcontroller (ATMEGA328p) which then also does all the math in order to extract the value of the added capacitance or inductance. The value is then adjusted in engineering units and displayed on a graphical LCD.
I designed the PCB using through-hole-terminal components only. That makes it really easy solder for everyone. There's room for improvements in the schematic. A second version would probably include these changes:
- make use of a rechargeable Li Ion battery
- add a usb connector on board - add charging circuitry for the battery
- add UART - USB translation circuitry on board
- add a voltage step up to boost the battery voltage to 5V
- increase the frequency of the AVR
The LC Meter PC application was written in C# and it's very useful when a lot of measurements have to be done. It includes a catalog function for the measured components and UART logging for debug purposes.
The firmware for the microcontroller is written in BASCOM. I shared the source files are too. You can modify and improve on them. You can easily port it the firmware to other languages. There's a readme file in the firmware's folder with the FUSES Configuration for the AVR if you decide to use the precompiled firmware.
PART 1: Needed materials and tools for this project, the operation principle behind the LC Meter, writing the algorithm on which the firmware will be based.
PART 2: Drawing the schematic and PCB for this project, soldering the components and a short explanation of the firmware.
PART 3: 3D Modeling the case for the LC Meter and assembling.
PART 4: Testing the LC Meter and the PC Application.
Enjoy making it and send me a photo of your finished LC METER !
coreWeaver / ioCONNECTED - 2021

 sjm4306
 MECHANICUS
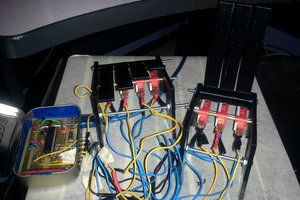
 Desreverteg
I almost finished this LC meter, waiting on a 82uh inductor and the display. . I used a OKI-78SR-5/1.5-W36H-C in place of the 7805 and rechargeable 9 volt battery and modified the case and battery cover to accommodate it.