-
1Wire ESP32 to relay board
Using the Fritzing breadboard drawing, wire the ESP32 to the web relay board.
Note: we are using the 5 volt output from the ESP32 to power the relays, and the 3.3 volt output to power the relay driver circuits. This requires removing any jumper between the VCC and JD-VCC pins on the relay board. We use 3.3 volts for the relay driver circuits to avoid any reliability problems with getting the relays to response to the ESP32's GPIO output levels.
-
2Load the code and test it
Download the Arduino code from Github:
https://github.com/rfall/trailer-tester.git
or from the Zip file attached to this posting.
Open the Trailer_tester.ino file in the Arduino IDE. This should also open a "task.cpp" and "task.h" file, which are used to provide scheduled tasks to drive the relays to blink at a regular rate.
Connect a 5 volt battery or adapter to the ESP32.
Select the proper ESP32 board (in my case it was "ESP32 dev module") and the proper port, then compile and upload the program file.
Once it's completed the upload and is running, use either a phone or a laptop to connect to the new WiFi AP "Trailer_tester" using the password "onthemove".
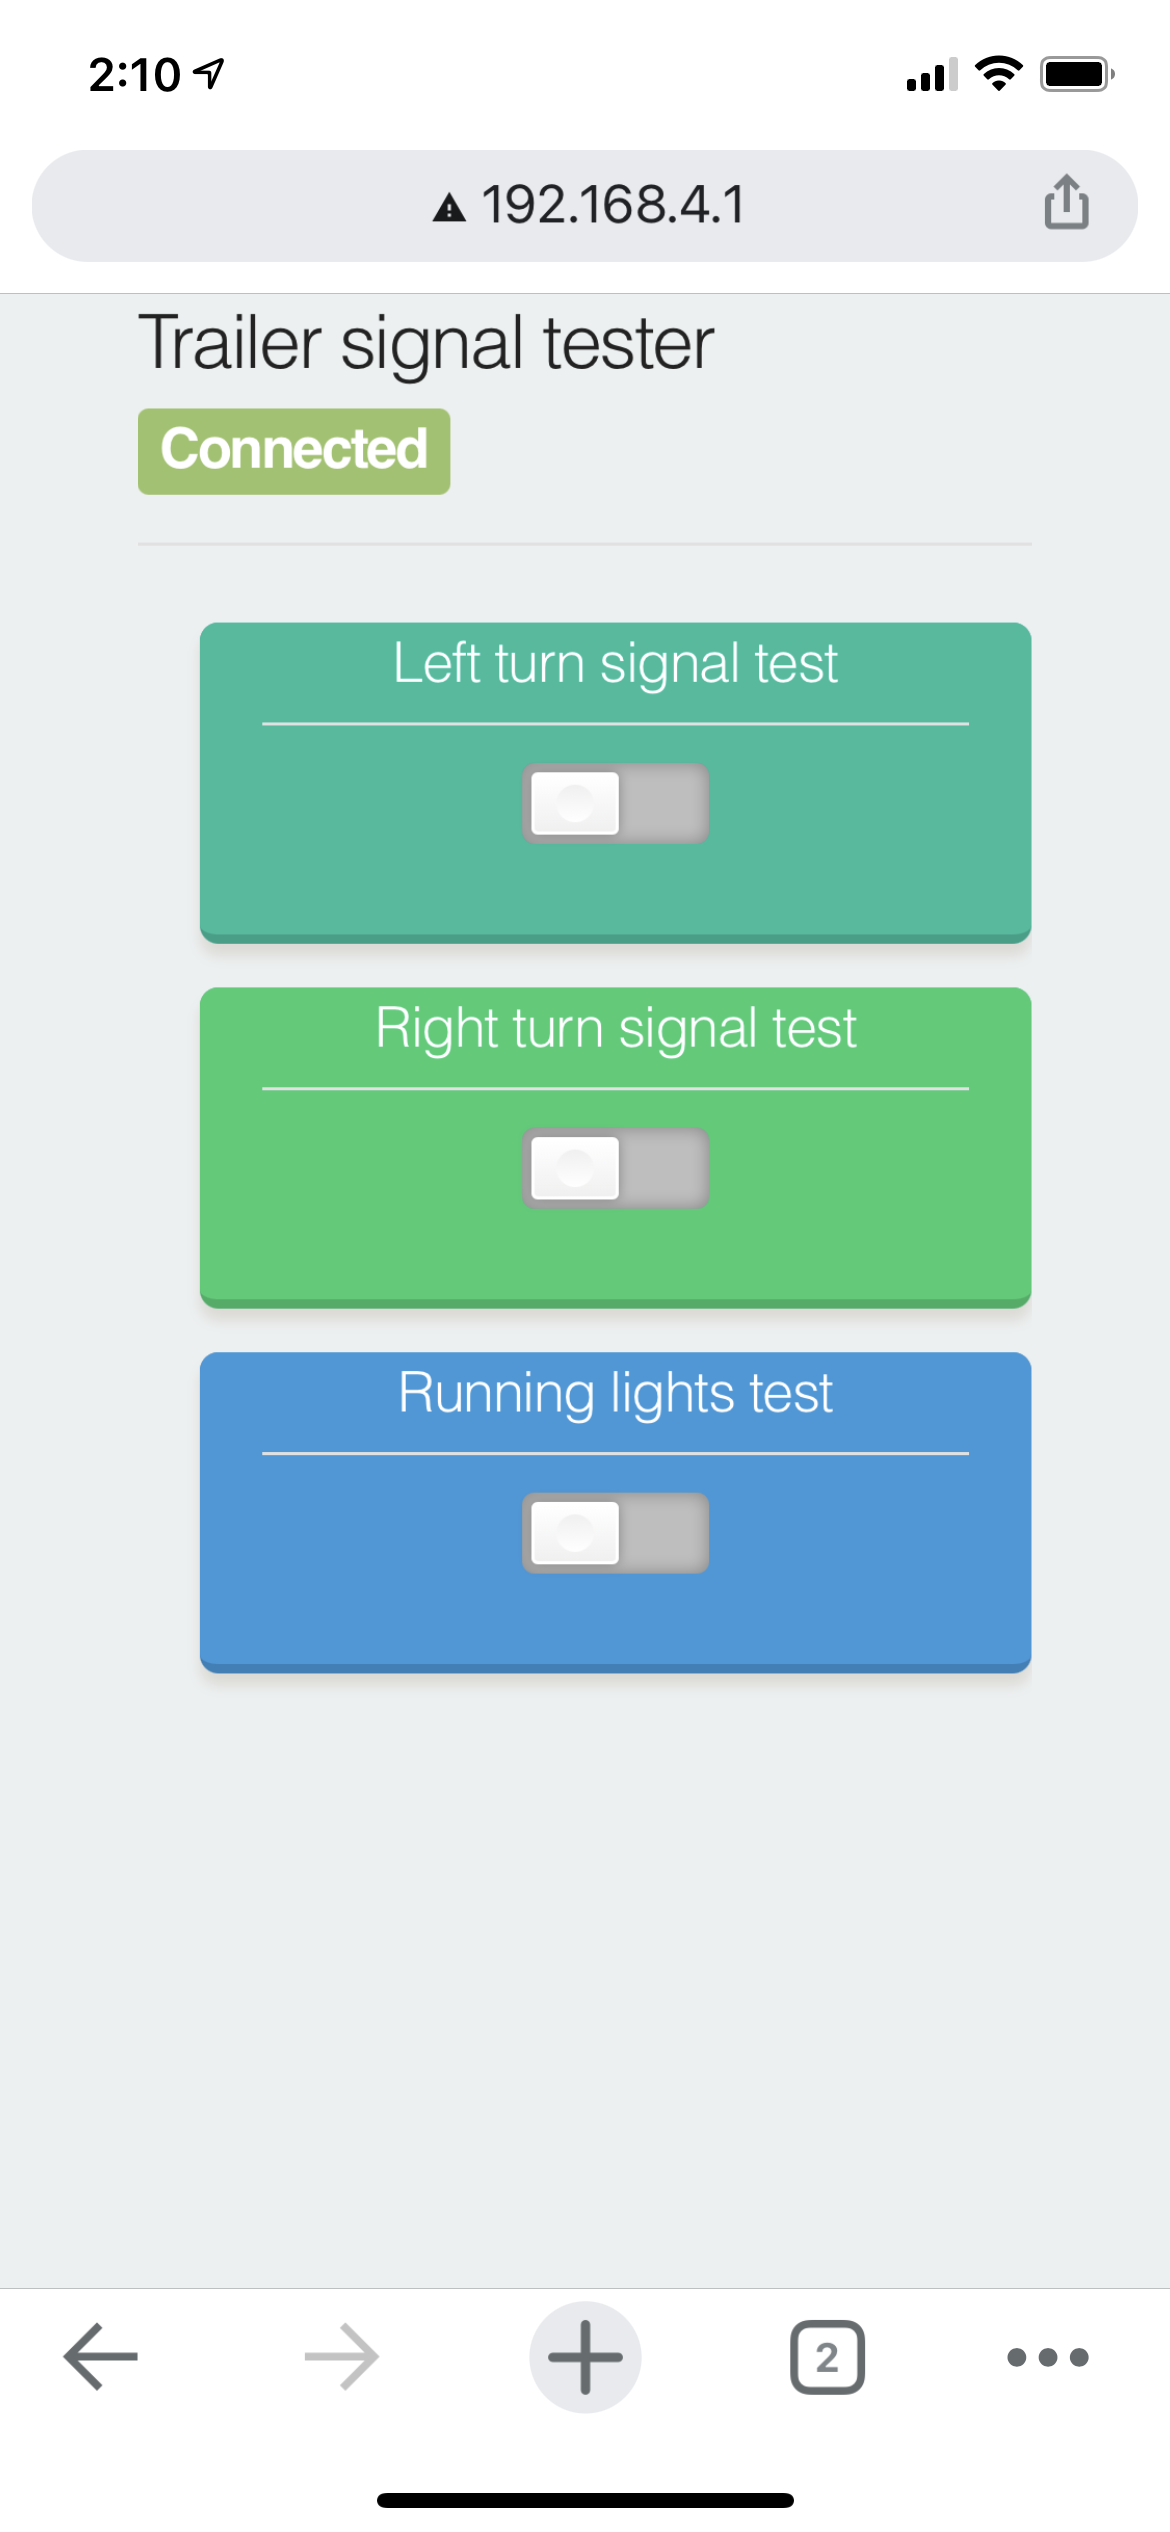
In a browser on that device go to "http://192.168.4.1". You should get a web page like this:
You can use the "Left turn signal test" and "Right turn signal test" switches to test those relays. They should cycle on and off at a once per second rate.
Toggling the "Running lights test" should turn the running lights relay on and off--this relay does not blink, so it clicks only once each time you toggle the switch.
If this works properly, proceed to the next step. If not, check your wiring and code upload and try again. -
3Wire the 12 volt battery and the trailer connector
Disconnect the 5 volt battery from the ESP32.
Wire the 12 volt battery, the relay outputs, and the trailer connector to each other as shown in the Fritzing diagram. Be careful to follow the color coding shown, as these identify the proper lights on the trailer.
-
4Connect the tester to the trailer
Connect the tester to the trailer in the following order:
- Connect the 4-pin flat connector to the mating connecting on the trailer.
- Connect the 5 volt battery to the ESP32.
(I assume the 12 volt battery is already connected. If not, connect it now.)
Connect your phone or laptop the same WiFi AP as previously, and go to the same URL in a browser.
Now toggle the switches and watch (and listen for) what happens.
If everything works--left and right turn signals blink, and running lights can be turned on and off), you're good to go!
If something doesn't work, re-check the wiring. if that looks OK then, congratulations, you have used the Trailer Tester for its intended purpose! Now trace out the problem on your trailer and happy hunting!
Trailer tester
An ESP32-based tester for 4-pin trailers designed to exercise the turn signals and running lights, using a WiFI-served webpage for control.

Discussions
Become a Hackaday.io Member
Create an account to leave a comment. Already have an account? Log In.