-
1Step 1: start making the Infrared Thermometer
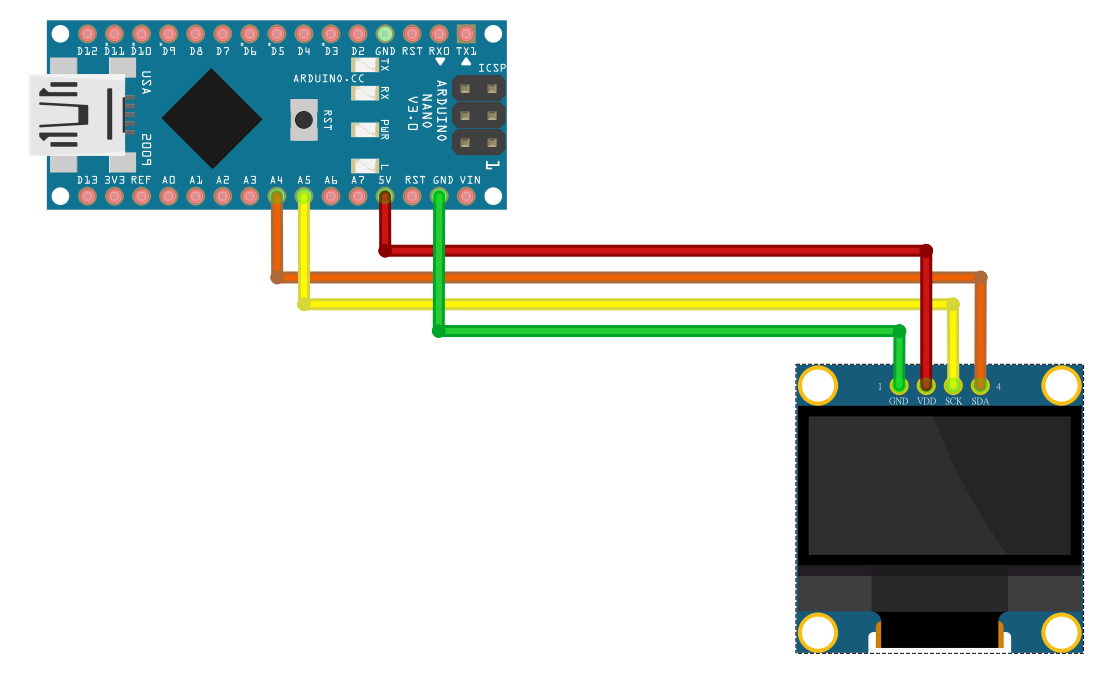
After deciding the main control board and the modules to be used, let's start wiring! The first is OLED. For wiring, please refer to the following table and picture:
![]()
![]()
-
2Step 2
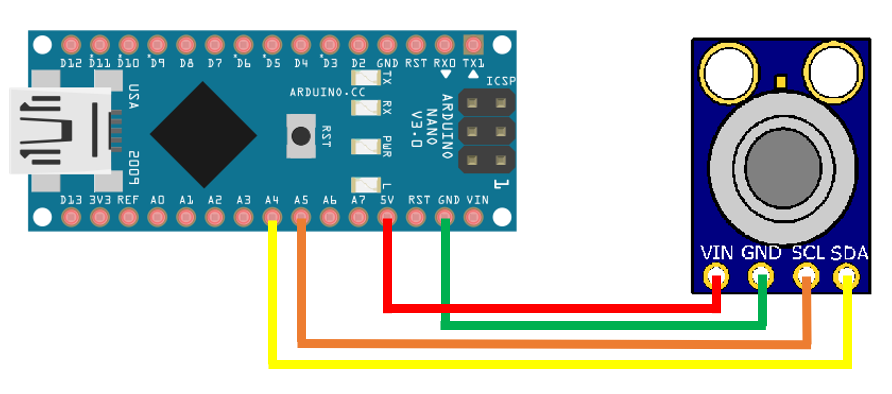
Next is MLX90614. For wiring, please refer to the following table and picture:
![]()
![]()
-
3Step 3
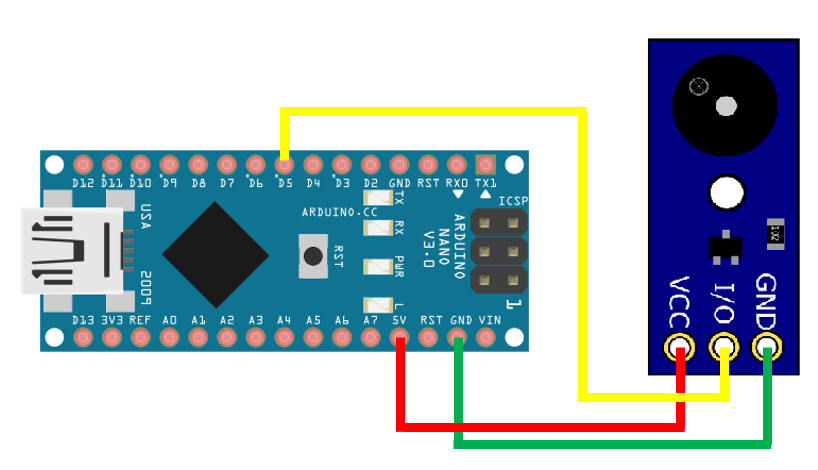
Next is the buzzer, please refer to the following table and picture for wiring:
![]()
![]()
-
4Step 4
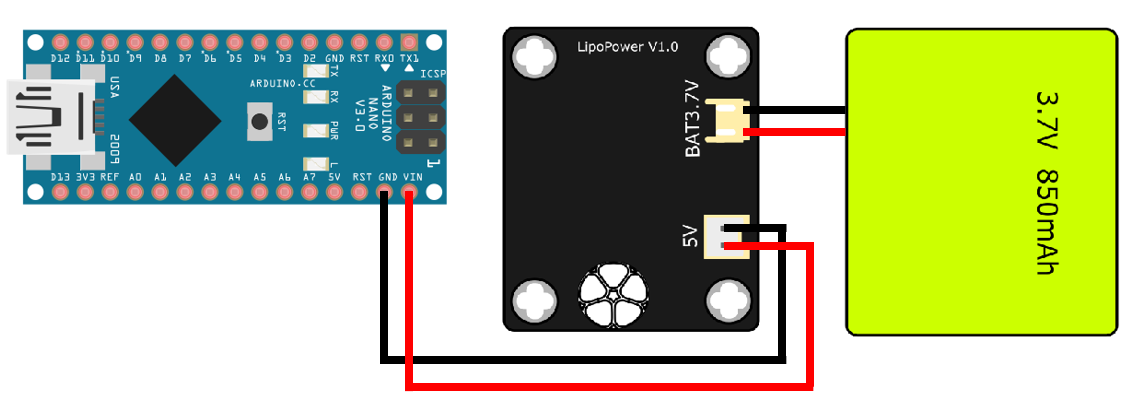
The last is the power supply. We first connect the lithium battery to the booster board. The booster board will boost the voltage to 5V, and then connect the booster board to the Arduino Nano for power supply. For wiring, please refer to the following table and pictures:
![]()
-
5Step 5: Completed the wiring
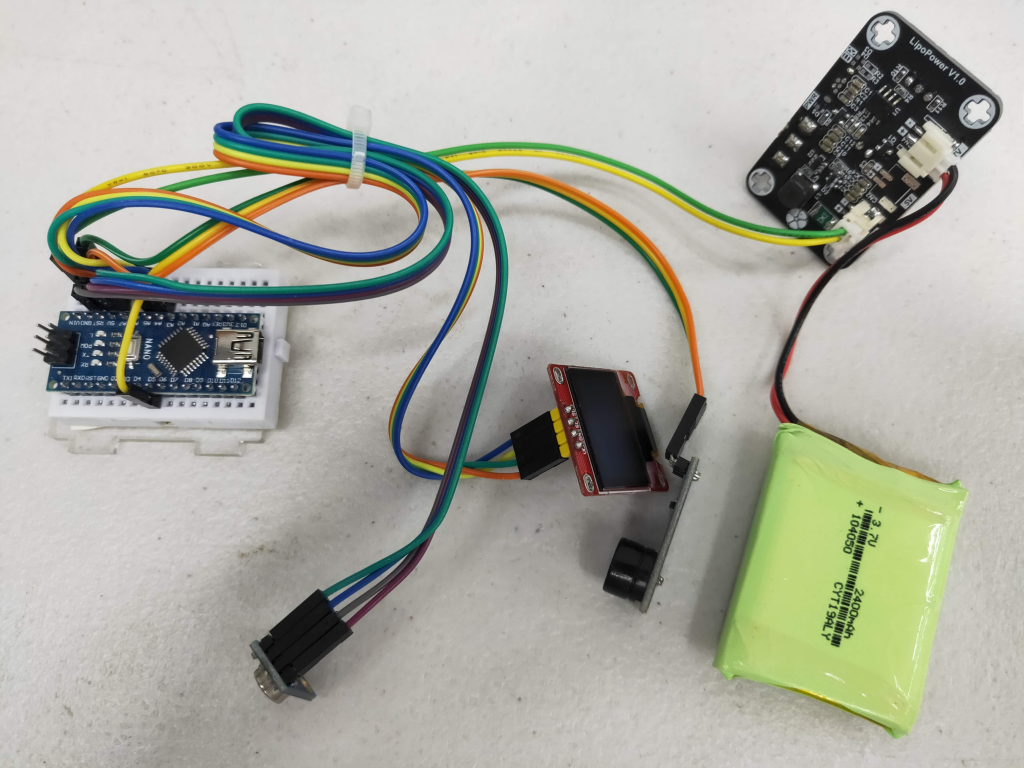
The wiring is completed as shown in the figure below:
![]()
DIY Infrared Thermometer
Recently, I saw many Makers publishing their own DIY thermometers. So I decided to make my own infrared thermometer.
 RachelAnne


Discussions
Become a Hackaday.io Member
Create an account to leave a comment. Already have an account? Log In.
You're right, well, maybe I'll try it later. ^_^
Are you sure? yes | no
Looks pretty good in the arcylic case, but it seems like a good excuse to design a case that can be 3D-printed.
Are you sure? yes | no