 Joel Kozikowski
I got my hands on a UV lamp from an inexpensive consumer mSLA printer. This lamp fixture is part of the original Sparkmaker 3D resin printer. After hacking a wire harness to retrofit the lamp fixture into the already existing Qwicktrace internals and a super quick software change, I got it functioning and was excited to test.

This particular lamp was taken directly from a used Sparkmaker I purchased off of eBay (I didn't want to wait for my shipment from China). While disassembling the printer, I noticed that they had put their protective glass UNDER the LCD, putting the LCD mask much closer to their resin vat. Hackaday community member @crun made some excellent comments on this project regarding defocus problems that can be caused by parallax in glass, so I decided to flip the glass in the Qwicktrace unit over, making the PCB sit directly on top of the LCD and eliminating the two or three millimeters of glass between the mask LCD and the copper board during exposure. What resulted was incredible results!

The above was four minutes and 30 second exposure with the new lamp and new LCD glass orientation, then 2 minutes and 45 seconds in the developer solution used previously. Notice how sharp the individual traces and pads are compared to the previous results done with my other UV lamp. Ignore the dark boarder to the left and top - this was a scrap piece of exposure board, and the protective film had peeled slightly which pre-exposed that edge of the board.
Pleased with the results, I decided to go to the next phase and test out a new etching vat I had put together:
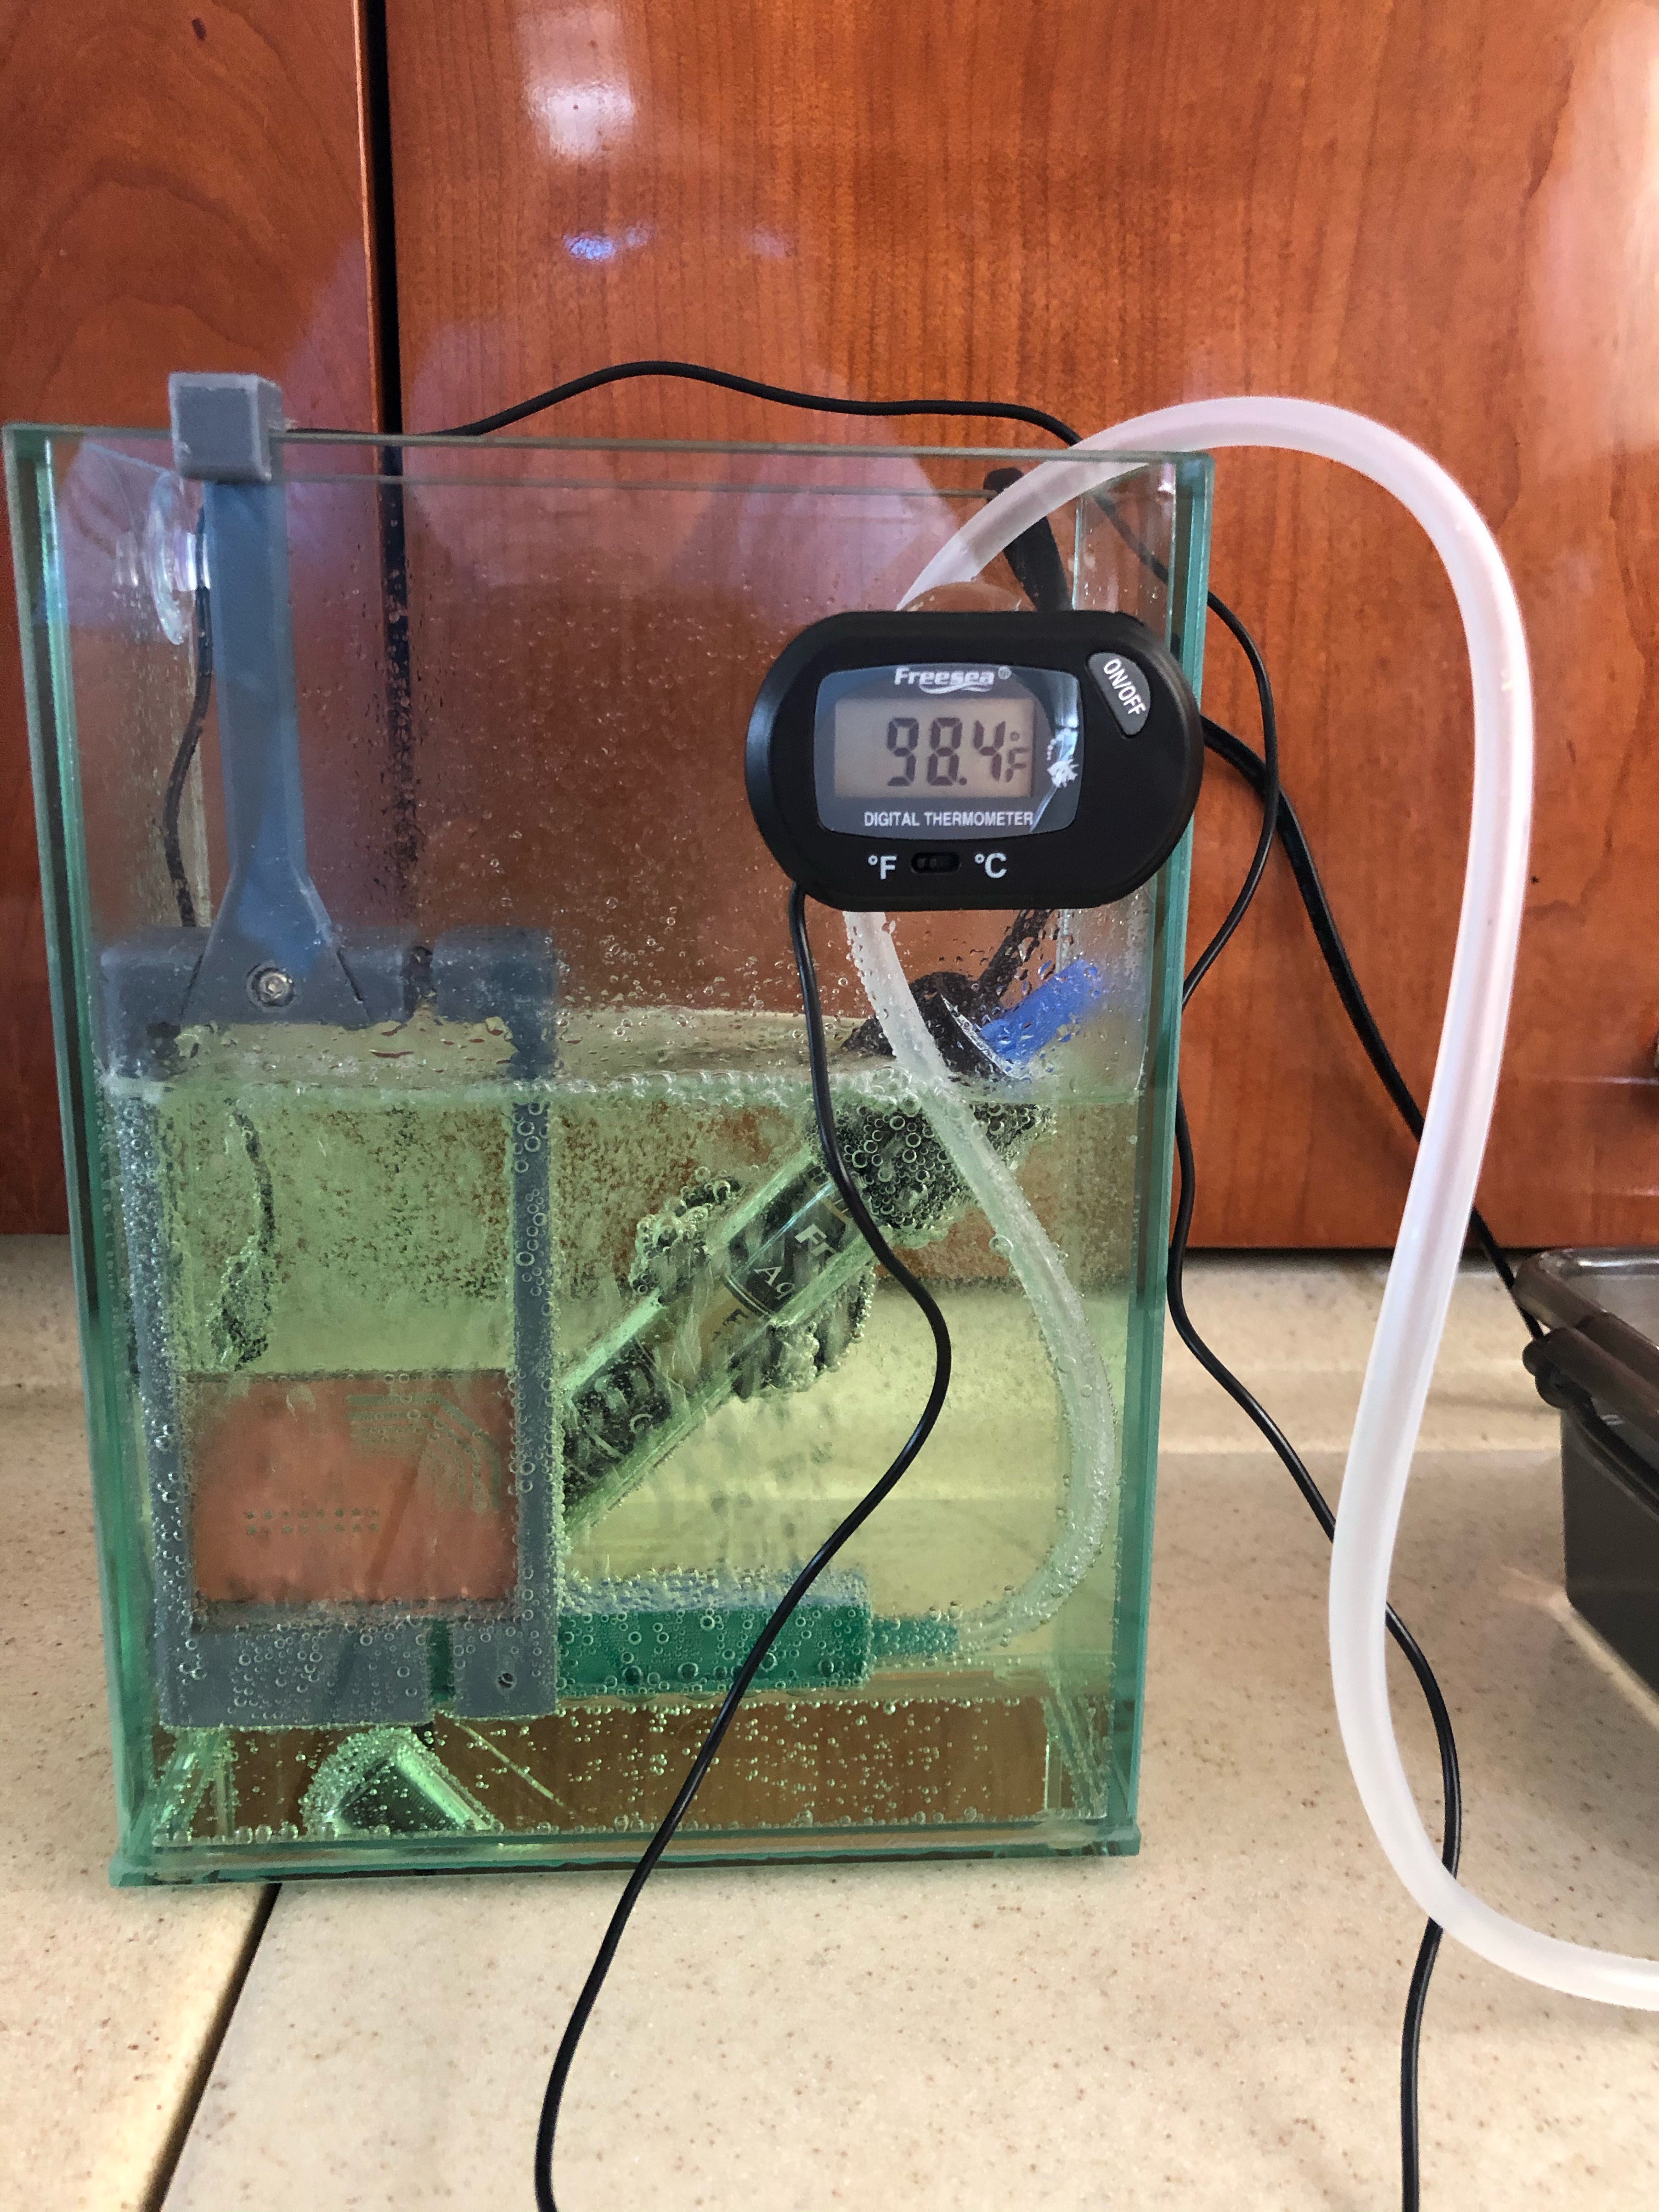
The "etching vat" consists of a rectangular glass flower vase, an aquarium heater with thermometer, and an aquarium pump with "air stone." Also in the mix is a 3d printed board hanger. All is submerged in a 2 to 1 solution of Hydrogen Peroxide and Muriatic Acid (available at your local pharmacy and swimming pool supply store respectively). I really like this mixture over ferric chloride, as it is less messy, and most important, you can see the board as the etching progresses.
Here is the final results after only five minutes spent in the etching vat:
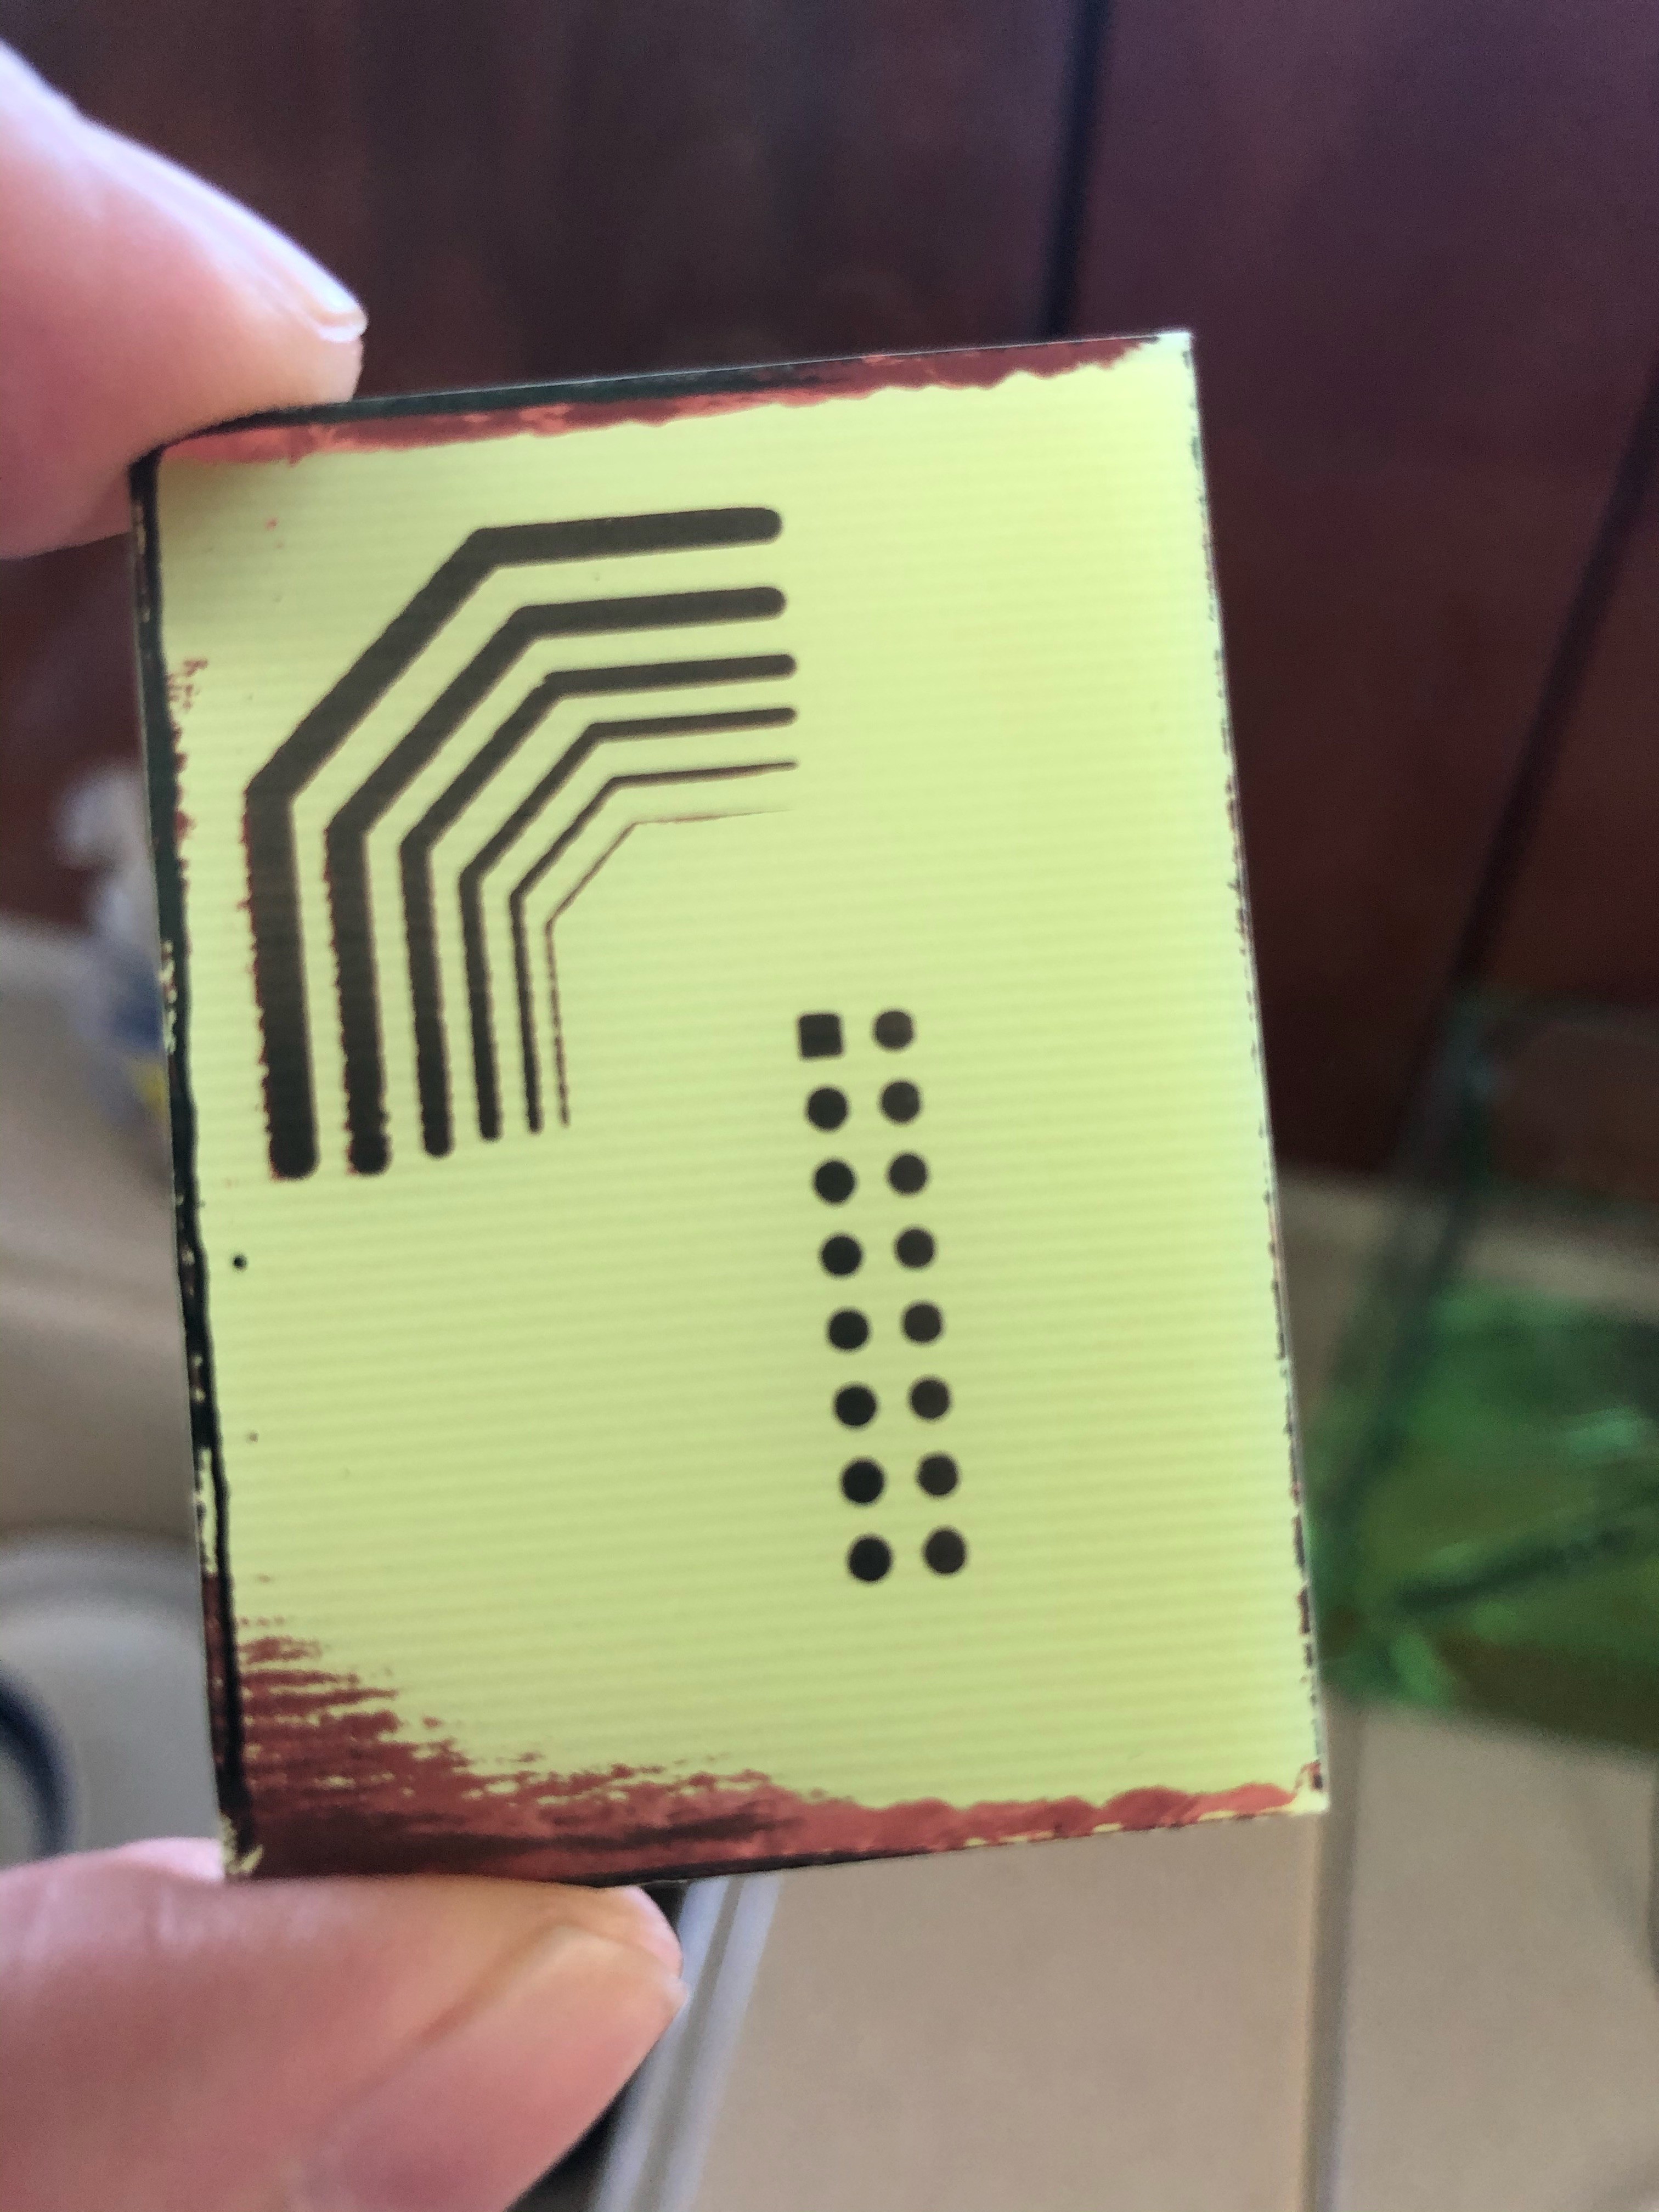
I stopped the etch a little early because I wanted to see how well the 0.25mm trace would come out (it looked like it was about to go). IT SURVIVED! The copper on the top and bottom of the board is a result of how the hanger I made holds the board. It is slotted, and it actually inhibits the acid from coming in contact with the copper, so that needs to be reworked. That, combined with the pre-exposed edges made the sides take longer to etch. At about the four minutes and change mark I think the middle of the board was about ready, so I think the 0.25mm could have come out even better.
These are all things that can be fine tuned, but I'm now confident that this unit is going to be able to produce some really nice boards with minimal effort.
Discussions
Become a Hackaday.io Member
Create an account to leave a comment. Already have an account? Log In.
Wow! That's some real progress. Maybe at one point it would make sense to study which change contributed the most, something like an ablation study. I am really interested in your project and will attempt to replicate at my local makers hub.
Are you sure? yes | no
I just received a shipment of led strip light from a different vendor. Much denser (about twice the number of LEDs per 100mm strip), and a better UV frequency (405 nm). I ordered these before I found the Sparkmaker board, but now that I have them, I might as well give them a try with the new LCD glass orientation. The new strip LEDs and the Sparkmaker board are both the same price ($35 USD) but I have some concerns about being able to source the Sparkmaker board on its own as it is an older model printer.
Are you sure? yes | no