 Deepak Khatri
-
11Headphone Jack
Solder Headphone jack at J2.
![]()
-
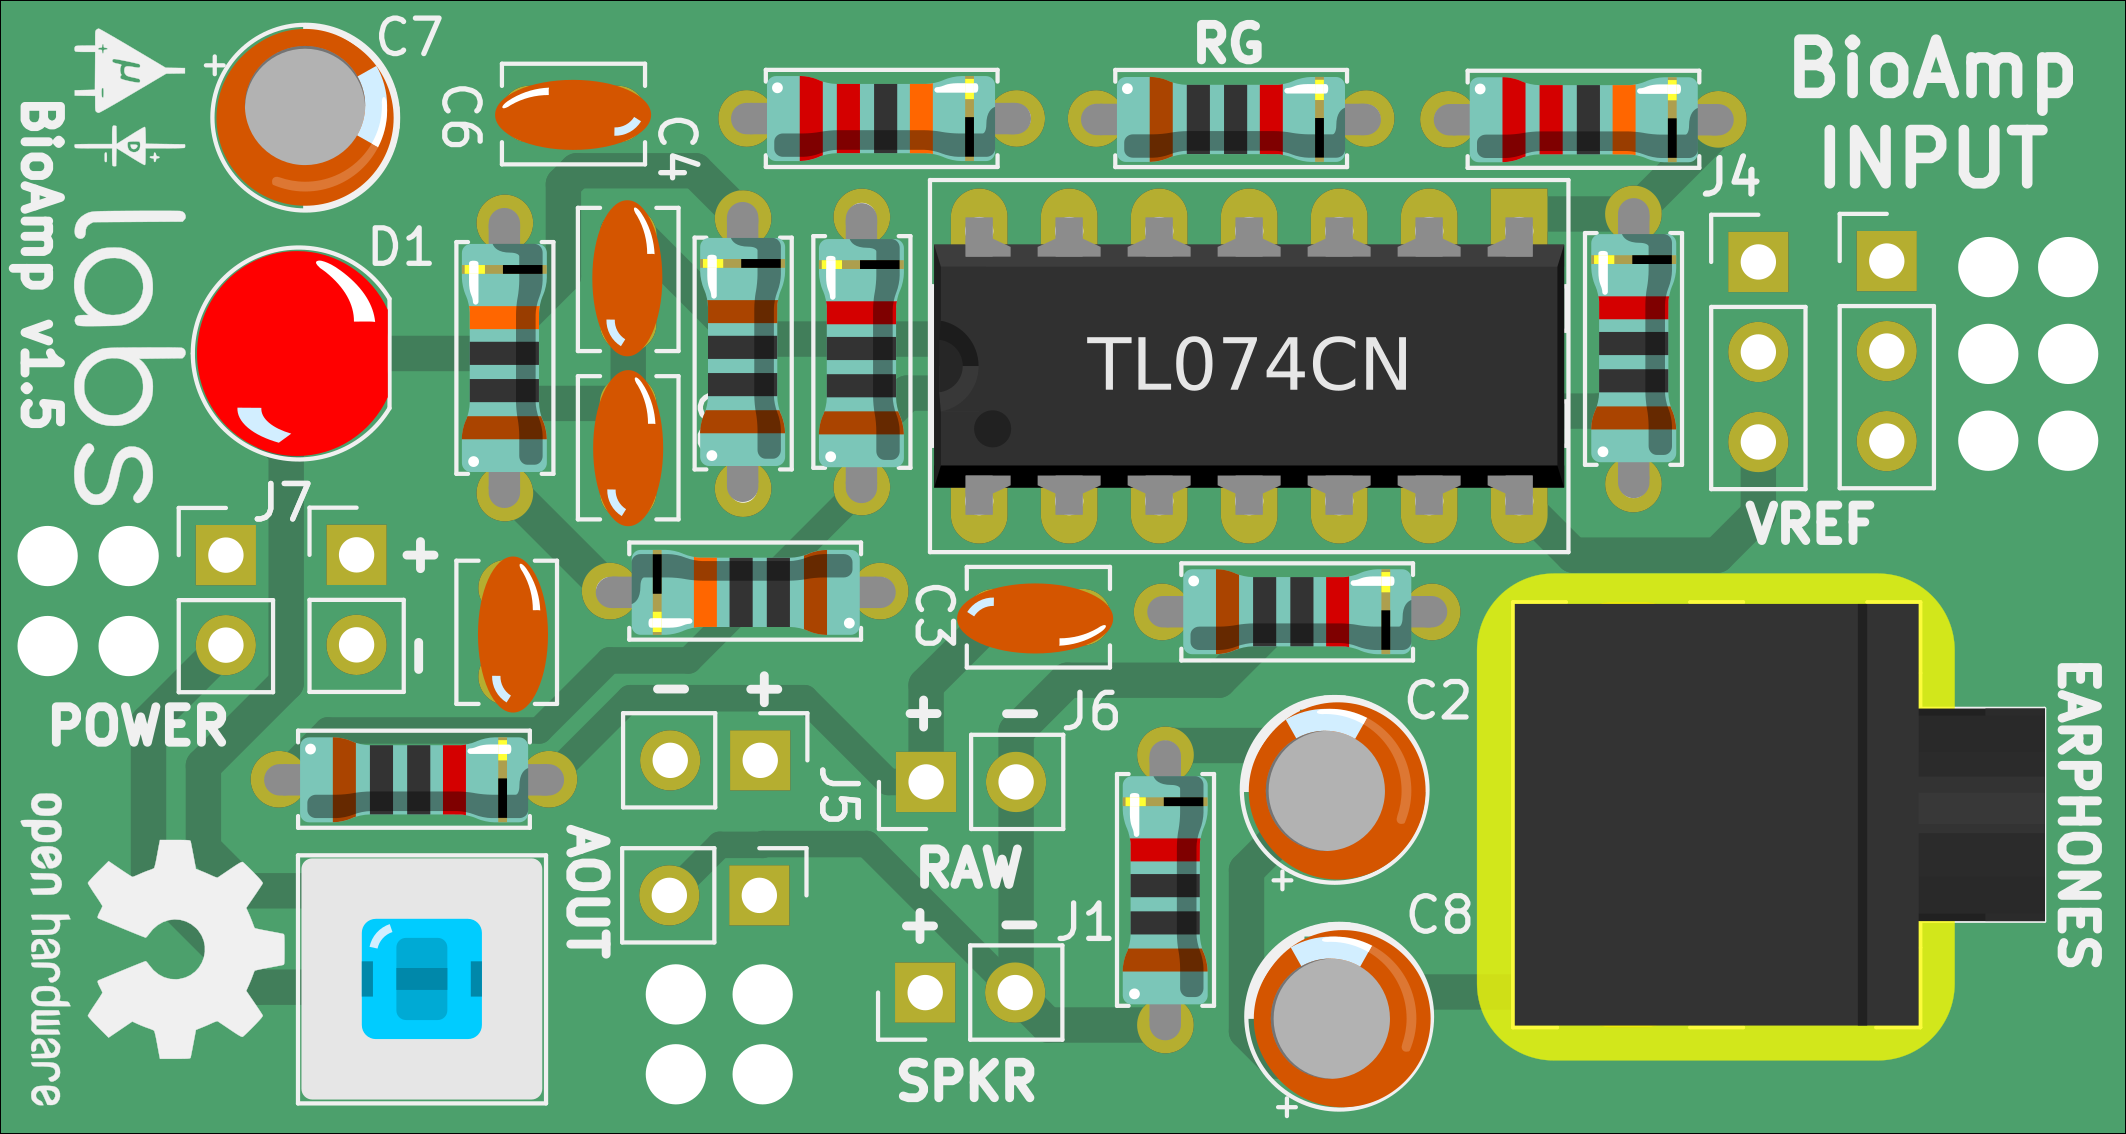
12Header Pin
Solder 2-Pin and 3-Pin header pins.
![]()
-
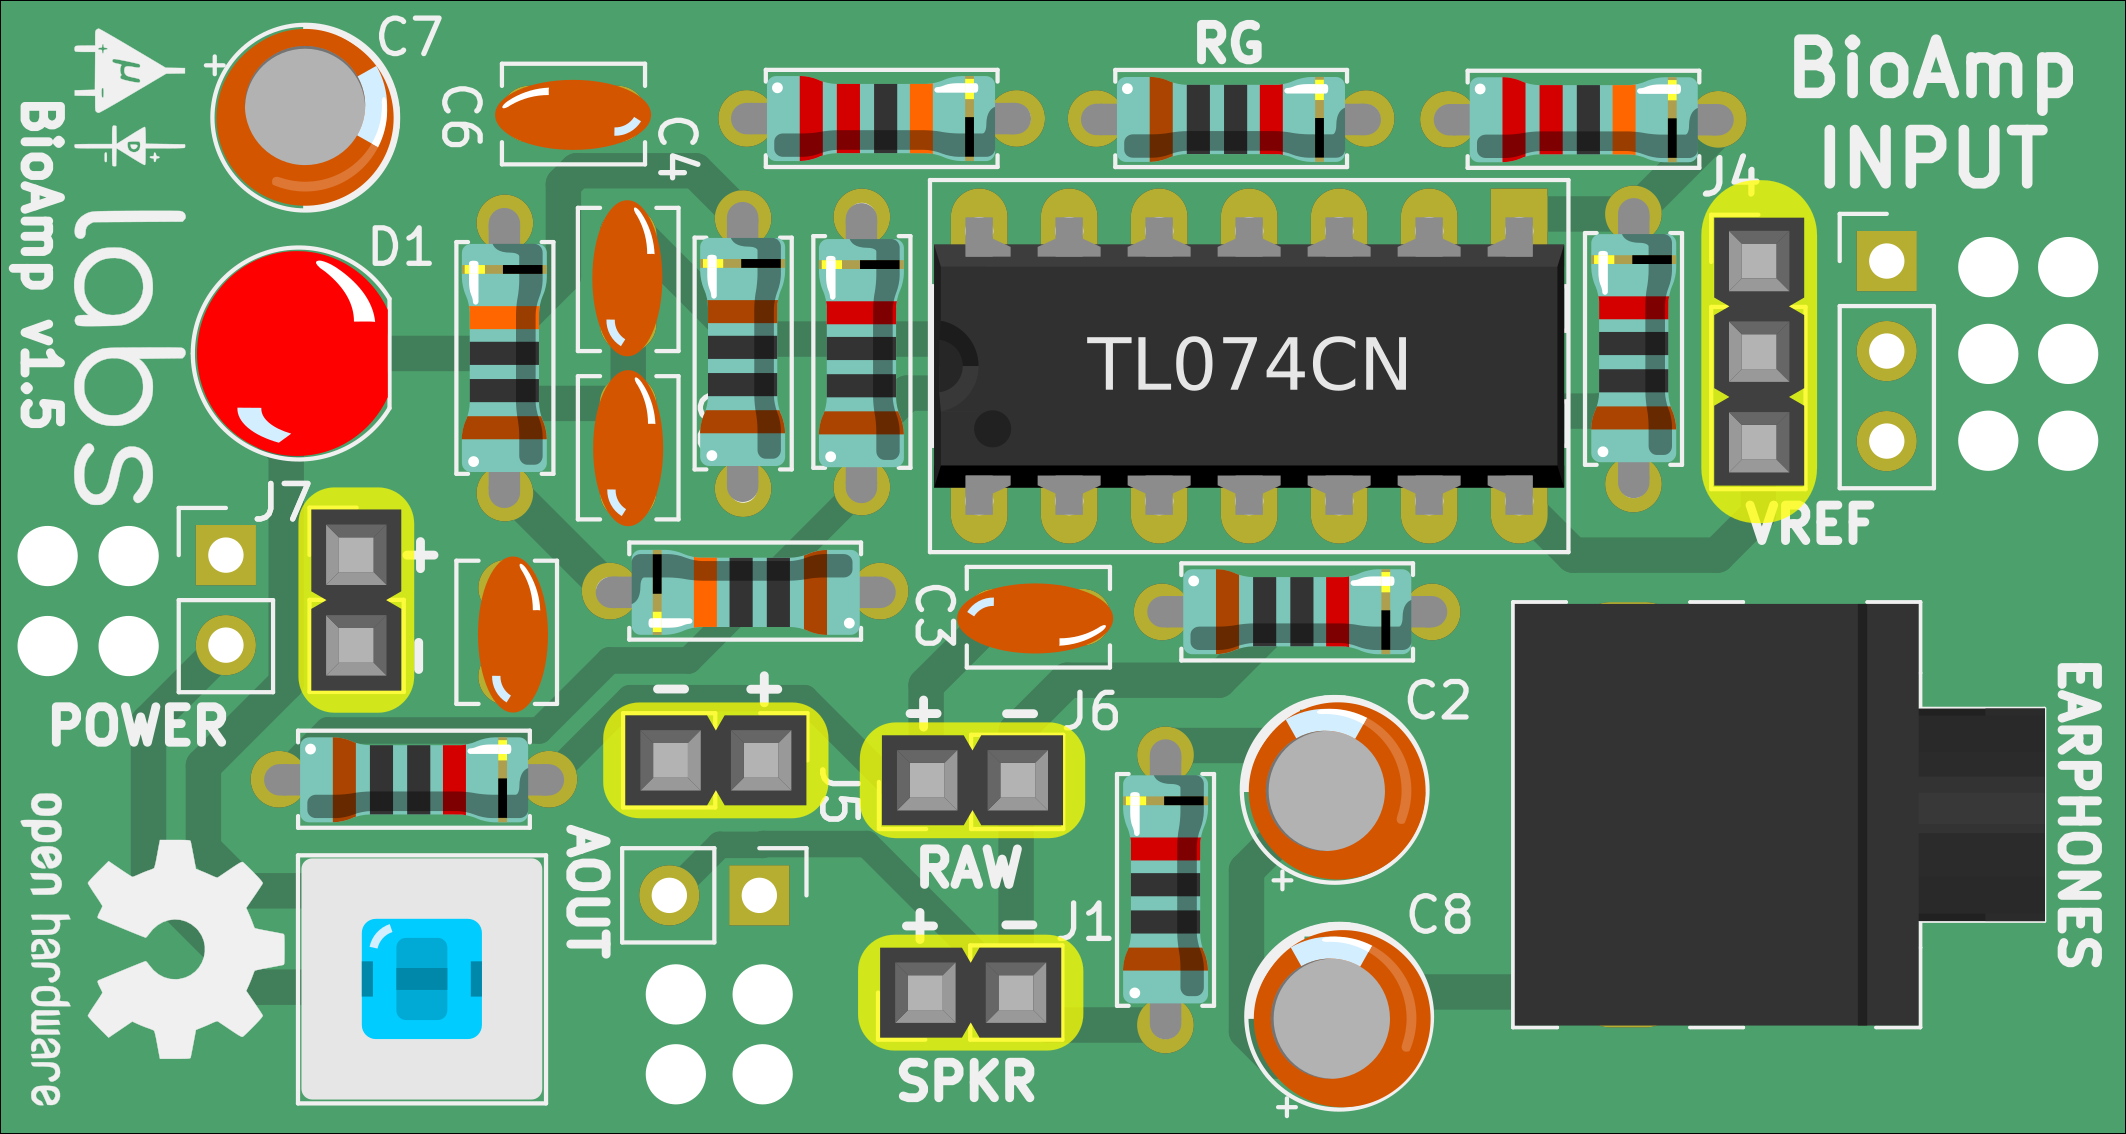
13Battery snap
Solder 9v Battery snap as shown in the image below, insert the wires from first pair of holes and pull back the wires from second then on to solder them on J7.
![]()
-
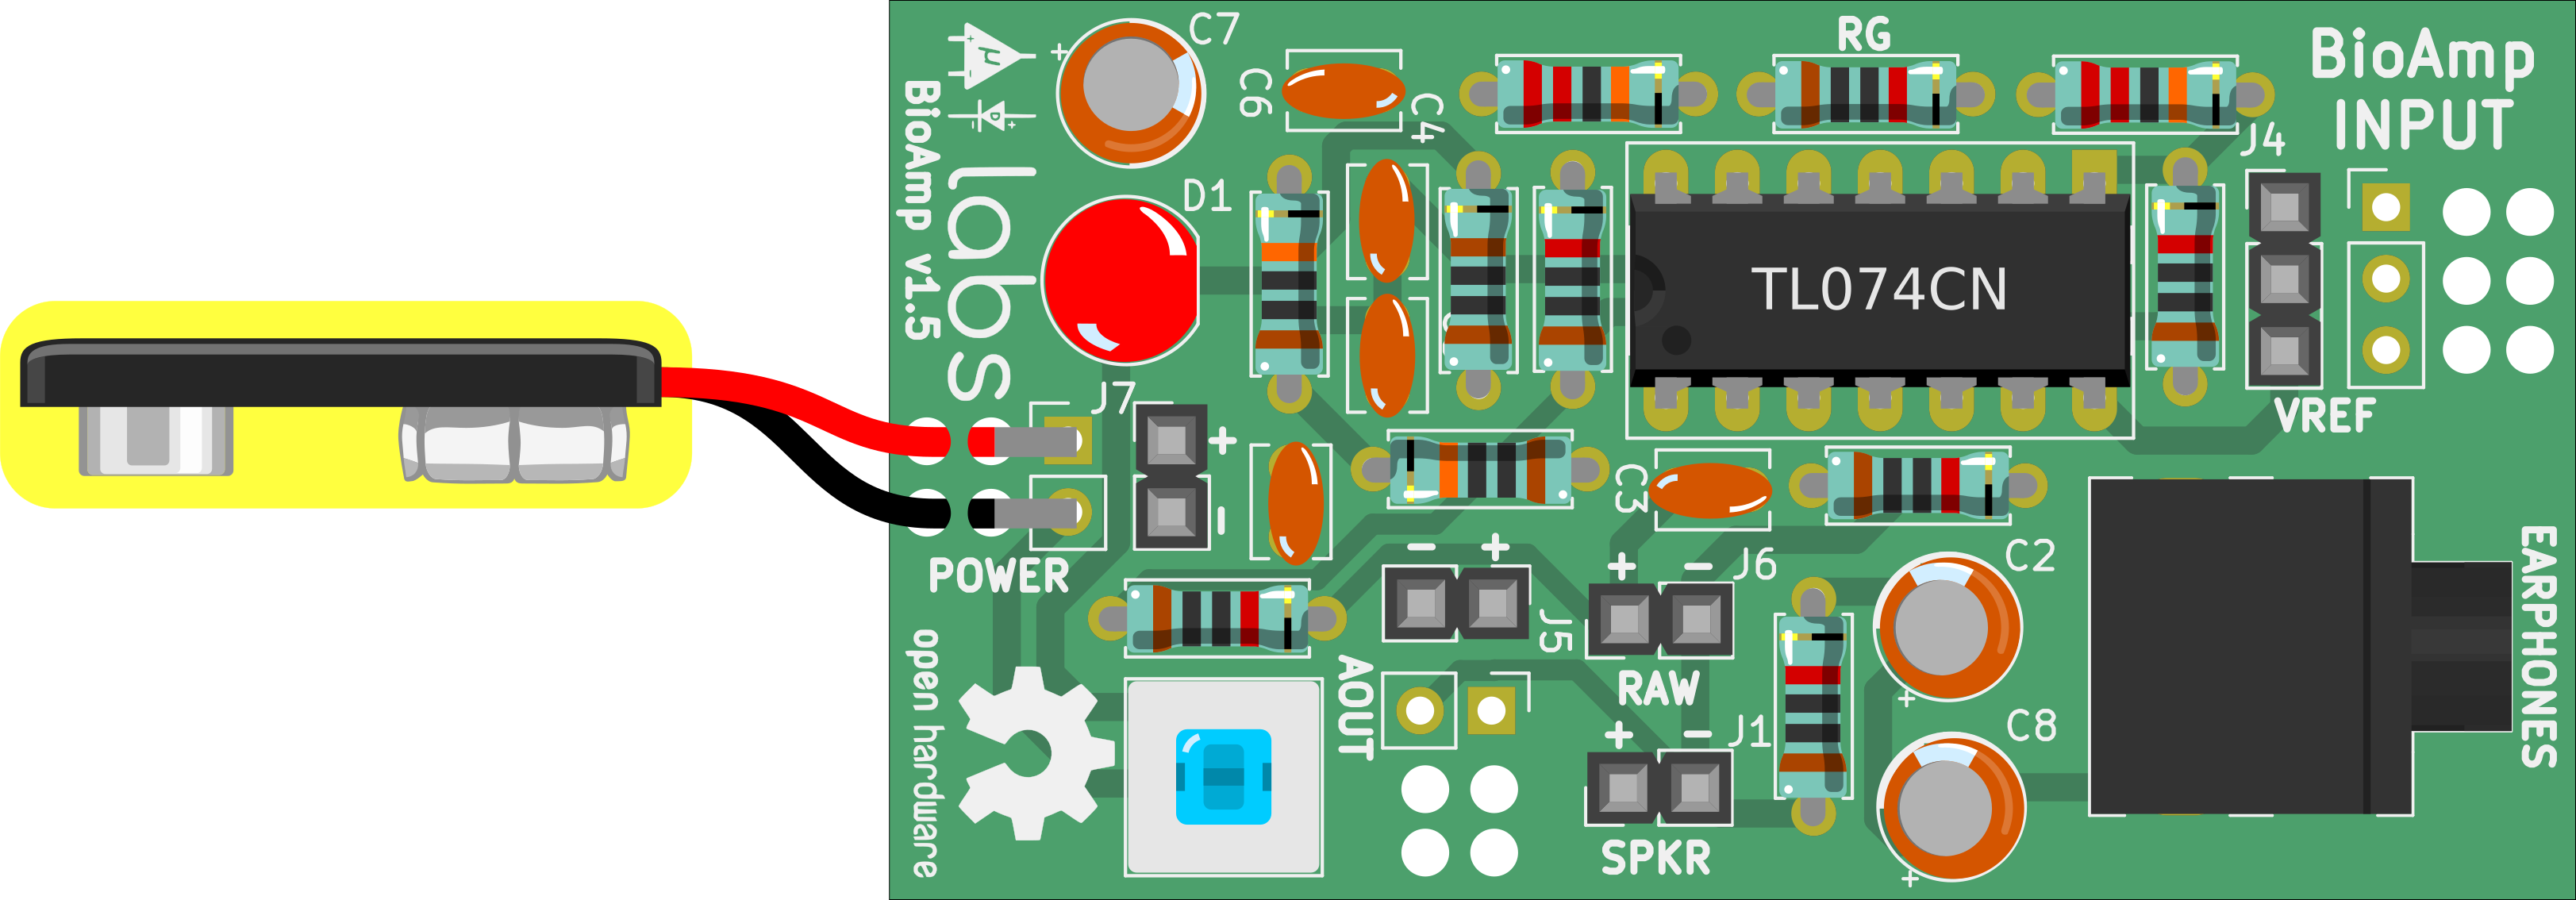
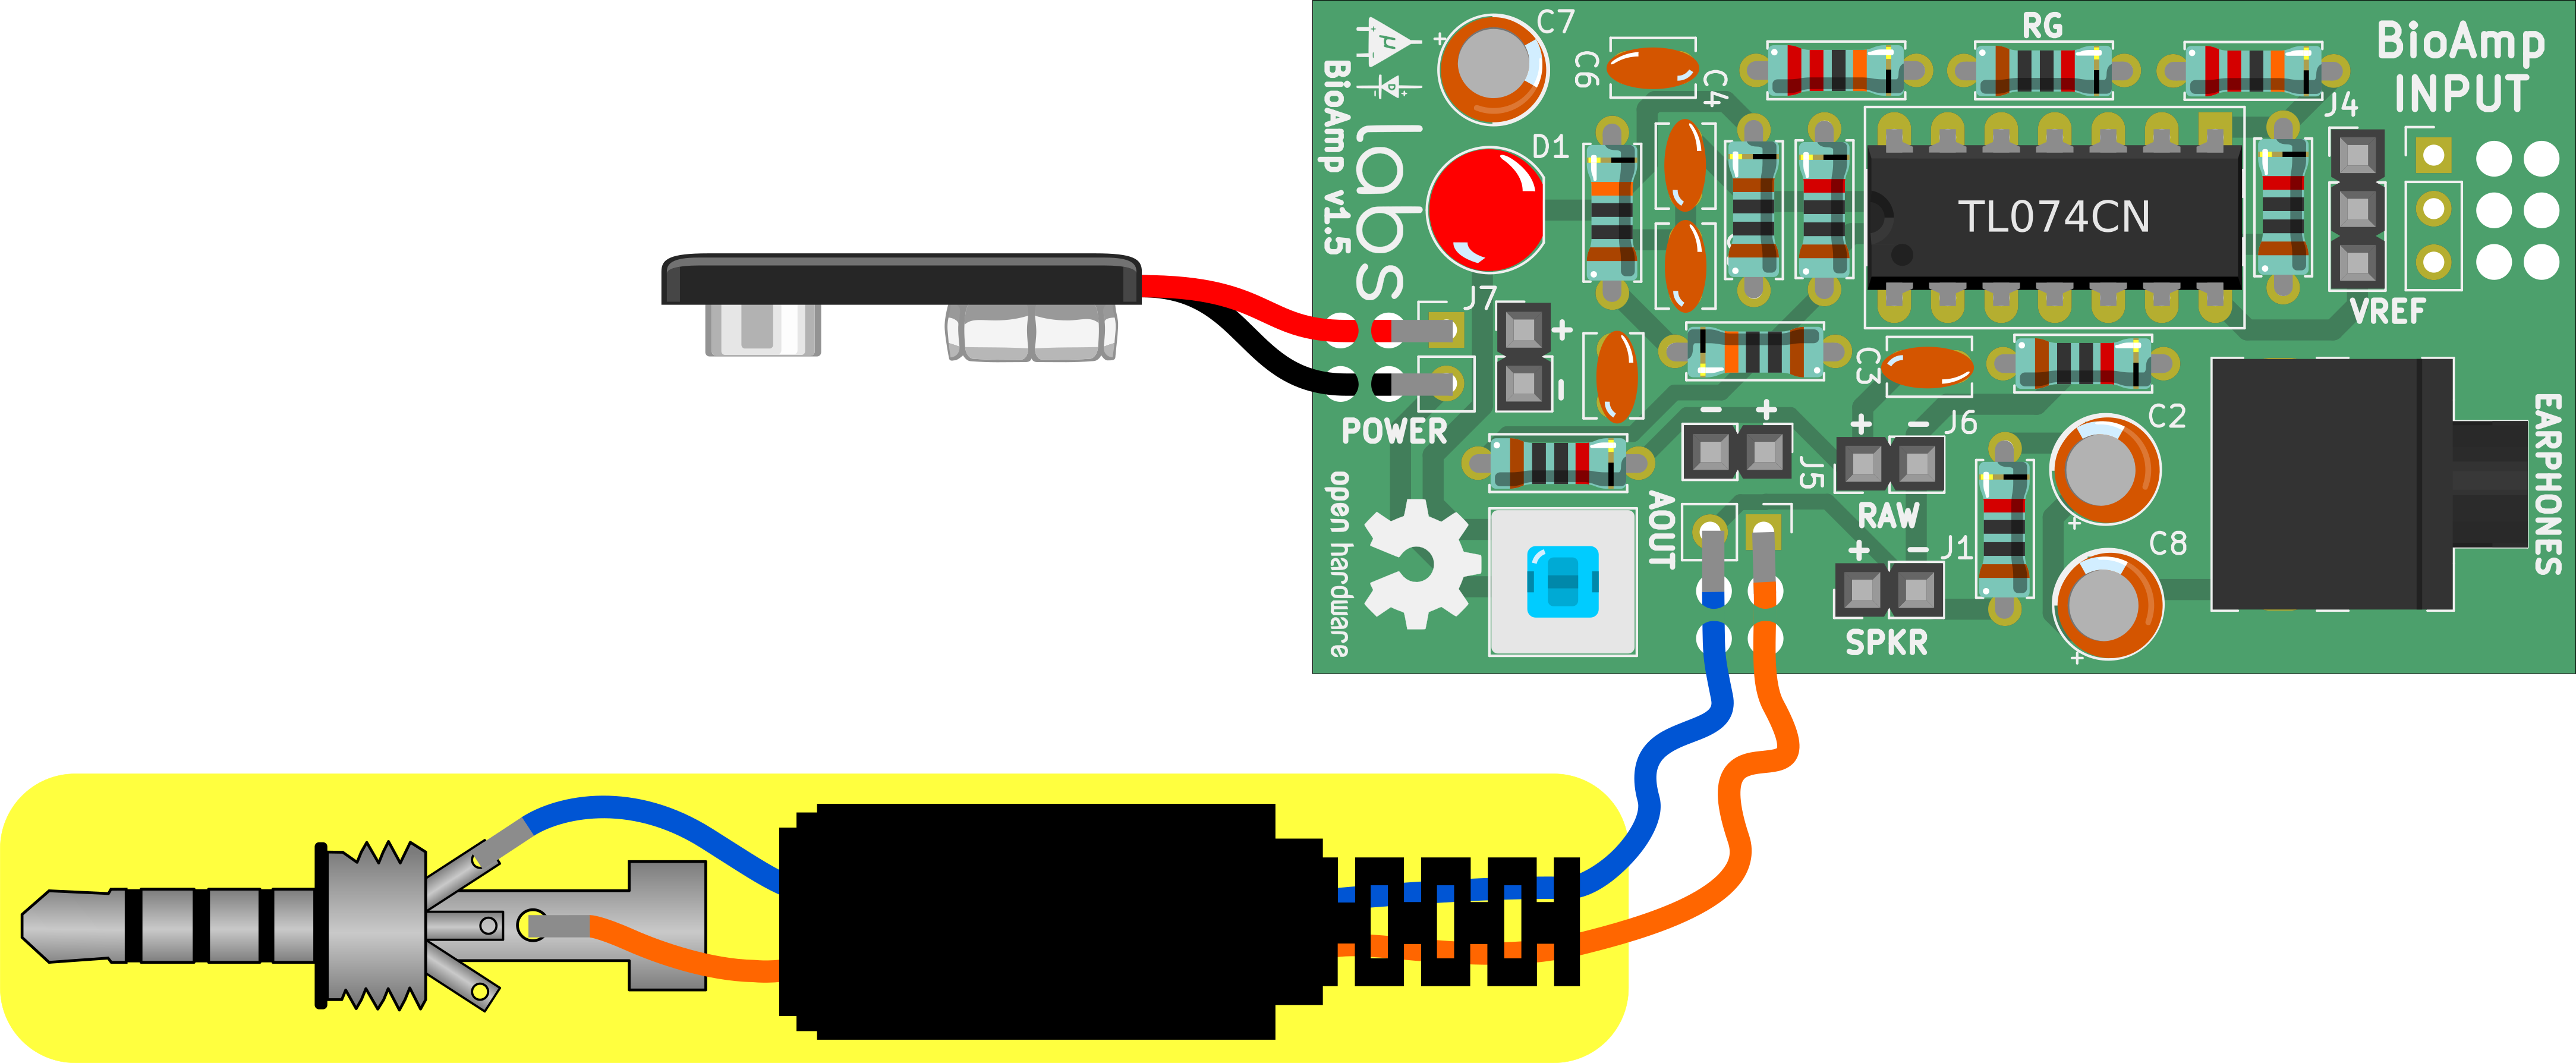
14Audio Cable
Un-screw the headphone jack provided in the kit which follows this pinout.
![]()
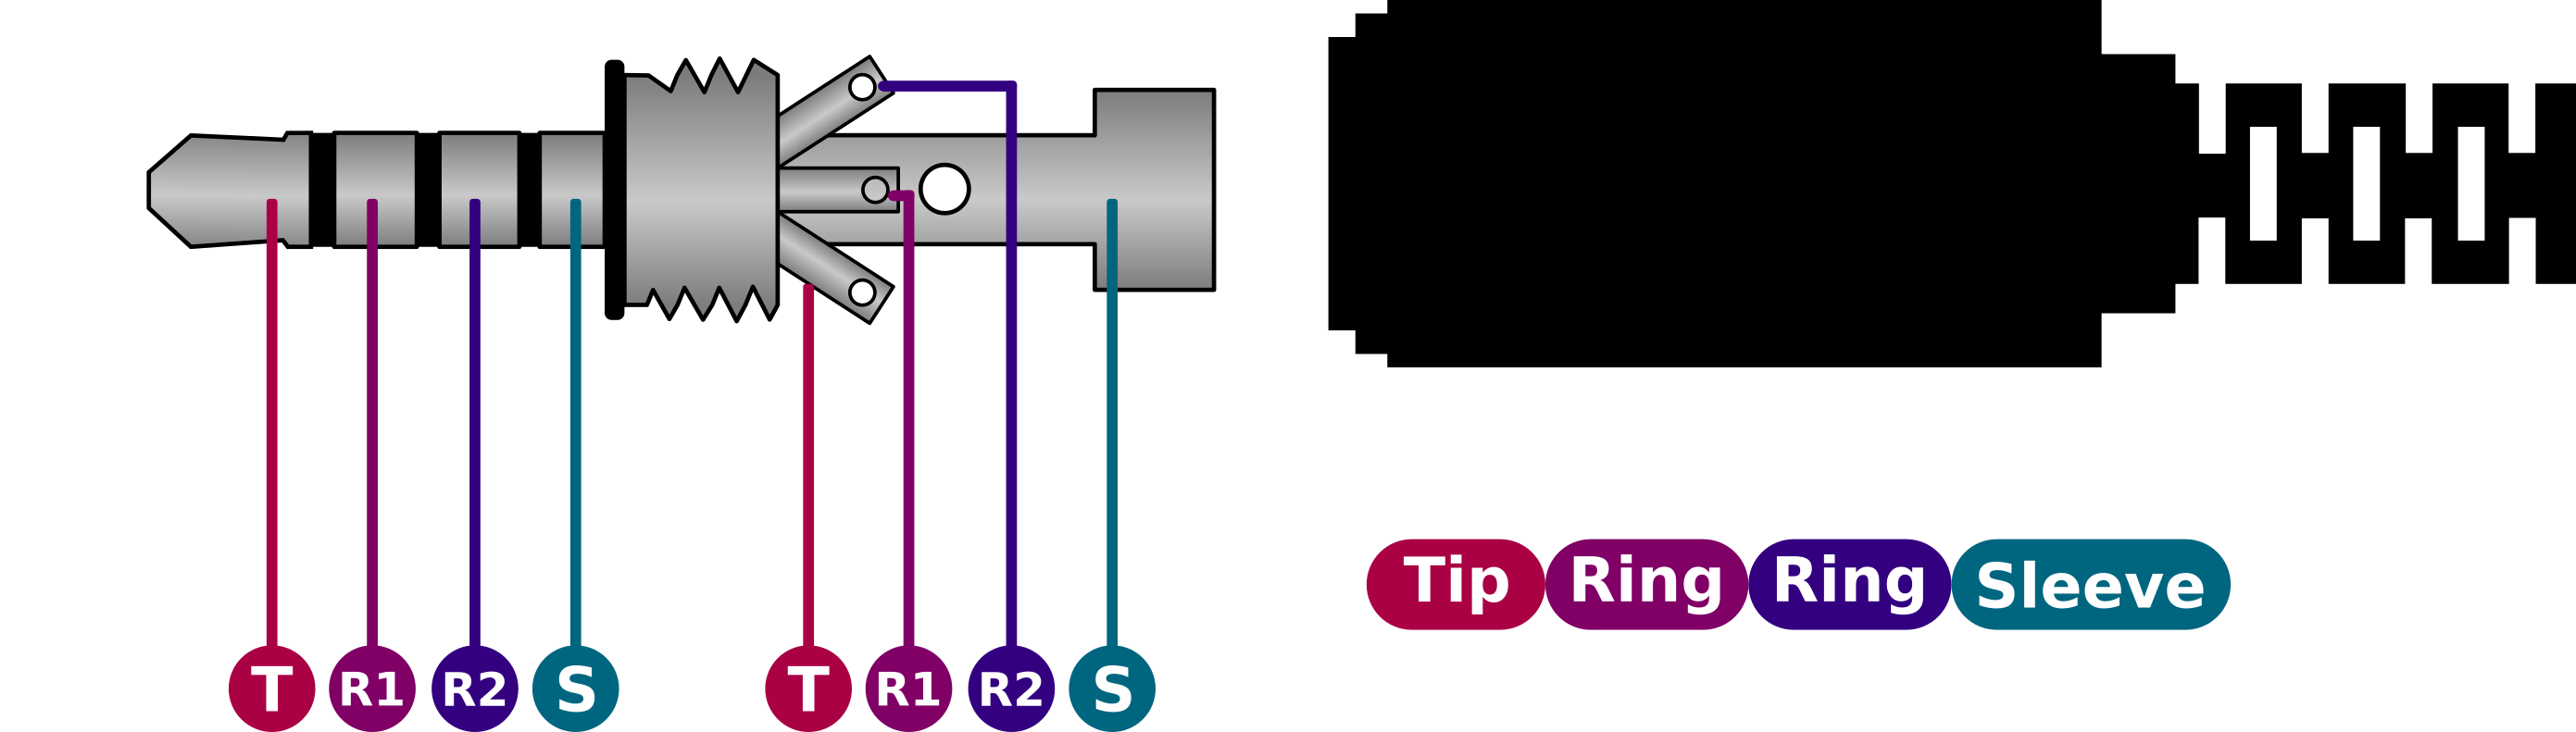
We need to use the microphone pins of this 3.5mm male jack, the connection for the same can be seen in the image below.
![]()
Solder the blue wire to Ring (R2) and orange wire to Sleeve (S) of the 3.5mm male jack as shown in the picture above. Now Insert the wire from the first pair of holes and then pulling from the second then solder them to J5.
-
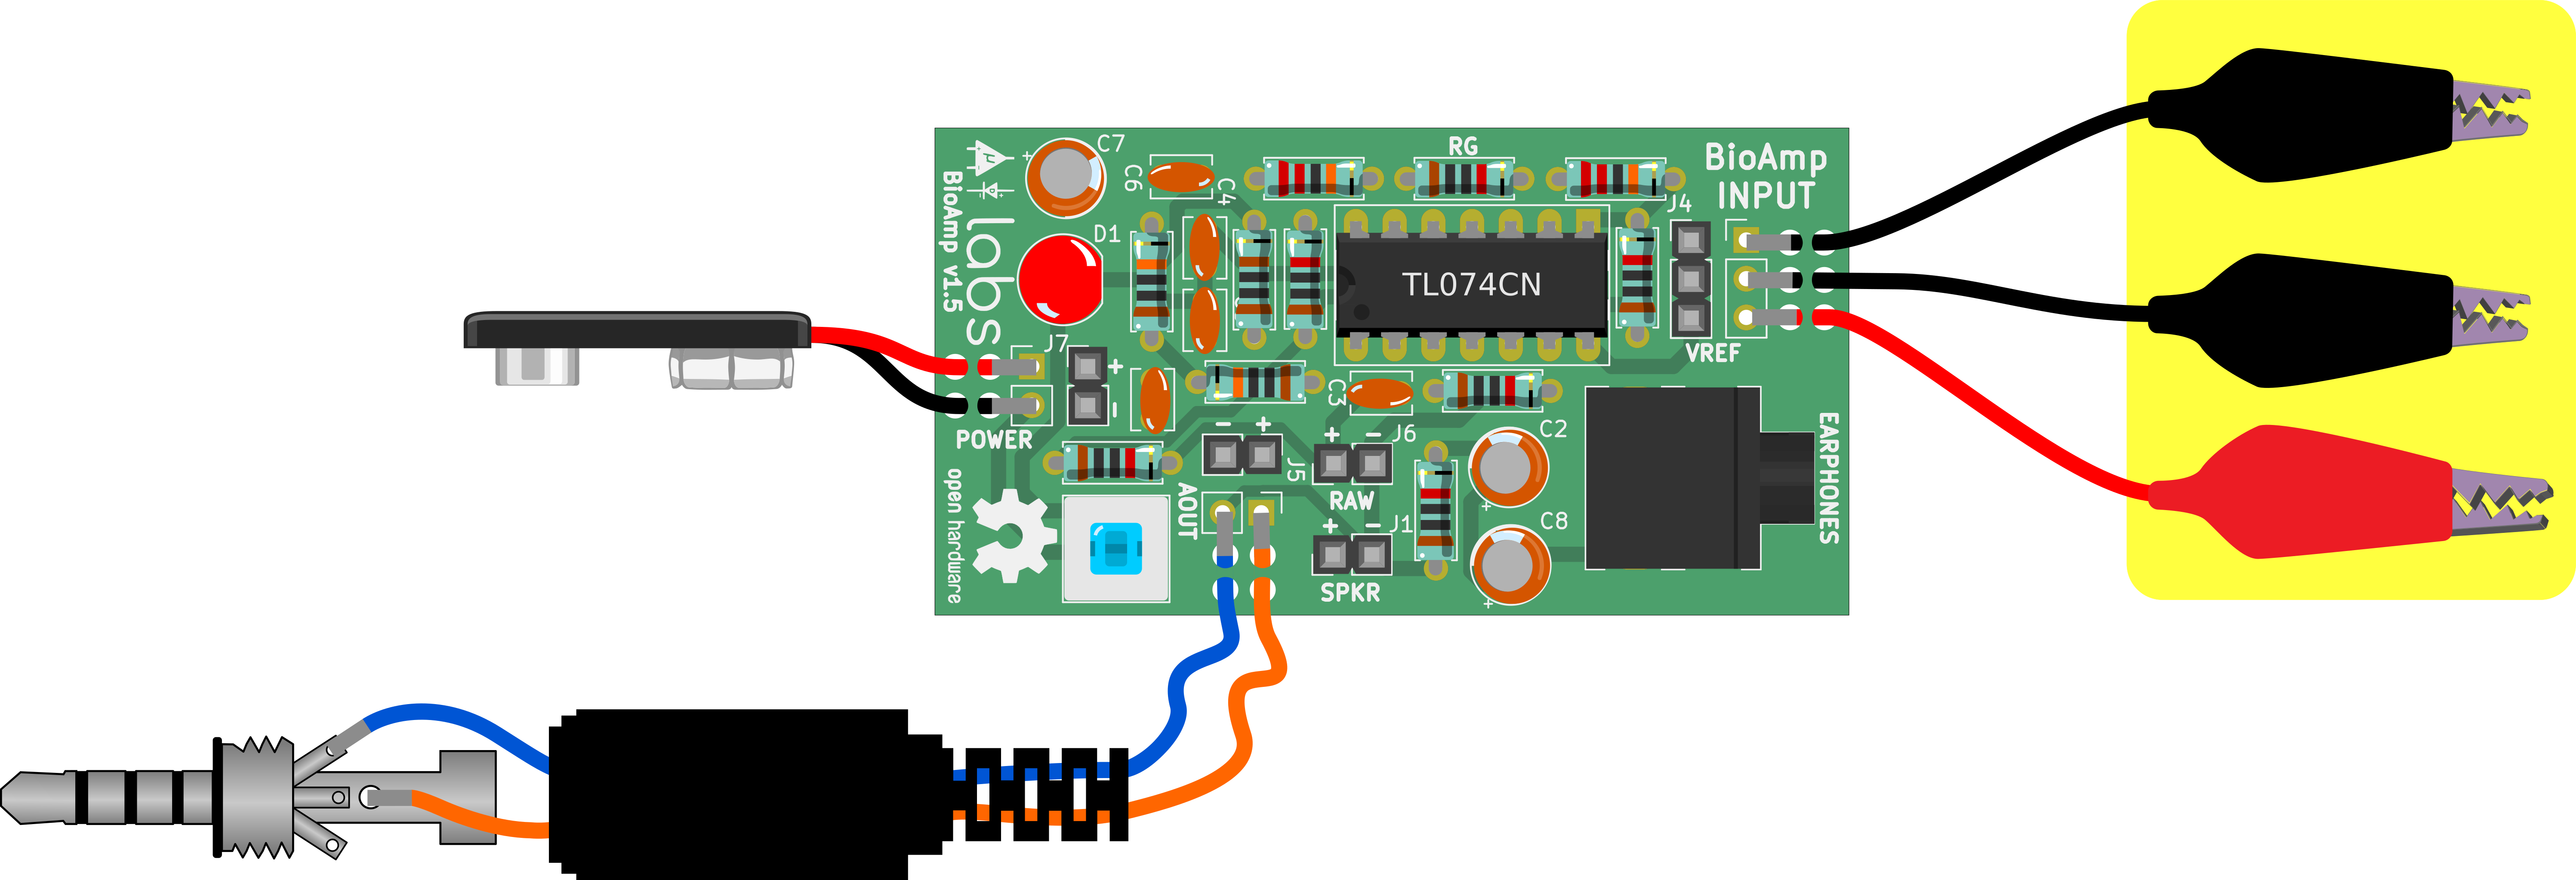
15Electrode cable
For Electrode cable,
- Solder all 3 wires to J4 as shown below.
- Remove the alligator clip cover and insert it on the wires.
- Now solder the loose ends of the wire to the clips.
- Insert back the cover from behind.
The final electrode cable should look something like shown in the picture below.
![]()
-
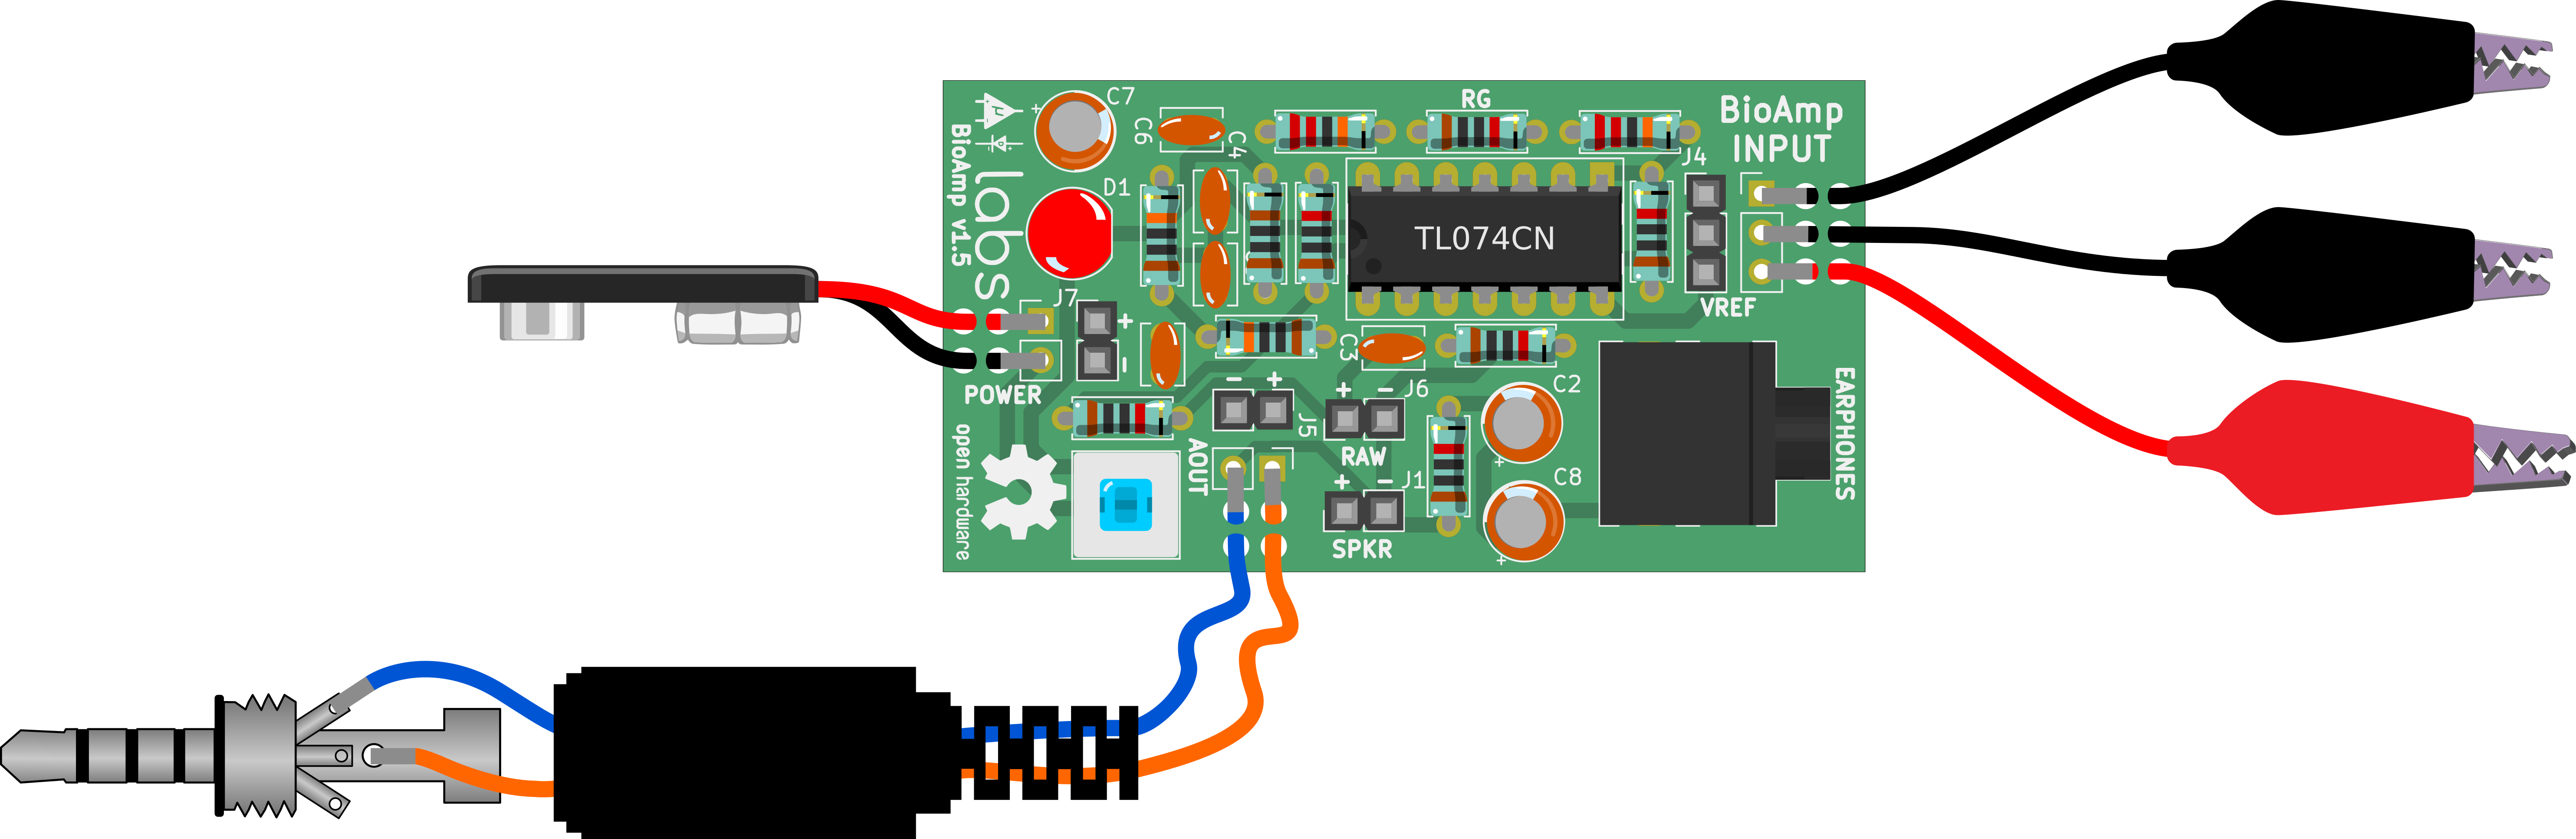
16Assembled kit
![]()
Now you are ready to use your fully assembled kit in 3 simple steps,
- Connect the module to the 9v battery.
- Attach electrodes to the body using gel electrodes provided in the kit.
- Listen to your muscles using headphones.
You can also record/visualize the signal by using Audacity on your PC or SpikeRecorder on your mobile phone. BioAmp v1.5 also provides options for RAW output and speaker output.
Discussions
Become a Hackaday.io Member
Create an account to leave a comment. Already have an account? Log In.