Stephen Holdaway
-
Simplified hardware boot switch
08/01/2021 at 03:30 • 5 commentsIf you liked the idea in the original post but found the microcontroller and firmware part a bit much, I've got good news! You can make your own equally effective dual-boot selection device using as little as a single USB flash drive.

An old 1GB flash drive and a well-loved toggle switch I had lying around. Booting based on drive presence
Out of the box, GRUB supports scanning for a filesystem by its UUID using the search command. This is typically used to locate your operating system drive independent of the order hardware is connected, but it conveniently reveals a secondary bit of information: if the drive is missing.
If you only need to choose between two boot options, connecting or disconnecting a flash drive with a known filesystem ID gives a signal that can be easily read in the boot script to change the default selection:
# Detect if drive exists to determine OS to boot
search --fs-uuid --set switch_drive C539-84FE

if [ "${switch_drive}" ] ; then
    # Boot Windows
    set default="2"
else
    # Boot Linux
    set default="0"
fi
Searching for a filesystem is a reasonably generic operation, so if you're using a different bootloader there's probably something similar available that you could leverage.
To get the UUID for a drive under Linux, you can use
blkid. If you don't know the device name, runningblkidwith no arguments will print information for all mounted filesystems.
See the readme from the original build for instructions on integrating this snippet into your GRUB boot script.
A more sophisticated variant of this plain-old-flash-drive solution is used by a nicely documented project called The Grub Switch, which also has a microcontroller implementations for Teensy, ATMega32u4 and some other common maker boards.
Switching power to the flash drive
While you could physically plug and unplug the flash drive from a USB port as a functional boot selection method, it's not quite as satisfying or easy as flicking a big clunking toggle switch.
Off-the-shelf USB power switches are available from many suppliers, so it's possible to rig up a boot switch without touching a soldering iron at all, if that's more your style:

For demonstration purposes, I'm modifying an old 1GB flash drive to add a custom toggle switch. This isn't required, but it's one way to switch the drive's power if you're comfortable soldering small things.
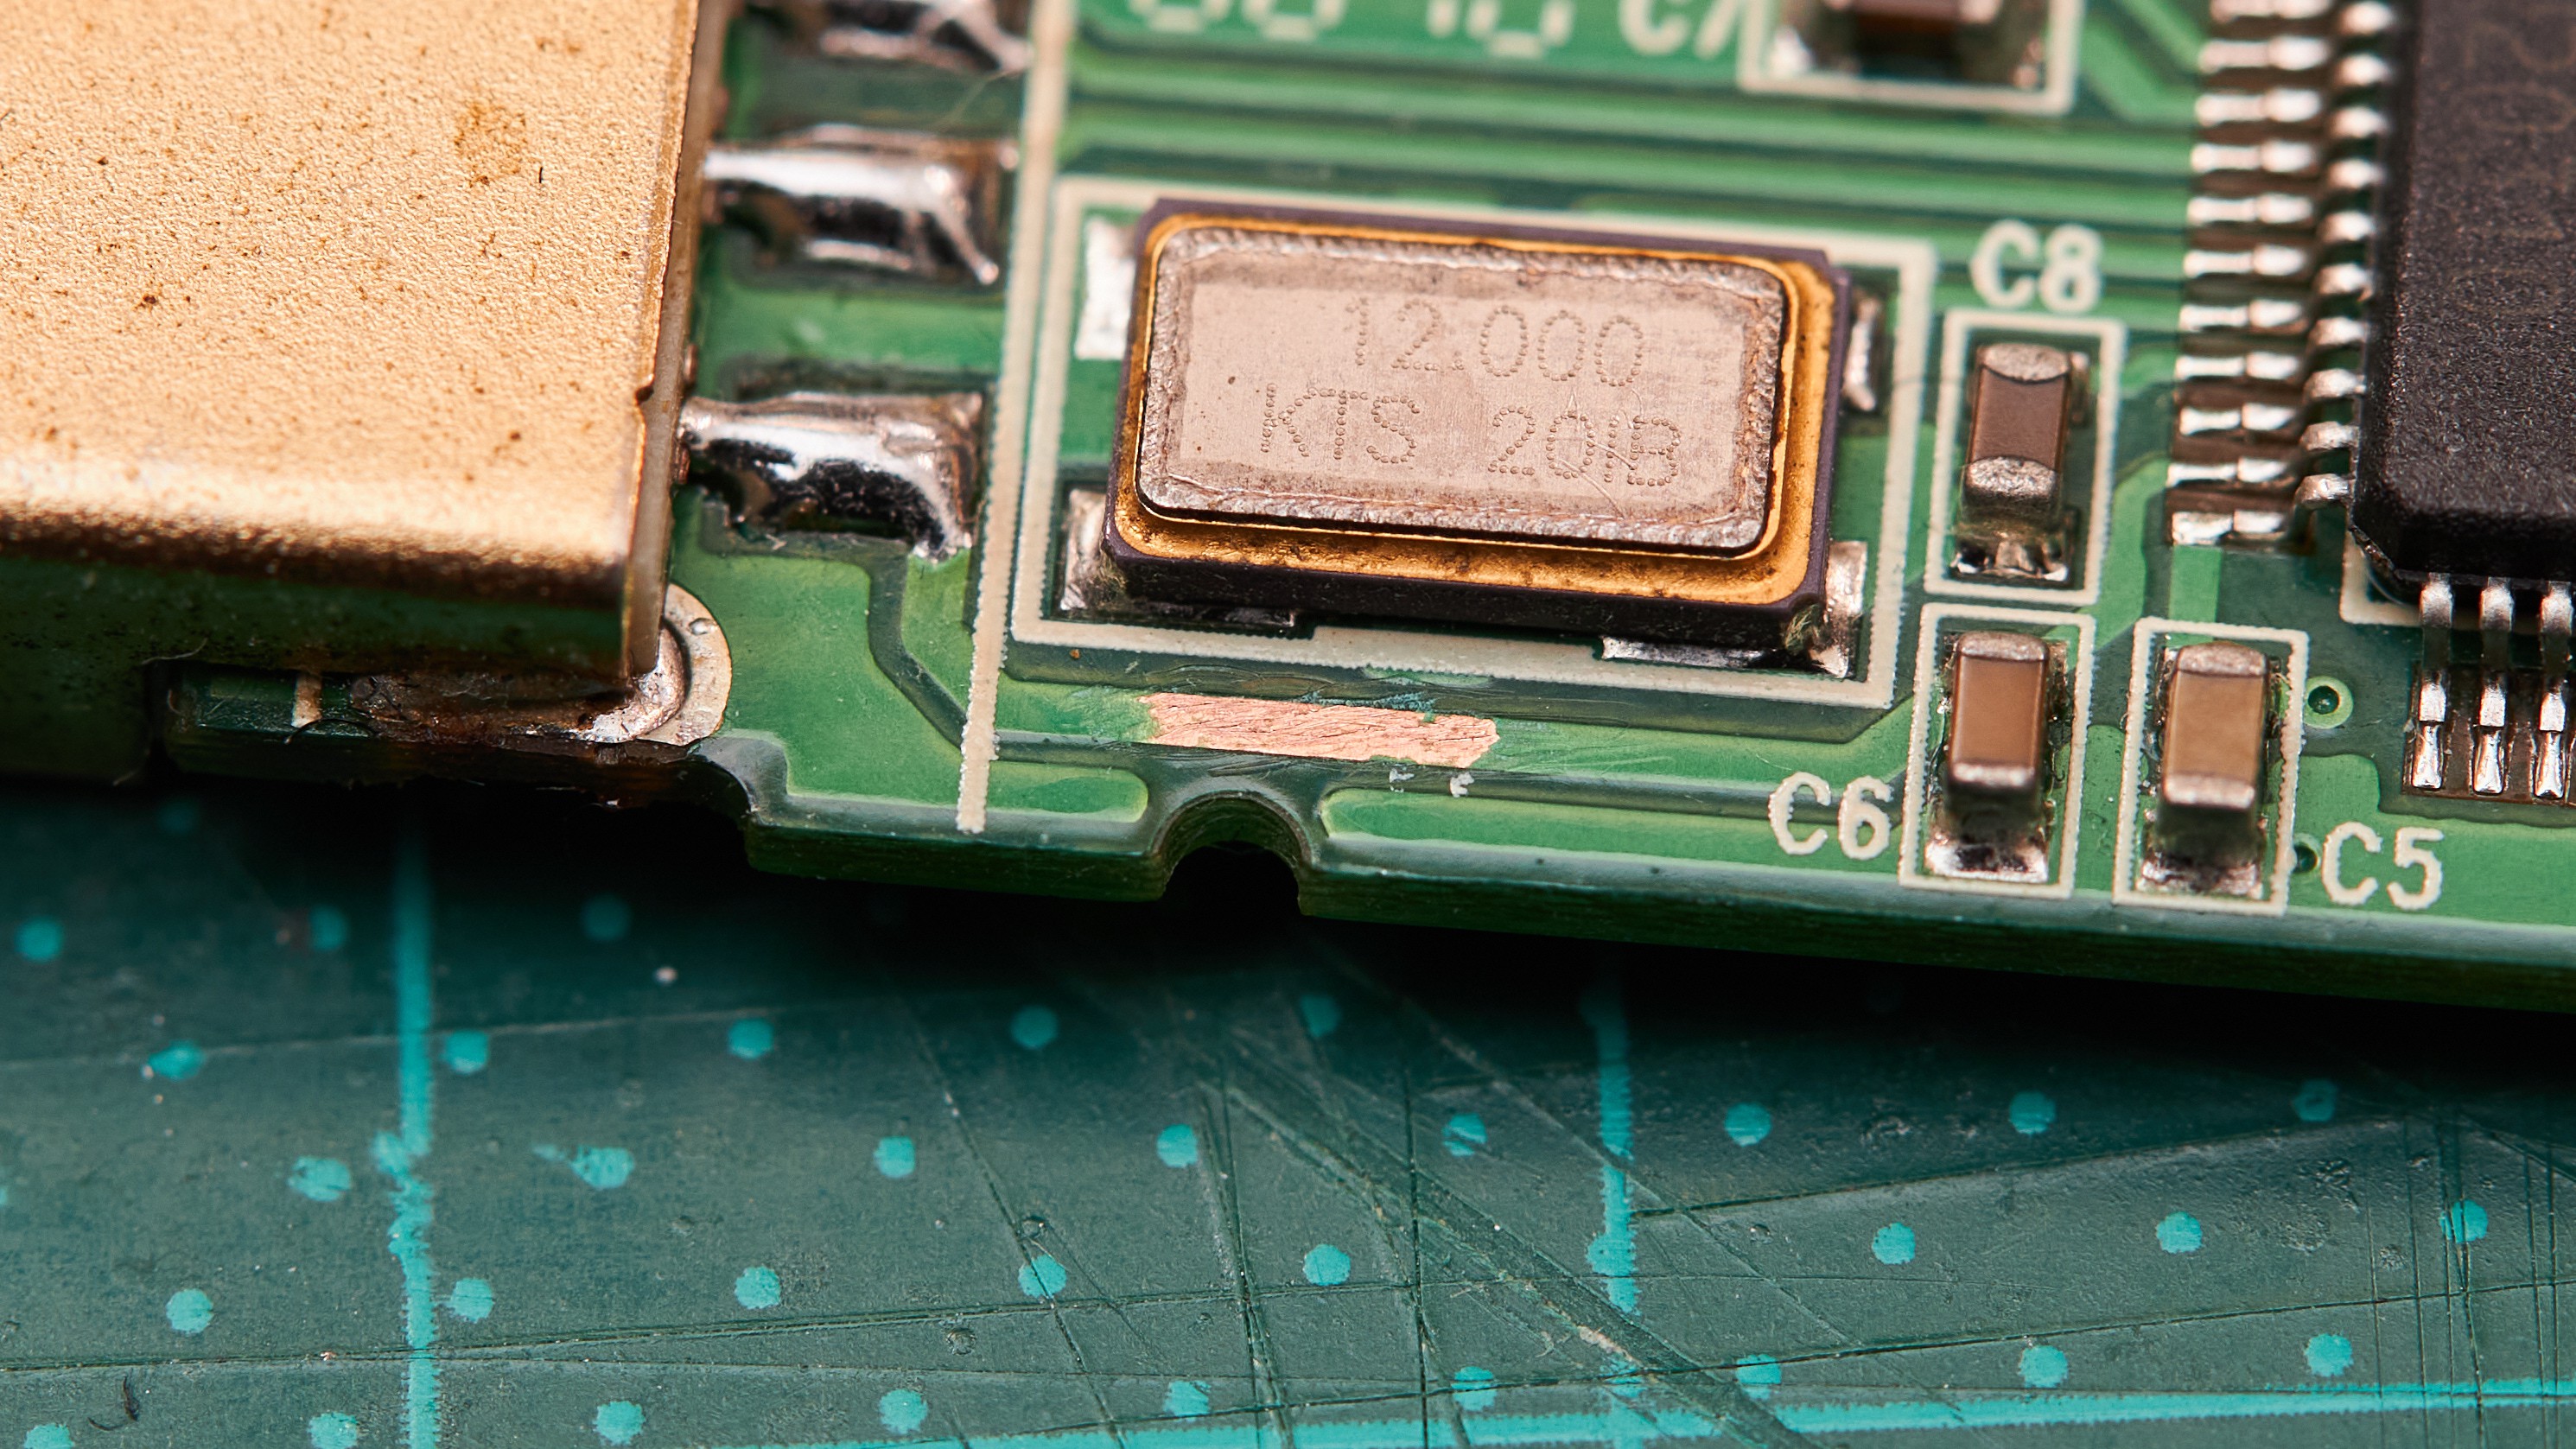
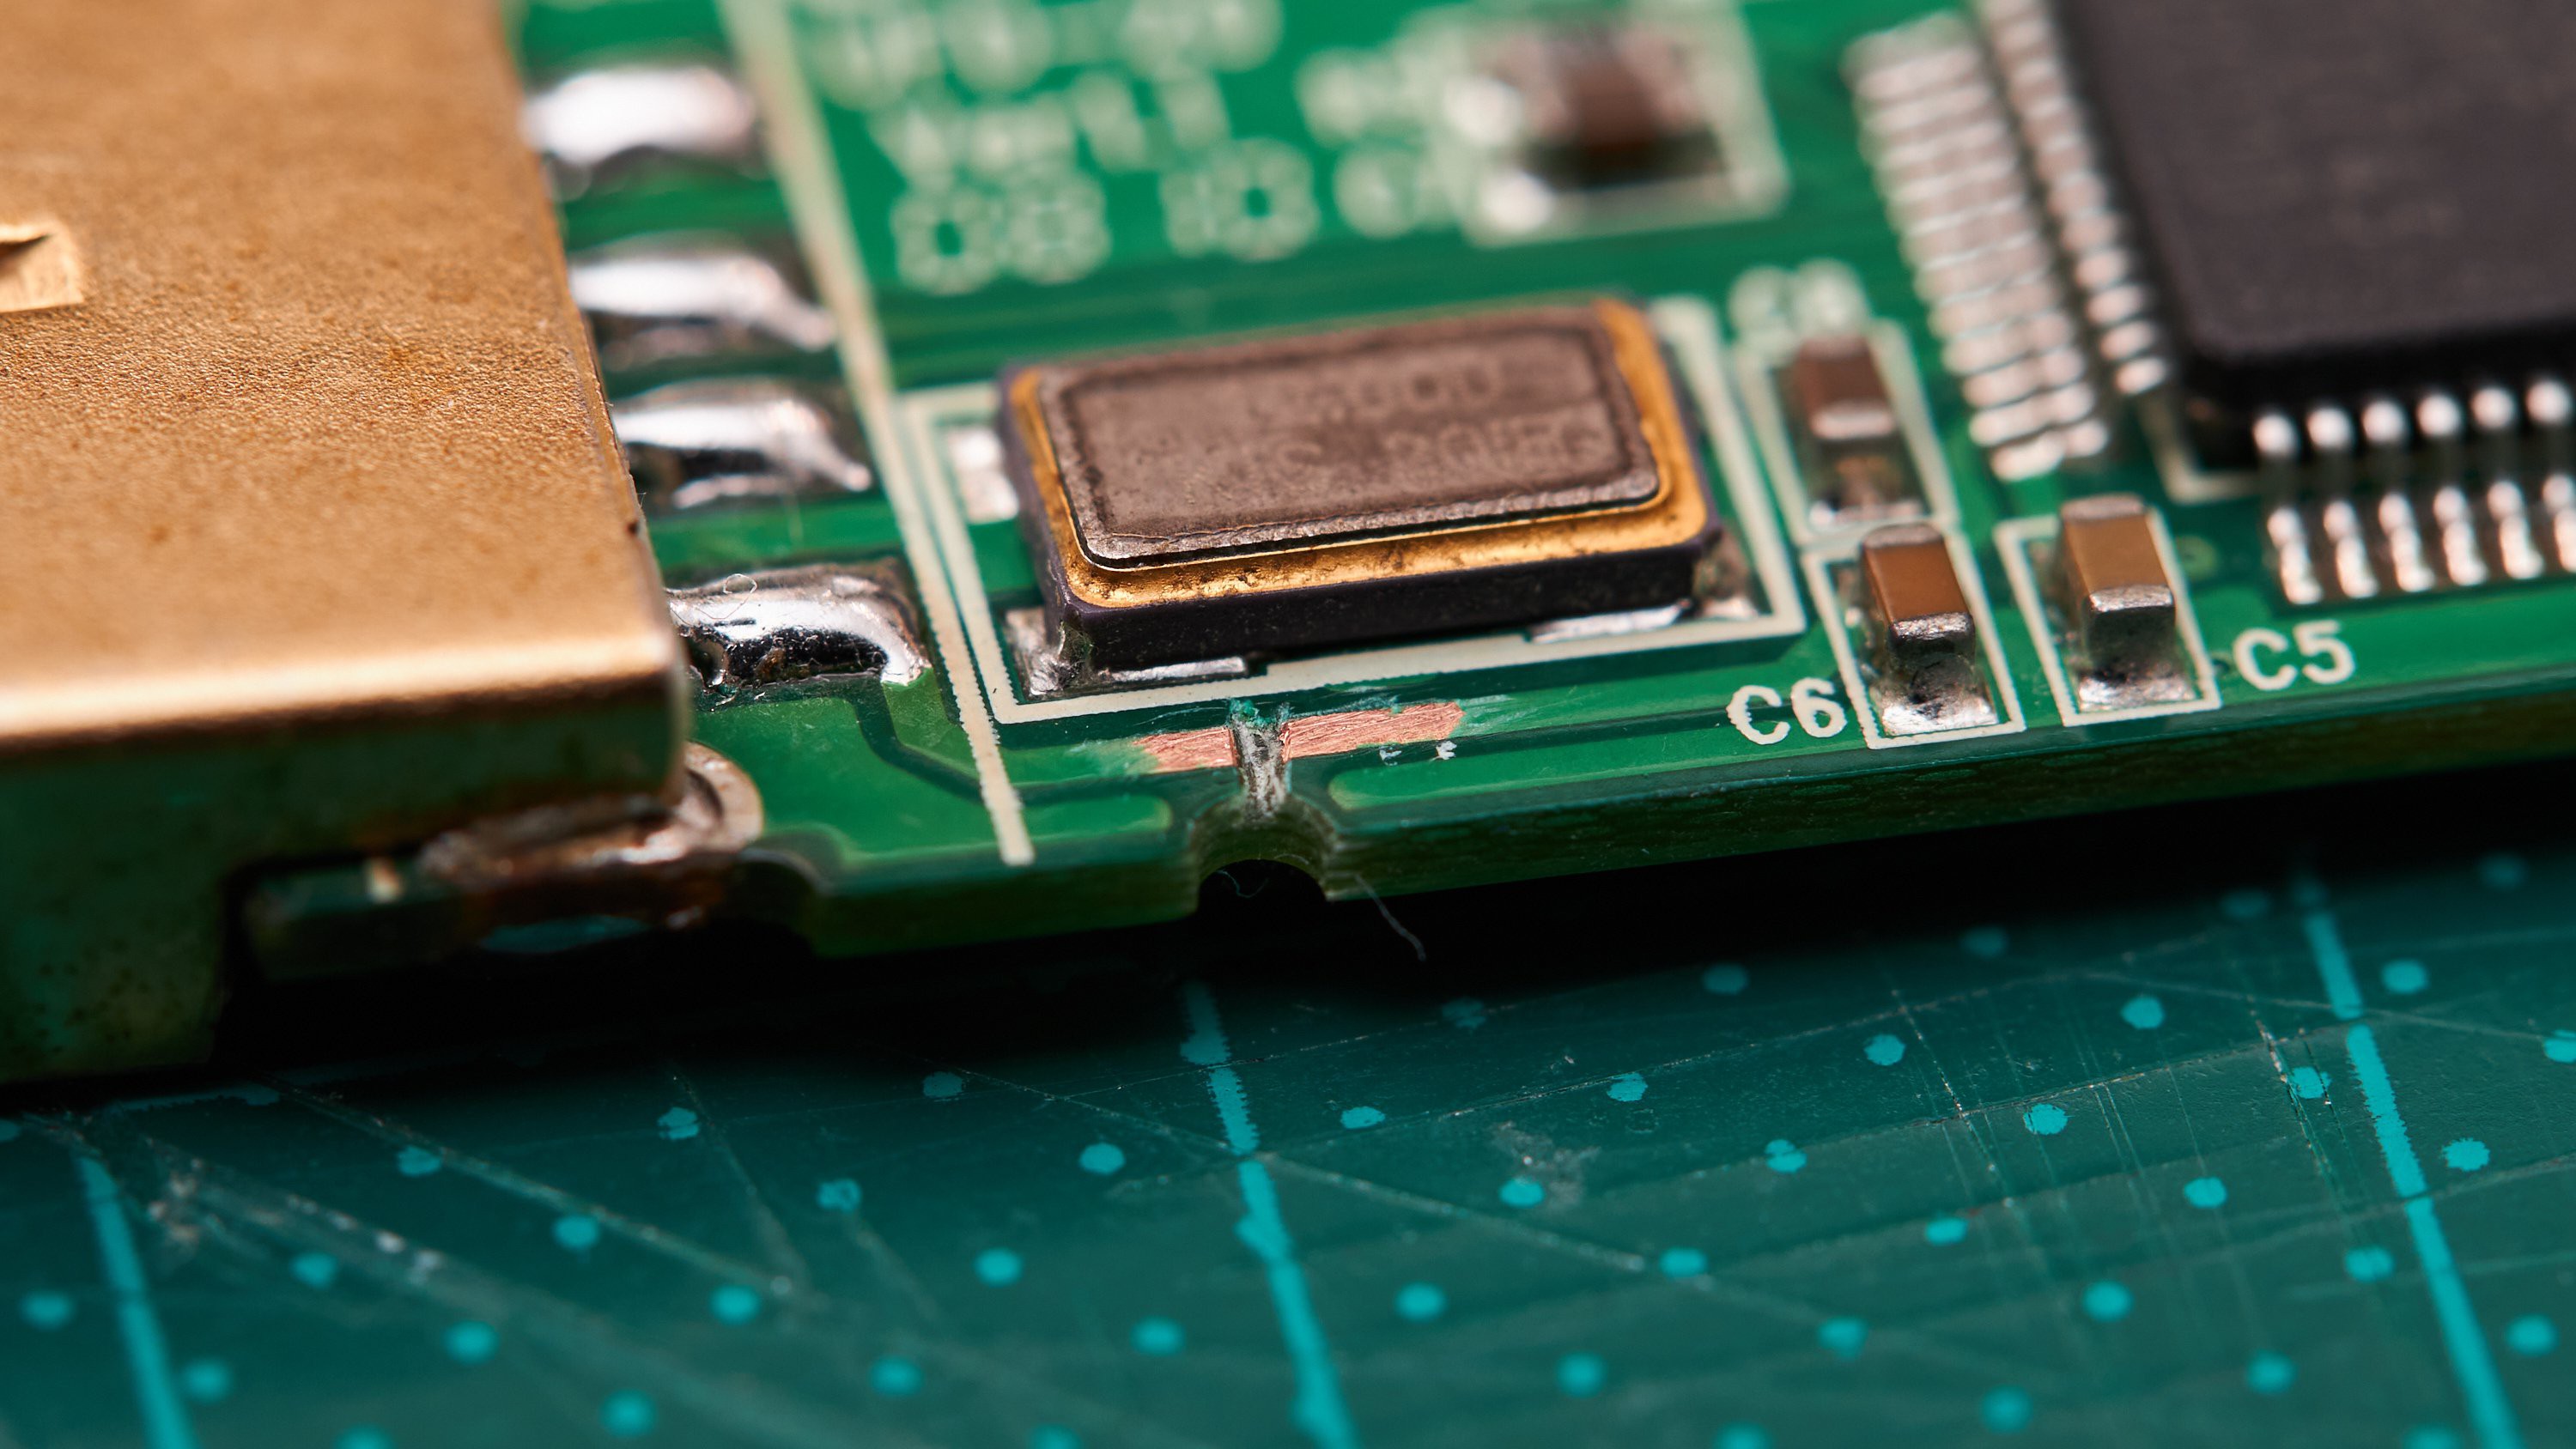
I initially wanted to take the USB connector off the flash drive's PCB, but it was fairly solidly connected so I changed tack to splicing onto the 5V trace as it comes off the USB connector. All flash drives will be different, so if you're doing this, confirm which pin is 5V with a multimeter and inspect the traces to find a suitable place to hack onto your particular PCB.
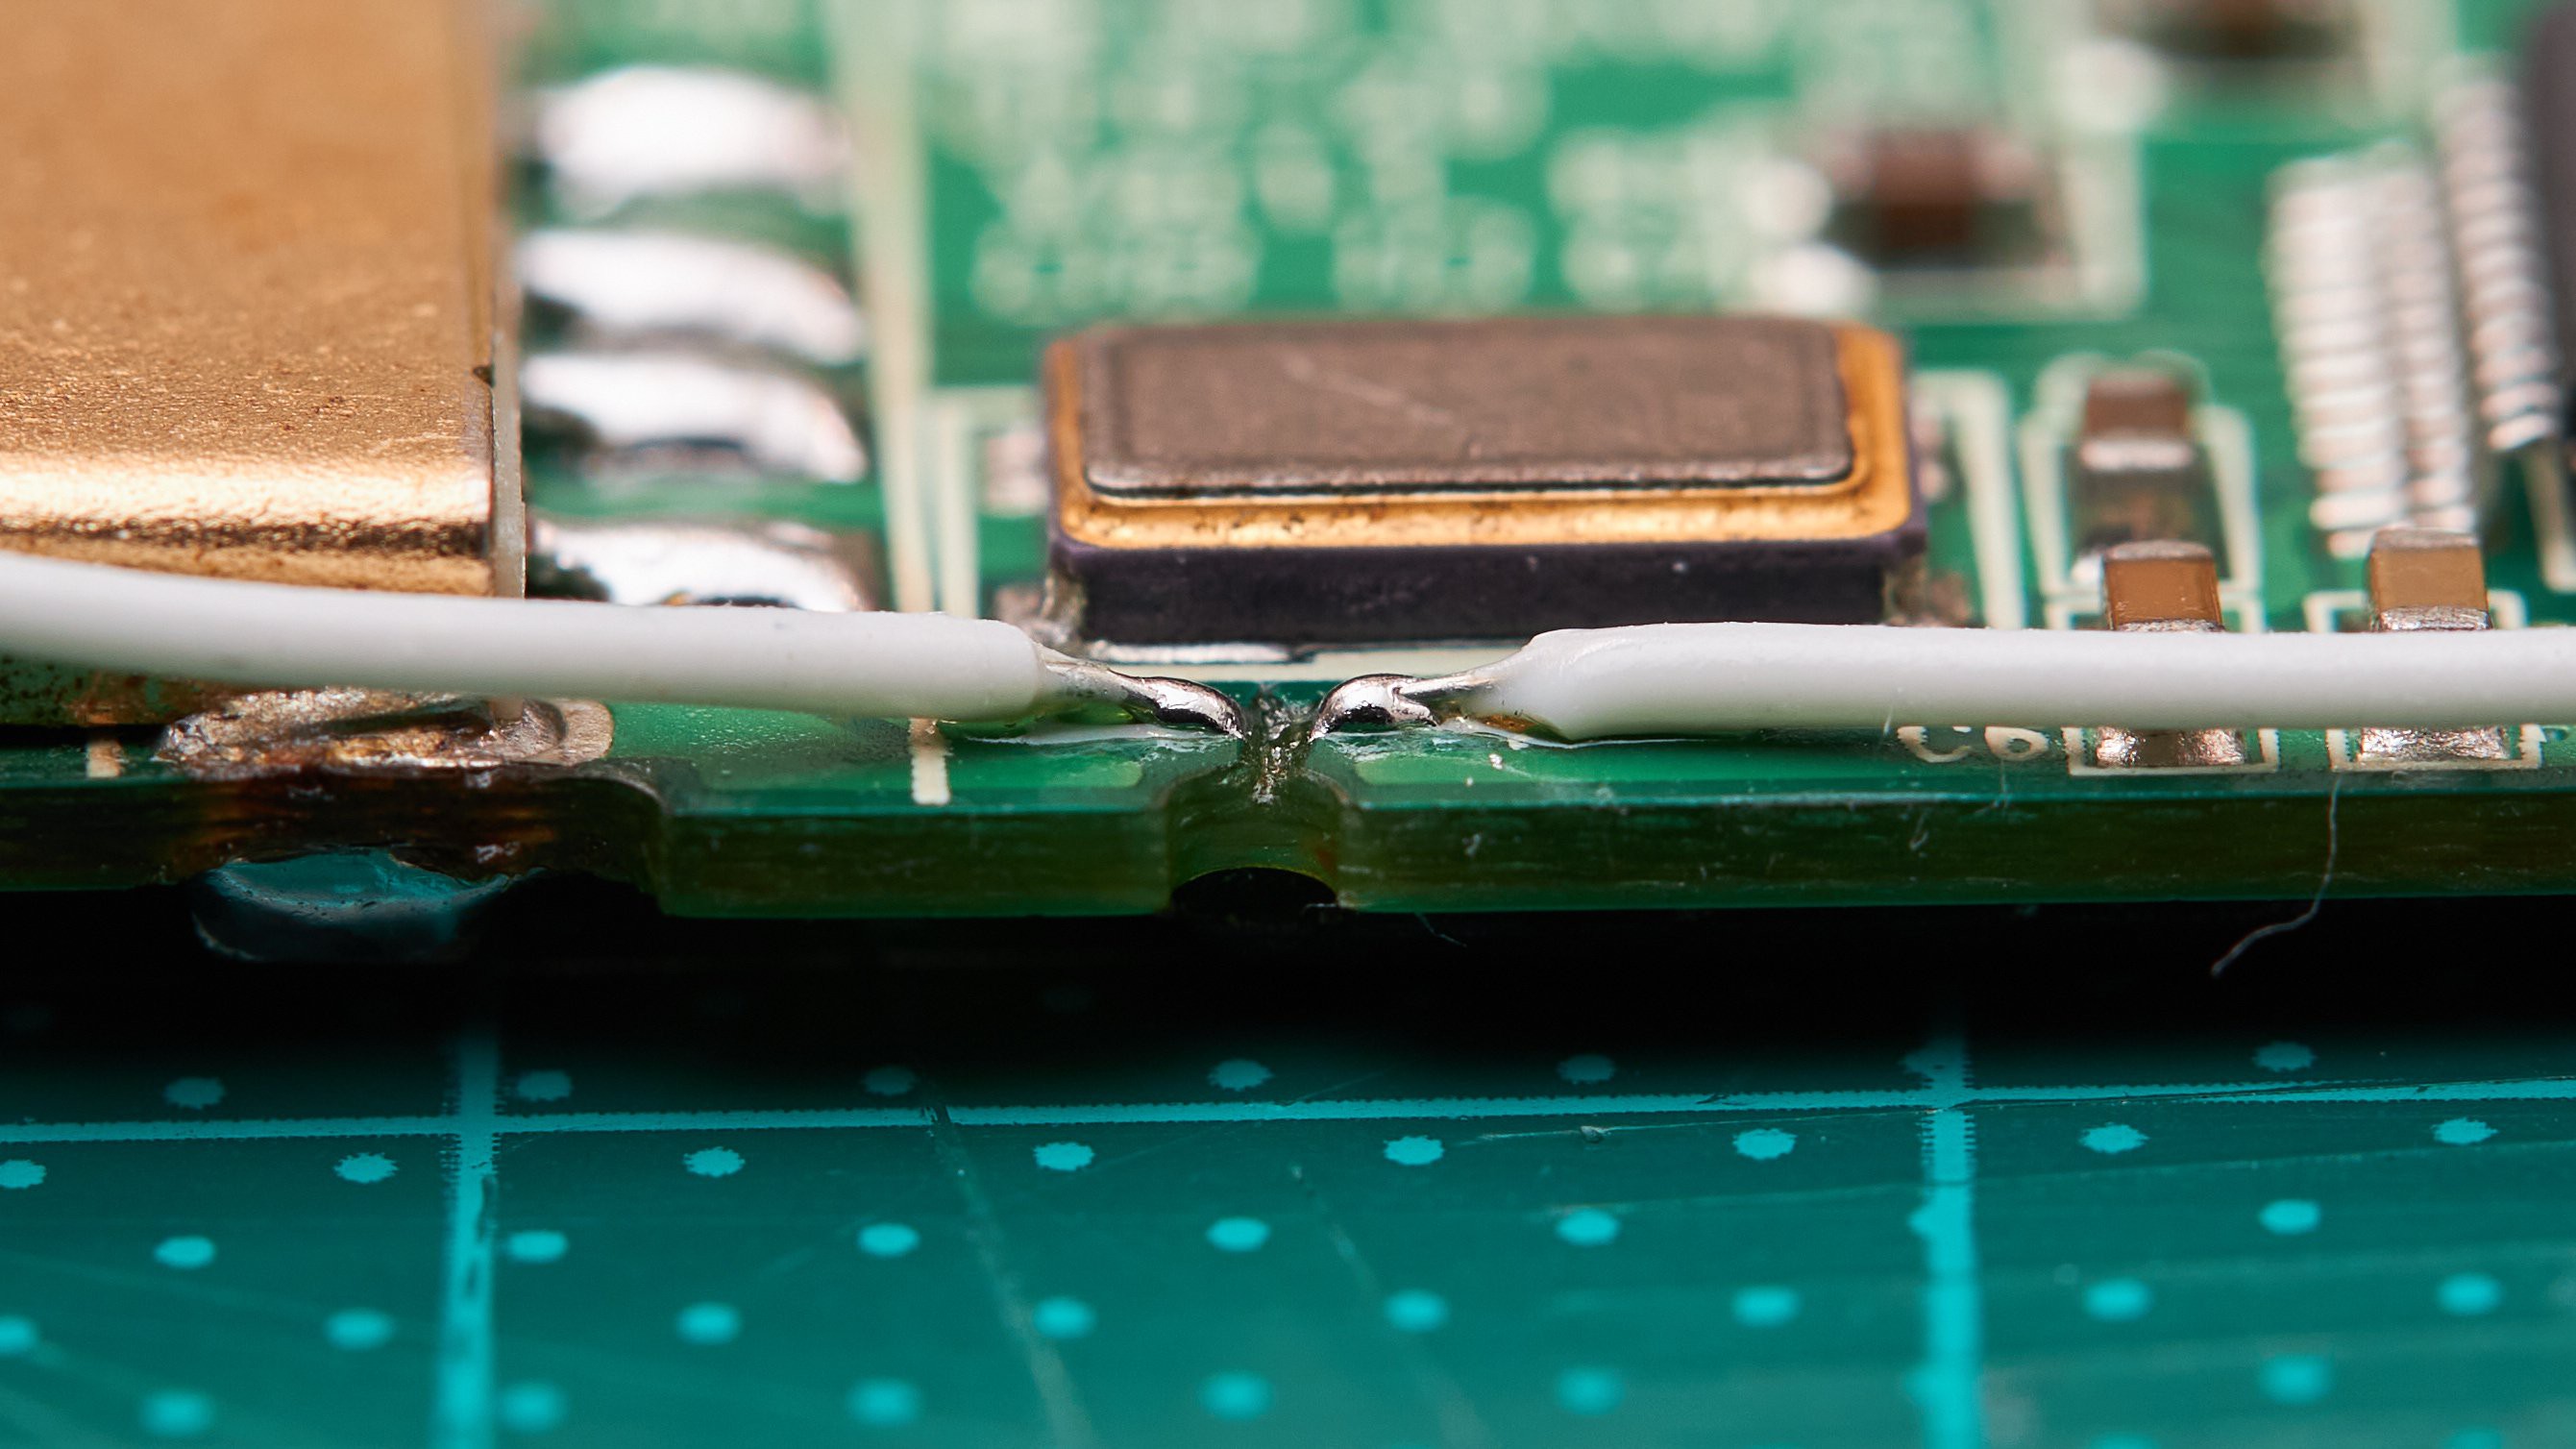
Once the trace to splice is identified, scratch away the solder mask, cut the trace with a sharp blade, and solder small wires to each side of the cut.
![]()
![]()
![]()
With a toggle switch connected to the other end of the spliced in wires, this old flash drive is now ready to toggle boot selection:

Happy hacking! Try to repurpose an old flash drive that's too small for general use, rather than buying a brand new one ⭐
Trade-offs vs a microcontroller solution
Limited window for selection
As this method relies on the BIOS / UEFI to detect if the mass storage device is turned on, you likely can't reliably change the boot selection once power-on / reset has begun. With the microcontroller solution, the switch position can change right up to the moment the GRUB script is executed.
A little messier to add more switch positions
One flash drive provides two states. If you wanted to select between three or more options, you'd need to add more flash drives and wire up a multi-position switch to power the right drive(s) for each position.
-
Hardware OS selection switch
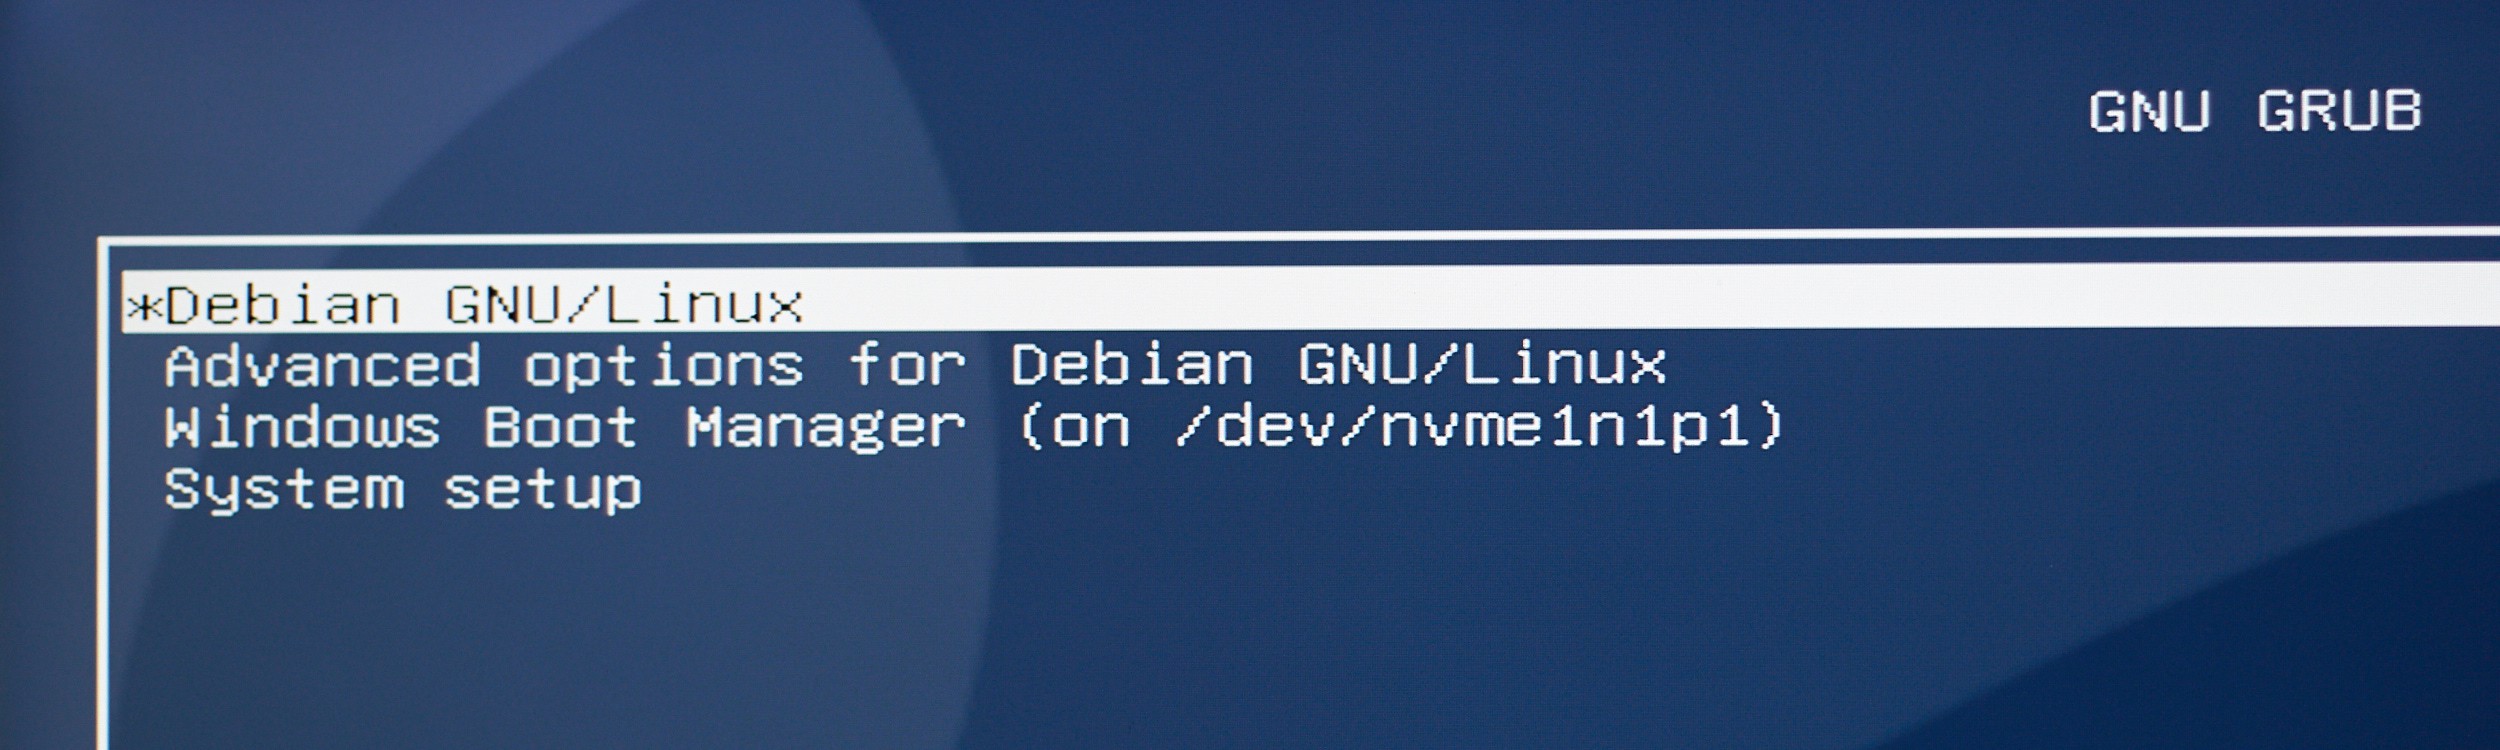
05/03/2021 at 20:41 • 10 commentsDual-booting Linux and Windows is a great way to get the best of both worlds, but there's one thing that's always bothered me. To boot into Linux, I simply press the power button and walk away. To boot into Windows on the other hand requires a tactical, precision-timed strike on the keyboard to change the selection when GRUB briefly reveals itself:
![]()
Now I could just increase the GRUB selection timeout, or remove it entirely, but I'd still need to wait around to make an operating system selection. I could use the mode in GRUB that remembers the last OS selection, but I'd still need to be around to change it half the time. I could make a "reboot into Windows" action in Linux, but I'm just as often booting from a powered-off state as I am rebooting from Linux.
Since I always know which operating system I want ahead of time, why not make a physical switch to select between Linux and Windows?
![]()
Scripting in the boot loader
GNU GRUB is a popular Linux boot loader - a program that runs before any operating system is loaded to decide what to boot and how to boot it. You'll normally interact with a menu like the one pictured above, but under the hood GRUB is configured by a simplified scripting language. Underneath that it's a system of modules written in C.
My only hands-on experience with GRUB script to date has been those occasional times where a system fails to boot and you find yourself plunged into a shell with the prompt "grub>". You fairly quickly discover that while this looks like typical Linux shell with ls, cat and tab completion, it is very much not. Running outside of an operating system, GRUB has to supply all of its own tools, so the functionality available is fairly bare-bones.
Arbitrary USB device access in GRUB?
My first thought was creating a USB device with a custom ("vendor-specific") interface to read out the switch position, which in non-USB terms is kind of like a bare serial connection. This is straight forward enough to access from an operating system, but I wasn't sure if GRUB could handle it.
GRUB does implement native USB support in its
ehci,uhciandohcimodules, but there's a catch - loading any of these disables the normal mechanism used to access disks through the BIOS to avoid conflicts, leaving you with no disk access. There is anativediskmodule for accessing disks independently of the BIOS, but slowness aside, using this module critically means that GRUB can't chain-load Windows (explanation), making this approach a write-off.In short, native access to arbitrary USB devices from GRUB isn't practical for this project, but USB isn't off the table entirely...
Pretending to be a USB mass-storage device
Instead of making a custom USB interface, we can leverage the fact that the BIOS already provides GRUB with access to all attached storage devices. All we would need to do is present our device as storage, containing a file whose contents indicate the switch position.
This is conceptually simple, but there are a few layers to it:
- Provide the mass-storage class descriptor, indicating one of several storage protocols to use (SCSI, ATA).
- Implement the chosen storage protocol. This is a set of commands to interrogate the storage device's capabilities, capacity, layout and other metadata in addition to standard requests to read and write sectors.
- Emulate a valid filesystem when read from, without actually having any storage medium.
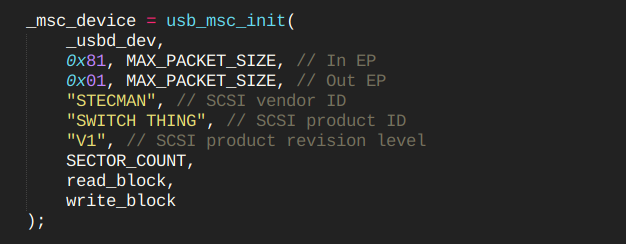
Using the USB-capable STM32 boards and code I already have from USB Status Light, changing a vendor class device to a mass-storage class device was a matter of changing a few bytes in the existing USB descriptors.
For the storage protocol layer, I was happy to find that
libopencm3has a built-in SCSI mass-storage implementation with simpleread_block(address)andwrite_block(address)callbacks, hiding the complexity of the storage protocol:![]()
Thanks to this, I was up and running fairly quickly with a recognisable storage device, even if it could only read out endless streams of 0x00 bytes at this stage. I did need to dig into the 581 page SCSI reference manual later on to resolve an issue with Windows, but this saved a lot of time:
![]()
Getting familiar with FAT
The next step was emulating a filesystem that GRUB could understand. I've formatted plenty of storage devices in my time, but I've never gone down to the byte level to understand the actual data and structures on disk. Without going into too much detail, I picked FAT12 as it's fairly well documented and has a simple layout:
- Boot sector: a fixed structure that describes the name and geometry of the volume
- File Allocation Table: an index of which parts of the disk are used, and how large files are distributed/fragmented
- Root directory entry: file metadata. pointing to where the actual file content lives
- [No fixed structure on the rest of the disk]
After a couple of evenings of reading and tinkering, I had a setup where a list of virtual files could be defined, with the directory entries and file contents generated on-the-fly when requested by the unsuspecting host:
struct VirtualFile {
    char* longName;
    struct FatDirEntry dir;
    void (*read) (uint8_t* output);
};

static void readSwtich(uint8_t* output) { // Output is a zeroed-out 512 byte buffer (one block)
    output[0] = gpio_get(GPIOA, GPIO6) ? '1' : '0';
}

static struct VirtualFile _virtualFiles[] = {
    {
        .longName = "switch_position",
        .dir = { .name = "SWITCH~1", .ext = "   ", .size = 1 },
        .read = readSwtich
    },
    // ...
};
Dumping the block device looks like this:
![]()
0000h is the boot sector, 0200h is the first copy of the FAT, 0400h is the second copy of the FAT and 0600h is the root directory entry. There are three 32 byte directory entries - two long-filename entries followed by the actual directory entry for that file at 640h. The virtual file content is read out at 4800h. I was a little worried that read-caching would cause issues with this approach, but thankfully there appears to be minimal or no read-caching in GRUB. Mounting the filesystem in Linux or Windows does cache reads heavily though, so this wouldn't be much use inside an OS.
Reading a file in GRUB
I had originally envisaged simply reading my "switch_position" file into a variable in GRUB and using that in an if/else condition. It turns out however that GRUB doesn't have any built-in support for loading the contents of a file into a variable, nor does it support command substitution like typical Linux shells do:
# This is BASH and what I wanted to do
# GRUB script unfortunately doesn't support this kind of substitution
pos=$(cat /path/to/switch_position)
echo $pos
I briefly looked into compiling a custom GRUB module to add a "read_file_into_variable" command, but compiling this and dumping in the /boot/grub/modules folder didn't seem like a stable long-term solution. It also wasn't particularly beginner-friendly and would need a lot of futzing around on any system it was going to be used on.
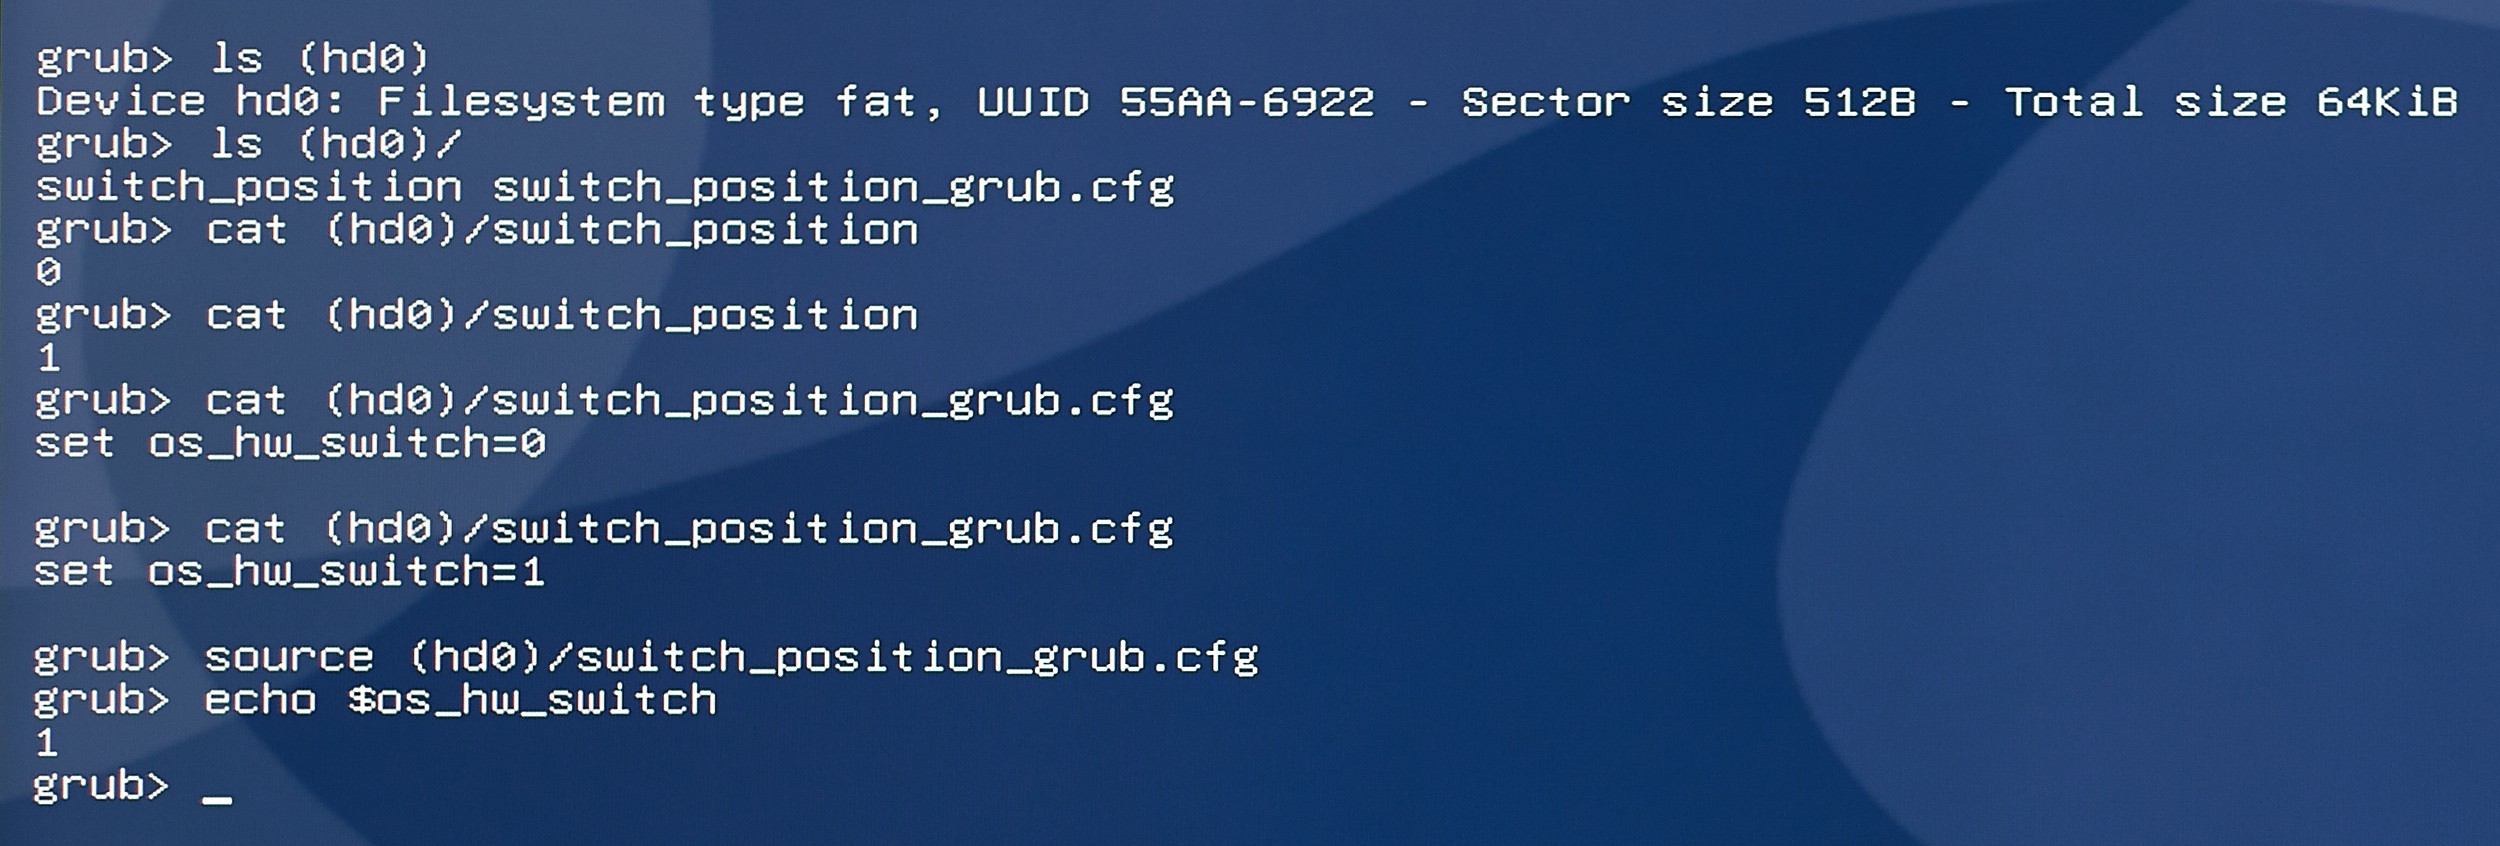
After some further poking around, I came to a much cleaner solution: using GRUB's "source" command to load additional config from a virtual file. This approach works out of the box, and in theory on any version of GRUB:
![]()
Booting based on switch position
Now that we are finally able to use the switch position in GRUB's shell, the only thing left to do is to modify the system boot config to make its boot selection based on this information. In /etc/grub.d/00_header I added this to the generated output (escaping removed to make it easier to read):
# Look for hardware switch device by its hard-coded filesystem ID
search --no-floppy --fs-uuid --set hdswitch 55AA-6922

# If found, read dynamic config file and select appropriate entry for each position
if [ "${hdswitch}" ] ; then
  source ($hdswitch)/switch_position_grub.cfg

  if [ "${os_hw_switch}" == 0 ] ; then
    # Boot Linux
    set default="0"
  elif [ "${os_hw_switch}" == 1 ] ; then
    # Boot Windows
    set default="2"
  else
    # Fallback to default
    set default="${GRUB_DEFAULT}"
  fi

else
  set default="${GRUB_DEFAULT}"
fi
After running
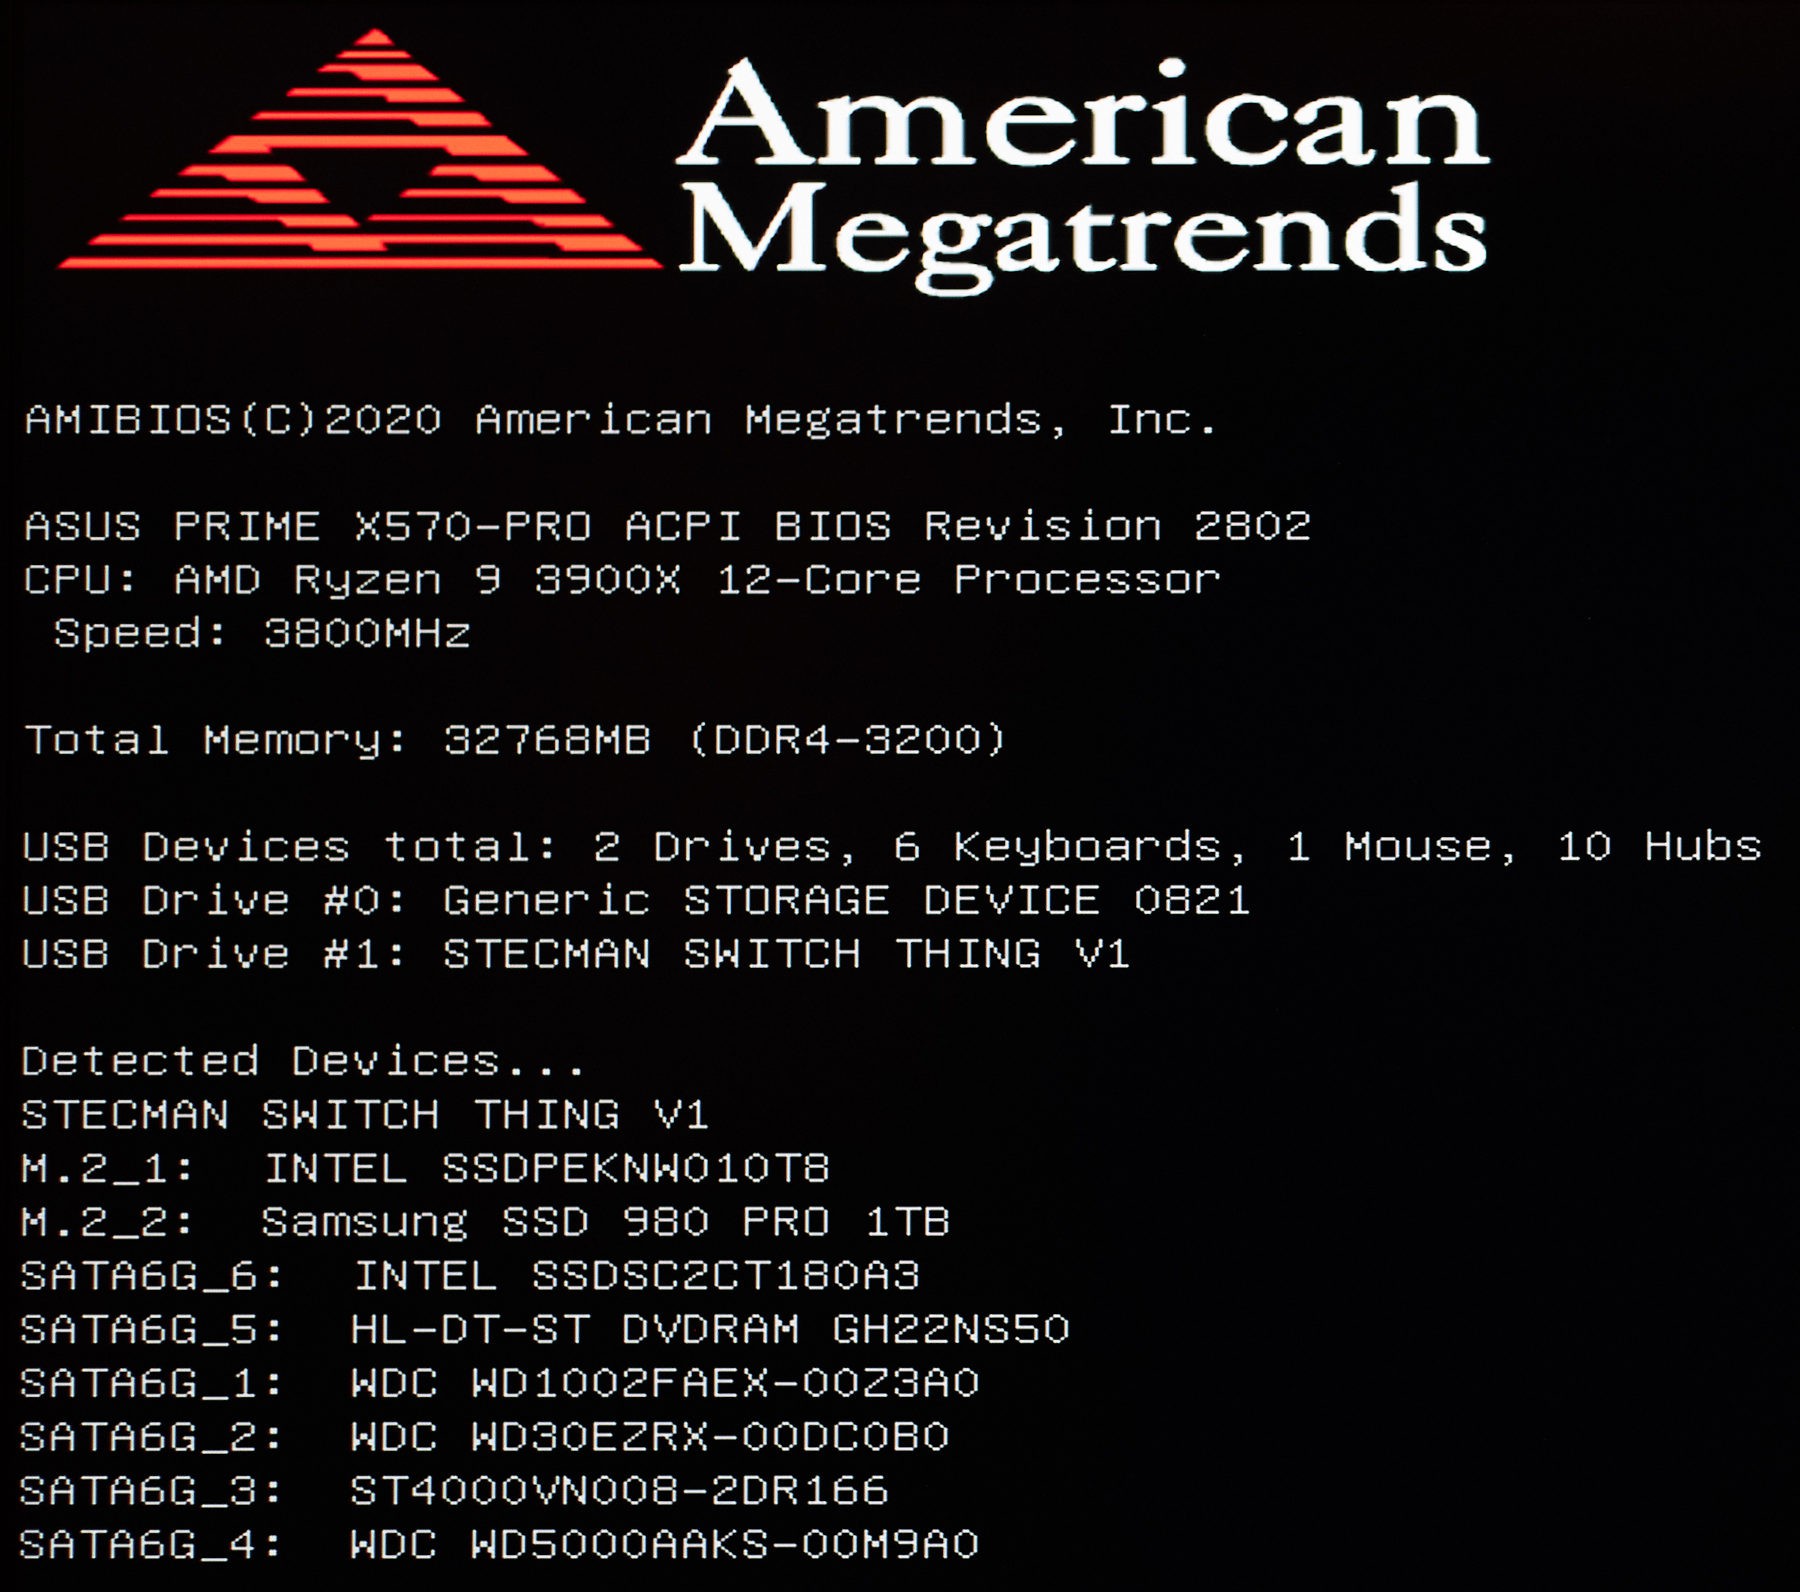
update-grubto generate the new boot config, I'm happy to report that this setup work superbly:Hardware installation
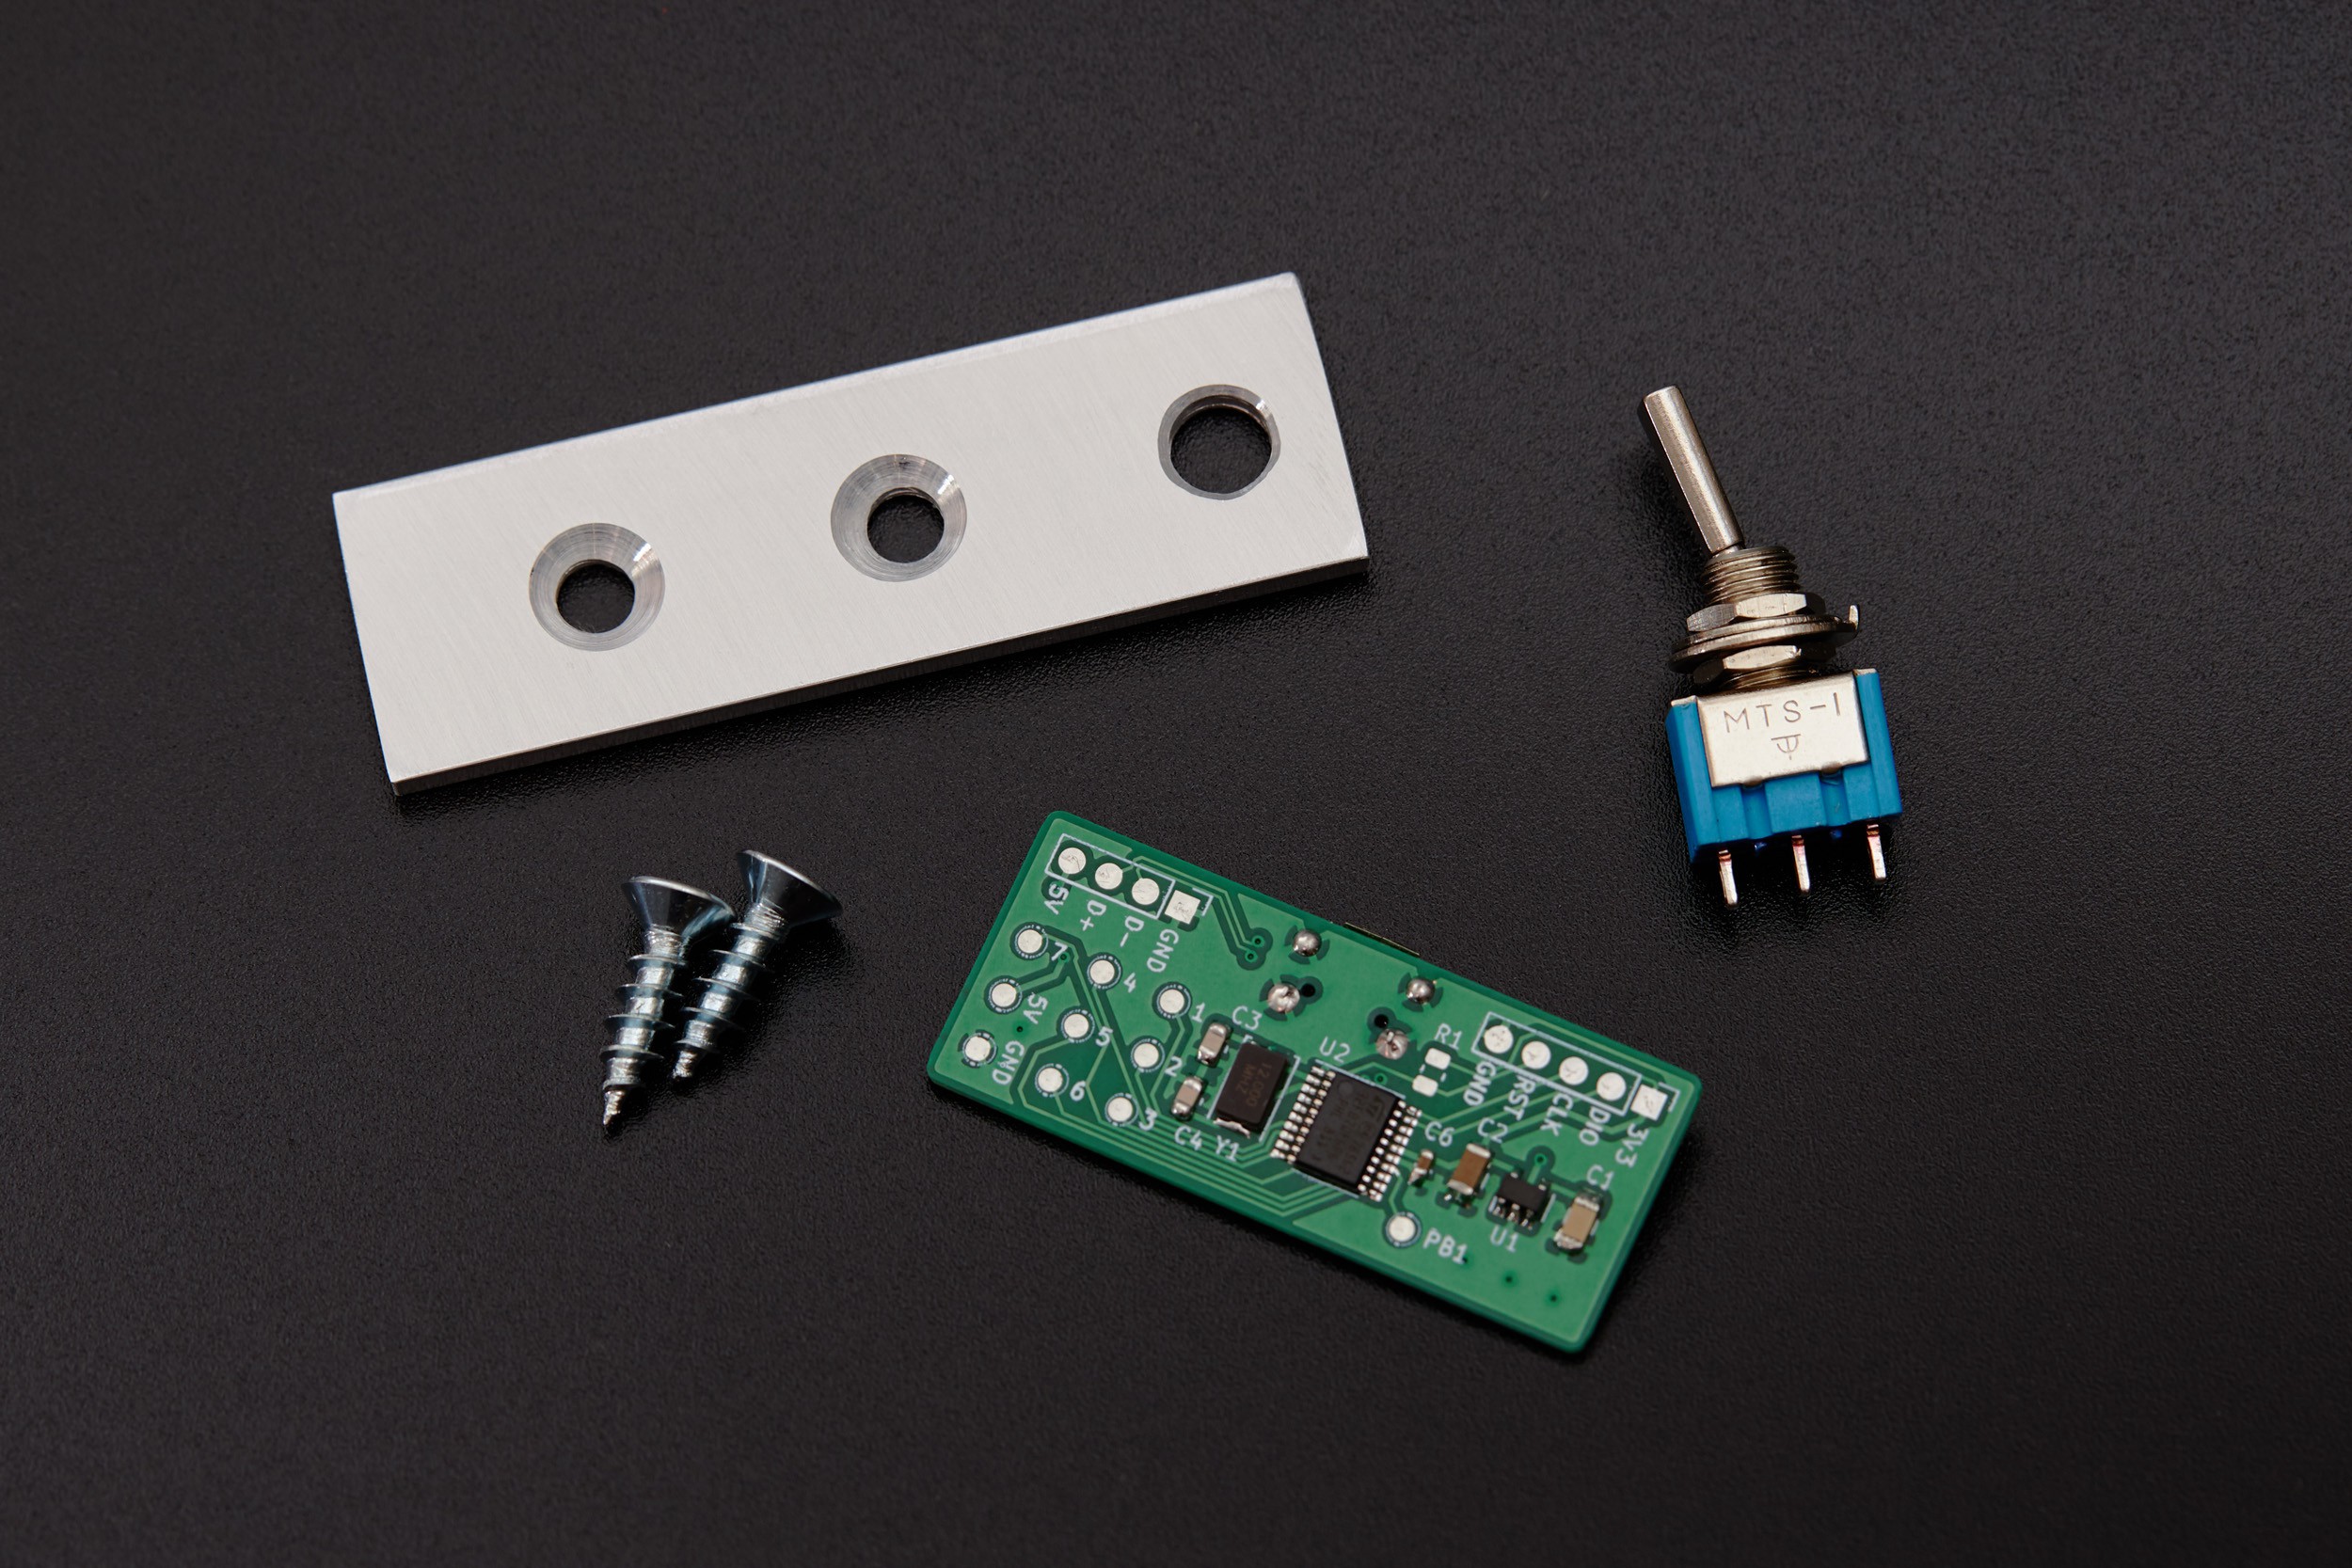
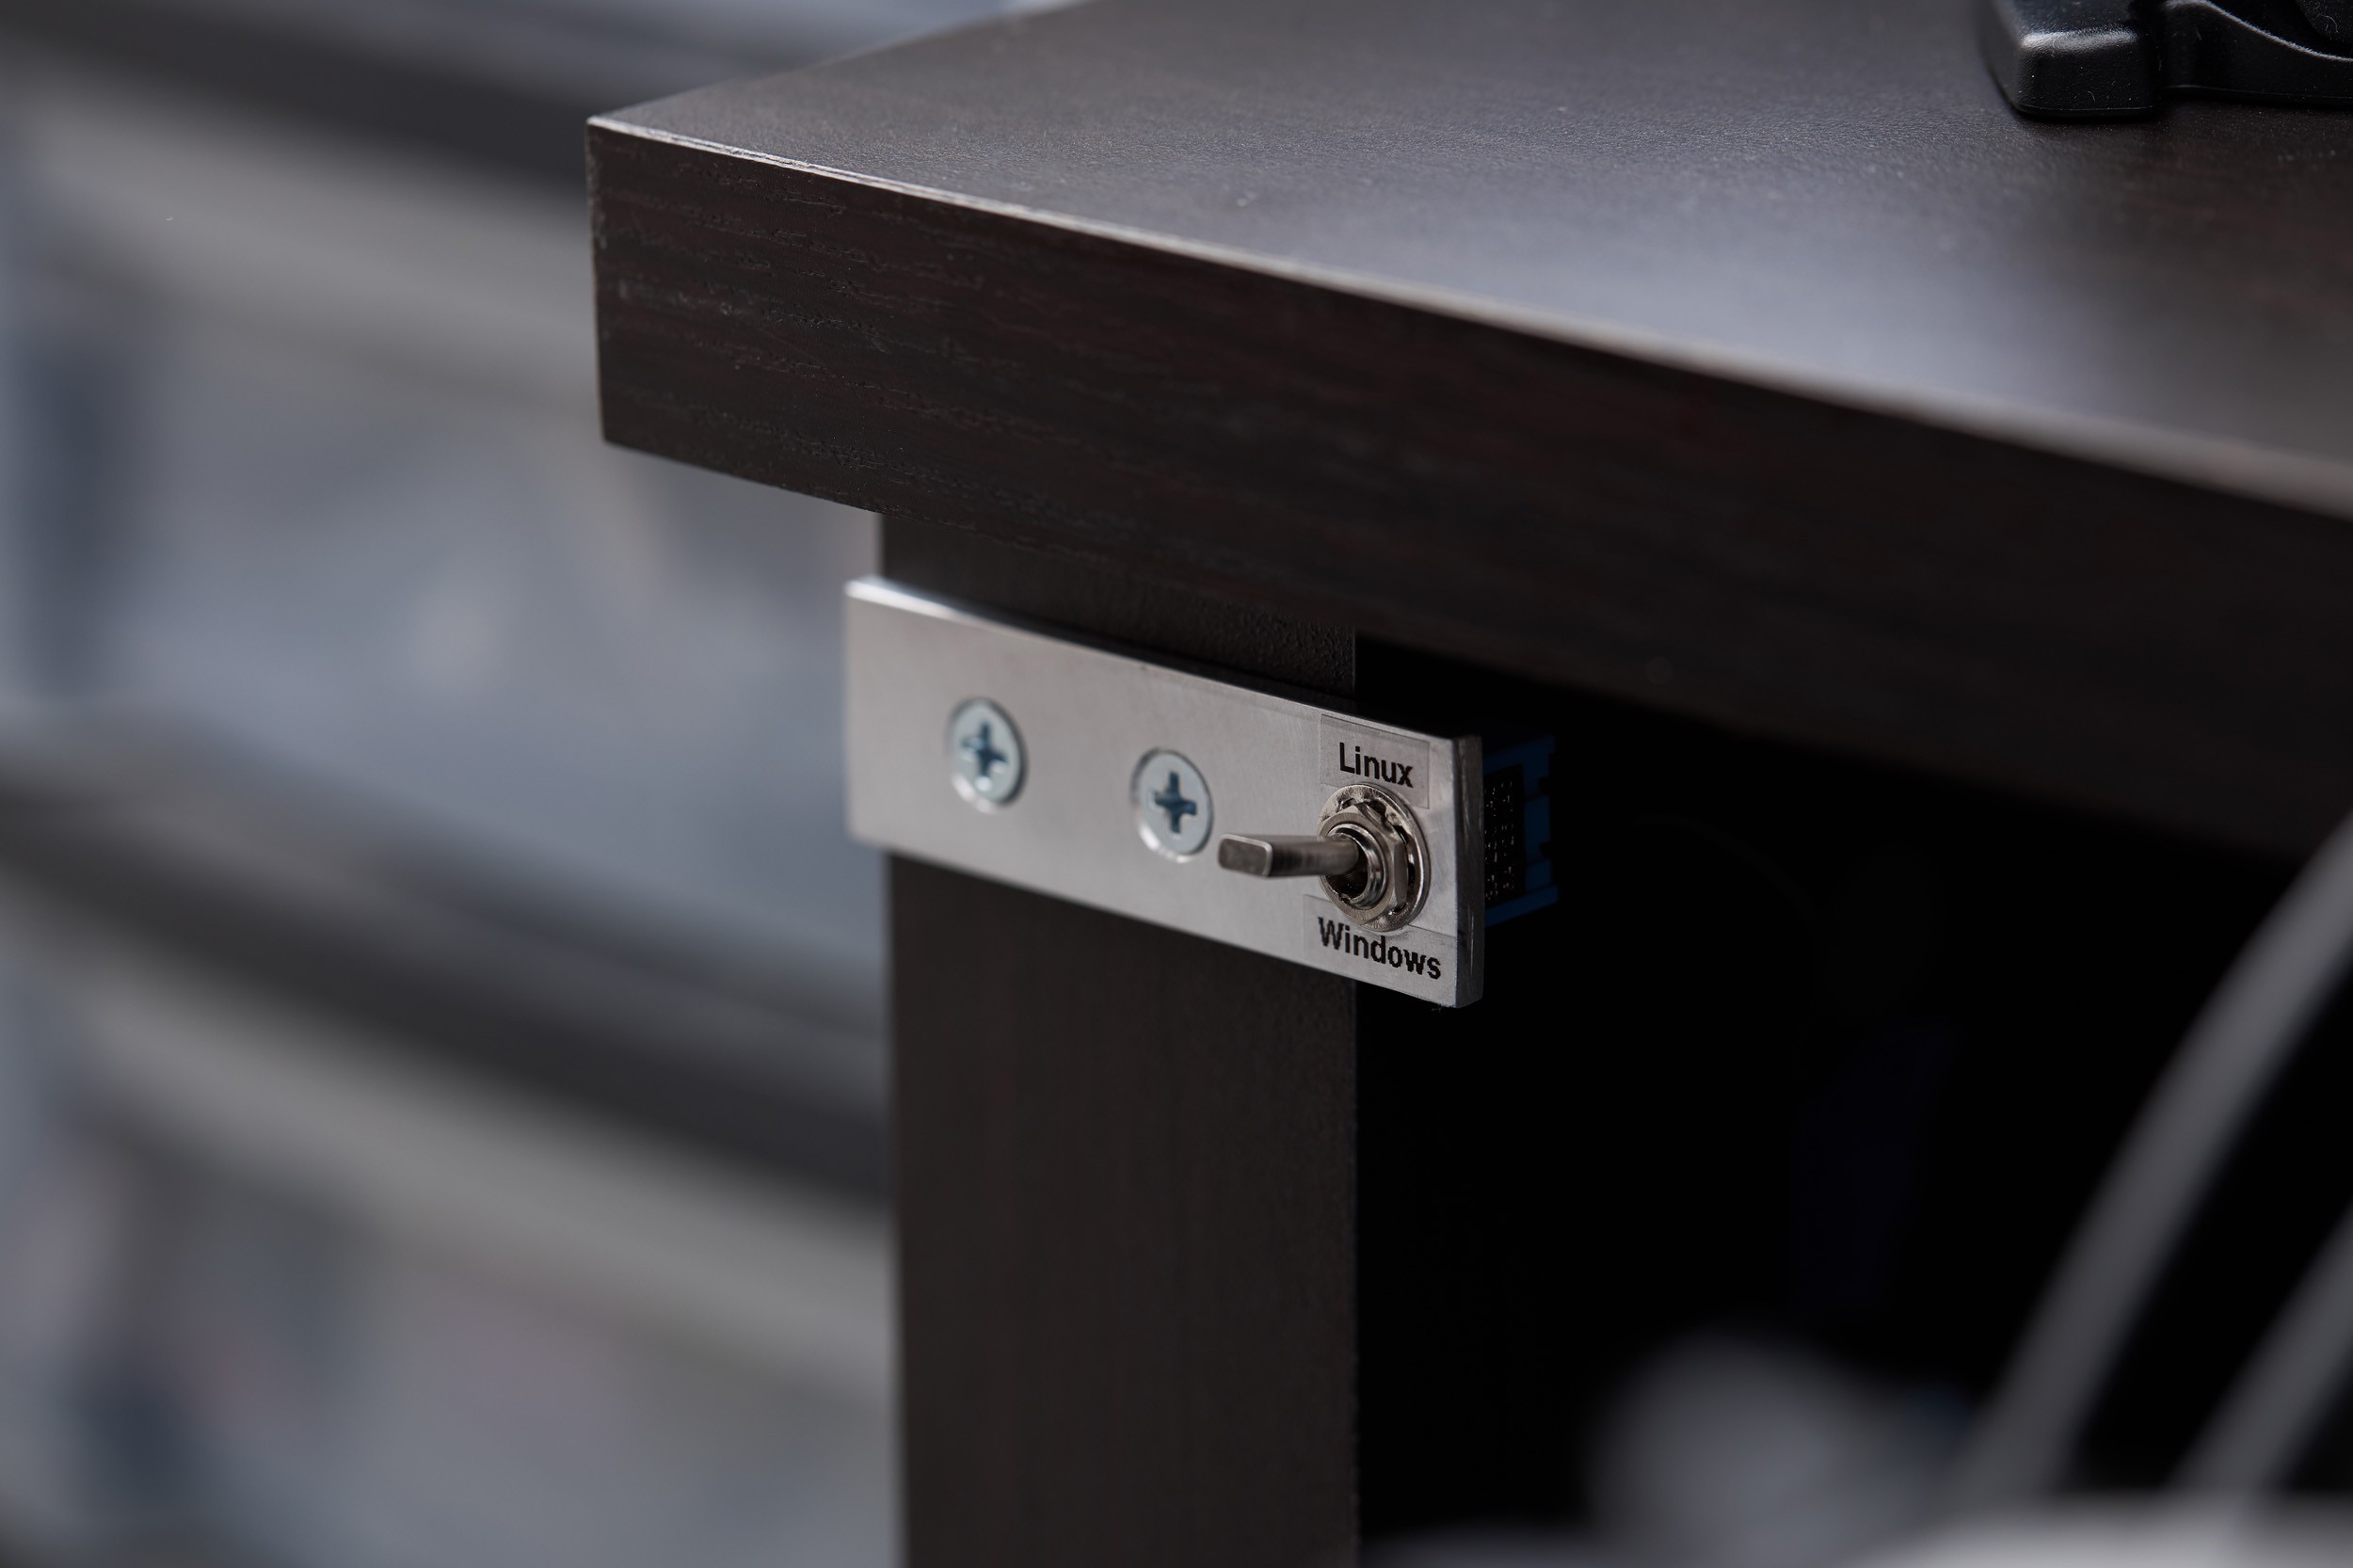
With a little aluminium flat-bar, a couple of screws and some drilling, this helpful little device is now a permanent fixture under the lip of my desk, within arms reach:
![]()
Making your own
If you'd like to make your own spin on this, you'll just need any USB-capable STM32 microcontroller and a switch of your choosing. The switch connects a single GPIO pin to ground when turned on, pulling it low. When the switch is off, the GPIO pin is pulled high by an internal pull-up.
The code and instructions to compile can be found on GitHub.
As this leverages libopencm3, it should be possible to build this for any USB-capable STM32 chip with minor additions to the code. I've added support for the common STM32F103 "blue pill" dev board as a starting point, in addition to the STM32F070 chip used on the custom board pictured here.
Hardware boot selection switch
A physical switch for my computer to choose between Linux and Windows