Laura
Laura-
Mix It Up
06/27/2021 at 19:43 • 0 comments![]()
The tldr; on this is that I got some gel medium to mix the thermochromic pigment powder into and I like the way it's handling a lot better than mixing it into white paint.
Now then.
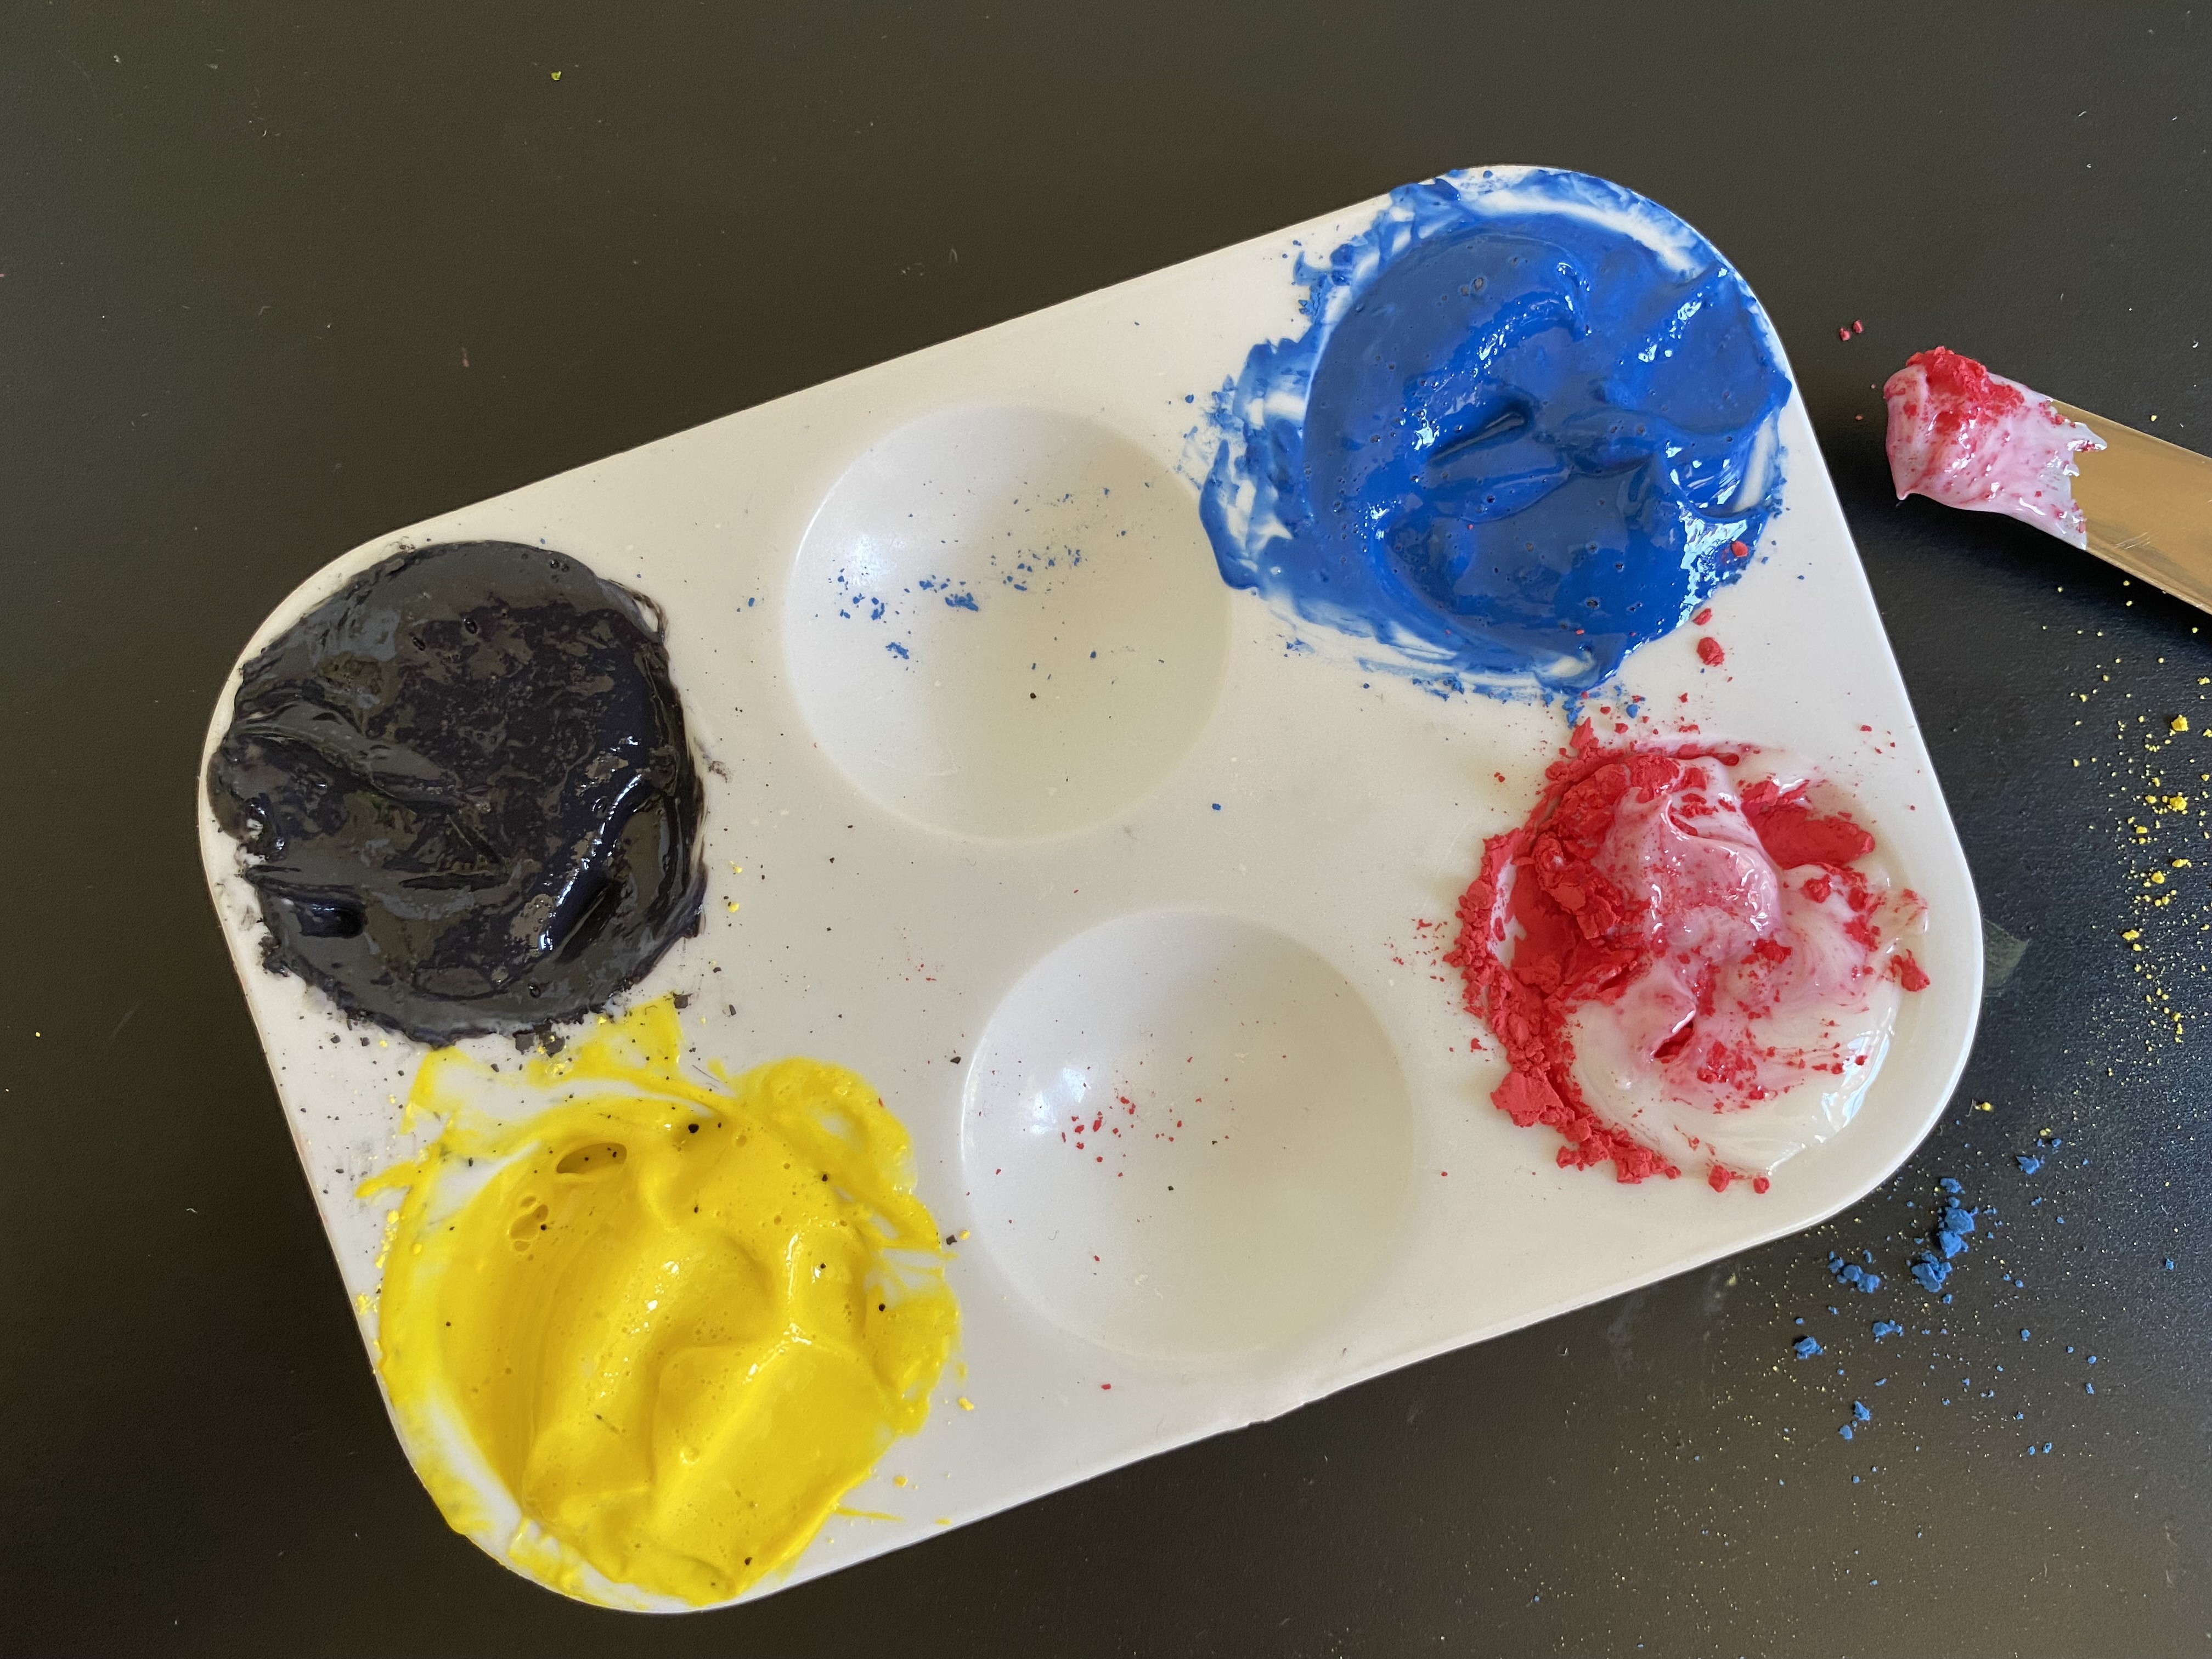
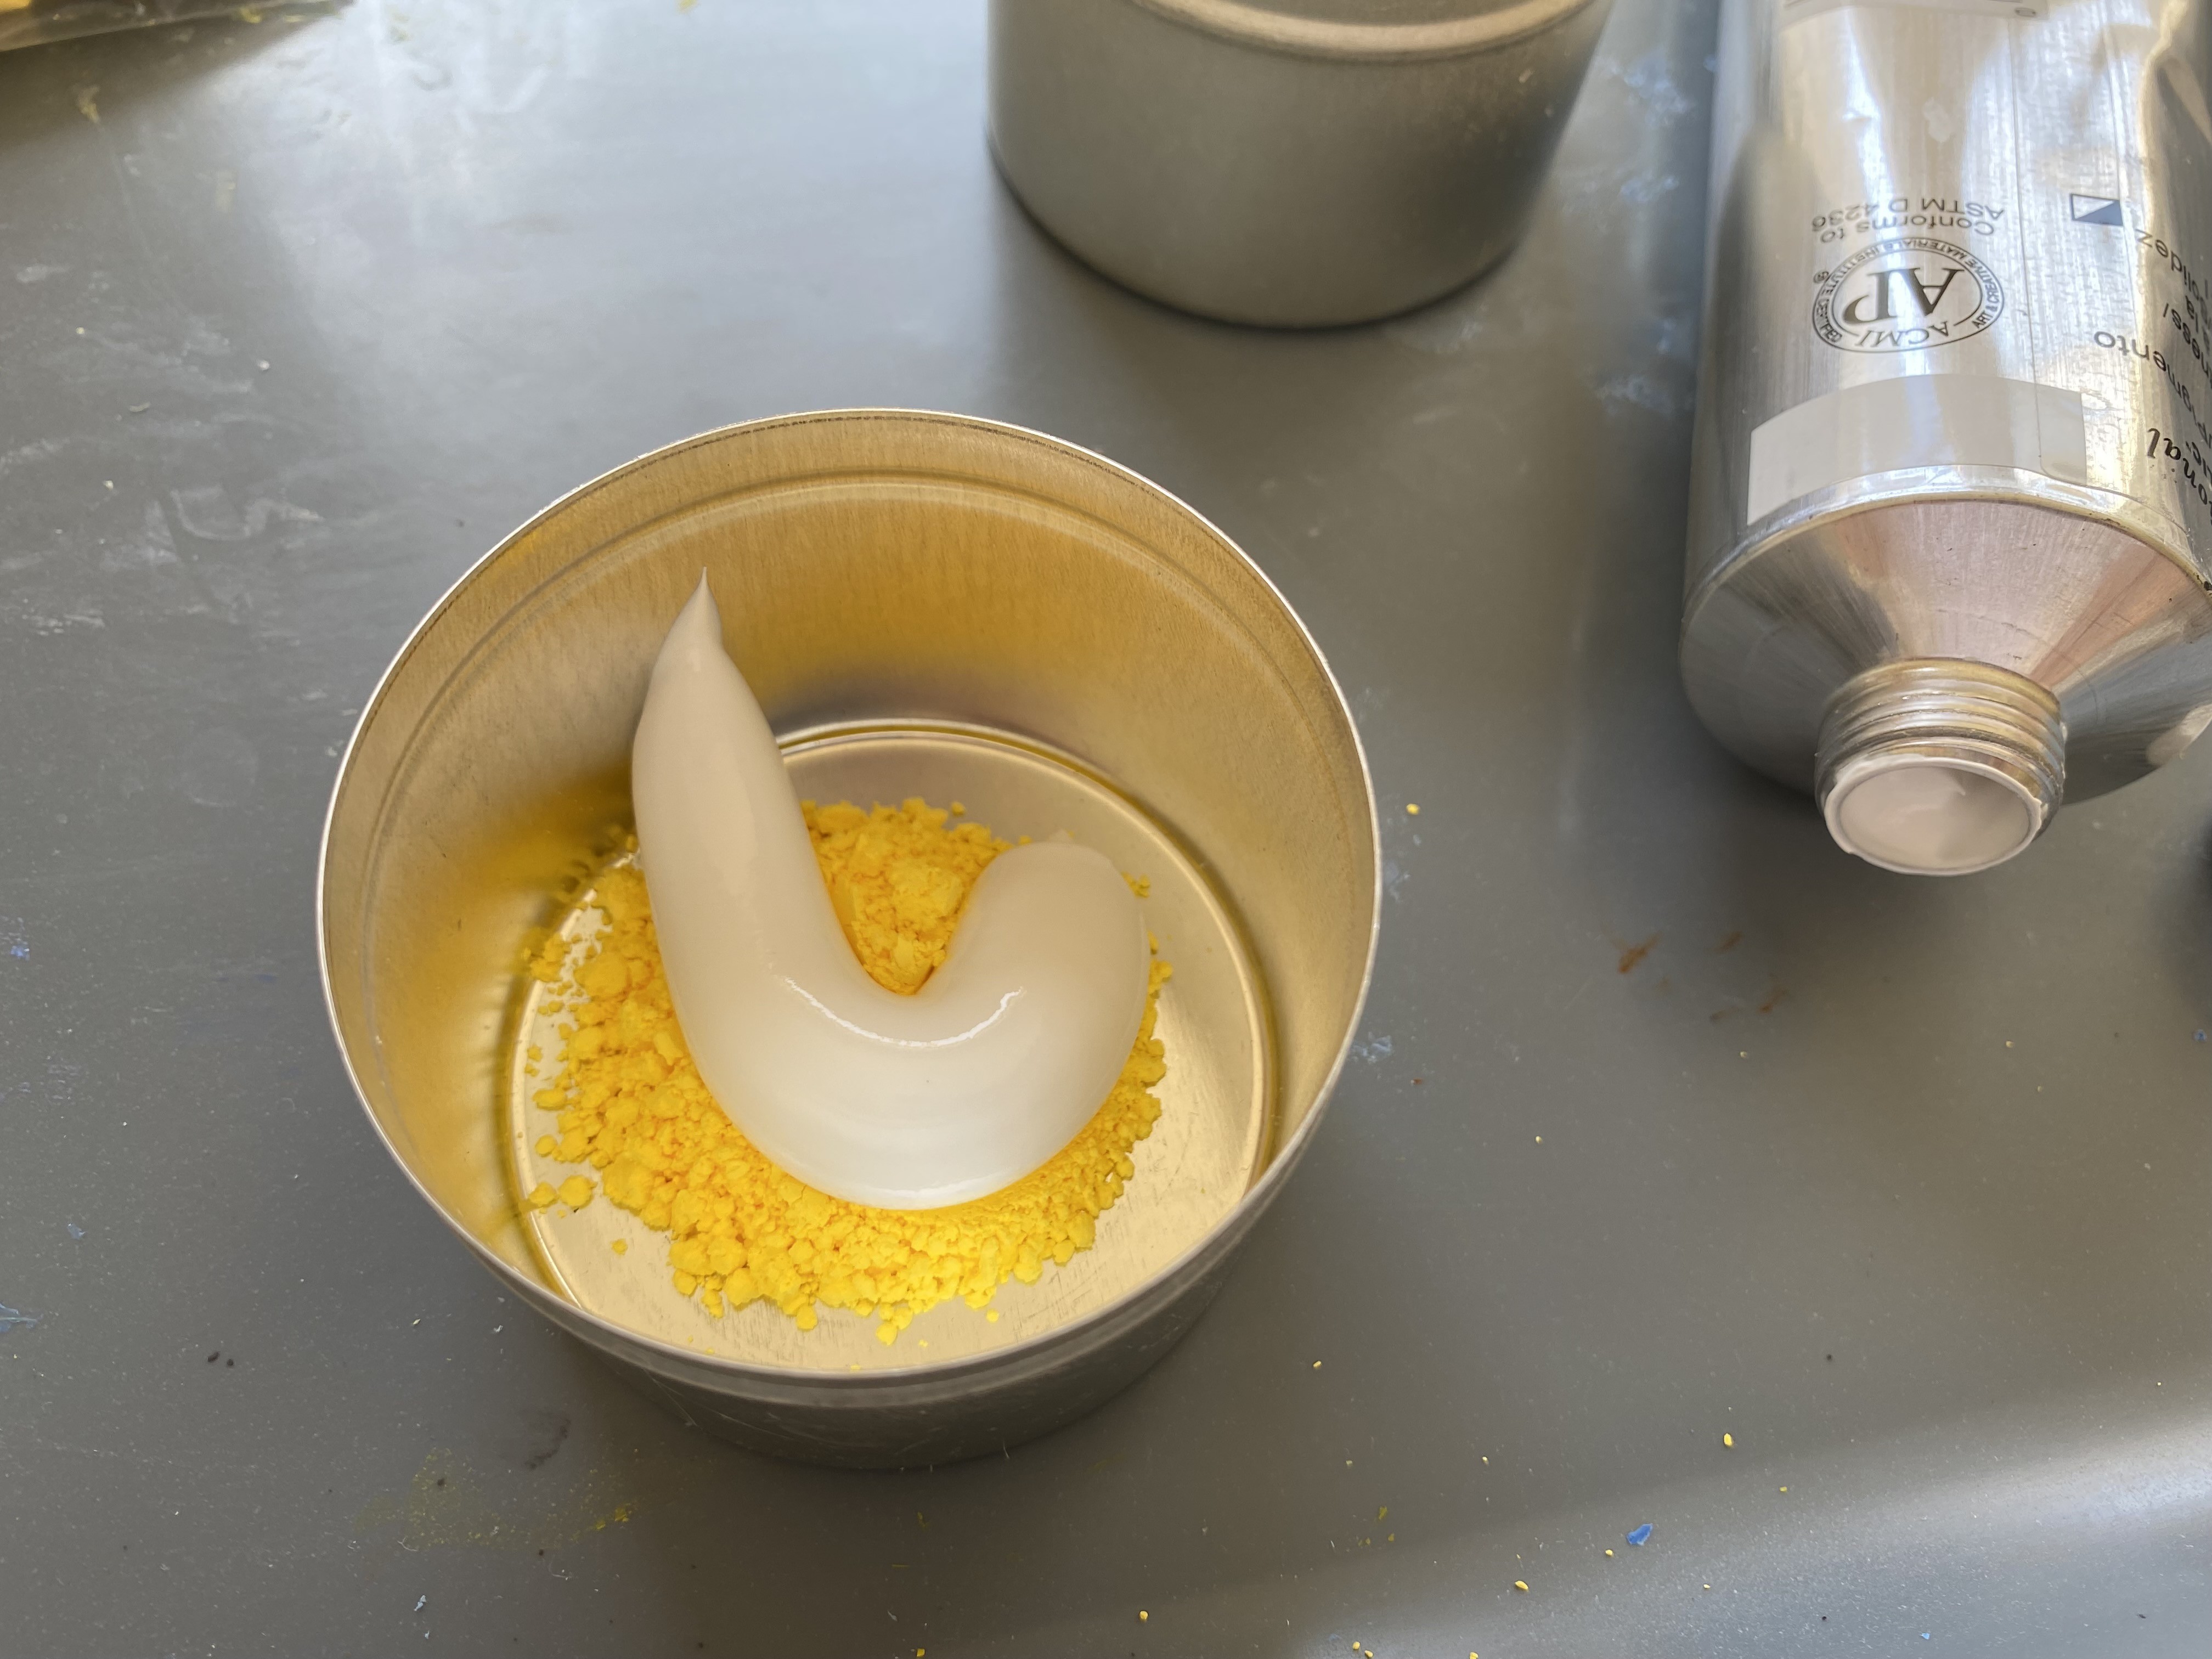
In the last set of tests, I had mixed the thermochromic powder with white paint and that worked okay, but meant that colors like black and dark blue weren't as dark as they could be. So I got some gel medium (Golden Soft Gel Matte), which is a translucent, colorless medium that can be used to make regular paint more transparent, or can be used the way I'm using it - to mix pigment powder into to make paint.
The results are much more to my liking.
![]()
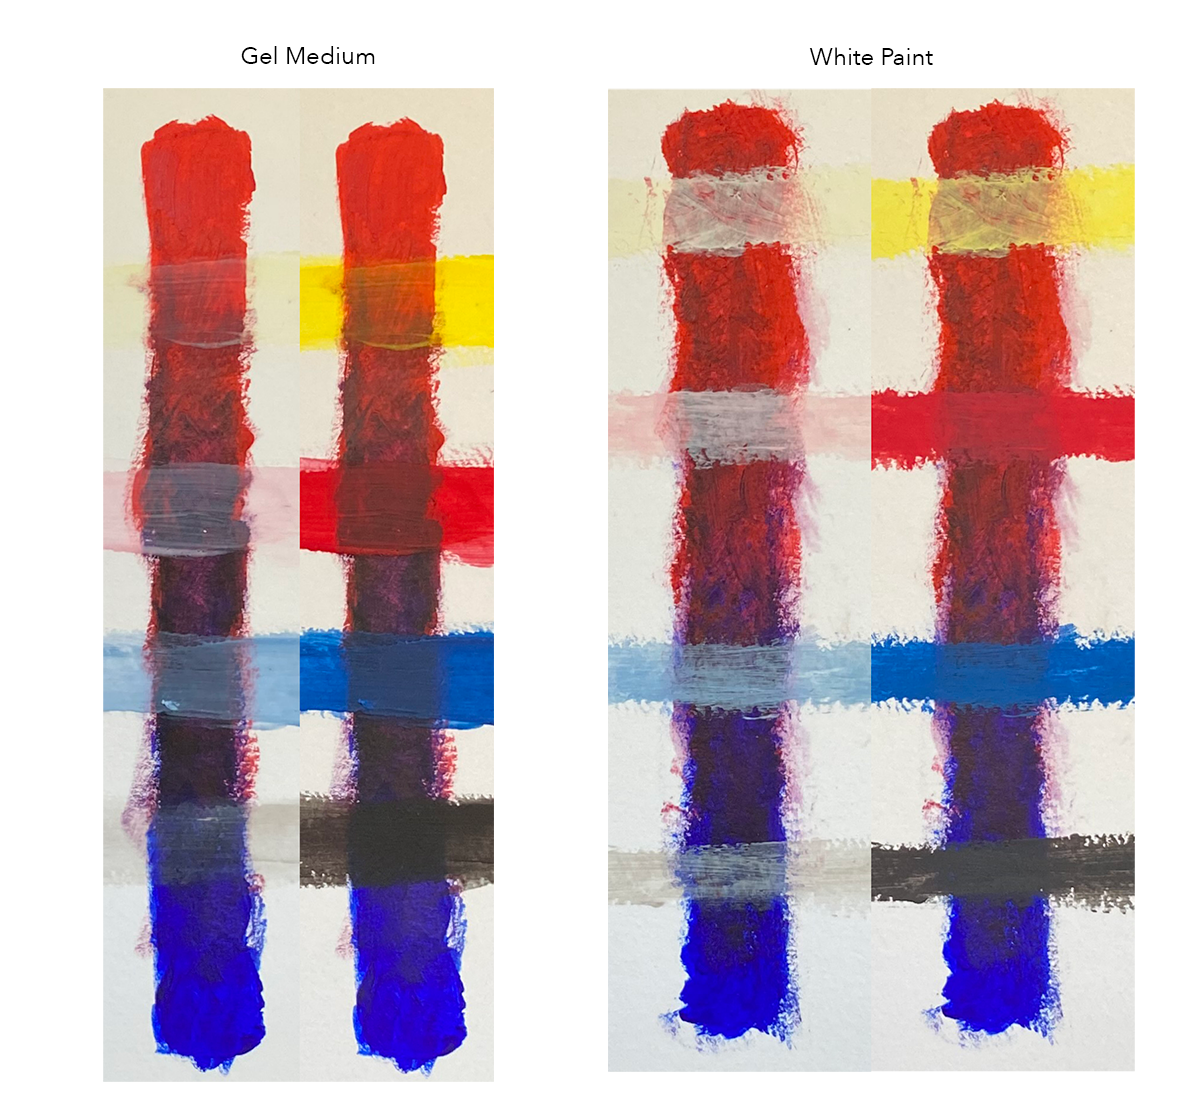
You can see in the above picture that although the gel medium is still visible when the thermochromic pigment is heated and colorless, it's a lot less opaque than the white paint version.
Also of note is that the thermochromic pigment goes *mostly* colorless. It's not completely gone, especially for the deeper hues.
![]()
The gel-based thermochromics are the horizontal lines in the above gif, and the lines are painted over and then under the regular paint vertical lines, and the animation shifts between heated and unheated. (The image only moves because I did the photos handheld - tripod next time!)
So now I need to do some experimentation with mixing the gel-based thermochromics into the regular paint and see how those transformations go when there is direct color mixing between the two.
-
Video: more defined animation
06/18/2021 at 23:34 • 0 commentsNo color change in this quick video, but an updated, more defined light animation.
-
Diffusion
06/14/2021 at 21:37 • 0 commentsI have tried a few different materials as diffusion in the light channels. Early on, I attempted to use pourable resin, but couldn't get it to stay in the slot - it both soaked into the cut edge of the wood and oozed out the bottom a bit. The excellent people in the weekly LED Art chat suggested using moldable plastic, and I have been refining my technique with that.
My first attempt was to use the plastic as indicated, by putting the pellets in hot water, rolling it into thin "snakes" and pressing it into the channels. That sort of worked, but it was too easy to push too much plastic into the slot, which splayed the board and since it's so thin, it just snapped.
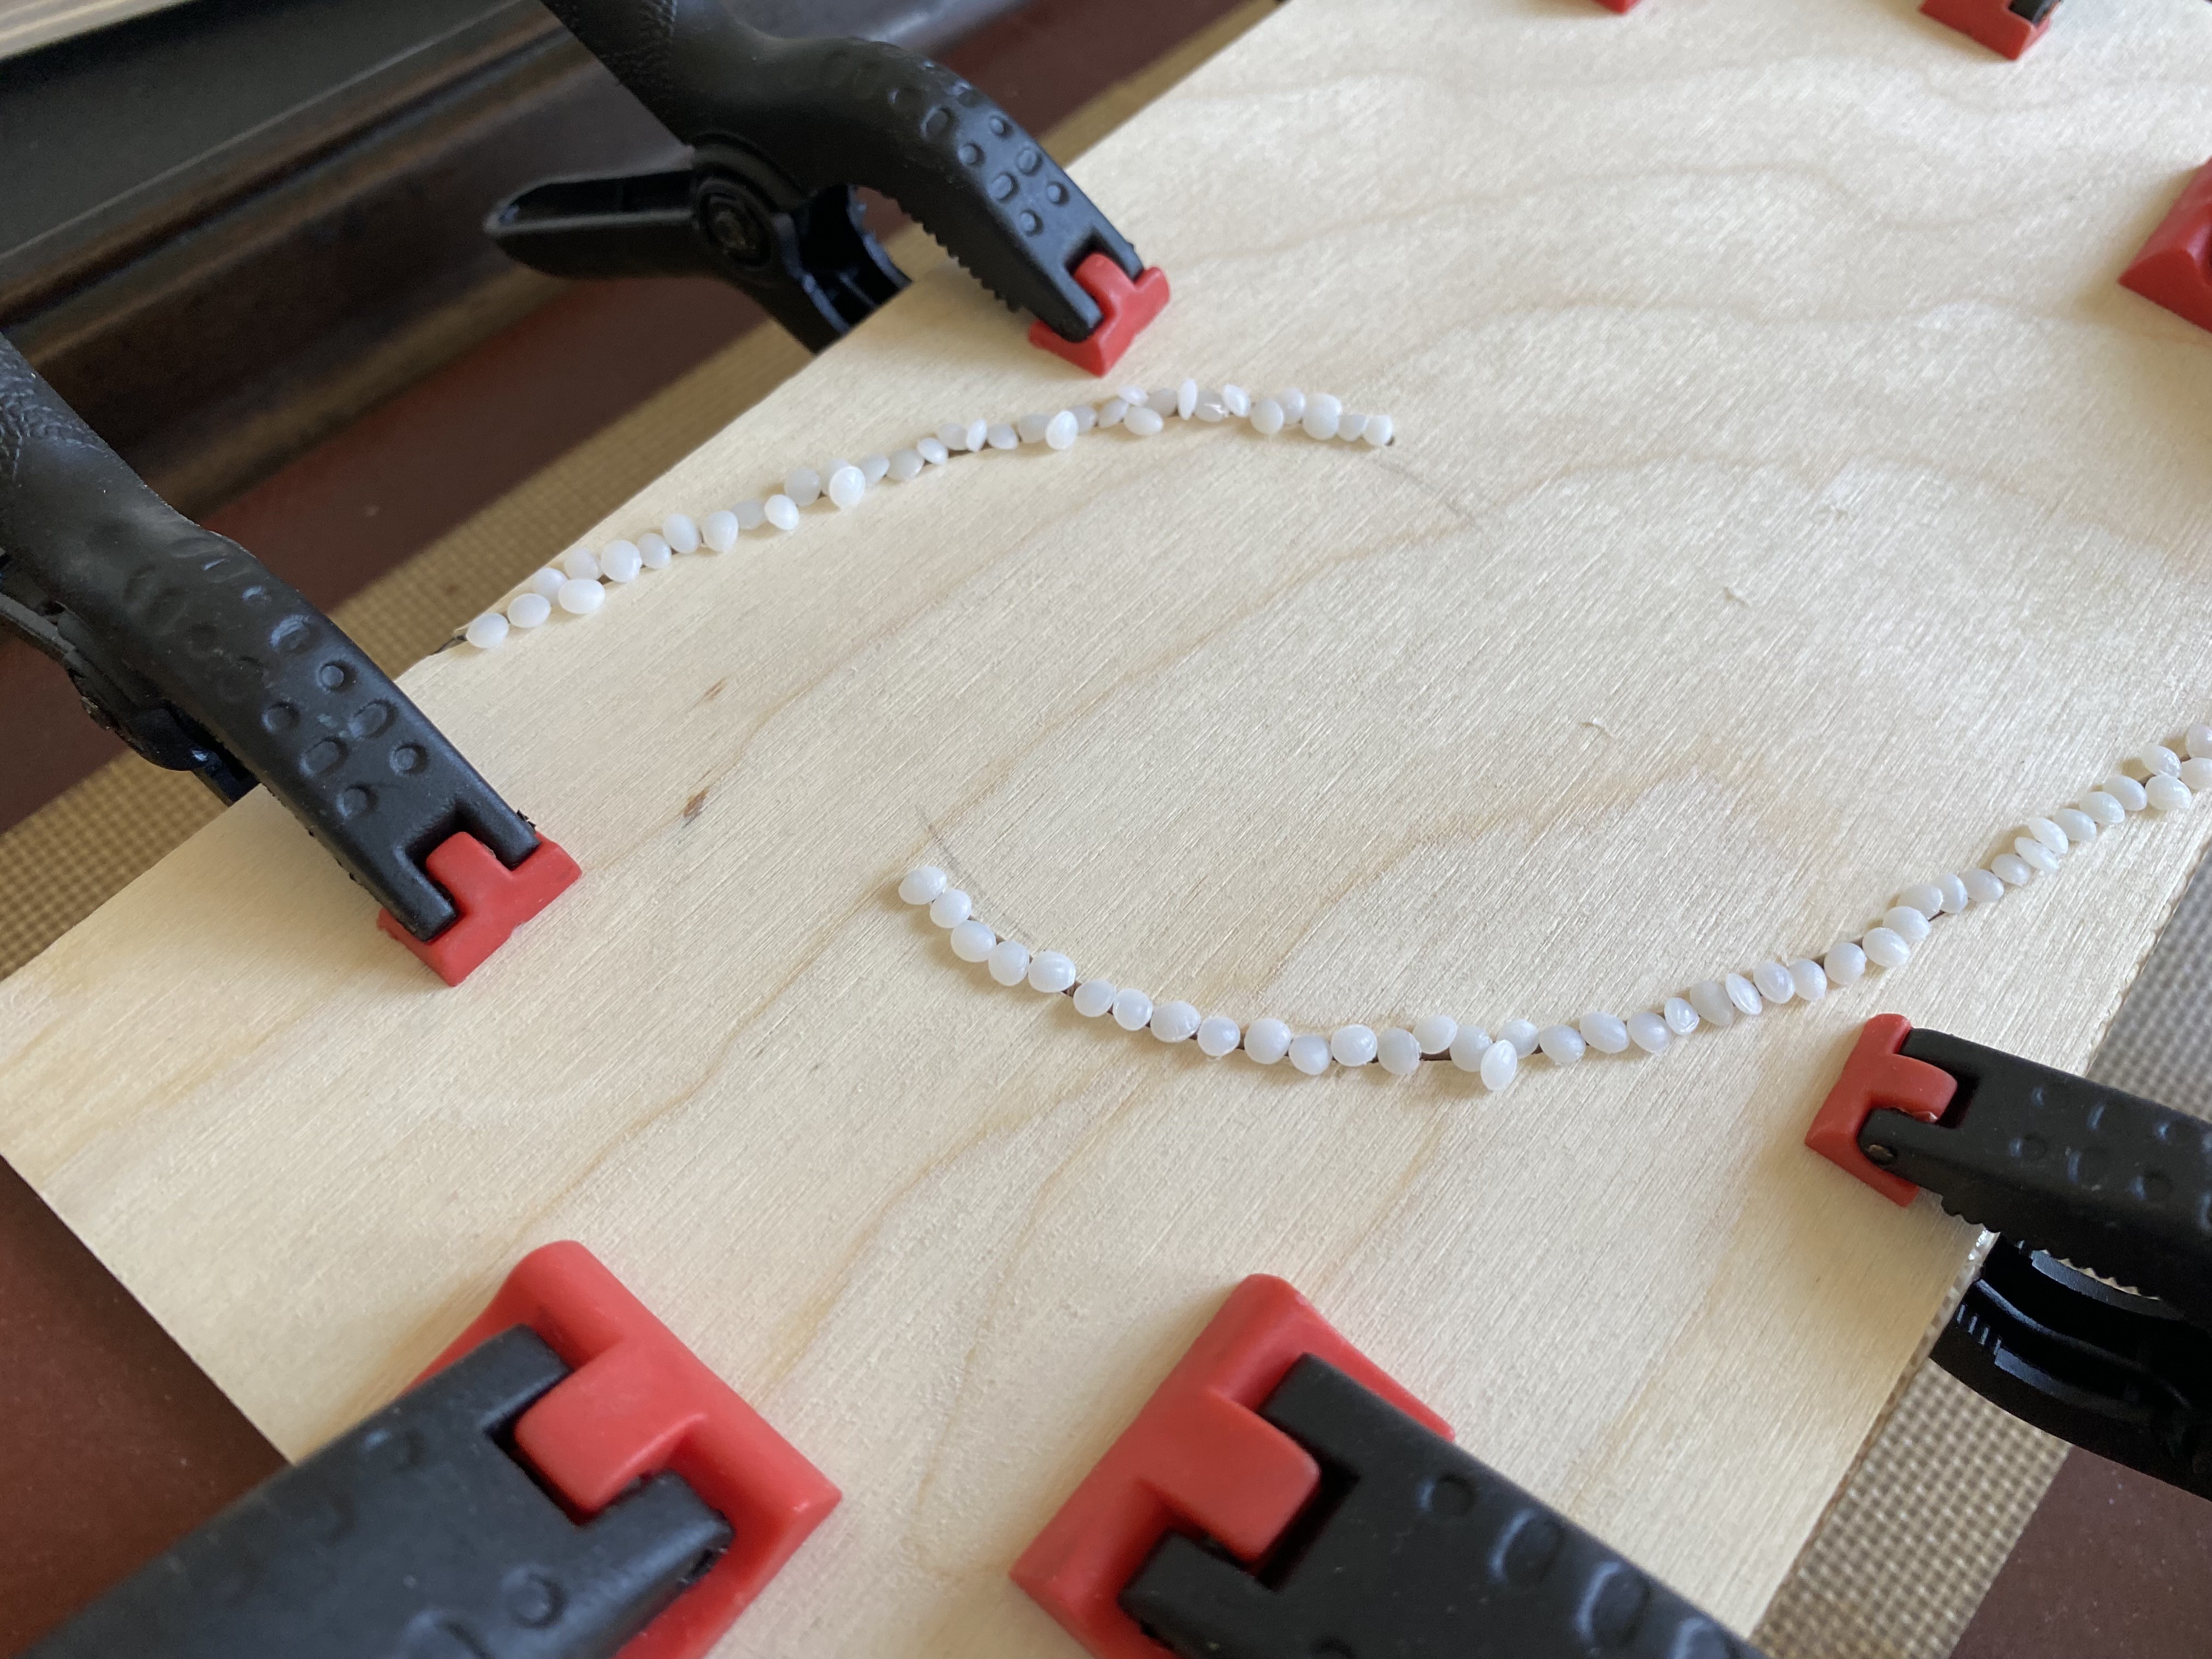
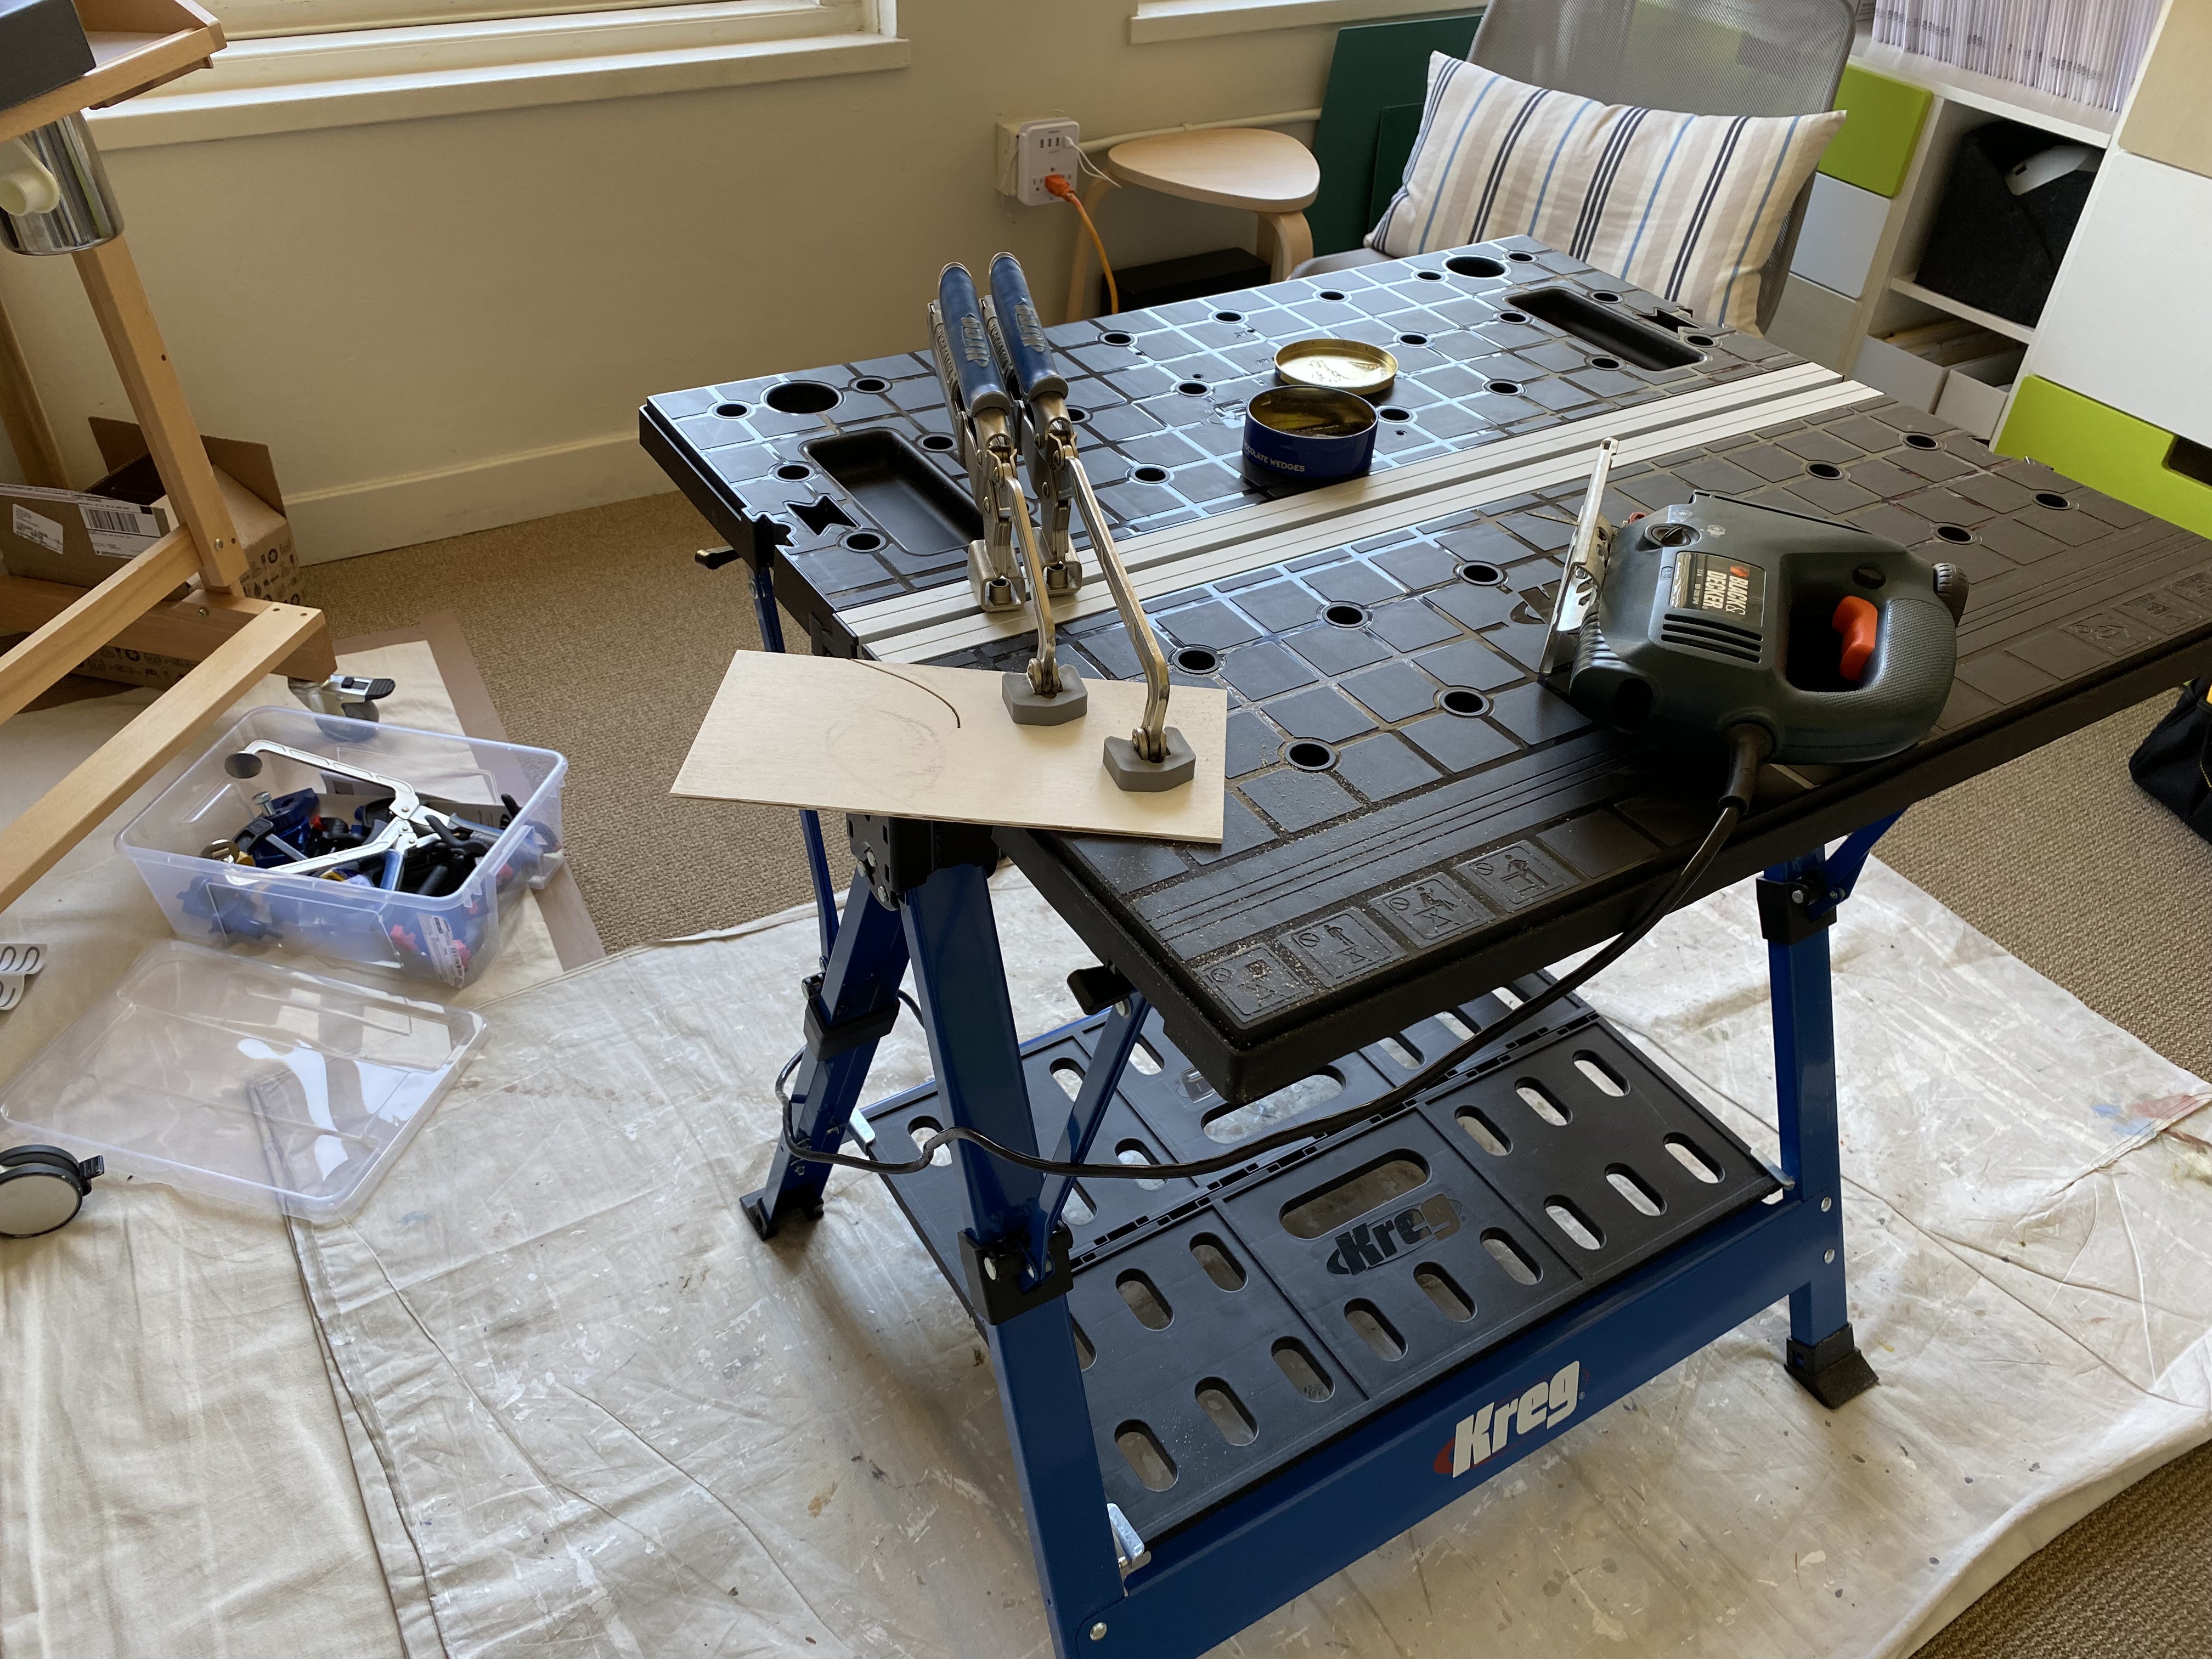
It occurred to me that I could use the oven to warm the pellets. I clamped the cut board to an uncut board with a thin silicone sheet between them. I sprinkled the pellets along the channel and put the whole thing into a 300º oven.
![]()
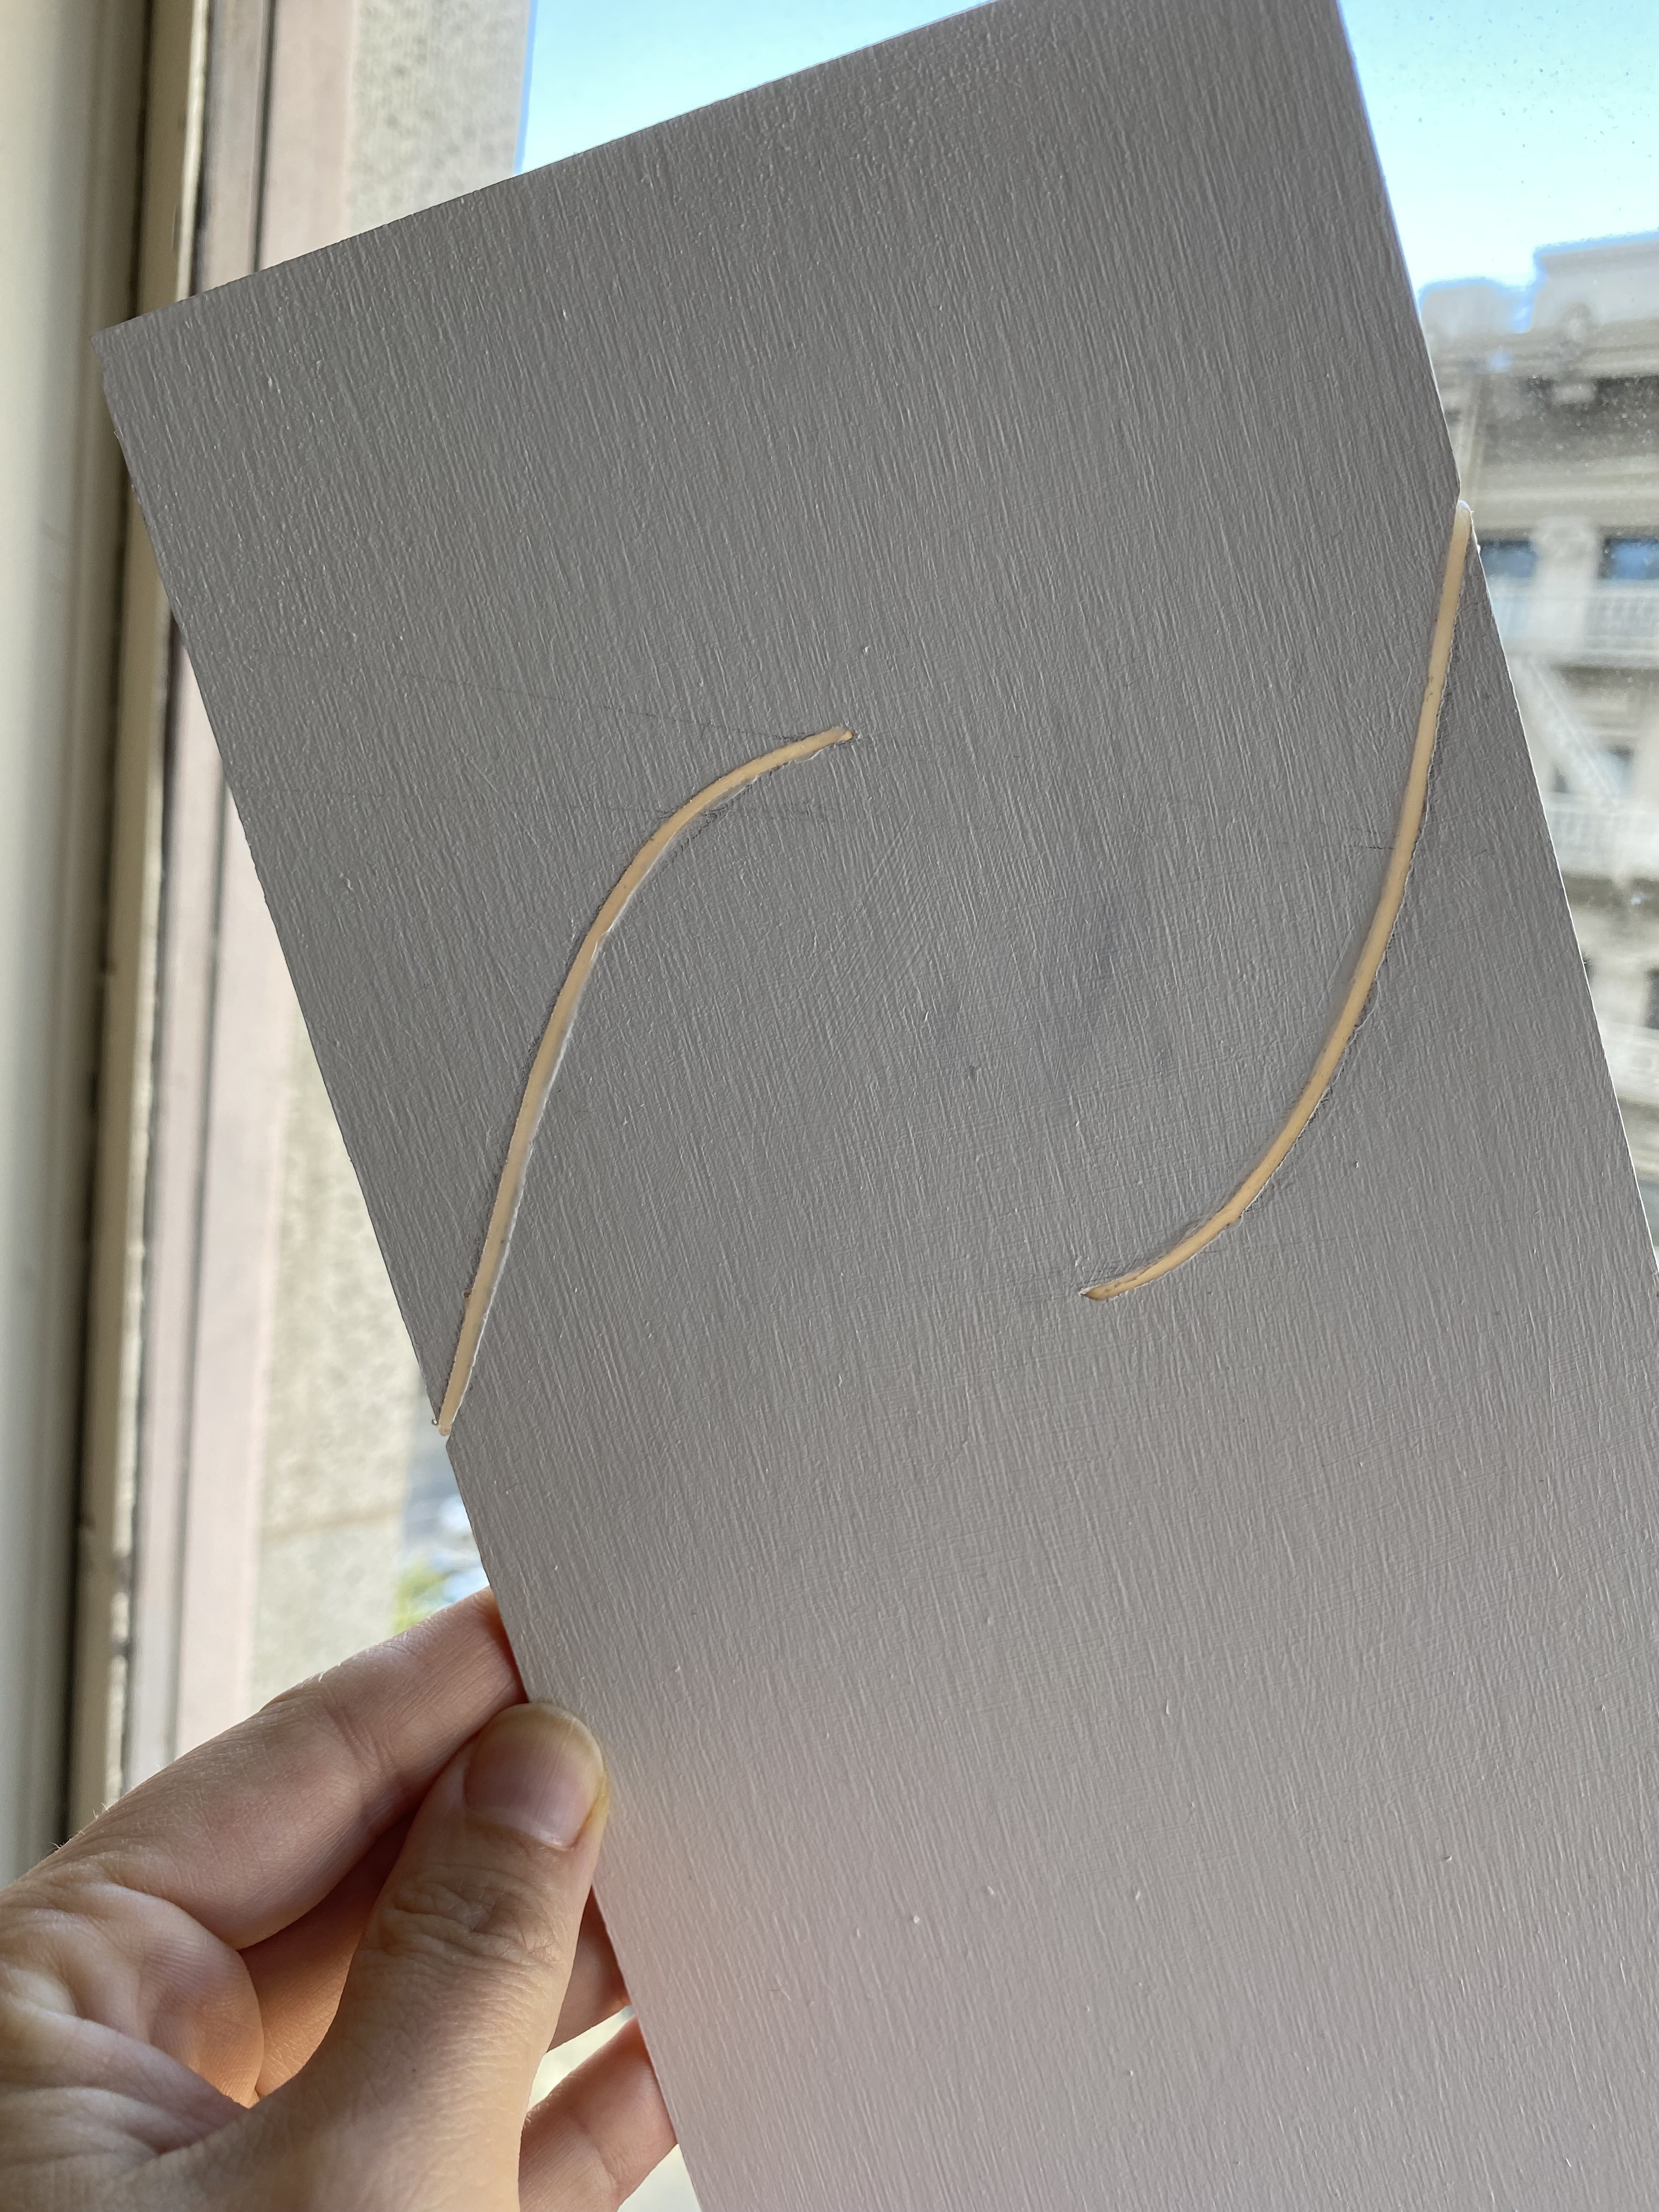
This actually worked pretty well! I used a silicone spatula to smooth them out a bit while they were pliable. This is the result of my first attempt:
![]()
I really like the level of light diffusion it provides, and I also like the white color.
![]()
Plain wood panels need a coat of some kind of primer or gesso (or both) to be able to make a painting on them. This creates a base layer so that your art paints don't soak into the wood unevenly. I gessoed this panel, and I decided to try gessoing right over the diffusion in the light channel.
![]()
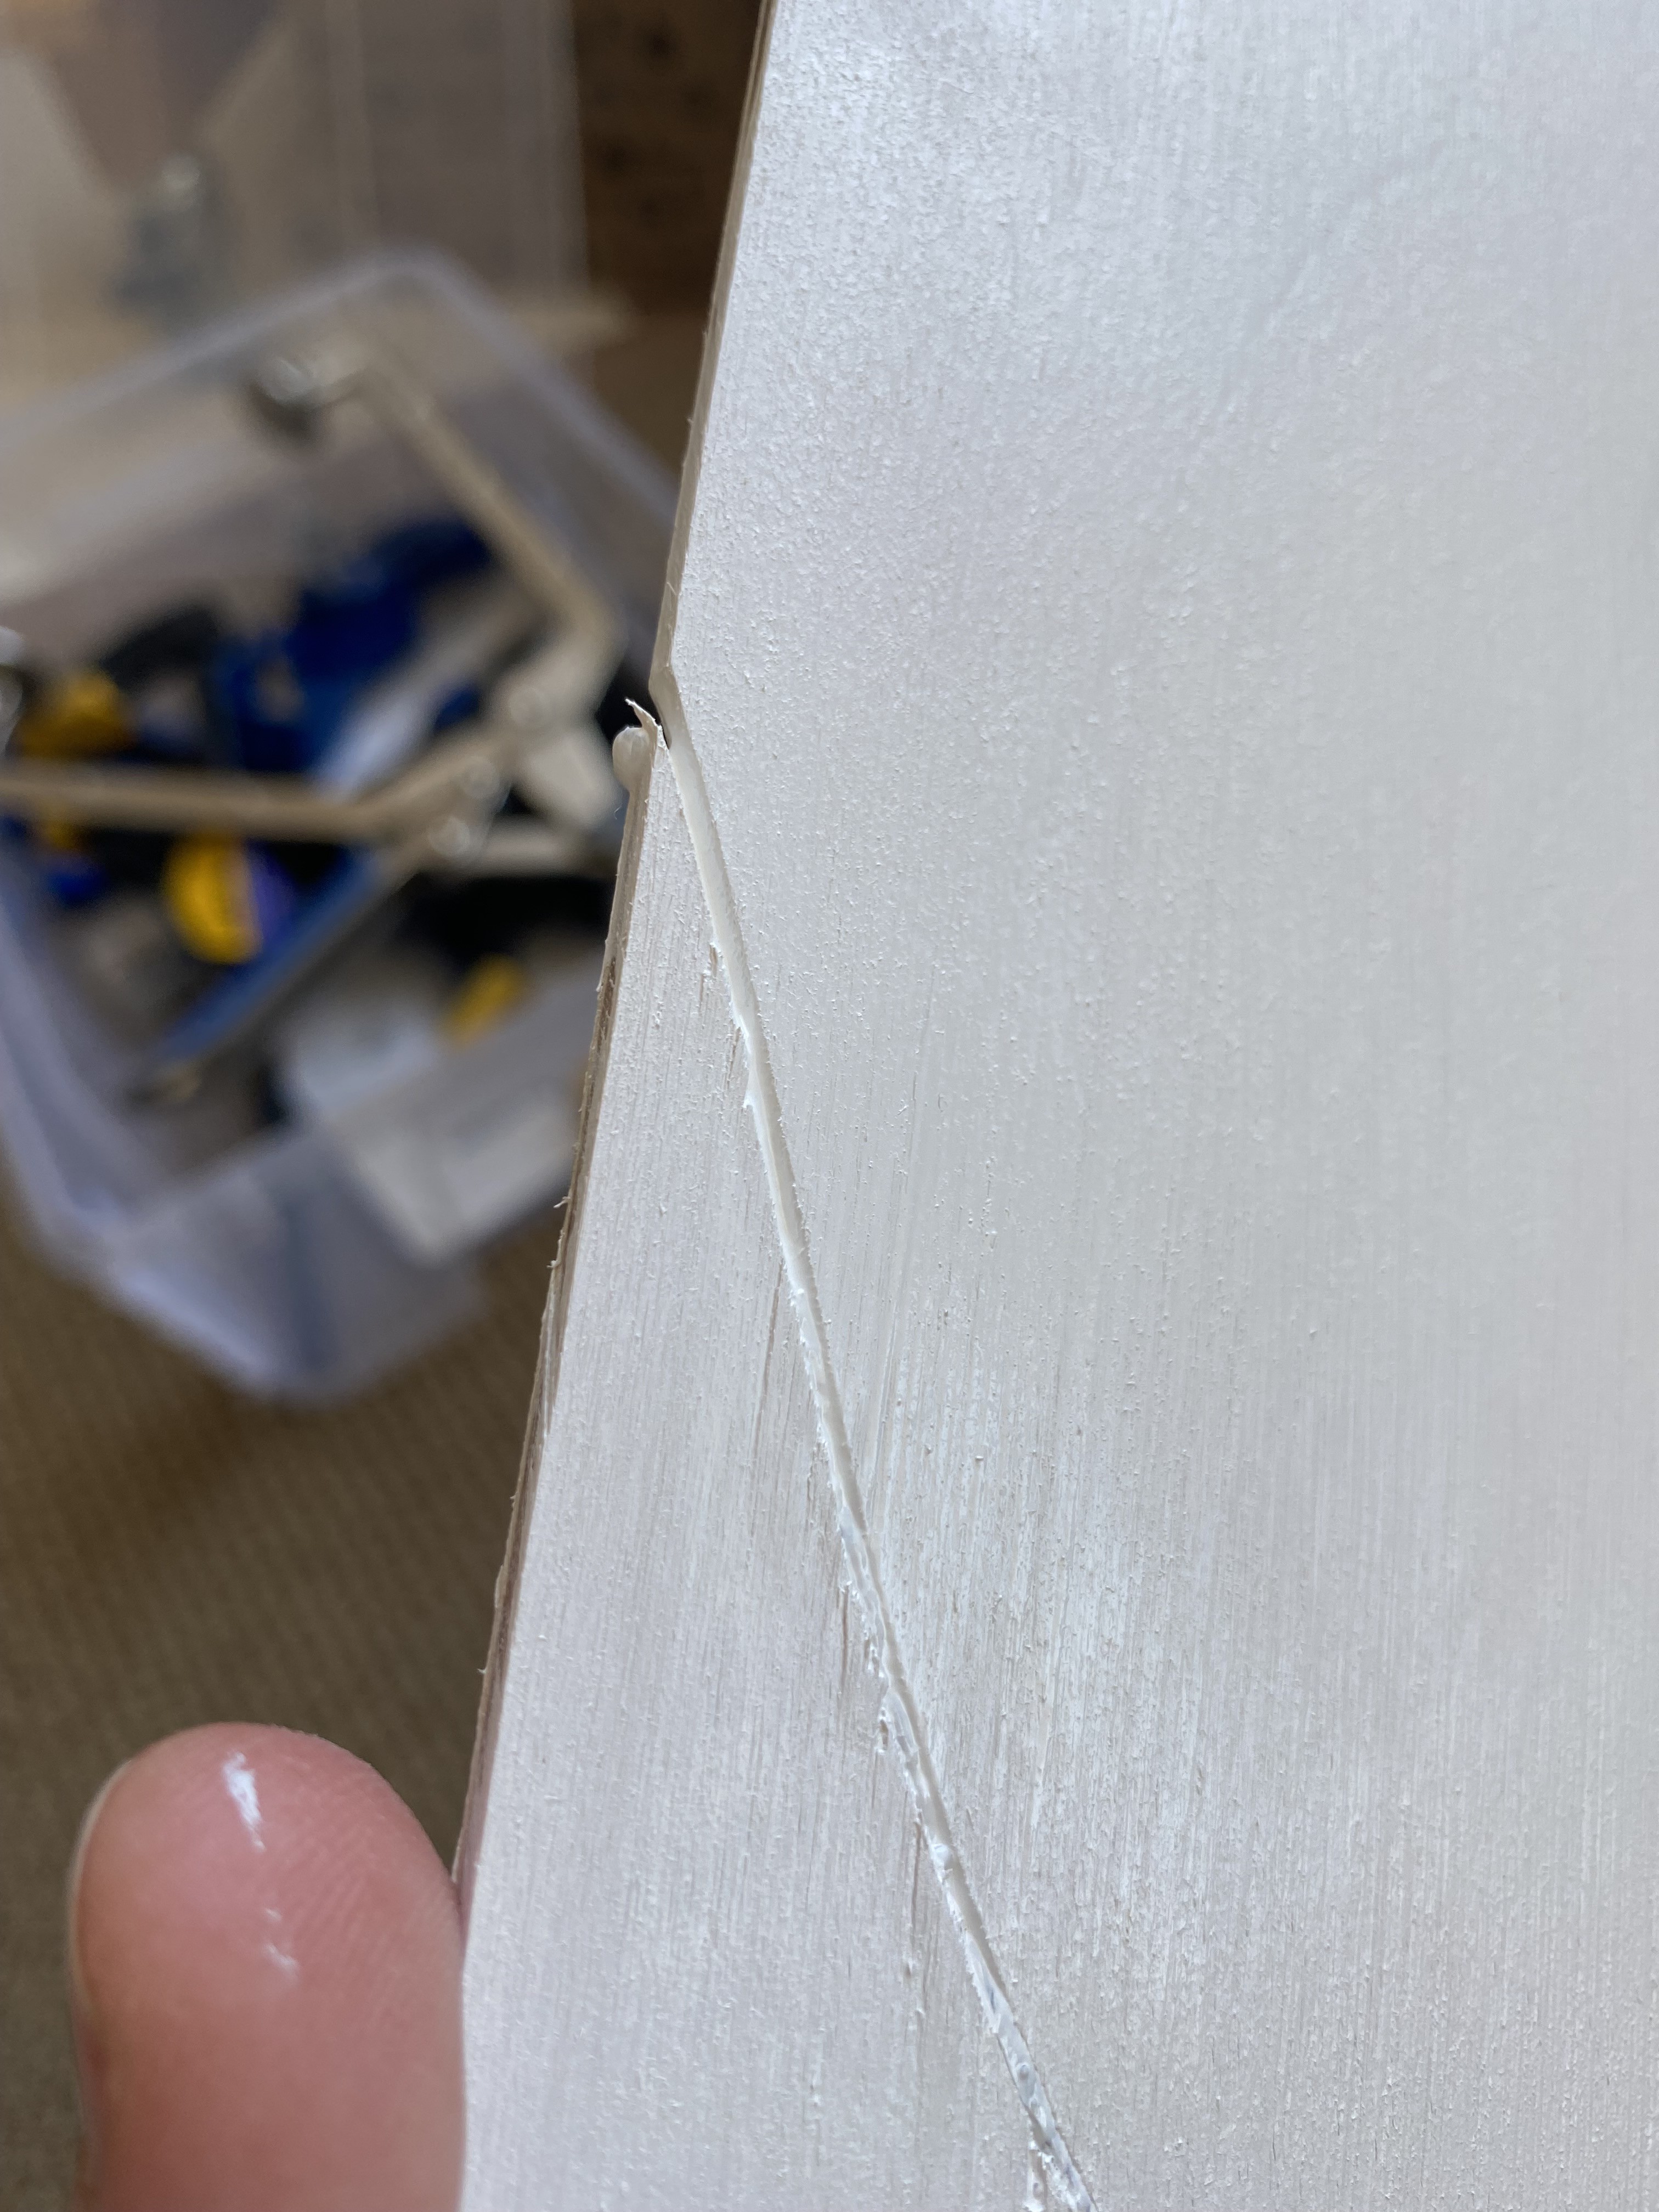
This did not really work. I was actually pretty surprised at how much more of the light the layer of gesso blocked. So for the next batch, I gessoed the panels first, then cut them, then added the diffusion. Much happier with the outcome. I do need to figure out how to get a nice flush edge on the diffusion at the edge of the panel, though.
![]()
I would also like to figure out how to get a nicer channel cut. I'm currently doing these freehand with a little electric jigsaw. I've tried using a tiny file to make a pointy end to the cut, but I haven't had the best luck with that so far. My "workshop" is limited by the fact that I live in an apartment block, so I'm using what I've got at the moment. I would eventually like to try using a laser cutter, which seems like it would be more suited to creating more precise cuts.
![]()
-
See it in action!
06/13/2021 at 22:39 • 0 commentsThis is a painting sketch using both the light channels and the color shift. The video is real time.
-
At the core of all this: Paint
06/13/2021 at 17:57 • 0 commentsI'm an oil painter. I am unsure, however, how oil paint will respond to being warmed and cooled over and over and over, so I'm using acrylics in this project. I chose the Winsor & Newton Professional line, because they are good quality for the price, and they don't shift color too badly as they dry.
I got an assortment of thermochromic pigment powders from Adafruit. They come in little packets, and the powder is super finely ground. In my first tries, I mixed the powder with transparent medium (essentially a thin, colorless paint) and I just did not like the results. It was hard to apply and came out too much like a glaze. This time, I've tried mixing the powders with white paint. I won't get as deep a color this way, but the body of the paint is better and easier to use and mix with.
If this plan generally works, I may try getting some transparent gel medium, which has a thicker body than the stuff I used before. I would like to be able to get rich color, and I'm concerned that using the white paint will keep things too pastel.
The crux of the success of this project - success in an artistic sense, anyway - will be how well I can make interesting color mixing choices. It's not anything I can just figure out in my head, it's going to take a bunch of experimentation time and effort. So I should probably stop typing and get back to the easel.
![]()
-
Microcontroller inventory - things and nanos and teensies, oh my!
06/07/2021 at 23:10 • 0 commentsFor the first part of this project, while I am working on figuring out the physical materials for the painting, I don't need much in the way of processor power. To get started, I really just need to be able to turn a heater on and off by hand.
But once I get a basic physical build worked out, I'll want to start displaying some data, even if it is simple, like whether it's sunny or not. So I went through my box-o-parts, and found some good microprocessor candidates amongst the leftovers. I have a couple Adafruit Huzzah ESP32 boards, a SparkFun Thing Plus, a Teensy 4, a couple CircuitPlayground boards, annnnnd an Arduino Nano 33 Sense. I think I may use that one. It'll be overkill in this phase, but it might make an easier transition into the next phase since it can handle TinyML.
The next phase of the data display part of the project is to build and code something that will respond to a person in the vicinity of the painting. There are lots of possibilities - is there a person present? are there multiple people present? did the person say a "magic word"? is the person smiling? frowning? I suspect that a simple motion/presence detector will be a good starting point, but I am excited to learn more about what I can accomplish with something like TinyML or something else in that direction.
But for the moment, an on-off switch will do the trick.
-
Thinking about materials
06/01/2021 at 23:11 • 0 commentsI am currently looking at the physical materials for the painting part of the project. I’ll tackle the electronics part after that.
I have two main ideas, and I would like to use them together so I get a nice range of things I can vary in response to whatever data I choose to display.
The first idea is to use thermochromic pigments to do color shifts in the painting. I think this is mostly a visual and artistic puzzle, and will depend on some cleverness in composition. Most of the pigments I’ve been able to find lose their color when they’re warmed. So, for example, does that mean I can I make “stars” appear when dark paint goes colorless? or can I make a green section go yellow when the blue disappears?
The second idea is light. I’m looking at various ways of letting light shine through the painting. If the substrate is thin, like canvas, light should filter through that, although I suspect it might be fairly diffuse, depending on how thick my paint application is. The other avenue is to have holes or channels in the substrate through which the light would shine - and that will require painting on a board or panel. I’ve done a little experimentation on this, and proper diffusion is a bit tricky. What I’m aiming at is a flat painting surface, without visible holes or channels at first glance. I’d like the diffusion to be “hidden” in the composition of the painting so that when it does light up, it creates a bit of surprise.
There’s a ton of experimentation to be done, of course. More to come.
Responsive Paintings
Using a mix of traditional painting materials and modern technology to create artworks that display and/or respond to data.