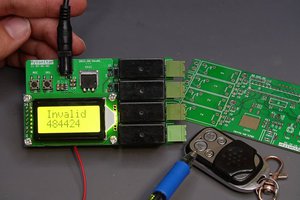
With this project, I have found a way to control my computer using a small four-button hand-held remote.
Here are some examples of things I have assigned the buttons to do, so far:
1. wake up my (Windows) computer
2. shutdown my (Windows) computer
3. send a lengthy string I find myself needing to otherwise often cut and paste to my mqtt server command line
4. type in some passwords to a password prompt window ( not necessarily advisable, use at your own risk :-) )
5. have the 'Enter' key pressed on my computer, from far away (how many times have you been in one room only wishing you could press the enter key from another?)
(you get the idea).
Here are some additional notes:
The ESP32 can retain 512 bytes of variable data in EEPROM when powered down. I use this space to retain the button settings. Most keys take one byte to store. However, some 'extended keys' (such as PageUp) require two bytes. There is a little overhead in storing the button values, but there is in the end 509 bytes of configurable storage space that can be shared between the four buttons on the remote.
Also, while 509 bytes may be quite enough for some people, I have also coded in 'macro buttons' which allow you to hard code in the sketch as many keystrokes as you would like sent in associate with a particular button, and only have these take up two bytes in total in EEPROM space. Effectively removing the 509-byte limit.
Button values may otherwise be updated dynamically via a web interface, which the ESP32 hosts. Again, these values survive a power down.
To get to the web interface, if you have a Windows 10 computer, all you need to do is press the 'Update buttons' button on the control board, or hold down the bottom remote button for five seconds, and your browser will automatically open up with the webpage where you can update the button values. If you don't have a windows computer, the same functionality exists, but you have to pre-open your browser and clear out the URL line before pressing the 'Update buttons' button. Here's a video which covers this in more detail:
The source code and pictures of the hardware I used are posted on Github here:
https://github.com/roblatour/BlueKeyRemote
Of note, the wiring instructions are found in the comments at the top of the .ino file. I have included a picture of the schematics if you want to put this together on a breadboard. Myself, I created the PCB using easyEDA, and had it manufactured and assembled by JCLPCB. Sadly almost as much money goes to shipping as does JCLPCB to make and assemble the boards. Here is the PCB: https://oshwlab.com/RobLatour/bluekeyremote
Also, what I did, was have JCLPCB create the PCB with the small components (resistors, LEDs, and buttons), but not with the ESP32 board or the 1527 receiver board. Rather, I had JCLPCB assemble onto the board female header pins for these, which I could just plug the ESP32 board and receiver boards (which I bought separately) into. This worked very well - but took a bit of extra work configuring as described in this post:
Here too is the 3d printable enclosure: https://www.thingiverse.com/thing:4881425
Link to where you can get a 1527 receiver board and matching remote: https://www.aliexpress.com/item/32852233124.html
Link to where you can get an ESP32 Devkit v1: https://www.aliexpress.com/item/4000071762309.html
Overall, however, I'm super happy with this build. If you decide to make one yourself I'd love to hear your comments.


 Andy Castille
 hesam.moshiri