 Alpenglow Industries
-
1Wire up the LCD
I happened to have an unused Adafruit RGB backlight positive LCD 16x2 handy, so I soldered on the headers, then followed their wiring guide to ensure everything was working. The particular LCD that I'm using is RGB-backlit, but to keep the project somewhat generic and applicable to standard single-color displays, I resisted the urge to get fancy, and only wired up the R(ed). There's quite a bit of wiring required, with 12 of the 16 pins populated on the standard LCD (the RGB adds another two pins for controlling green and blue). The Adafruit tutorial has an excellent description of how to hook it up, as well as what each pin does, but here's a cheat sheet so that you can check your work, or skip the long version:
1    GND
2    +5V
3    contrast pot wiper (with other sides of pot connected to GND and +5V respectively)
4    Arduino D7
5    GND
6    Arduino D8

11    Arduino D9
12    Arduino D10
13    Arduino D11
14    Arduino D12
15    +5V
16    GND
-
2Test the LCD
Once you've got the LCD wired up, it's a good idea to give it a quick test before proceeding, so grab the built in HelloWorld example from File->Examples->LiquidCrystal. The Adafruit tutorial uses different pins than the Arduino default, so we'll need to tweak the code slightly; instead of:
const int rs = 12, en = 11, d4 = 5, d5 = 4, d6 = 3, d7 = 2;
LiquidCrystal lcd(rs, en, d4, d5, d6, d7);
we need:
LiquidCrystal lcd(7, 8, 9, 10, 11, 12);
for the way we wired it. Compile and Upload the sketch, and you should see a lovely hello, world! on your LCD. If not, hit me up in the comments and I'll try to help you figure out what went wrong! 💙
-
3Add the DHT11
Now that we know the LCD is working, let's have a look at the temperature. I'm using the commonly available, inexpensive, DHT11. It's not the fastest or most accurate way to measure temperature, but it's cheap, and good enough for our purposes. Hook the middle (out) pin on the DHT11 to digital pin 2 on the Arduino, and the + and - pins to 5V and GND respectively. You'll need to install the Adafruit DHT sensor library as well as its dependency, the Adafruit Unified Sensor library - if you've not done this before, Adafruit has an excellent walk-through. With the libraries installed, we can run another quick test sketch like we did for the LCD: open File->Examples->DHT->DHTtester and uncomment this line (15 at the time of writing) by removing the leading forward slashes:#define DHTTYPE DHT11 // DHT 11
then comment out this line (16) by prefixing it with two forward slashes:
//#define DHTTYPE DHT22 // DHT 22 (AM2302), AM2321
and give it a quick Compile. If you run it, chances are you won't see the expected output on the serial monitor, but as long as it compiled OK, we should be good for now.
-
4Bring on the BigNums!
After confirming all is well with the basic hardware, it's time to go large! The first step in using the BigNums2x2 library is...well...getting your hands on the library! Like the other libraries that we installed via the Library Manager, we can simply search for bignums to locate and install it:
Load File->Examples->BigNums2x2->BigNums2x2FontDemo, and like we did with the basic LCD example, update the pins to:
LiquidCrystal lcd(7, 8, 9, 10, 11, 12);
then Compile and Upload to get a feel for the available fonts and how they work. File->Examples->BigNums2x2->BigNums2x2LocDemo is also worth a quick try in order to understand how the positioning functionality works.
-
5Put it all together
Now it's as simple as combining the DHT11 and BigNums2x2 examples to create our own big numeric thermometer remix! Create a new sketch, and add the header portions of each, including the library includes, as follows:
#include <LiquidCrystal.h>
#include <BigNums2x2.h>

#include "DHT.h"

#define DHTPIN 2
#define DHTTYPE DHT11
DHT dht(DHTPIN, DHTTYPE);

LiquidCrystal lcd(7, 8, 9, 10, 11, 12);
BigNums2x2 bigNum(TREK);
In setup(), we need to initialize the LCD, and DHT:
void setup() {  lcd.begin(16, 2);  dht.begin();
}
Then in the never-ending loop(), we just read the temperature value and output it to the LCD via BigNums, over and over, with a 2 second (2000ms) delay between each run:
void loop() { float f = dht.readTemperature(true); // Check if read failed and exit early (to try again). if (isnan(f)) { return; } lcd.clear(); bigNum.print(f); delay(2000); } -
6Get fancy!
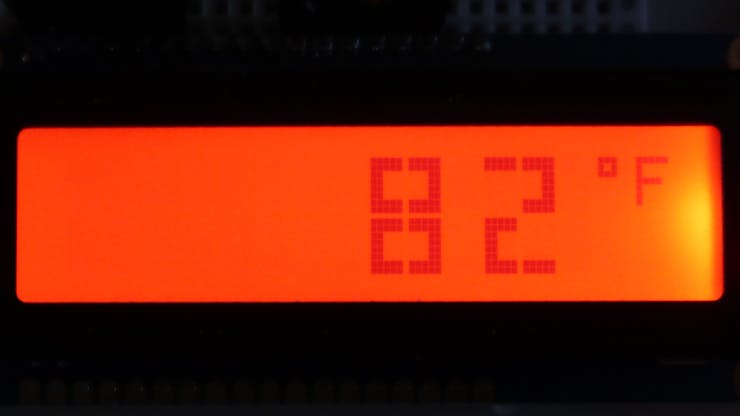
Now that we have our temperature values outputting via BigNums2x2, let's get a little fancy. The numeric value alone is useful if you're completely familiar with the context (and you probably are, since you wrote the code!), but most temperatures will indicate which scale they are using in order to eliminate ambiguity. Although we're using BigNums, there's nothing stopping us from using plain ol' LCD characters alongside their chonkier sistren, so let's add a small °F legend to the right of our temperature value. To do this, we'll shift the position of our BigNums two to the left, plus use (char)223 in order to tell lcd.print that we want to use the ° character; replace bigNum.print(f); with the following 5 lines:
bigNum.print(f, 2);
lcd.setCursor(14,0);
lcd.print((char)223); // °
lcd.setCursor(15,0);
lcd.print("F");
Behold, a pretty decent-looking thermometer, which can easily be viewed across a room:
If Celsius is more your thing, just swap dht.readTemperature(true) to false, and the F character to C. Or you could get really fancy and cycle between the two, or add a button to toggle them, or calculate the heat index with computeHeatIndex(), or ... well, let us know what crazy things you come up with in the comments below!

Discussions
Become a Hackaday.io Member
Create an account to leave a comment. Already have an account? Log In.