 Francesco
-
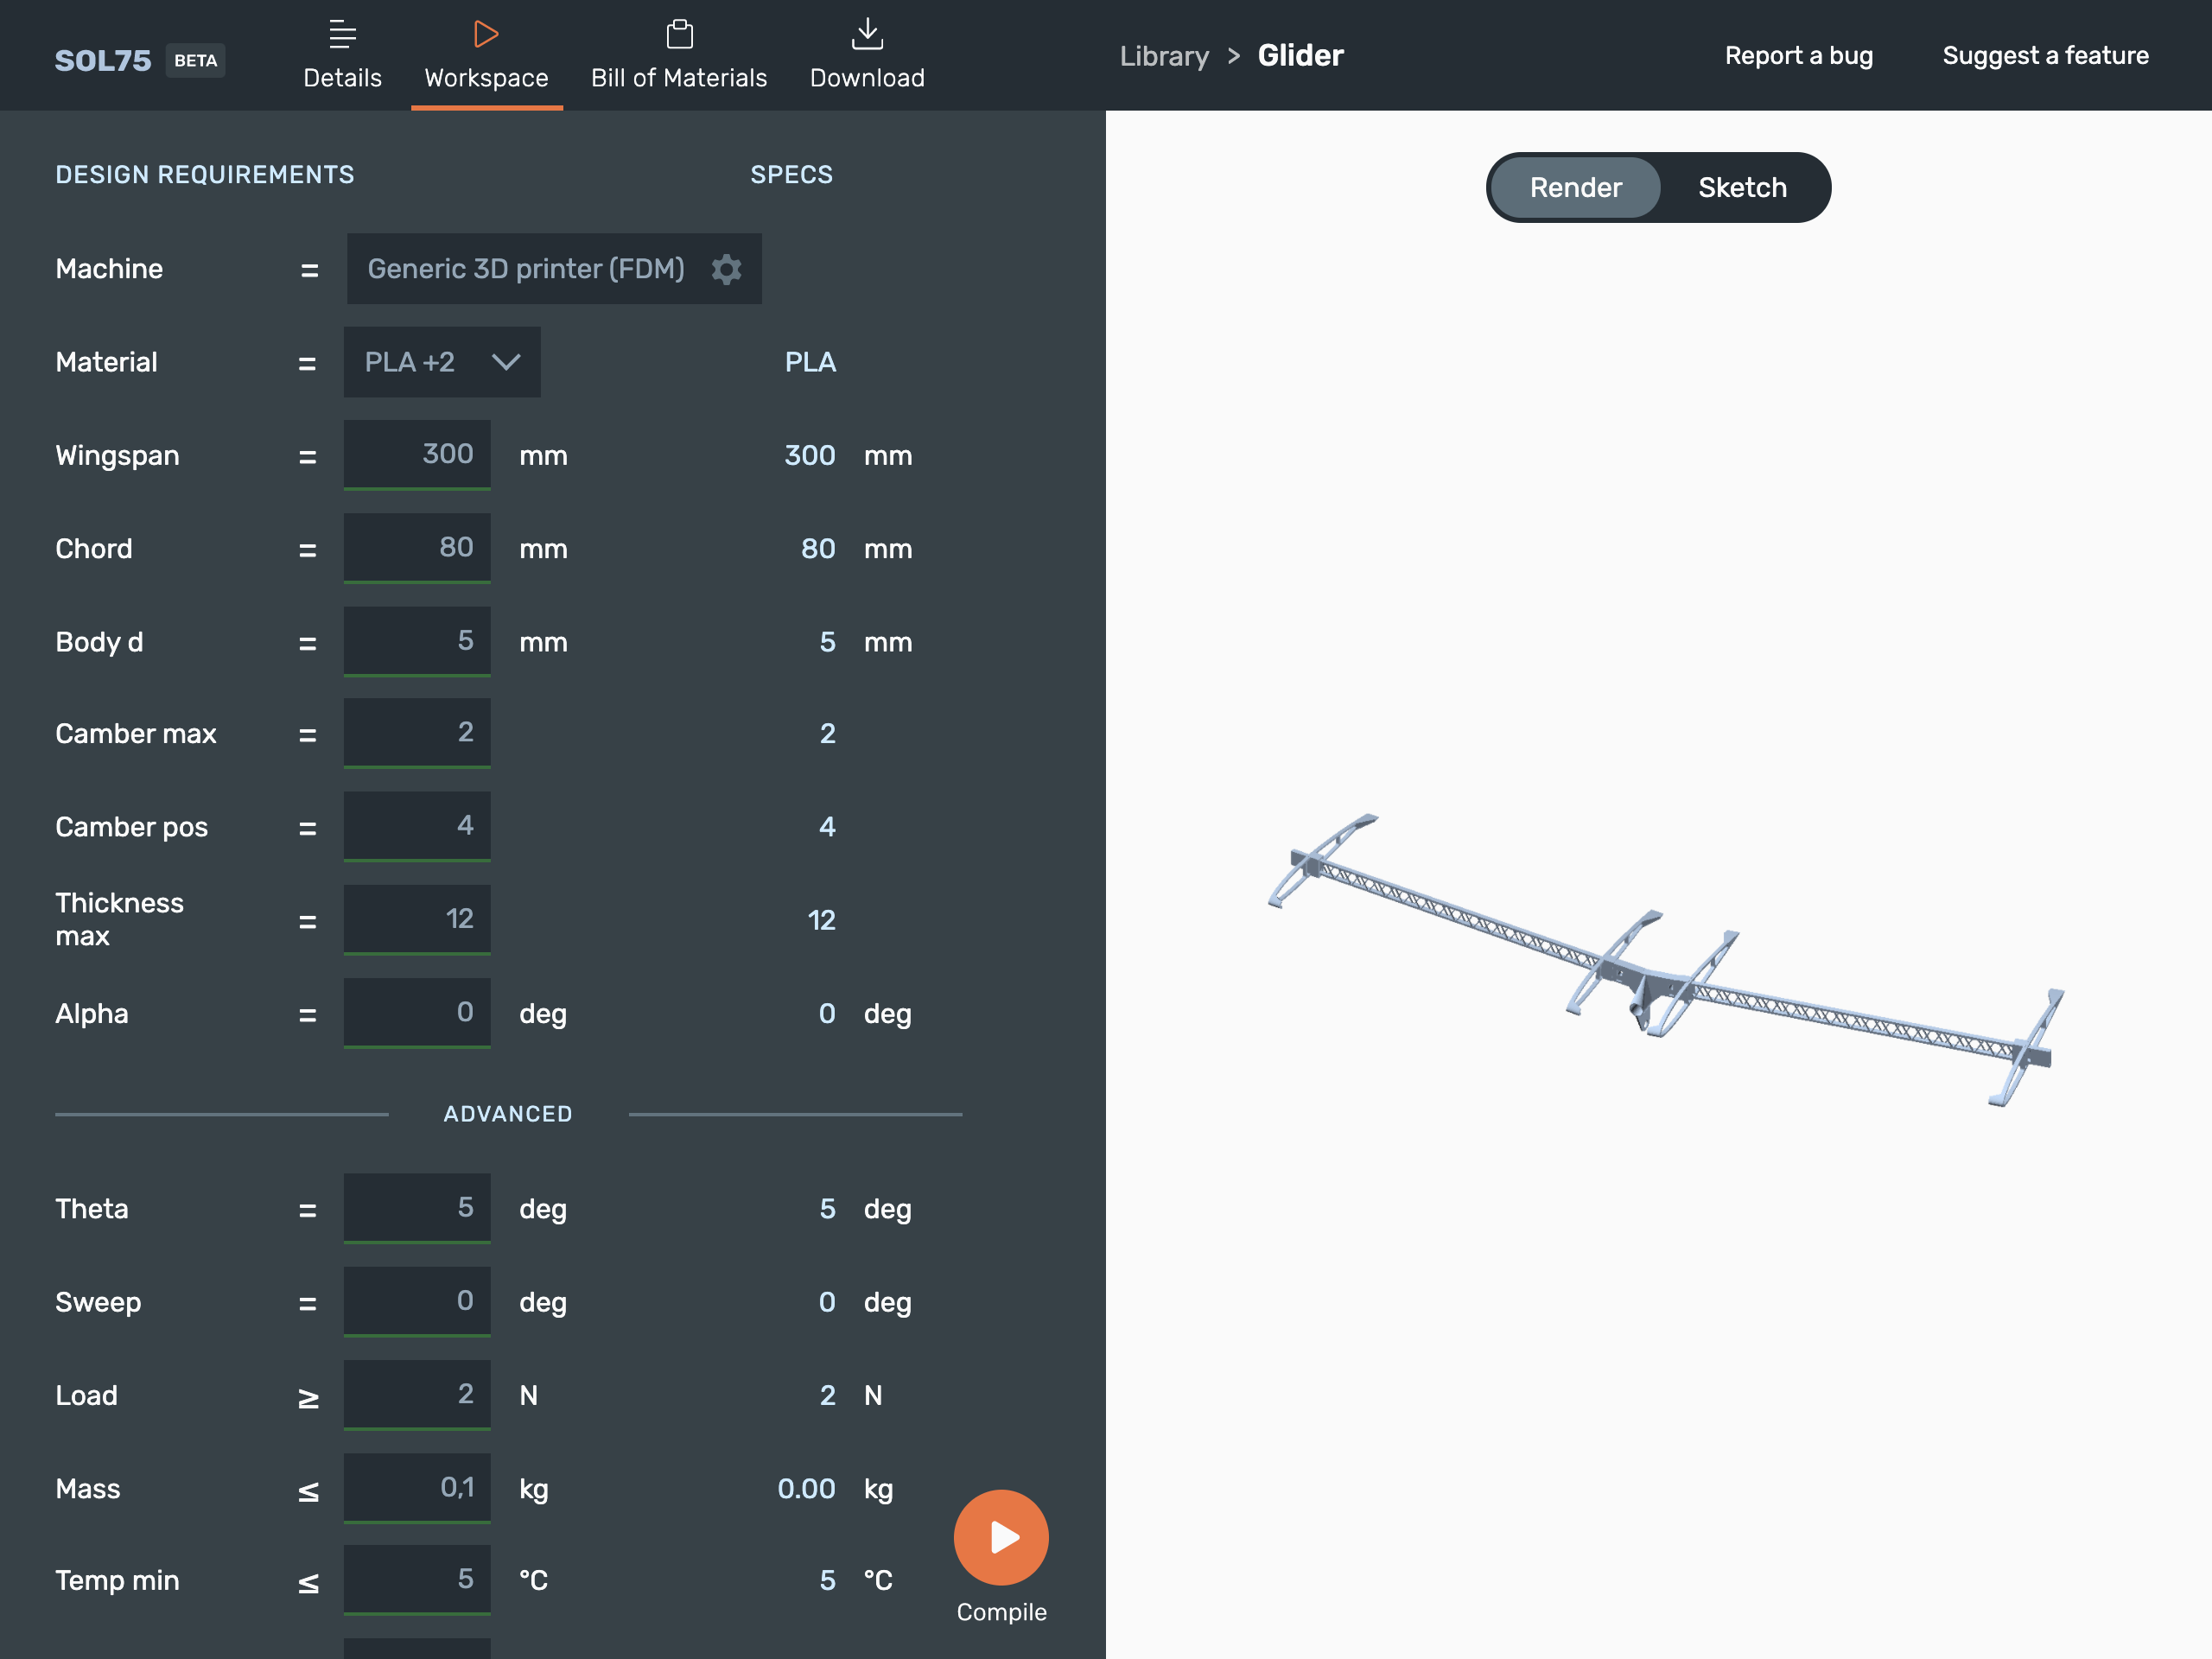
1Customization on SOL75
![]()
-
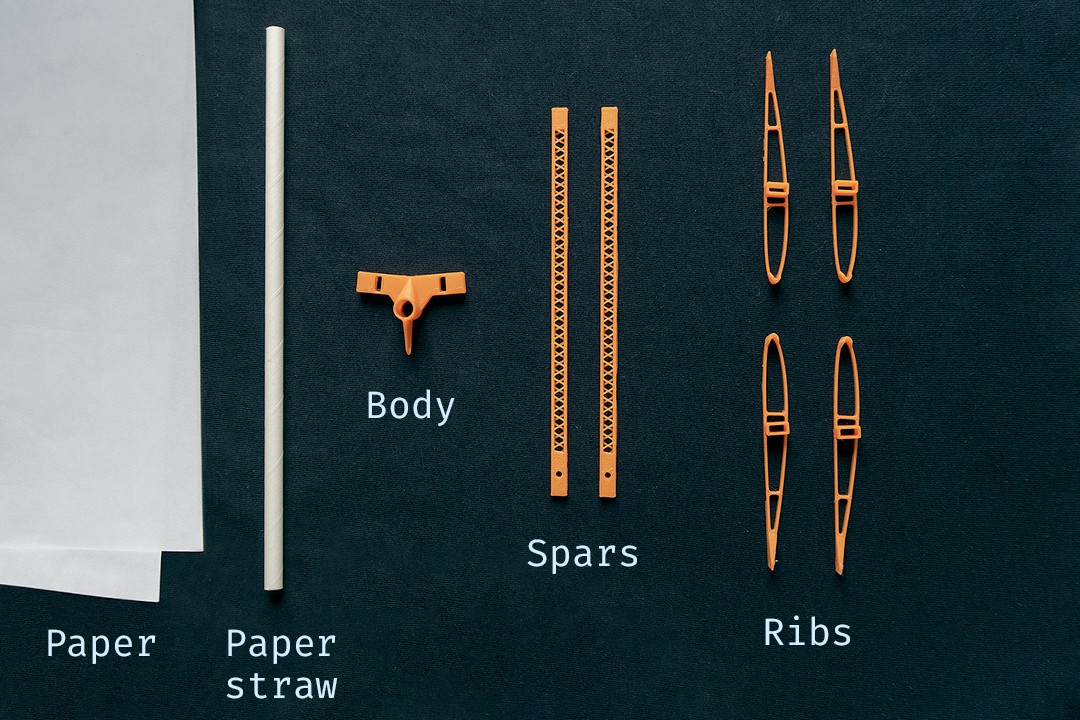
2Assembly - Frame
![]()
The spars should fit tightly in the center element. If you want to be able to disassemble the glider, you can use a small removable pin to lock them in place. Otherwise, you can glue the spar directly on the body. The two spars are identical but note that only one end of each spar has a hole for the pin. Once the hole is aligned with the slit in the body you'll know that the spar has been fully inserted.
NB: Be careful while handling the spars; even though they can withstand a relatively large distributed vertical load, the truss elements are very thin and might get crushed by a localized compression.
To complete the body, you will need to add a tube and the tail. For the tube, you could use a fancy carbon fiber tube, but a paper straw has worked well for me. Do not glue the tube to the center body until you have actually tested the glider. Changing the position of the tube allows you to easily change the center of mass of the glider, which is crucial for a good flight performance (more about this in the stability section below).
-
3Assembly - Wings
![]()
You'll need to add the skin to the wings. Paper seems to work well but feel free to experiment with other materials.
NB: Once the wings are covered by the skin, it is a bit harder to attach them to the body. If you don't want removable wings, it will be easier to cover the wing after the whole structure is glued in place (the ribs glued to the spars and the spars glued to the main body).
You can cover each wing with a single rectangular piece of material. Cut it wider and longer than what you need, then fold it in two. The extra thickness can be cut off later. The extra length can be left to increase the wingspan or folded up to form wingtips. Align the fold with the leading edge and glue it in place. The ribs are thicker at the front and back to increase the contact surface and increase the bond strength. Once the skin is attached to the leading edge, wrap it around the wing and fix it to the trailing edge. Use glue to attach it to the trailing edge on the ribs; cut to size and add tape to join the upper and lower skin together. This will ensure a sharp trailing edge.
-
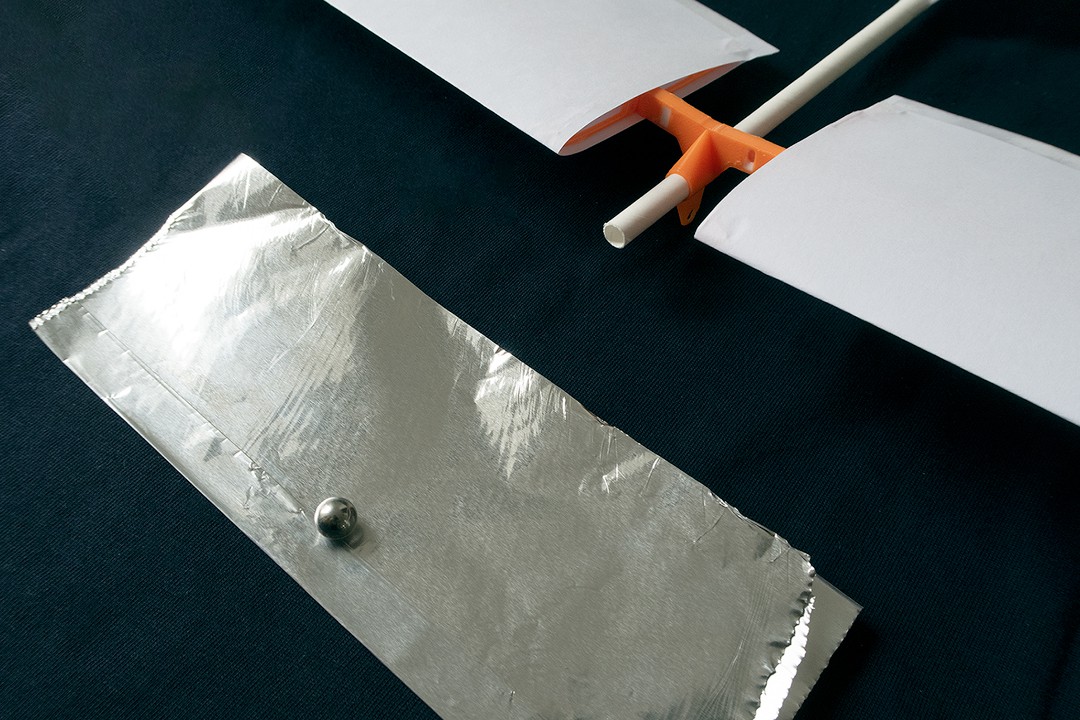
4Assembly - Nose and Tail
![]()
The glider will likely be tail heavy, so you’ll need to add a small weight in the front. I’ve used a steel ball from a ball bearing, but anything dense (like a bolt) would work too. Wrapping it into aluminum foil makes it easy to insert in the paper straw.
NB: that it might be wise to have the nose stick out with respect to the leading edge of the wings. This way when you crash the nose will absorb most of the force, preserving the wings. For the tail, feel free to experiment with various sizes and shapes. In my experience, a "V tail" is the simplest to make and attach to the tube. When sized correctly, it seems to work well.
-
5Ready to fly
Make it your own: The design is quite robust and forgiving, so it can handle more than a few crashes. This makes it well suited to experiment, so don't hesitate to tweak it and have fun with it!
Suggestions on stability: you'll need to balance the glider in the longitudinal direction. As a starting point, try to place the center of mass around the first third of the wing (from the leading edge). The glider will likely be tail heavy, so you can either increase the mass on the nose or slide the tube toward the front to shorten the tail section.
Customizable glider
A 3D printable glider design dynamically generated from aerodynamic parameters

Discussions
Become a Hackaday.io Member
Create an account to leave a comment. Already have an account? Log In.