Russell Munro
-
First Member Build!
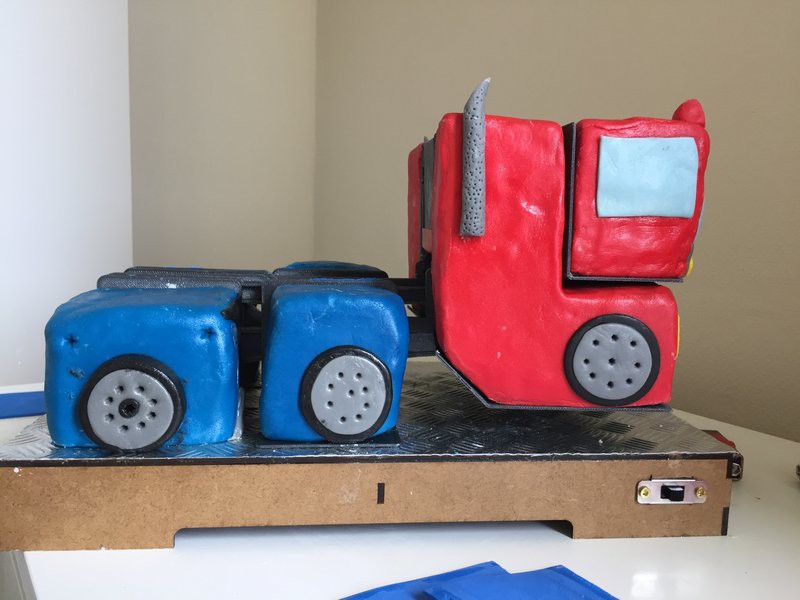
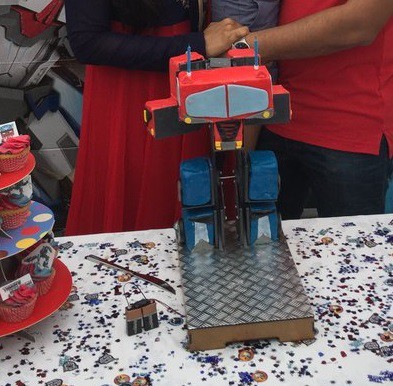
06/25/2017 at 05:36 • 0 commentsI'm thrilled to announce that project member Anna from Scotland is the first to tackle this project. It was a struggle at times for Anna and her husband but they persevered and create a fabulous cake for their friends son.
Anna has provided heaps of feedback which I have used to improve the project information for all to come.
![]()
![]()
![]()
-
Bring the Base
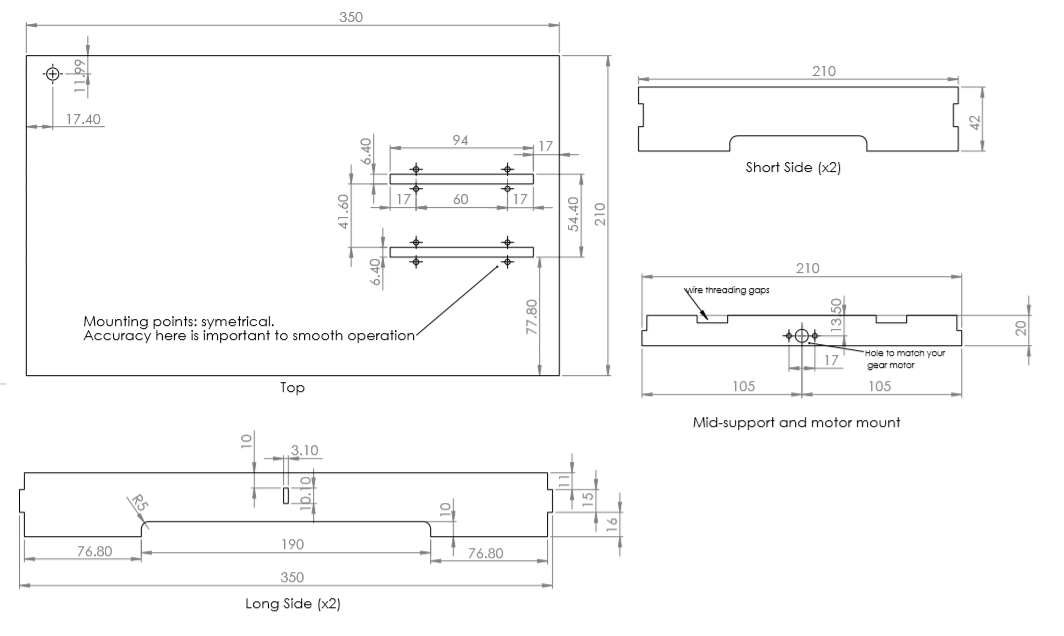
06/08/2017 at 14:00 • 0 commentsI have uploaded 2 files for the base: a dxg file for lasercutting and a drawing with dimensions, if you are feeling brave and want to make the base yourself.
![]()
-
Exploded
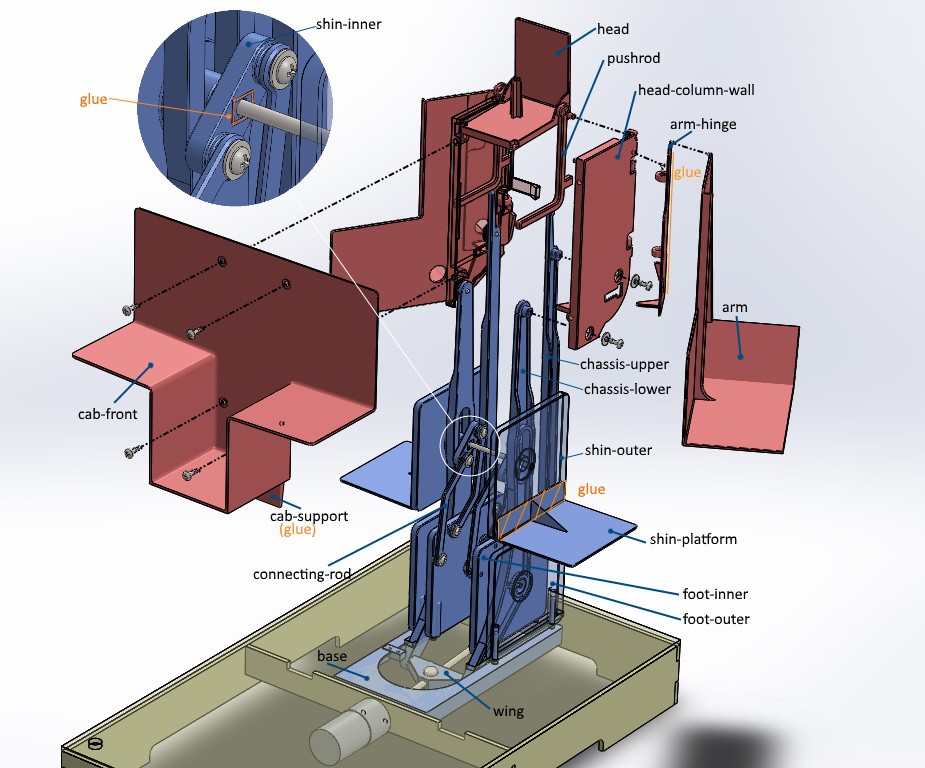
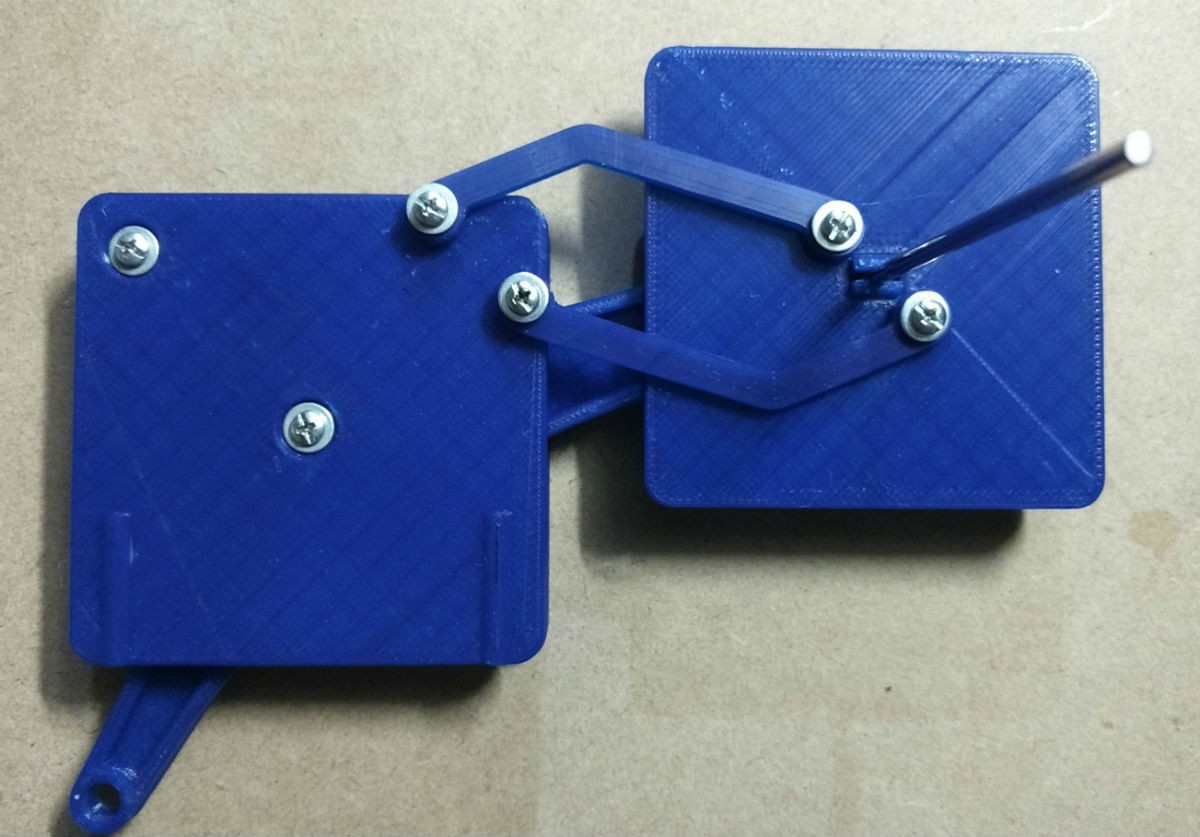
04/30/2017 at 03:24 • 0 commentsHere is a exploded view for the full sized STL parts. The names are those of the fill sized STL files. I have indicated where parts need to be glued together.
![]()
-
Progress Video
03/28/2017 at 13:53 • 0 comments -
Taking shape
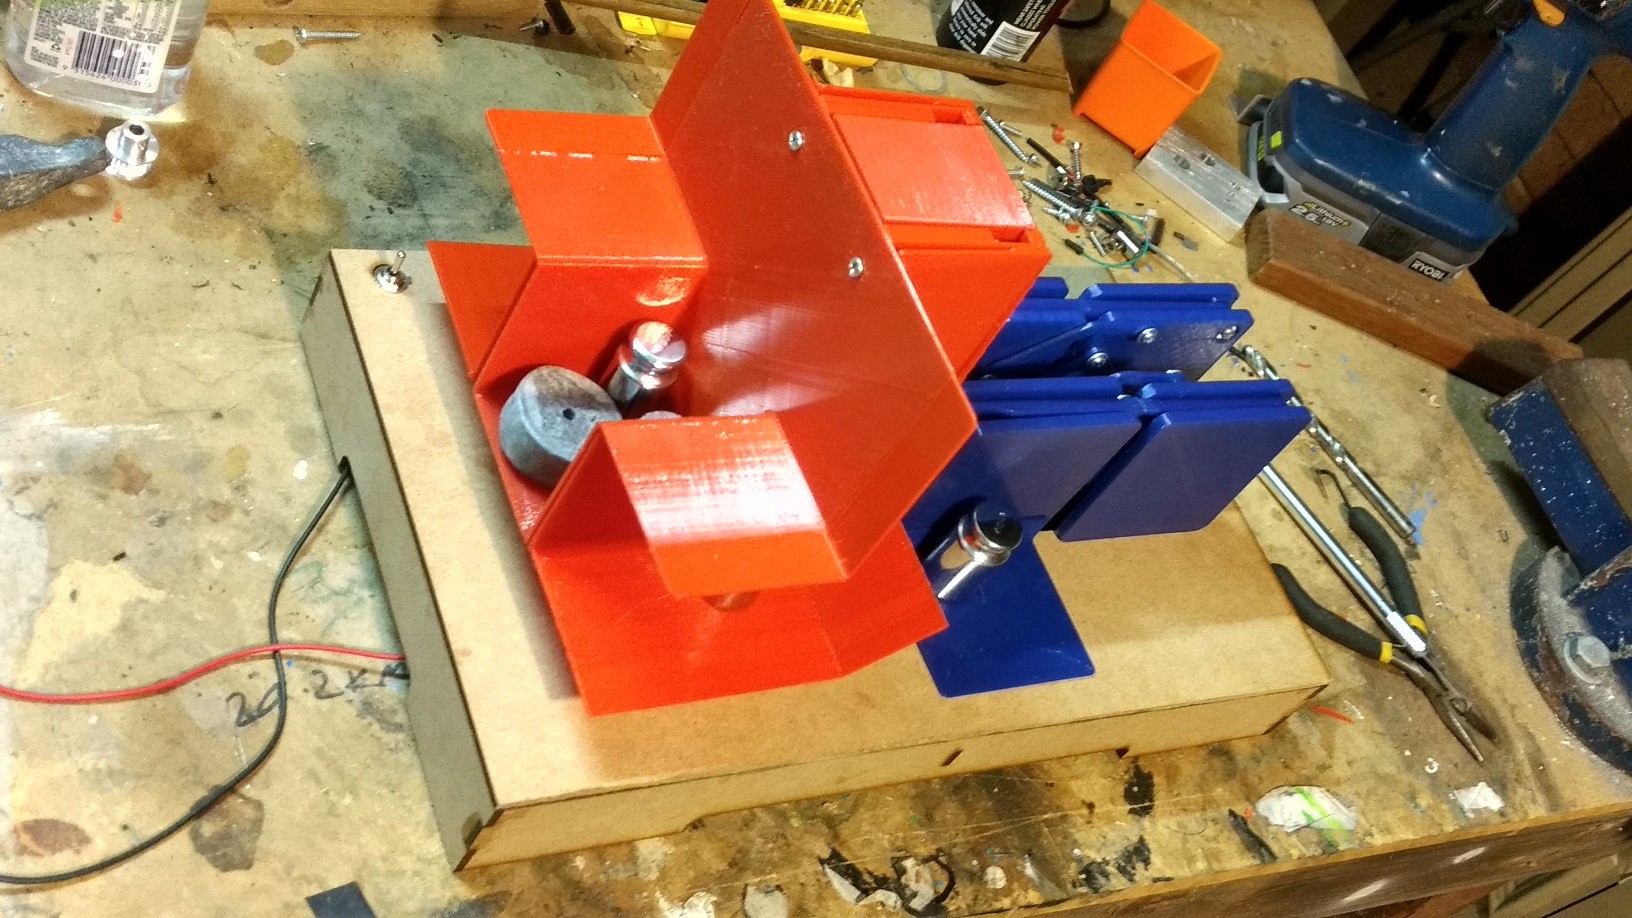
03/25/2017 at 13:58 • 0 commentsThe first run of the printing is done and I'm really happy with the proportions and the standing motions some of parts aren't playing as well together.
In my experience with 3D modelling and printing this is to be expected. 3D modeling is great for designing the parts but as for interactions, how parts move with each other, there is little substitute for the real thing. So I have a few refinements to make, mostly on how the arms open and shut and how the head is raised and lowered.
In the picture you can see the little lead and steel weights I am using as stand-ins for the cake to make sure the motor and batteries are up the the task.
Also pictured is the switch (top-left corner) that I am using to activate the open and down motion for testing. Currently it is a simple switch, no Arduino yet. I am using 6AA batteries for about 8v of power and so far this seems to be enough juice to lift the frame with 900 grams of weight in 6 seconds.
As soon as I am happy I will post a video and the STLs soon after.
![]()
-
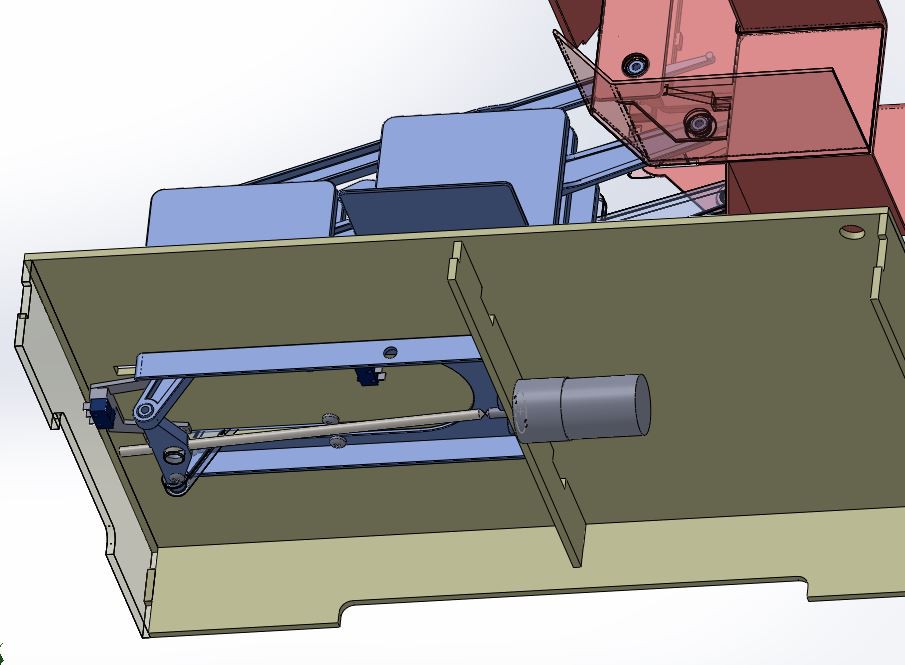
Printing and planning
02/14/2017 at 14:59 • 0 commentsI have started 3D printing and so far, so good. There are are many pieces to print so whilst that is happening I have started on the actuation design. Using a gearmotor, leadscrew (m4 thread rod) and micro switched for end-stops.
![]()
![]()
-
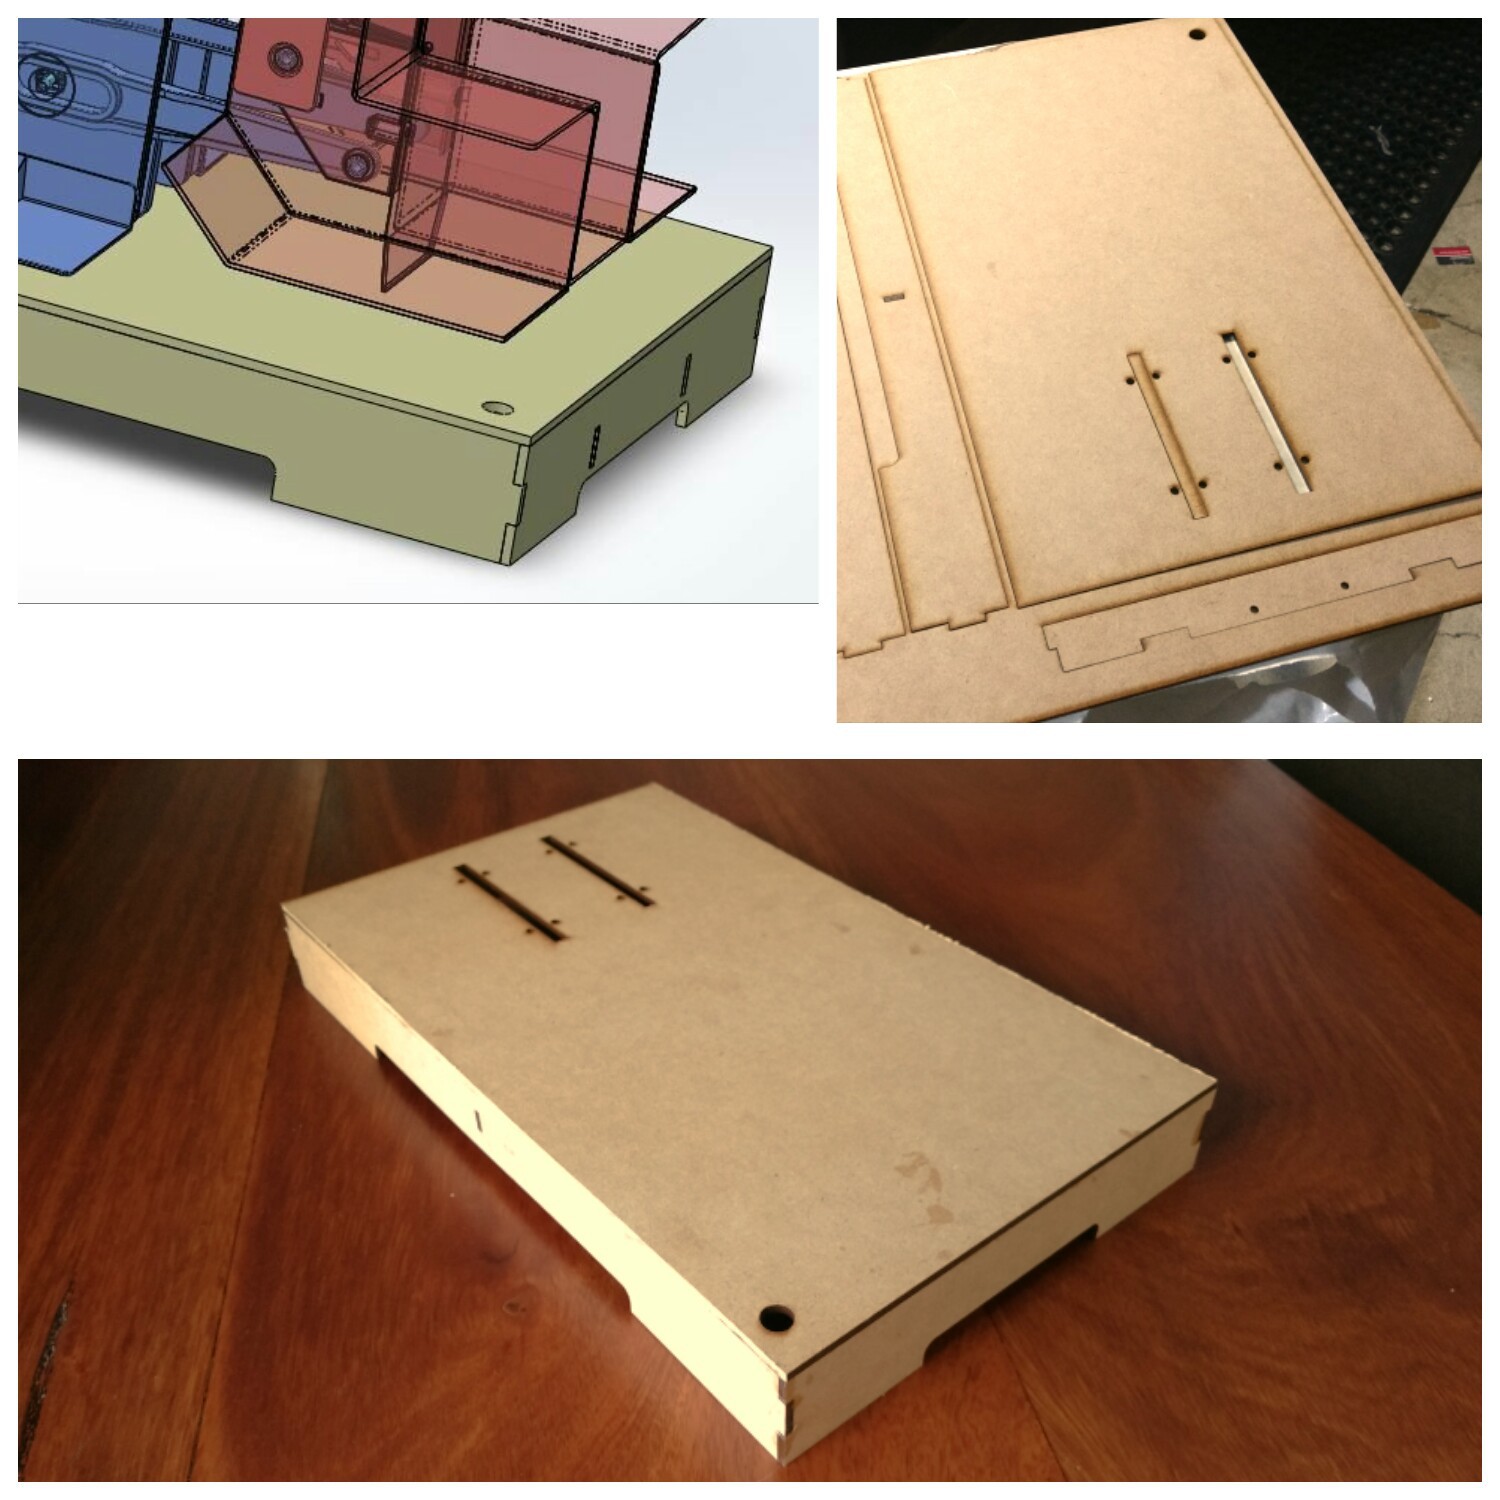
Lasercutting!
02/09/2017 at 00:05 • 0 commentsThis week I received my Laser cut base from Ponoko. I think Ponoko will be my go-to online shop for Laser cut from now on. I was really chuffed with their service: functional and easy to use web site app, automated price quotes and fast turn around time. Plus $20 off my first order.. niiice.
The only trade off for this efficiency is that they use set sheet/template sizes so I had to shrink the bases design a little too get it to fit in the most affordable template.
A little bit of masking tape and wood glue and the base is now complete.
![]()
-
Printing... almost
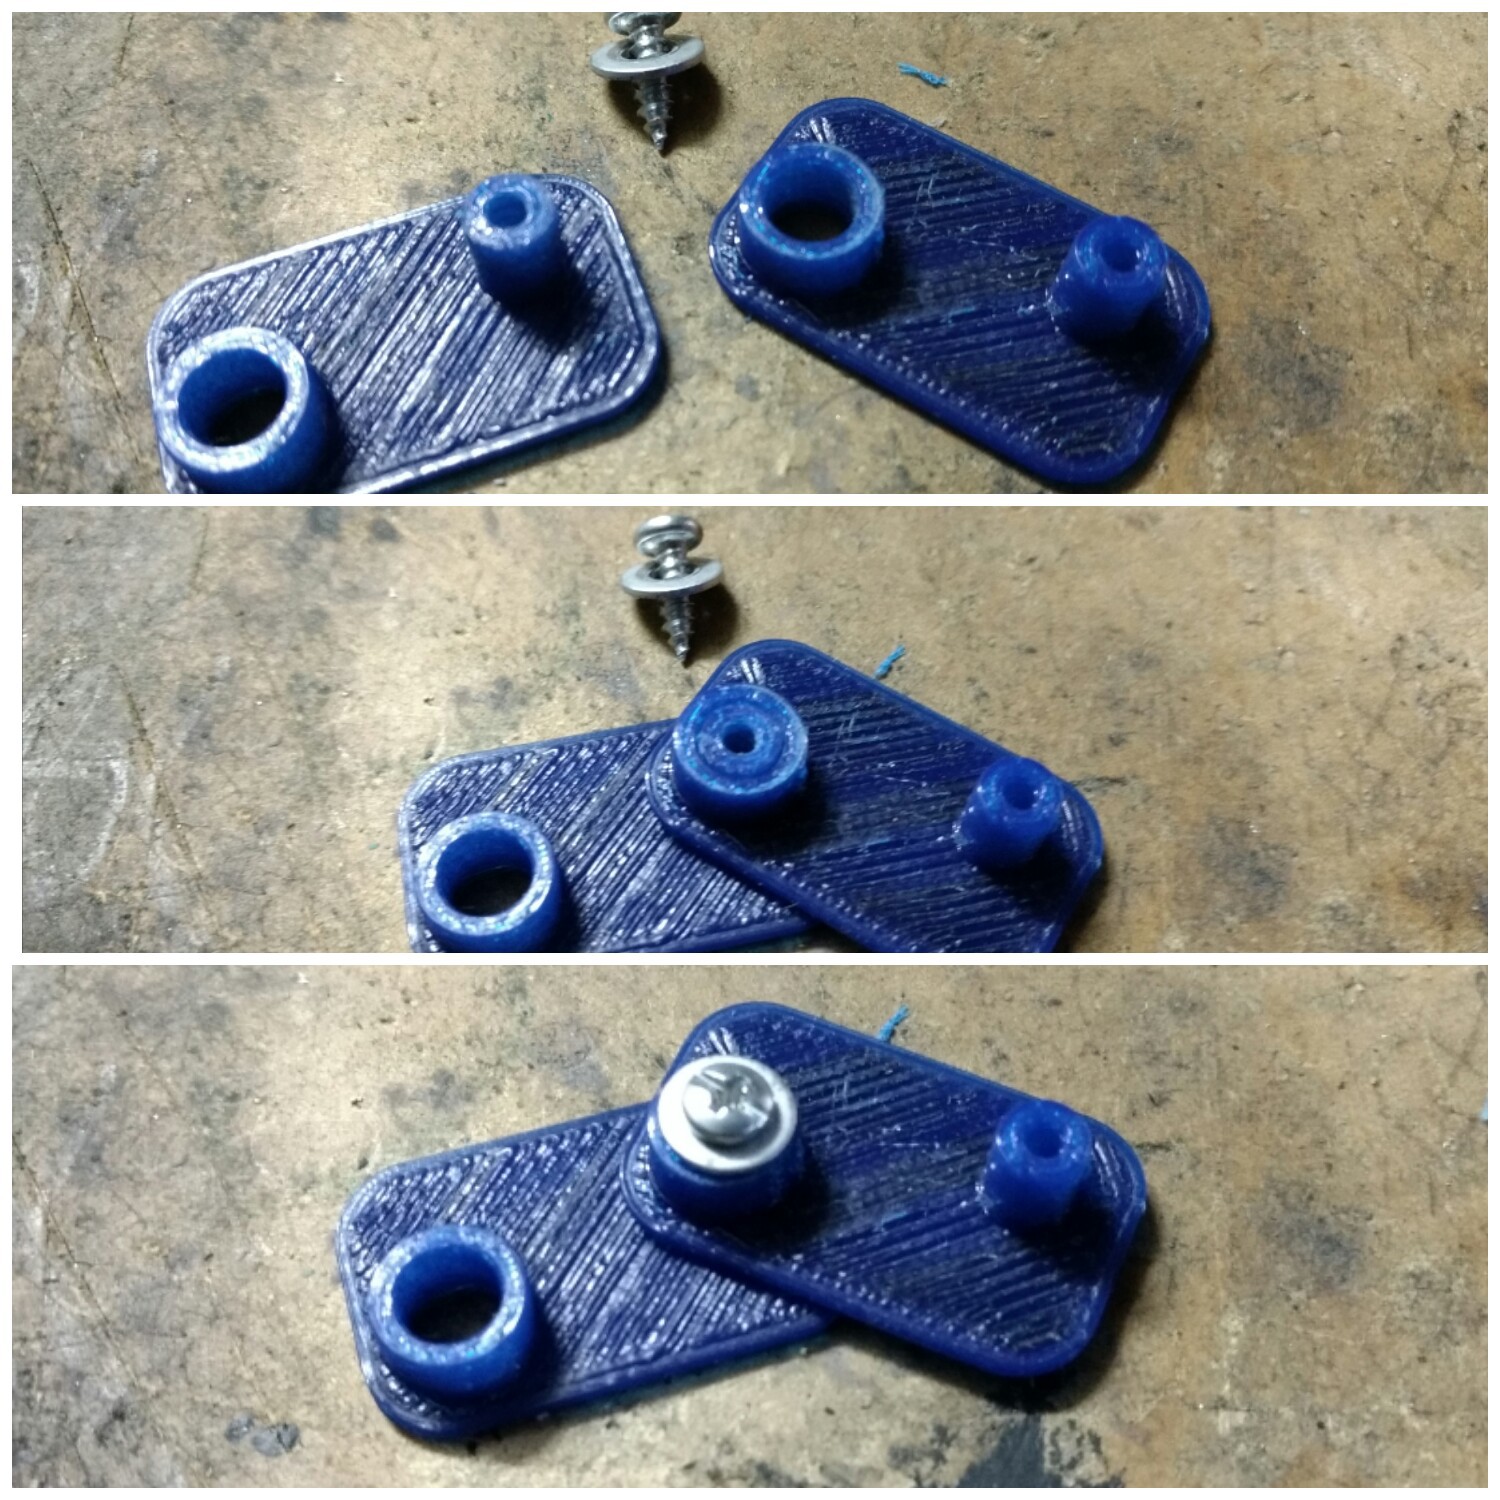
01/26/2017 at 23:59 • 0 commentsTwo rolls of lovely blue and red ESun PLA filament arrived yesterday from hobbyking.com
I'm excited to get started printing but to avoid wasting time or filament I started with a test print (see montage pic), because there are moving parts it's important to get the fit right.
I'm printing on a lulzbot mini using default medium speed settings profile. I'm aware not all 3D printers are as good as the Mini so I am making the gaps between pin and barrel wider than I normal do. Additionally all the holes sizes are common metric drill bit sides (namely 2.5, 6 and 10mm) so if your printer gets over excited you can just drill the hole to clean them up.
In the original cake I used M3 bolts which are more at home in metal than plastic. This time I am using common hardware wood screws. Only two types: 25mm to securely join the feet to the base and 9mm everywhere else.
The tests print gave me the feedback I need so I can now start printing and begin the print-fail-feedback-repeat cycle until I am happy with the 3D models, then I will publish the stl's here on hackaday.
![]()
![]()
Transforming Birthday Cake
Birthday cake on a moving platform that sounds and transforms like Optimus Prime.