Matt Barr
-
2017 Project Footage
12/04/2022 at 04:13 • 0 comments -
2017 Test Flight Video Footage
12/02/2022 at 23:57 • 0 comments -
Data Updates & Canopy Details
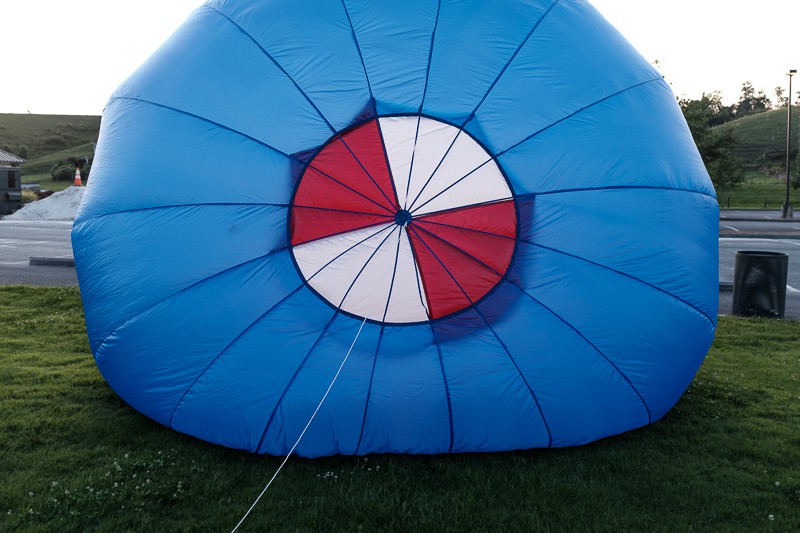
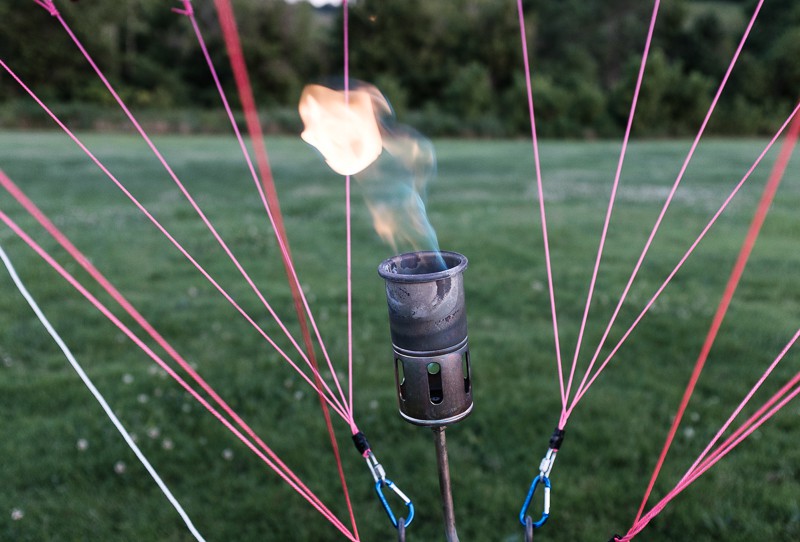
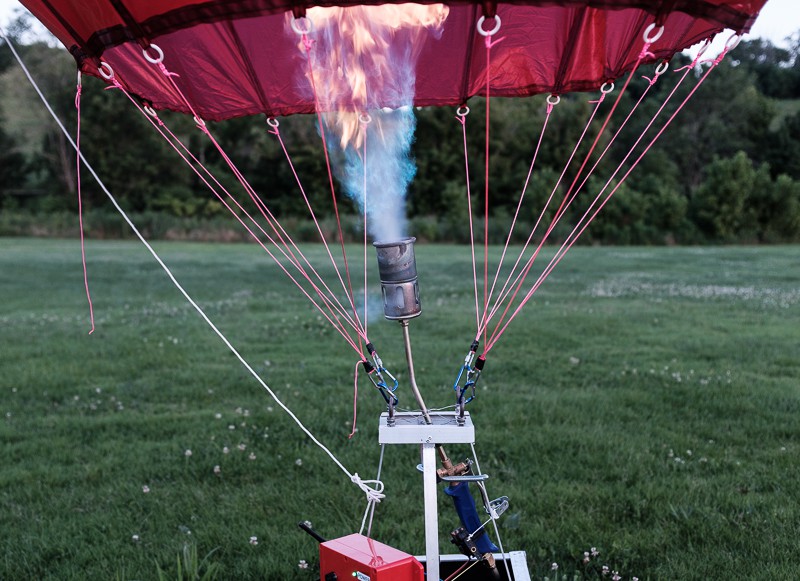
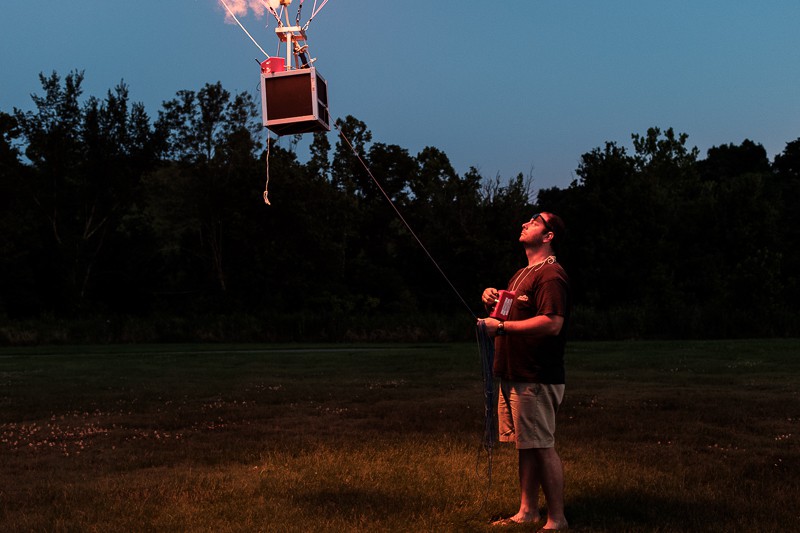
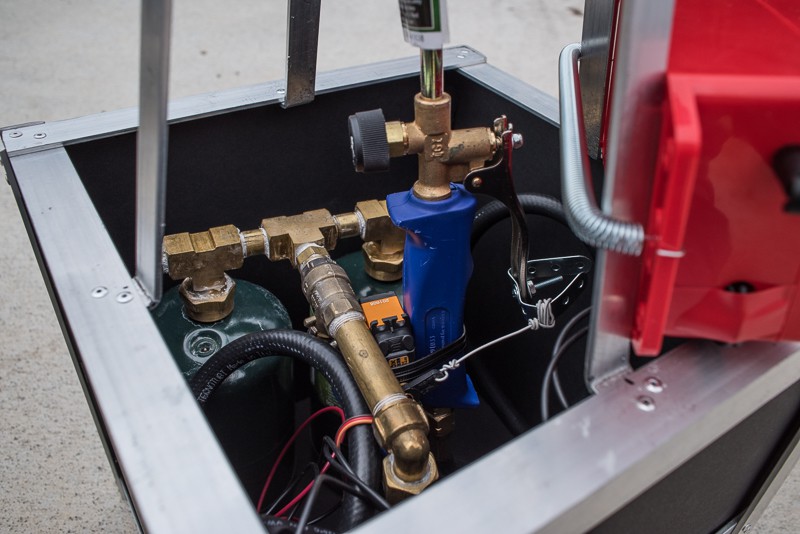
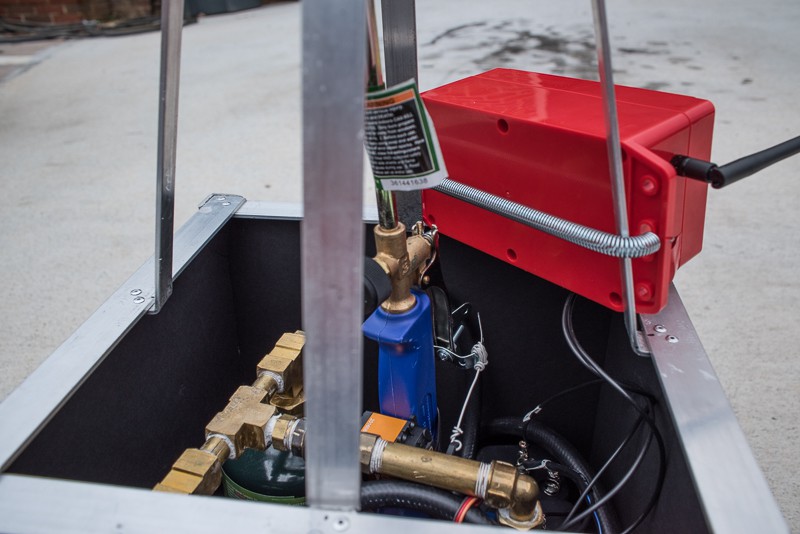
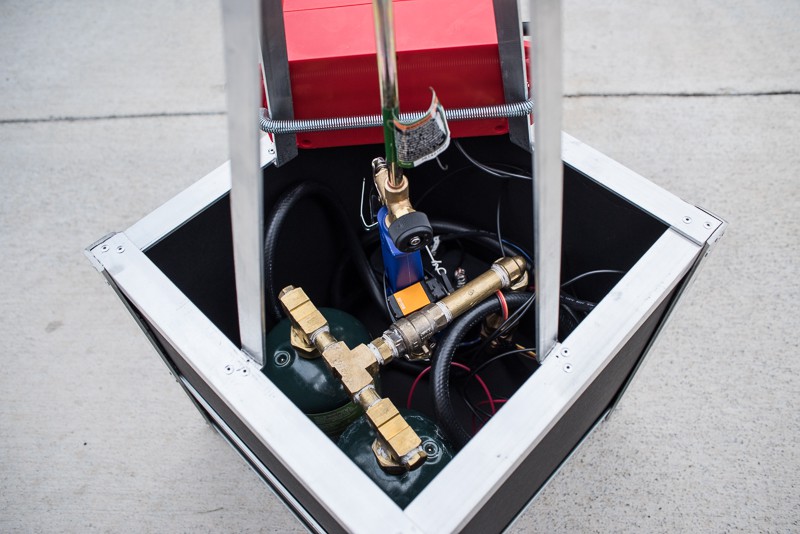
07/11/2017 at 02:58 • 0 commentsI’d like to post some updates since the last flight. We added a failsafe/interlock to kill the gas in the event of connectivity issues, and made some fuel adjustments. Also, we have had quite a few questions from the Hackaday.io community about the canopy that I’d like to answer. For fuel, we have determined that we can get a lot more thrust by flipping the propane tanks upside down. The liquid propane on the bottom of the tanks generate much more power than the vapor you’d normally get by having them right side up. Using liquid, the burner is much more dynamic and the balloon does not need as much gas to fly, thus being more efficient. It does seem to be more prone to having the flame go out this way, so we intend to add a pilot light soon. It also makes the tanks very cold, as you can see in the last picture below. I also had a chance to take some pictures of the top of the balloon to show the vent to those who were interested. Our canopy has a vent on top like a regular balloon, but is not something we need to use in flight. It is mainly for making it easier to pack the balloon up. On a large-scale balloon, the tops can be popped to reduce altitude. Lastly, I had a chance to get a crude measurement of lifting capacity by measuring it with a crane scale. This and some other measurements can be found in the project details. The canopy width and height was a rough measurement with a tape measure after it was inflated and just before we got it upright.
![]()
![]()
![]()
![]()
![]()
![]()
![]()
![]()
![]()
-
RC System Build
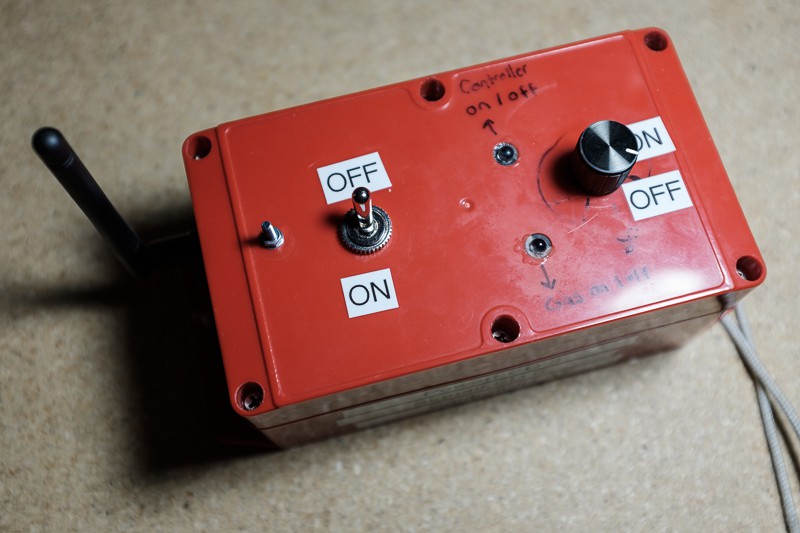
01/05/2017 at 14:46 • 0 commentsThe radio system is Arduino powered using the NRF24L01+ 2.4GHz radio modules. On the transmitter side, there is a master power switch, 10k pot, two led indicators, Ardunio, and 9V battery. Both switches provide a simple on/off function. The NRF24L01+ transmits the on/off state of the 10k pot. One led is a power indicator and the other is a gas on/off indicator. On the receiver side, there is a master power switch, Ardunio, two led indicators, and 9V battery. One led is a power indicator, and the other is a connectivity indication. There is an interlock/failsafe function in the receiver code that will turn the gas off should connection be lost. Two 9V lantern batteries, wired in series, provide power to the servo. There is a L7805CV 5V voltage regulator attached to the servo power line to reduce voltage to the servo. The Savox SA-1230SG servo is rated at 416 oz/in torque@4.8V. It can tolerate up to 6V. Any less than 390 oz/in is not enough torque to pull the handle. Having a little more than this, and providing a little less power than the maximum the servo can handle is a good compromise between having enough power without burning out the servo. Everything fits nicely inside some SparkFun project boxes.
![]()
![]()
![]()
-
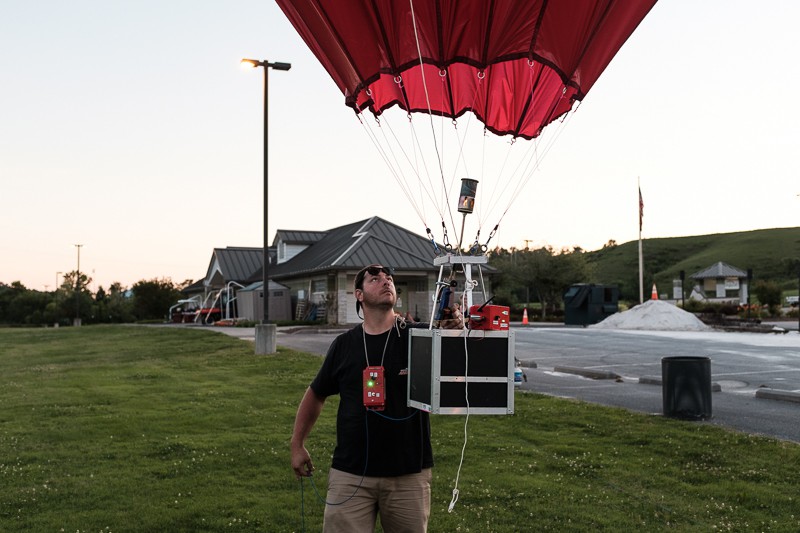
Basket Build
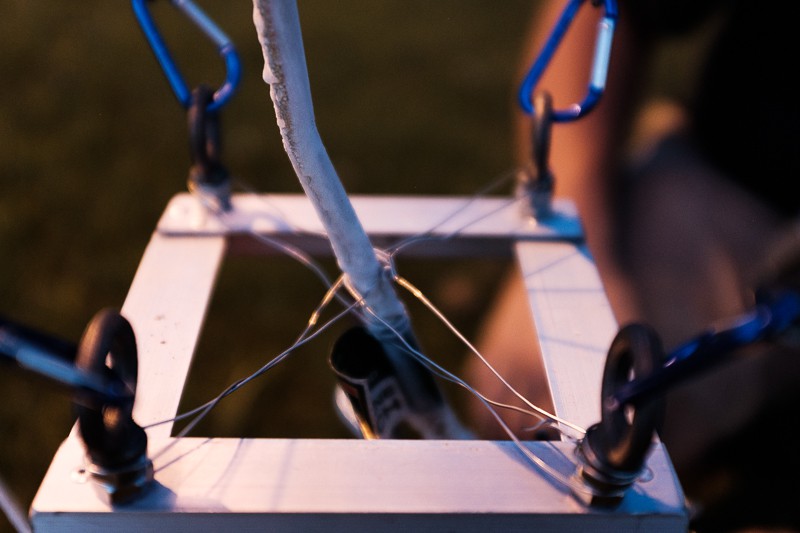
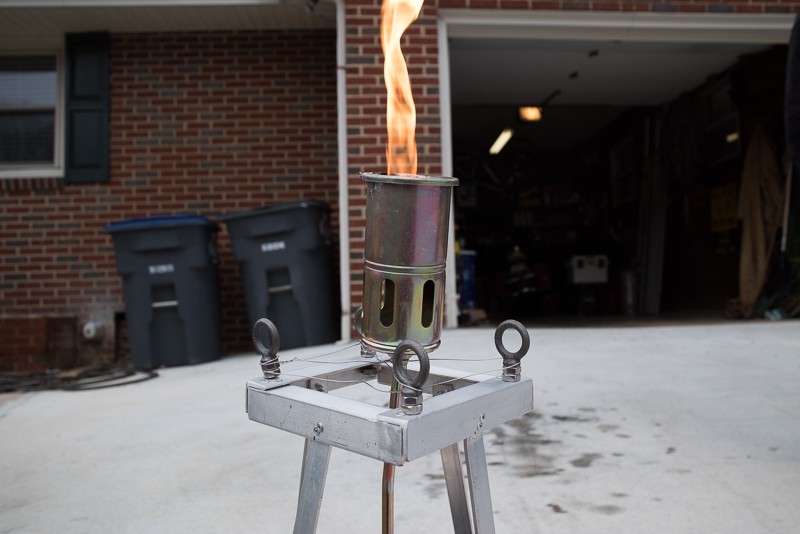
01/05/2017 at 13:16 • 0 commentsThe basket frame is built from lightweight aluminum angle, riveted in place. The sides of the basket are fitted with black foamcore panels trimmed to size. One sheet of foamcore from Hobby Lobby was enough to cut all the panels. The main burner is a simple propane weed burner from Harbor Freight. It is held in the basket with 20ga wire, and actuated with a high end (>400 oz/in) Savox servo. The servo attaches to the handle with some heavy gauge wire and a zip tie. Gas is provided by dual Coleman camping fuel tanks with a custom fitting to reduce a standard propane grill tank fitting to one that will fit the Coleman tanks. The burner comes with a pretty long hose with fitting attached, so it’s not too hard to connect.
![]()
![]()
![]()
![]()
-
Up and Running...
11/30/2016 at 19:12 • 0 commentsI started building the remote system with a Picaxe micro-controller. My programming board went out, so I switched over to Audrinos because they are more durable and easier to work with. The nRF24L01+ Wireless Modules are amazing, I highly recommend them. At this point the remote system is complete and working properly. We will now attempt to field test them, then move on to the balloon itself if everything checks out.