 Alexander Williams
I've made a production order for v.2 PCBs. They'll be available for purchase on Tindie as soon as I receive them.
The thermal tests are mostly complete. Essentially I wanted to confirm if the 3mm PCB traces can handle a 50W hotend heater: they can with no temperature increase @ 2A/24V.
Based on some calculations, with a conservative 5deg C temperature rise, one trace should handle at most 3.9A but since I doubled the traces on both sides of the PCB, it could handle possibly 7.8A, however that's extremely theoretical and I would caution against more than 5A. I haven't tested with that much current so it's at your own risk.
Moreover, it's probably a good idea to fuse the cables to be extra safe.
Here's a view of the final front and back of the PCB:
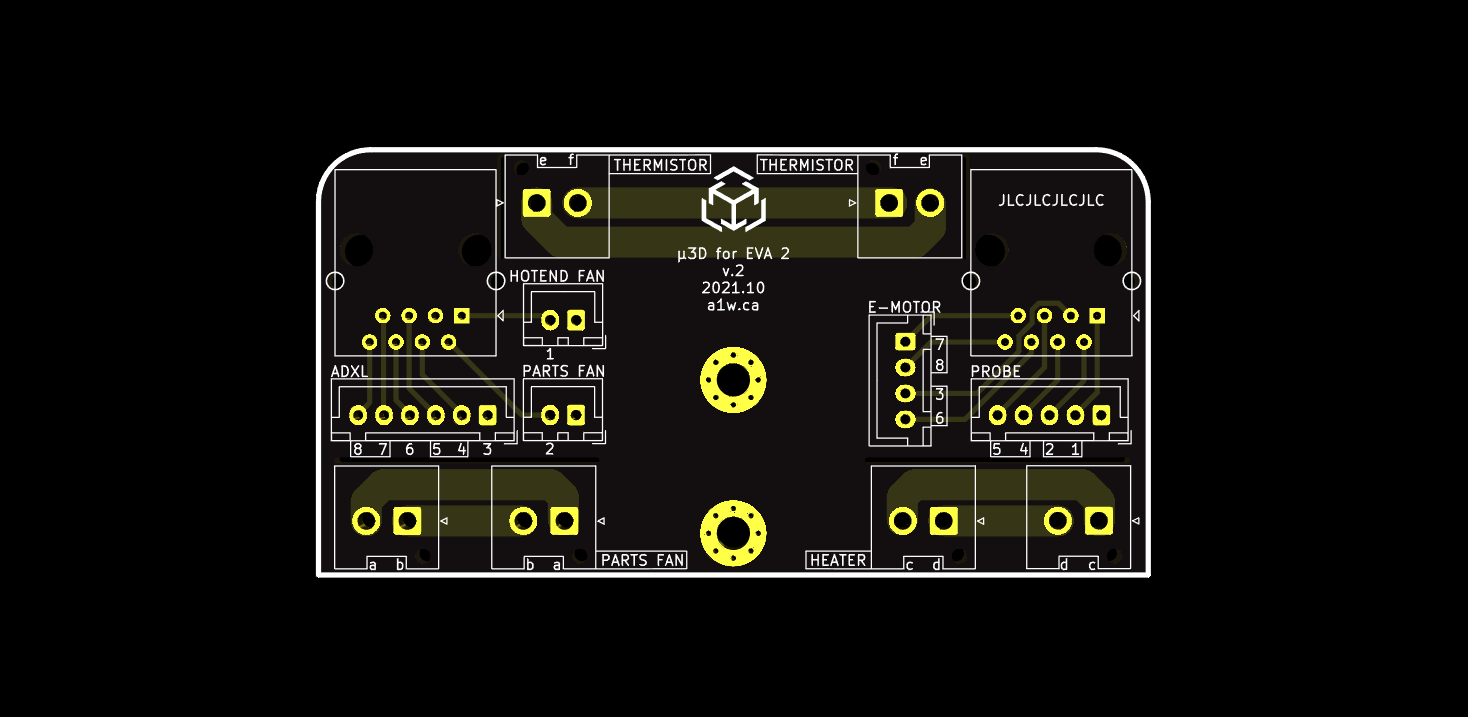
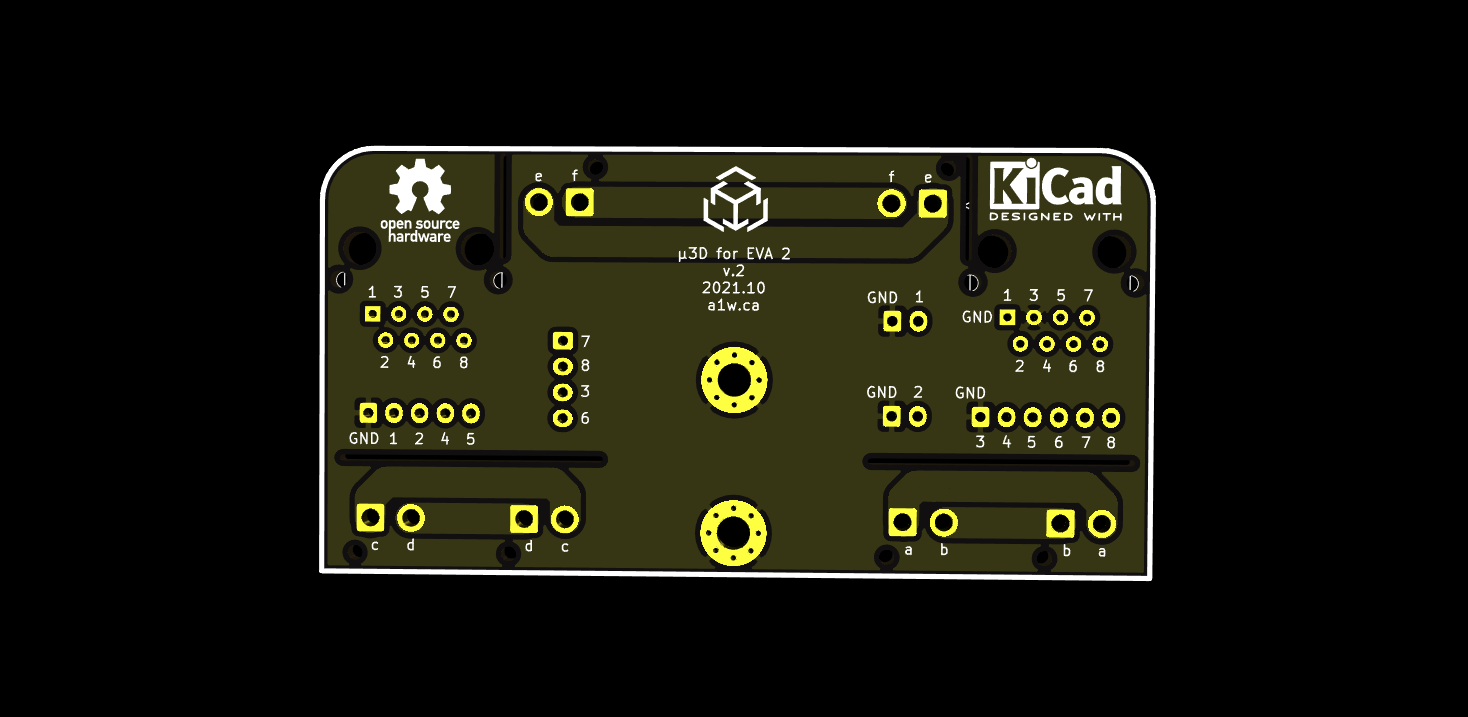
A few things to note:
- I labeled the high-current pins with letters instead of numbers, since they don't map to the RJ45 numbered pins. With this information, it should be quite obvious how to correctly crimp the JST-VH cable assemblies.
- I added some openings to separate the high-current connectors from the low-current connectors, as a way to isolate the signals and provide a way for heat to escape (probably overkill haha).
- On the front of the PCB, I labeled where I think the thermistor, parts fan, and heater should be wired, but those are completely optional.
- The JST-VH connectors do not share GND, which provides additional wiring and voltage flexibility (ex: a 5V parts fan can be used and powered by a totally separate 5V power supply).
- There are actually two (2) connectors labeled "PARTS FAN", that's to allow for either 1) wiring a 3-pin or 4-pin fan (ex: GND, PWR, PWM, SPEED) or 2) wiring a third non-PWM (2-pin) fan or other device. If a PWM fan is used, I recommend wiring GND and PWR through the high-current connectors (even if it's a low-current fan), and using pin 2 on the JST-XH for the PWM signal (and not wiring the GND on the JST-XH connector).
Stay tuned for the next update within a week or two.
Discussions
Become a Hackaday.io Member
Create an account to leave a comment. Already have an account? Log In.