 Martino
-
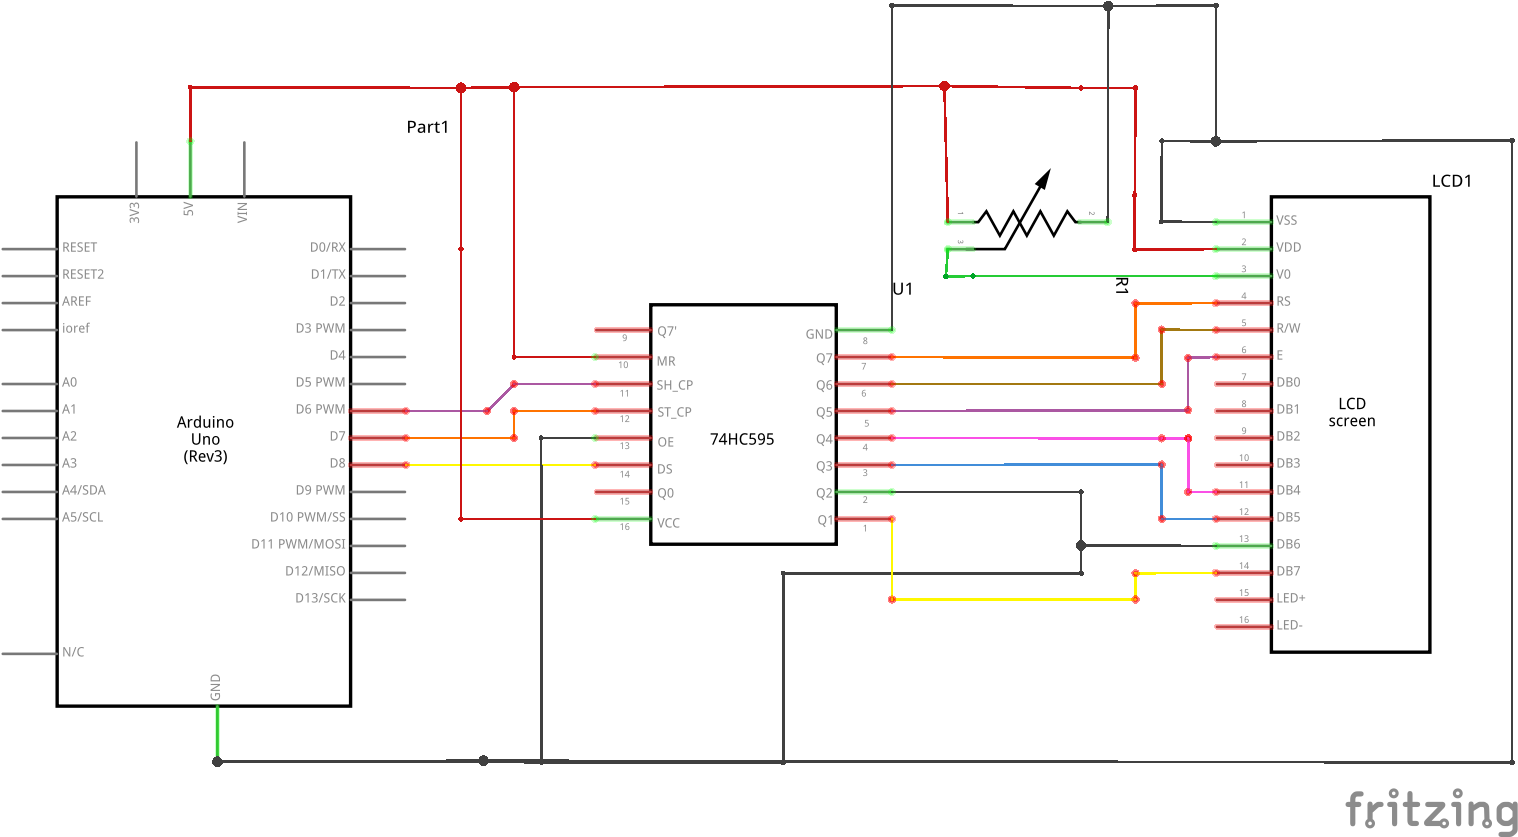
1Keep in mind the schematic
Following this diagram can seem very complex for a beginner, but you need only to pay attention to the pins and their position (if you prefer you can also download the file with the diagram).
![]()
-
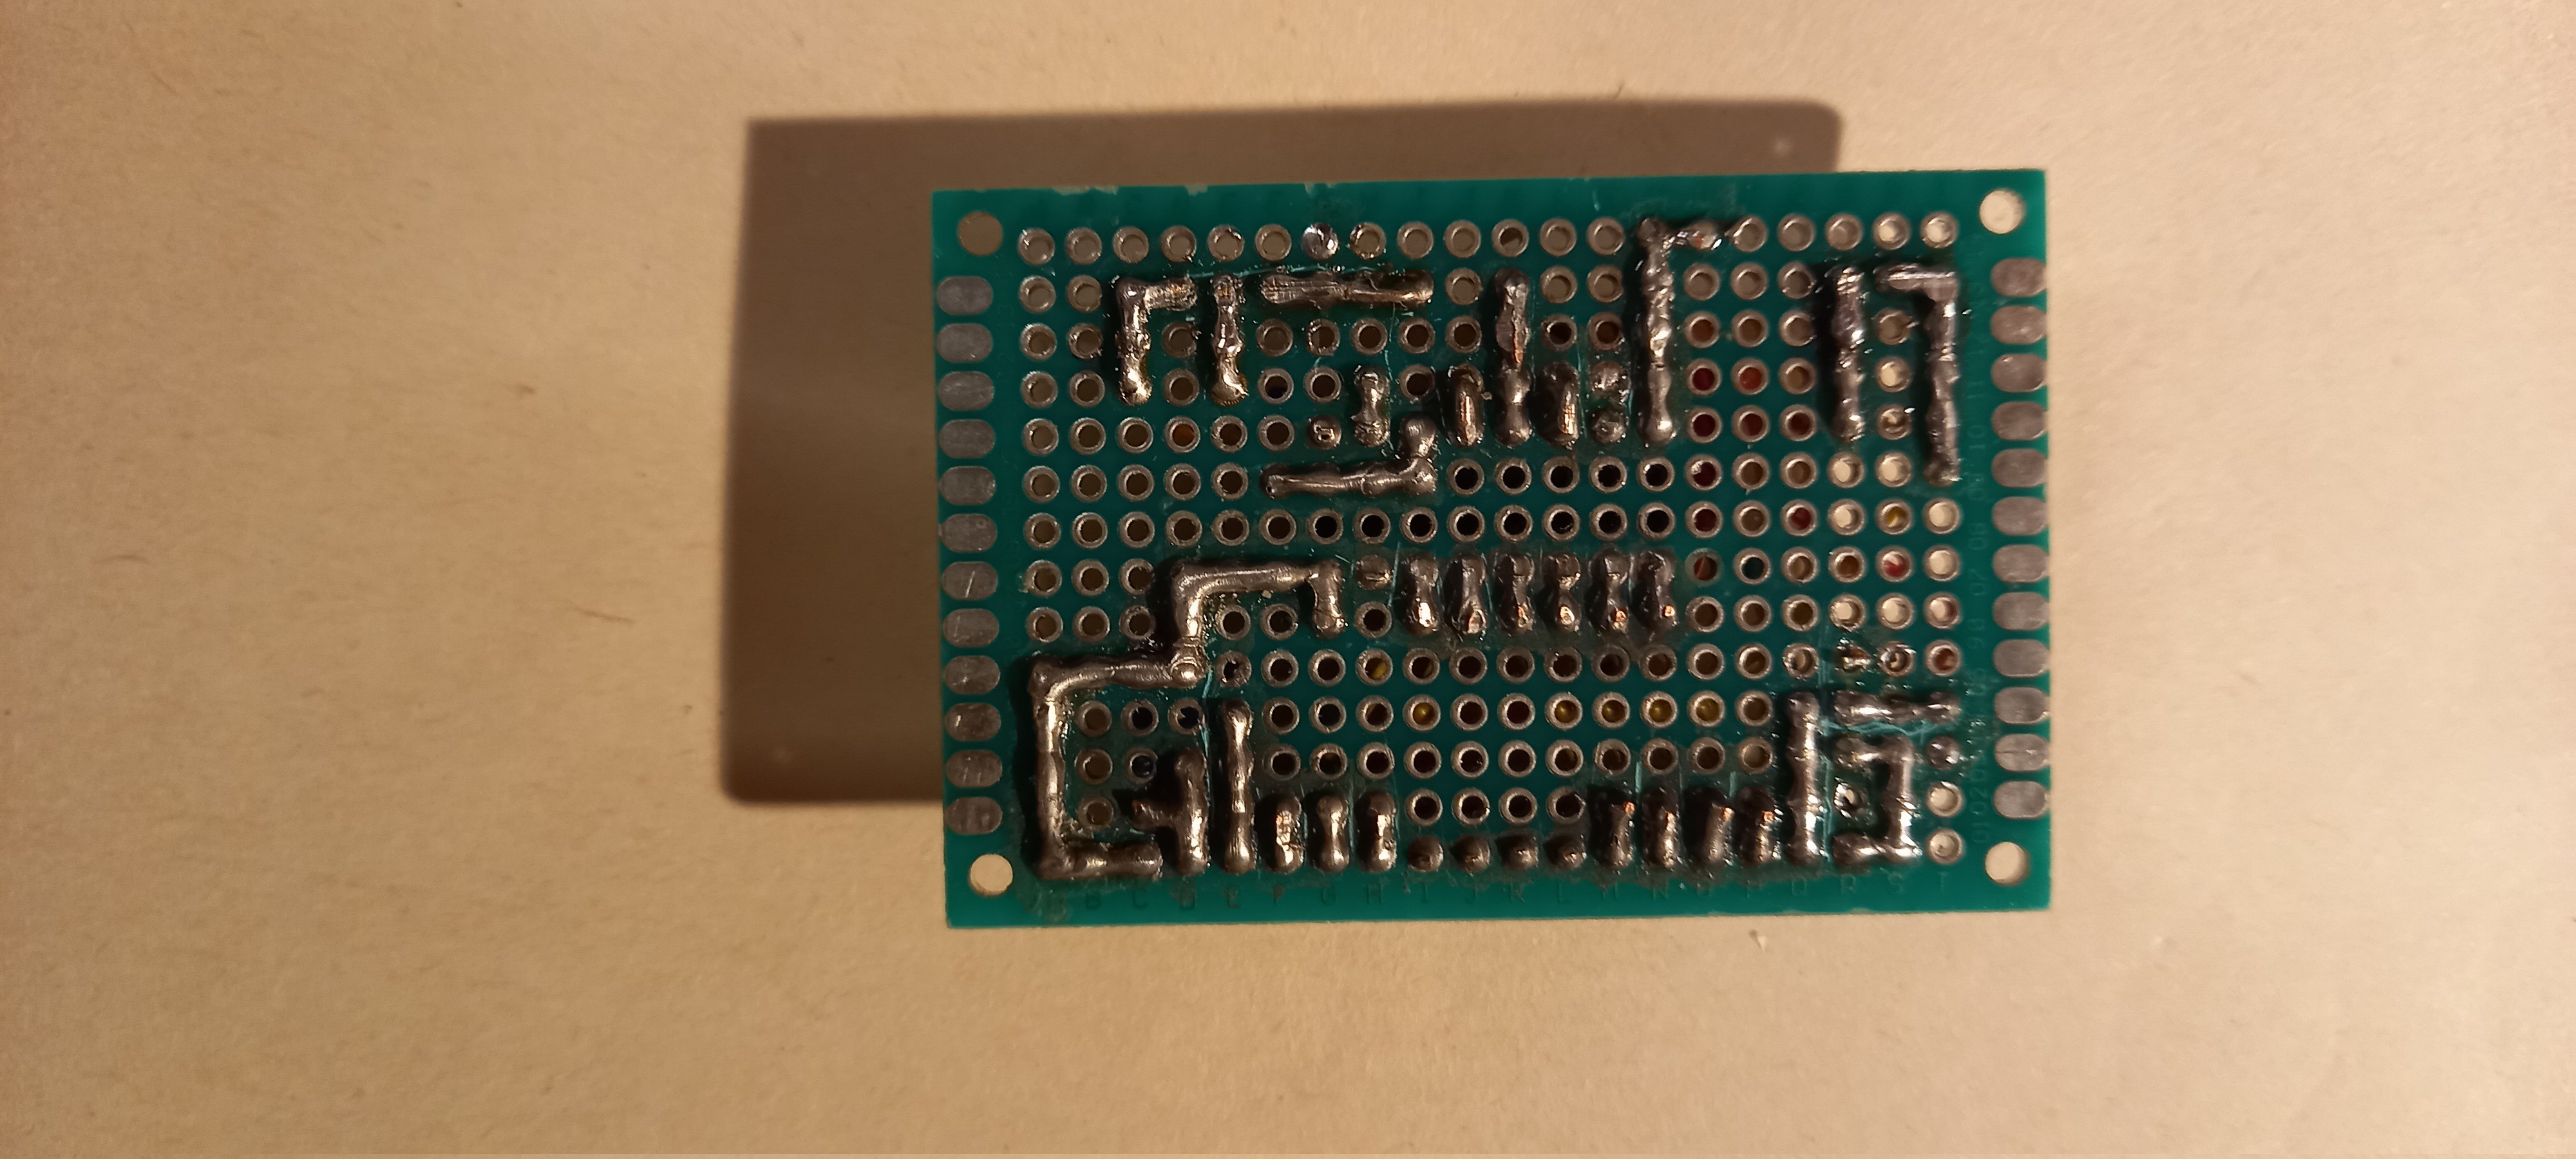
2Build up the tin maze!
Following the path described in the diagram connect the jumpers to pins using the soldering iron, if you are a beginner you can use also the breadboard.
At the end of this instruction you should have a structure very similar to a maze.
Like this...
![]()
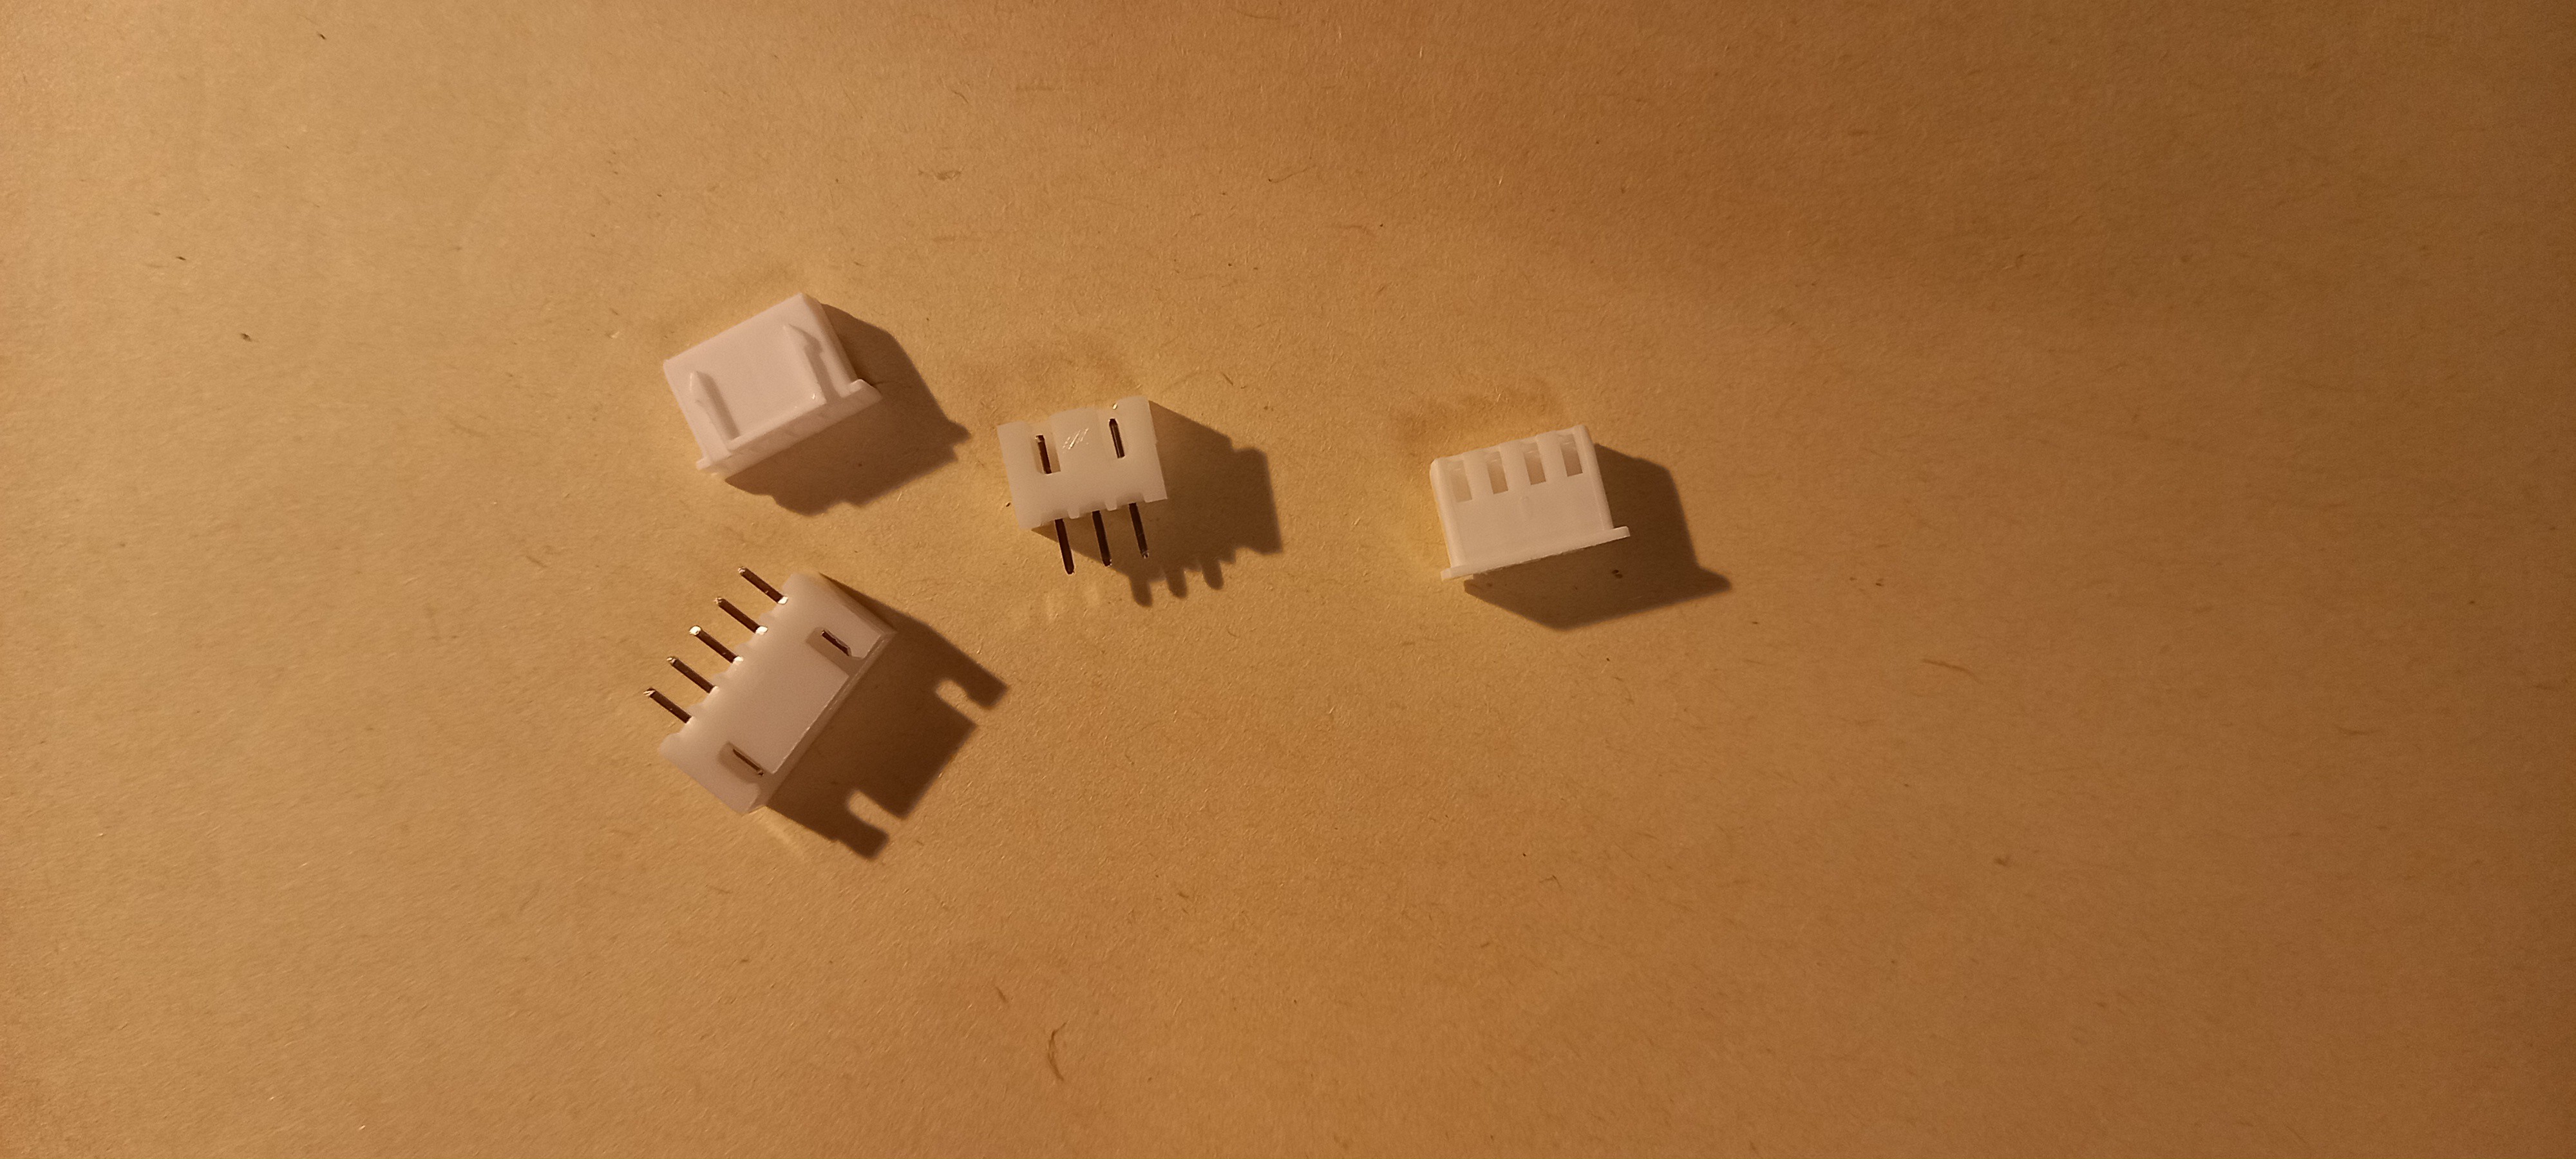
Remember if want to manage the output cables in a more ordinated way you can use also JTS connectors like these
![]()
connecting the jumpers to their pins.
-
3Test your prototype!
Now your prototype is ready to be tested, so connect it to your microcontroller and run this script always paying attention to the connections
#include <LiquidCrystal_74HC595.h>

#define DS 8
#define SHCP 6
#define STCP 7
#define RS 7
#define E 5
#define D4 4
#define D5 3
#define D6 2
#define D7 1

LiquidCrystal_74HC595 lcd(DS, SHCP, STCP, RS, E, D4, D5, D6, D7); //Pins association

void setup() {
  lcd.begin(8,2);//Defining columns and rows

}

void loop(){
  lcd.print("Hello World!");//Printing the message
}
If the code is not very clear here I'll include the file in the files section.
The current code is written in C++.
-
4Enjoy and create!
Finally, you should be able to print messages on the LCD
using your own shield, I hope that all the instructions were clear, this is my first article on hackaday.
I really that this article will help someone.
Goodbye makers!
INVIDUINO
A rudimental graphic card for LCCDs, using 74HC595 shift register
Discussions
Become a Hackaday.io Member
Create an account to leave a comment. Already have an account? Log In.