 Charitha Jayaweera
-
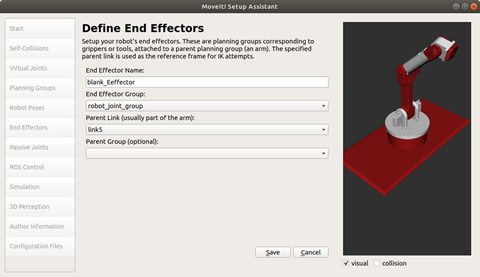
11Defining End effector
Next move onto adding an end effector. Select the parent link of the end effector (for this, it would be the link 5), designate a name for the end effector, and set save.
![]()
-
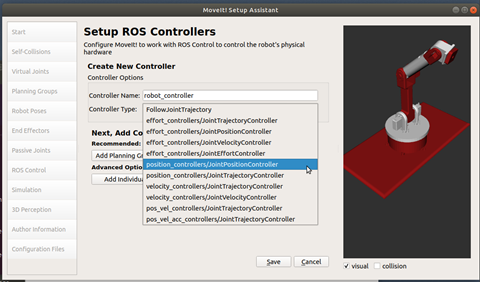
12Passive joints
Next the passive joints, which are the unactuated joints, which is not applicable here. The ROS topic will not publish the joint state for these particular joints. And then we move onto ROS control section. This is where we specify what kind of controlling, we want for the arm, position control, velocity control, torque control etc. This really goes down to the preference and application of the robot, but for a normal robot hand like this, which is generally used for pick and place actions, the position control would be the more suitable one. Therefore, in the ROS control section, add a controller, give a name to the controller (remember the naming convention) and select the controller type you want, in this case, position_controllers/JointPositionControllers, and click on save.
![]()
-
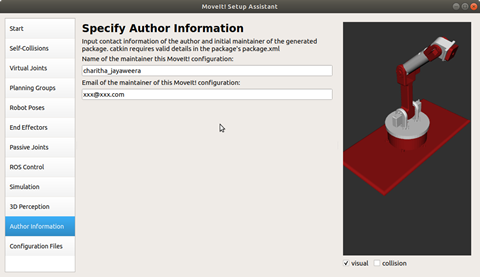
13Setting the Author Info and saving the configuration file
Set the name of the person/company maintaining this, and the email.
![]()
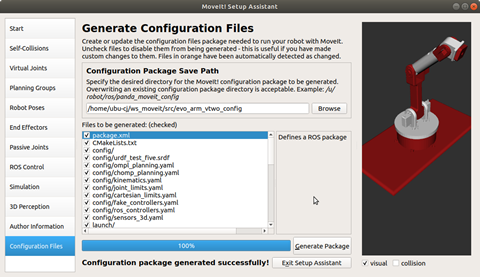
Finally, saving the configuration file, all that remains is to set the path, a name for the configuration folder (remember the naming convention) and save. Save the configuration in the src folder of the catkin workspace (MoveIt! workspace). And generate the package.
![]()
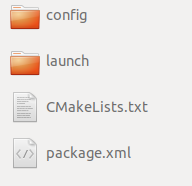
Close the setup assistant, and go and check if all the folders are present. It should have this folder structure.
![]()
-
14Simulate in Rviz
Now that we are done with generating the config files, all that remains is to simulate it in Rviz. The generation process automatically generates a demo launch environment with nothing but your model. Loading that, we can test out the robot arm in an empty environment.
We have to open a terminal in the catkin workspace, build and source the config files. Run the following commands in a new terminal.
cd ~/ws_moveit
catkin build
source devel/setup.bash
Open the simulation, run the following command
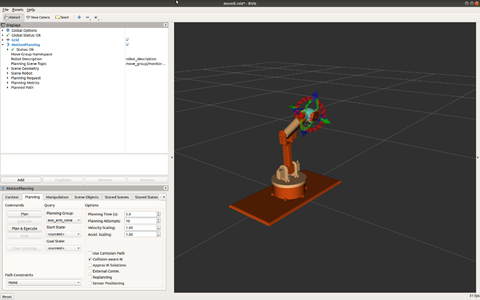
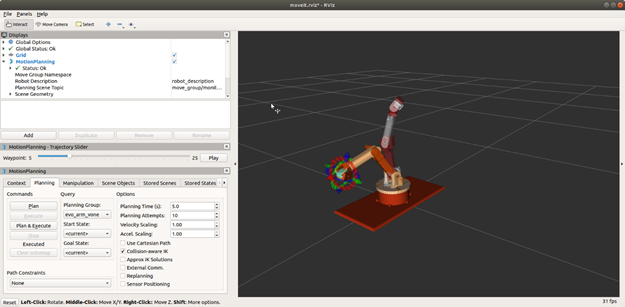
roslaunch evo_arm_vtwo_config demo.launchThis launches the Rviz simulation environment.
![]()
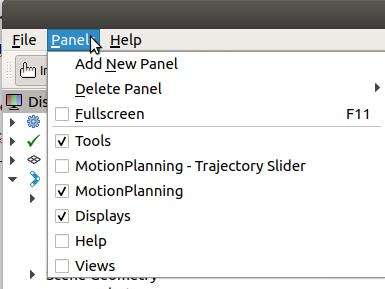
Using the arrows and dragging them, you can re orient the robot. If you do not have the Motion planning options, go to the panels menu in the menu bar and tick the following
![]()
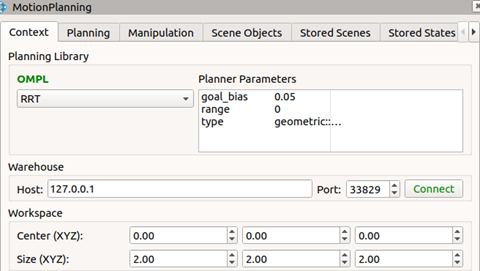
To see how the robot move, move the robot with the triad shown in the end effector. You can see some links becoming red, indicating collisions. After moving, click on the Context tab of the MotionPlanning panel and set the Planning library as follows.
![]()
Then move onto the Planning tab and run plan & execute. You will see the trace of the robot arm and algorithm finding a path to move your robot from the initial position to the position you set. You can turn on the trajectory slider from the panels menu to pause the robot arm at any point in its trajectory too.
![]()
This is basically how you can port your solidworks design from Solidworks to ROS environment. You can also use gazebo to simulate this instead of Rviz or you can use both (especially if you have a perception method like a point cloud setup). This is a very basic tutorial. This can be a very powerful tool to use if you further explore its capabilities.
Simulate your CAD model of the Robot in ROS
This guides you through how you can simulate a CAD model with ROS

Discussions
Become a Hackaday.io Member
Create an account to leave a comment. Already have an account? Log In.