 Robert Gawron
This project involves an STM32 and an ESP8266 microcontroller, which communicate with each other via UART. Previously, I created a simulator for the STM32's firmware that allows me to run and test it on a PC. In this post, I will share my progress in simulating the ESP8266 firmware.
Below you can see an emulated ESP code that is just echoing what it received on UART and is blinking an LED (the yellow circle at the bottom of the display represents an LED connected to an ESP pin).
The Idea
I think the approach is always the same:
- Identify Code to Simulate: Check which parts of the code need to be simulated. Likely, this includes all project-specific code but excludes libraries that handle hardware communication.
- Write Mock Implementations: Take the code and ALL header files it includes (libraries too). Then, create .cpp files for .hpp files that were taken without their source code – these will be the mocks.
Why is it better to compile the code with .hpp files of the libraries we want to stub? They could just be copied and modified; maybe this would be easier?
Well, no. If the .hpp file is modified (for example, if a new version of the library is used), the simulation build will simply fail to compile (the implementation in .hpp and .cpp will not be aligned), and we will know that our simulation is not up to date.
However, this is problematic here because (which is not good) in many headers of Arduino libraries, the .hpp has methods with their bodies not in the .hpp or .cpp. For example, in HardwareSerial.h:
class HardwareSerial: public Stream
{
public:
    size_t getRxBufferSize()
    {
        return uart_get_rx_buffer_size(_uart);
    }
};
uart_get_rx_buffer_size() comes from uart.h, so now we need to stub not only HardwareSerial.h but also uart.h. If uart.h has method bodies in the .h file rather than in a .c file, this process repeats. In the end, there was too much work, and I just copied the headers and cleaned them a bit. It’s not perfect but good enough.
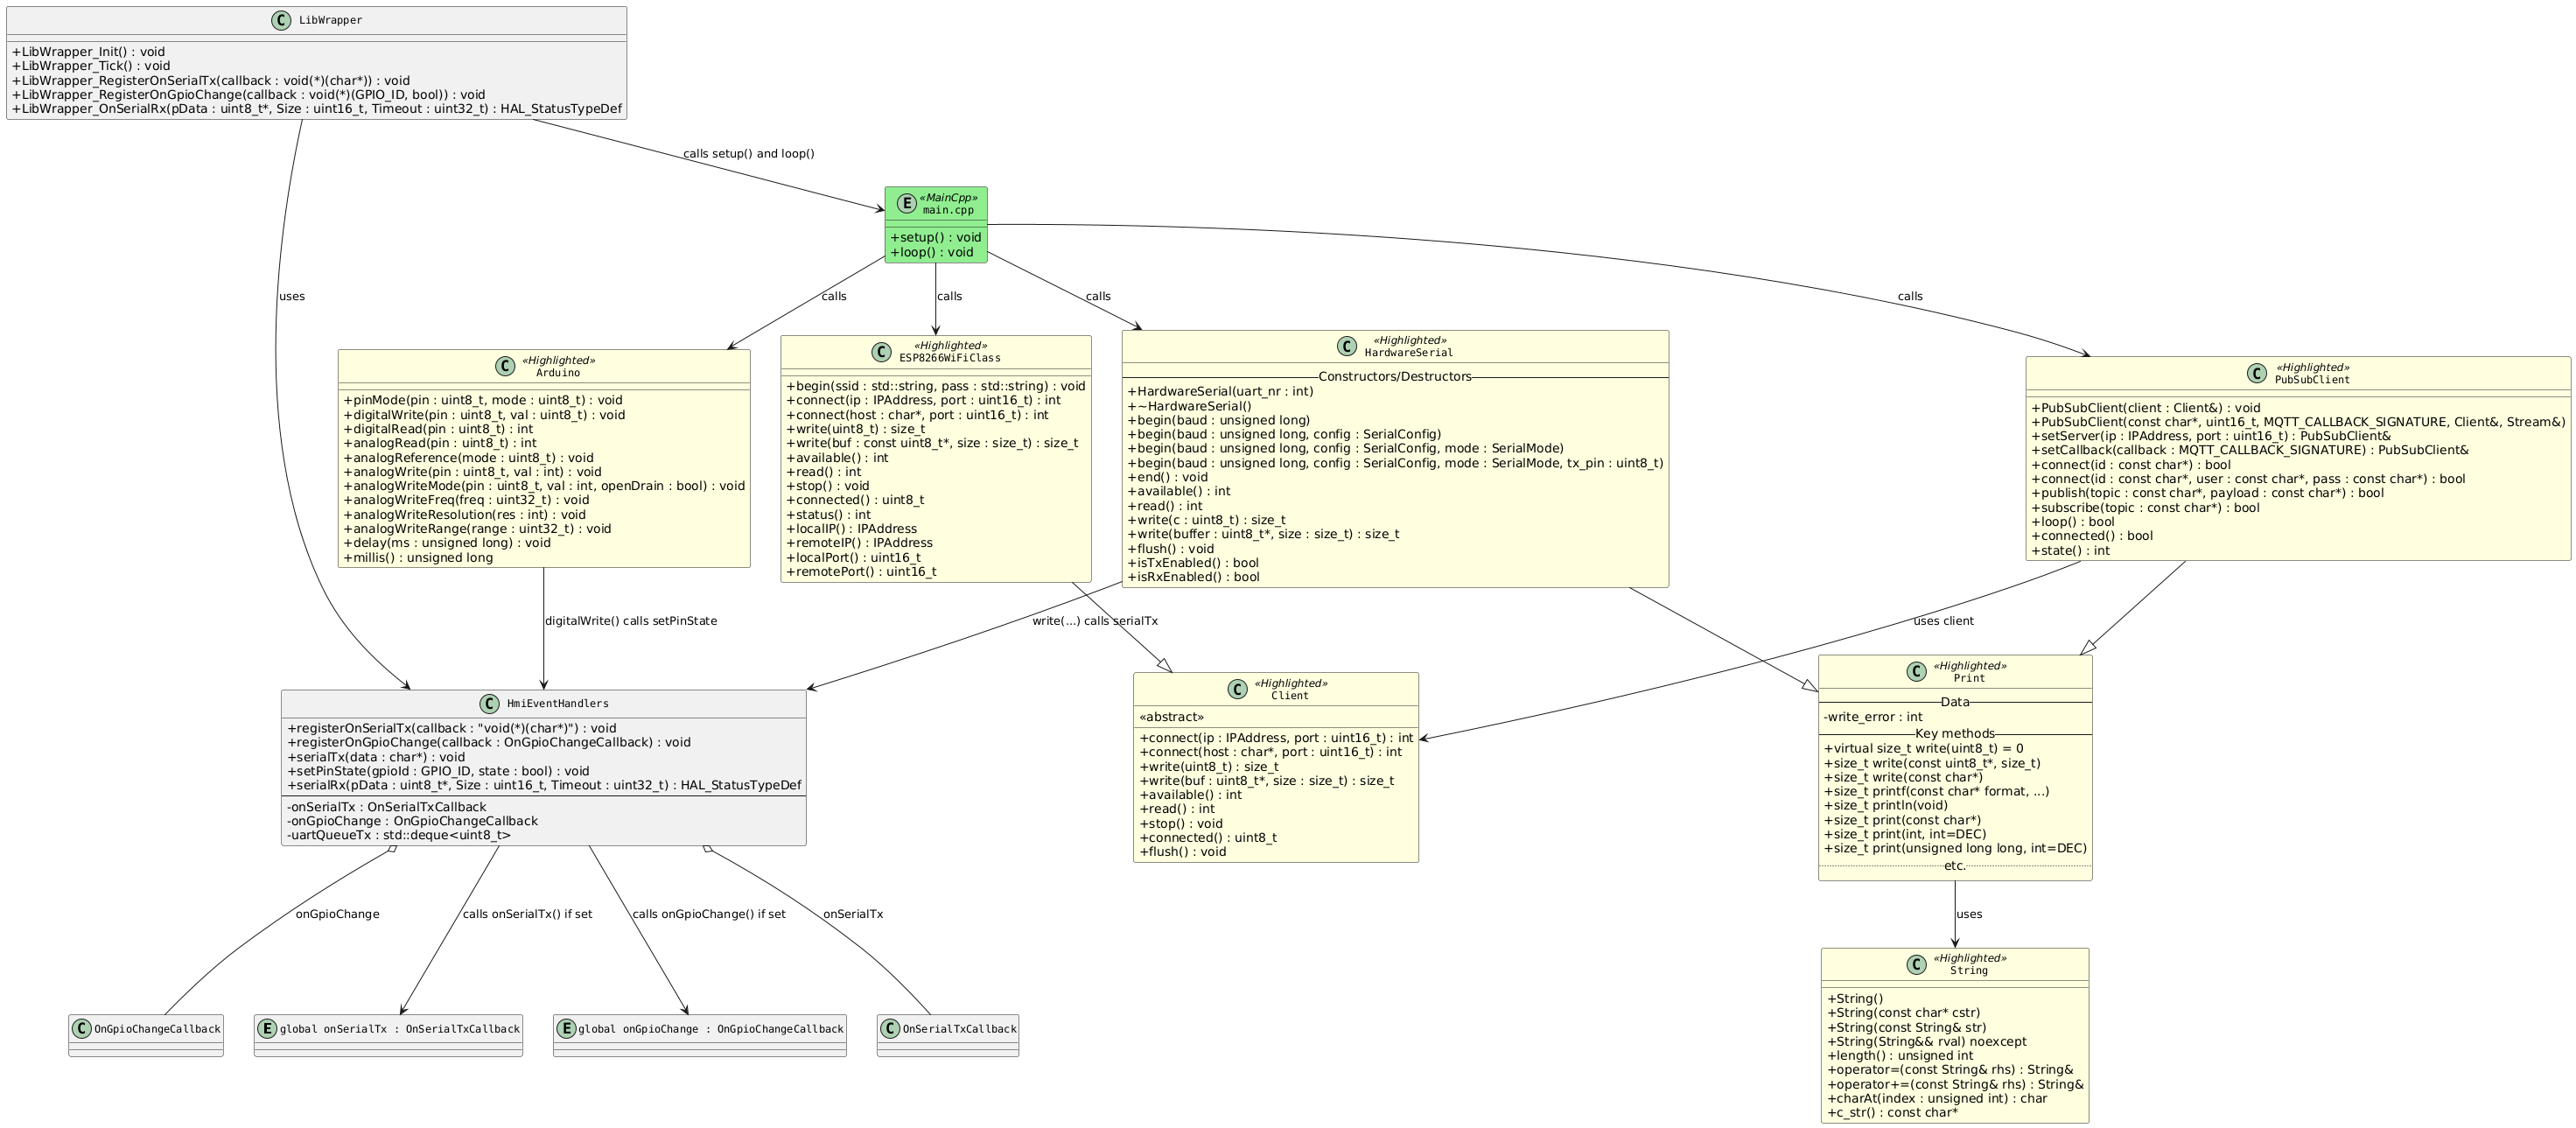
The diagram below presents the results. In yellow are mocked files from Arduino libraries, in green the emulated code, and in grey additional classes to provide an API for the simulation. The code is compiled into a .so library that is used by the GUI in Python.
Functionalities
There are not many functionalities for now, only simulation of GPIO and UART (both send and receive). How is it done?
To send data to the firmware via UART, there is a method in the .so library:
HAL_StatusTypeDef LibWrapper_OnSerialRx(
    const std::uint8_t *pData,
    std::uint16_t Size,
    std::uint32_t Timeout);
It puts the data into a queue, and then HardwareSerial reads this data. The objective is that the simulated main.cpp code uses HardwareSerial but doesn’t know whether the data comes from a real UART or this simulated method.
It’s a bit trickier when the simulated code needs to change GPIO state or send some data back. How would the simulation know that the state has changed (to show it on the screen to the user)? There are at least two ways:
- Polling: The simulation periodically checks the state of the UART and GPIO mocks. This is not ideal because we would need to poll very frequently to get good precision.
- Callback: The simulation registers a callback function with the mocks. On state change, the mock calls the callback. The callback points to a method in the simulation that, in the end, updates the screen. This is not ideal because code with callbacks can be difficult to debug and may crash at runtime if poorly written.
I used the second method. It’s implemented in the HmiEventHandlers class.
That’s all. I’m pretty happy with the results, although it is not complete.
Discussions
Become a Hackaday.io Member
Create an account to leave a comment. Already have an account? Log In.