Robert Gawron
-
A DevOps Trick: Multi-Stage Docker Builds
12/11/2024 at 16:39 • 0 commentsI don't know if you guys are interested in DevOps, but while setting up Docker for the project and searching for how to install stm8flash (an open-source software to flash STM8 chips), I found a repository using a nice trick I didn’t know about - multi-stage builds. I've used it here.
Some software pieces are not available as Linux packages and need to be downloaded and installed manually in the Dockerfile. However, this approach leaves the downloaded source code and potentially the tools required for compilation in the final image. This isn’t a huge problem, but it’s not ideal either.
With multi-stage builds, we start as usual by selecting a base for the image. For me, it’s (note that I’ve labeled this as "build"):
FROM ubuntu:20.04 AS build
Then, we download the code we want to compile, compile it, and start "fresh" again with a new base (this time labeled as "runtime"):
FROM ubuntu:20.04 AS runtime
Our Docker image won’t include any modifications we made in the previous stage, but we can explicitly copy the binaries from the earlier labeled stage:
COPY --from=build /stm8flash/stm8flash /usr/bin/
Our final Docker image will only contain the files we’ve copied - no intermediate files or unnecessary build tools!
-
Design of the new hardware version (minor improvements).
12/09/2024 at 17:12 • 0 commentsI've designed a new version that I haven't built yet, but it's looking pretty cool. The changes are:
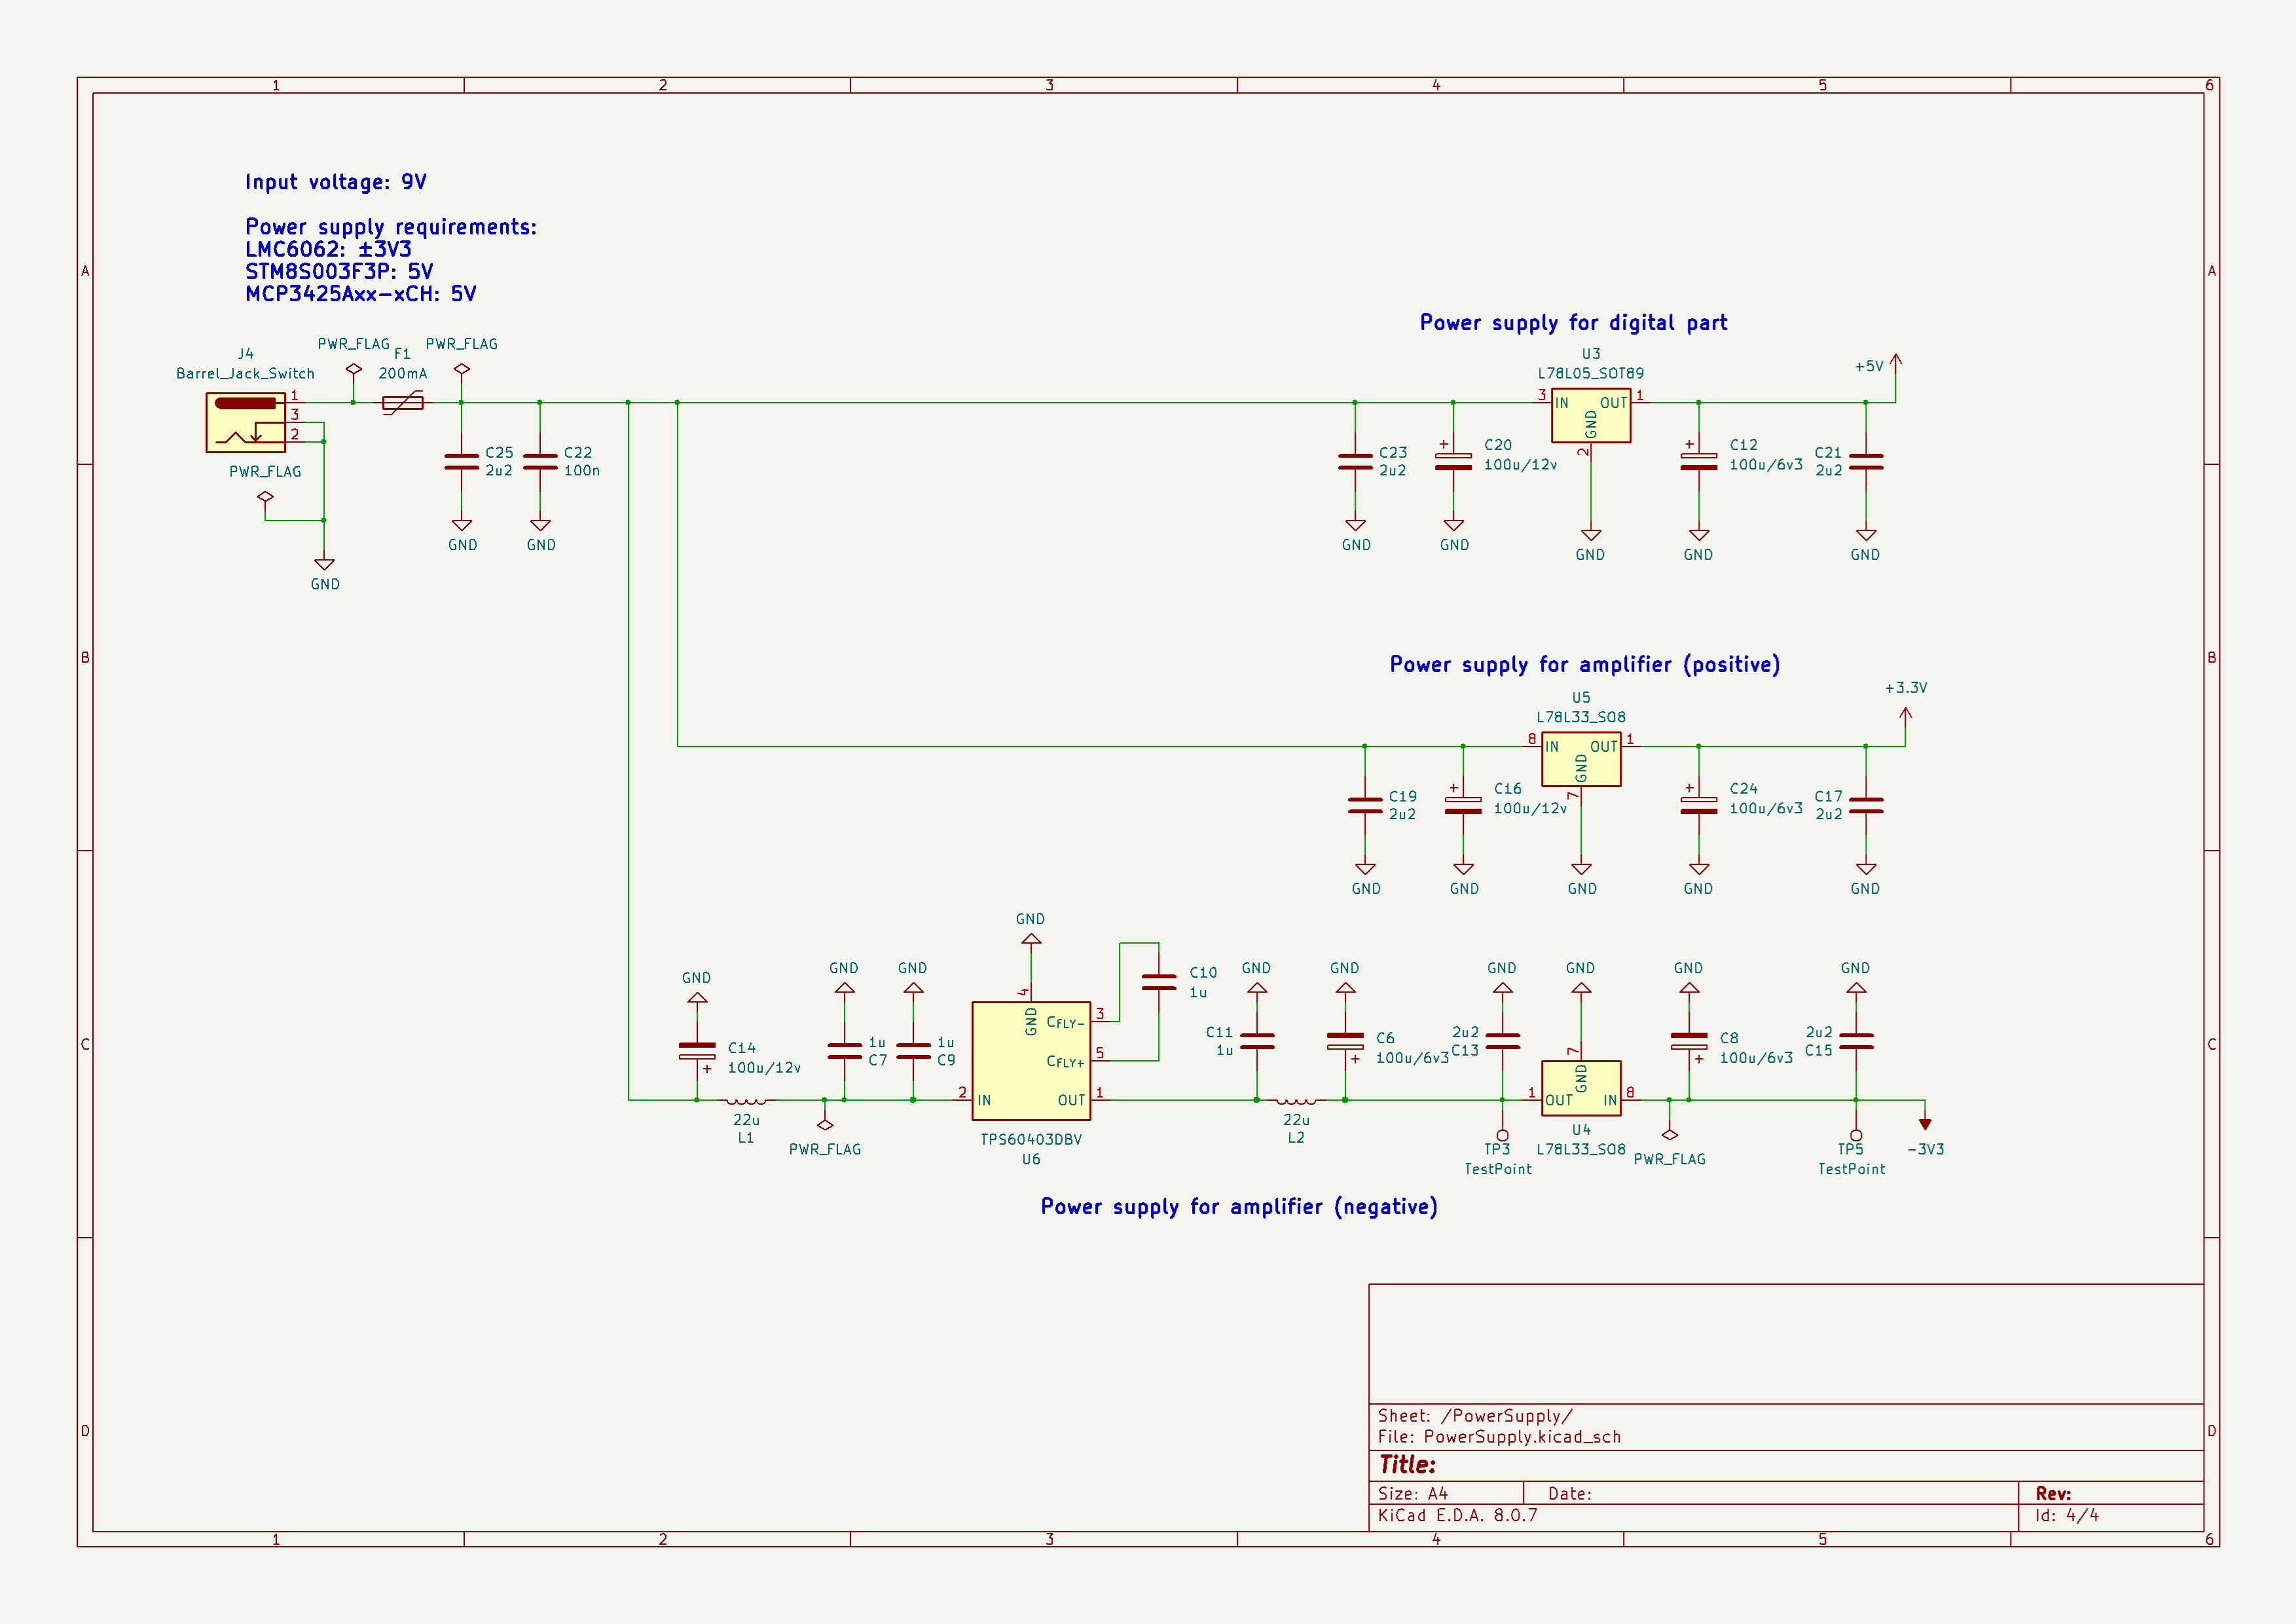
- No need for batteries to power the amplifier. I have some doubts about whether this will work, as the first stage is a bit tricky (with tens of gigaohms as a feedback resistor), but I will give it a try. Now, I use a small DC/DC converter to create a negative voltage for the amplifier. Everything is powered by a 9V wall adapter. There are still batteries to polarize the ionization chamber, but since it draws almost no current, it's fine.
- Made it more compact. I just want something I can put on my shelf, connect to a data logger, and monitor background radiation. I have made a data logger and I want to use this device as a source of data for it, you can check this project on Hackaday, I have 112 followers here! :))
The device now consists of four parts:
- Ionization chamber (I was considering ordering it to be cut out on a CNC, but it's too expensive).
- Polarization for the ionization chamber (three 12V batteries instead of just two). I hope this will increase sensitivity.
- Amplifier PCB (it has spaces for the mentioned batteries). The metal chassis is the same.
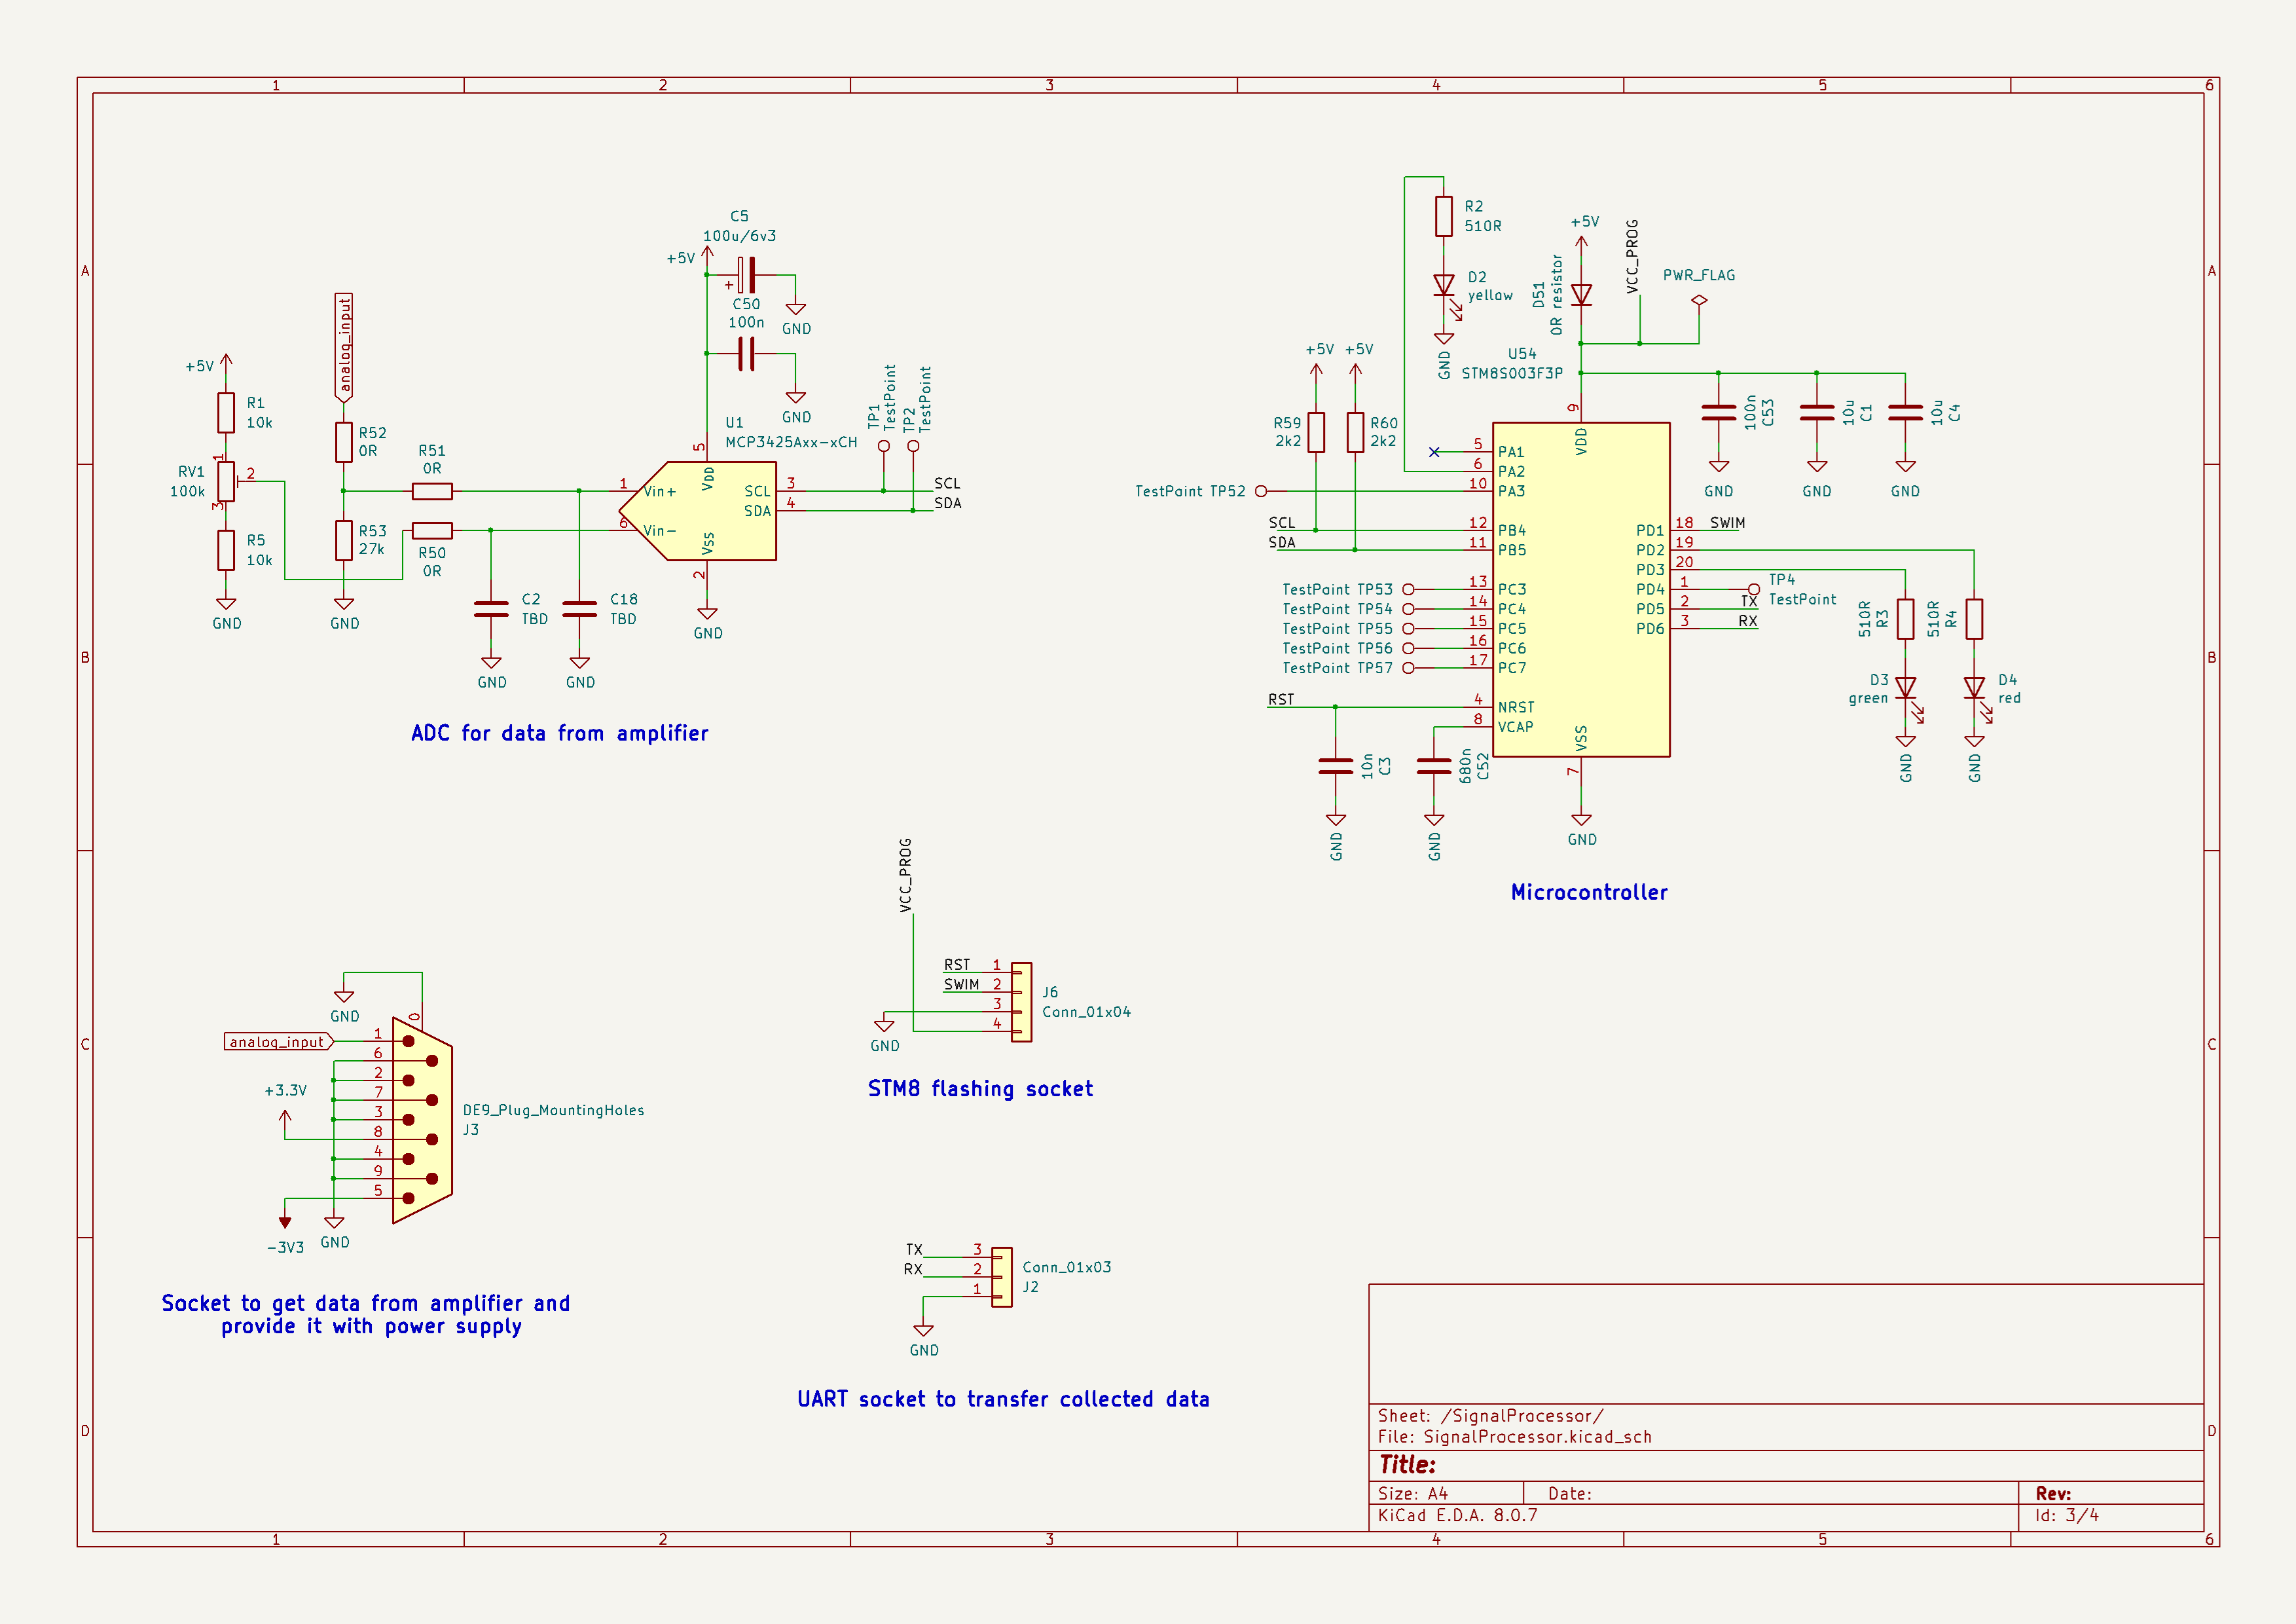
- PCB with data processing and power supply handling (same ADC, same microcontroller).
To summarize, the new version will be just more robust (if it works)!
I will share the diagrams I made below. If you have any remarks, I would appreciate them.
Below is the amplifier PCB and its rendering.
![]()
![]()
![]()
Below is the acquisition module and its rendering.
![]()
![]()
![]()
I hope to have time soon to build this version and share the results with you.
Ionization Chamber: A Homemade Radiation Detector
Measure Radioactivity Without a Geiger Tube and Avoid False Positive Results, Unlike Many Other Ionization Chamber Projects.