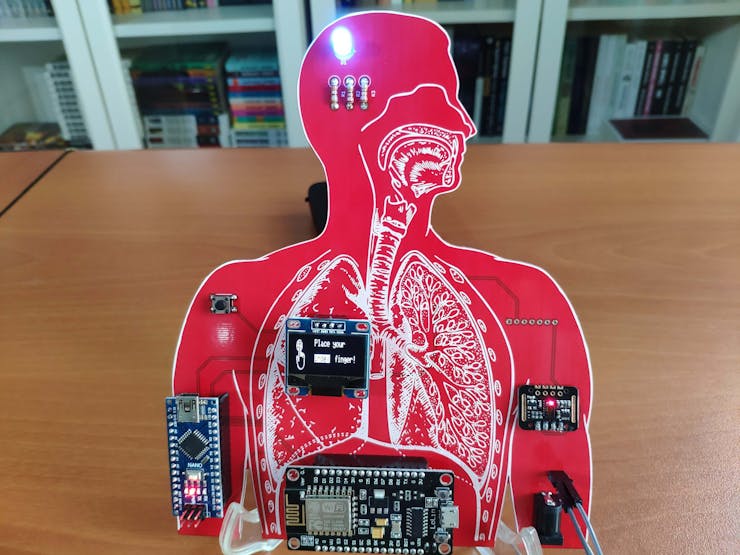
Although there are abundant methods and systems to monitor and track the heart rate (BPM), in this project, I focused on developing a new device with an easy-to-understand mobile application interface compatible with Android and iOs for observing the data generated by the pulse oximeter sensors.
I decided to use the Tuya IoT Platform in this project because it allowed me to develop a mobile application interface compatible with various operating systems and save information to the Tuya Cloud to track the data generated by the pulse oximeter sensors. In the following steps, I will explain how I benefited from the Tuya IoT Platform to improve this project in detail.
While I was developing this device from scratch to monitor and track heart rate (BPM), I did not want to make the device work with merely one type of pulse oximeter sensor. Thus, the device supports two different sensor types as connected to the Arduino Nano:
- MAX30102
- MAX30100
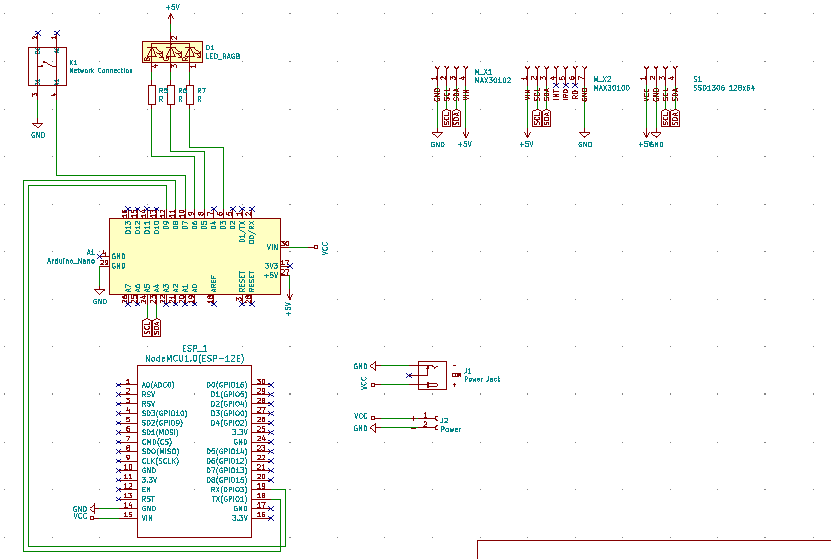
I have the two mentioned sensors at my disposal, but I decided to use the MAX30102. Then, I connected an SSD1306 OLED (128x64) screen to display the heart rate (BPM) before sending data to the Tuya Cloud.
Finally, I added a 5mm common anode RGB LED to show the connection status between the device and the Tuya Cloud.
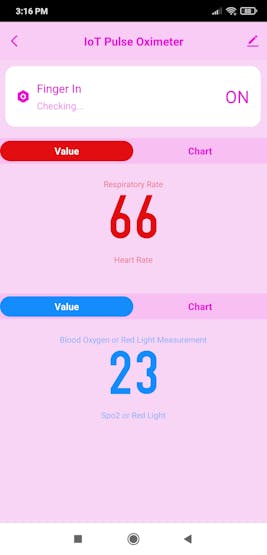
On the mobile application interface supported by the Tuya Cloud, the device lets the user display three different data points with correlating charts:
- Finger_In - Finger Positioning
- Respiratory_Rate - BPM
- Blood_Oxygen - SpO2 (Optional)
- Blood_Oxygen - Red Light Measurement (Optional)
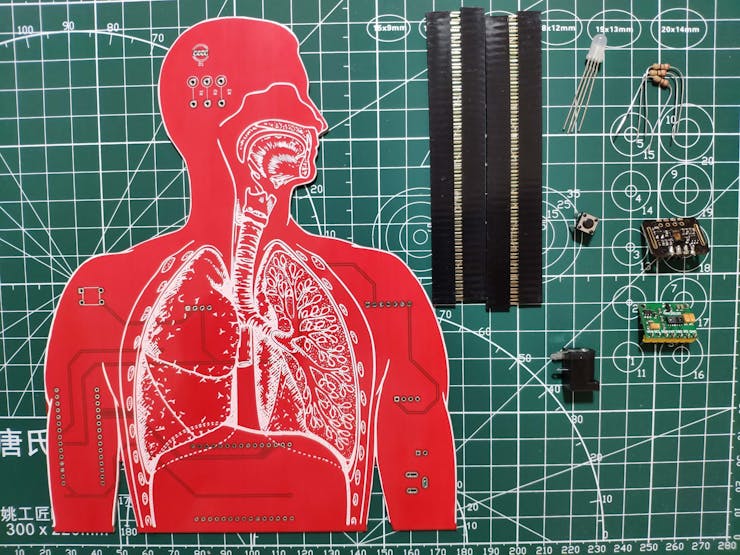
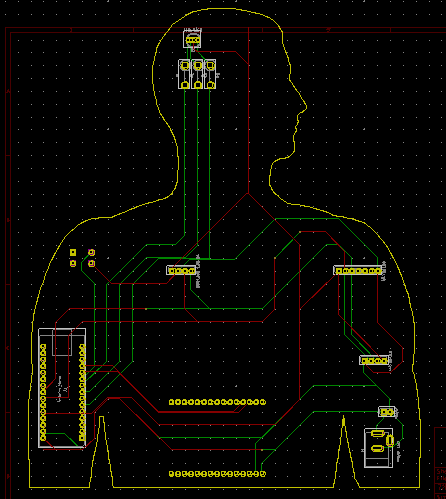
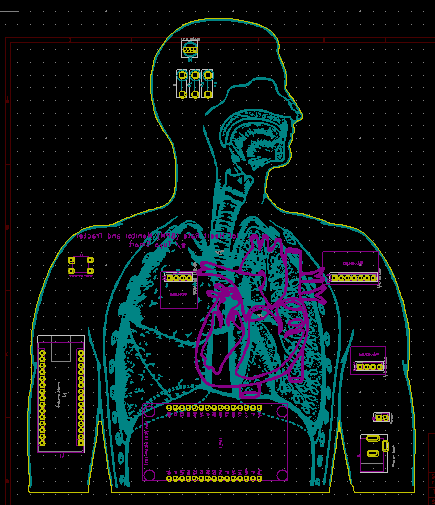
After completing wiring on a breadboard and testing the code, I designed my respiratory system-inspired PCB as an indicator of the salience of heart rate. Thus, the device became a stylish and functional apparatus to monitor and track heart rate :)
Huge thanks to PCBWay for sponsoring this project.
-Monitor-and-Tracker-w-Tuya-Smart/Pictures/monitoring.gif)
Step 1: Designing and soldering the IoT Heart Rate Monitor PCB
Before prototyping my PCB design, I tested all connections and wiring with Arduino Nano and ESP8266 on the breadboard.
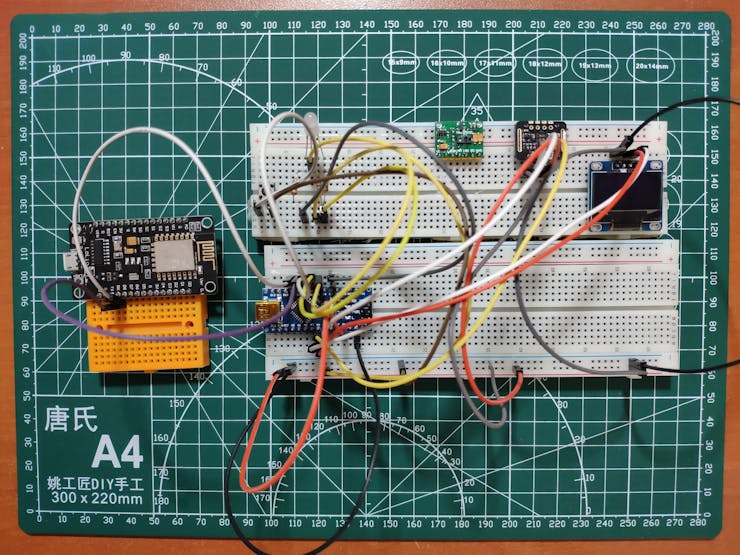
Then, I designed the IoT Heart Rate Monitor PCB by using KiCad - inspired by the precious respiratory system :) I attached the Gerber file of the PCB below, so if you want, you can order this PCB from PCBWay to create a fitting and effective apparatus to monitor and track the data generated by the pulse oximeter sensors with Tuya Smart.
Click here to inspect and order this PCB directly on PCBWay.

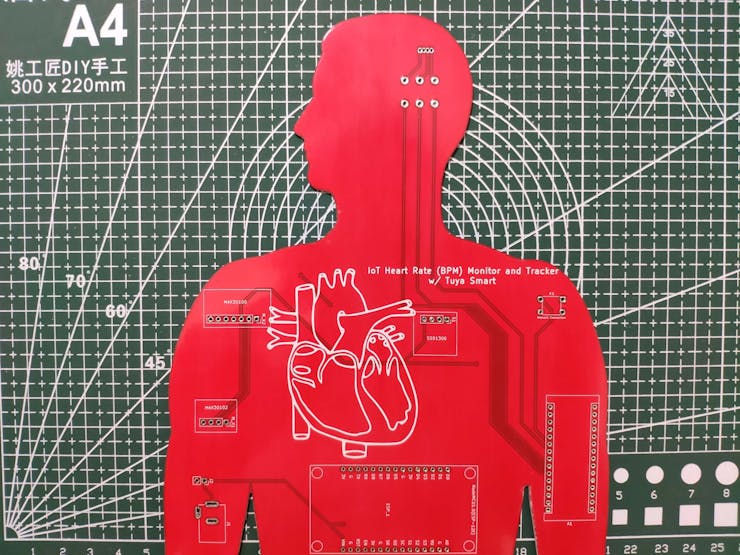
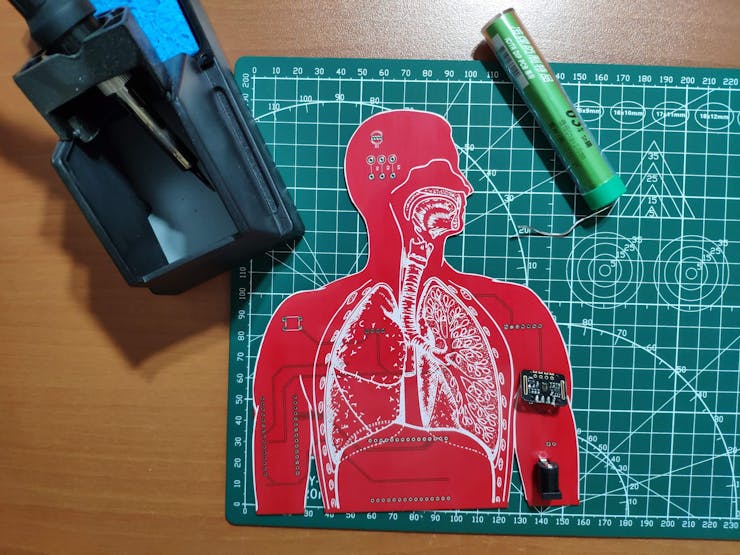
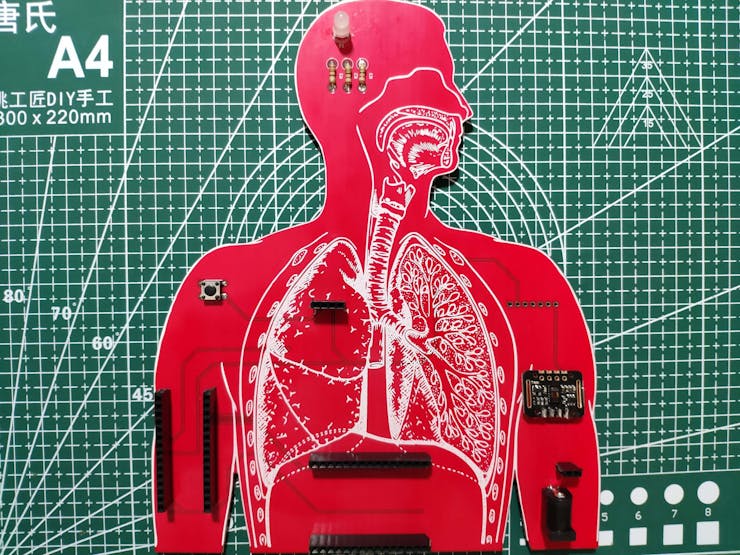
First of all, by utilizing a soldering iron, I attached headers (female), a MAX30102 pulse oximeter sensor, a button (6x6), a 5mm common anode RGB LED, 220Ω resistors, and a power jack.
Component list on the PCB:
A1 (Headers for Arduino Nano)
ESP_1 (Headers for NodeMCU V3 LoLin ESP8266)
S1 (Headers for SSD1306 OLED Screen)
M_X1 (MAX30102)
M_X2 (MAX30100)
K1 (6x6 Button)
D1 (5mm Common Anode RGB LED)
R1, R2, R3 (220Ω Resistor)
J1 (Power Jack)
J2 (Headers for External Battery)
Step 2: Creating a new product on the Tuya IoT Platform
Tuya Smart is a global IoT platform that enables smart home products to come to life for brands, OEMs, manufacturers, and retail chains. But, Tuya is not providing its services and APIs for companies only. Tuya has established an IoT cloud platform that delivers a full suite of offerings to developers, including Platform-as-a-Service (PaaS), Software-as-a-Service (SaaS), and other cloud-based services. Tuya Cloud Platform has built a thriving ecosystem providing more than 410, 000 product SKUs in over 1, 100 categories, covering over 220 countries and regions.
Tuya IoT Platform lets the user develop a smart product from scratch and provides built-in functions for different product types. Furthermore, Tuya SDKs allow controlling a registered and authorized product with a development board via serial communication. You can get more information about Tuya SDKs from the Tuya Developer Platform.
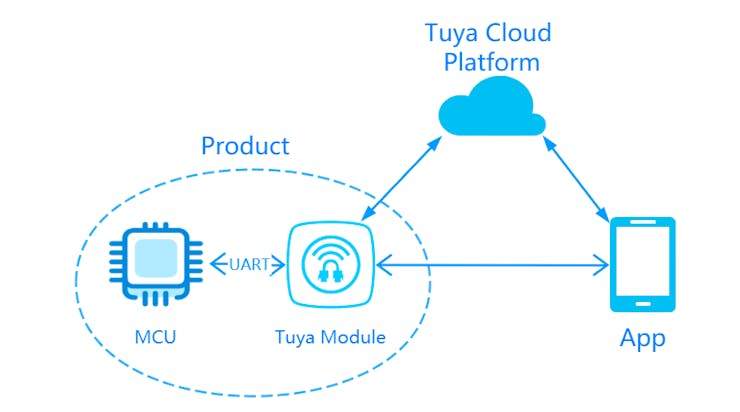
While employing the Tuya IoT Platform to create a custom product...
Read more » kutluhan_aktar

Please feel free to leave a comment here if you have any questions or concerns regarding this project 😃