 tobychui
-
1How to solder Raspberry Pi Zero W to the main PCB
The Pocket Cloud PCB has written instruction on the back of the PCB for you to solder it to the pi zero w.
Things you will need
- A soldering iron
- Solder
- 4 thin metal / copper wire
- A Pocket Cloud Server integrated main board (the PCB)
- Pi zero w and micro SD card
-
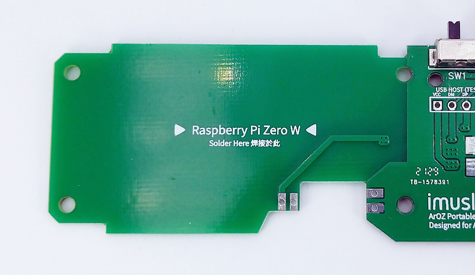
2Secure the pi zero w
Place the pi zero w on top of the PCB at the location written "Raspberry Pi Zero W " and secure it in place with double sided tape.
![]()
-
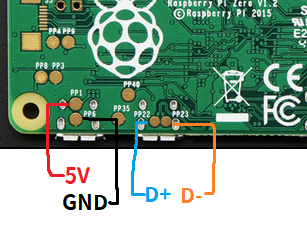
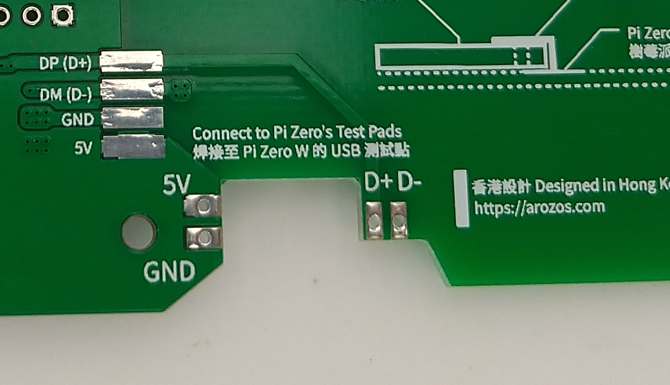
3Match the soldering points
Flip the PCB with the pi zero w upside down, the Pi zero w's USB test pads should align with the PCB's attachment points.
![]()
![]()
-
4Solder two boards together
Bridge the two joints with solder and / or a thin piece of conductive wire. The following diagram show how do you bridge two point on two different PCB
![]()
-
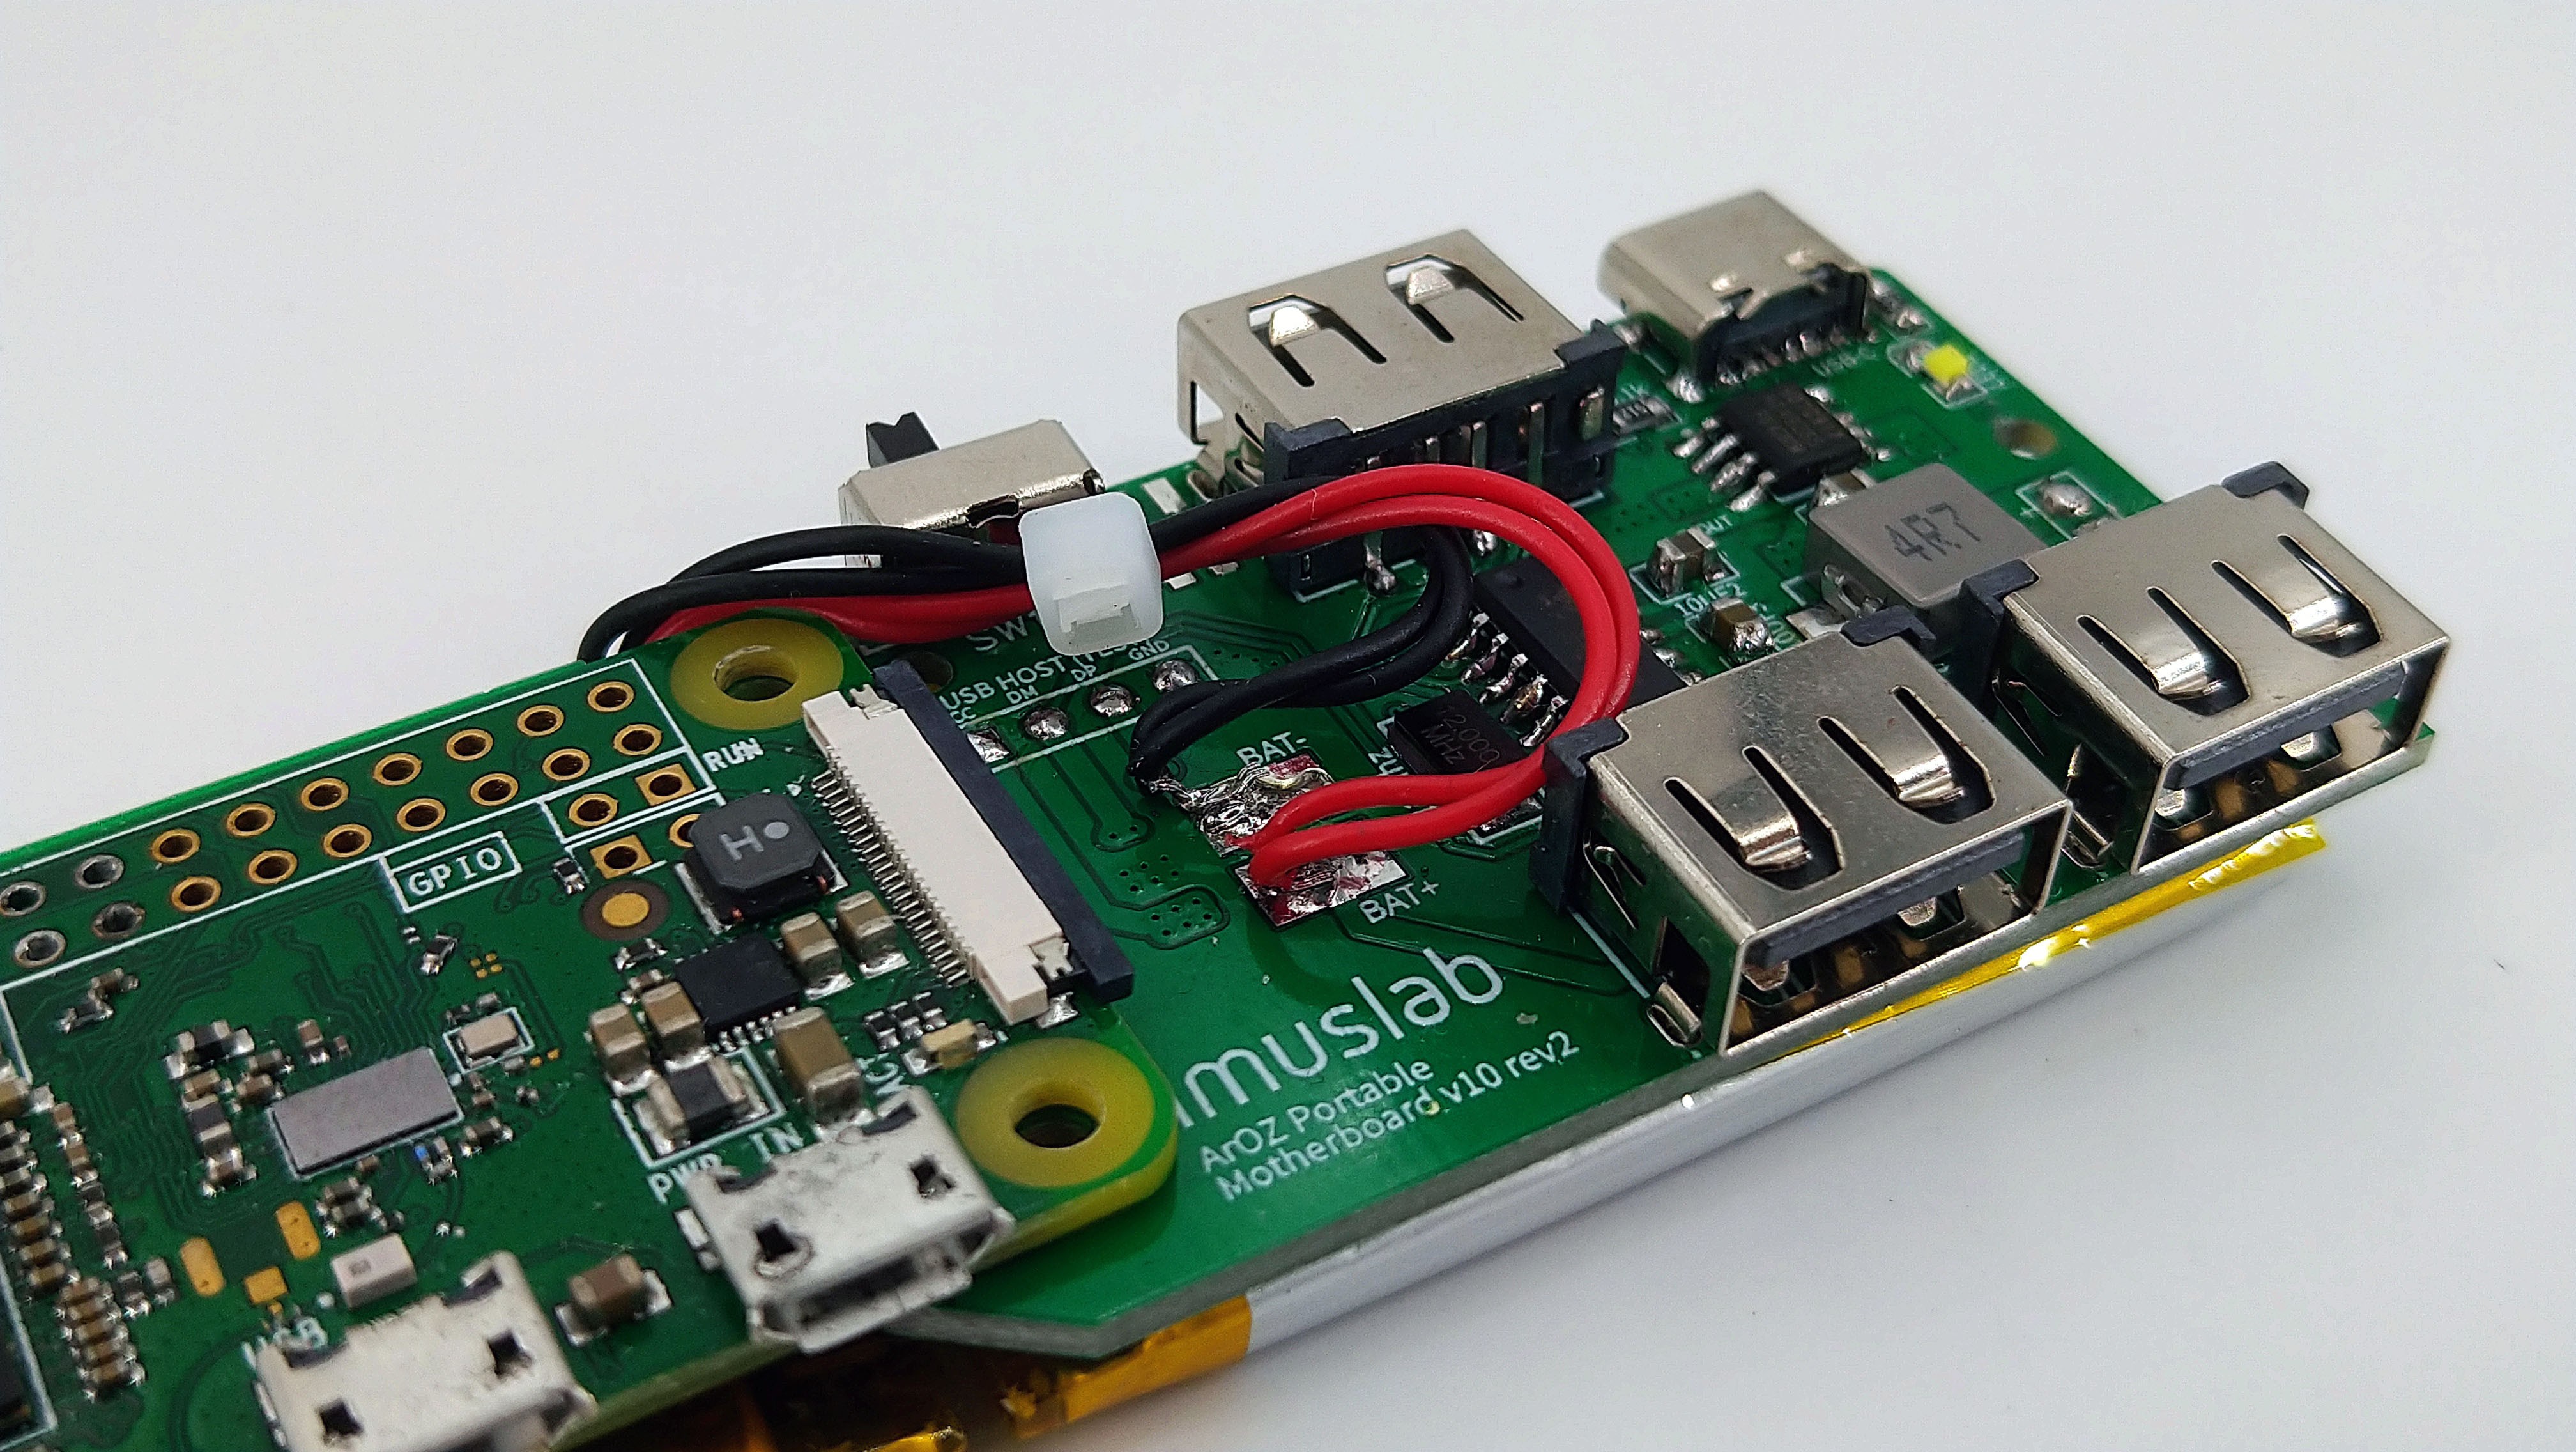
5Solder Battery
Solder the LiPo battery to the BAT+ and BAT- terminal and the hardware assembly is completed
![]()
-
6Install the ArozOS (build from source)See the video for a full installation tutorial
Pocket Cloud Server (Final version)
The ultimate final version of the Pocket Cloud Server project that I have been working on for 4 years. Production completed with SMT PCBA

Discussions
Become a Hackaday.io Member
Create an account to leave a comment. Already have an account? Log In.