-
1Getting started with Tuya’s Cloud development platform
For demonstrating a simple use case, we’ll use a Tuya-enabled Virtual device and control it with Python SDK via API calls. There are a total of just four steps with device debugging being an optional one
-
2Configure cloud project
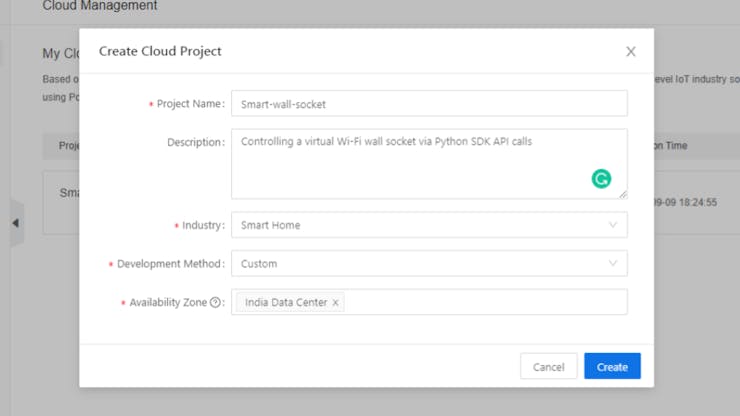
Go to Tuya’s Cloud Development platform website and Signup with an email address. The free trial versions with a limited time period are available if you’re interested in just experiencing the platform for now. After signing in, go to Cloud > Development > Create Cloud Project. A new window will show up asking you to fill in some details which are pretty straightforward.
![]()
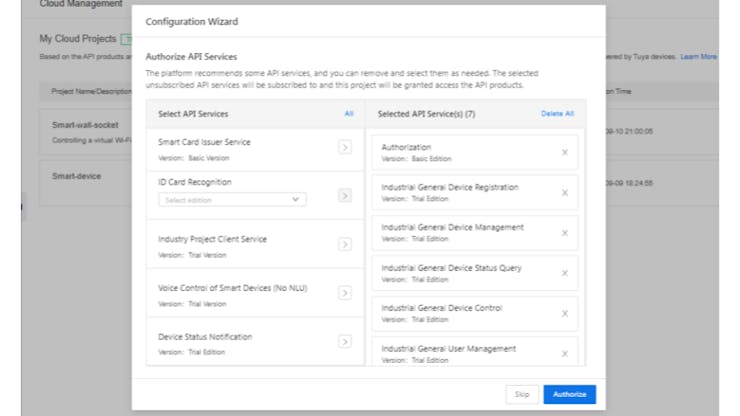
Next, you’ll be navigated to Authorize API Services where you can select the API Products for your use. By default, a few APIs are already selected based on the type of project you’re going for, so we’ll keep it like that and click on Authorize.
![]()
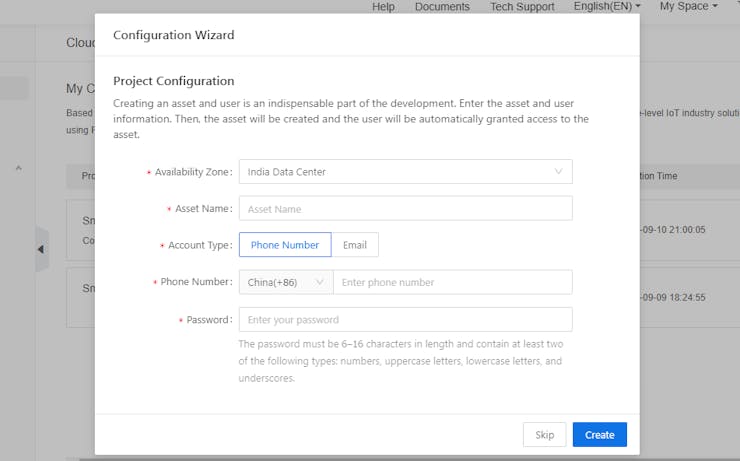
Finally, you’ll get the Project Configuration which you can fill if interested or skip for now. With this, the project should be created and we can move on to the next step.
![]()
The project will now be created and once you click on it you’ll see the Access ID and Access secret key which will be used in the further sections.
-
3Add device
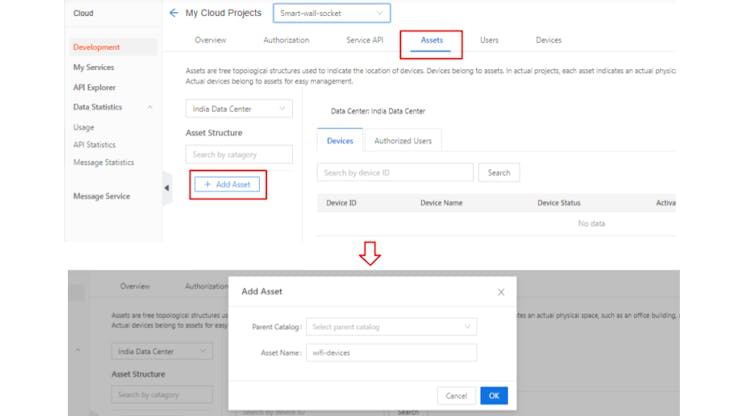
Before adding a specific device, you need to add an asset under which the devices would be grouped together. Go to your project > Assets > Add Asset. You get the window asking for Asset name, we’ll name it wifi-devices for now.
![]()
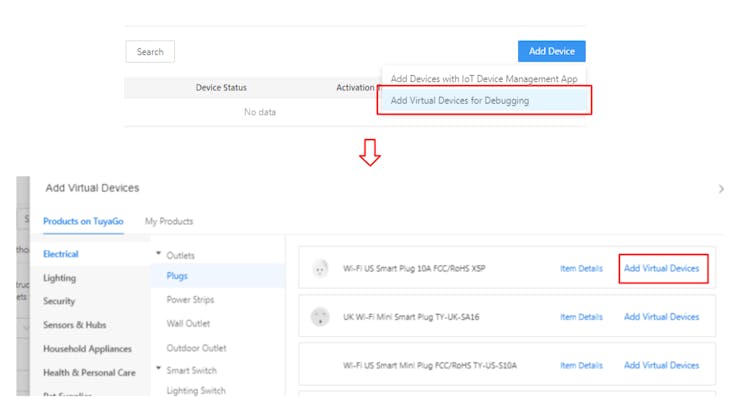
Now, go to Add Device at the right corner and click on Add Virtual Devices option. You’ll be provided with a huge list of available devices, so choose the one you like and click on Add Virtual Devices.
![]()
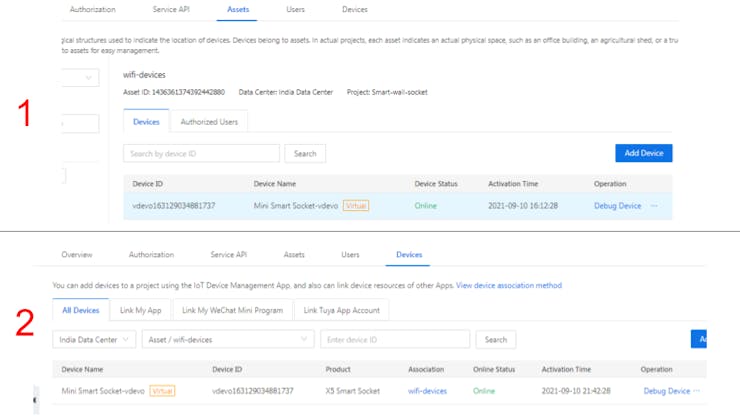
With this, the device is added successfully and should be visible under the Assets tab as well as the Devices tab.
![]()
Click on Debug Device and you’ll be navigated to a new tab. There under the Basic Information section, you’ll see the Device ID which will be used in the next section.
-
4Develop IoT service (using Python)
For testing out the Cloud services, we’ll use the Python SDK provided by Tuya to control our virtual device. The very first step would be to install Tuya’s Python support package using the following command:
$ pip3 install tuya-connector-python
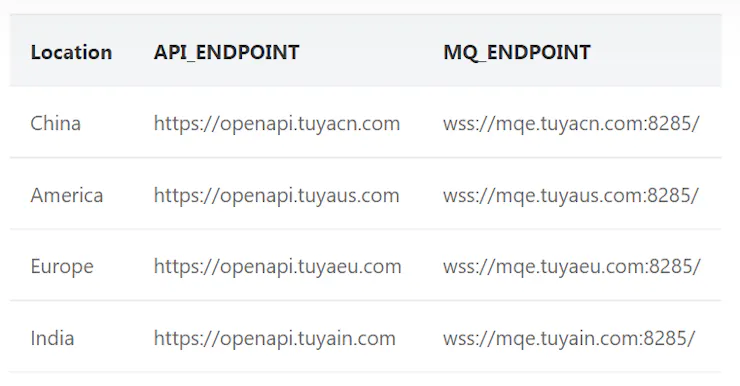
- Now, open a Python code editor of your choice and copy the device_control.py code from here. Enter your Access ID and Access secret key which we had obtained in the first section. The API_ENDPOINT differs for every region as shown in the table below. Select the one nearest to you.
![]()
Also, make sure you enter the Device ID which we had obtained from the device debugging page. Once done, go to the following line where we send the commands and change switch_led to switch_1. The value as False indicates that we are switching off the device.
# Send commandscommands = {'commands': [{'code': 'switch_1', 'value': False}]}With that, the code is all set and you can run it now. The response should be something like:
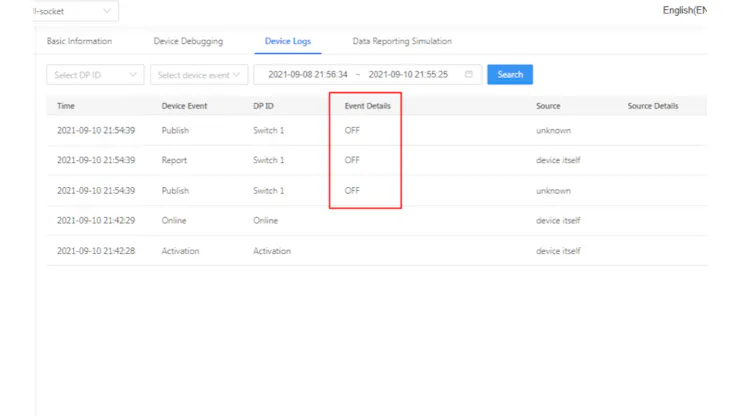
[2021-09-10 21:23:17,542] [tuya-openapi] Request: method = POST, url = https://openapi.tuyain.com/v1.0/iot-03/devices/vdevo163121020750588/commands, params = None, body = {'commands': [{'code': 'switch_1', 'value': False}]}, t = 1631289197542[2021-09-10 21:23:17,596] [tuya-openapi] Response: {"result": true,"t": 1631289197597}Inside Response, the result: true depicts the command was sent successfully and the device should be turned off. You can confirm it by checking the Device Logs section:![]()
Now, again change the commands line but this time set the value as True which will turn on our virtual device’s switch.
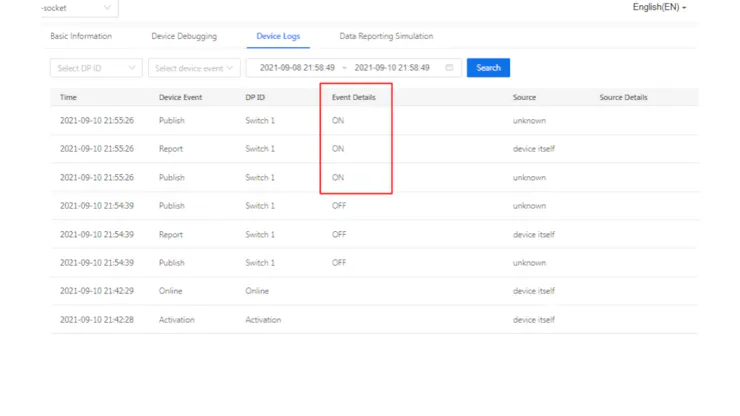
# Send commandscommands = {'commands': [{'code': 'switch_1', 'value': True}]}After running with the above command, the Device Logs should show that the device turned on.
![]()
With this, we’ve successfully built a very basic Cloud-based IoT system and in a similar way, the other APIs can be used as well. If followed properly, the process won’t take longer than 15 minutes which proves the fast development advantage. Everything is available within clicks of buttons, making the process a lot simpler.
You can learn more about Tuya’s Cloud Development platform on its website.
Getting started with Tuya’s Cloud development plat
Have a look at Tuya's Cloud Development features and a small guide to get you started quickly.
Discussions
Become a Hackaday.io Member
Create an account to leave a comment. Already have an account? Log In.