 Ric Real
-
1Processing Facemasks into granules for filament extrusion
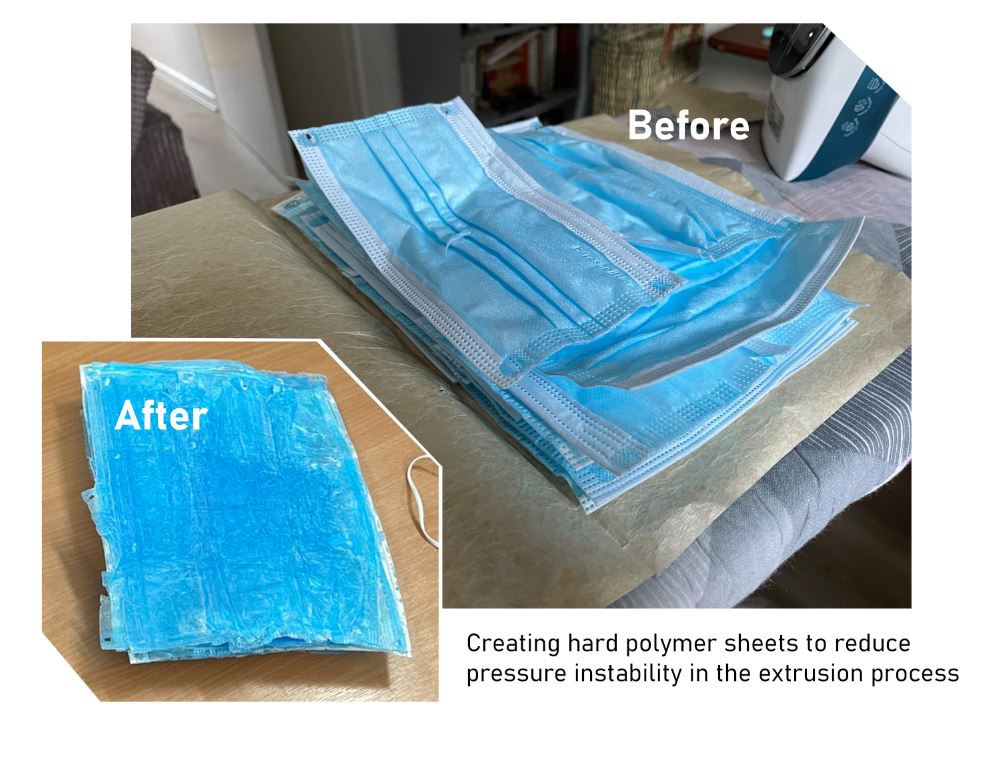
Through early experimentation it was realised that the fibrous composition of masks posed a challenge to any conventional methods of plastic recycling, the cause of many a ‘clogged machine’. To overcome this issue a step prior to grinding the masks is introduced, where the masks are heated and pressed to form a hard sheet. This takes the material to its glass transition point where the Polypropylene fibers fuse together to create something with more rigidity. In this example, a simple iron and non-stick baking paper are used.
![]()
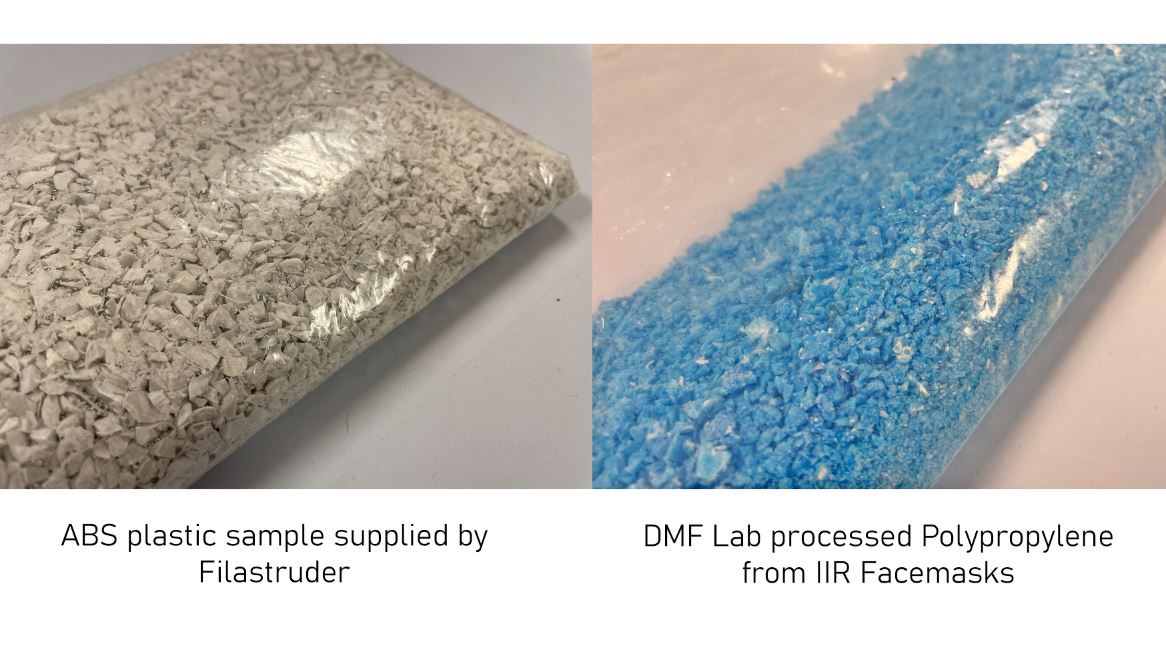
The rigid sheets are then broken-up into smaller parts to put through the blender (300W Breville Blend Active), achieving the fine granules of facemask blue PP pictured on the right. For comparison, the sample ABS material supplied by Filastruder is also shown. This process of increasing rigidity improves results from extrusion by reducing pressure instability in the barrel of the filament extruder. Further, this prevents the issue of fibres jamming the machine barrel. The blue granules are fed into the extruder to produce filament.
![]()
To address concerns around contamination of the material produced, it should be noted that the masks are heated throughout the process of extrusion to a temperature far beyond that which SARS-CoV-2 has been shown to survive.
Another issue to consider is the pre-processing of masks i.e. removing ear loops and metal nose straps. These are fairly easy to remove manually, although could present difficulties in automating the sorting/preparation process. It might be that in the future users are prompted to separate these parts before recycling.
-
2Extruding Filament
This image shows the most recent set-up of the filament extrusion kit in action. You can see a video of this on the project blog post (link).
The Filastruder is vertically mounted using a 3rd party non-standard vertical hopper found on thingiverse.
Extrusion Settings
- Nozzle temp: 170 C
- Voltage: 11V (turned down to reduce speed)
- Amps: 1.6 (current limited)
- Cooling: On
- Nozzle hole diameter: 1.75mm
- Filawinder: Automatic speed
This set up produced good results, however there are still issues with achieving a consistent filament diameter.
Nevertheless, 7 meters of ‘useable‘ filament was spooled with an average diameter of 1.5 mm (-0.25 mm below the standard of 1.75 mm). These initial results suggest that with further refinement it will be possible to achieve the desired diameter within a reasonable tolerance. At the time of writing this post, the standard nozzle has already been drilled from 1.75 mm to 1.9 mm, and parts for a motor driven vertical feed are being 3D printed. Improving these aspects of the system should get the filament closer to the ideal 1.75 mm diameter.
This first batch of filament was used to run some early stage tests on an ender 3 desktop 3D printer.
![]()
-
3Printing with Facemasks
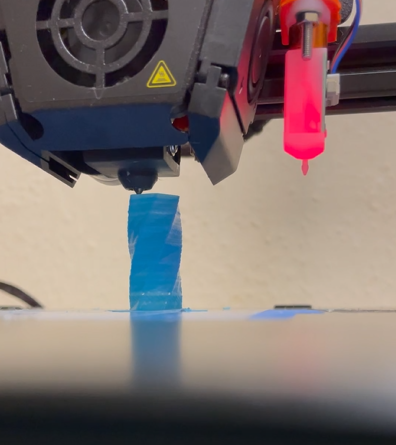
Polypropylene (PP) is notoriously difficult to 3D print as it doesn’t bond well to common printer build platforms. However, it does bond well to itself, PP. A trick is therefore to print on normal clear tape as this is often also PP. Using this method it was surprisingly straightforward to 3D print with our rudimentary stock of filament on a low-cost, run-of-the-mill machine. This highlights that issues currently reside in producing the filament and not in 3D printing with it, or other applications.
Print Settings
- Printer: Creality Ender 3 Max
- Nozzle temp: 235 C
- Bed temp: 100 C
- Print speed: 40 mm/s (slow)
- Fan speed: 100>#/li###
- Retraction: 4mm (Bowden)
- Retraction speed: 30 mm/s
- Flowrate: 350% (account for thinner filament)
These settings worked well considering the inconsistency in diameter of filament. The flowrate took some playing with.
Whilst not very widely used as a material in 3D printing, some properties of PP make it an alternative worth exploring. These include the materials durability, and resistance to chemicals and fatigue. Polypropylene is also both food and microwave-safe.
In addition to the points above, PP is one of the most common polymers in use. From an environmental standpoint the use of recycled Polypropylene, and polymers in general, poses an opportunity to reduce the consumption of virgin material in rapid prototyping processes such as 3D printing and Injection Moulding.
![]()
-
4***************** INJECTION MOULDING ***********************************
The following steps cover the process of injection Moulding LFD test cases using 3D printed mould tools and recycled facemasks. Step 1 from above is required to produce pellets for use with the injection moulding machine.
-
5Mould Tool Design and Simulation
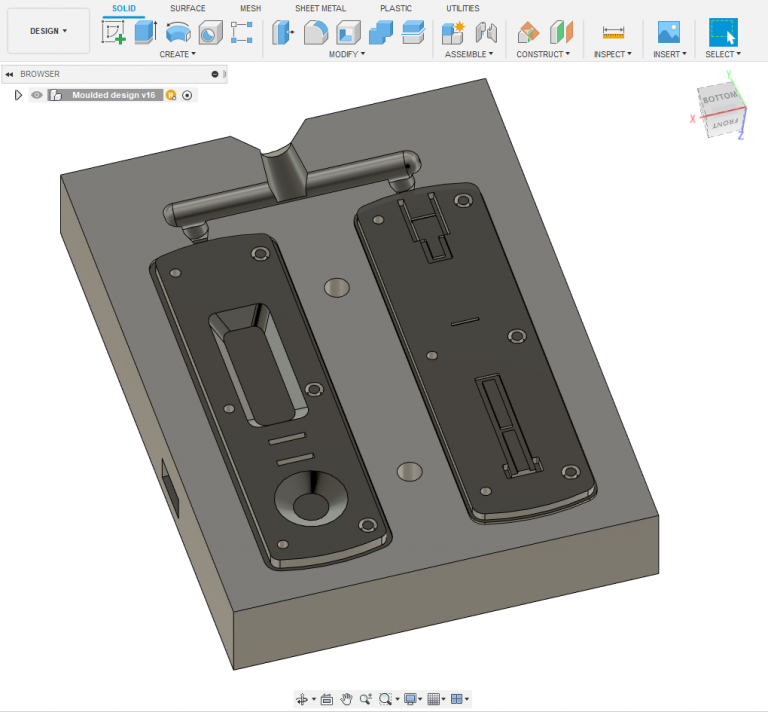
A Computer Aided Design (CAD) model was developed to capture key geometry and surface details of a reverse engineered UK standard issue LFT casing. The CAD model was used to generate a core and cavity style mould tool. Where traditionally mould tools are machined from tool grade materials such as carbon steels or aluminium on a CNC or EDM machine, recent advances in 3D Printing materials have enabled the manufacturing of low volume tools (producing <~100 parts) in a fraction of the time and cost. With this in mind, the tools were designed for 3D printing to include built in fixtures and moulding features.
![]()
The LFD tools were designed and simulated in Autodesk Fusion360. Fusion’s built-in tools allow for moulding simulations to be performed before sending parts off to be made. This provides useful info on the shapes suitability for moulding, estimated part quality, and statistics for filling.
The GIF below shows a mould filling simulation for the LFT case.
![]()
-
6Additively Manufacturing Mould Tools with SLA Technology
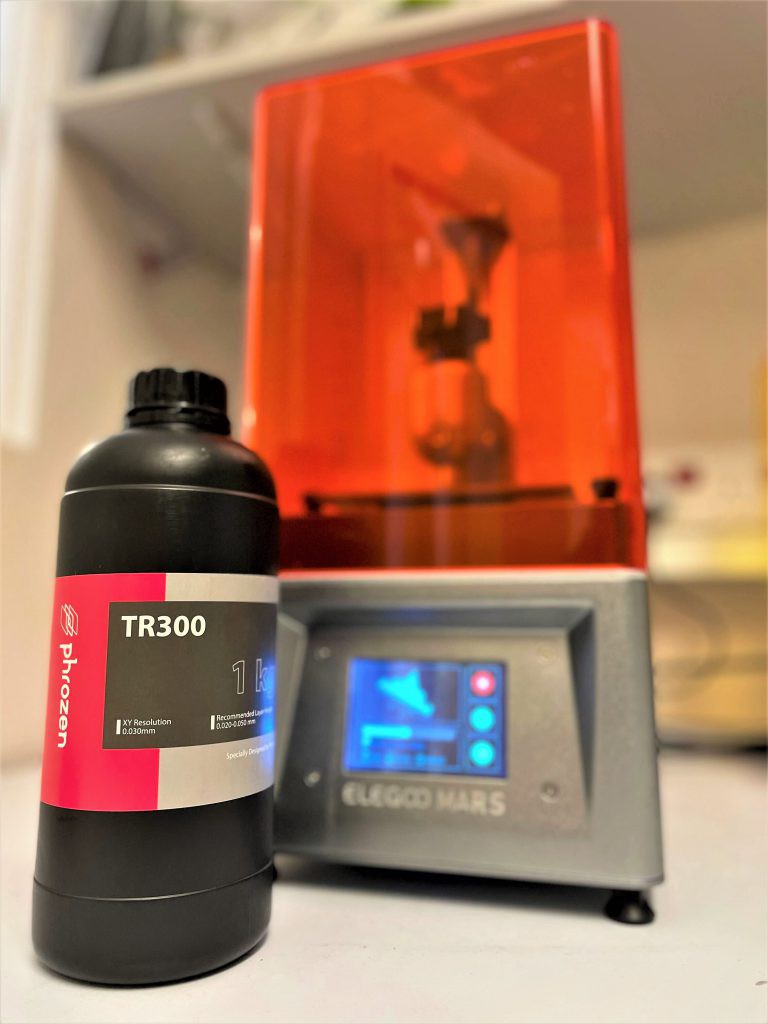
With tools designed and STL files in hand, an MSLA Elegoo Mars 3D Printer was enlisted to manufacture the LFD case tools. The mars is a fairly entry level machine (costing under £150), although, it is capable of reproducing very fine details.
![]()
Elegoo Mars spec:
- XY Resolution: 0.047 mm (2560*1440)
- Z Axis Accuracy: 0.00125 mm
- Layer Thickness: 0.01 to 0.2 mm
- Printing Speed: 22.5 mm/h
- Build Volume: 120 x 68 x 155 mm
The Mars printer was paired with a thermally resistant engineering resin. Manufactured by Phrozen, the TR300 resin features a heat deflection temperature of 325 °C, high tensile strength, and low shrinkage for £70/Litre.
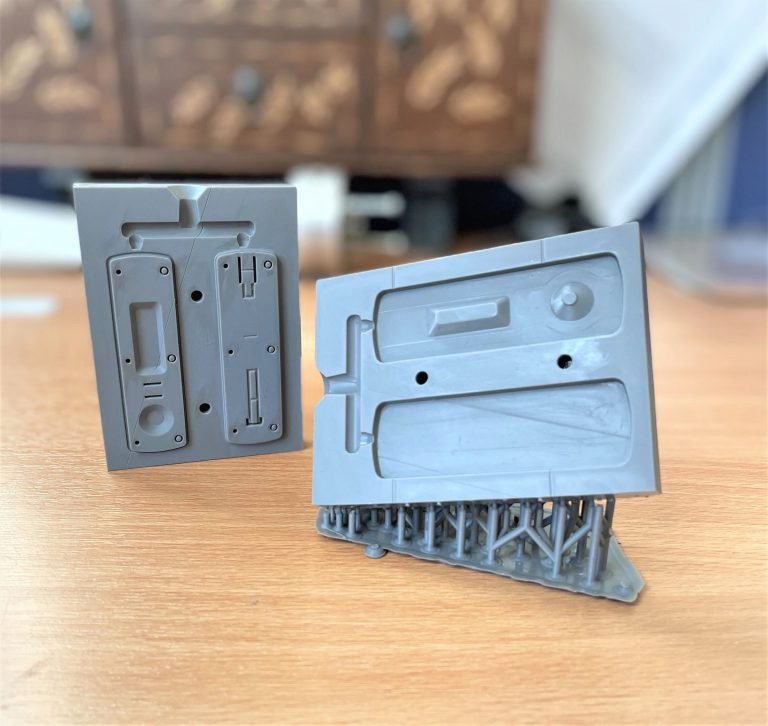
After washing, curing, and removing supports the printed tools (pictured below) required minimal additional finishing. The surfaces came out with reasonably good quality for a moulding application.
Print stats
- Cavity(right): 10h 33 mins, £7.96 in resin
- Core(left): 10h 51 mins, £9.17
- Total : 21h 24 mins, £17.13
Note: prints were offset from the bed and angled to avoid warping.
(Resin settings for mars: ET 10s, ETB 40s – the rest are the same as the TR300 data sheet)
![]()
-
7Desktop Injection Moulding
The injection moulding process involves injecting a volume of molten material into a mould over a controlled period of time. Naturally, this requires the use of a machine designed for such a task.
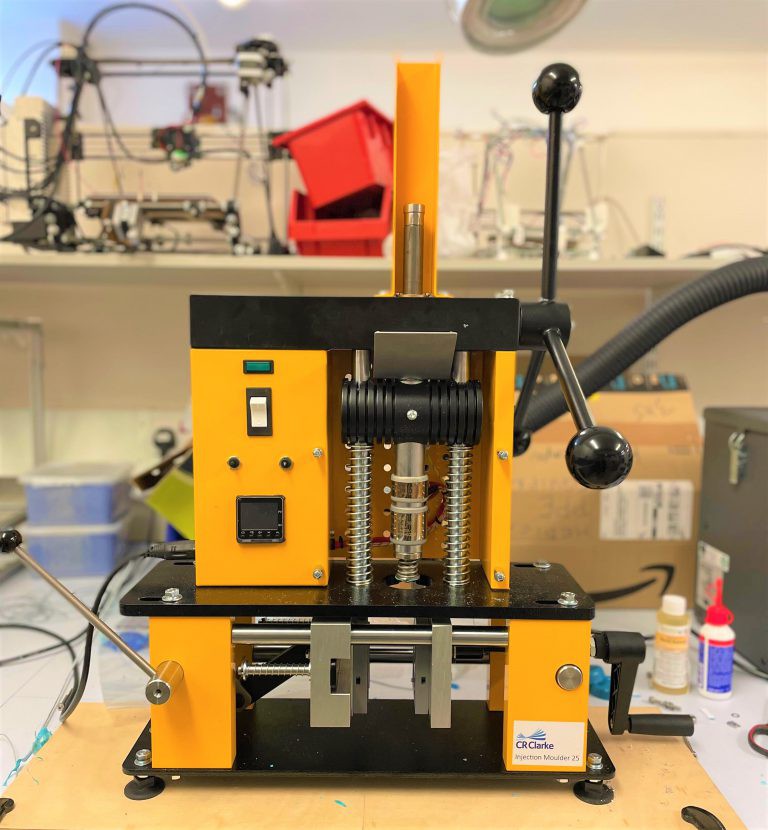
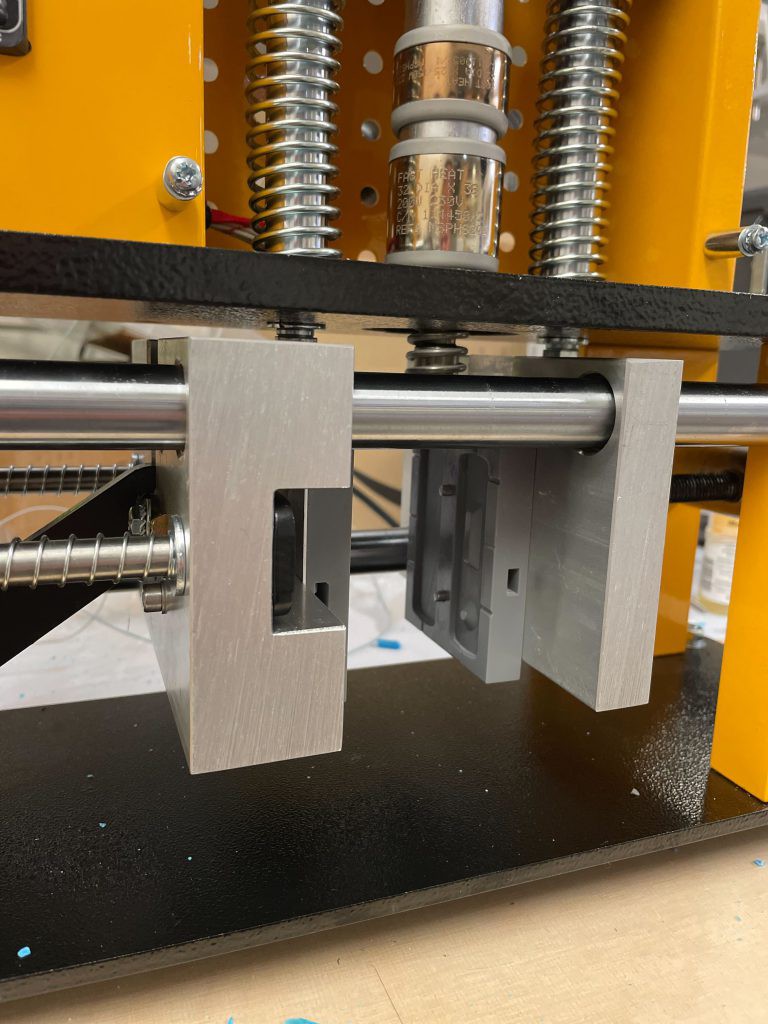
Pictured below is the C R Clarke 25 mechanical desktop Injection moulding machine used to mould our recycled facemasks into new, blue, LFT cases. The process itself is fairly simple. PP facemask pellets are fed into the hopper, moulds are clamped, and a large handle is turned until the mould cavity is filled. Here’s a good video to demonstrate.
Moulding Machine Spec:
- Mould Diameter: 75 mm
- Max Mould Thickness: 95 mm
- Max Moulding Weight: 20 g
- Typical Cycle Time: 45 s
- Max Temp: 200 °C
![]()
![]()
![]()
-
8Results
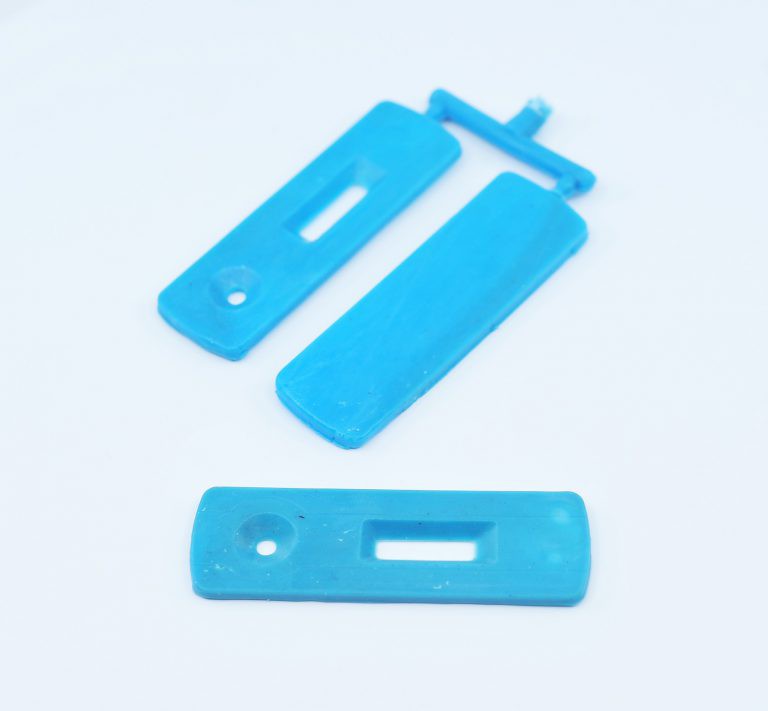
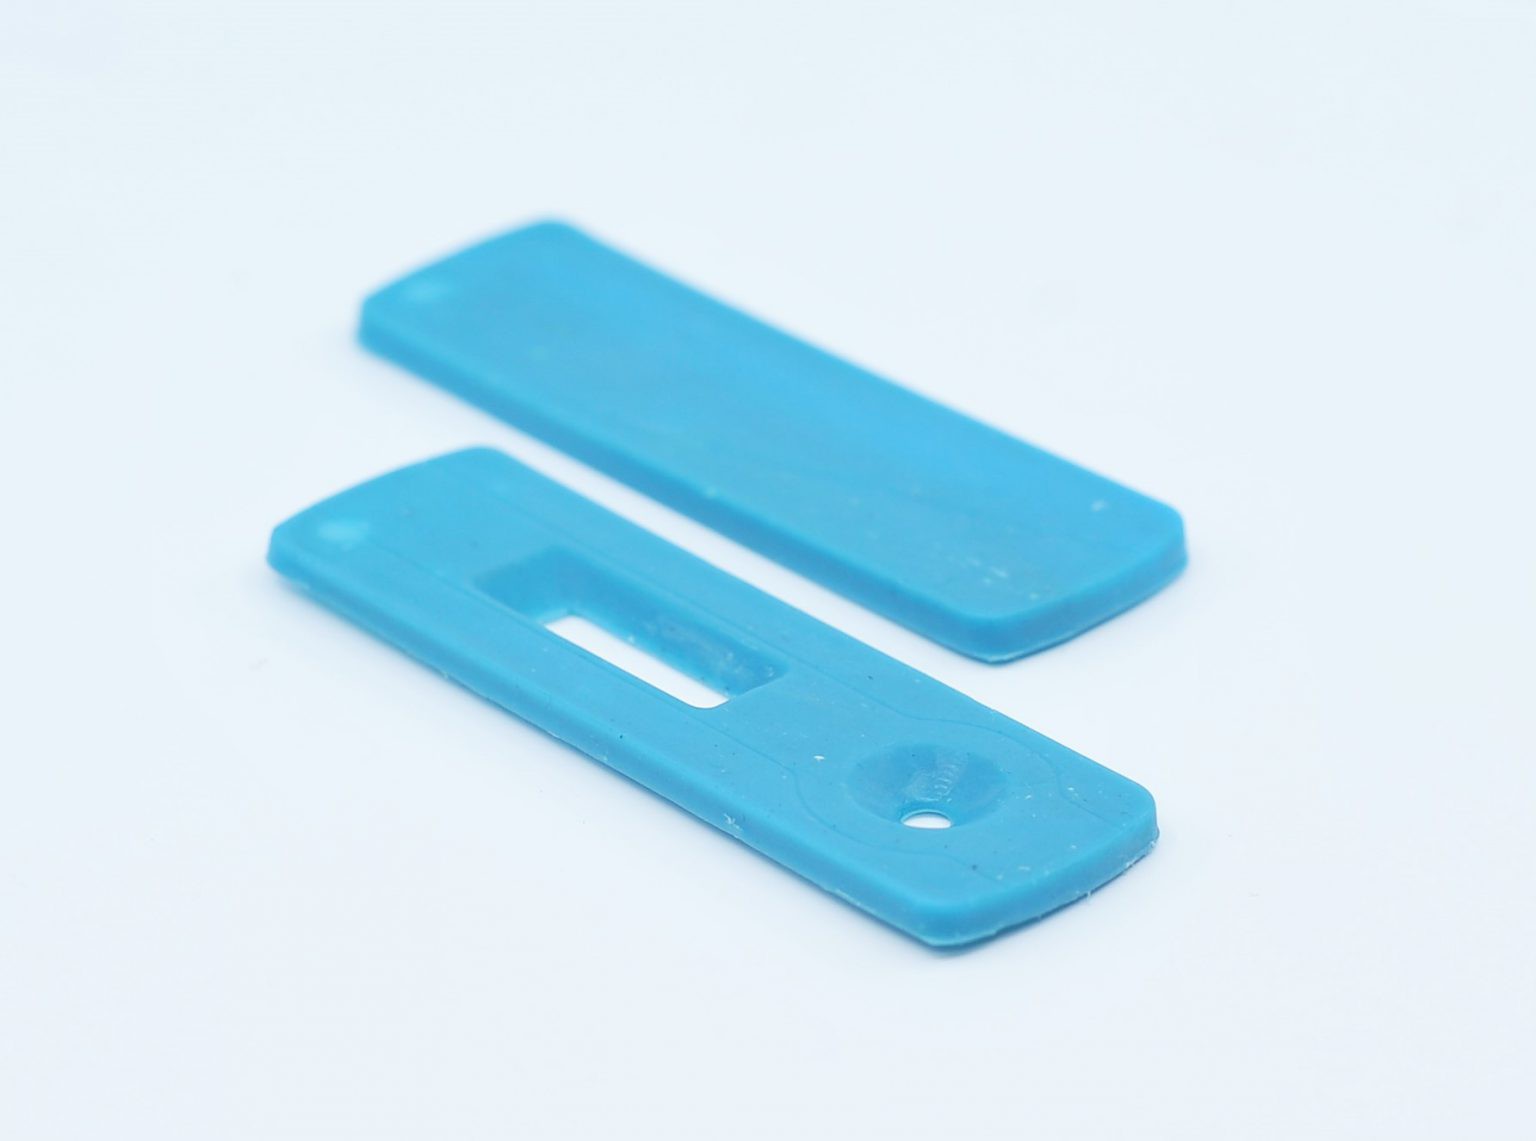
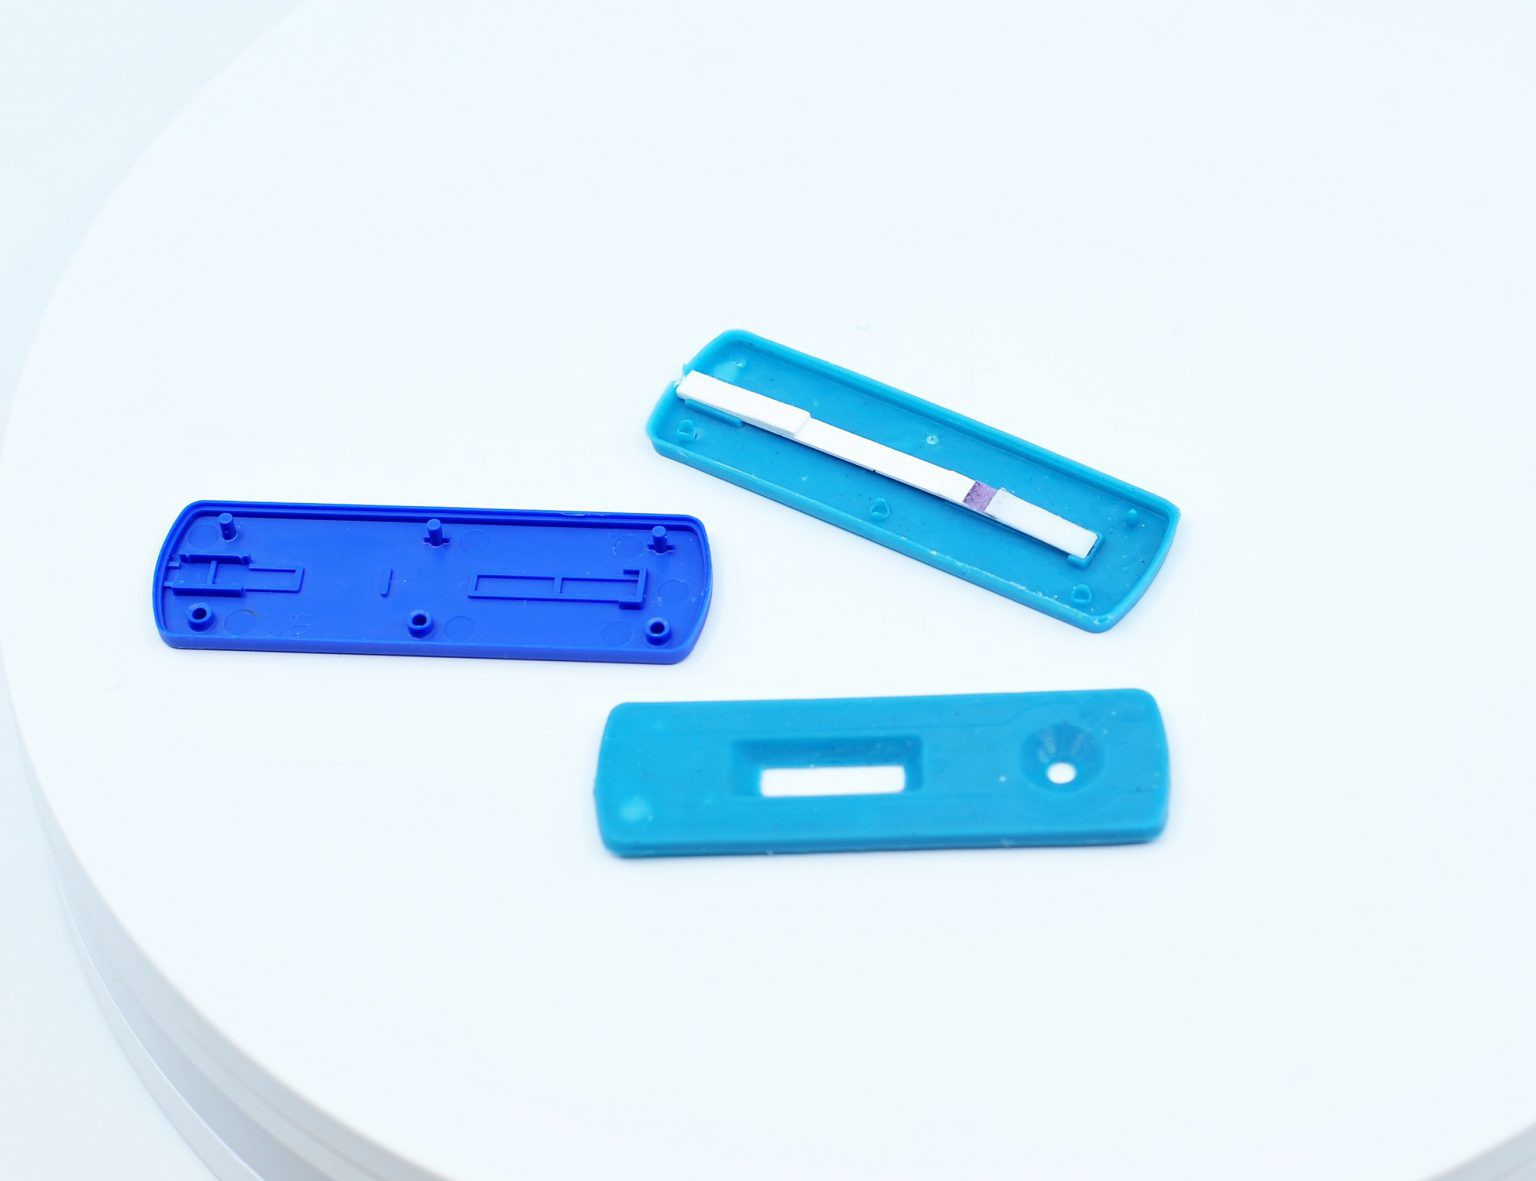
The outcome is far better than expected. Of course, the process could do with some refinement. Fine internal details could be modified to facilitate moulding with mechanical machines, or improvements could be made to the mould tool design itself. However, it is a functional LFD case, made from recycled facemasks, using 3D Printed tools, on a desktop moulding machine.
![]()
![]()
![]()
3D Printing and Moulding with Recycled Facemasks
Can we turn waste PPE into something useful for society? This work explores methods to recycle disused type IIR Facemasks into new products.


Discussions
Become a Hackaday.io Member
Create an account to leave a comment. Already have an account? Log In.
The printed part doesn’t actually look too bad… which is somewhat surprising, given that it’s entirely 3D printed with disposable facemasks.
Of course, these are fairly idealised conditions, the masks used are 100% Polypropylene and have never been worn. This work is therefore a step towards better understanding the challenges in recycling this type of PPE.
The areas we identify for future work include:
Would this process be feasible on a larger scale?
1) Processing mixed materials i.e. could a range of similar type masks all be put through the same machine, and would this produce anything useful?
2) Could the fibrous nature of these masks be exploited for use in composites?
3) What are the best practices for collecting PPE waste for recycling?
4) Could institutions (such as universities) create their own PPE circular economy? Overseeing the distribution, collection, and recycling of PPE.
Are you sure? yes | no