Xtreme Tech
-
Final Model
12/10/2021 at 18:45 • 0 commentsFinally transferred everything on to a perf board ! For the final model I used mechanical keyboard switches and keycaps.
![]()
-
The Code
11/07/2021 at 17:20 • 0 commentsThe code was very simple. The first thing I did was install the keyboard library and include it into my code. Next I initialised the buttons and under void start( ) I set up the buttons and joystick. To actually make the button carry out their respective tasks I used 3 functions:
1. Keyboard.press( )
This function just presses the specific key that you mention in the brackets. For instance, Keyboard.press(KEY_LEFT_GUI) presses the left command button (on mac).
2.Keyboard.write( )
This function not only presses but also writes the specified key. This function is mostly used to press and write any letter, number or symbol on your keyboard. Like, Keyboard.write('c') writes the letter c on your screen by pressing that key. While the Keyboard.press( ) function is usually used for keys that do not write anything on your screen, like the shift and command/control keys.
3. Keyboard.releaseAll( )
This function releases all the keys that have been previously pressed. The Keyboard.press( ) function does what the name suggests, it only presses keys. These keys will not be released until the Keyboard.releaseAll( ) has been called too.
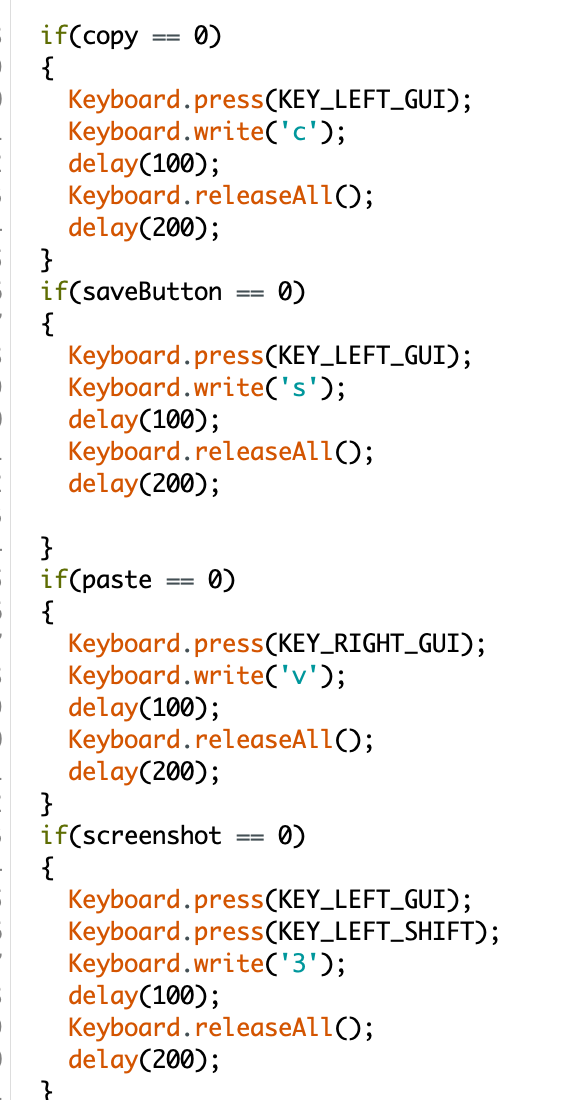
To build this macro keyboard I coded all the buttons using an if statement ( in the void loop( ) ) as shown below:
![]()
I would like to point out that I have added a delay(200) at the end of the block of code in each if statement. This is to make sure that when I press the button, the if statement does not get executed multiple times. With the delay( ) function I am able to place a time buffer to compensate for the time we spend while pressing a button. This way when the button is pressed once the statements are only executed once. The amount of time you want to delay your code by is completely customisable. Here I have delayed it by 200 milliseconds.
-
First breadboard model !
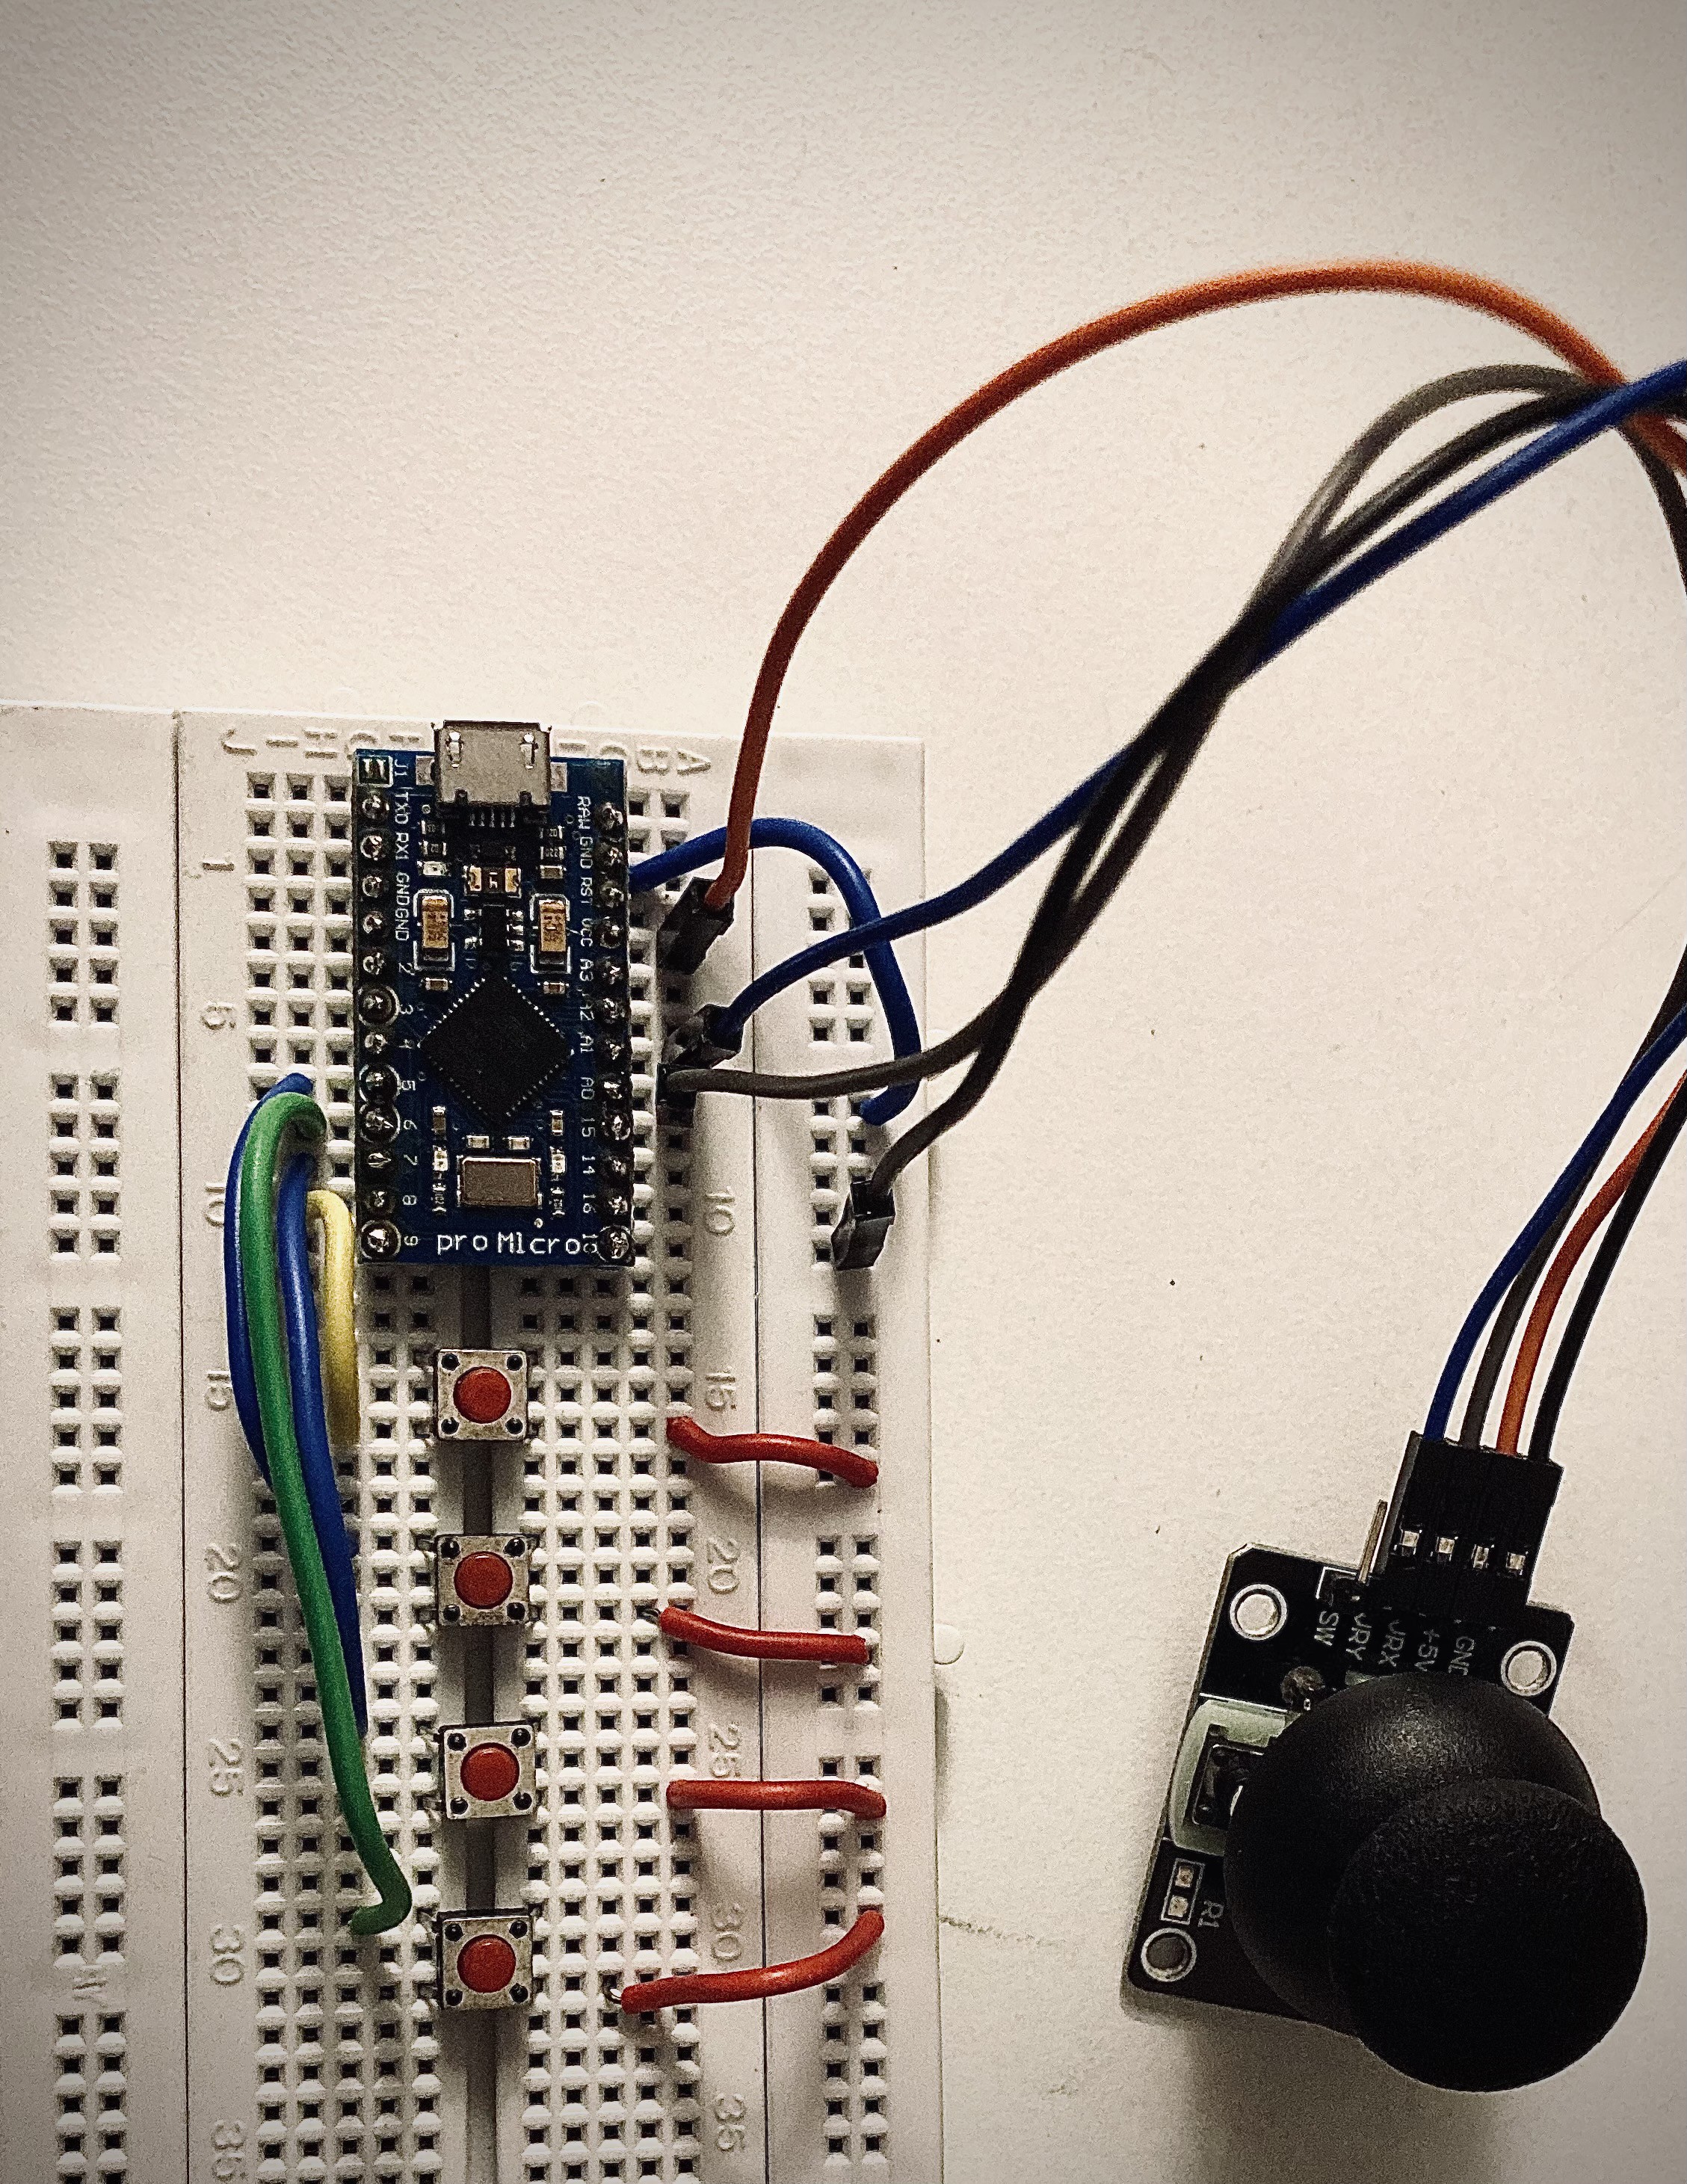
10/17/2021 at 04:53 • 0 commentsI just finished my first breadboard model for the macro keyboard. I have used the arduino pro micro board, 4 tactile push buttons and 1 joystick. In this model I have coded 4 buttons; one for copy, one for paste, one for save and finally one for taking a screenshot of your full screen.
![]()
The code was simple, all I used was the Keyboard.press() function to press the required keys, Keyboard.write() function to write certain keys and the Keyboard.releaseAll() function to release all the pressed keys. However, one of the problems I faced was that only my copy button was working and no other button seemed to function. I soon realised that was because I wrote Keyboard.press(KEY_LEFT_CTRL) when I was suppose to write Keyboard.press(KEY_LEFT_GUI) because I was using a mac. After I changed that everything worked fine. So, if you want to build this macro keyboard for a mac then your command button would be 'KEY_LEFT_GUI' and if you want to build this for windows then your control button would be 'KEY_LEFT_CTRL'.
Furthermore, I coded the joystick to act as my arrow keys.
![]()
My next step would be to transfer all of this onto a perf board and solder them there and I will probably dive deeper into the code in my next log !