 HYuiii
-
1Code Edition
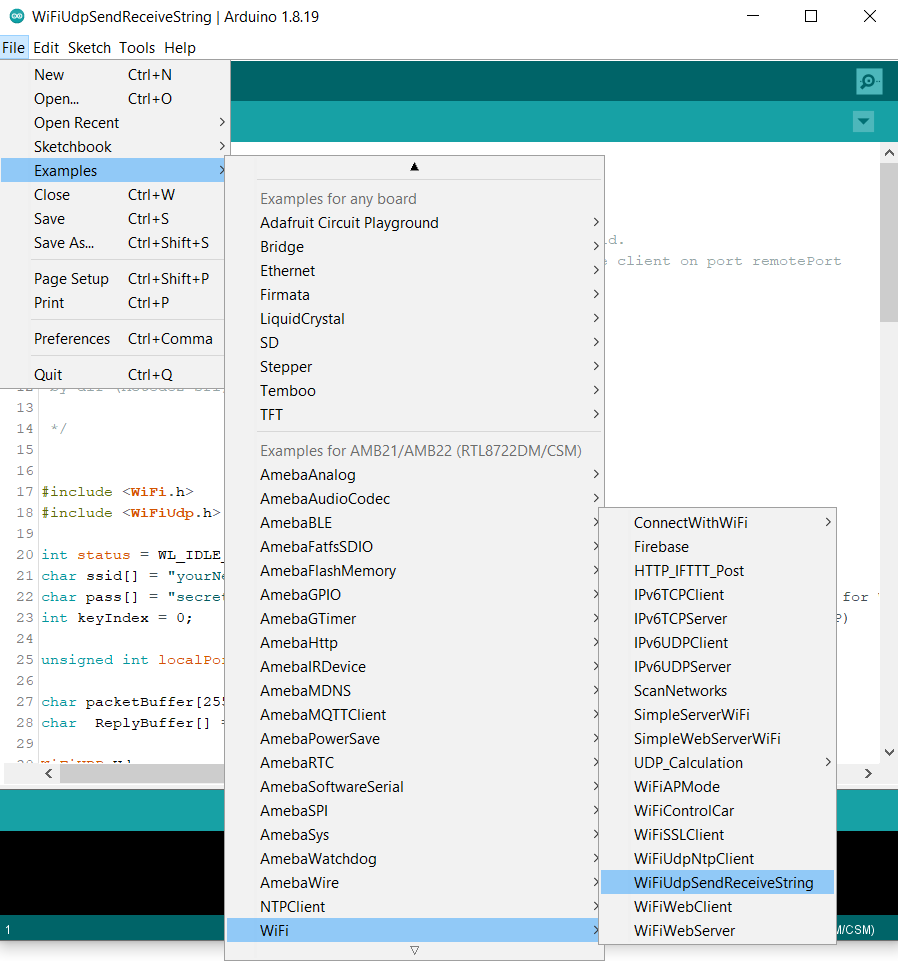
Open the WiFi Web Server example. “File” -> “Examples” -> “AmebaWiFi” -> “WiFiUdpSendReceiveString”
![7-1]()
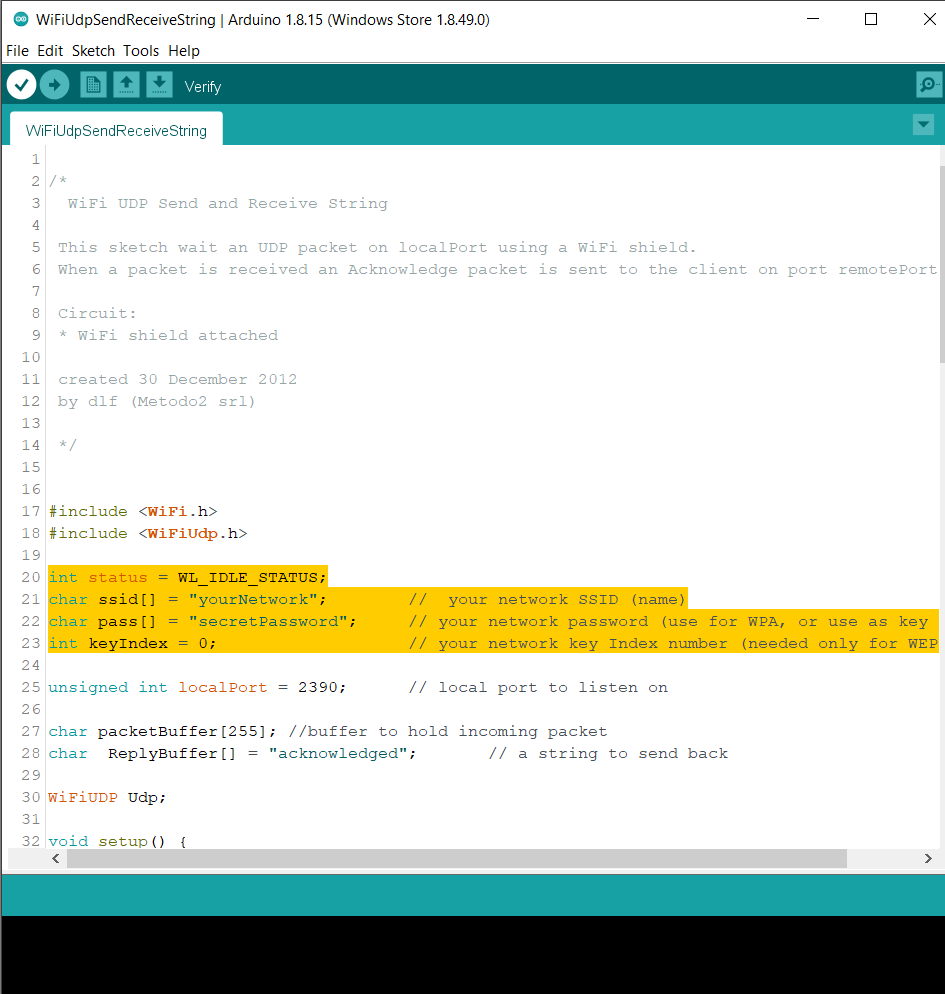
Modify the highlighted code section (ssid, password, keyindex) to connect to your WiFi network.
![7-2]()
-
2Upload and Execution
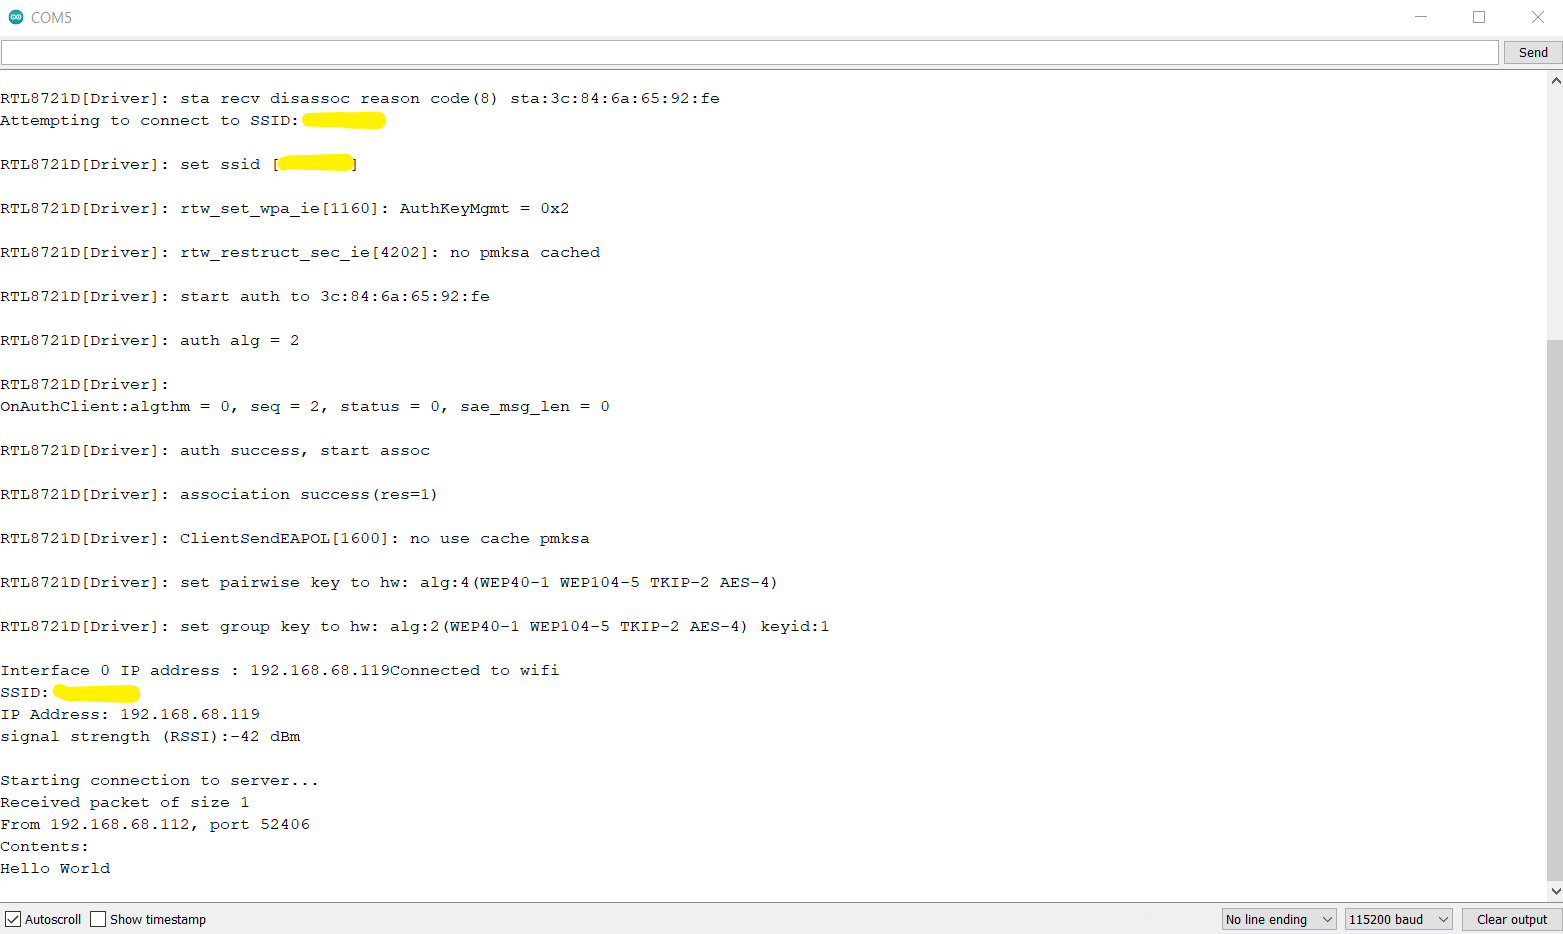
Compile the code and upload it to Ameba. After pressing the Reset button, Ameba connects to WiFi and starts the UDP server with port 2390. After the UDP server starts service, Ameba prints the “Starting connection to server” message and waits for client connection.
![7-4]()
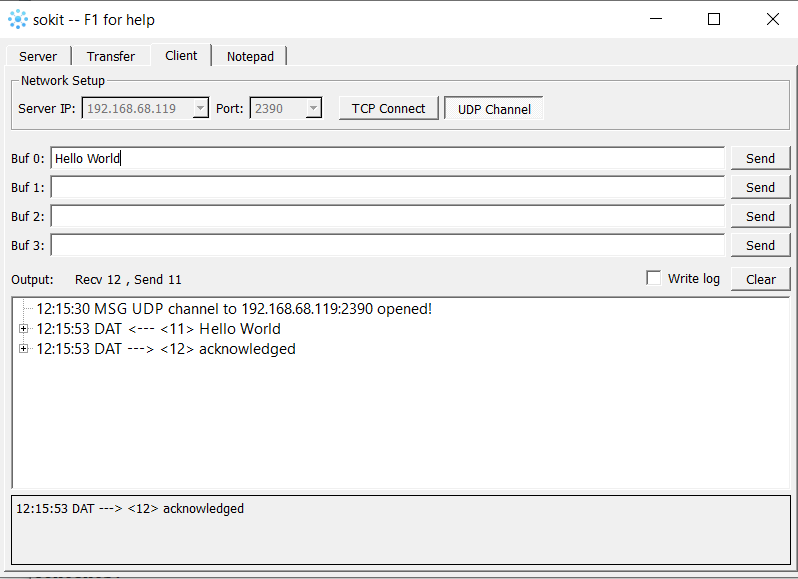
As to the UDP client, we use “sokit” program in the computer to connect to UDP server.Choose client mode and fill in the IP of UDP server (which is the IP of Ameba) and port 2390, then click “UDP Connect”.
After the connection is established, fill in “Hello World” in the Buf 0 field in sokit and click “Send”. Then you can see the Ameba UDP server replies “acknowledged”.
![7-5]()
-
3Code Reference
Refer to the Arduino tutorial for detailed information about this example.
https://www.arduino.cc/en/Tutorial/WiFiSendReceiveUDPString
First, use begin() to open an UDP port on Ameba.
https://www.arduino.cc/en/Reference/WiFiUDPBeginUse parsePacket() to wait for data from client.
https://www.arduino.cc/en/Reference/WiFiUDPParsePacketWhen a connection is established, use remoteIP() and remotePort() to get the IP and port of the client.
https://www.arduino.cc/en/Reference/WiFiUDPRemoteIPThen use read() to read the data sent by client.
https://www.arduino.cc/en/Reference/WiFiUDPReadTo send reply, use beginPacket(), write(), end().
https://www.arduino.cc/en/Reference/WiFiUDPBeginPacket
https://www.arduino.cc/en/Reference/WiFiUDPWrite
https://www.arduino.cc/en/Reference/WiFiUDPEndPacket
RTL8722DM MINI: Use Ameba as UDP Server
In this project, we connect Ameba to WiFi and use Ameba to be an UDP server.
Discussions
Become a Hackaday.io Member
Create an account to leave a comment. Already have an account? Log In.