 Mark
Mark-
1Print the Tombstone
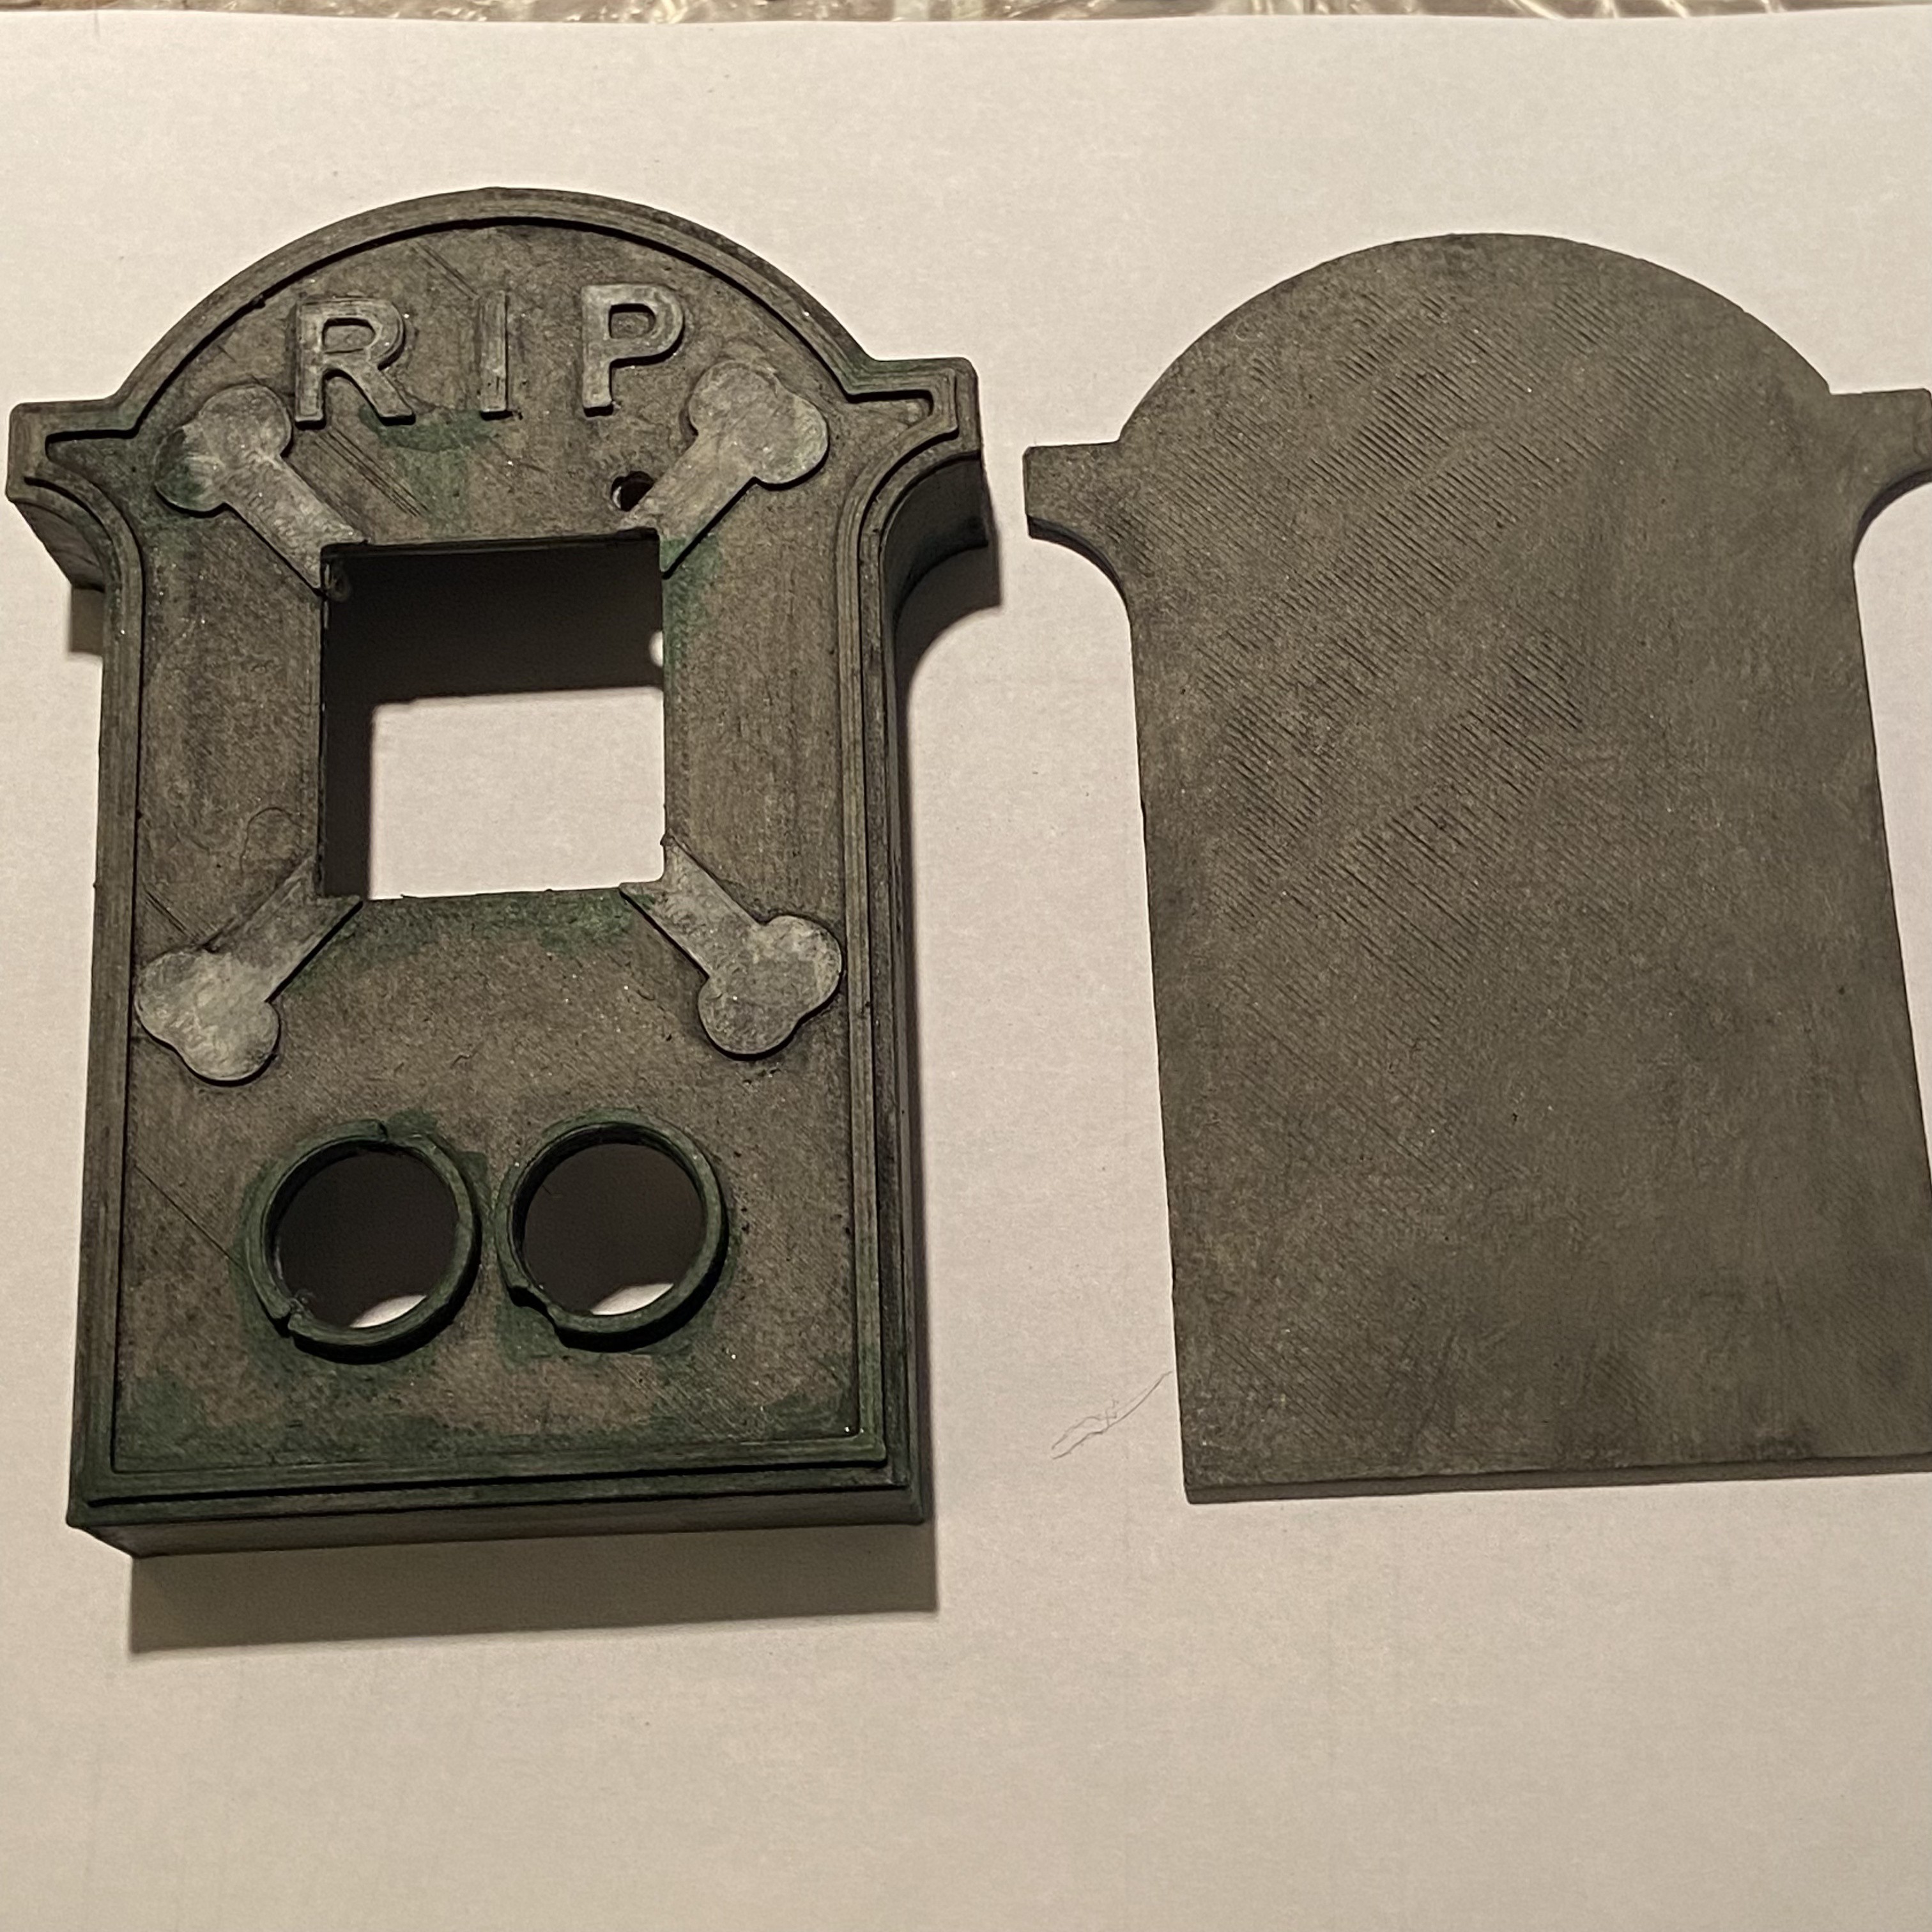
This is the arts and crafts part of the project. There are three parts to the finished tombstone: the base, the detailed front plate and the back plate. All parts print flat on their back with any standard print settings. No support is needed.
The front plate needs to be glued on the base. Crazy glue or epoxy will work. The back plate is snap fit meant to be able to come on and off to turn the project on and off and access the battery.
-
2Paint the Tombstone (Optional)
While it is entirely optional painting the tombstone adds that extra level of fun and scariness! Do not let me limit what you do with yours, but I primed all the pieces grey and then painted them all with a medium grey acrylic. The letters and bones were then painted white and green was added around various areas to simulate vegetation / moss.
Finally I did a black wash to give it the aged look. For those who have never attempted a wash before, get some black paint on your brush, dilute it pretty heavily with water and coat the model. Then wait, I usually waited about 30-60 seconds. Then wipe the paint off gently with a paper towel or similar. You need to be gentle as you want some black paint to remain.
![]()
-
3Install CircuitPython and the Tombstone code
Before all the electronics are inside it is easiest to do the setup. The project runs on CircuitPython (was written for 6.3 but should work on anything newer too) so the first step is to ensure the Hallowing has CircuitPython installed. If it does not see the Hallowing guide to get it installed. You will also need the adafruit_imageload, adafruit_led_animation, adafruit_uc100 and neopixel libraries.
The python code to run the tombstone can be found here on GitHub in the code-distance.py file. You will have to rename this file to code.py on the Hallowing.
-
4Configure the code
After the imports in the python file there are several options you can configure. They are detailed in the code as well as these instructions.
USE_LIGHT_SENSOR = False    # if you want to disable the light sensor
USE_DISTANCE_SENSOR = True  # if you want to disable the distance sensor
USE_NEOPIXELS = True        # if you want to use the onboard neopixels

LIGHT_VALUE = 1500          # value at which we turn on/off the laughing
DISTANCE_VALUE = 50         # value at which we turn on/off the laughing

MODE_SWITCH_TIME = 0.2      # how long to wait for a changed reading
                            # to be consistent to change modes

LAUGHING_SPEED = 0.1        # how fast the animation runs
USE_AUDIO = True            # if you want to disable audio
USE_ANIMATION = True        # if you want to disable animation
The first block of configuration is which sensors are active. The tombstone can run on distance or on light level. The last option is if you want the side neopixels to light up.
The second section is the trigger values for the light and distance the code will trigger on. The distance is in centimeters. The light is an analog value, 1500 was the light in my room so vary it as required.
The switching time configuration is how long the sensor value has to hold before switching modes on or off. This either lets you delay the reaction and prevents the trigger from quickly flipping back and forth if it is near the border.
The last section is primarily used if you want to run the project on other CircuitPython boards and alters the animation speed, whether to use audio and if you want the skull to animate. On slower boards it can help to turn these off.
-
5Assembly
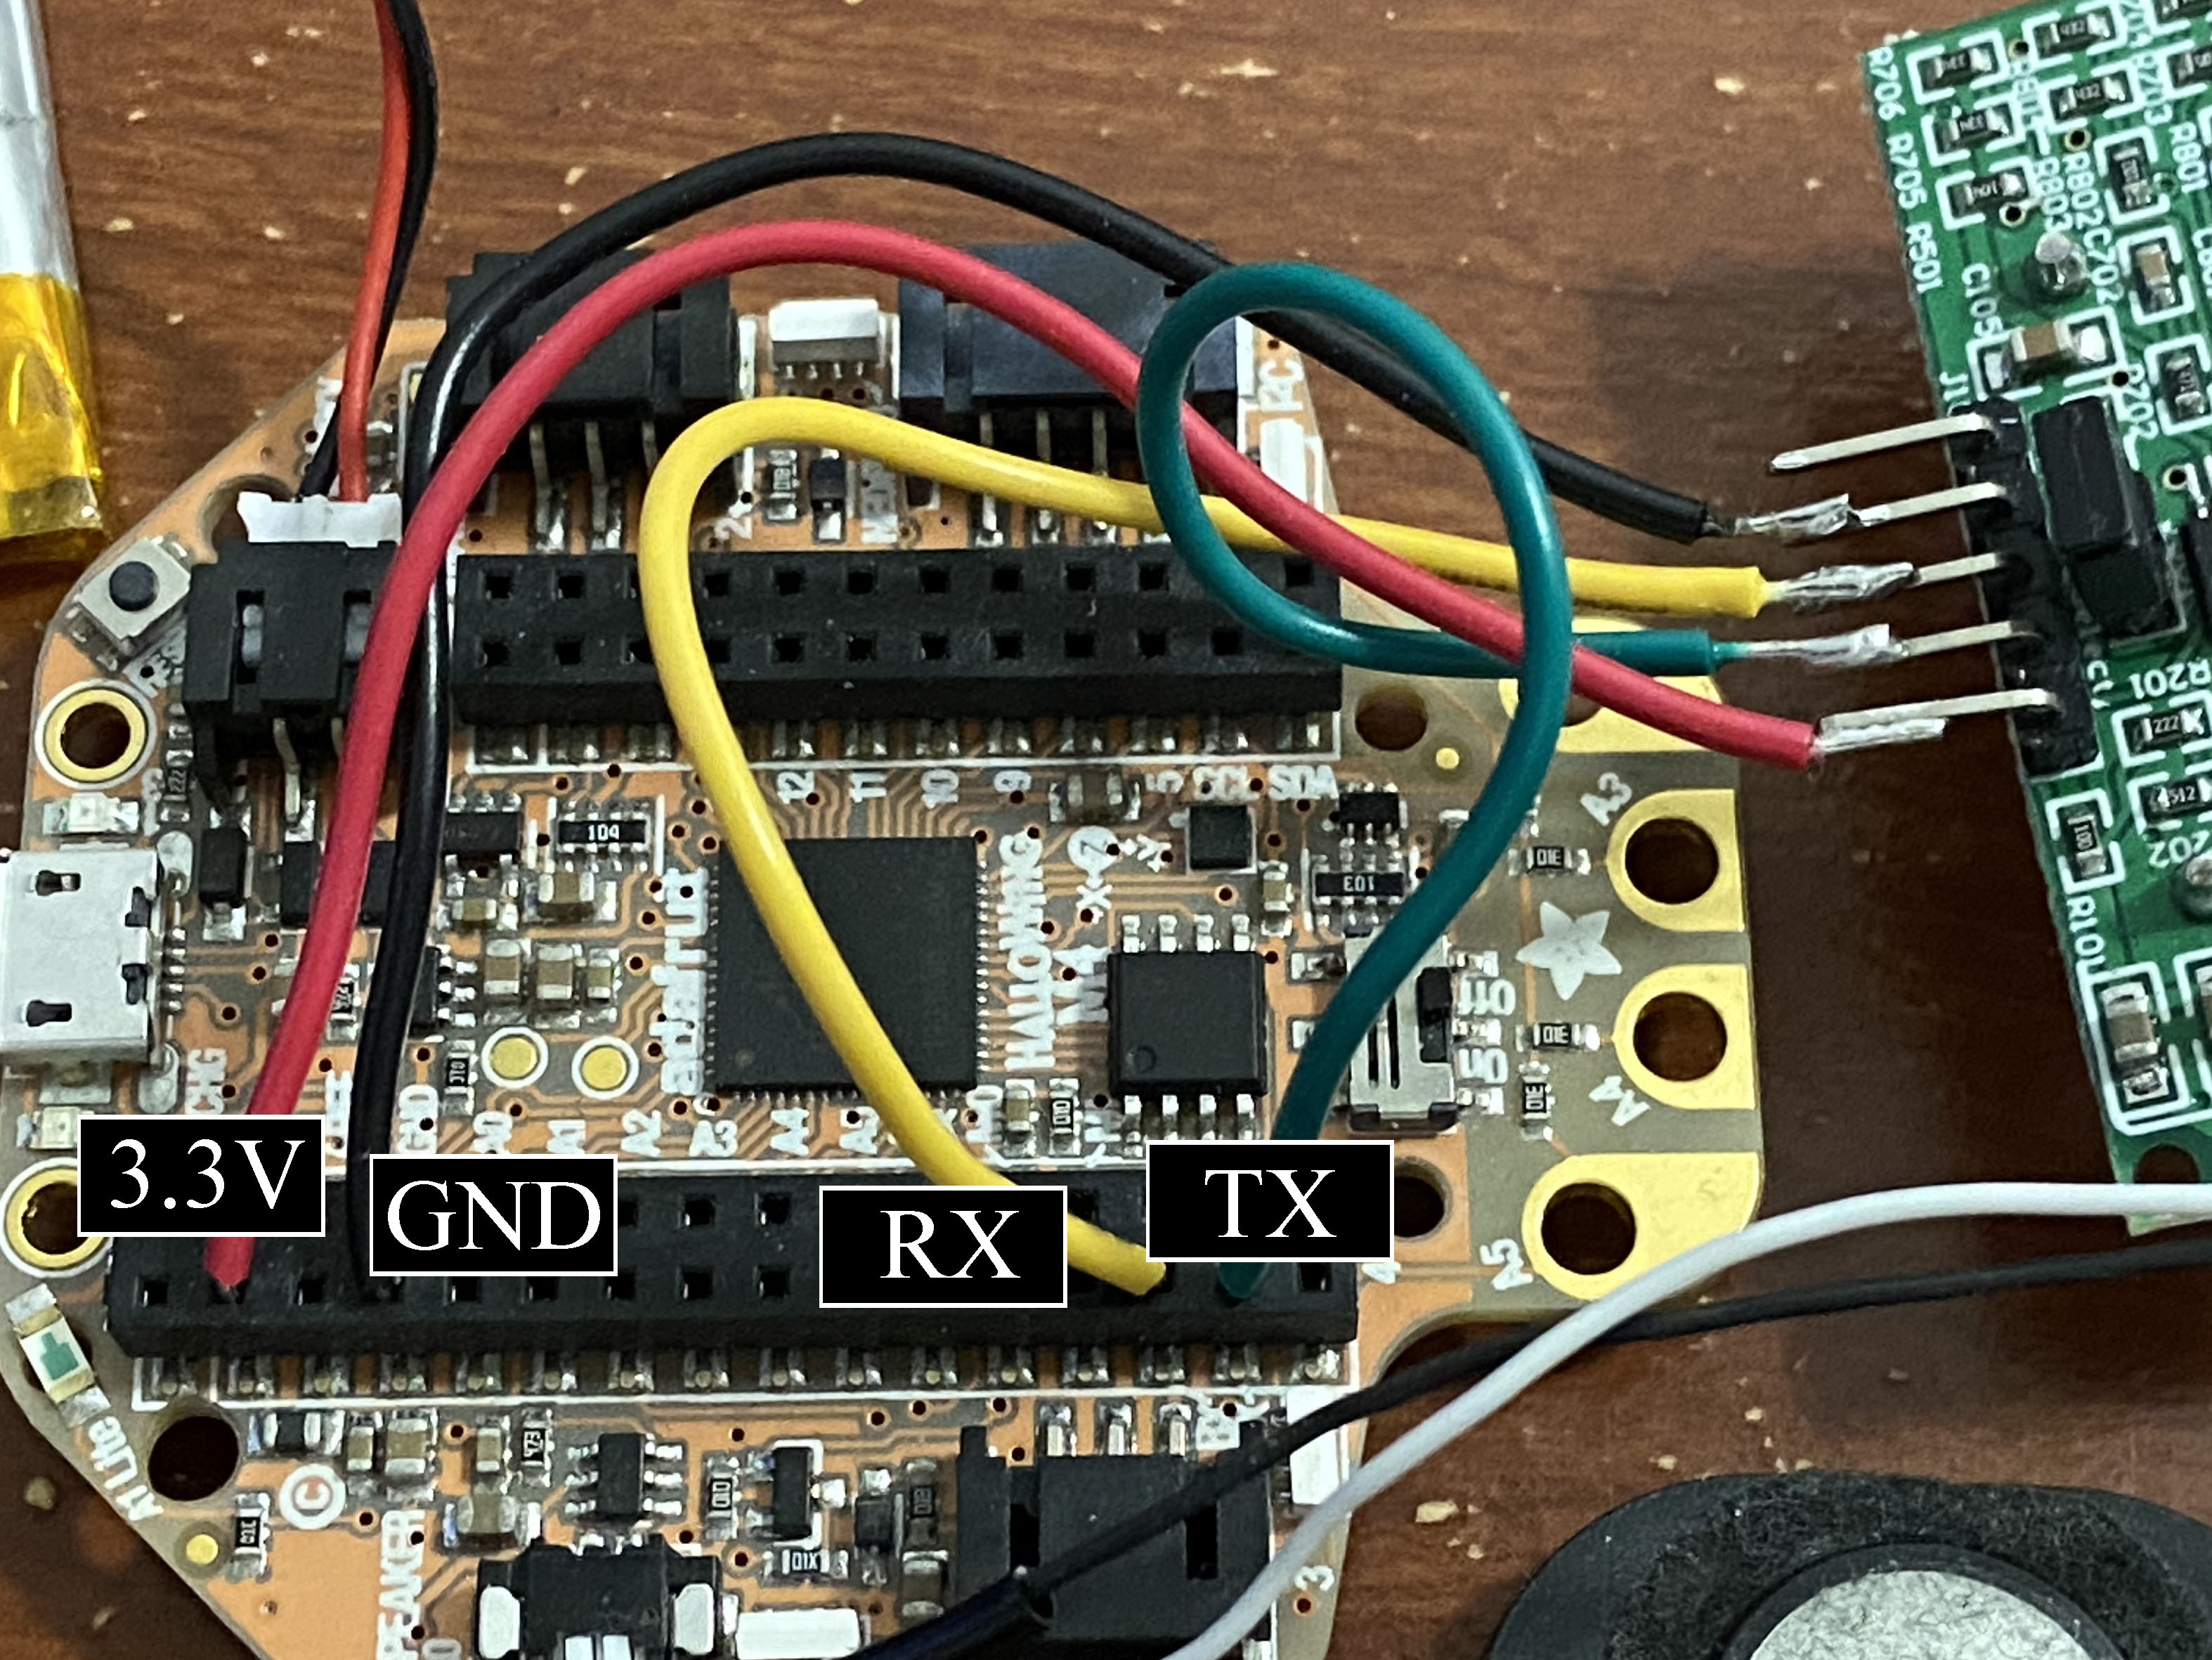
The Hallowing fits on the posts in the center of the tombstone base. I found room on top of it for the battery to sit. The distance sensor fits into the two holes at the bottom and the speaker plugs into the Hallowing and can sit loose or be mounted in the indentation on the back plate.
Hooking the UC-100 sensor to the hallowing is the trickiest part of the assembly. I soldered wires to the sensor that fit into the Hallowing feather ports. The sensor labels what each pin is. Ground and VCC go to the Ground and 3.3V holes on the Hallowing.
The RX/TX pins go to the RX and TX holes on the Hallowing. This is important as some sensors have RX go to TX and vice versa. Not for this sensor.
![]()
You can either hope things hold in place or use a small amount of hot glue or tape to hold the wires and components in place. You could also get a ProtoWing that can mount into the Hallowing and then solder the wires from the sensor to the ProtoWing.
![]()
-
6Set it up and wait
Turn the Hallowing power switch on, snap the back plate on and you are ready to set it up and wait for someone to get scared!
Jump Scare Tombstone
This creepy old tombstone will reveal its evil soul when you approach too close!

Discussions
Become a Hackaday.io Member
Create an account to leave a comment. Already have an account? Log In.