-
Video Production: 1st Video Completed
11/30/2021 at 21:15 • 0 commentsUpdate: video link at bottom.
I finally have some extra time and energy to get back to my video production project on the Pi. I’m currently wading through a sea of unlabeled video clips I shot for this project about a year ago. I decided to ignore my original notes as my creative tastes have changed.
I have some new criteria for what is going to make it into this final video:
Yes: Makes me laugh as soon as I see it.
No: Terrible video quality, not funny, generally useless, or worse version of another clip.
Maybe: Funny but not super funny. Might be a good option if there is no other version of the scene. Just has potential.I am making all these judgements based on my initial reactions to watching the clips. I use to trust my gut all the time when I was younger, but got away from it years ago. I used to be known as a very funny and entertaining person, and that made me very happy to make others happy. I did so by just being myself. Gotta be myself on this project and see what hot garbage comes out the other end.
I started by using Krename to bulk rename the known 1080p and 4K files, respectively. I add either [1080p] or [4K] to the end of the file name to save time. The Pi 400 won’t even play 4K files for some reason, so I don’t even try. I batch converted a bunch of 4K files last time I worked on this. The Pi did an admirable job and gave me very good video quality. I CAN edit 4K video directly and render the final project in 1080p, but without having seen the clips and decided which ones are going to be used, I need to review them all. It’s far easier to convert first.
Currently just watching all videos and making notes on them. Here’s an example of my current notes:
Yes:
Mr_Fish_picnic_table_001[1080p].mp4
Mr_Fish_pine_needle_flop_001[1080p].mp4
Mr_Fish_rock_sun_bathing_001[1080p].mp4
Mr_Fish_plays_ukulele_004[1080p].mp4
Mr_Fish_uses_toilet_001[1080p].mp4No:
FPV_looking_around_at_beach[1080p].m4v
Mr_Fish_plays_on_slide_002[1080p].mp4Maybe:
Mr_Fish_rock_flop_002[1080p].mp4
- Might be better option
Mr_fish_cooking_dinner_001[1080p].mp4
- questionable lighting and focusIt’s a simple text document that helps me make a quick decision, mark it down, then move on. I copy the file name by just right clicking, hitting “rename” then control+a, then escape. Then I just paste the file name into my notes. I COULD do this without notes, but it’s far more mentally taxing and I’d rather not make mistakes that require hours of rendering to fix. It’s all about the process, which I am still working out. After I decide what clips will go into the final video, I have to decide on the order to put them in. These clips were taken at different times of lighting, so it’s fairly easy to sort by time of day and then sort even further within each category. Most of the work on this project is done at the beginning, just laying out the story line. It’s worth the effort to see a good video come out the other side. It will be even more satisfying doing it on the Pi and showing how easy it can be for anyone with $100 to get into video production.
A random note on production notes: A good set would allow someone to lay out the entire video, and someone else to actually create the video, freeing up the person who wrote them. The notes are the outline for the entire project. Very helpful. I write my notes as if they need to be understood by someone else, even if that person is just future Me.
I finally got a selection of clips I am happy with. I added notes where needed, and put them in the order I want to start with. I won’t know the final order until I line them all up and watch. That’s the fun part, where the creative work begins to become visible to others. Right now they’re just file names in a list. The next step is to open Kdenlive and import the clips to be made into proxy clips.
Before that, I’ll add in my notes up to this point, as people may be interested in them:
---------------------------------------------------------------------------------
Yes:
Video:
Mr_Fish_pond_coast_flop_001[1080p].mp4
Mr_Fish_rock_flop_002[1080p].mp4
Mr_Fish_rock_sun_bathing_001[1080p].mp4
- Longer than other clips; peaceful
Mr_Fish_pine_needle_flop_001[1080p].mp4
Mr_Fish_tunes_ukulele_002[1080p].mp4
- Ukulele_mid_001.WAV
Mr_Fish_plays_ukulele_004[1080p].mp4
Mr_Fish_uses_toilet_001[1080p].mp4
Mr_Fish_swingset_004[1080p].mp4
Mr_Fish_fire_pit_001[1080p].mp4
Mr_fish_climbs_rockwall_001[1080p].mp4
Mr_fish_playground_steps_002[1080p].mp4
Mr_Fish_plays_on_slide_001[1080p].mp4
Mr_Fish_picnic_table_001[1080p].mp4
Mr_fish_cooking_dinner_001[1080p].mp4
- Overlay sizzling, lower sizzle volume
Chicken_breast_skillet_001[1080p].mp4
- Use as final clipAudio:
Ukulele_Bad_001.WAV
- Use second part
- try with original audio, use funnier of the two.
Ukulele_mid_001.WAV
- Use with tuning clipNo:
FPV_looking_around_at_beach[1080p].m4v
Mr_Fish_plays_on_slide_002[1080p].mp4
Mr_Fish_rock_flop_001[1080p].mp4
Mr_Fish_shrub_001[1080p].mp4
Mr_Fish_swingset_001[1080p].mp4
- Too much motion, not enough Mr. Fish.
Mr_Fish_swingset_002[1080p].mp4
- Too much motion, not enough Mr. Fish
Mr_Fish_swingset_003[1080p].mp4
- Not funny enough; doesn’t fall out.
Mr_Fish_tunes_ukulele_001[1080p].mp4
- Not funny enough; not hitting it
Mr_fish_cooking_dinner_002[1080p].mp4
- Bad lighting
Mr_fish_cooking_dinner_003[1080p].mp4
- Bad lighting
Mr_fish_playground_steps_001[1080p].mp4
- Not funny enough: Doesn’t fall down steps
Mr_fish_playground_steps_003[1080p].mp4
- Not funny enough: Doesn’t fall down stepsMaybe:
Mr_Fish_rock_flop_002[1080p].mp4
- Might be a better optionOrder:
Morning:
Mr_Fish_uses_toilet_001[1080p].mp4
Mr_Fish_rock_flop_002[1080p].mp4
Mr_Fish_rock_sun_bathing_001[1080p].mp4Day:
Mr_fish_playground_steps_002[1080p].mp4
Mr_Fish_swingset_004[1080p].mp4
Mr_fish_climbs_rockwall_001[1080p].mp4
Mr_Fish_plays_on_slide_001[1080p].mp4
Mr_Fish_fire_pit_001[1080p].mp4Evening:
Mr_Fish_pine_needle_flop_001[1080p].mp4
Mr_Fish_tunes_ukulele_002[1080p].mp4
Mr_Fish_plays_ukulele_004[1080p].mp4
Mr_Fish_picnic_table_001[1080p].mp4
Mr_fish_cooking_dinner_001[1080p].mp4
- Use transition between slow and fast flopping
Chicken_breast_skillet_001[1080p].mp4
- Cut clip shorter than rest.
---------------------------------------------------------------------------------Shortly after starting the editing process, I realized that the ordered lists at the bottom were not up to date and had to correct them. The final notes are above. I don’t believe I completely finished them, as I remember just working from memory at some point and leaving the notes alone. I want to get out of that habit as the projects get larger and more complex. Working from memory doesn’t often scale well in my experience.
I have a total of 15 clips I’ve chosen to work with on this project. I have more in 4K, but they’re from Mr. Fish' perspective, and I don’t much care for them. They would break up the consistency of the video. They’re also 4K and I don’t feel like waiting for them all to render right now. I’m excited to make some progress on this video after about a year of forgetting all about it.
Upon adding the files to Kdenlive, I was prompted multiple times that the program was not responding. I chose the “Wait” option every time and the clips eventually imported. I now have 15 clips with proxy versions ready to go. Going to just start by adding them to the timeline in the proper order. I also just realized that this log would make a great video tutorial. Too bad I don’t have screen capture set up yet… Soon.
After a rather enjoyable editing process, I have the final video rendering. I hope I won’t have to make any changes, but you just never know. It’s rendering now, at about 6 frames per second, which is extremely slow, but it is working and the system is responsive enough to write this log in LibreOffice Writer with all 4 CPU cores maxed out. It looks like it will only take about 2 minutes to render about a minute of video file as a lossless x264 MP4 file.
I have the final file and it looks good...from what little bits of it I can watch. This Pi will not play the file in VLC smoothly, so I can’t see if the transitions came out ok or not. It will freeze on a video frame so long that most of the video will have gone by before it catches up. I have no idea how to fix this, nor do I have the patience right now. It’s very frustrating that the Latest Pi can’t even play 1080p video, yet is advertised as supporting 4K60. I know I’m using an unsupported OS, but it is incredibly frustrating having to wait years for the software support of a feature that was advertised at launch. I plan to switch over to Raspberry Pi OS to Use Steam Link and take a break, so I will try to play it back there. If that fails to play, I will either use my Android phone or my Linux gaming laptop to check the file before I upload it anywhere.
It’s 758MB for about a minute long clip, so I may compress it before upload to YouTube. If I can, I will do a test and convert it to h265(HEVC) and upload that. Curious as to how long it would take to convert and the final file size. Well, I started encoding it to h265 1080p and it was averaging 0.25 frames per second and was estimated to take over 30 minutes to complete for a 1 minute video. Terrible, but possible. It’s one of those things were you’d just let it go overnight. If you have very limited upload time or speeds, but plenty of idle computing time, encoding in a more efficient format such as h265 makes perfect sense. If you have fast upload speeds and/or plenty of time to spend uploading, it doesn’t make sense. When I travel, I may either being paying for all mobile data I use, or have limited access to data and would benefit from producing the smallest file sizes possible.
This was an enjoyable project that proved my theory that basic video production tasks can be completed in a reasonable manner on a Pi 400. I have already proven I can edit 4K videos and render a final video without an intermediary file using proxy clips in Kdenlive. I will continue to do my video editing on the Pi 400 as I go. I enjoyed it enough to stick with it. All my notes were taken here, all video and audio editing, review of all the files, everything. I am working on another project to create a Pi based video camera using the HQ Camera Module. When that is ready, I will tie it all together to make a video production set up based entirely on the Pi ecosystem. I am very much looking forward to that day. Until then, I will keep knocking out the simpler tasks. The next step is to upload the video to YouTube and my hackaday.io page so people can see the final results. I hope you’ve enjoyed this adventure so far. I always appreciate feedback, so don’t be afraid to comment. Especially if you may know of a better way to do things.
Update: I got the video uploaded to my main Youtube channel, Dustin's Hot Garbage. It's a place for me to practice video production and document my adventures. The Pi 400 has earned its place as the official editing computer of my channel.
Video Here. (Opens in new tab)
Update(again): I was able to watch the video, at 1080p on the Pi 400. It looks very good, considering how little effort I actually put into it. Playback from YouTube was far better than with VLC Media Player with the local file. I hope you enjoy the video.
-
Gaming on the Pi: Steam Link
11/27/2021 at 21:13 • 1 commentI finally got Steam Link running on my Pi 400 and am really enjoying it. I'm currently typing this on my Pi laptop, into the Firefox browser running on my gaming laptop. I thought Steam Link would only allow me to play games over the network, but it's pleasantly surprised me by letting me control the entire OS. I was actually looking at hardware just today to make the gaming laptop easier to access. I was getting tired of having to switch to the other keyboard and track pad to do anything. This is a nice change of pace. I may still set up a proper remote desktop client in the near future.
As far as networking goes, I plugged the Pi 400 into the laptop using a cheap Cat6 ethernet cable. It's plenty responsive, even at the limited 90Mb/s of the Steam Link software. This is a known limitation, probably caused by porting over the settings from the original Steam Link hardware. This limitation is what makes me want to set up proper remote desktop. The Pi 400 may not be very powerful, but it does seem to make an excellent remote client for more powerful machines. I shared the laptop wifi connection over ethernet to get internet to the Pi, and it hasn't much, if any affect on internet speeds. If I had to guess, I'd say its because the laptop has a better antenna and gets a stronger signal than the Pi where I am located at the moment. I may end up sharing the laptop internet connection to my old wifi router and using that to connect everything else to. The end goal is to be able to take a high powered laptop, my Pi 400 laptop, and a small but speedy wifi router on the road with me and run them all from a vehicle battery, portable battery bank, and random outlets. I really just want to see if it's possible to travel super light and still take all of the tech comforts of home with me. I think it would be quite fun to play my Steam games on top of a mountain or something stupid. Not everything I do has to make sense. It would just be nice to have a portable set up to take with me and share with friends and people I meet. I'm also looking into a VR headset that could travel and run off the laptop I'm saving up for. Vanishing Realms was the first VR game I ever played and it became one of my favorite games of all times. I'd love to be able to play that wherever I go and share a VR experience with others who may not be able to afford such a set up. I know I couldn't for the longest time. Still can't justify it yet. Anyway, the Pi running Steam Link is the first step in playing decent games on this humble, yet capable little PC. It runs very well, and I can already play games on it that never had ARM releases. Like Golf with Your Friends. Love that one.
There was a trade off I had to make to get this to work: I can't run Steam Link on my favorite Pi OS. Pop!_OS is based on Ubuntu 20.10, which is unsupported and will not run Steam Link. Luckily, I have an SD card with Raspberry Pi OS Bullseye on it. Oh wait...Steam Lin won't run on that either... Luckily again I have an SD card with Raspberry Pi OS Buster on it, which runs great. I'll be keeping a boot drive with Buster on it for gaming and general goofing off. It's not my preferred OS, but it is still quite capable. One of the best features of the Pi is that the boot drive can be changed out very quickly. Unlike my laptop, which is going down for an upgrade from Linux Mint 19.3 to Pop!_OS. I love mint, but Pop is my new favorite. I'll be installing Pop on a different SSD and swapping them out in case I run into problems with Pop and need to revert. I've been running Mint on this PC since I got it, and on everything else since 2018 or so. I'm hoping that Pop will have better hardware support for my GPU(GTX 765M) and give me better gaming results, which would make the Pi experience even better.
Overall, I'm very happy with everything so far, and have learned quite a bit just trying to get Steam Link working on the Pi 400. I don't game often, and it's mostly because I usually don't have the time, and it's too much hassle to set things up. I like Steam and will actually use it. The key for me getting things done is often just making them easy to do. The Pi is becoming easier to use every day as I iron out all the little wrinkles.
My game should be done updating now. Let the gaming begin.
-
Cooling Update and Random Thoughts
11/25/2021 at 19:01 • 0 commentsCooling Update
I've been using the Pi on and off all day and I do think the little cooling fan is helping the LCD driver board. It does seem significantly cooler. I can feel the air coming from the fan when I check now. I'm guessing the little bearings had to warm up and loosen to really get it spinning. I can feel it running when typing, but it's silent. The Pi still runs very hot, but that's to be expected and dealt with later.
Random Thoughts
I really like that my entire laptop is white with no branding at all. It's the least distracting computer I have ever used or seen in my entire life. I love that. It's a tool for creating things, and shouldn't get in the way. I have considered loading it up with fun stickers, but I really like how low key it is. That and no one would have a clue what it is if they just looked at it. A Pi enthusiast might notice it, especially if they saw the Pi button on the keyboard. Being white, it does show dirt easier, but that helps me remember to clean it. I might get the Vilros rubber keyboard cover for the Pi 400 and see how I like that. Sometimes I'm gross AND need to use my computer. Like when cooking. This would be pretty neat for watching videos on while cooking. Except the screen splatter...
-
Pidock 400 Active Cooling 1: LCD Driver Board
11/25/2021 at 16:25 • 2 commentsDisassembly
Getting the Pidock 400 apart was far easier than I thought it would be. It looked like there was super glue holding the front corners together, but it was just some crappy plastic work. It's held together by clips and quite easy to get into with some sort of prying tool. I used a small flat head screwdriver. The hinge covers are side specific, so just switch them if they leave a gap on the back side. There is a bit of 3M VHB tape that holds down the center bit at the back. This may be tough to remove, so take your time. I was luck in that someone put tape on the bottom AND top but never peeled the backing off the lid side, so it came right apart. I left it like that for easy disassembly. I'd use adhesive double sided Velcro there in the future. I used to use it for RC planes and it was very handy. I don't have a picture of the case open without the fan installed, but there is actually a small grate there with mounting holes for a fan. I have 4 of these fans on hand...Perfection.
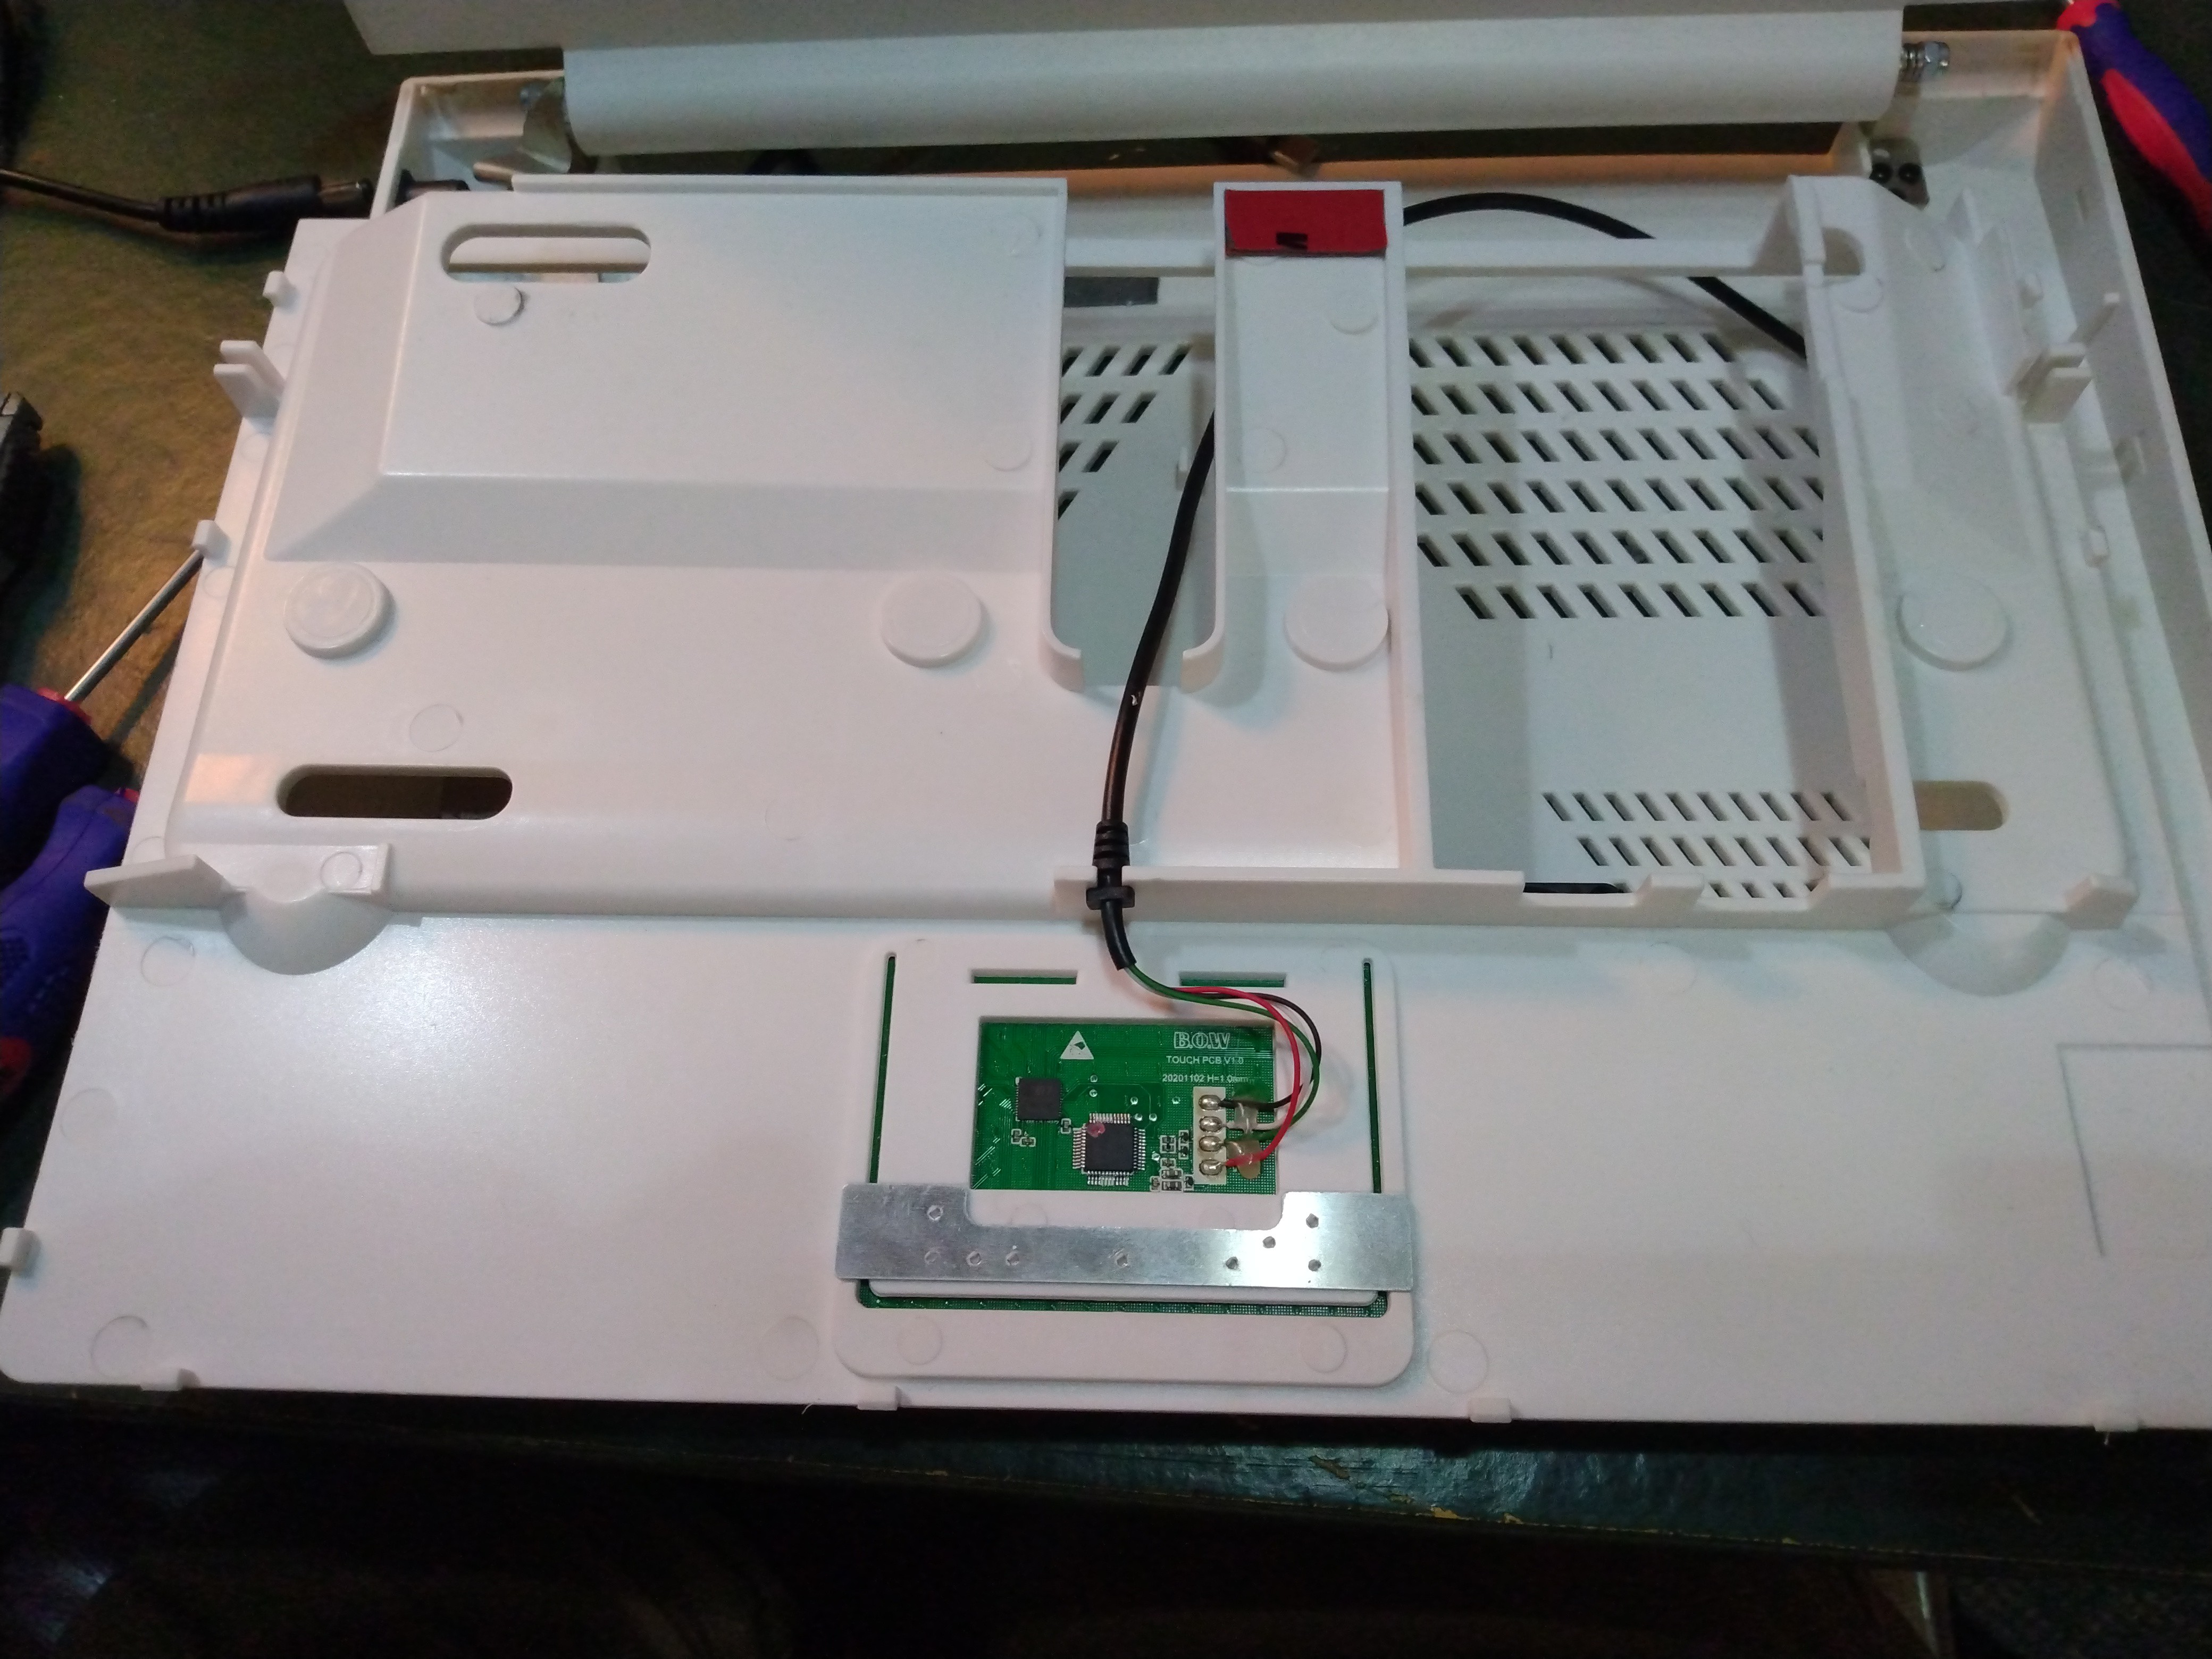
![Underside of the Pidock 400 deck Underside of the Pidock 400 deck]()
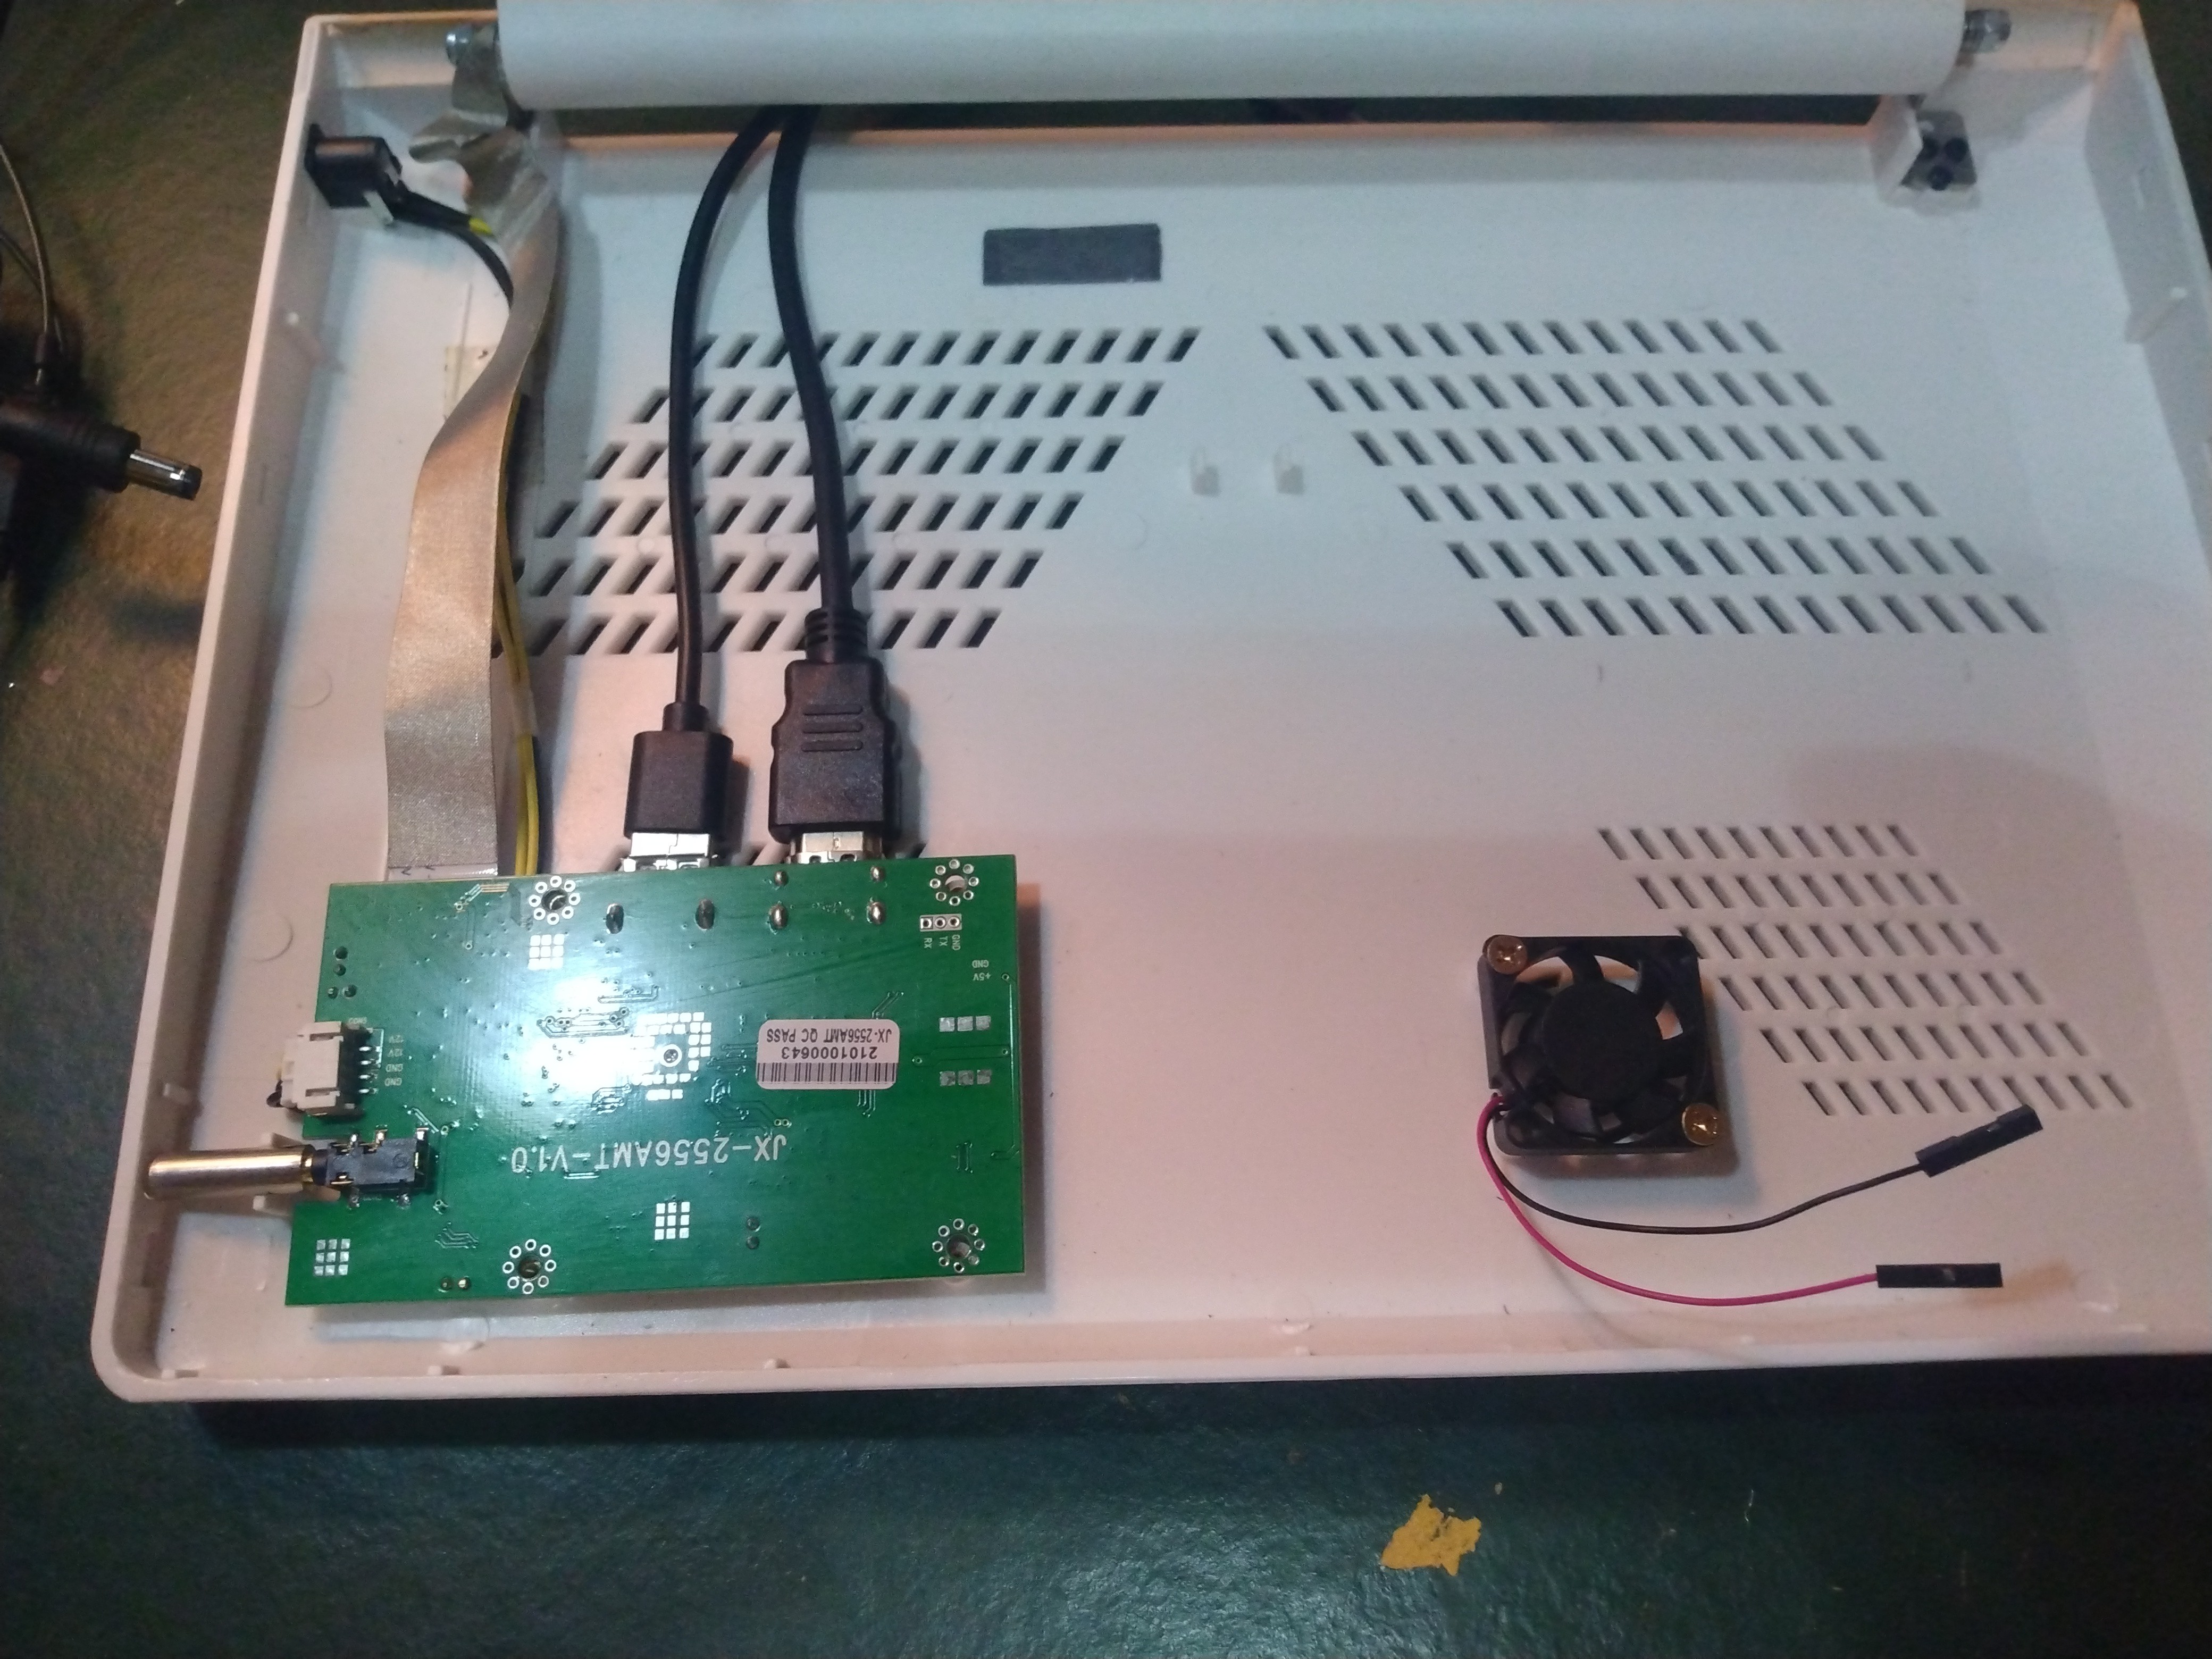
Here's the underside of the Pidock deck. Bottom center is the touchpad hardware. It's actually braced under the buttons. Not bad. ![Pidock 400 Internals, fan mounted Pidock 400 Internals, fan mounted]()
Here's the inside of the Pidock 400, fan screwed in place with brass wood screws I had laying around. Fan Installation
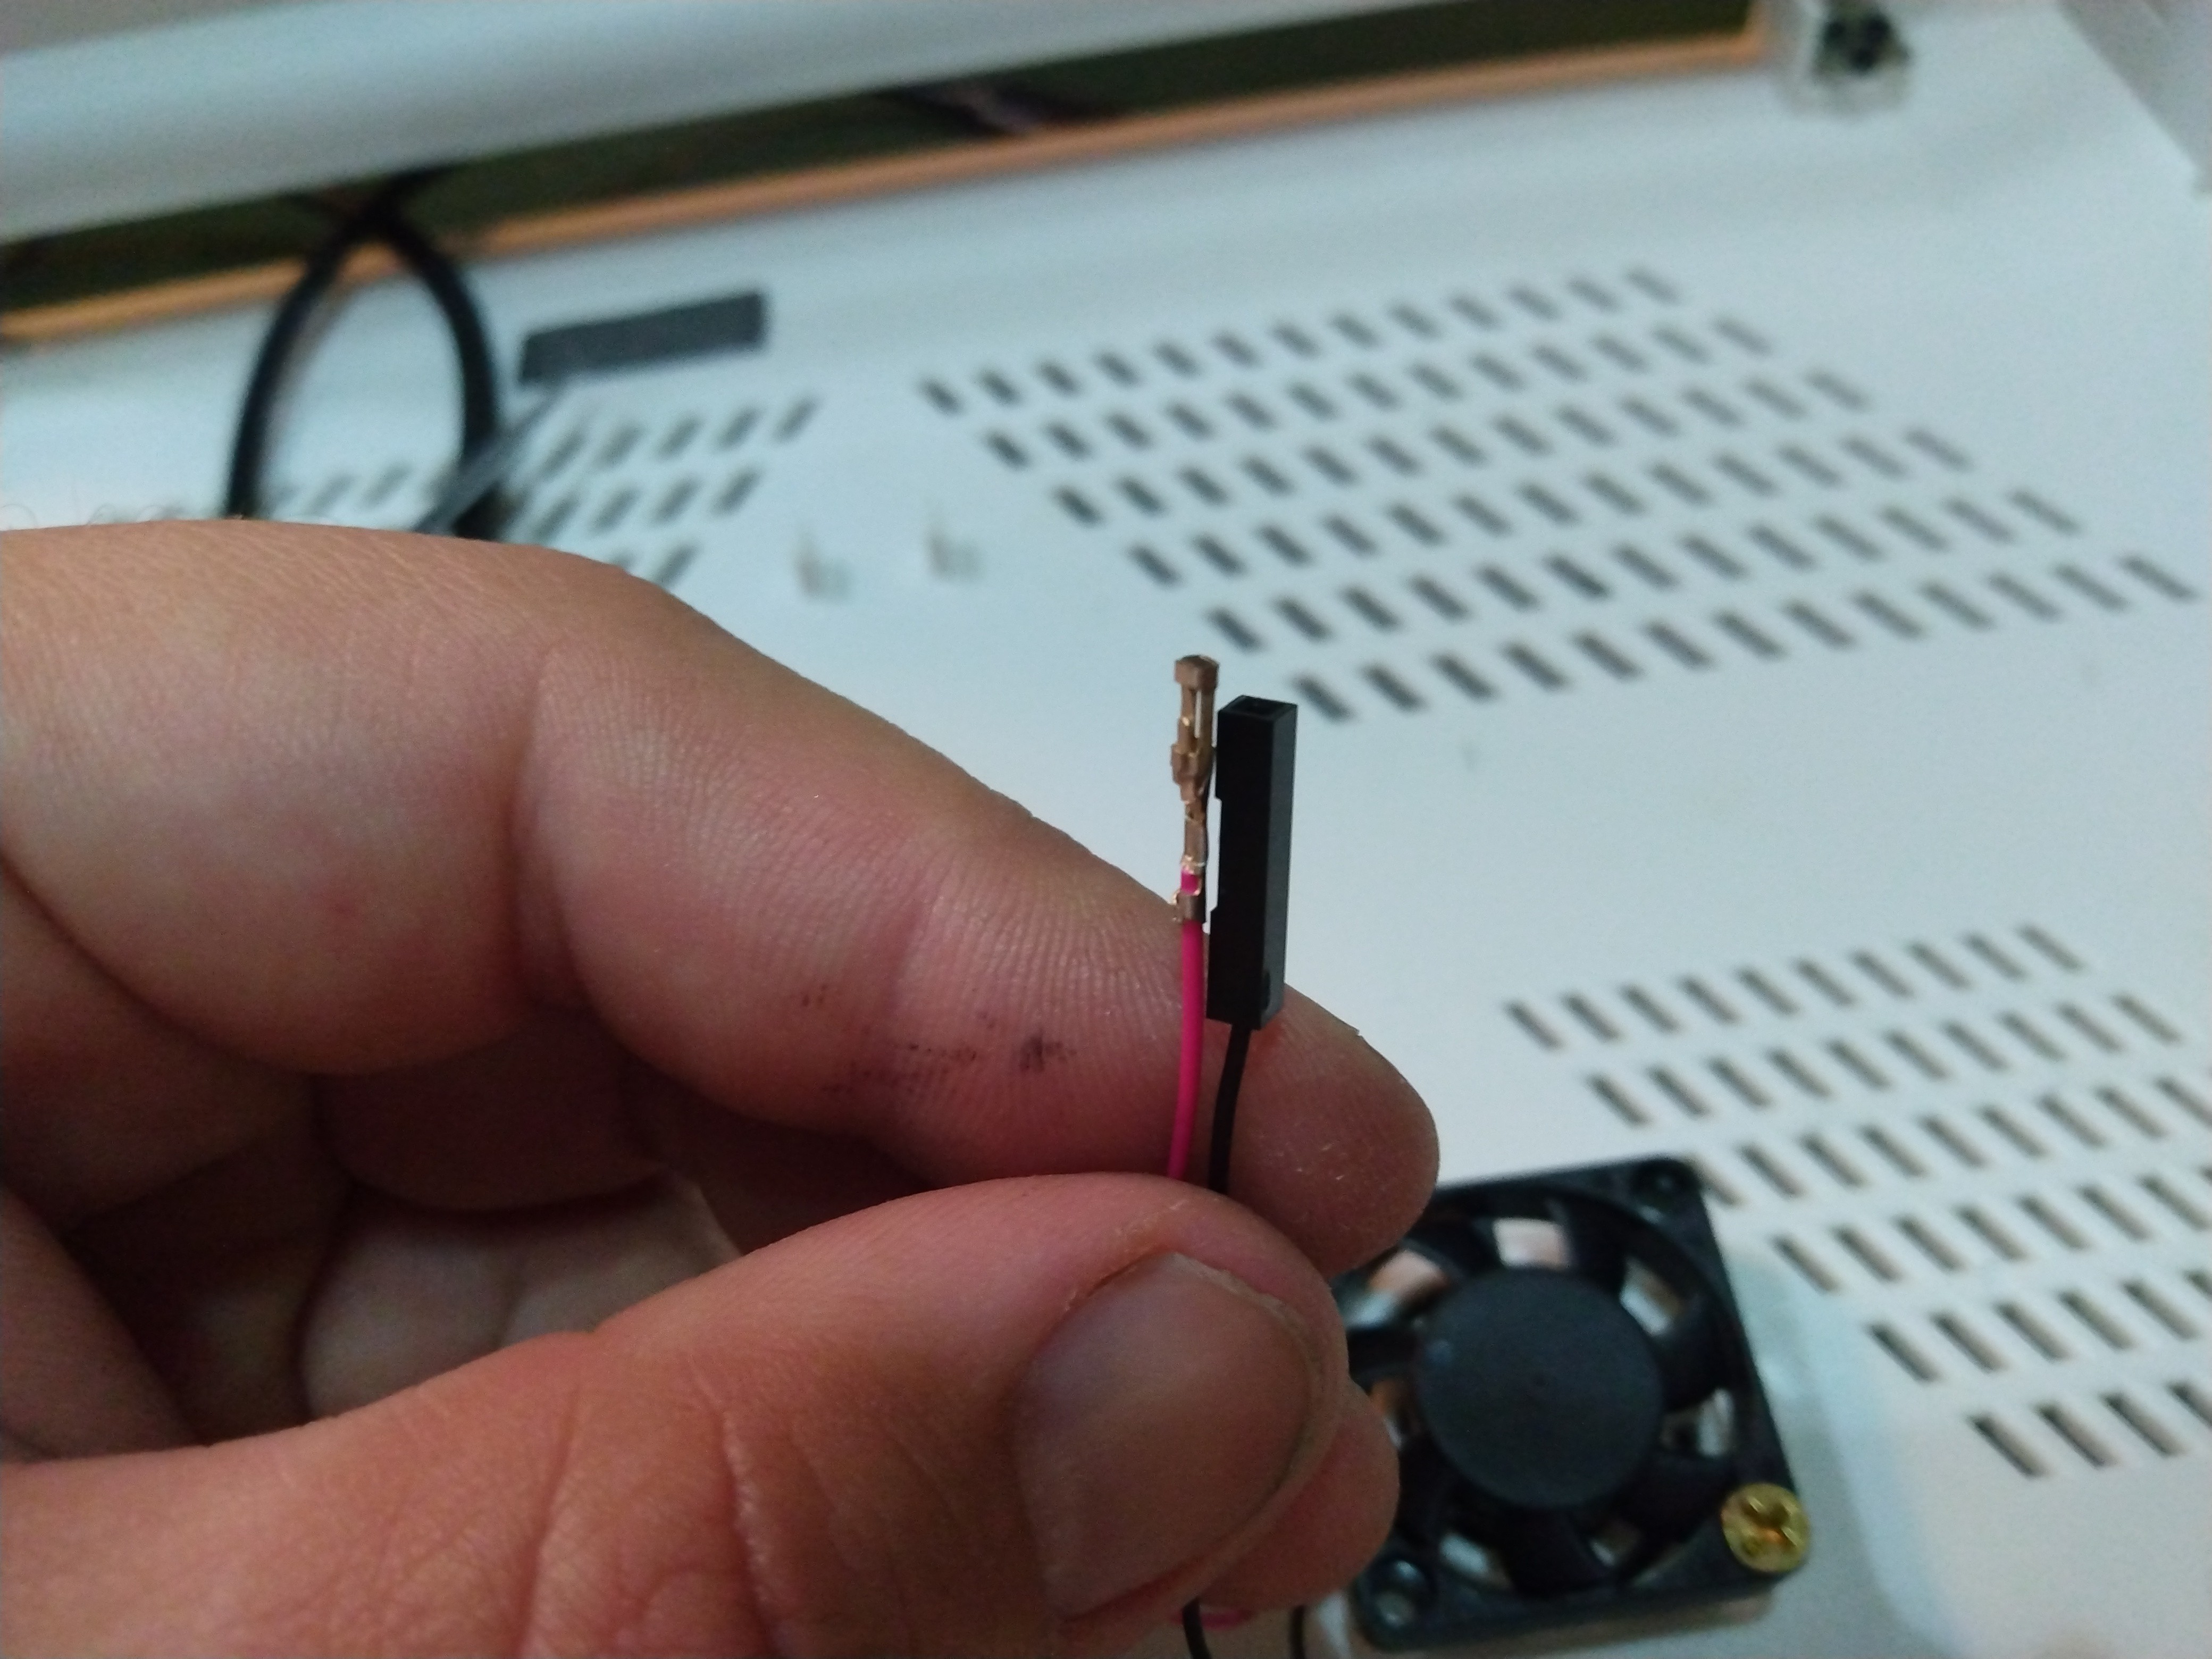
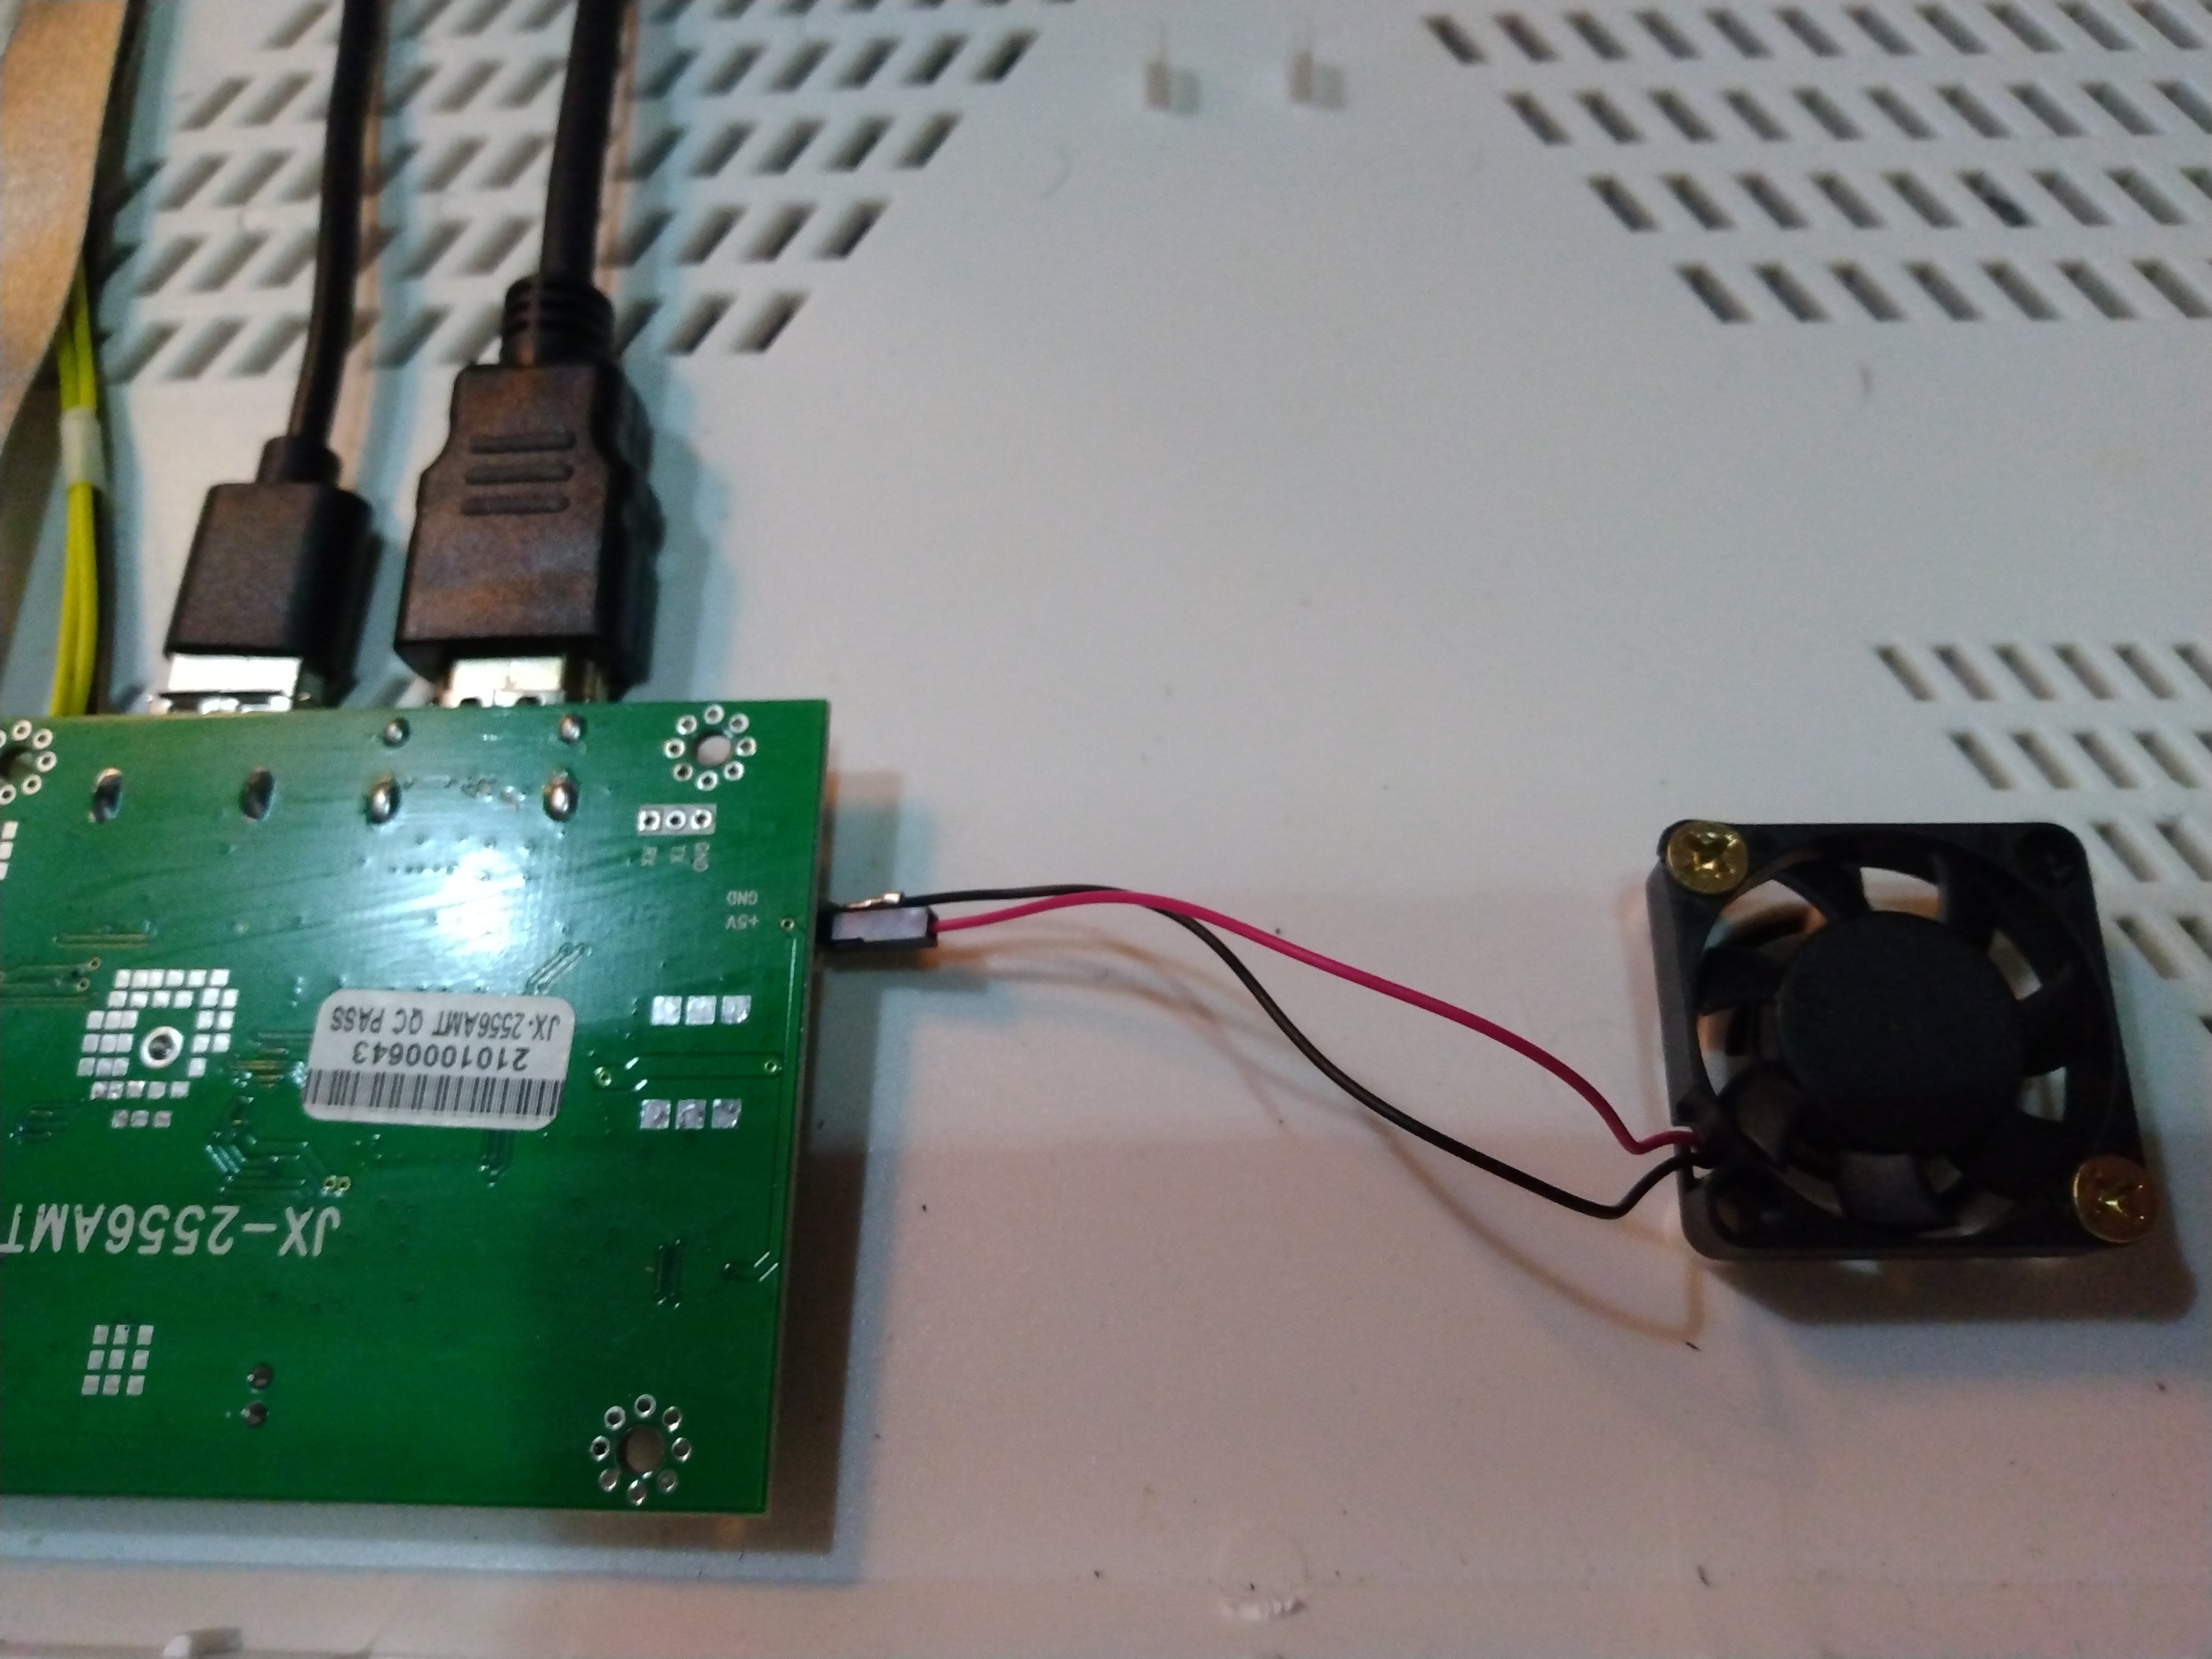
Installing the fan was far easier than I thought. There is a place with screw mounts and vent holes that seem to be designed for the exact size fan I had on hand. The holes line up, everything fits, the cables even reach the 5 volt socket on the board. I ended up pulling off the black plastic end on the ground cable of the fan, as the two side by side wouldn't fit into the socket on the LCD driver board. This worked well enough and I used tape to hold the wires down. This worked better than I thought it would. Not too much to say, so check out the pictures.
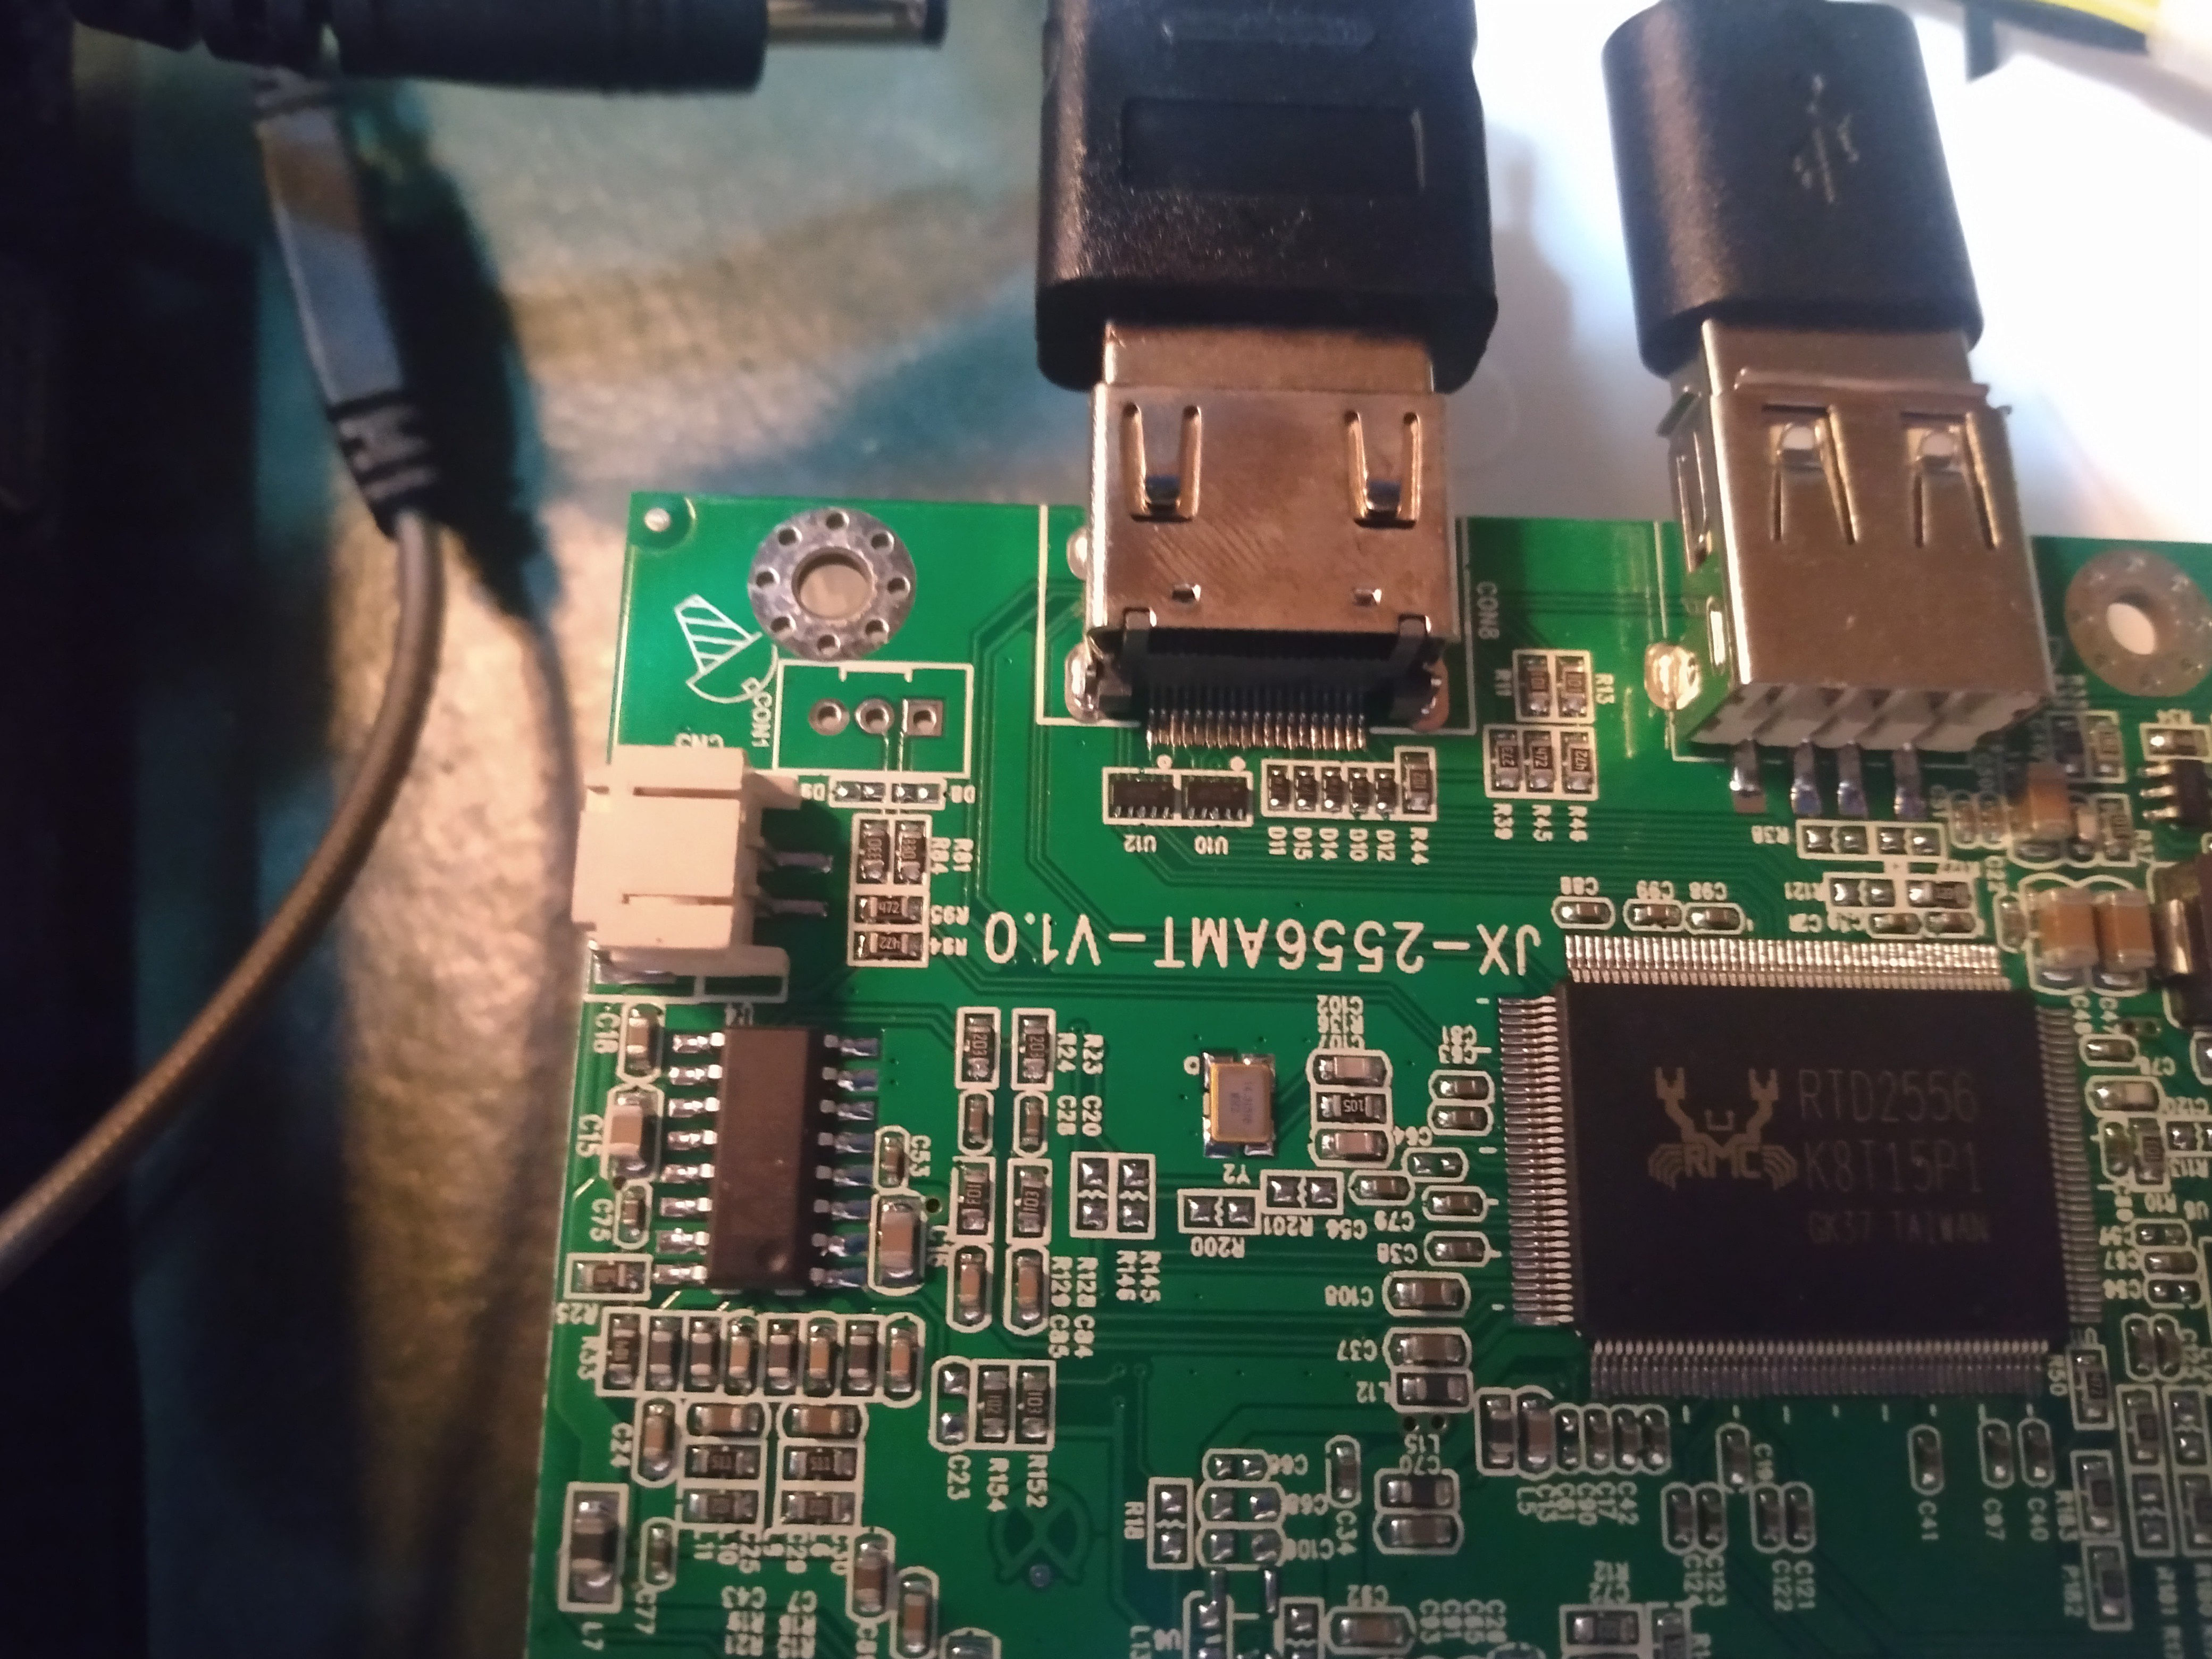
![Underside of Pidoc 400 LCD driver board Underside of Pidoc 400 LCD driver board]()
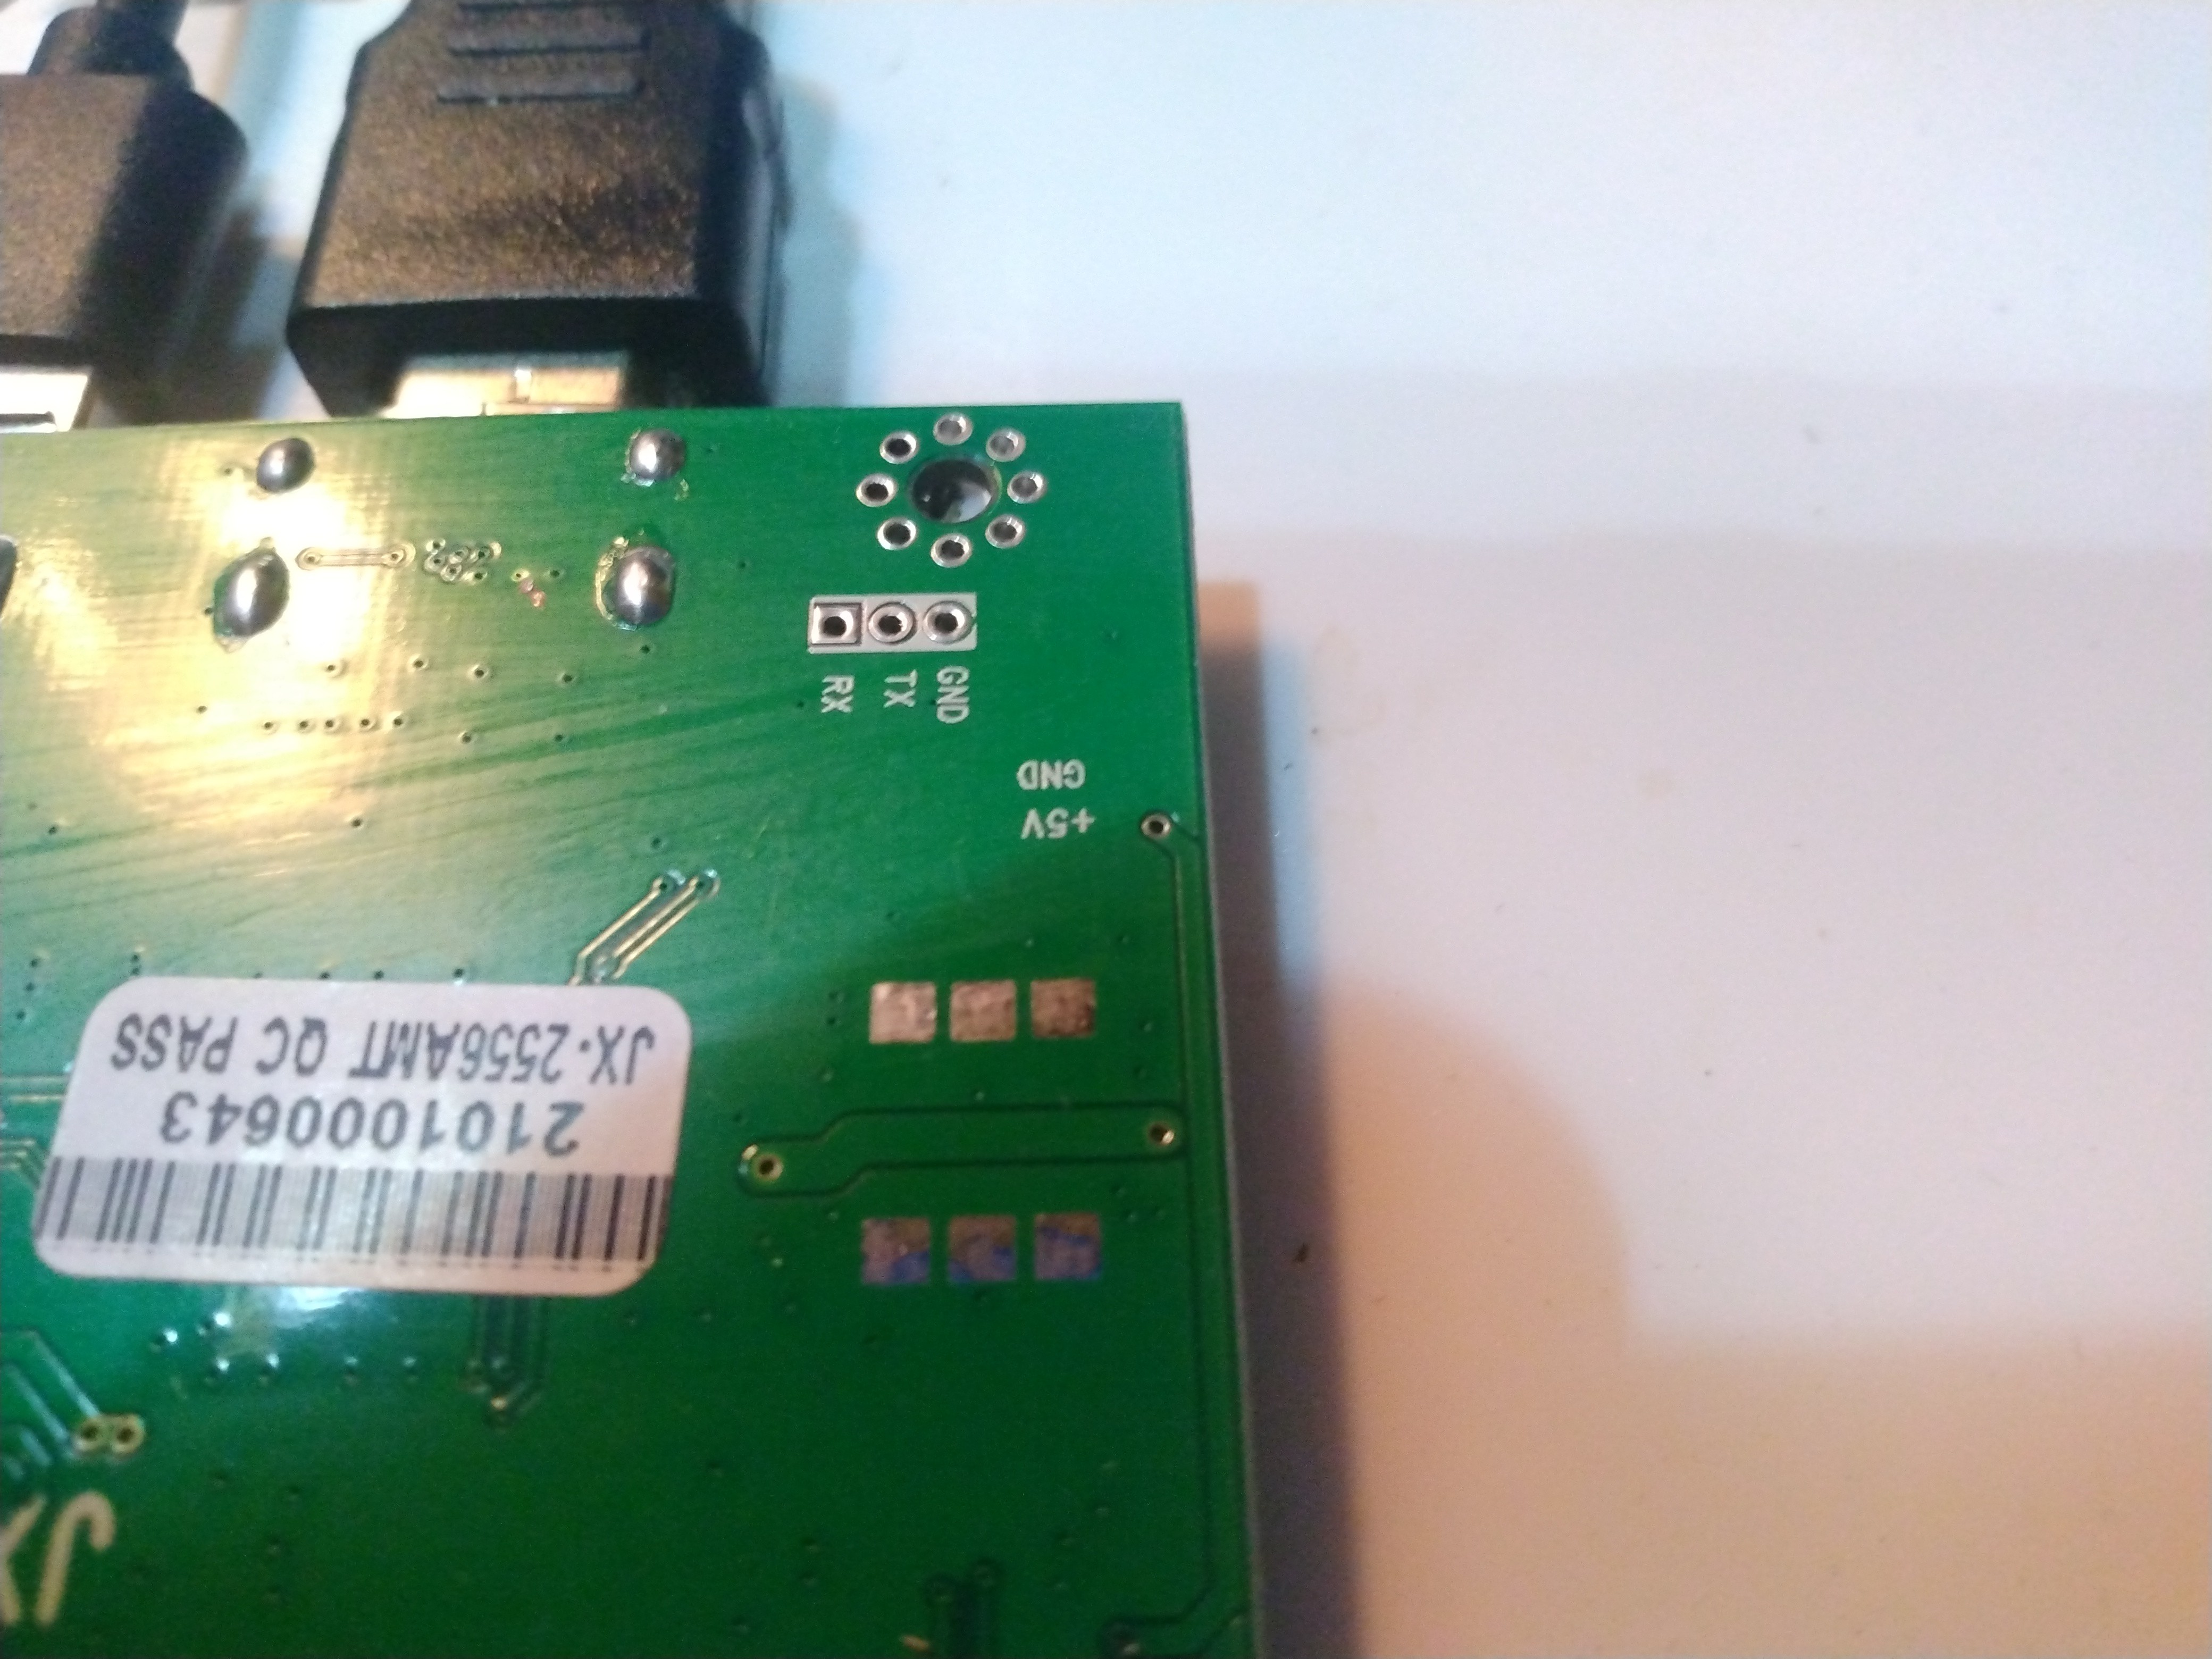
On the underside of the board is a 5 volt power socket. I know it's 5 volts because it's labeled on the top of the board. That label is what made me turn the board over. I was expecting to find solder pads and have to solder the fan wires on. ![Top of Pidock 400 LCD driver board, showing the 5 volt and ground labels Top of Pidock 400 LCD driver board, showing the 5 volt and ground labels]()
Here is the label that go me interested in he underside of he board, where I discovered a 5 vol socket. ![Fan wih modified wires in Pidock 400 Fan wih modified wires in Pidock 400]()
Here's how I go he fan wires to connect o he socket on he LCD driver board. Used a small pick tool to release he plastic sheath on the wire. I ended up taking it off the ground instead of the positive, as pictured here. It works just fine once taped down. ![Fan connected to Pidock 400 LCD driver board. Fan connected to Pidock 400 LCD driver board.]()
Here's the fan connected to the driver board, minus the tape that holds it in place. The wires are very loose, so the tape was not optional. A proper plug is what I should use, but tape is what I have. Assembly
After verifying the fan runs and the Pi boots and has video, I assembled the case. I ran into some trouble getting the corner over the driver board clipped in, but I suspect it's because the entire case has warped since it has been in use. I know good plastic mold making when I see it, and this is decent, but not great. It looks like proper trash compared to my Hilti hammer drill, but Hilti is known for proper industrial quality, not budget niche electronics. Overall, this thing is great quality for the price. I would personally pay double for better plastic, more ventilation, tons of cooling, an SSD mount and adapter cable, keyboard light above the display, power button on the case, and built in battery and speakers. That would make a proper Pi 400 laptop, which would make me very happy. I might just design that one of these days. If I ever have the time, skill, and energy. Until then, the Pidock 400 will work fine. The rest of the assembly went just fine. I did get the hinge covers on the wrong side, which left a puzzling gap. I immediately suspected they weren't symmetrical as I first thought, and a closer look at the tabs verified they are different lengths. Switching them around had it back together once more. The entire bottom seems to have warped, causing the Pi to sit up a little higher than it should. I may heat the case and gently straighten in back out later, but it's a very minor problem right now. It does not effect the user experience at this time.
![Pidock 400 cable management Pidock 400 cable management]()
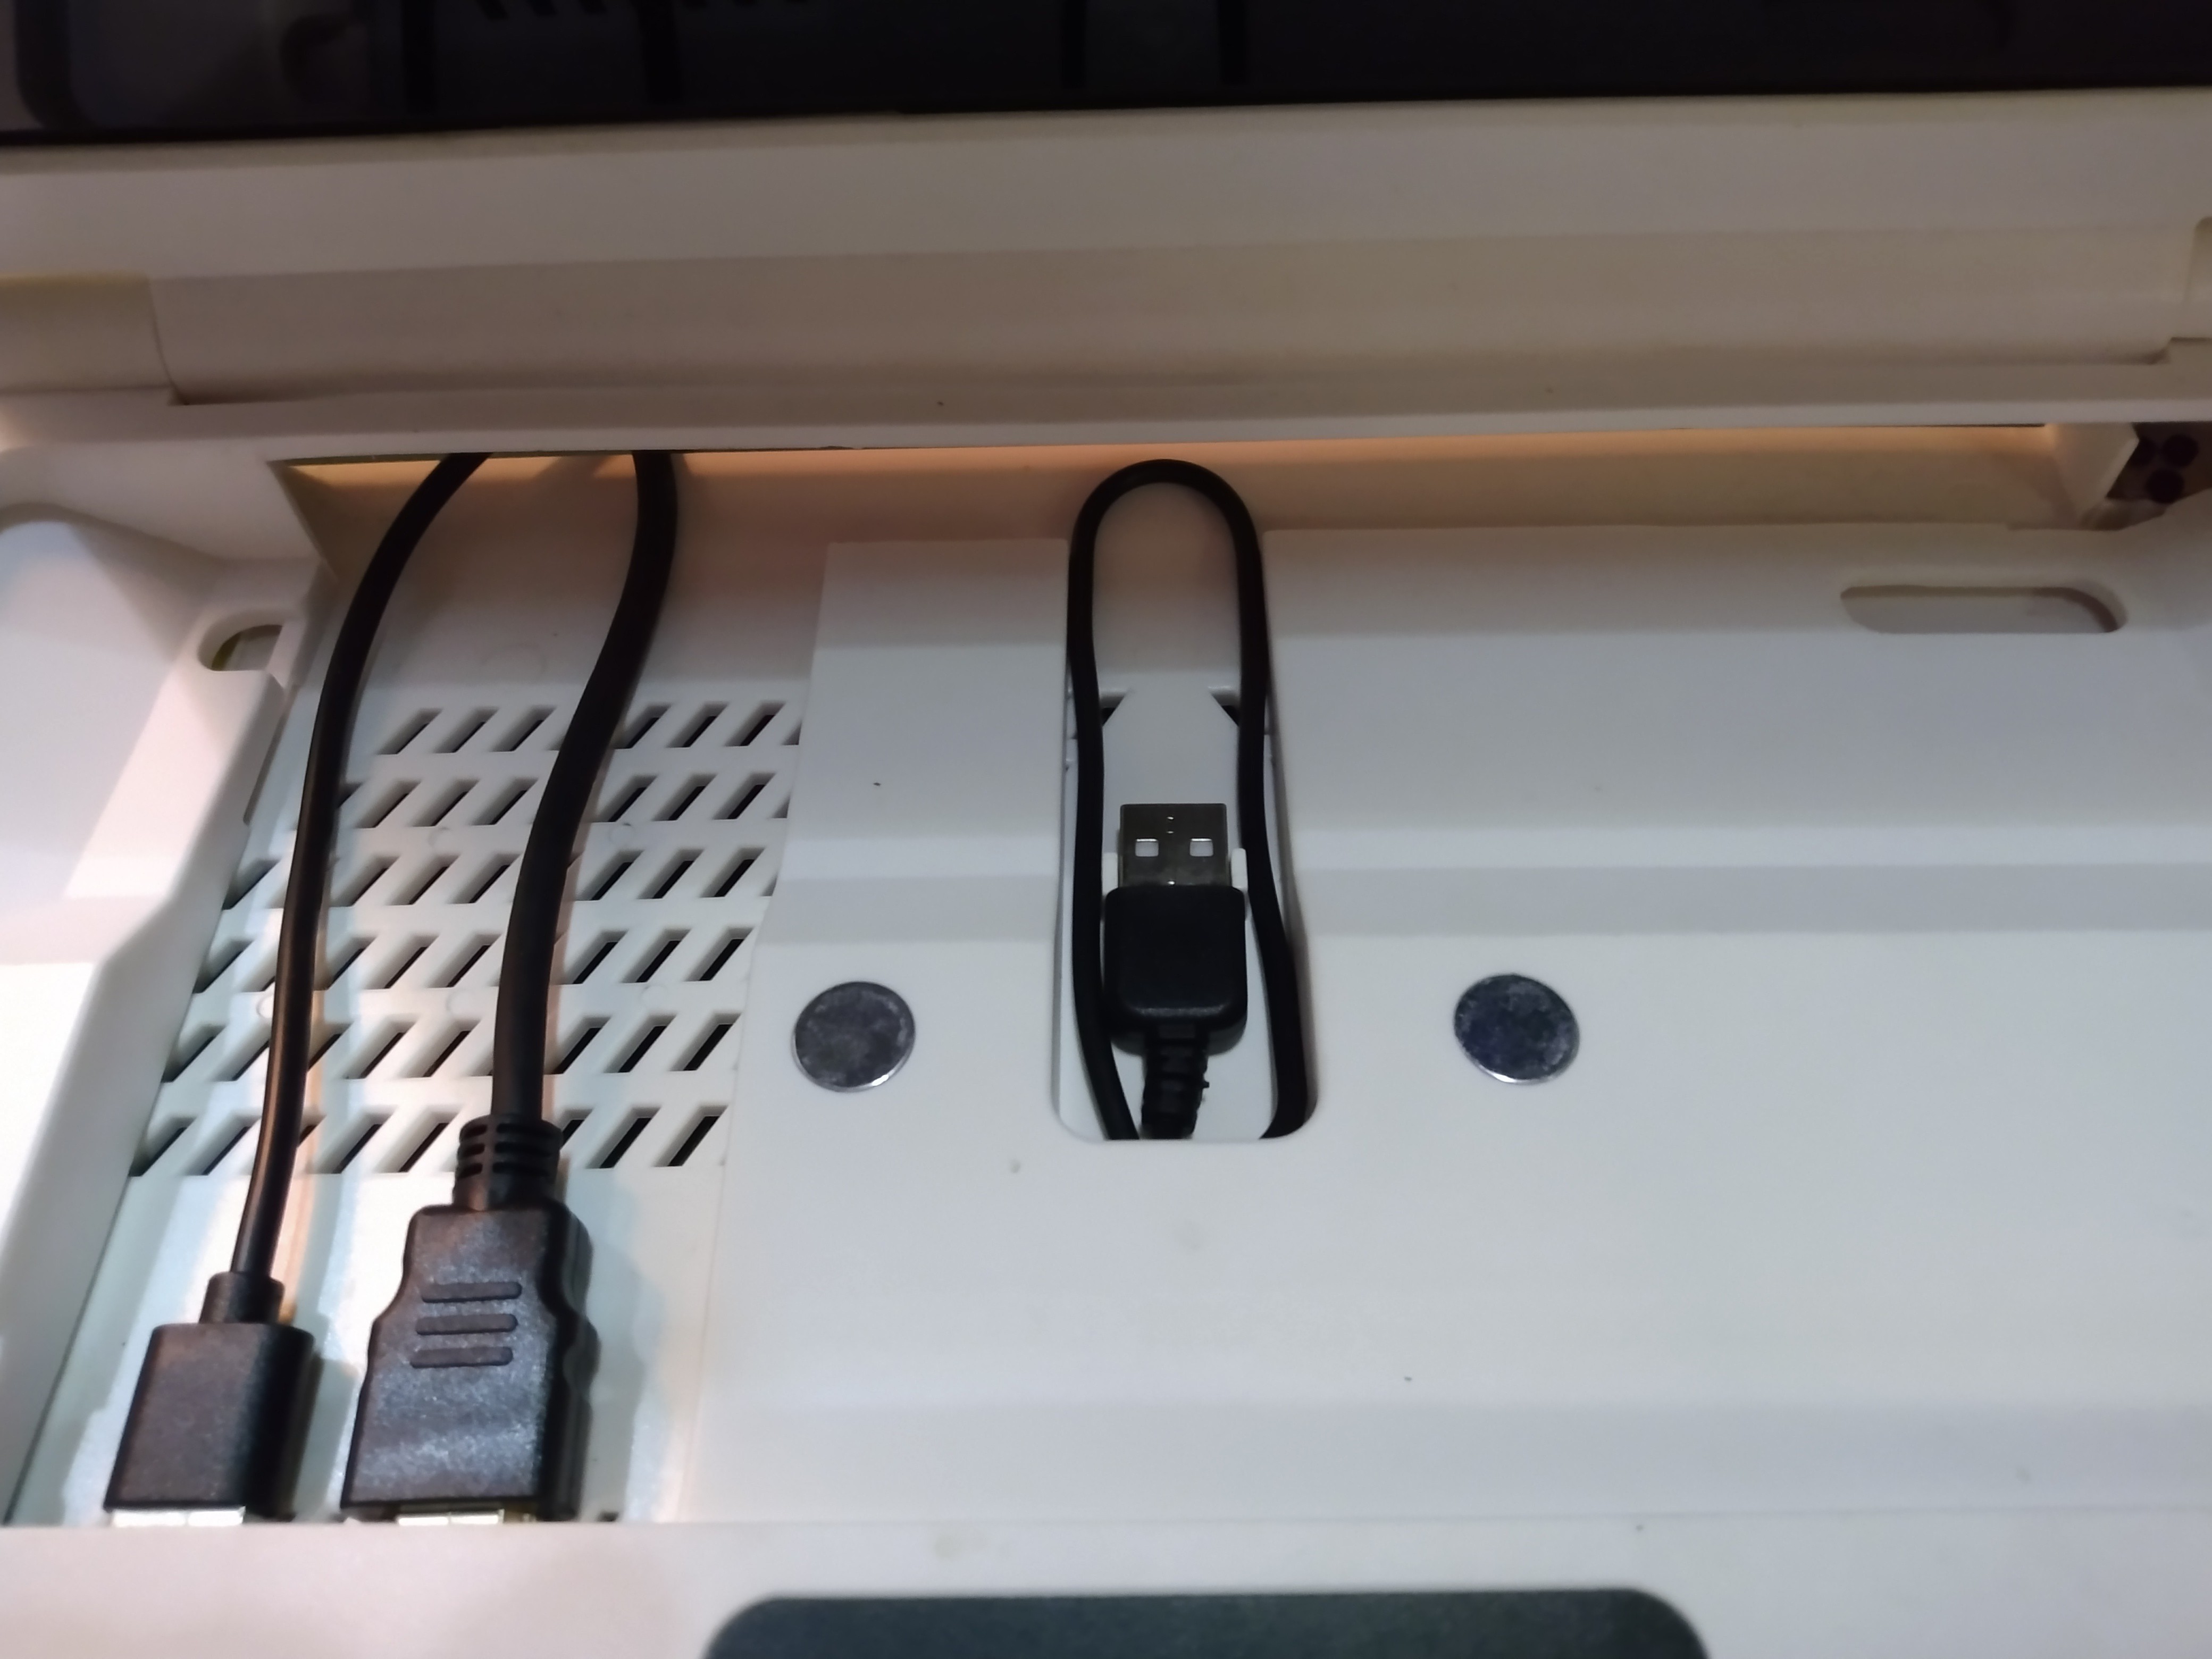
I hadn't been able to figure out what the two clips the channel where the touchpad USB cable runs are for until now. They hold the USB plug neatly in place when the touchpad is not connected. There was definitely a good deal of thought put into the design of this device. I really appreciate the little details and love my Pidock overall. I think it's a fantastic idea and well executed for the price. The silver disks are magnets that hold the Pi 400 down. There are 4 of them and they do help significantly. I tested to see if they are actually holding the Pi down, and they really are. ![Pi 400 slid forward in the Pidock 400 Pi 400 slid forward in the Pidock 400]()
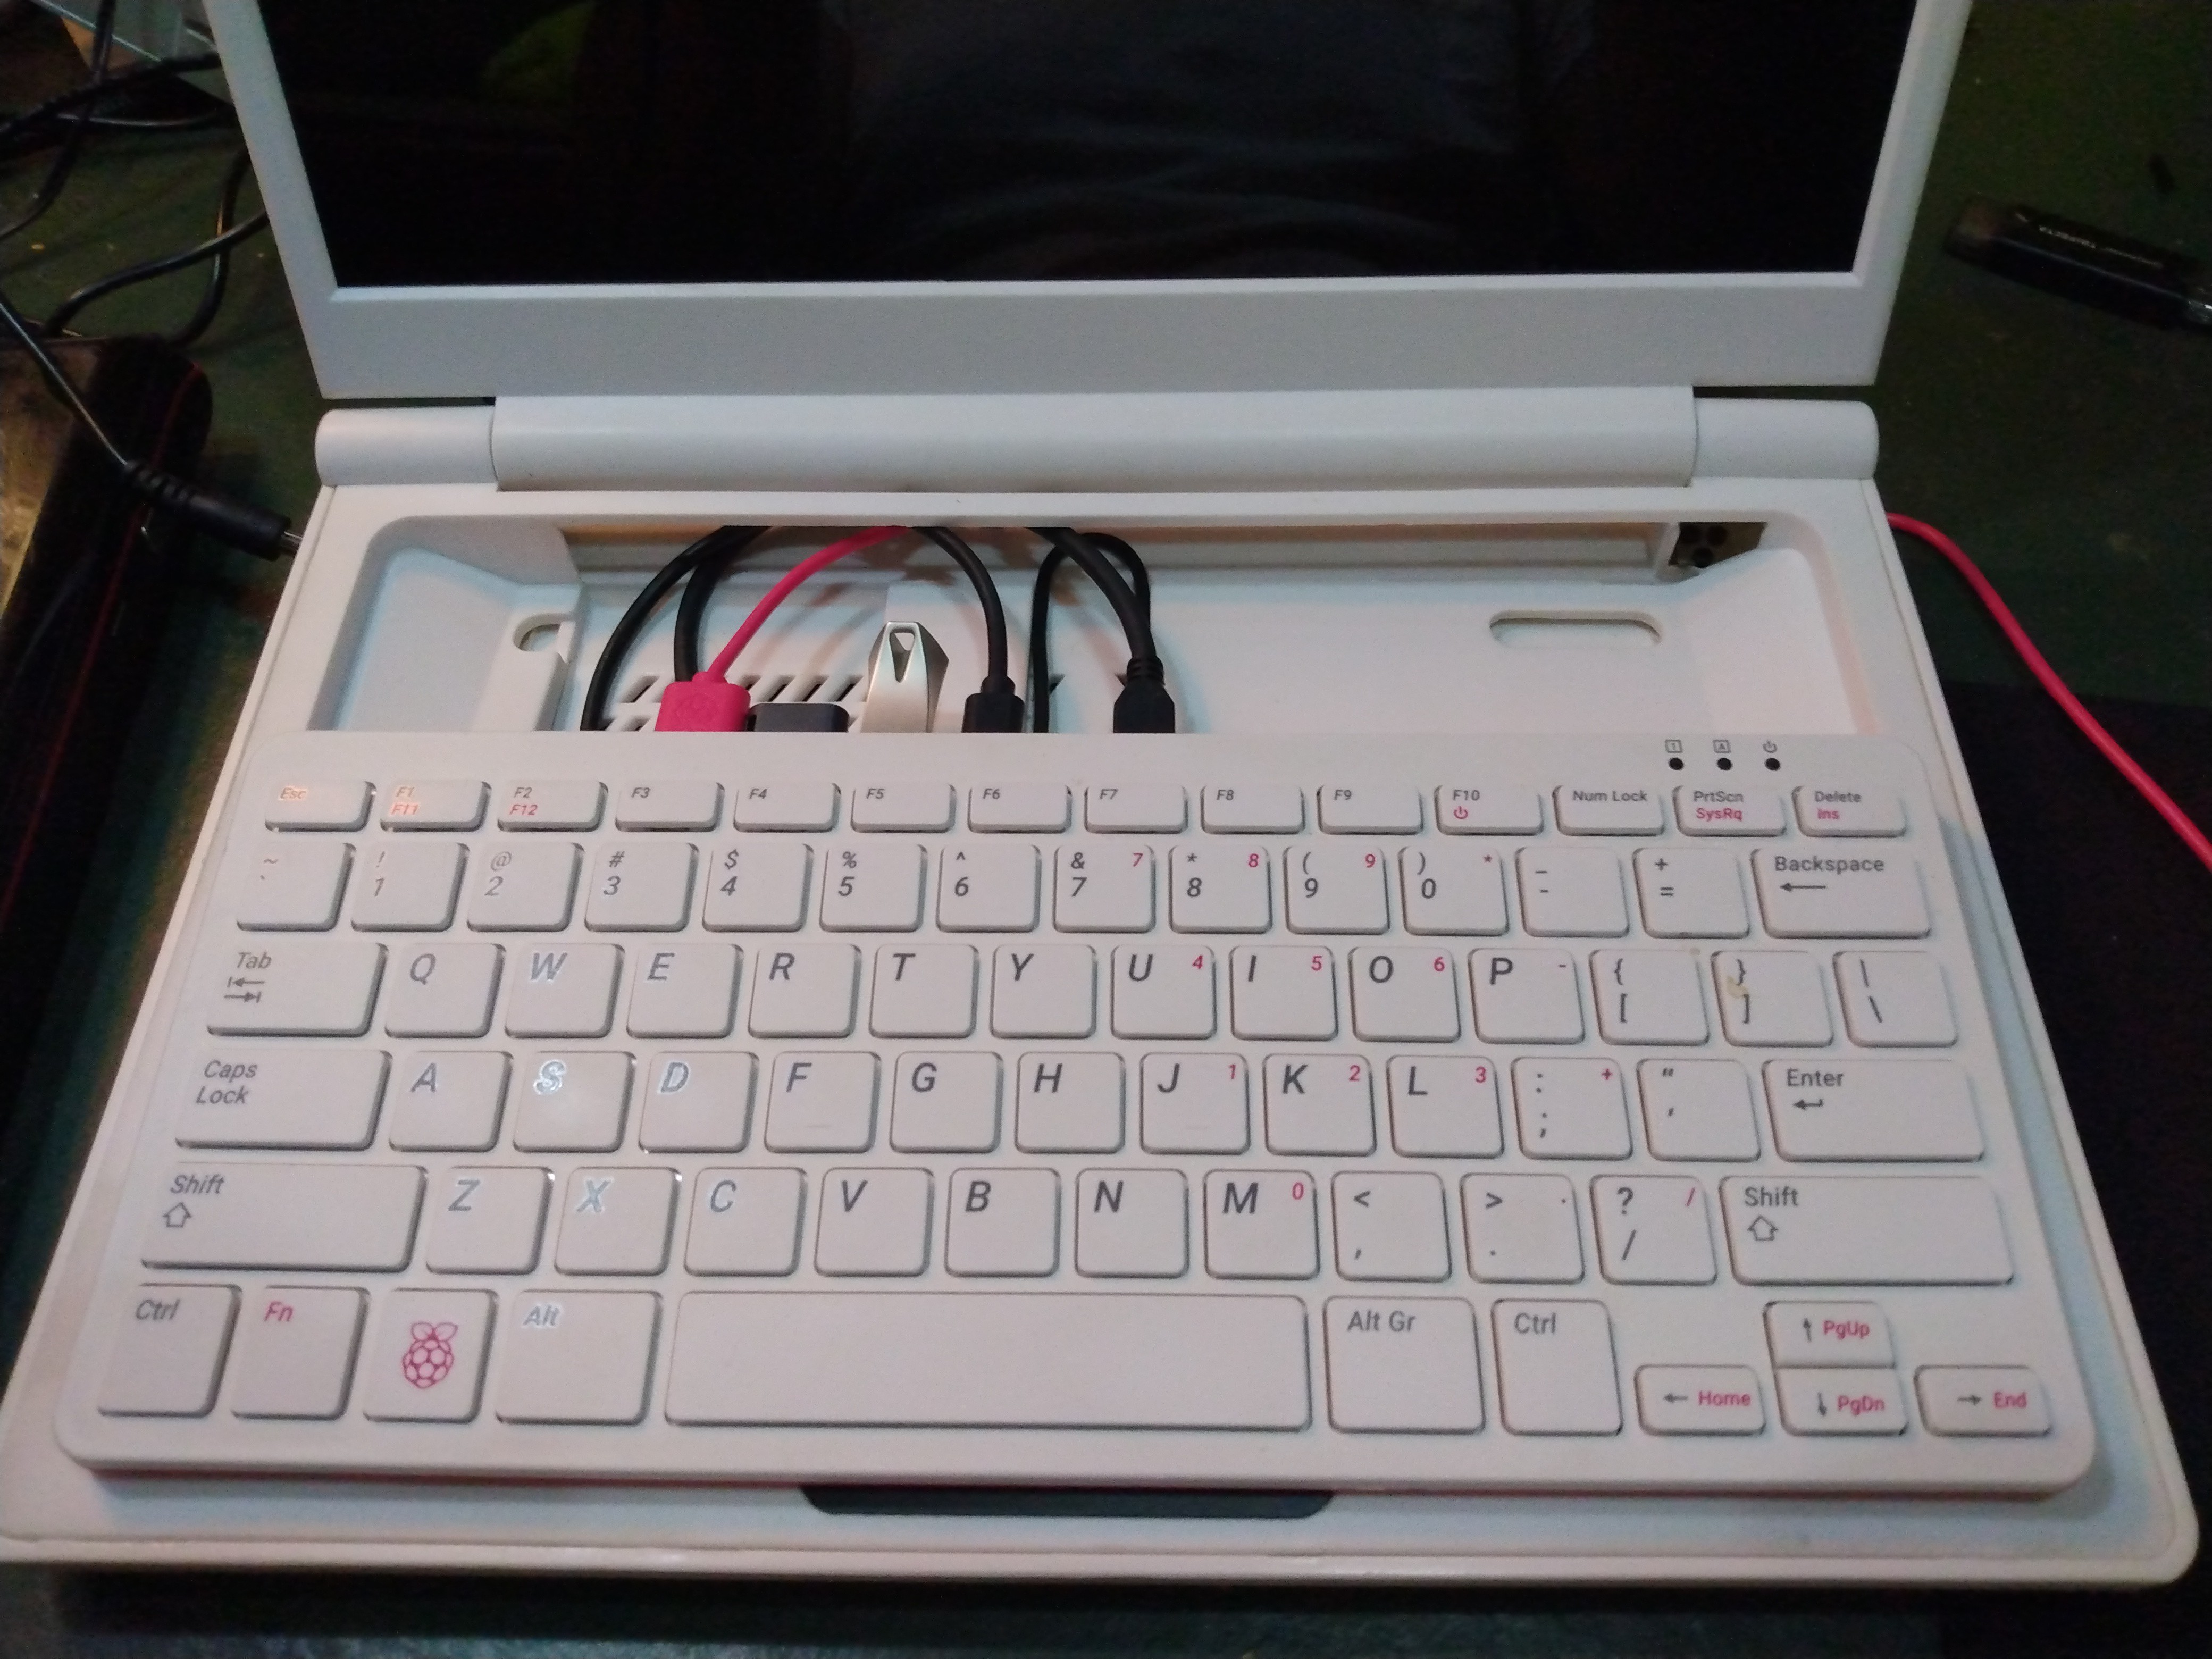
This is how I access the rear IO on the Pi when using this device. I simply slide it forward and tip it towards me. It's actually far more convenient than any other device I have ever used. Even large flash drives and SD card readers can be accessed like this with careful tilting. I let the Pi cool down and run like this when it gets hot as well. Future Considerations
This little fan may or may not help the system run cooler, but I feel it's well worth investigating. The Pi will not likely benefit from this at all, but time will tell. The left side of he palm rest may feel a little cooler, which would be good enough for me. Anything to help the system last longer. I don't think the power draw from this fan will hurt the board. It has a 5 volt output for a reason. I'm curios as to what it is originally for. I have plans to add a 12 volt 5015 blower fan, normally used for 3D printers. I'll tie this into the 12 volt power jack so it doesn't put extra strain on the LCD driver board. This fan will be to cool the Pi, and I may add a few if needed. There is a fair bit of room inside the Pidock case and I may even have room for the boot SSD inside with the fans. I'll order the fans and if they don't work out in here, I'll find another use for them. I just peeled open the display bezel a bit and found there should be enough room in there to add a keyboard light where a camera would usually go. I never use webcams, so an LED here would be perfect. I think I'd add a red LED as I find red light very pleasing in the dark. I'll add a switch to the Pidock case when I get around to adding the LED. I can pull the power from the 5 volt port the fan is connected to. Now if I could only dim the LCD....
The fan I just installed may be useless, but I at least know what is possible and how to work on this thing. I recommend the Pidock 400 to normal users and hackers alike. It has loads of potential and very well thought out features that make it daily driver friendly and hacker friendly.
I think I may be the only person tinkering with this thing and posting the results online at this moment in time. I can't find any hacks or info on the Pidock 400, which is why I started doing them myself.
-
New Software and Boot Drive Considerations
11/25/2021 at 14:51 • 0 commentsNew Software
I finally have a stable system and am ready to get back to work on a few projects. For this I installed Kid3 for editing metadata on media files, Krename for batch renaming files, and ConvertAll which I use for figuring out unit conversions without having to wait for the browser to load or needing internet. I try to do as much offline and local as possible. I don't always have internet access. I used to use Metamorphose2 for batch file renaming, but I haven't been able to install it for quite sometime. I wonder if it's been discontinued or something. Kid3 is what I normally use, so no learning curve there. I still need a backup solution since my usual TimeShift won't get through a restore operation without crashing. I've been cloning the boot drive to an SD card. Just finished doing so a few minutes ago before installing any new software. Just never know when something will ruin the OS like the audio fiasco after system updates.
Boot Drive Considerations
I really need to settle on a boot drive. I've found that my Samsung Bar 32GB flash drive is decent, but it gets incredibly hot and slows way down. I really want a 1TB super tiny portable SSD but they're about $160USD and I don't want to spend that on just a single drive right now. For the same price I can get 5 good SD cards, a SATA to USB 3.0 adapter to use with my 256GB Samsung flash drive, a cooling fan for the Pidock 400, 512GB SD card, and a 256GB Samsung Bar Plus flash drive. I'd just use the 512GB SD card as a boot drive, but I have had countless SD cards corrupted by the Raspberry Pi. A single system crash can be all it takes to ruin them. My 256GB SD card for 4K video recording was permanently ruined by this very Pi 400. That was fun AND expensive. I won't run from SD anymore. My recovery system is Raspberry Pi OS with a write protected OS so it's less likely to die when I trp a breaker and shut everything off by accident. For now, I will just use the SATA SSD I have as a boot drive. It will be tucked neatly under the Pi, and not attached directly to the super hot USB ports. It's older, but far faster than the flash drives and SD cards, and will be thermally insulated. I will also have the option to upgrade the SSD in the future. Ultimately I want an NVME SSD to boot from, but I may ot have enough physical space inside the Pidock. I don't want things dangling all over the place off my Pi. It's annoying and how things get broken or left behind. I'll be opening up the Pidock 400 soon to see what kind of space I have to work with. I'm not above drilling holes, cutting notches, adding fans and power supplies and batteries, and just generally hacking it up a bit. It's very close to a perfect Pi laptop already, might as well finish the job and share the results.
-
Teaching Others?
11/25/2021 at 00:48 • 0 commentsI've always loved the library. Especially my local hometown library. I finally live close to it and want to spend more time there and contribute something useful. It's where I spent the most productive and peaceful days of my rather stressful childhood. I get the library email newsletter and it's always a good read. I love sharing knowledge and teaching as much as gathering knowledge and learning. It all brings me immense joy for whatever reason. I'm trying to think of ways to use my Pi and what I'm doing here to teach others. Maybe I could take it in and demonstrate what's possible with such a simple and affordable system? All I know is that I want to teach classes at my library. I just need to figure out what and how. I'm probably one of the most tech savvy person in my entire home town right now. I'm probably the only one with an interest in teaching classes at the local library. I'll keep thinking on it and see what I come up with. Maybe I teach video editing and creative work on the Pi and send a few people home with a Pi 400 kit and a custom OS image to work with. Endless possibilities. Oh how I miss the antique oak tables and plush leather arm chairs of that gorgeous old library...
-
Video Editing: Thermal Throttling
11/24/2021 at 23:42 • 0 commentsIt finally happened: I got my tortured Pi 400 to thermal throttle. It took longer than I expected. I've been rendering videos on and off all day and finally did it with Handbrake. It rendered a short 4K clip at 1080p, very high quality settings, and I got the little flashing thermometer symbol in the top right of the screen. The system never crashed so I'm ok with it. Active cooling is definitely coming. I want to get the system set up for daily use before I start worrying about extra hardware.
Anyway, I hit an interesting milestone. I' considered turning down the overclock from 2.2GHz to 2.0GHz, but I want to see what happens and how long the Pi lasts. I may order a backup/secondary Pi 400 soon anyway. Good stuff.
-
Video Editing 1: Successful Attempt #1
11/24/2021 at 19:00 • 0 commentsI finally got this thing working and am ready to try to make a video. I'll start by outlining the overall process. After I install Handbrake...
Done.
There are two ways I can do this right now, as I am starting with 4K video files. The first is to just shove them into Kdenlive and let it render them down into proxy versions that I can actually work with. The second is to run all the files through Handbrake ahead of time to compress the files down to 1080p before I try to edit them. If I do this, I'll be rendering the files twice: Once to drop from 4K to 1080p, then again in Kdenlive to drop them down further for proxy versions. Thinking about it, the proxy render is unavoidable due to the low power nature of the Pi 400. Proxy rendering may be faster if I start with 1080p videos, but I'm not sure. If I know I will be making a video and have time, I'll compress the video files ahead of time. Otherwise, I may just see if Kdenlive can make proxy files in a reasonable time. I was writing this log as I go in Firefox, but want to free up system resources so I will switch over to WordGrinder and paste the log back into here when done. Saving the draft. Never mind, can't get what I have into WordGrinder, using notepad... I forgot to install VLC Media Player. The whole audio failure has really thrown me through a loop here. At least I get to open a ton of programs and windows at once and see how the system handles it. I'd say far better than before. I'm guessing there was an update somewhere that crippled the entire system. It feels much ore responsive.
Testing Kdenlive with a 4K file first, as I have them handy. I suspect the videos I have labeled as "final" are already 1080p, judging by the file size. I'll try to find the 4K version of one of these files and test both in Kdenlive. VLC codec info confirms this is a 1080p version of the file. Labeling it in the file name. It turns out I don't have the original 4k file handy. I do have a bunch of 4k files shot from a different point of view. They all need converted to 1080p for this project, which will be a good test. I just spent the past 15 minutes or so just organizing the media for this project. It really needed cleaned up. I have a folder template for video projects that makes it easy to organize everything. I have a log file where I typed up notes originally. I need to go back through it and figure out where I left off. Had I not done all of that, I'd be rather overwhelmed with this project right now. Most of the work here is just organizing and preparing for the creative work. So far, the Pi has hadled things admirable. Pop!_OS has done exactly as it was supposed to and stayed out of my way. I haven't had any OS distractions after I set up the floating windows exceptions, which stops certain windows from resizing automatically. Specifically I set up VLC and Kdenlive to ignore tiling requests. This means they both open full screen every time. VLC freaks out when it opens a video and tiling tries to put it somewhere. It was slowing things down.
I need a to do list for this right now:Set up battery bank as UPS for the Pi as the power in my camper goes out randomly when I turn on too many things.
Watch, name, and organize the unsorted 4k files. Requires modifying the config.txt to allow 4k playback, which I disabled. Alternatively, I can simply let Handbrake compress them down to 1080p. This is the better solution as it needs done anyway.Switch to a text editor with autosave in case the system locks up or power is lost.
Test Kdenlive with 4k and 1080p videos.
Do the actual creative work and render the final video.
There is a lot to do here, but it is coming along nicely. I will start with setting up the battery bank as a UPS to make sure I will have stable power. Well that failed quite nicely. The battery bank was causing the Pi to throw the low voltage alarm, so I went back to wall power. I have a 12 volt battery bank in mind that can run the Pidock 400 and Pi 400, but it’s nearly $200 and I have other things to worry about. I hope to add an internal battery some day.
I finally got Kdenlive running with audio. I set up proxy clips to use the vaapi h264 encoding profile and added a small 4K clip. It works surprisingly well so far. Adding a second, larger 4K clip and waiting on the proxy clip to generate. The experience, even when scrubbing through clips is quite good. It’s a better experience on the Pi 400 than my MSI GE60 laptop with Shotcut and a dedicated Nvidia 765m GPU. Proxy clips really is the key to getting this working. It failed to even play the 4K clips and froze the program the first try. I am very pleased and surprised so far.Rendering my first clip now. It’s 1 minute long, going from 4K to 1080p as fast as possible. That failed beautifully. The render consumed all of the RAM and crashed the entire system very gracefully. There is no swap space on this system, so I think I will address that. I need to find ways to reduce the RAM usage, but not sure if that is possible. It was going at 5fps and would have taken less than 10 minutes to render a 1 minute 4K clip. That’s not unreasonable. A 10 minute video would take about 100 minutes. Start the render, go do something else, done. LibreOffice Writer did an admirable job recovering this log file after the crash. I created an 8GB swap file and got it running. Trying the render again. RAM usage never went above 2.3GB of the 3.8GB available and swap was completely untouched. It held steady at 18fps with spikes of 38fps. I used the same settings in both tests as Kdenlive recovered the project after the crash. I did set it up to render using all 4 cores, and all 4 were indeed at 100% nearly the entire time. The OS was still reasonably responsive. I’m quite surprised with performance here. The video quality was terrible, but that was to be expected at the fastest setting. I turned it down to the slowest setting for this next test. Holding steady around 2.6GB of RAM usage, and 1fps. ETA of 7 minutes for a 1 minute 4K clip. Still not bad. It’s not “needs to run overnight” slow. More like “might as well eat your lunch” slow. I’m ok with that. Very good for a $100 pc trying to work with 4K video files. I can work with this. The system is still quite responsive, considering the CPU is completely maxed out. ETA has jumped up to 18 minutes for the 1 minute clip. A 10 minute video would take 180 minutes at that rate. 3 hours. Still not bad for dealing with 4K. I don’t need to be editing and rendering full time. Just a video every few days or weeks. It can run overnight no problem. I still plan to build a Pi CM4 based video editing system at some point that can sit around rendering all day while I use my Pi 400. I don’t recommend this set up if it can be avoided, but you definitely can get some editing and real work done on the Pi 400. We’re down to 0fps now. Hasn’t crashed yet. I am running a 2.2GHz overclock, but it may be thermal throttling for all I know. Going to let it finish and see what comes out the other end.
Bored, opening Firefox to see if I can do something productive while this poor thing tries to spit out that video file. 3.0GB of RAM used(80%). It is working by some miracle. I’ve read a few HaD articles without incident. The boot drive is painfully hot to the touch though. I chose a Samsung Bar as it’s what I had on hand, but it is working very well. Being metal, it does help conduct the heat away. The poor Pi is burning up though. Even maxing out the entire system, it is still far more responsive than when I had the system fully updated. It seems there was something going on before that caused the entire system to slow down. It’s almost responsive as a cheap smartphone, even under full load. Good job Raspberry Pi. Rendering completed in 32:35. Just realized I didn’t have the GPU overclocked. Setting to 750MHz for now.
The latest video render has completed and the results are hideous. Very blocky. On the next test I’ll use the “lossless” x264 codec option. I’m still learning the basics here, but I am making progress. The 1080p videos that came out of handbrake on my old laptop look fantastic. The ones from Kdenlive look like crap. If I can fix that, I will be ok with video editing on this Pi. After I shut down everything, LibreOffice Writer started acting weird until I shut it down and restarted it a few times. Video playback on VLC was also terrible until I set it to use 4 cores under the Codec section. It was far better. Even fairly good. Restarting the Pi and trying again with the lossless codec. I also went and found a way to check if hardware acceleration is in use and how to make various programs use it. It was enabled and working by default in Pop!_OS, which is fantastic and unexpected. I guess I should expect it from System76. I am a huge fan these days. I had to enable it in Firefox and VLC Media Player, and install the H264ify extension in Firefox, but they are minor changes. Going to re-enable 4K output over HDMI and see just how well it works in VLC. 4K videos still get stuck on one frame and play audio. No luck at all. 1080P playback is better, but still a little choppy. YouTube at 720p in Firefox is acceptable, 1080p is not great.
Moving onto the next render test: Lossless. This went better than the previous test. RAM got maxed out and 1.2GB of swap was used, but the render finished. The results are far better. I can’t actually play the file with VLC, but the single video frame that rendered looked very good. The lossless x264 codec is the way to go. I started with 692MB of 4K video files and ended up with a single 1.5GB 1080p video file. That’s a very large file for a 1 minute clip. Going to check render options in Kdenlive and may just compress with Handbrake if there aren’t any good options there. The quality is more than good enough to upload to YouTube. This is excellent progress. I have been at this for about 7 hours now, and am happy to get such good results. I just realized that I only ever adjusted the encoder speed, not the actual quality settings of the h264 encoder. I’m very tired, so I will try again tomorrow and post this log.I feel that the Pi 400 is acceptable for video editing, provided you have the time and patience. It will not hold up to production environments, and even playing back files can be problematic. I feel I’ve given this Pi the best chance I can for the time being. Running Pop!_OS, with hardware acceleration enabled, an overclock, and running from fast storage devices makes a huge difference. I may test video editing with a stock Pi 400 and OS at some point, but I suspect it will be significantly slower. I have some hardware upgrades planned that should speed things up even more. I recommend the Pi 400 for anyone who needs a cheap and capable PC. I recommend running Pop!_OS on it as well, provided you do not update the OS and just install the software you need until the audio issue is fix. I will clone this drive and eventually make a system image of it, both for my personal use, and to distribute to anyone who wants to try it out. I am still new to much of this, but feel I’ve made decent progress.
The following pictures show the difference between the first attempt and the second attempt.![]()
![]()
It may be hard to see the difference, but the video quality differs greatly. I can make this work for simple projects and will finish my fish video on the Pi 400 soon.
-
Creating a Custom Pop!_OS Pi 400 Image
11/23/2021 at 22:33 • 0 commentsAfter the recent audio failure under the OS, and losing an entire day to sorting it out, I've decided to create my own system image. I'll install and test everything needed for daily use, then clone the system to an image file, write to a drive, and verify it still works. I couldn't imagine a non Linux or non tech savvy person trying to sort this crap out. I'm struggling with it and I've been daily driving Linux for a few years now. When done, I'll have an image that can do video editing and all the stuff I need. I'll get hardware acceleration sorted out as well. I'll find a way to share the images I make in case anyone ever wants them. I'll add the to the "Files" section of the project page and maybe my GitHub page as well. This has been a nightmare. I'm still creating a new recovery drive that I can use to flash drives with on the Pi 400. It's very tedious.
Anyway, keep an eye out for up to date, verified system images on this page. They'll be Pop!_OS at first and maybe some Raspberry Pi OS images later down the road.
-
Pi 400 Video Editing: Fail #1
11/23/2021 at 15:18 • 0 commentsI'm sitting down to start creating a video I started a while ago and never finished. I'll be doing it on the Pi 400 of course. Pi 400, Vilros Pidock 400, in ear monitors, kdenlive, Audacity, extra patience.
The first step is to review all the footage and decide what I want to use in this video. This is probably the most difficult step for me. I could use so many different clips in so many different combinations with may different audio clips or music tracks. It's the part where I have to decide what story to tell and how to tell it. I have a little YouTube channel where I experiment with videos, and a mascot named Mr. Fish. It's one of those electronic flopping fish cat toys. I have footage of him flopping about and doing different things. I call this video project "A Day in the Life of Mr. Fish." It's fairly simple, but I have to find the most hilarious order to put the clips and find the audio I want to use. Having started this months ago and forgotten about it, I only vaguely remember where I left off. Luckily I started taking notes and sorting files. I have a folder called "Final" that has all the video files I originally decided to use. They're good, but I will review all files again and revise the list. Just watching all the files can be tedious at times as they're 4K and the Pi does struggle ever so slightly to play them. Luckily VLC Media Player seems to be rather quick about it. I couldn't imagine streaming 4K to the PI. I could actually edit 4K video and render in 4K on the Pi as long as I use the kdenlive proxy settings and be patient. I'll try a 4K project later. Perhaps just a 4K version of the same video. I'll be rendering this one in 1080p. I've found that shooting in 4K and rendering in 1080p actually gives a better picture than shooting in 1080p.
Currently copying all the project files from a flash drive to the main boot drive. I could leave them on the flash drive, but I want to make sure I have access to them even if I have to plug something else into the other USB 3.0 port. It's copying very slowly for some reason. About 5MB/s. Not sure why. Hoping the read speeds will be better when I go to edit the videos. Researching what kind of video editing/gaming machine I could build with a Pi while I wait... $75 for top of the line CM4 module, $35 for the carrier board. $110, plus a GPU. Not bad. It has 2 camera connectors on it, which would allow me to actually use the thing to record the videos as well as edit and upload them... I think I'll revisit my idea to make a portable video production studio made using Raspberry Pi hardware... If this project goes well, I'll create a project page and get started on it as I go. Still copying files...Copy complete. Waiting on Jeff Geerling to get a GPU working to really worry about the GPU aspect of the CM4 video station idea.
Reviewing files and such. No audio...No audio devices available... Saving log draft, restarting PC... Many hours have passed working on this and I'm now so annoyed I've decided to reinstall the entire OS and start from scratch. I really hate this about working with Linux. I was keeping plenty of TimeShift backups on an SD card, but the restore doesn't work and just crashes the program. I have no simple way to restore the system. From now on I will just clone the damn boot drive for backups and be done with it. Creating a new boot drive now so I can format the current one. Very frustrating. Luckily I keep all on OS files on separate drives so I don't have to worry about pulling personal data and can just wipe the drive. Now I have to waste all that time to reinstall all my programs and set everything back up again... I guess that's one of the hidden costs of using a beta OS. Adding my overclock settings to the config.txt file on the fresh install to help speed things up initially. I could have used my other laptop to flash the drives, but I want to stick with the theme of only using the Pi 400. Makes things really interesting with only 3 USB ports and a messed up OS.
It's the next day. I'm going in to work early to quit, so I'll have plenty of time during the Thanksgiving Holiday period to work on projects before starting a new job. I've gotten a recover SD card made with Pop!_OS on it and got the Raspberry Pi Imager program installed. That was harder than I thought. The Pop Shop won't work as it thinks the system is offline... It's not. I remember dealing with this before but forgot the solution. I think it requires a system upgrade. I installed Snap and the Pi Imager through Snap. Wrote the OS to my main boot flash drive, got it set up. I haven't installed any software yet. I'll be doing that later. After I set up a Raspberry Pi OS boot drive so I can use the SD Card Cloner tool to make backups of the system. Such a tedious process. I could use dd to create a system image, but I don't feel like learning that right now. I need Pi OS for testing other things as well. This has been a nightmare so far. First major problem. I will have it sorted soon and get back to work in the Pi.
I'm surprised to find that this project is slowly gaining a following. Hopefully my work on this, as amateur as it may be at times, will help other people out. I would have loved something like this when I was first getting into computers. I had a thrift shop $3 Dell running Windows 98 and the slowest broadband you could get. Still, I had a computer at a very young age. It was old and slow, but worked. I can't imagine what kids could learn and do on something like the Pi 400 these days. Good stuff.
I've finally made some progress on this. I've set up a micro SD card with a fresh install of Pop!_OS and set it up. I then cloned that to my main boot flash drive, expanded the file system, then verified it boots. Now I've got an SD card that I can experiment on safely. I installed Kdenlive, Audacity, Inkscape, and Kmahjongg on the SD card, rebooting after every install to verify audio output wasn't broken. So far so good. I have all the basic tools to edit videos, as well as something to do while I wait for things to go. Currently cloning that SD back to the flash drive using the SD Card Cloner tool under Raspberry Pi OS. It's known as piclone, but I can't get it to install under Pop!_OS. I just use another OS to run it. I also updated the wifi binary blob and firmware. I copied the two files to my storage flash drive and wrote some scripts to install them from that location. I added over locking to config.txt and put a copy in the same storage drive. Now I can easily add overclocking and the wifi firmware updates to a fresh install if needed. I plan to write a script file that will take care of all this for me in the future. This has been a real challenge so far, simply due to a bug that kills audio support on the Pi 400 under Pop!_OS. I've narrowed it down to an update, but unsure which one it is. For the time being, I'll avoid updating the system until I can determine which one is at fault. System76 may get to it before me. If so, great. I'm ok with this otherwise. I'll end this log here and start the next one with some actual video editing. I enjoy trying new and weird things as I learn stuff and usually find weird bugs. I now know how to get this particular set up at least running and stable. I've done some research and decided to upgrade my boot drive to a 256GB Samsung Bar Plus flash drive. I was considering using an NVME SSD over USB, but that gets expensive and bulky, and is out of reach of many people like kids who may not have the means to set it up. The goal of this project is to use REASONABLE means to run a Pi 400 as an every day computer. Even my Pidock 400 could easily be replaced with whatever tv or monitor is available.
Raspberry Pi 400 Daily Driver
Learning to use a Raspberry Pi 400 laptop as an everyday computer and sharing the results.
