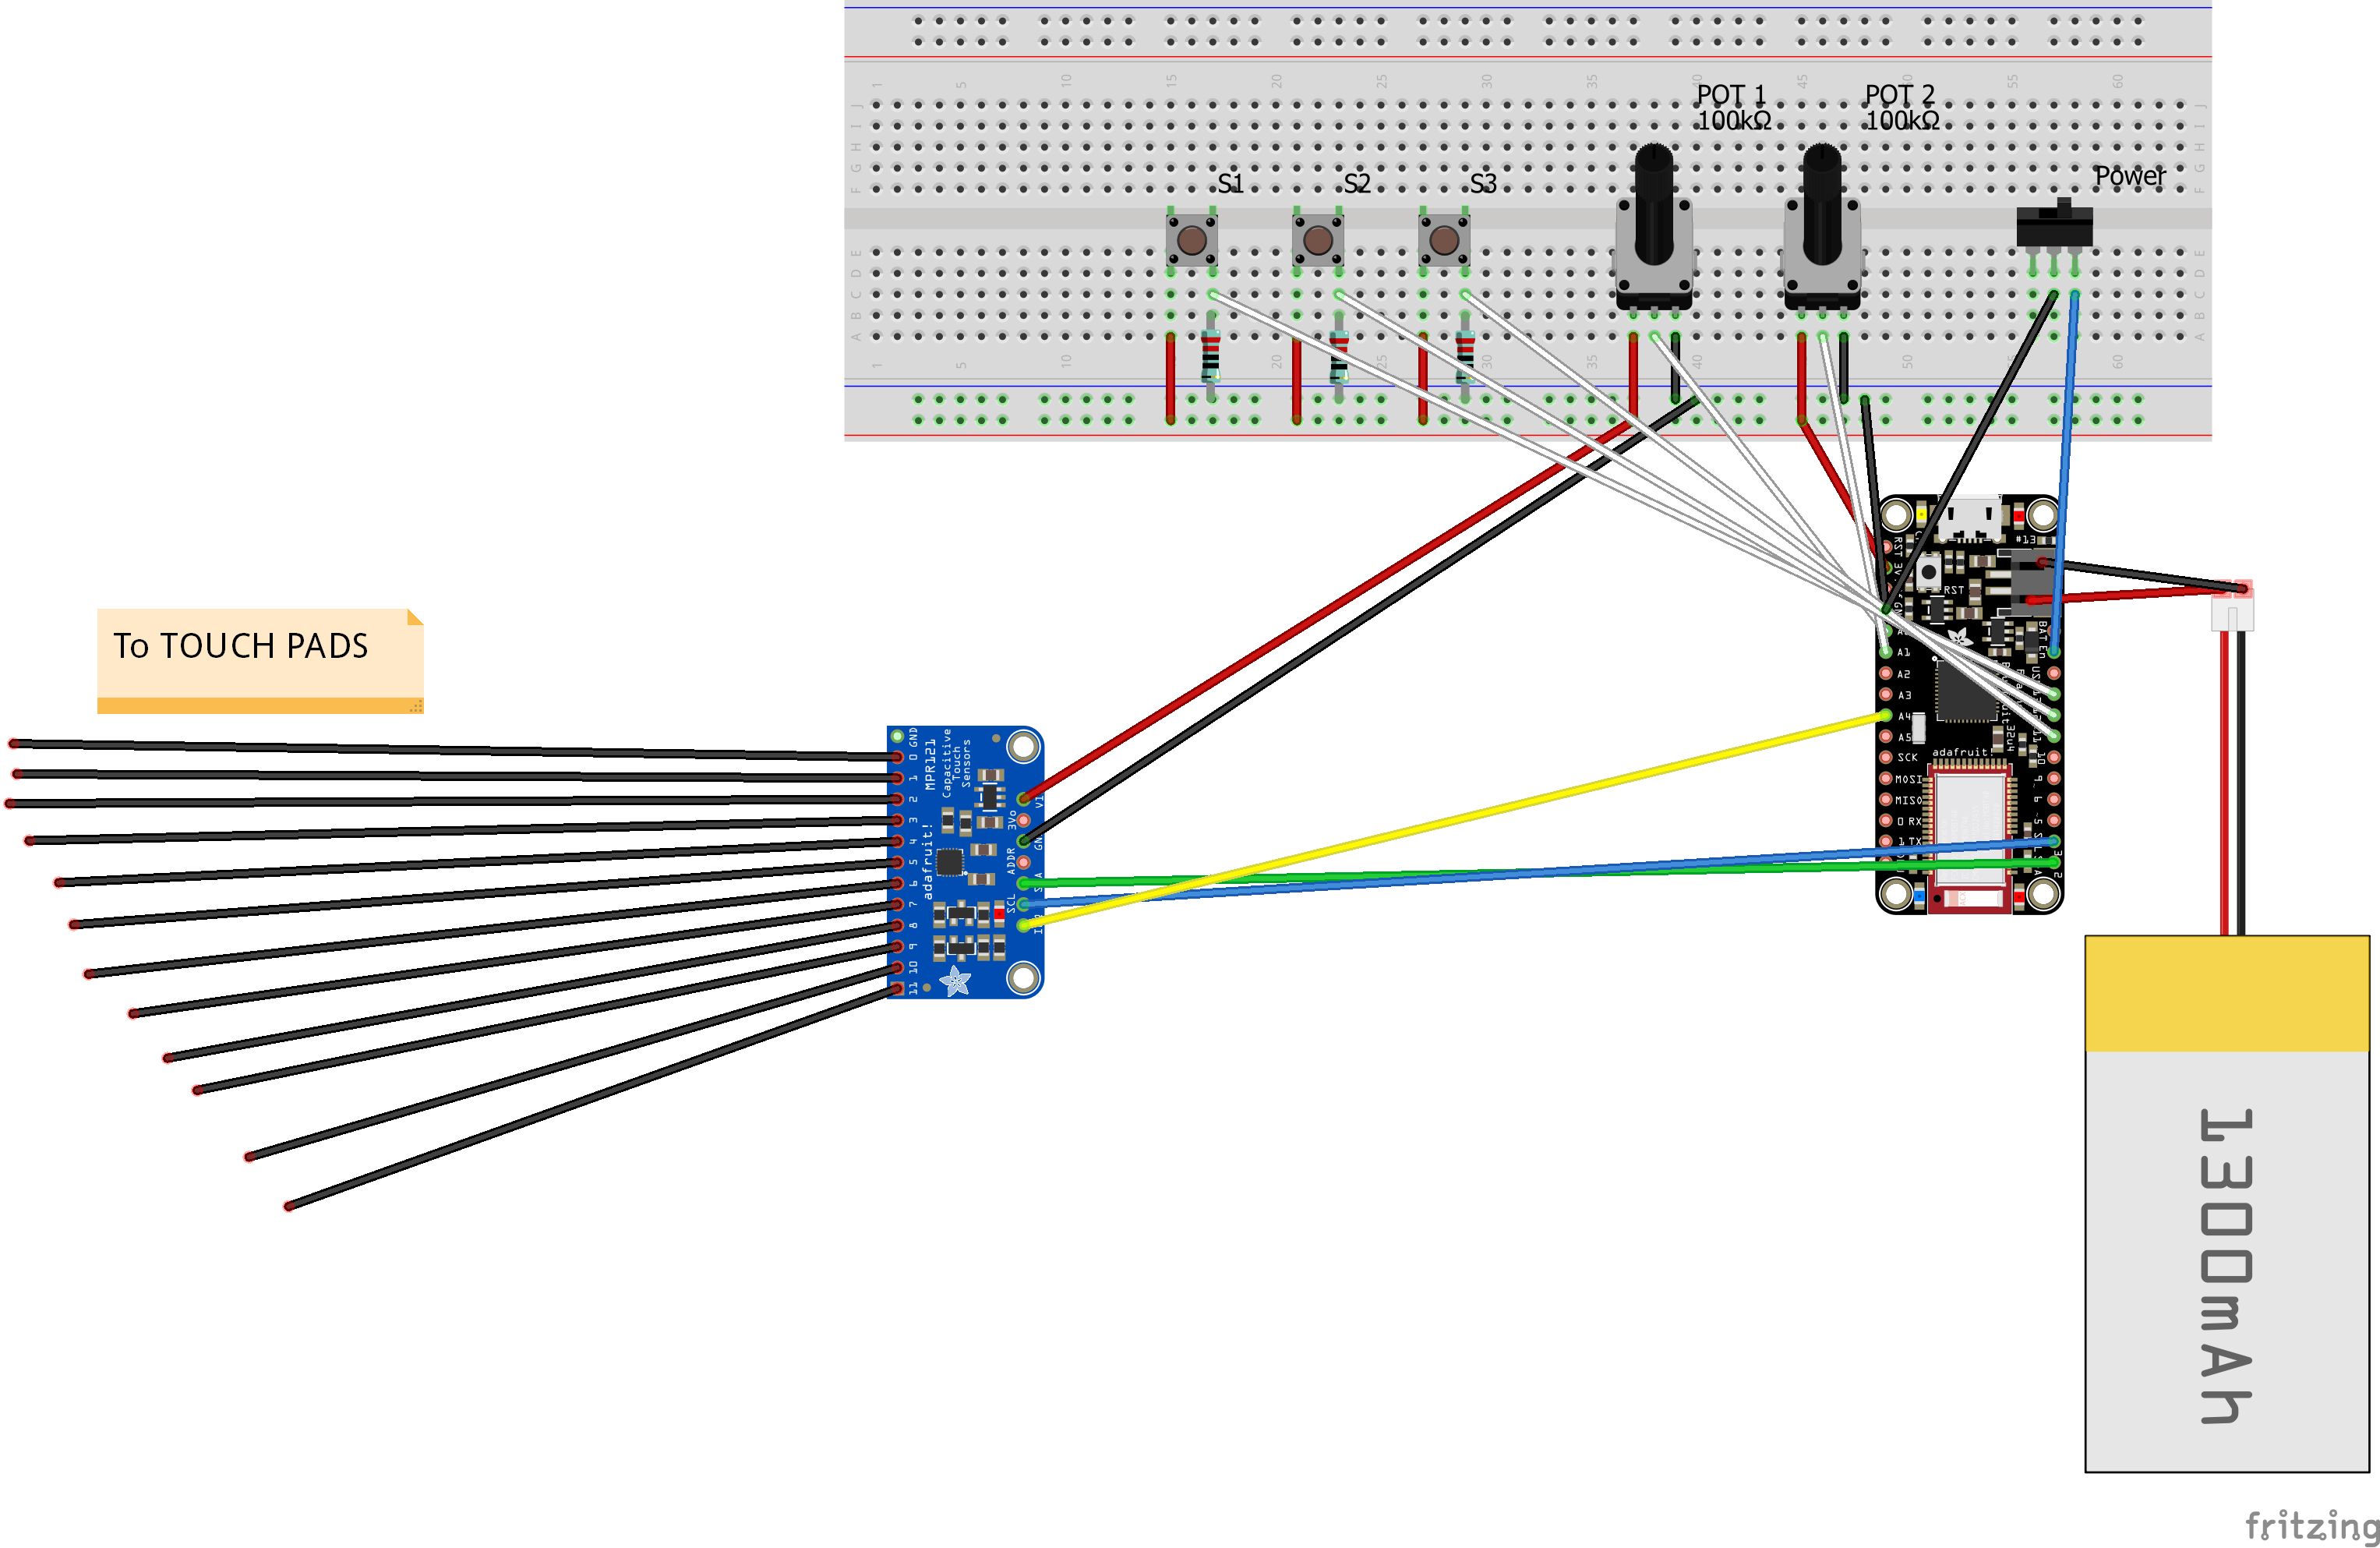
For a microcontroller, I decided to use an Adafruit Feather 32u4 Bluefruit as it allows you to send MIDI using low energy bluetooth. Conveniently, it also has a JST port to enable charging via a Lipo battery. This makes it an ideal microcontroller to make a portable MIDI device with.
How the controller works
Twelve capacitive touch pads are used, corresponding to the twelve notes in the chromatic scale. These pads are wired to an Adafruit MPR121 capacitive touch sensor breakout, which provides a convenient way to send capacitive sensing information to the microcontroller through I2C communication. The breakout board and associated library also handle the analog data from the touch pads making this part of the project easier to code.
Three push buttons, two potentiometers and a toggle switch are also wired to the microcontroller. Their functions are defined below:
Push Button 1 (Octave Up): Increases the pitch of the capacitive touch pads by one octave.
Push Button 2 (Octave Down): Decreases the pitch of the capacitive touch pads by one octave.
Push Button 3 (Sustain): Switches the MIDI controller to/from sustain mode. In sustain mode the controller can only play one note at a time. A note is played when a pad is pressed and stopped when the pad is pressed again or a different pad is pressed. In contrast, default behavior allows multiple notes to be played at once, and notes are only played when a pad is pressed.
Potentiometer 1 (Volume): Determines the value of the volume knob (CC 7). Maps to a value between 0 and 127.
Potentiometer 2 (Mod Wheel): Determines the value of the mod wheel (CC 1). Maps to a value between 0 and 127.
Note: using MIDI Learn it is usually possible to make these CC values control other parameters on your software synth.
Toggle Switch (Power): Turns the board on and off.
 Kzra
Kzra

 IntuitiveHarmony
 J. M. Hopkins

 John Lassen