-
1Wiring
The wiring is shown in the breadboard diagram below. Before soldering, I recommend first creating a prototype device on a breadboard to ensure you have wired the circuit diagram properly. When creating a device that will be soldered and mounted to a guitar ensure you measure wire lengths to the necessary lengths. This requires measuring the wire length from the MPR121 to the microcontroller, and the touch pads to the MPR121 respectively. In my case this was 40 cm and 20 cm respectively.
For a battery, I used a 2000mAh LiPo battery which can connect directly to the feather via a JST-PH connector. When buying a LiPo battery: the important thing is that your battery has a JST-PH connector with the wires in the correct orientation.
In the prototype example shown here I use the exposed ends of single-core wires as touch pads. You could also make actual touch pads by sticking the ends of the wires to the scratchplate with conductive tape.
![]()
-
2Software
The Arduino IDE code is given in the files tab. You will first need to configure the Arduino IDE to detect the Adafruit feather. You will also need to install the following libraries:
- Adafruit MPR121
- Adafruit BluefruitLE nRF51
Start by opening the BluefruitConfig.h tab (available from the nRF51 example sketches) and then open and upload the MIDI scratchplate sketch.
Acknowledgements: I adapted my code from ble_neopixel_mpr121.ino example by Todd Treece, copyright of Adafruit.
-
3Testing
Before mounting the controller, it's worth testing that it works.
Once the controller is wired (either to a breadboard or protoboard) and the code is uploaded, it can be connected directly to a software synth on a platform that supports Bluetooth LE. I connected my controller to the free Audiokit Synth One app on an iPhone SE. The controller was visible as a Bluetooth MIDI Device (named 'Adafruit Bluefruit LE') and can be connected to directly via the app. It's then ready to make music and you can mount it to your guitar.
-
4Mounting
Mounting the controller to your guitar via my method requires sticking electrical PVC tape directly to the finish of your guitar. If you aren't comfortable doing this, do not proceed with my method. I cannot guarantee this won't blemish the finish on your guitar.
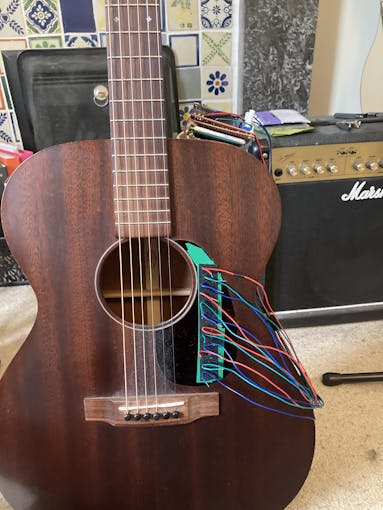
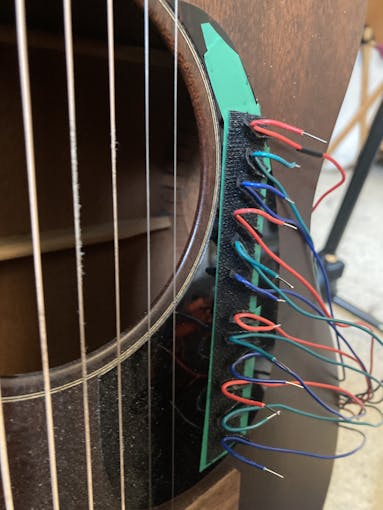
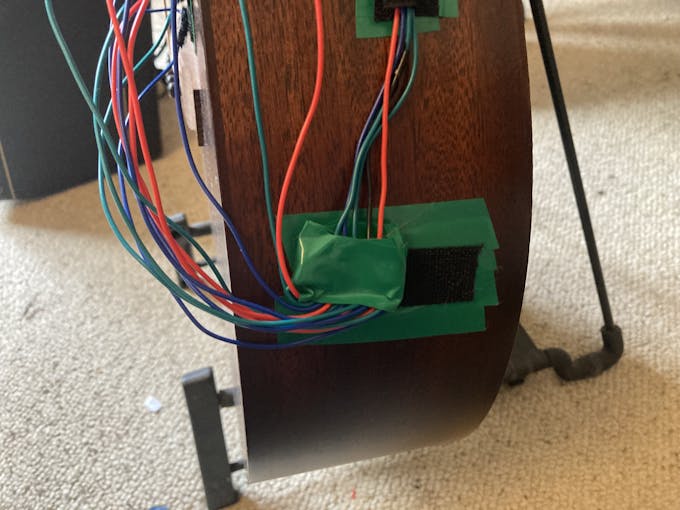
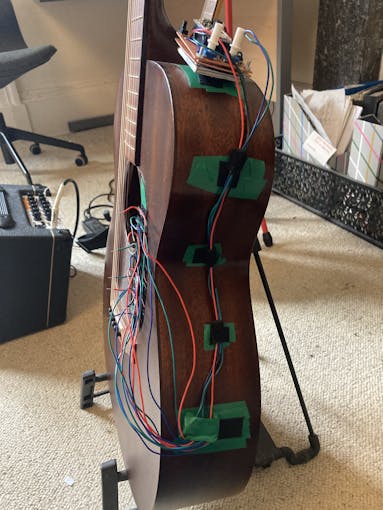
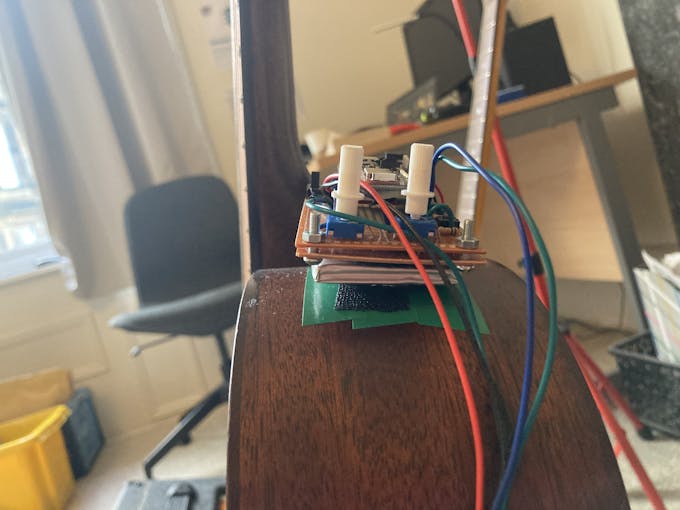
To secure the controller to the guitar I used electrical PVC tape and hook and loop tape (of which velcro is a well known brand). See the pictures below to see how this works.
The purpose of the PVC tape is to protect the finish of the guitar from the adhesive on the hook and loop tape. I tested a few different tapes (masking, parcel, PVC) and PVC was the cleanest to remove from the wood of the guitar. I recommend testing a small strip of your PVC tape to ensure it can be removed without leaving adhesive residue on the finish of the guitar before adding more tape.
All the boards, batteries and wires can be fixed to the guitar using hook and loop tape. I fixed the hook tape to the body of the guitar (protected via PVC tape) and the loop tape to the boards, batteries and wires. This means the controller can be removed or installed quickly and non-destructively.
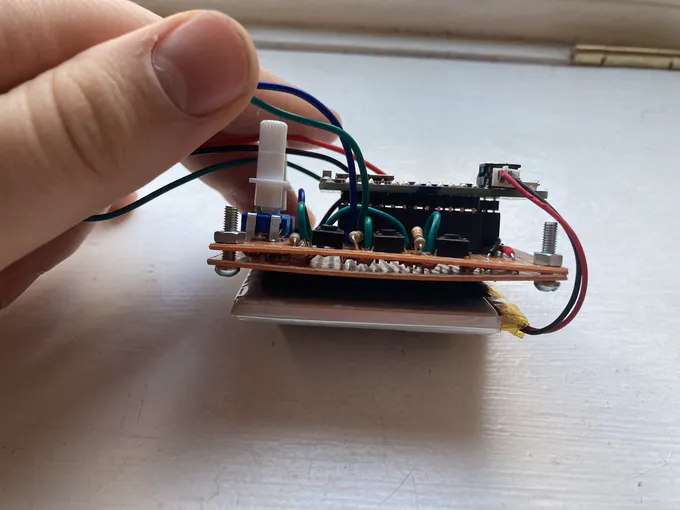
Stick a thin section of of loop tape to each wire and a long section of hook tape to the scratch plate. You can orient the wires however feels natural. I angle down the wires that I won't use in a particular song. The capacitive touch sensor breakout board is wrapped in PVC tape. All components and wires are mounted with hook and loop tape. The feather is mounted on a protoboard alongside potentiometers and switches. ![]()
A LiPo Battery is connected to the board using hook and loop tape.
Guitar Pickguard Wireless MIDI Controller
A wireless MIDI controller for an acoustic guitar's pickguard that detects note presses via capacitive touch sensing.
 Kzra
Kzra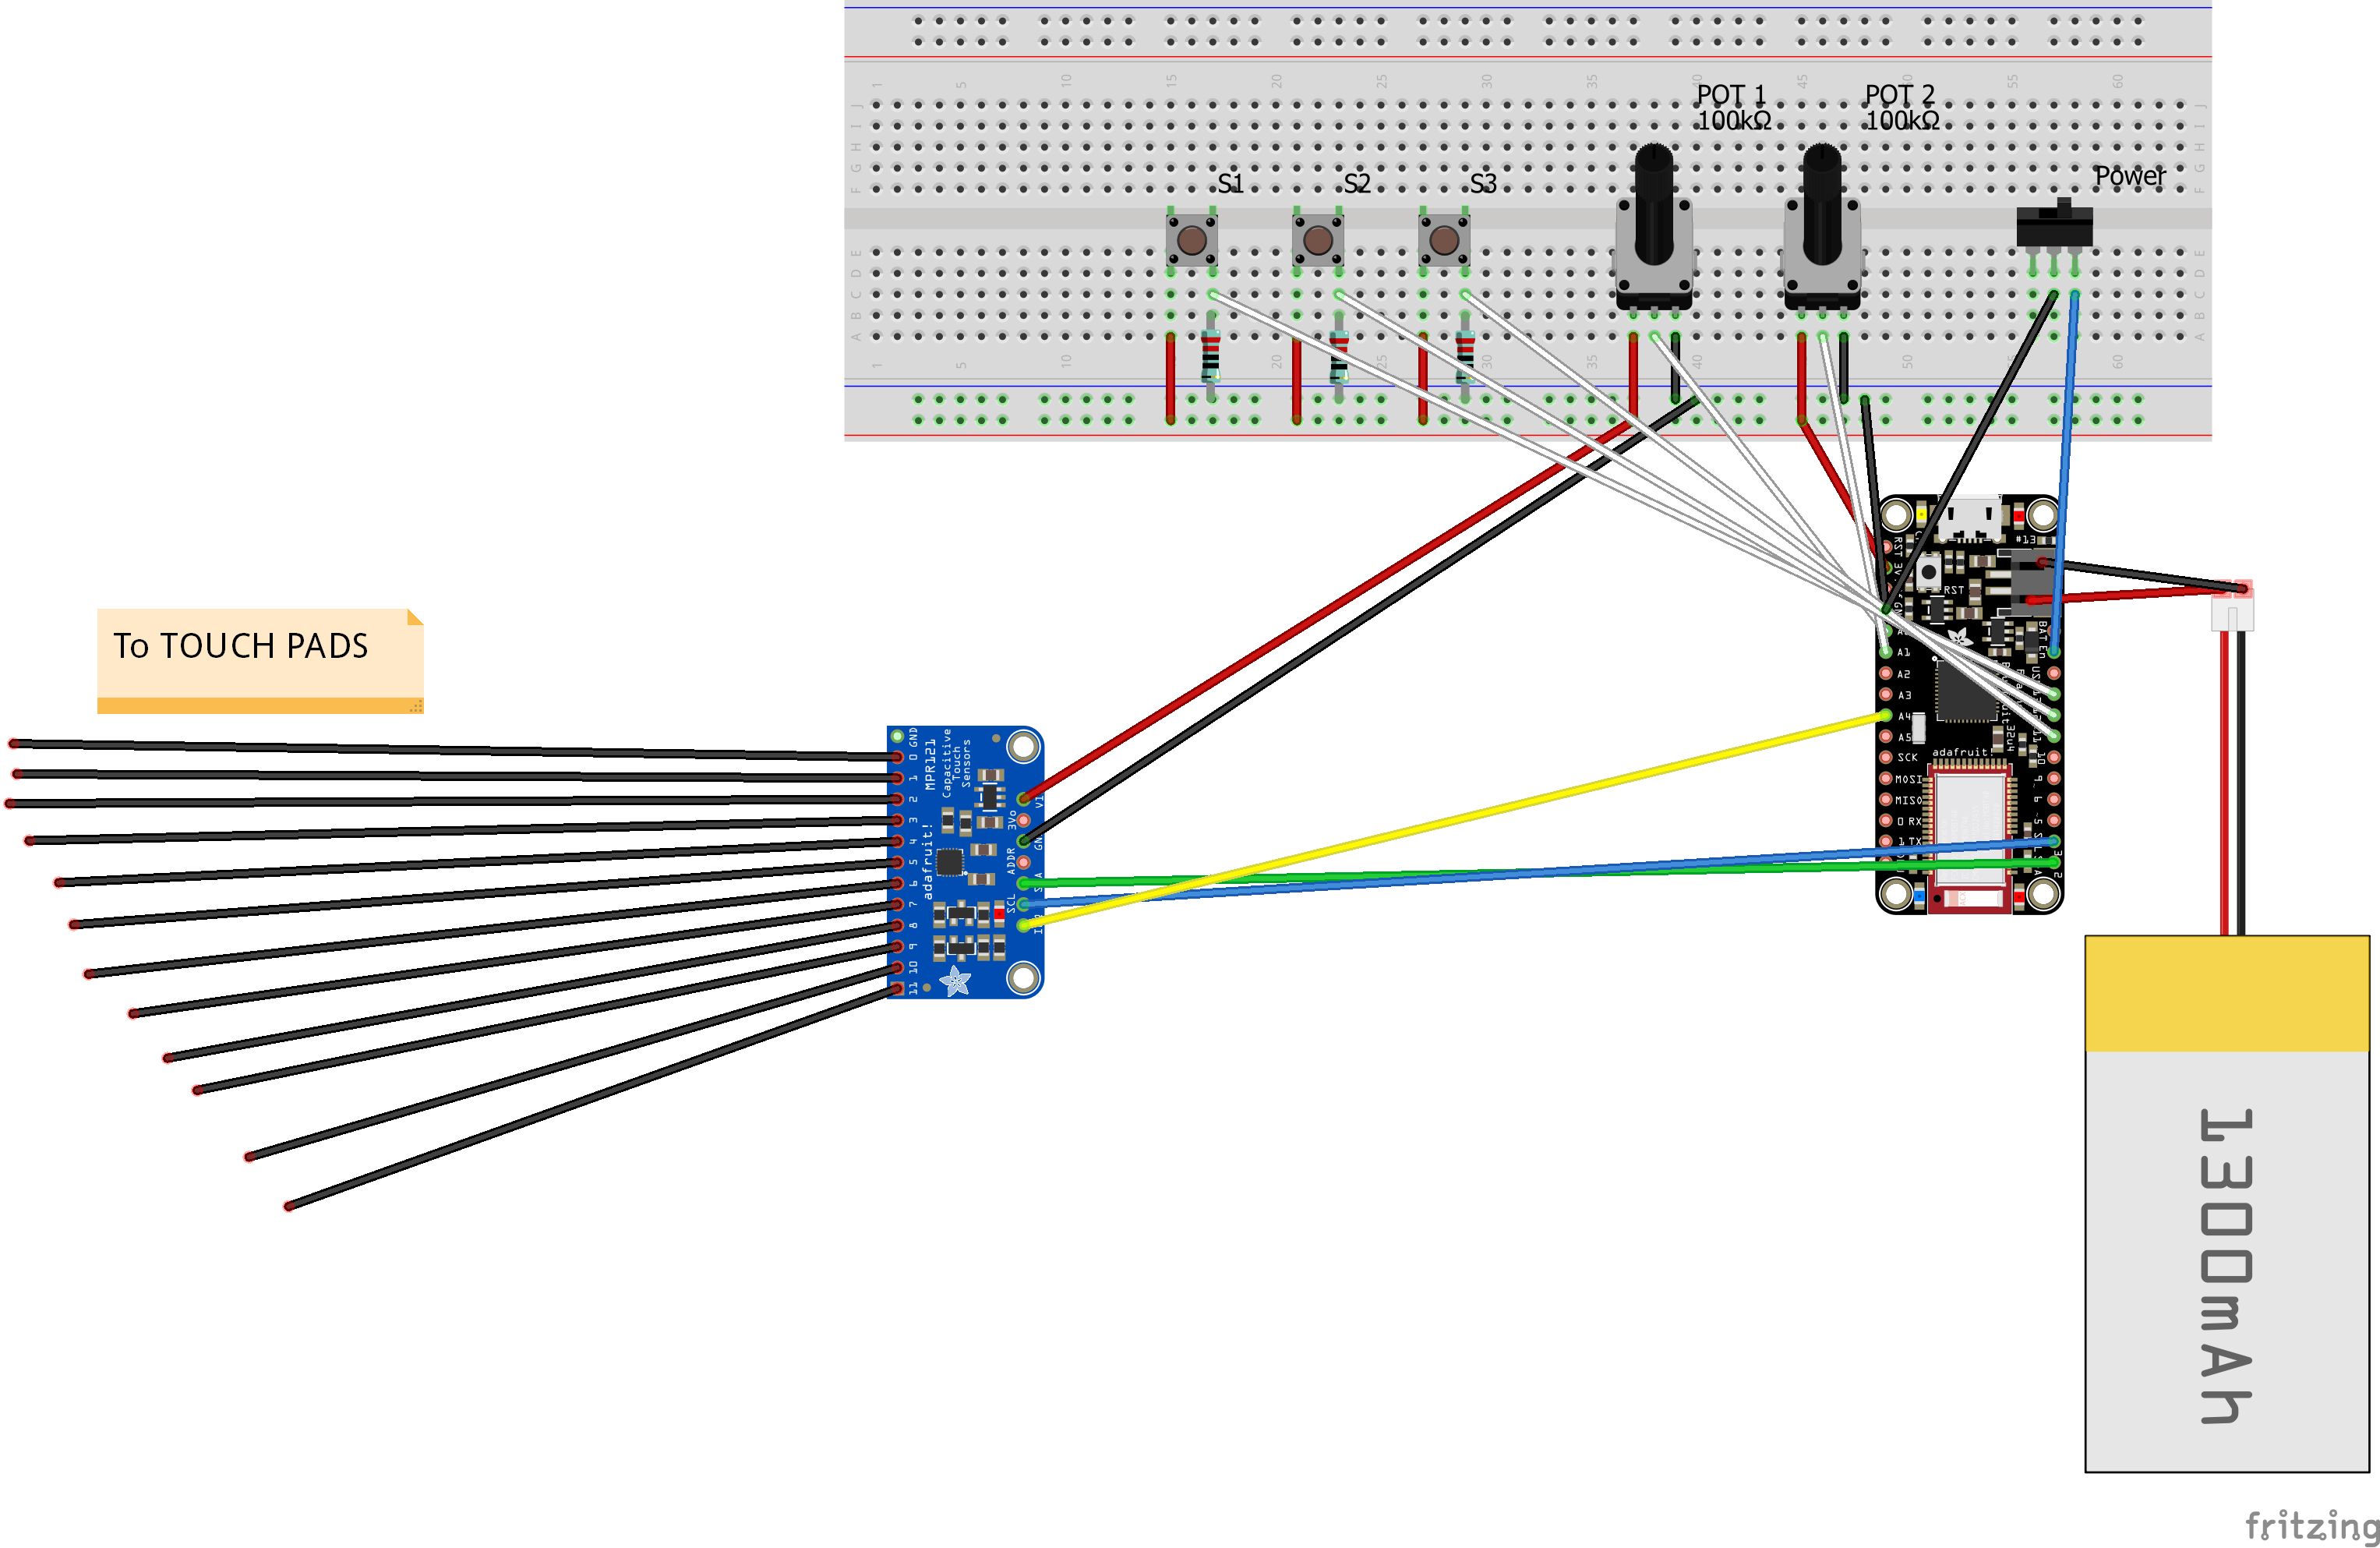
Discussions
Become a Hackaday.io Member
Create an account to leave a comment. Already have an account? Log In.