-
1Making Connections
The hardware part of this project is fairly straightforward.
The hardest part is probably tracking down a Steel Battalion Controller. Ebay prices as of 2021 show them running north of $300. Admittedly this is probably not a problem as people interested in this project probably already own one.
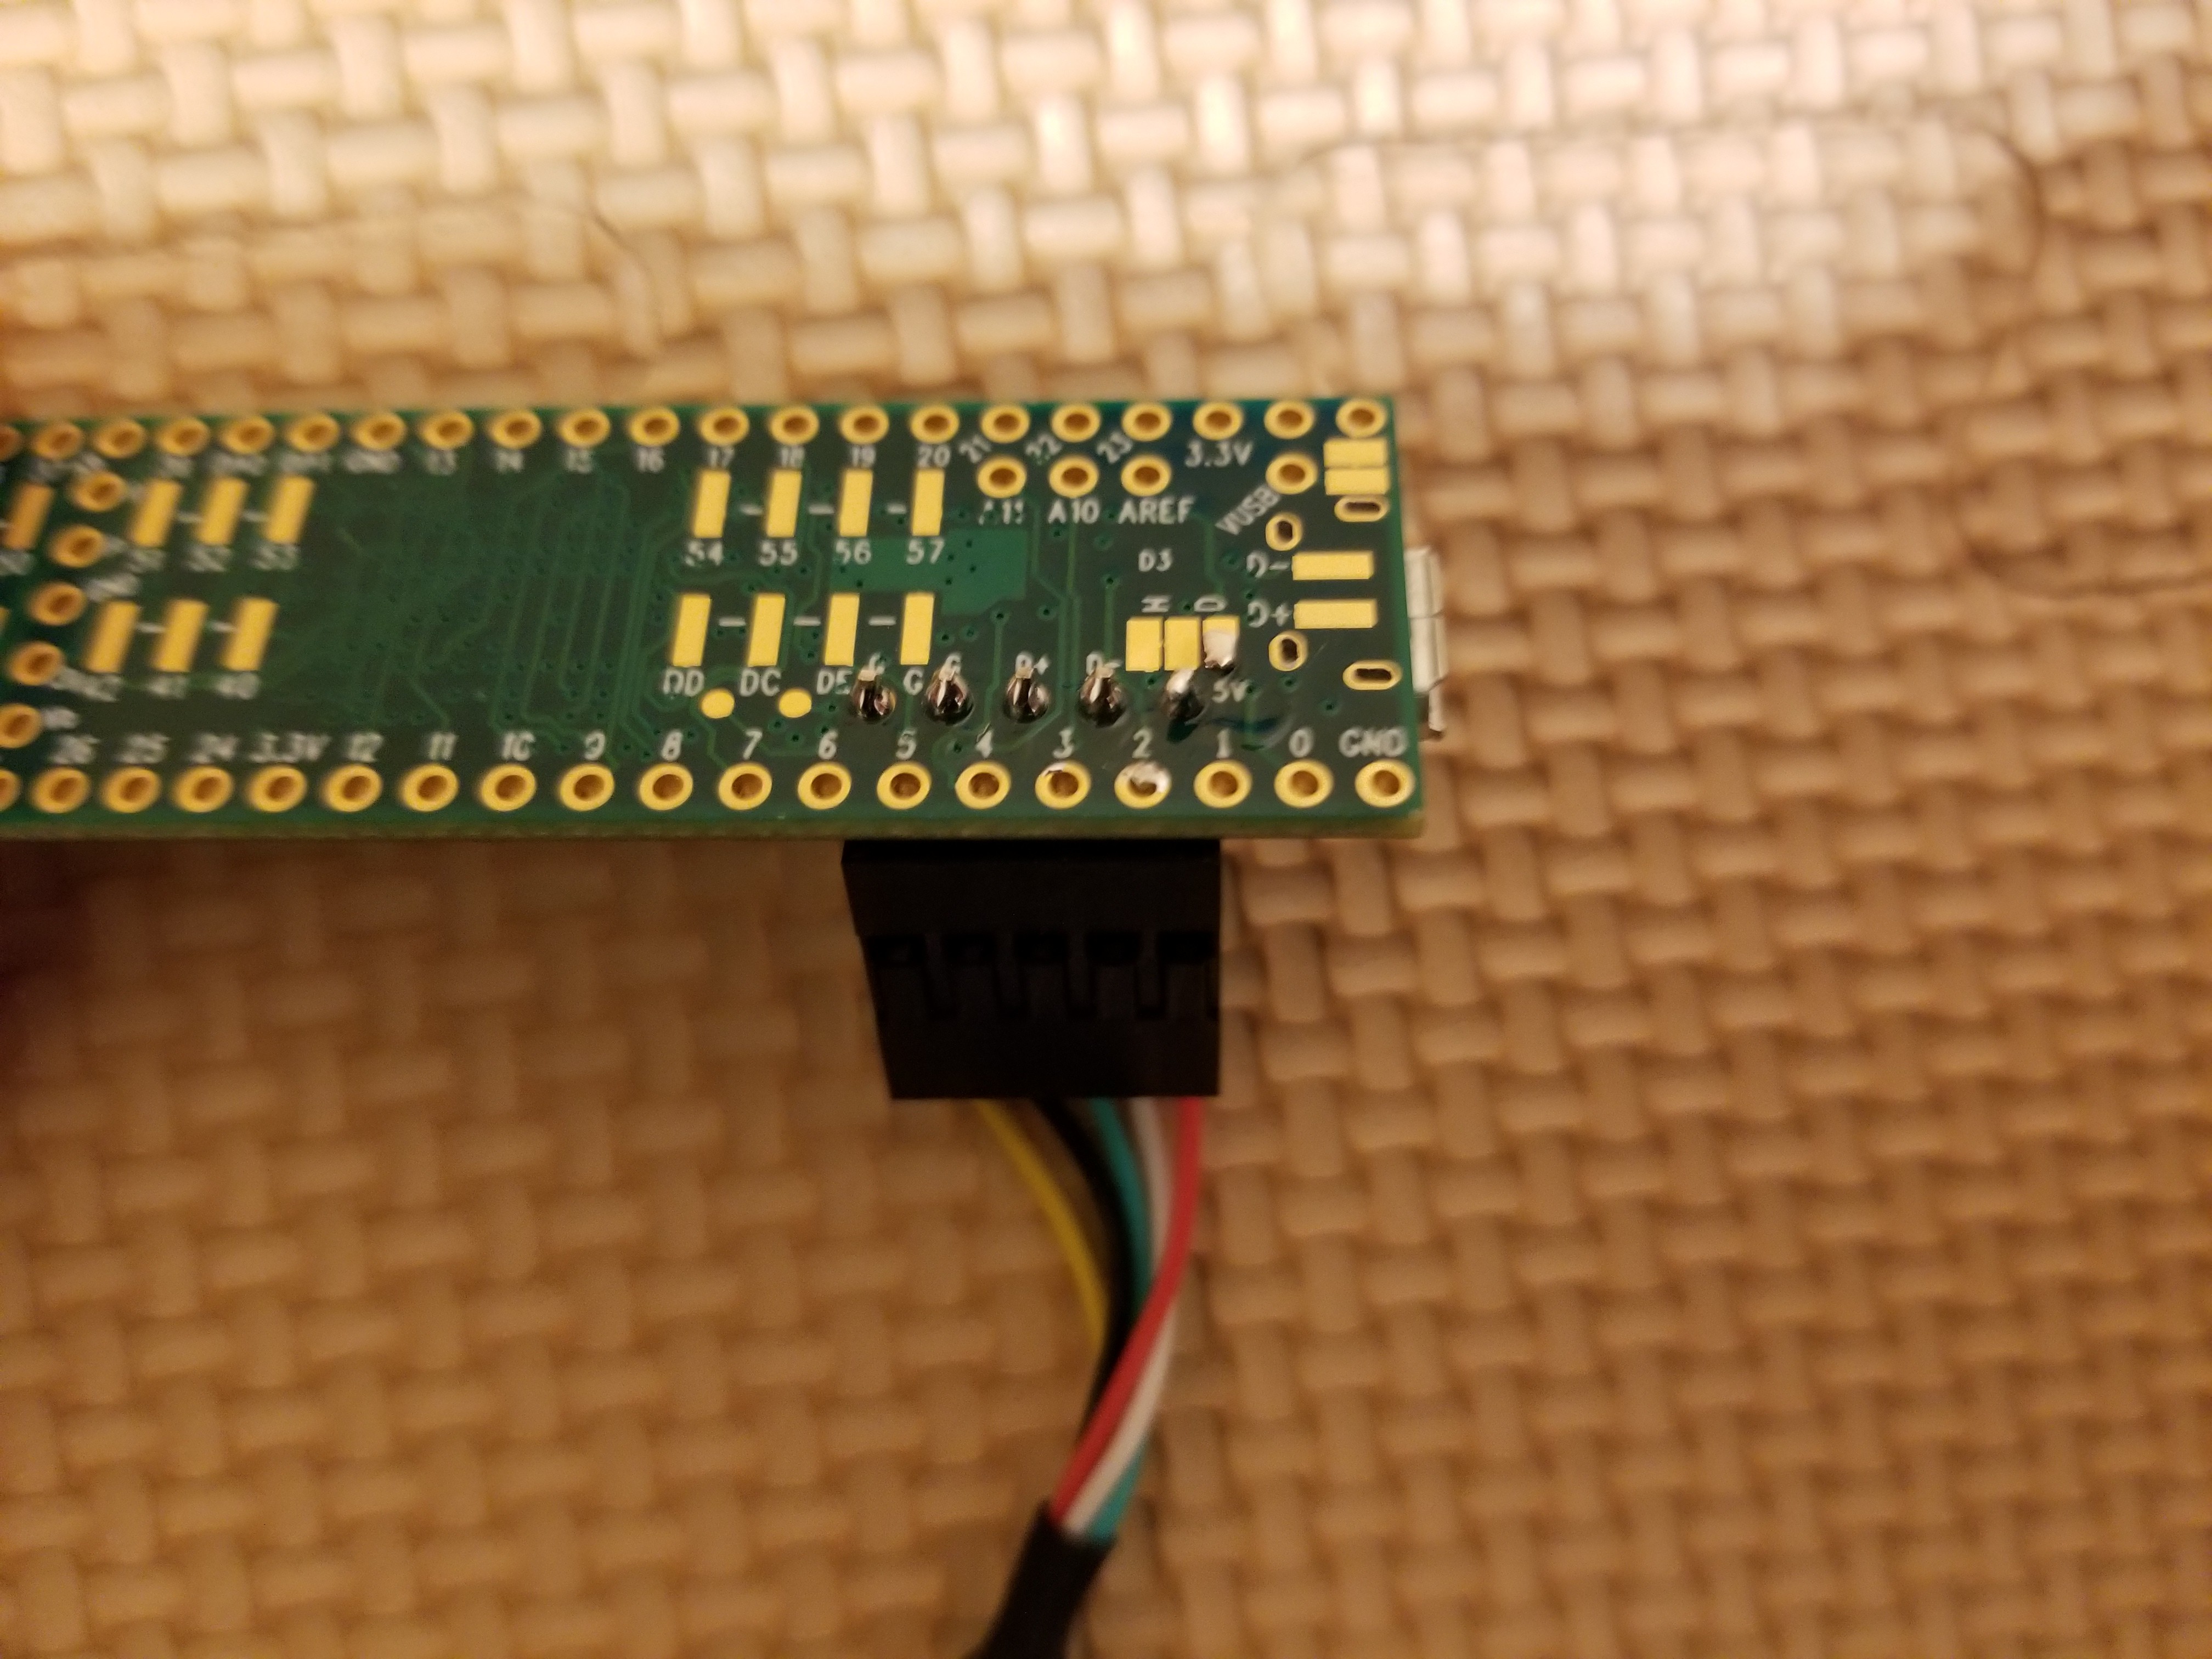
You'll only need to solder 5 pins to the Teensy 3.6 to make this work. The project contains a full list of parts that you will need.
![]()
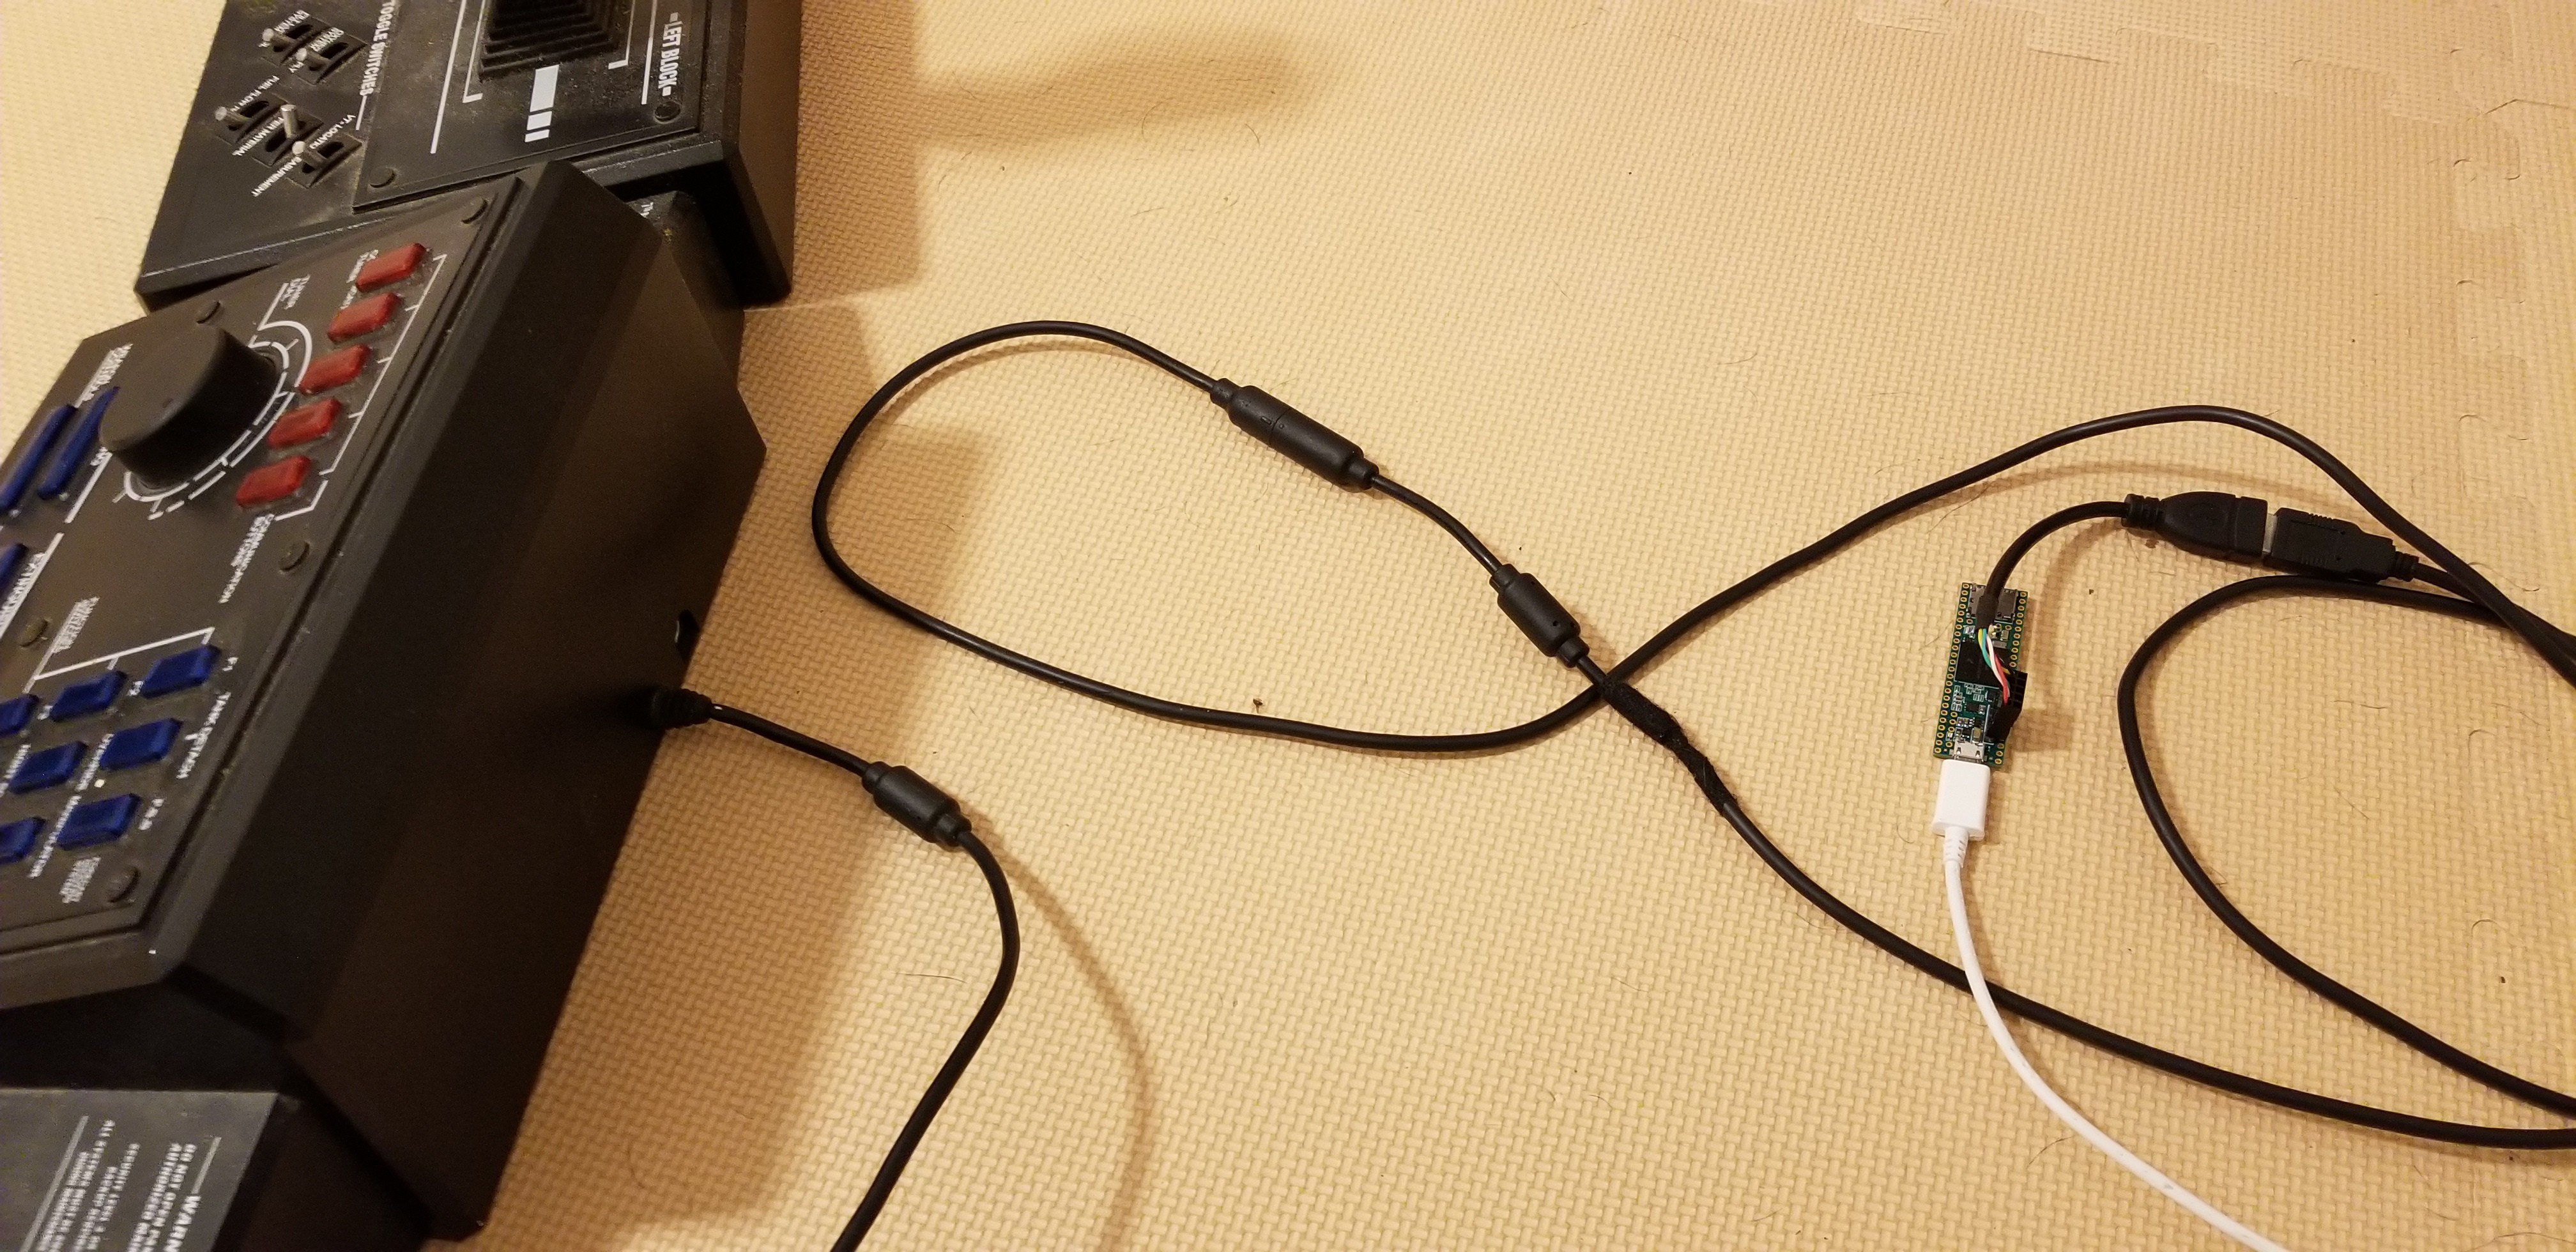
If you purchase the cable listed, yellow and black point away from the micro usb port and red is closest to it, with red matching 5V.
Looking at the pinout, reversing this cable MAY DESTROY your Steel Battalion Controller. Often times when power is involved you'll find that positive and negative are not opposite from each other, so that polarities won't line up when the cable is reversed. That is unfortunately NOT the case here. What we'll do is use a cheap keyboard or mouse to make sure things are working properly before connecting the SBC.
The USB adapter is actually a 5x2 cable with one row empty. Make sure the empty row points out.
That is about it. The hardware part of this project is simple. A few small notes. I had some issues running this off of an unpowered USB hub. It ran fine when connected directly to my PC. This may have been a localized issue, but it's best to try this connected DIRECTLY to a pc first.
Other things to note. I listed a fairly short 0.7 ft xbox -> usb cable adapter. The MAXIMUM these can run is 2 feet before you may run into issues. This may not be as big a problem now as it was 10 years ago, but there were plenty of very long adapters which DID NOT work with the SBC. The SBC already runs a cable close to max USB spec and the long adapters put the length above the maximum.
-
2Installing Arduino
If you are visiting Hackaday or have done any diy project in the last 10 years you have heard of arduino.
I am using the latest release as of November 2021, 1.8.16. This may or may not work, but as far as I can tell you can simply modify the number to get a specific version. For example for Windows, to get 1.8.16 you go to.
https://downloads.arduino.cc/arduino-1.8.16-windows.exe
However
https://downloads.arduino.cc/arduino-1.8.7-windows.exe
Also works and that is from 2018.
Here are the linux and mac links:
https://downloads.arduino.cc/arduino-1.8.16-linux64.tar.xz
https://downloads.arduino.cc/arduino-1.8.16-macosx.zip
It's a standard installation, so you should have no problems.
-
3Installing Teensyduino
Support for Teensy doesn't come standard with Arduino so you have to add it. I'm using Teensy Version 1.55
- Macintosh OS Software (10.10 - 12.x)
- Macintosh OS-X Installer (10.7 - 10.14)
- Linux Installer (X86 32 bit)
- Linux Installer (X86 64 bit)
- Linux Installer (ARM 32 bit / Raspberry Pi)
- Linux Installer (AARCH64 / Jetson TX2)
- Windows XP / 7 / 8 / 10 / 11 Installer
I'm trying to be specific about versions because I've seen things change over time, but I'm not too concerned about long term support as PJRC has supported the Teensy project for more than a decade.
Here is a link to their site showing how to install:
https://www.pjrc.com/teensy/td_download.html
Again, like Arduino this is a fairly straightforward process. Only catch is to make sure to either select ALL libraries on install or at least check off the USBHost_t36 library to enable USB Host support
-
4Testing Teensyduino support
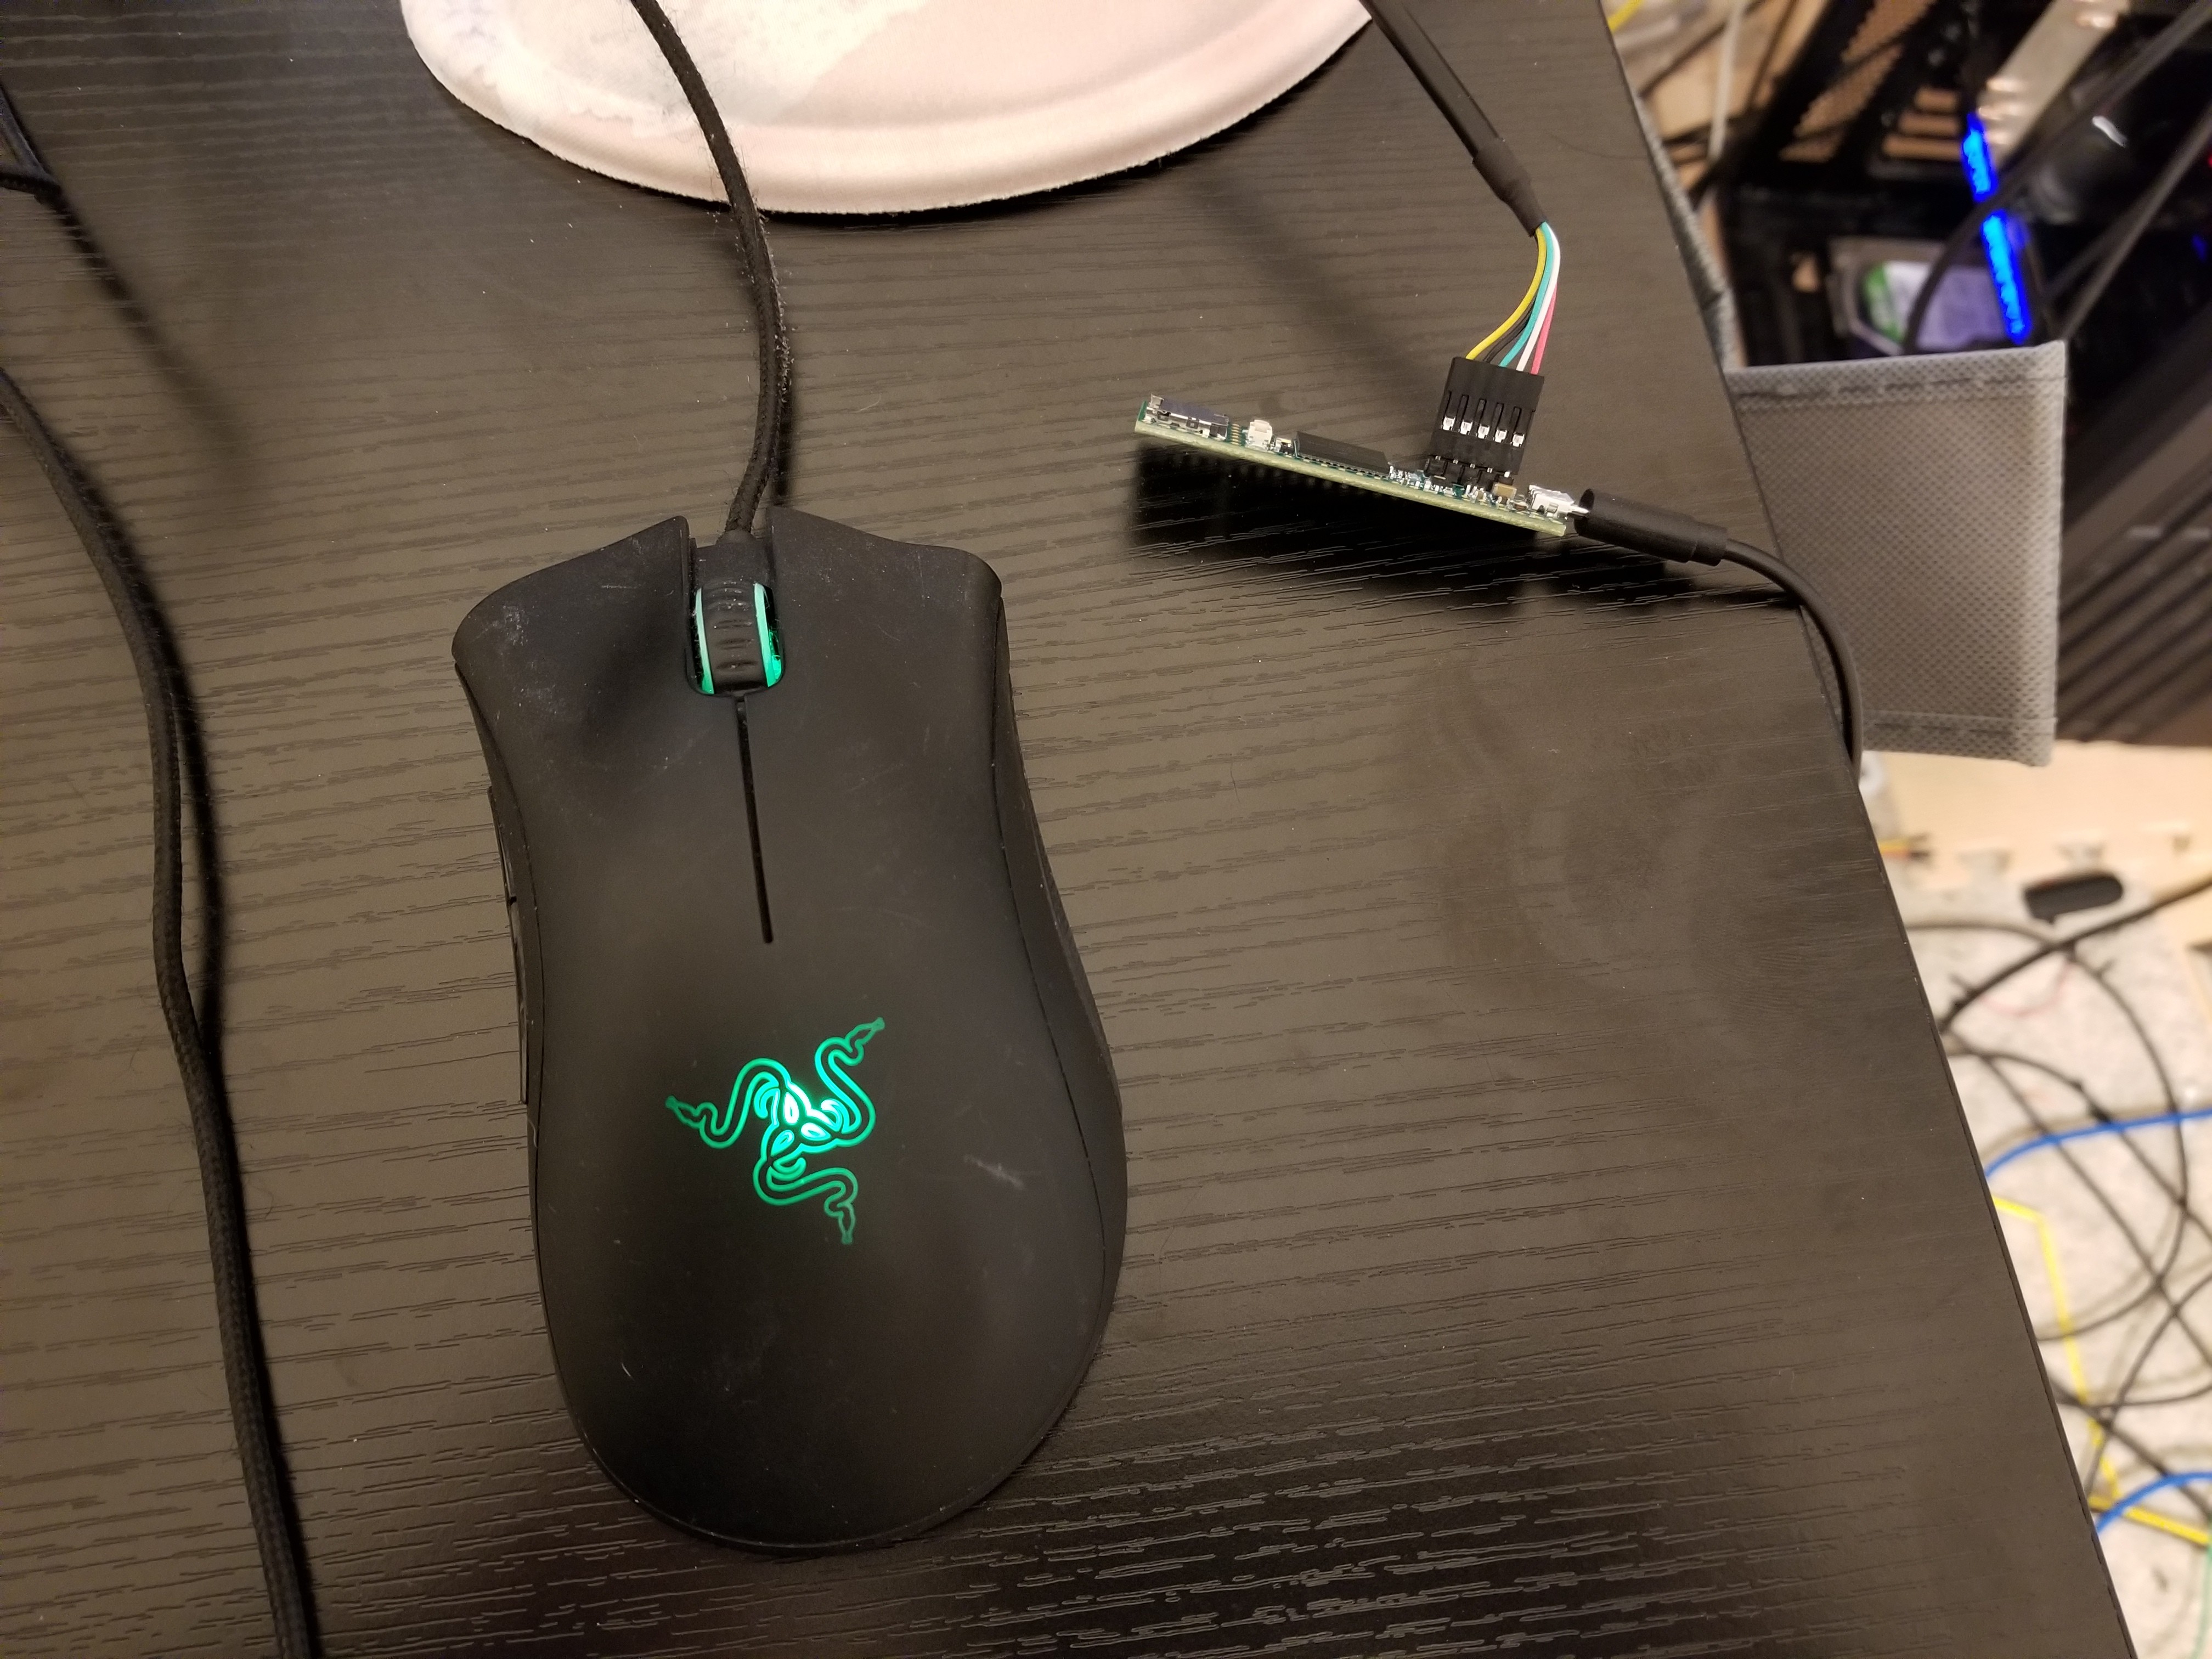
There's 2 purposes to this step, one two make sure the usb header is properly connected and that if the POLARITY is in the wrong direction you don't fry a rare controller.
![]()
The mouse is over $20 but I was confident that I had plugged it in. It also accidentally did double duty as the lights on it prove that it was connected correctly. Any cheap usb powered device would work too.
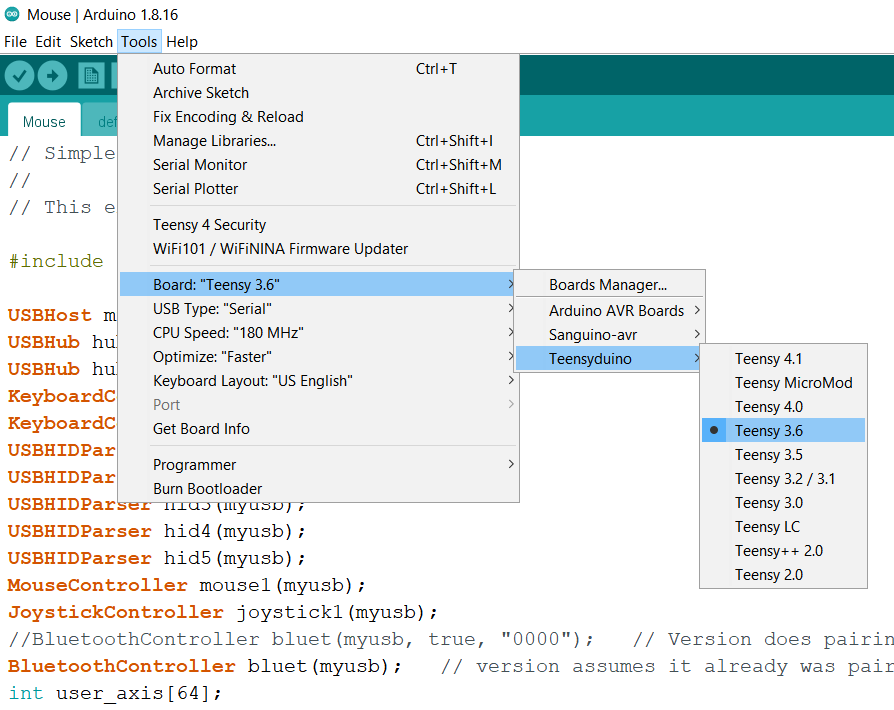
If you followed the previous step and installed teensyduino correctly you should have a new range of options within Arduino
![]()
Go down and select Teensy 3.6
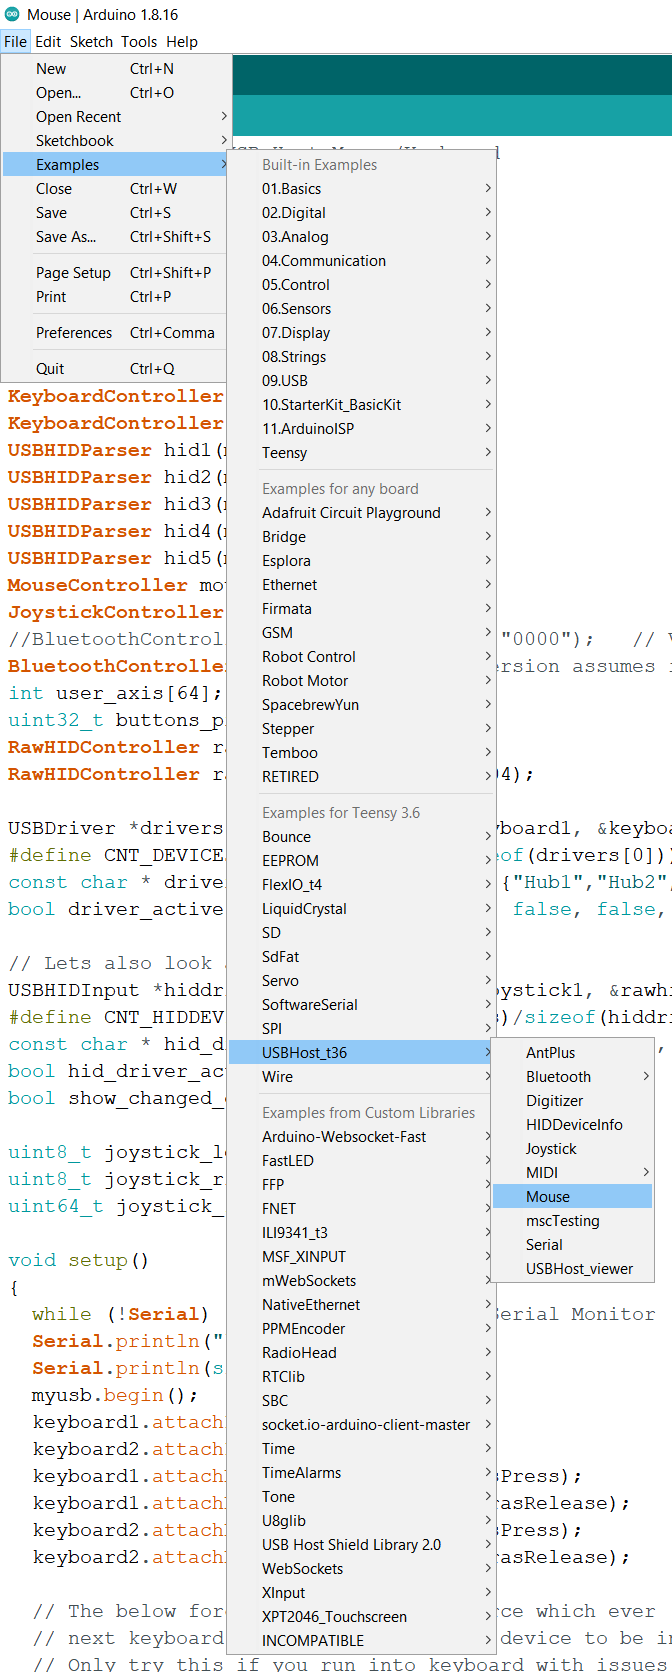
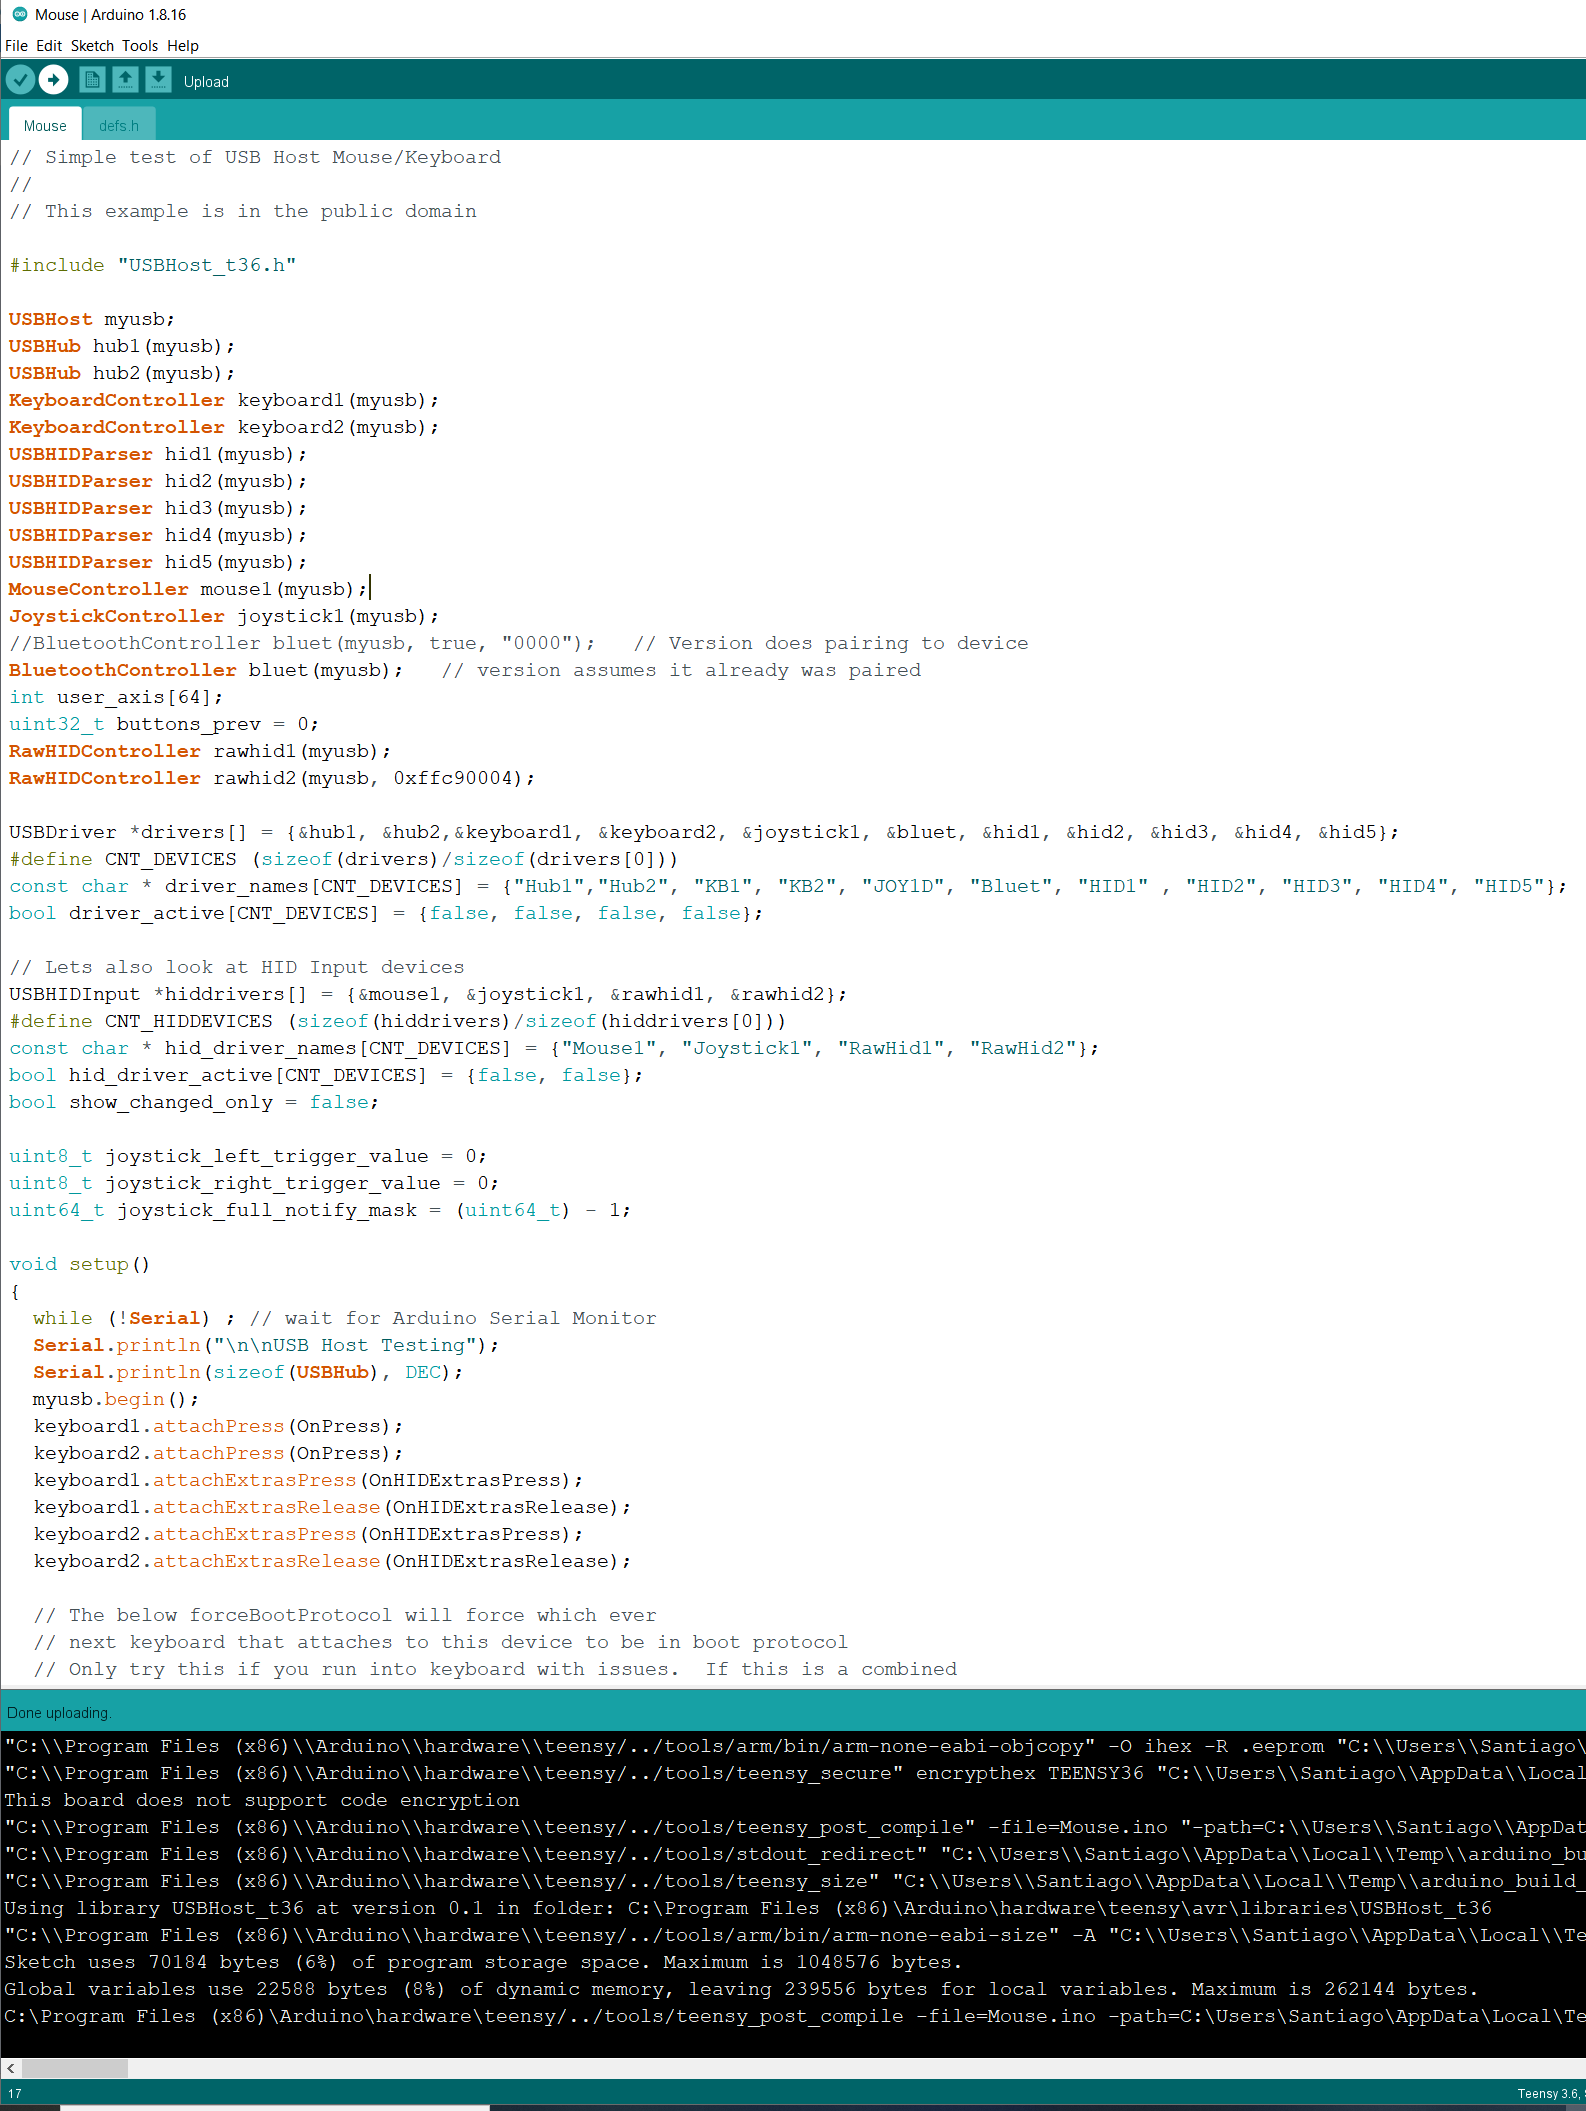
Now if you selected All Libraries, or USBHost_t36 during the Teensy selection you should be able to select the Mouse example in this case:
![]()
Only a few steps left, now upload to the board:
![]()
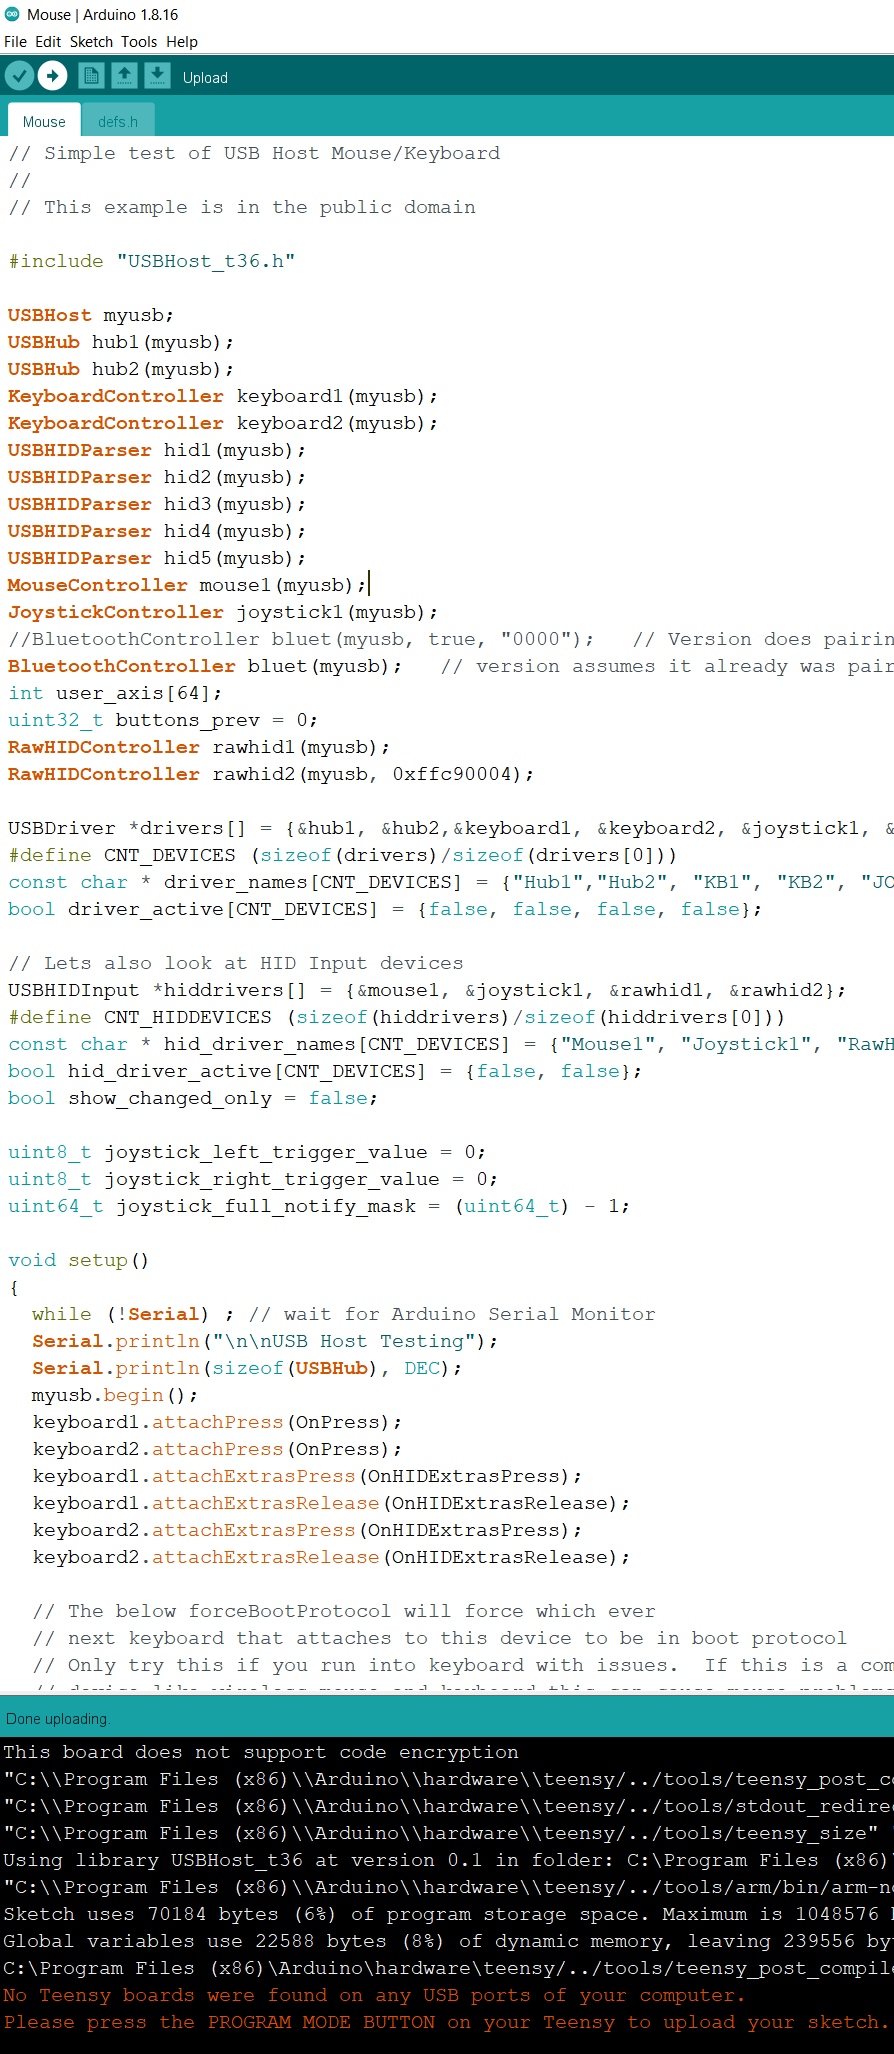
If everything goes well after selecting the highlighted upload button you'll see Done uploading at the bottom. However things can not go right. In writing this tutorial I ran into an issue
![]()
As you see in Red at the bottom, no Teensy boards were found. I had accidentally used a CHARGING micro usb cable and not a regular data one. Additionally if you have made it farther in this tutorial and have uploaded an XINPUT version to the device you may have to press the reset button on the board to upload. In which case the Teensy Flip loader should upload things for you.
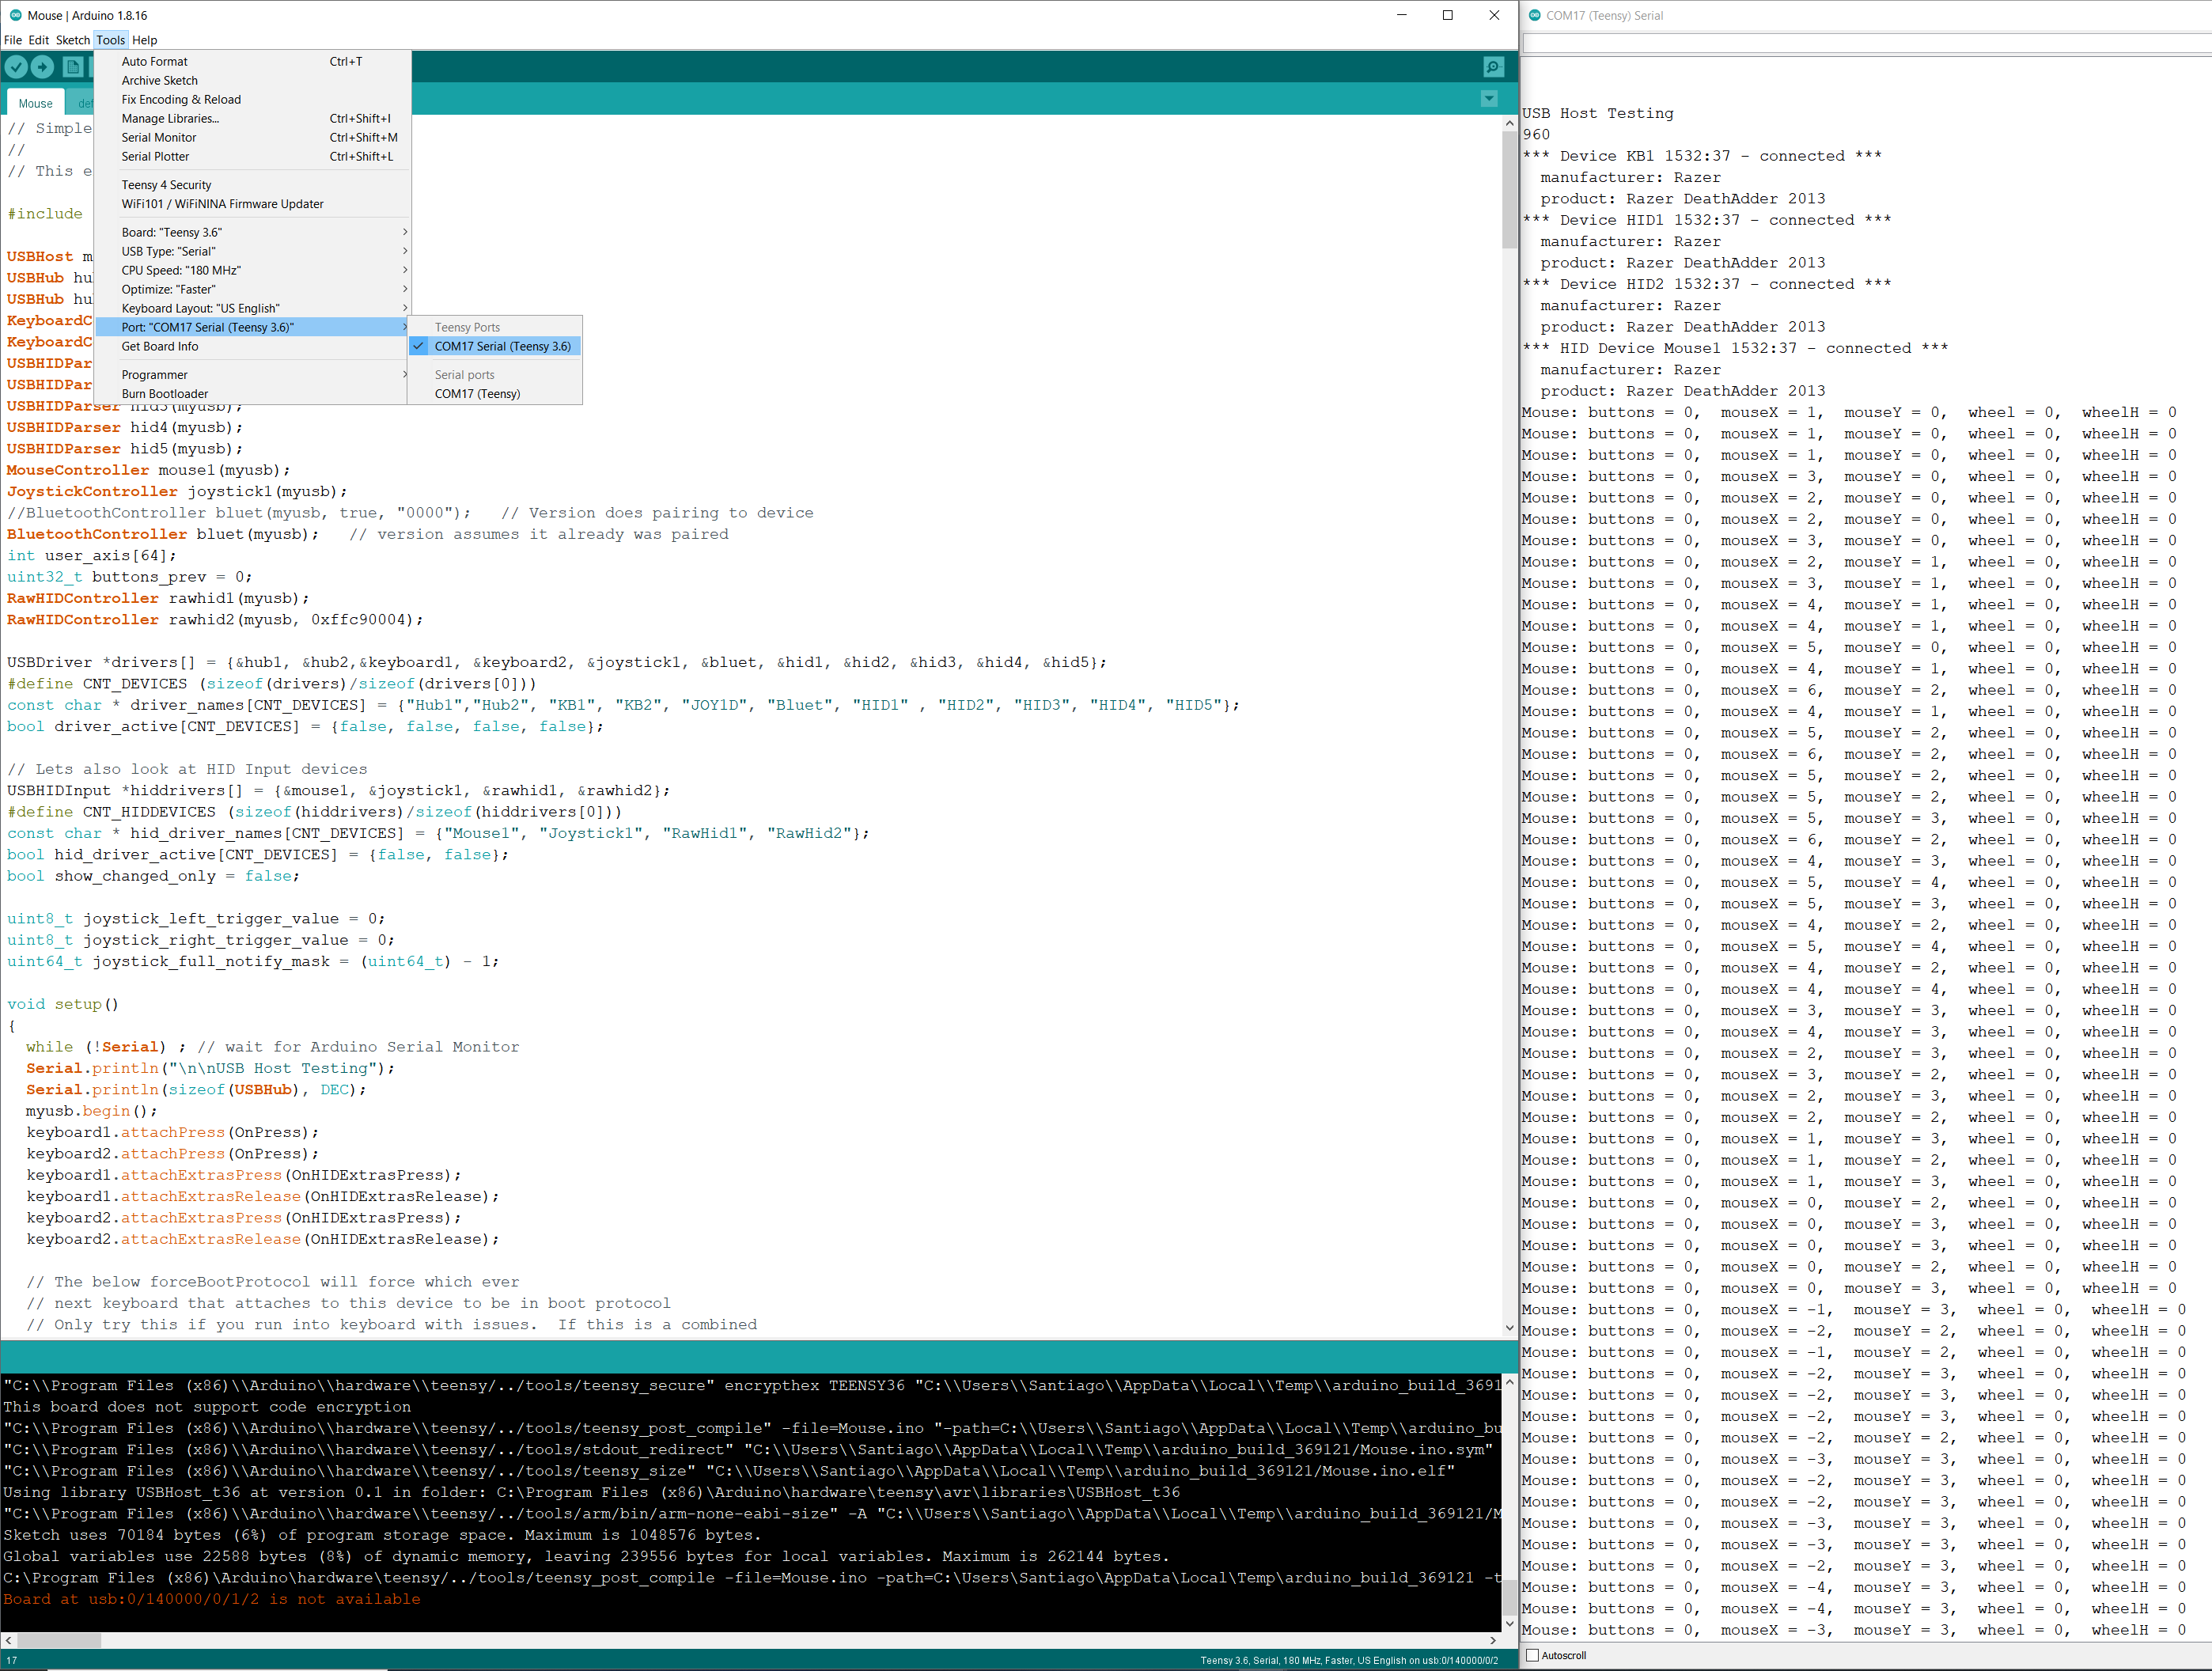
Assuming things went well we can now test the USB mouse. The teensy emulates a USB to serial device by default. (It can emulate other things as well) Go to the tools menu and select the appropriate serial port and go the Serial Monitor to see the results:
![]()
In this case I had COM17 and on the right you can see i enumerating the device and you can see the output as a result of moving the mouse. Congratulations we are almost there.
-
5Connecting the SBC to the Teensy for the first time!
If you have followed this far then you should feel confident in plugging in the SBC. As far as software I tried to make it as easy as possible by submitting an Arduino library to make it easy to download support for the Steel Battalion Controller.
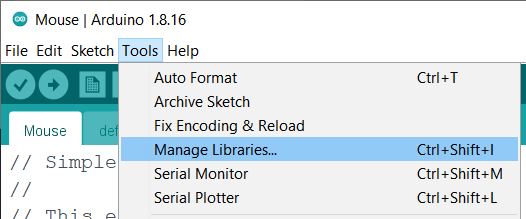
Go to Tools->Manage Libraries
![]()
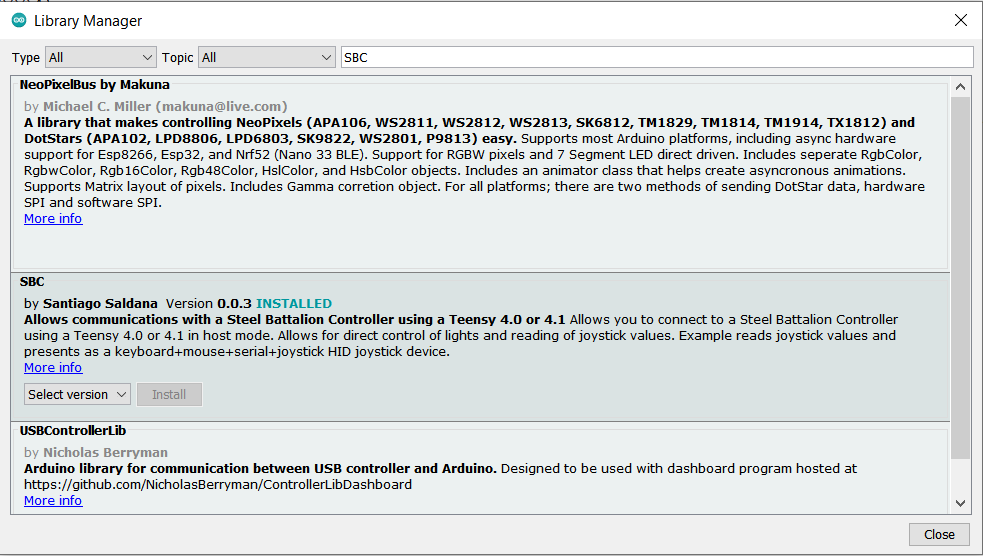
Search for and install SBC
![]()
At the point of writing the current version is 0.0.3 I expect to update the library with more examples if more people get to using it. Click Install to install the latest version.
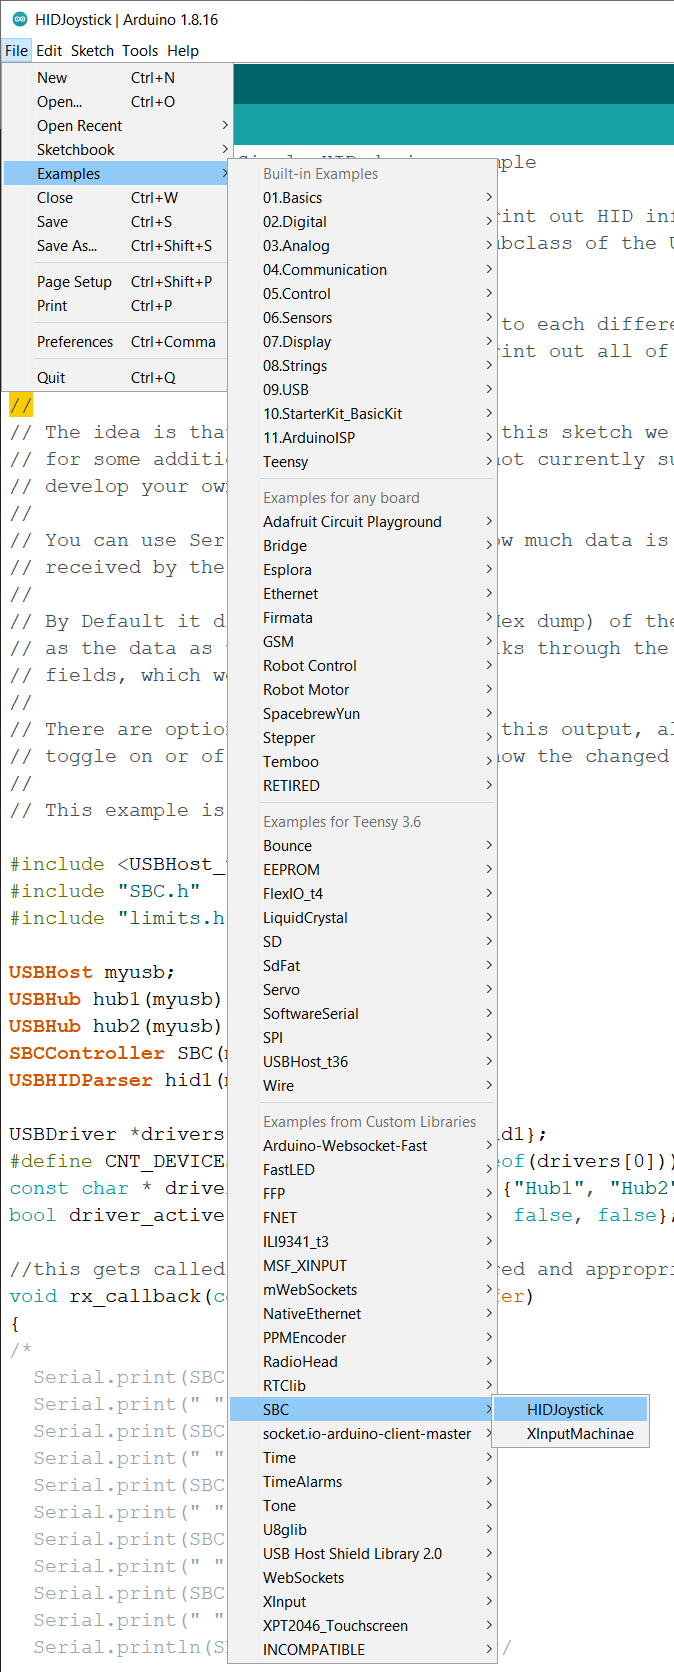
Now go to File->examples->SBC->HIDJoystick
![]()
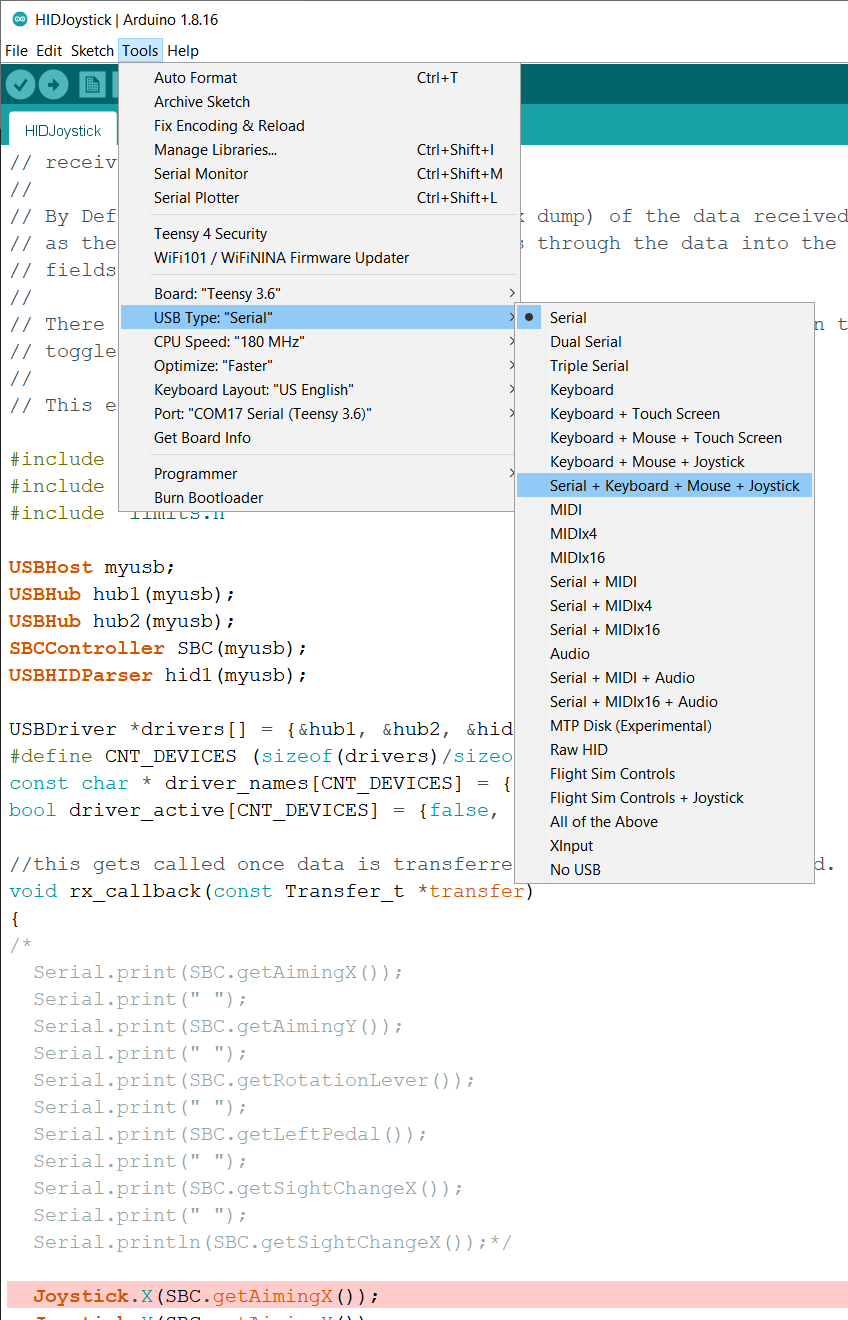
If you try and upload at this point you'll get an error as we have to change the USB type, go to Tools->USB Type-> Serial + Keyboard + Mouse + Joystick
![]()
The Teensy is powerful and can emulate all these devices at once! This really opens up the possibilities for customization.
Go on and plug in the SBC -> xbox usb adapter to the female USB adapter on the teensy. If it is already plugged in you'll see just the gear light on. For a quick display, hit the reset button on the teensy and you'll see a video like this one below:
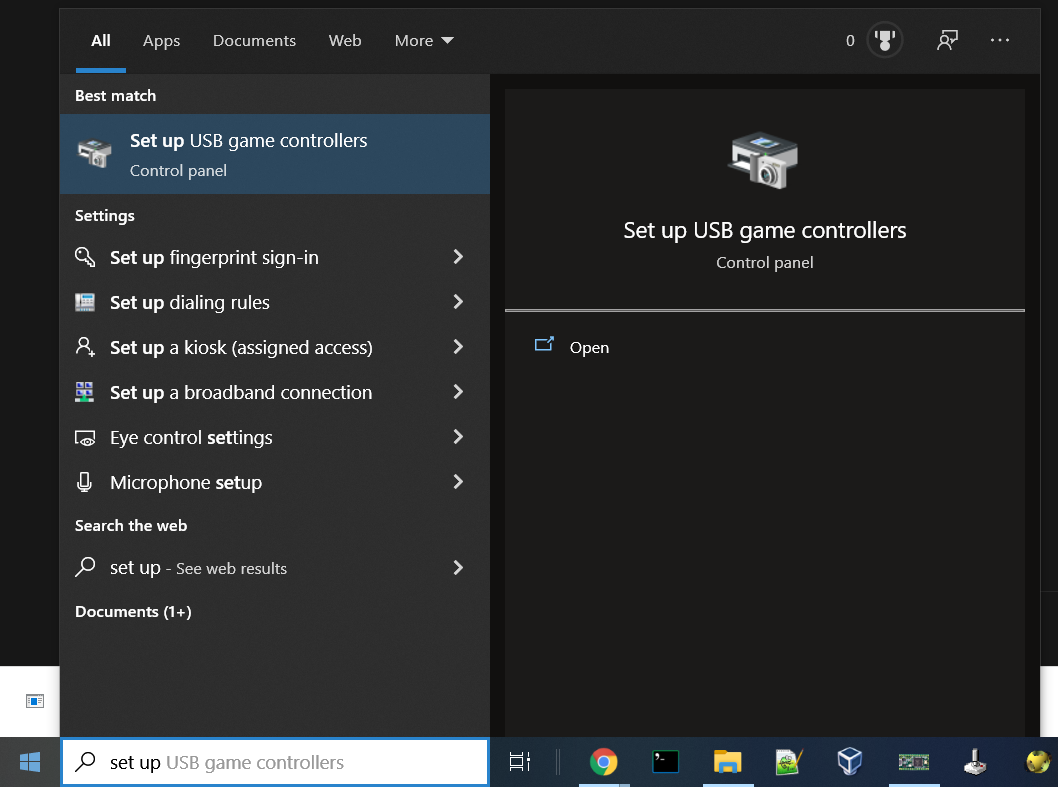
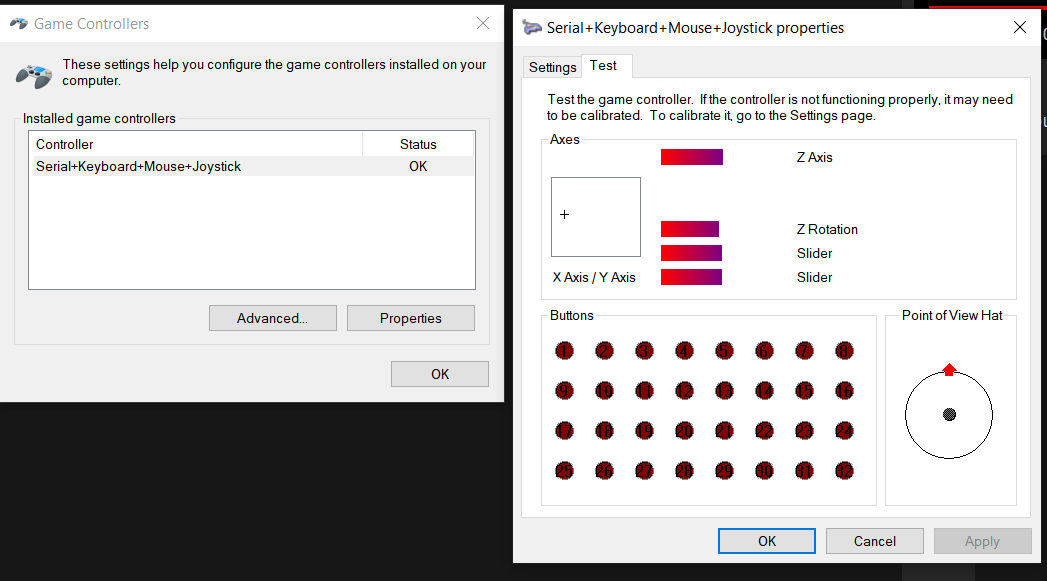
At this point you'll also have a working USB HID device. This is what it looks like in WIndows. Go to Set up USB game Controllers
![]()
click on Serial+Keyboard+Mouse+Joystick and click Properties
![]()
Play around with the buttons and various axis.
The demo only supports 6 axes and 32 buttons. Windows will support 8 axes I believe without any additional tweaking but the default Teensy example only supported 6 so I stuck with that
![]()
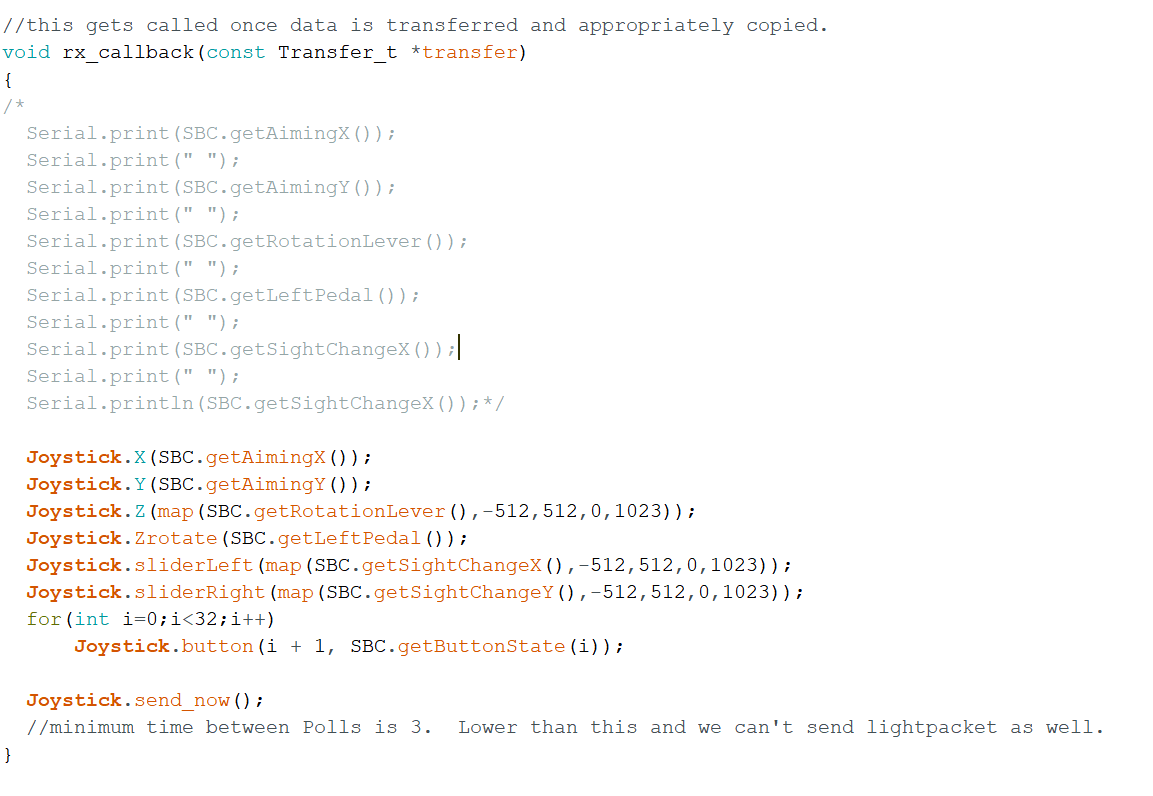
All the mapping code for this sample is contained within the rx_callback section. This example code is very lean and runs quite fast. If you want the lowest latency possible go with this approach rather than the Xinput approach.
-
6XInput emulation
The next step involves installing another software package and another library.
First we need to add another option to the list of things Teensy can emulate, this involve modifying some hardware files.
Instructions for install are at :
https://github.com/dmadison/ArduinoXInput_Teensy
Here is a link to the version I'm using.
https://github.com/dmadison/ArduinoXInput_Teensy/archive/refs/tags/v1.1.1.zip (UPDATED 11/12/2022)
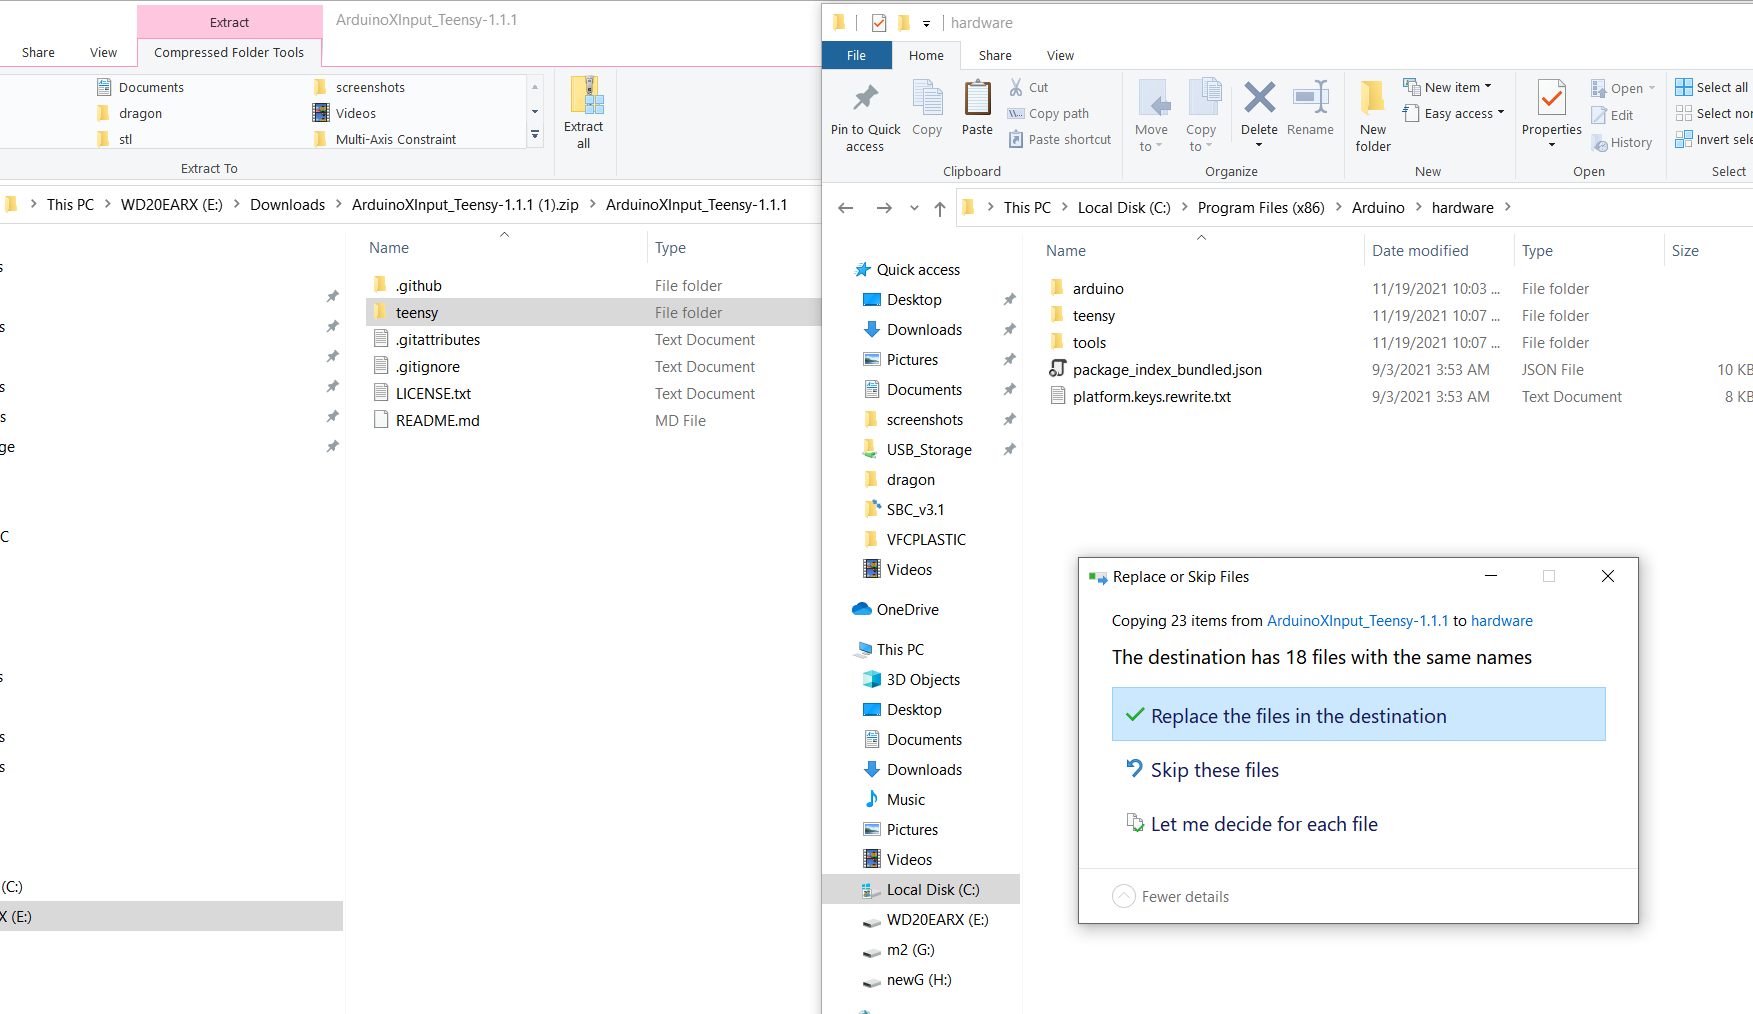
Copy the Teensy folder over and overwrite the Teensy folder in C:\Program Files (x86)\Arduino\hardware\teensy
![]()
That's all you have to do to provide Teensy support.
Just restart the Arduino program.
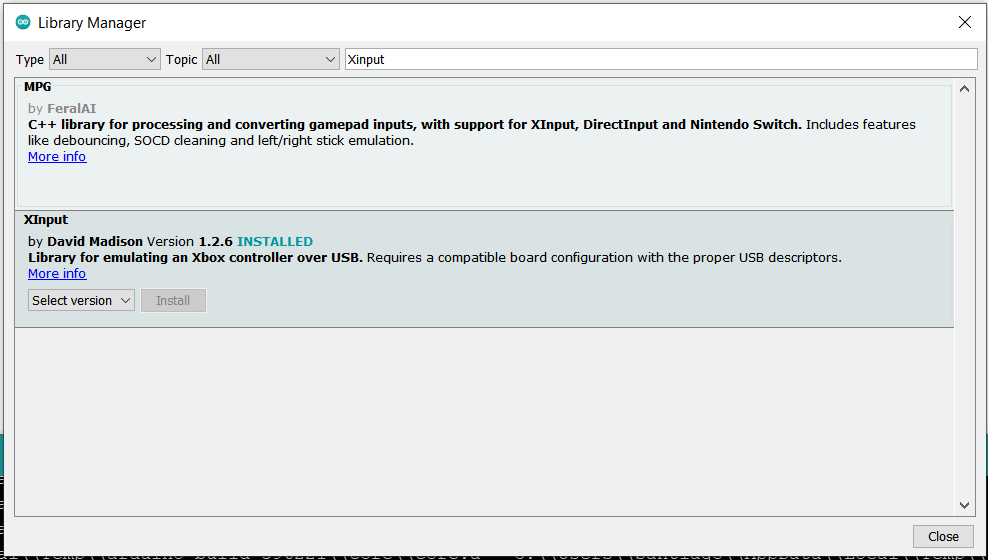
Now follow the steps outlined before to install SBC and instead of searching for SBC install. (UPDATE 11/12/2022, make sure to use version 1.2.6 for Teensy 4 support)
![]()
Now you should nearly be all set. Now we'll open up the Xinput example: File->examples->SBC->XinputMachinae
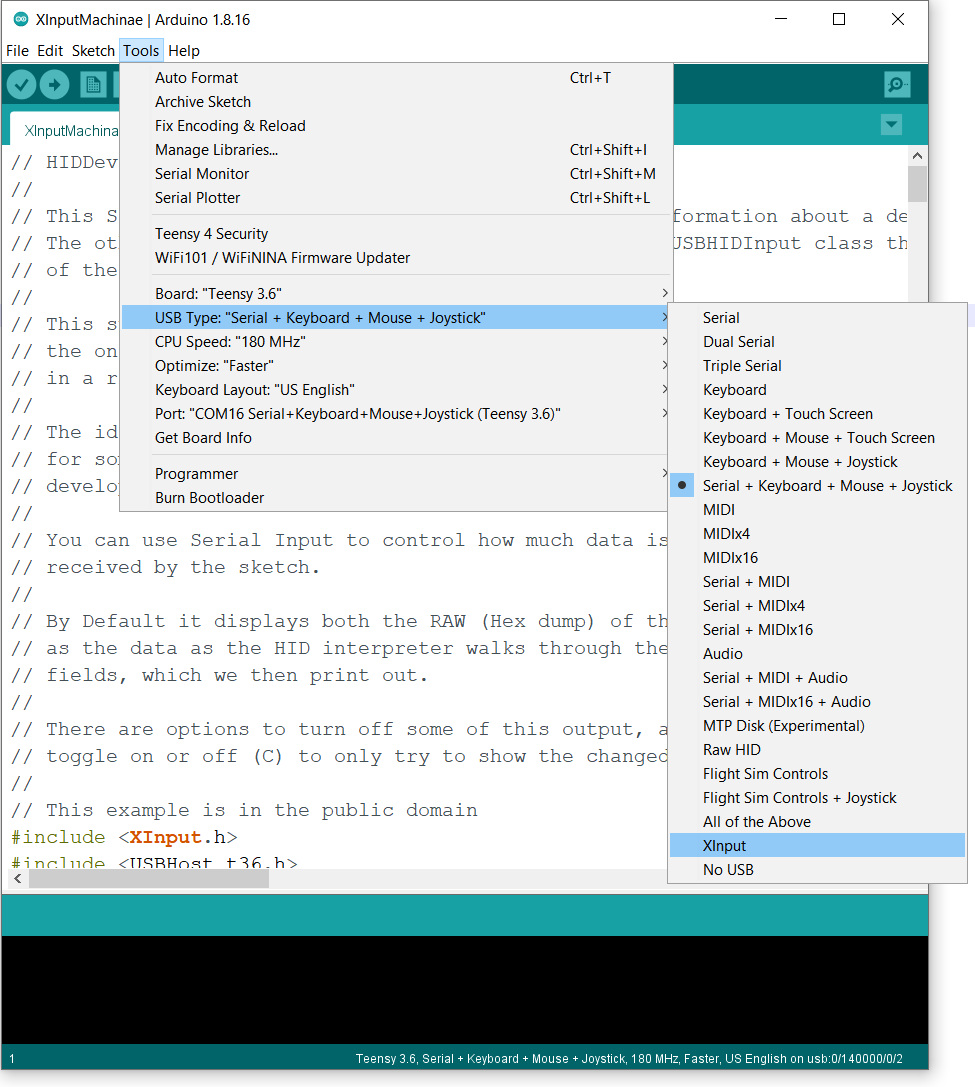
Go to Usb Type and select Xinput
![]()
Now upload and have fun.
-
7Final Notes
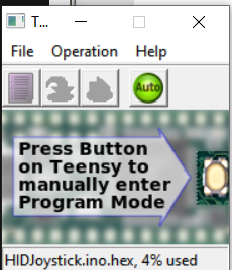
If using Xinput USB type, you can not emulate any other device. This also means you CAN NOT upload normally to the device. You have to press the reset button and Teensy Flip Uploader should pop up and upload after Arduino complains that no devices are connected
![]()
Also when modifying the voxmachinae file don't try and send light commands to the device in the rx_callback function. There are several places where you can lock up the device if you use blocking delays. This can make coding complex light functions complicated. There are more sophisticated approaches than how I did it, but I simply did comparisons with the millis function to know when to set off a light sequence.
-
8Teensy 4.1 Update (11/12/22)
A user reached out to me and notified me that Arduino_Xinput added support for Teensy 4.0/4.1 I happened to have a Teensy 4.1 from another project and I gave it shot. I'm happy to report that no code modifications were needed. I simply installed the latest libraries and it worked. I've updated the links and pictures in the project to reflect the update.
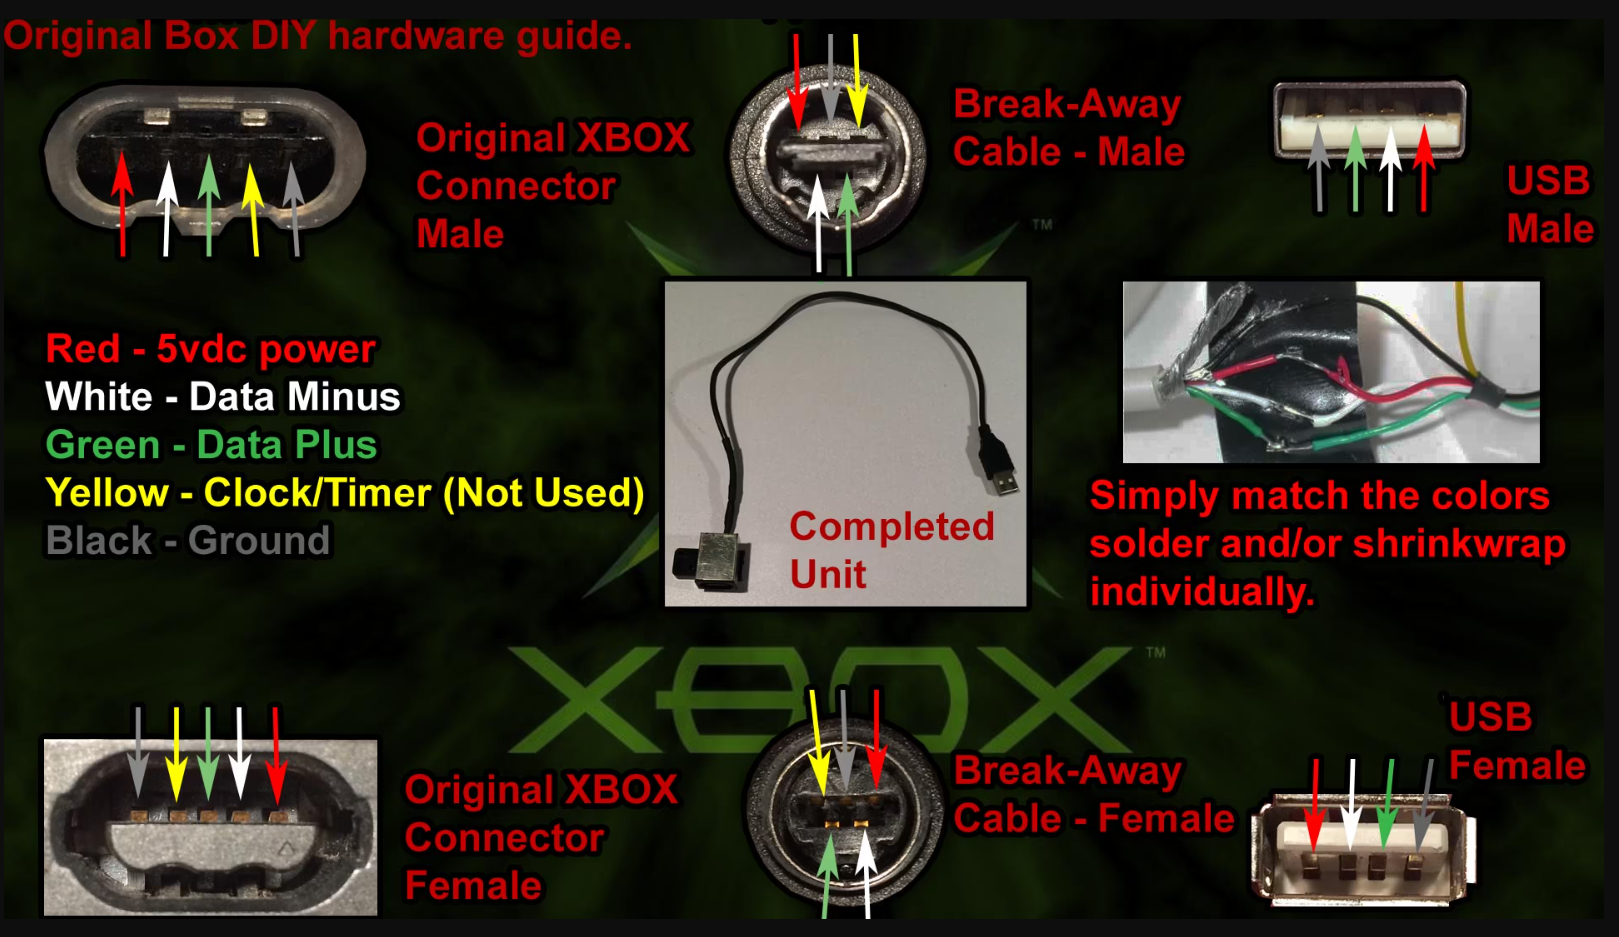
One thing to note I went back and my previously working adapter no longer worked. Took me a few hours to trace it back to a faulty XBOX->USB adapter. You have a few options to mitigate this issue, I built my own. I simply cut off the XBOX end of the XBOX -> USB adapter and the XBOX end of the quick disconnect and carefully traced the wires and soldered them together. After succeeding the TEENSY adapter works with no issues for Teensy 3.6 and 4.1
![]()
Another option is to make one yourself, here is an option:
![]()
https://www.s-config.com/xbcd-original-xbox-controllers-win10/
However to build one you would probably need to buy an original breakaway cable:
and a new xbox -> usb adapter. which might fix the problem without requiring any soldering.
Steel Battalion Controller Teensy Adapter
A hardware adapter allowing a Steel Battalion Controller to appear as an Xinput device.
 SantiagoSaldana
Discussions
Become a Hackaday.io Member
Create an account to leave a comment. Already have an account? Log In.