-
1Cardboard Stake
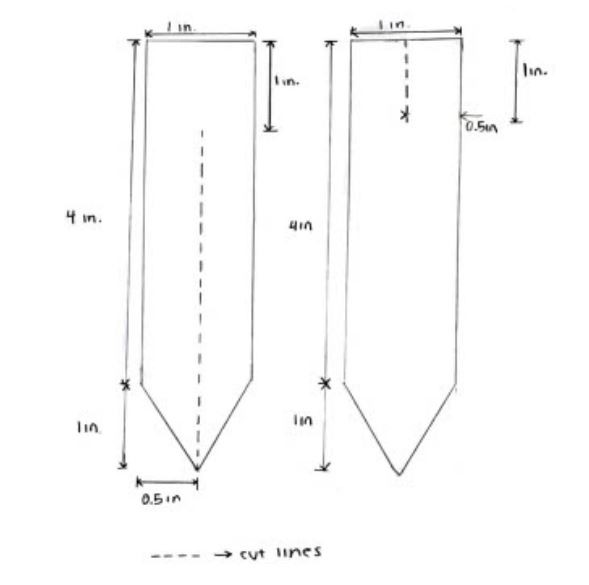
Cut out the two pieces that make up the stake with scissors from a piece of cardboard. Be sure to cut along the dotted lines. The dimensions of these parts can be found in the attached image.
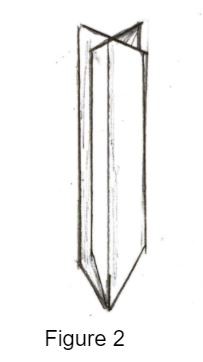
Then, assemble the stake together by sliding each of the pieces together to form a cross. Use the assembled stake drawing below (Figure 2)
as a guide. I found that securing the two pieces together with glue helped with stability.
-
2Housing
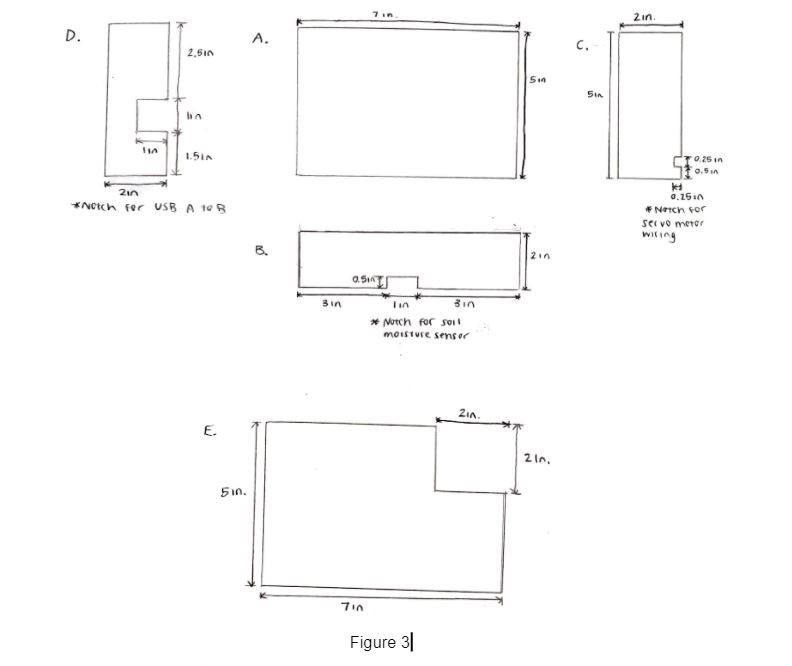
Cut out the cardboard pieces (Labelled A,B,C,D,E) that make up the housing with scissors. The dimensions of these parts can be found in Figure 3.
-
3Circuit
Attach Arduino, breadboard, and the battery to the cardboard piece labelled part A. I attached them with a few dots of glue so as to not damage the components(can easily be peeled off later).
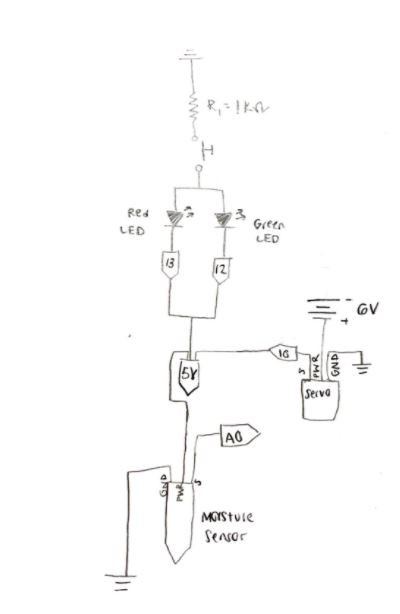
Assemble circuit as in the circuit diagram above..
-
4Housing Assembly
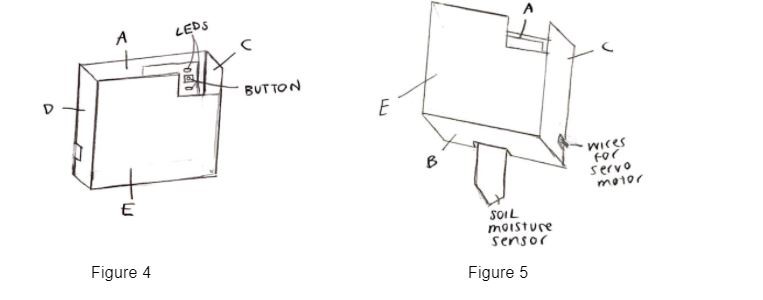
The next step is to begin to assemble the housing. For steps 6, 7, 8, and 9, refer to Figures 4-6 for a guild of how each cardboard piece connects to the assembly. First, glue part B to complete the bottom of the housing. Be sure to put the moisture sensor in the designated notch labelled on the diagram so it is partially sticking out of the housing.
Glue part C to the partially completed housing, making sure servo motor wire is fed through the labelled notch on the diagram so that the servo is outside of the housing.
Glue part D to complete the sides of the housing, again referencing Figures 4-6. Make sure the USB A to B cable can reach the Arduino through the notch in part D.
Glue part E, which covers the majority of the electrical components, to complete the housing assembly.
-
5Water Bottle
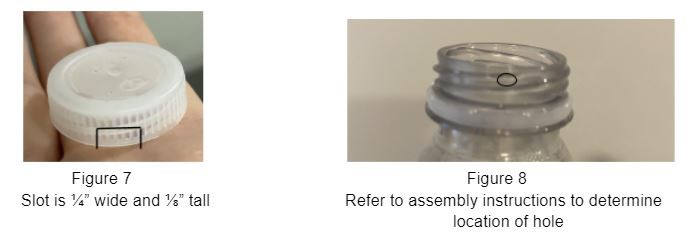
To modify the water bottle itself, I pierced it with a needle making a small hole. To pick a location for the hole, I put the cap of the bottle on and closed the bottle about halfway before marking a spot that was accessible through the slot.
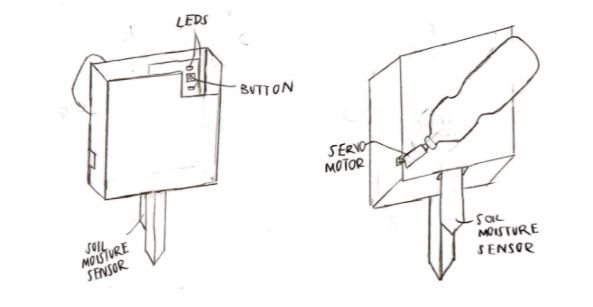
Glue the servo motor to the back of the housing (Part A) such that the output shaft is angled roughly 45 degrees upwards from the horizontal. Reference Figure 10. Then attach the water bottle to its cap such that the small hole is facing towards the ground. Then glue the water bottle to the housing.
-
6Final Touches
Finally, glue the stake to housing, attaching it roughly in the center of part B.

Discussions
Become a Hackaday.io Member
Create an account to leave a comment. Already have an account? Log In.