likeablob
-
ESP32 and the non-standard Web Bluetooth API
01/29/2022 at 12:13 • 0 comments![]()
By wearing this, you can watch Harry Potter and 50% of the Sorcerer's Stone. Instead of improving the duct-tape-made prototype-1, I started replacing a Digispark with ESP32 board to create some kind of Web-based controller. It's just because I'm interested in what can be achieved with Bluetooth Low Energy and Web Bluetooth.
Although I used the word "non-standard" in the title of this entry, connecting the ESP32 and (Chromium-based) browser was pretty straightforward, thanks to the well-made abstraction layers of the both "arduino-esp32/libraries/BLE" (which is based on the Bluedroid stack) and Web Bluetooth API.
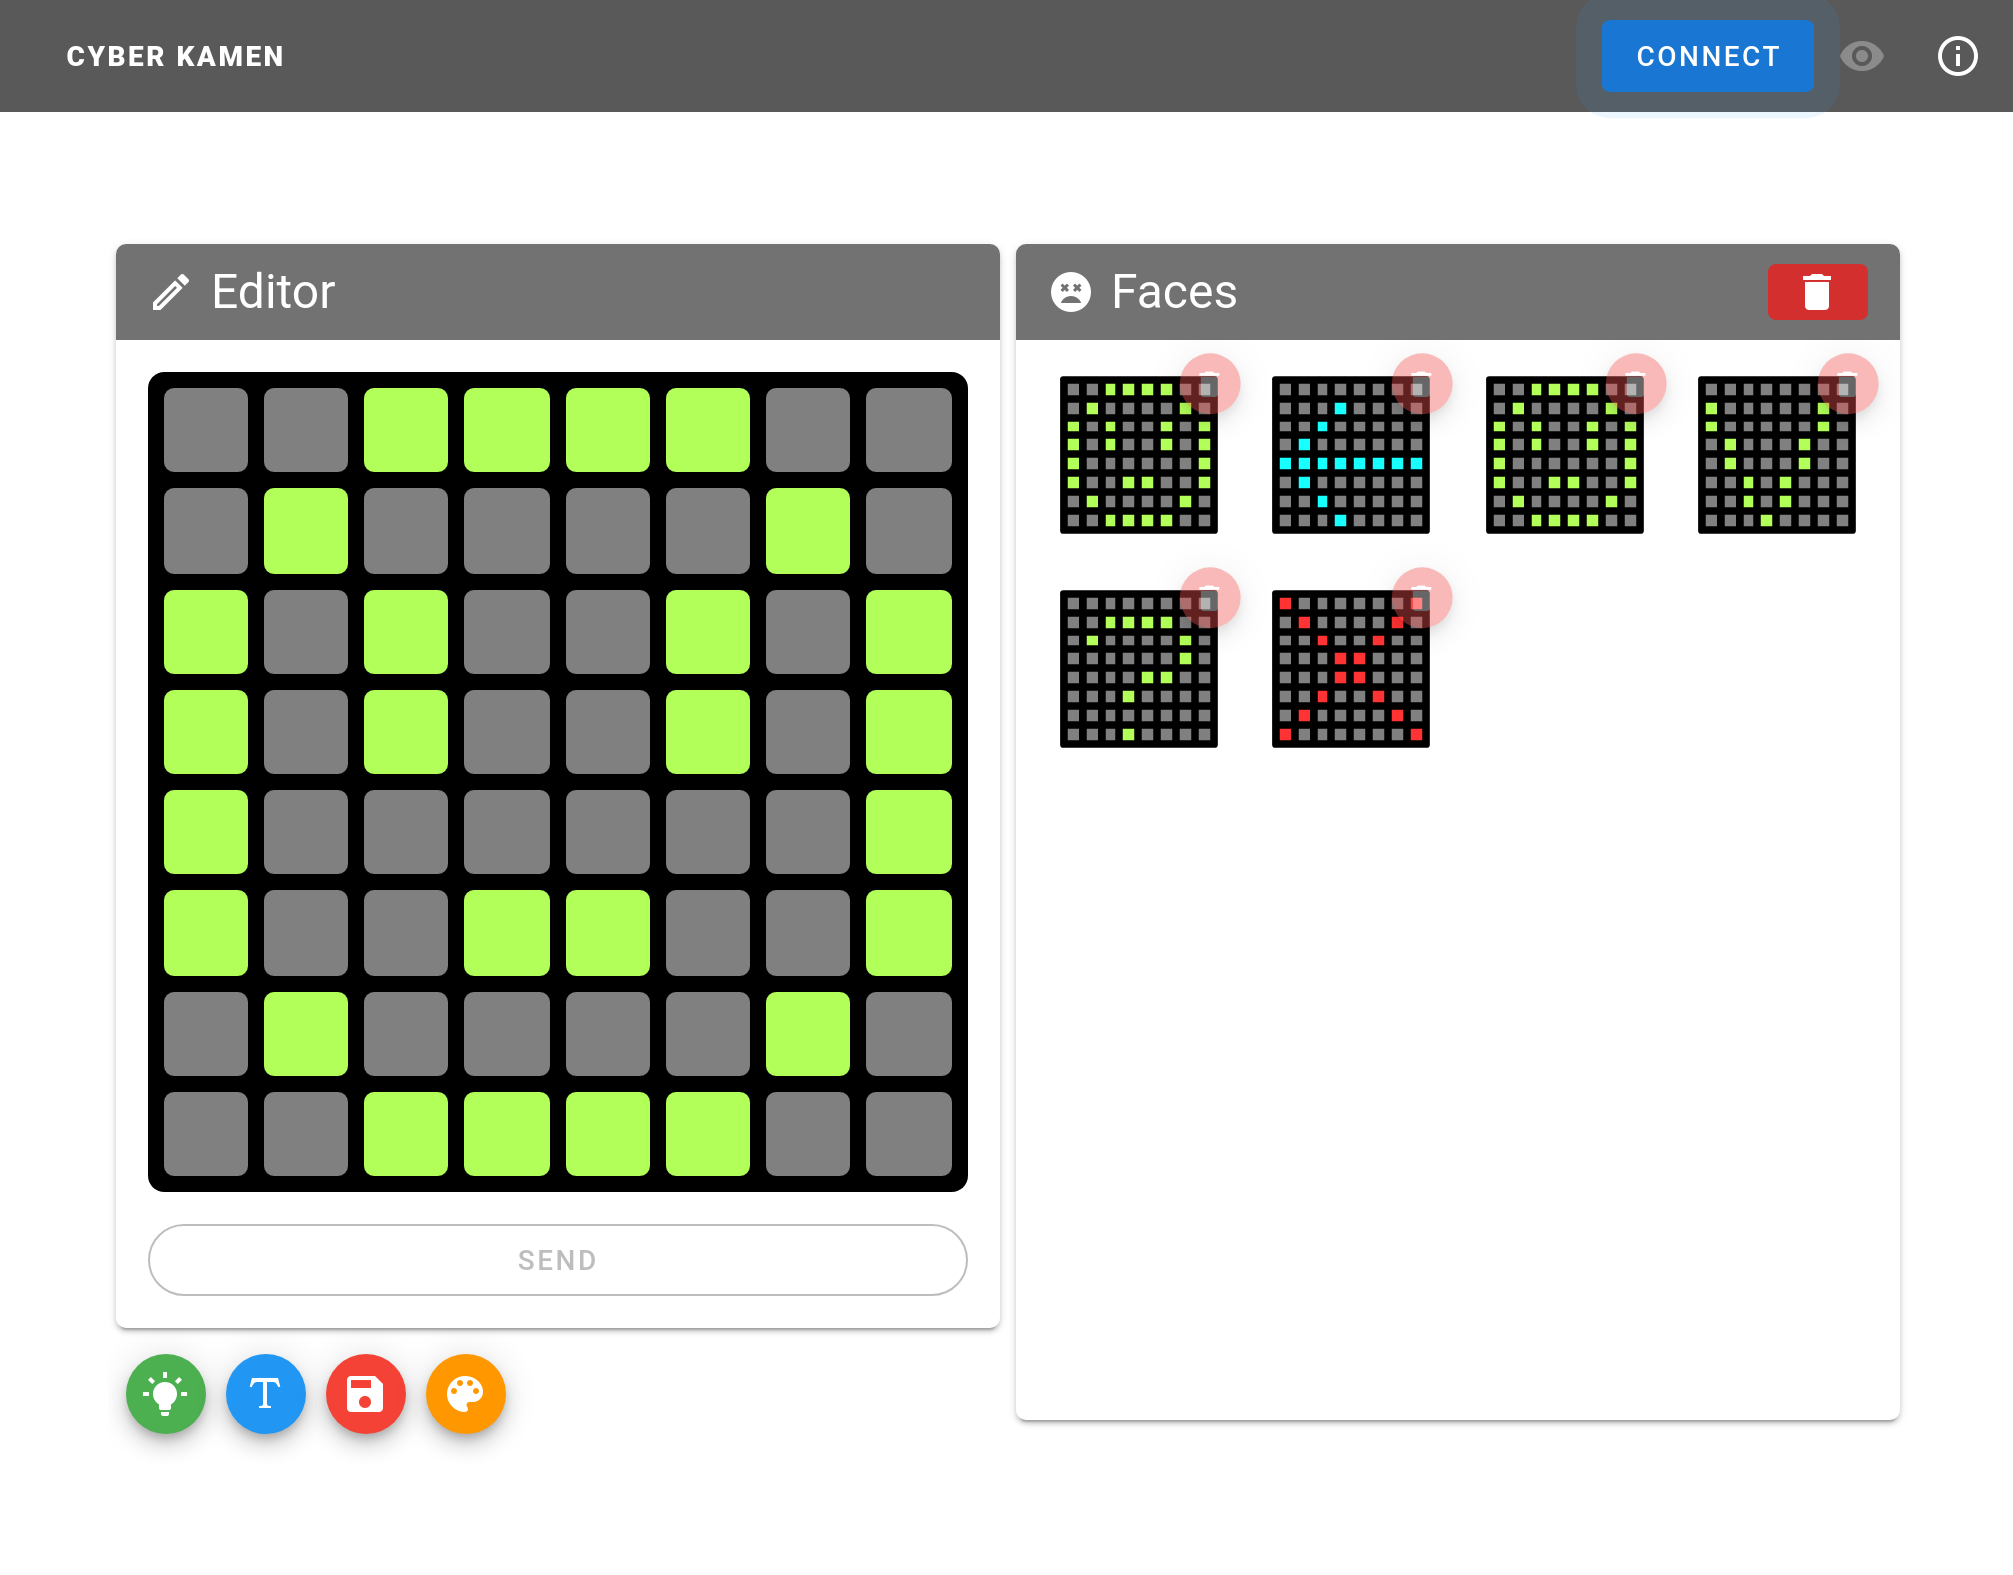
![]()
https://likeablob.github.io/cyber-kamen-webapp/ I have not much to talk about as I have never seen any unstableness nor had to go deep into the stack or chromium/src.git.
So here I'd like to share references which are probably useful for someone interested in the similar setup.- ESP32
- Cyber Kamen firmware source code
- https://github.com/likeablob/cyber-kamen
- It's a PlatformIO project. Internally it depends on;
- Chrono for simple task scheduling.
- Adafruit_Neopixel and Adafruit_NeoMatrix for controlling the LED matrix
- MsgPack for cross-platform data serialization.
(Yeah, https://msgpack.org/ works well. BLE has 512 bytes limit on a single write/read.)
- Arduino-esp32/libraries/BLE/examples
- Tips and Tricks:
- libraries/BLE is relatively fat (occupies > 900 KiB !). You may want to use `min_spiffs.csv` for the flash partitioning.
- NimBLE-Arduino could be a solution. Not tried yet though.
- Since WS2812B is driven by 5V, a level shifter is required.
- You can use this hack. https://hackaday.com/2017/01/20/cheating-at-5v-ws2812-control-to-use-a-3-3v-data-line/
- libraries/BLE is relatively fat (occupies > 900 KiB !). You may want to use `min_spiffs.csv` for the flash partitioning.
- Cyber Kamen firmware source code
- Web Bluetooth API
- Cyber Kamen Webapp source code
- https://github.com/likeablob/cyber-kamen-webapp
- Nuxt.js (v2) , Typescript and Vuetify.js. Nuxt.js v3 looks very promising but no SPA support has arrived yet.
- Use @types/web-bluetooth if you need auto-completion.
- @msgpack/msgpack for browser-side data serialization.
- @nuxtjs/pwa to make the app install-able on mobiles. (Web Bluetooth API is only available in Android Chrome though.)
- Web Bluetooth Samples
- https://googlechrome.github.io/samples/web-bluetooth/
- Not sure why but the samples lacks an example for writing characteristic value. Use BluetoothRemoteGATTCharacteristic.writeValueWithoutResponse()
- Tips and Tricks;
- Web Bluetooth requires a HTTPS origin. You may want to use hosting services like GitHub Pages, Netlify, Vercel or GitLab Pages.
- On Linux (Bluez), Web Bluetooth uses hci0 interface. Also after changing service or characteristic UUIDs, you may want to clear cached information tied to the device MAC.
- Cyber Kamen Webapp source code
- ESP32
-
Printing a flexible light diffuser
01/29/2022 at 09:46 • 0 comments![]() +
+![]()
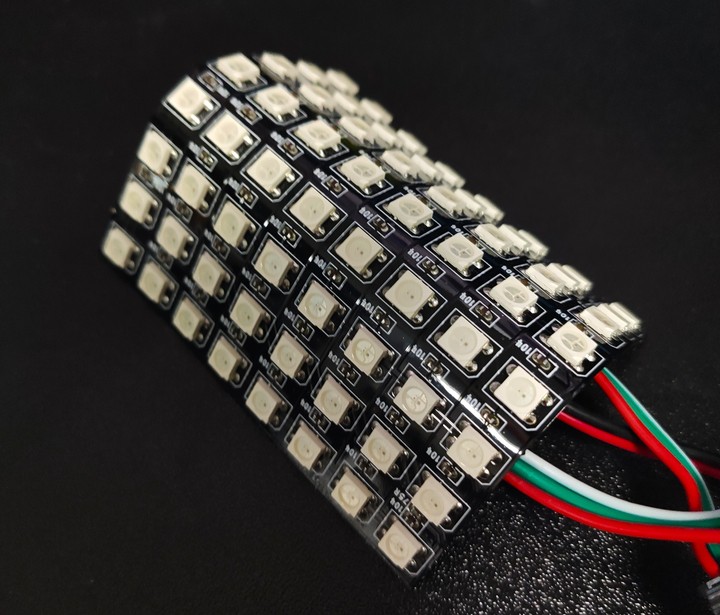
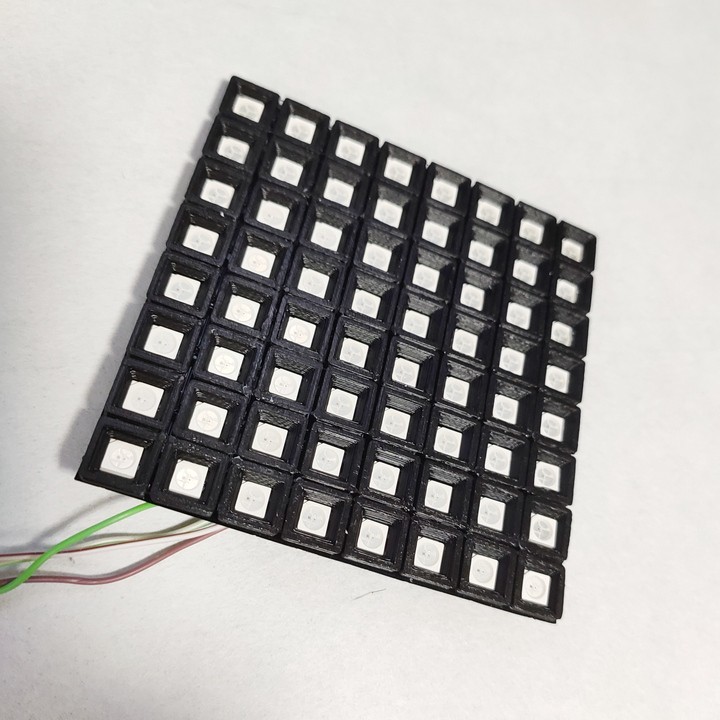
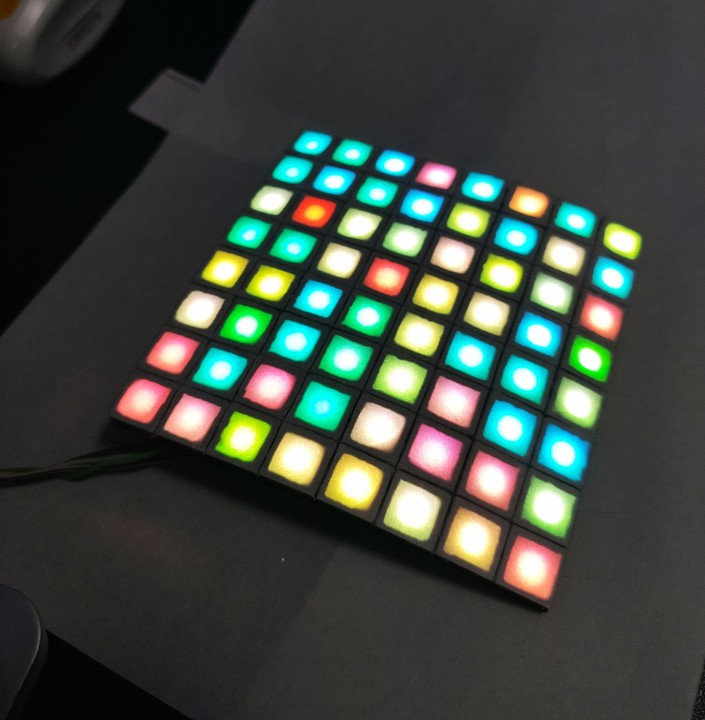
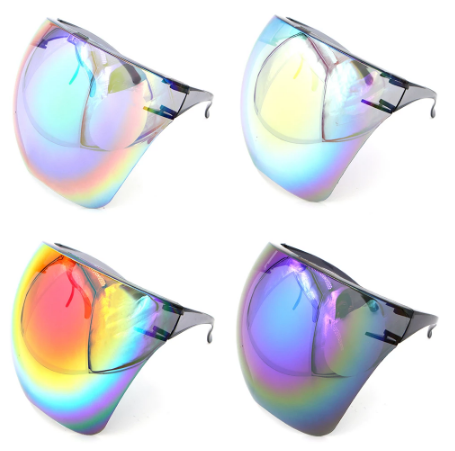
After checking that the "Face shield" and 8x8 WS2812B matrix (10 x 10 cm) nicely fit together at the size, I found the substrate of the LED matrix is a little bit visible by its light.So I decided to have a light diffuser for hiding it. Since the matrix tightly fits to the curved surface of the face shield, the diffuser must be flexible too.
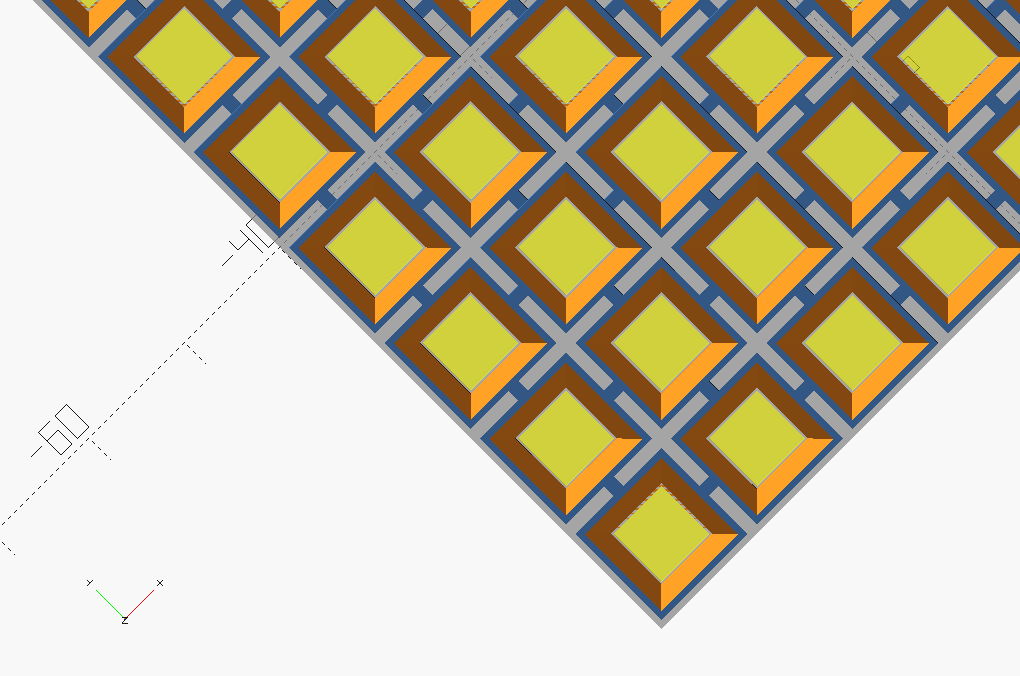
It's time to launch OpenSCAD.
![]()
![]()
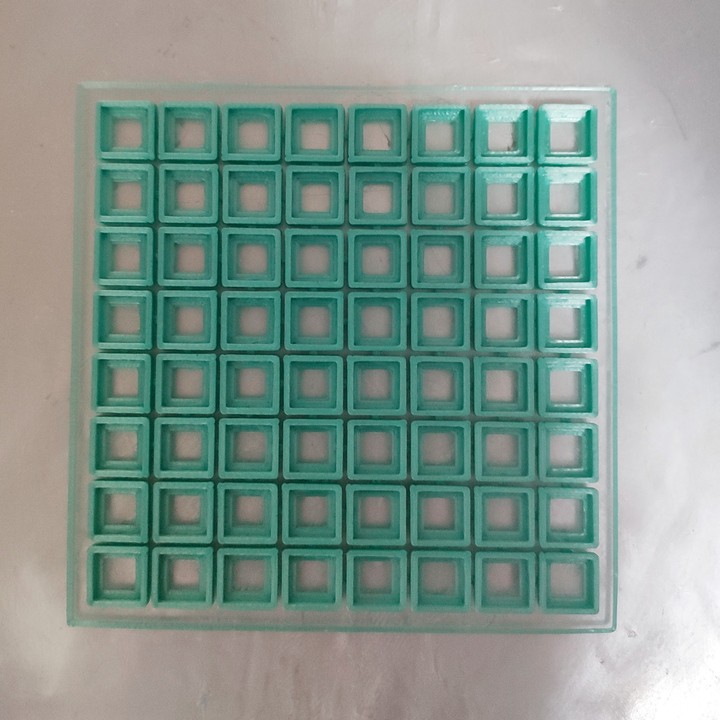
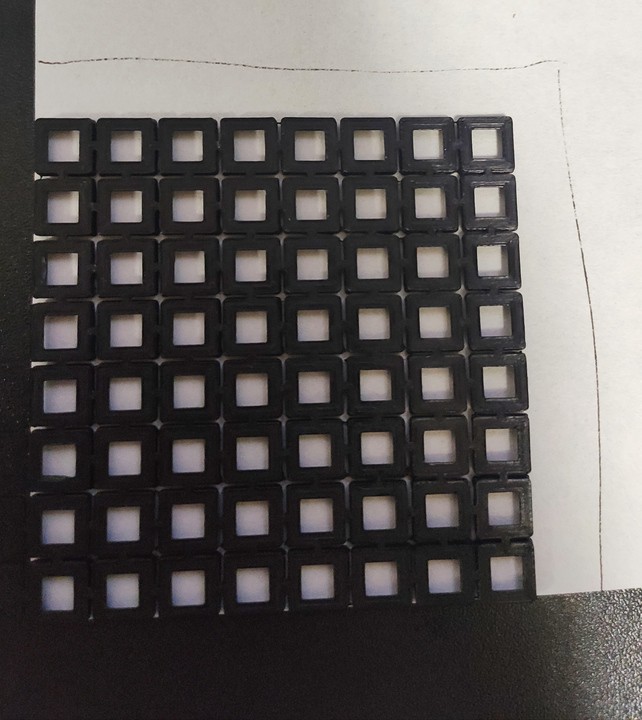
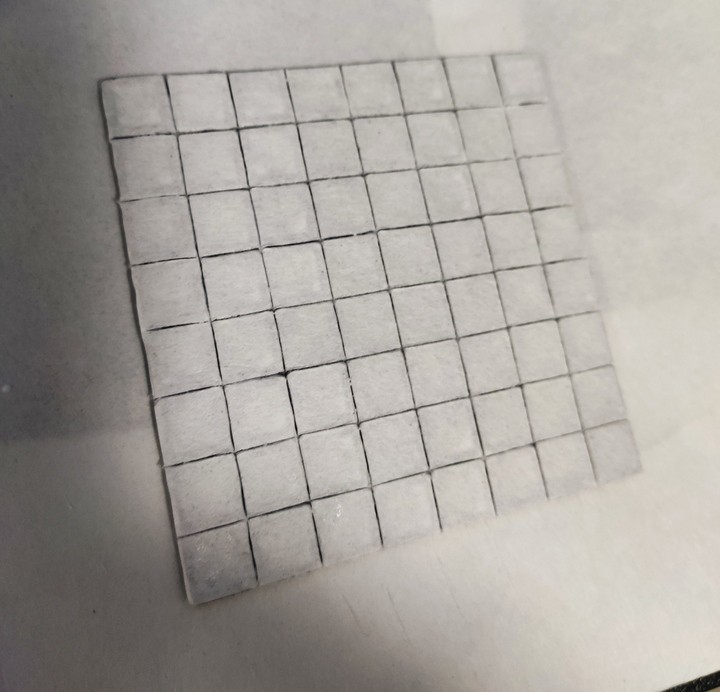
Note: I eventually printed this parts up-side-down because the holes of the cells need to be fit accurately to WS2812B cells. The diffuser consists of "cells" for each WS2812B pixel and "tabs" which connect between "cells". Because the "tabs" are thin and have been printed with PLA, the structure got some flexibility.
![]()
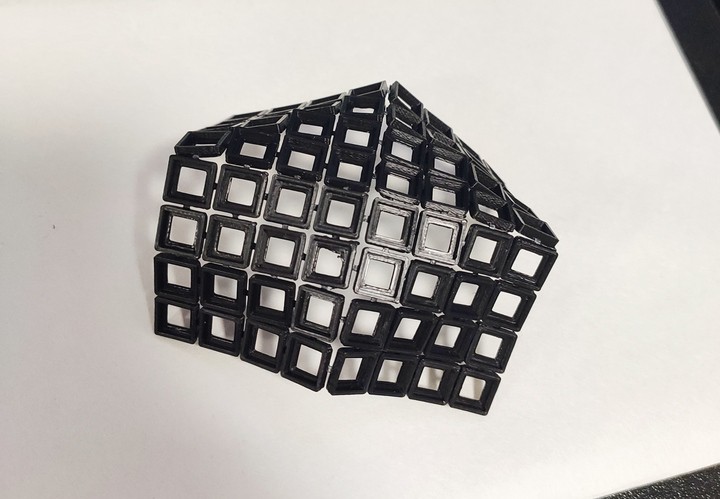
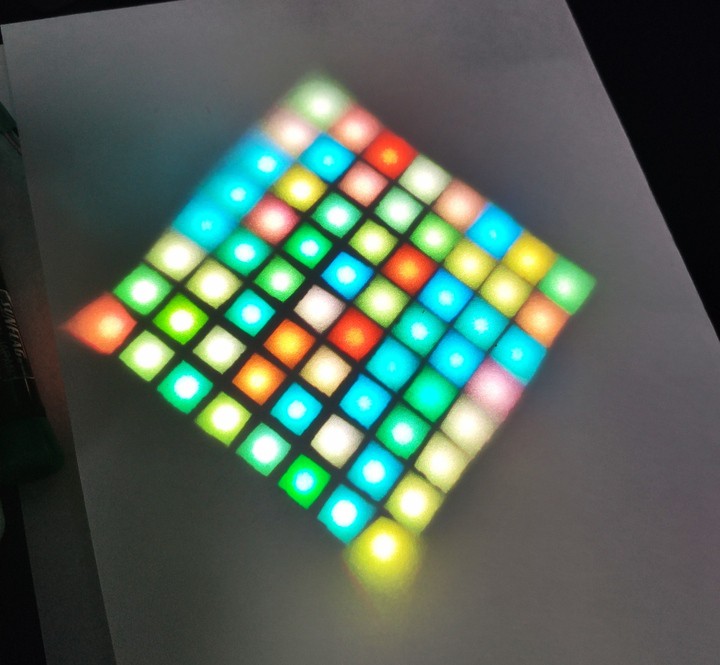
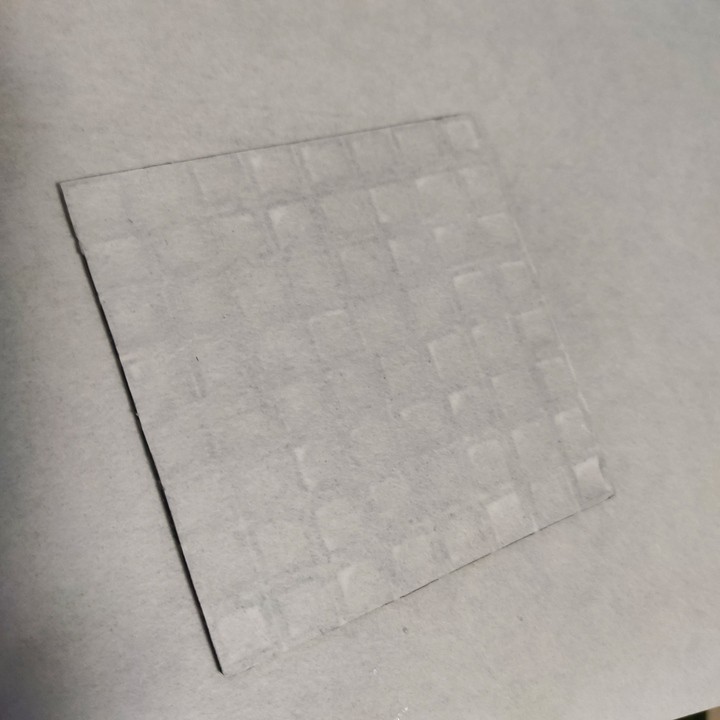
Let's assemble the diffuser and LED matrix and put a piece of paper on it for checking.
![]()
![]()
Looks fine. Then the last thing to be done is pasting them together with some glue.
![]()
![]()
![]()
![]()
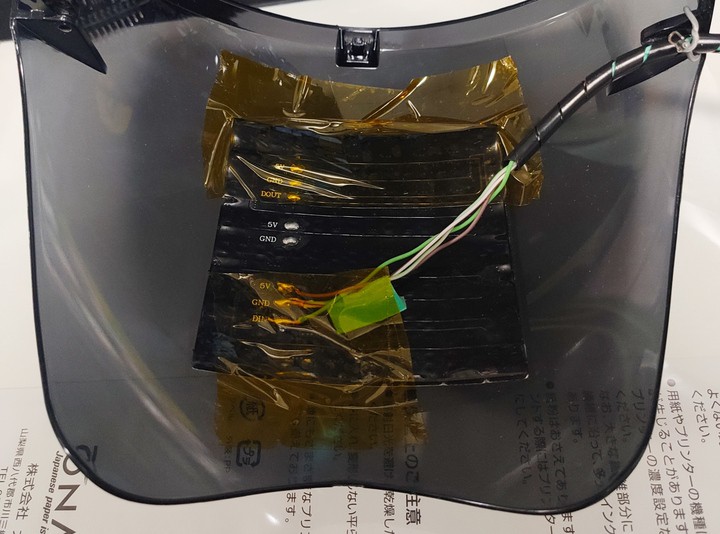
That's it! It's a prototyping, so I allowed myself to use a ton of tapes to fix this assembly onto the face shield. (Hey, no need to feel guilty, even Apple uses tapes and glue in their products.)
![]()
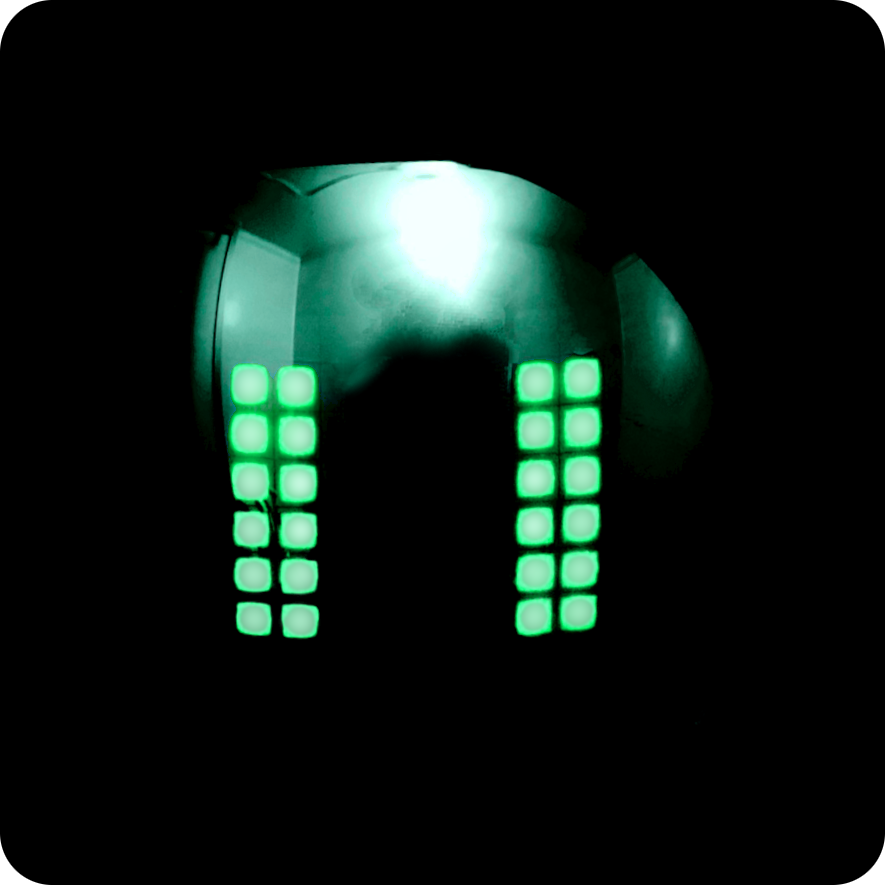
Wrote a test sketch to a beloved Digispark clone, now it started blinking.
![]()
$ mkdir firmware
$ pio init -b digispark-tiny -d firmware
$ code firmware
$ code firmware/platformio.ini
[env:digispark-tiny] platform = atmelavr board = digispark-tiny framework = arduino lib_deps = https://github.com/adafruit/Adafruit_NeoPixel https://github.com/SofaPirate/Chrono#390c2ee
#include <Chrono.h> Chrono blinkTask; #include <Adafruit_NeoPixel.h> #ifdef __AVR__ #include <avr/power.h> #endif #define PIN 1 #define NUMPIXELS 64 Adafruit_NeoPixel pixels(NUMPIXELS, PIN, NEO_GRB + NEO_KHZ800); uint16_t hue = 200; int16_t saturation = 200; int16_t brightness = 10; const uint8_t face1[] = {0b0, 0b11000011, 0b11000011, 0b11000011, 0b11000011, 0b11000011, 0b11000011, 0b0}; const uint8_t blink_frame_0[] = {0b0, 0b0, 0b11000011, 0b11000011, 0b11000011, 0b11000011, 0b0, 0b0}; const uint8_t blink_frame_1[] = {0b0, 0b0, 0b0, 0b11000011, 0b11000011, 0b0, 0b0, 0b0}; const uint8_t blink_frame_2[] = {0b0, 0b0, 0b0, 0b11000011, 0b0, 0b0, 0b0, 0b0}; const uint8_t face2[] = {0b10000001, 0b01000010, 0b00100100, 0b00011000, 0b00011000, 0b00100100, 0b01000010, 0b10000001}; void drawFrame(const uint8_t frame[]) { for(int i = 0; i < NUMPIXELS; i++) { uint8_t rowInd = i / 8; uint8_t row = frame[rowInd]; uint8_t colInd = i % 8; if(rowInd % 2) { // reversing for the Zig-zag alignment colInd = 7 - colInd; } uint8_t bit = (row >> (7 - colInd)) & 0b1; pixels.setPixelColor(i, pixels.ColorHSV(hue, saturation, bit ? 20 : 0)); } } void randomColors() { for(int i = 0; i < NUMPIXELS; i++) { pixels.setPixelColor( i, pixels.ColorHSV(rand() % UINT16_MAX, 200 + rand() % 50, 100)); } pixels.show(); } void blink() { const uint8_t *frames[] = {blink_frame_0, blink_frame_1, blink_frame_2, NULL, blink_frame_1, blink_frame_0}; for(auto &&i : frames) { if(i == NULL) { pixels.clear(); continue; } drawFrame(i); pixels.show(); delay(30); } } void setup() { clock_prescale_set(clock_div_1); pixels.begin(); for(int i = 0; i < NUMPIXELS; i++) { uint16_t hue_ = rand() % UINT16_MAX; for(size_t j = 0; j < brightness; j += 3) { pixels.setPixelColor(i, pixels.ColorHSV(hue_, saturation, j)); if(i) { pixels.setPixelColor(i - 1, pixels.ColorHSV(hue_, saturation, 0)); } pixels.show(); delay(5); } } } void loop() { hue = hue + 1 % 655535; drawFrame(face1); pixels.show(); if(blinkTask.hasPassed(2000)) { blinkTask.restart(); blink(); } } -
It starts blinking. (Prototyping with Digispark)
01/06/2022 at 16:58 • 0 comments![]()
Cyber Kamen
64 bits ought to be enough for anybody's face expression. (WS2812B, ESP32 and Web Bluetooth API)
 +
+