Close
0%
0%

Repairing a Delta-Q QuiQ Battery Charger

Sometimes when you throw money into a pit, you miss and hit the other side and actually save some.

Similar projects worth following
In late summer, a good friend of mine sent me a link to a CraigsList ad for a 2008 ZENN all-electric car. It was in fairly rough shape. It needed new batteries, needed a few replacement parts, had some body damage, and hadn't been powered on since 2011. But the best part? It was cheap. And I mean crazy cheap. And of course by crazy cheap, I mean it is a money pit. Ultimately I found that mine had a bad battery charger. This project will describe the repair of the charger.

If you are interested in the background on this project, I would encourage you to start here:

Introducing the ZENN Electric Car

In that post, I explain why on earth I have a Delta-Q QuiQ charger, and its a fun little read on my newest project.

Next, for some details on the charger itself:

The Delta-Q QuiQ Charger

Now that we know about the patient, what are the symptoms?

Problem Determination

Performing the repair:

The Repair

Did it work?

The Final Verdict

Delta-q Battery Charge Profiles.pdf

Adobe Portable Document Format - 361.07 kB - 05/21/2019 at 18:00

Preview

delta-q-battery-charger-manual.pdf

Adobe Portable Document Format - 1.06 MB - 11/19/2016 at 21:51

Preview

  • The Final Verdict

    leadacid4412/05/2016 at 00:12 0 comments

    So, after all of that work, did it actually fix the problem?

    Yes! Yes it did!

    Honestly I'm kind of shocked. Happy, but shocked. For such a simple fix to cause such a complex charger to totally fail is kind of impressive. But I'm not going to look a gift horse in the mouth.

    Once I hooked the charger back up to the car, I gave it a test. I connected it to my watt meter to see if it was pulling any current, and it was! About 500W. As you can see in the video below, it is working perfectly. The LED lights, from right to left are:

    1. Solid = AC Power Good
    2. Solid = Bulk charge complete, battery at 80%
    3. Current output. Moves from level 3 to level 2, indicating less current going to battery.

    I've had the charger in operation for a few weeks now, and so far so good. No further problems. Of course, now that winter has set in, I won't have much opportunity to use the car until spring.

  • The Repair

    leadacid4412/04/2016 at 23:25 2 comments

    To recap, here are the steps as outlined by the instructions I found on the internet:

    1. Remove charger from vehicle, Remove 8 screws on top,
    2. Remove 3 bottom screws that secure the AC panel,
    3. Loosen the AC input panel and rotate 90 degrees to access the PC board,
    4. Locate the current shunt wire located where the PC board meets the LED board,
    5. There is a limited amount of solder on one end of the wire. Scrape the conformal coating until the wire is shiny and solder with 60/40 resin core,
    6. Reassemble by re-rotating the AC panel and install the bottom center screw until flush then complete the assembly.

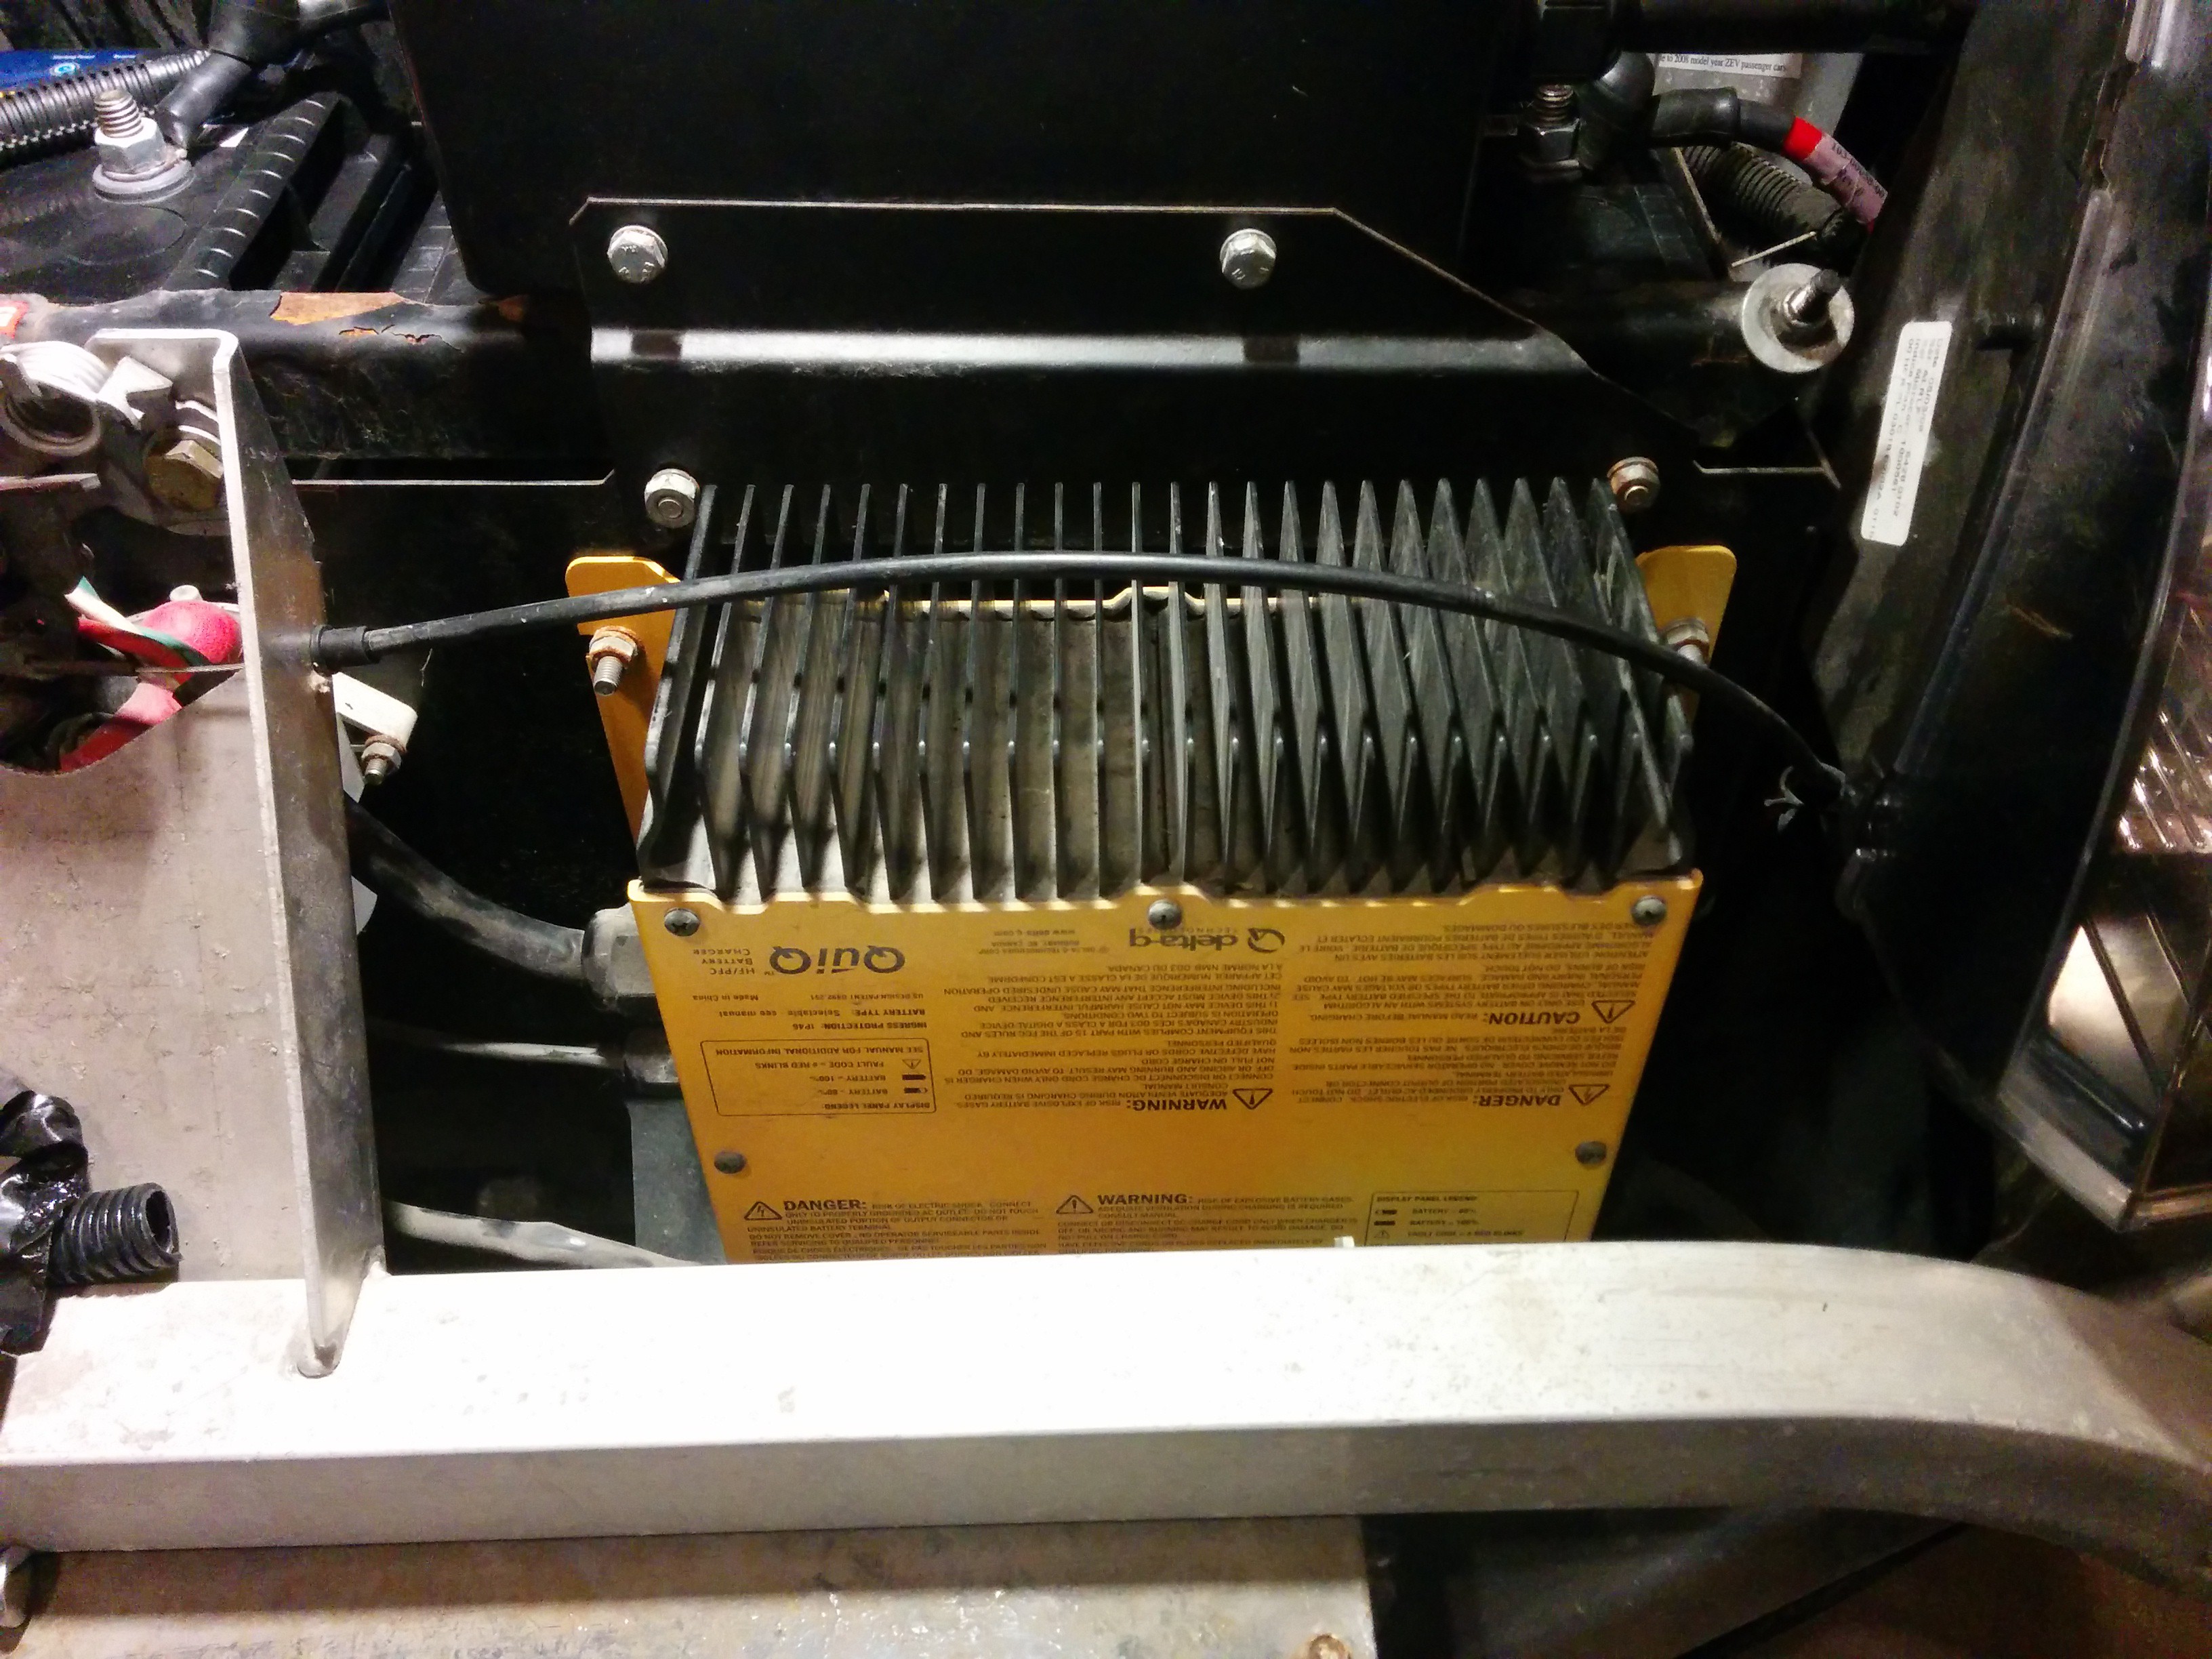
    Okay, sounds easy enough. First things first, removing the charger from the car. On my Zenn, this was a fairly straight-forward process. I would strongly recommend disconnecting the main battery pack and removing the front plastic on the car. Its about 4 bolts, four plastic clips (which will invariably break when you try to remove them) and the whole operation should swing away from the car by some pivots up by the lights. Unclip from the lights and you can remove it in one piece. You will see the QuiQ on the right.

    Disconnect the charger and unbolt from the car. The cables are kind of hard to get at, but aren't too bad. Watch the ground screw on the right-hand side.

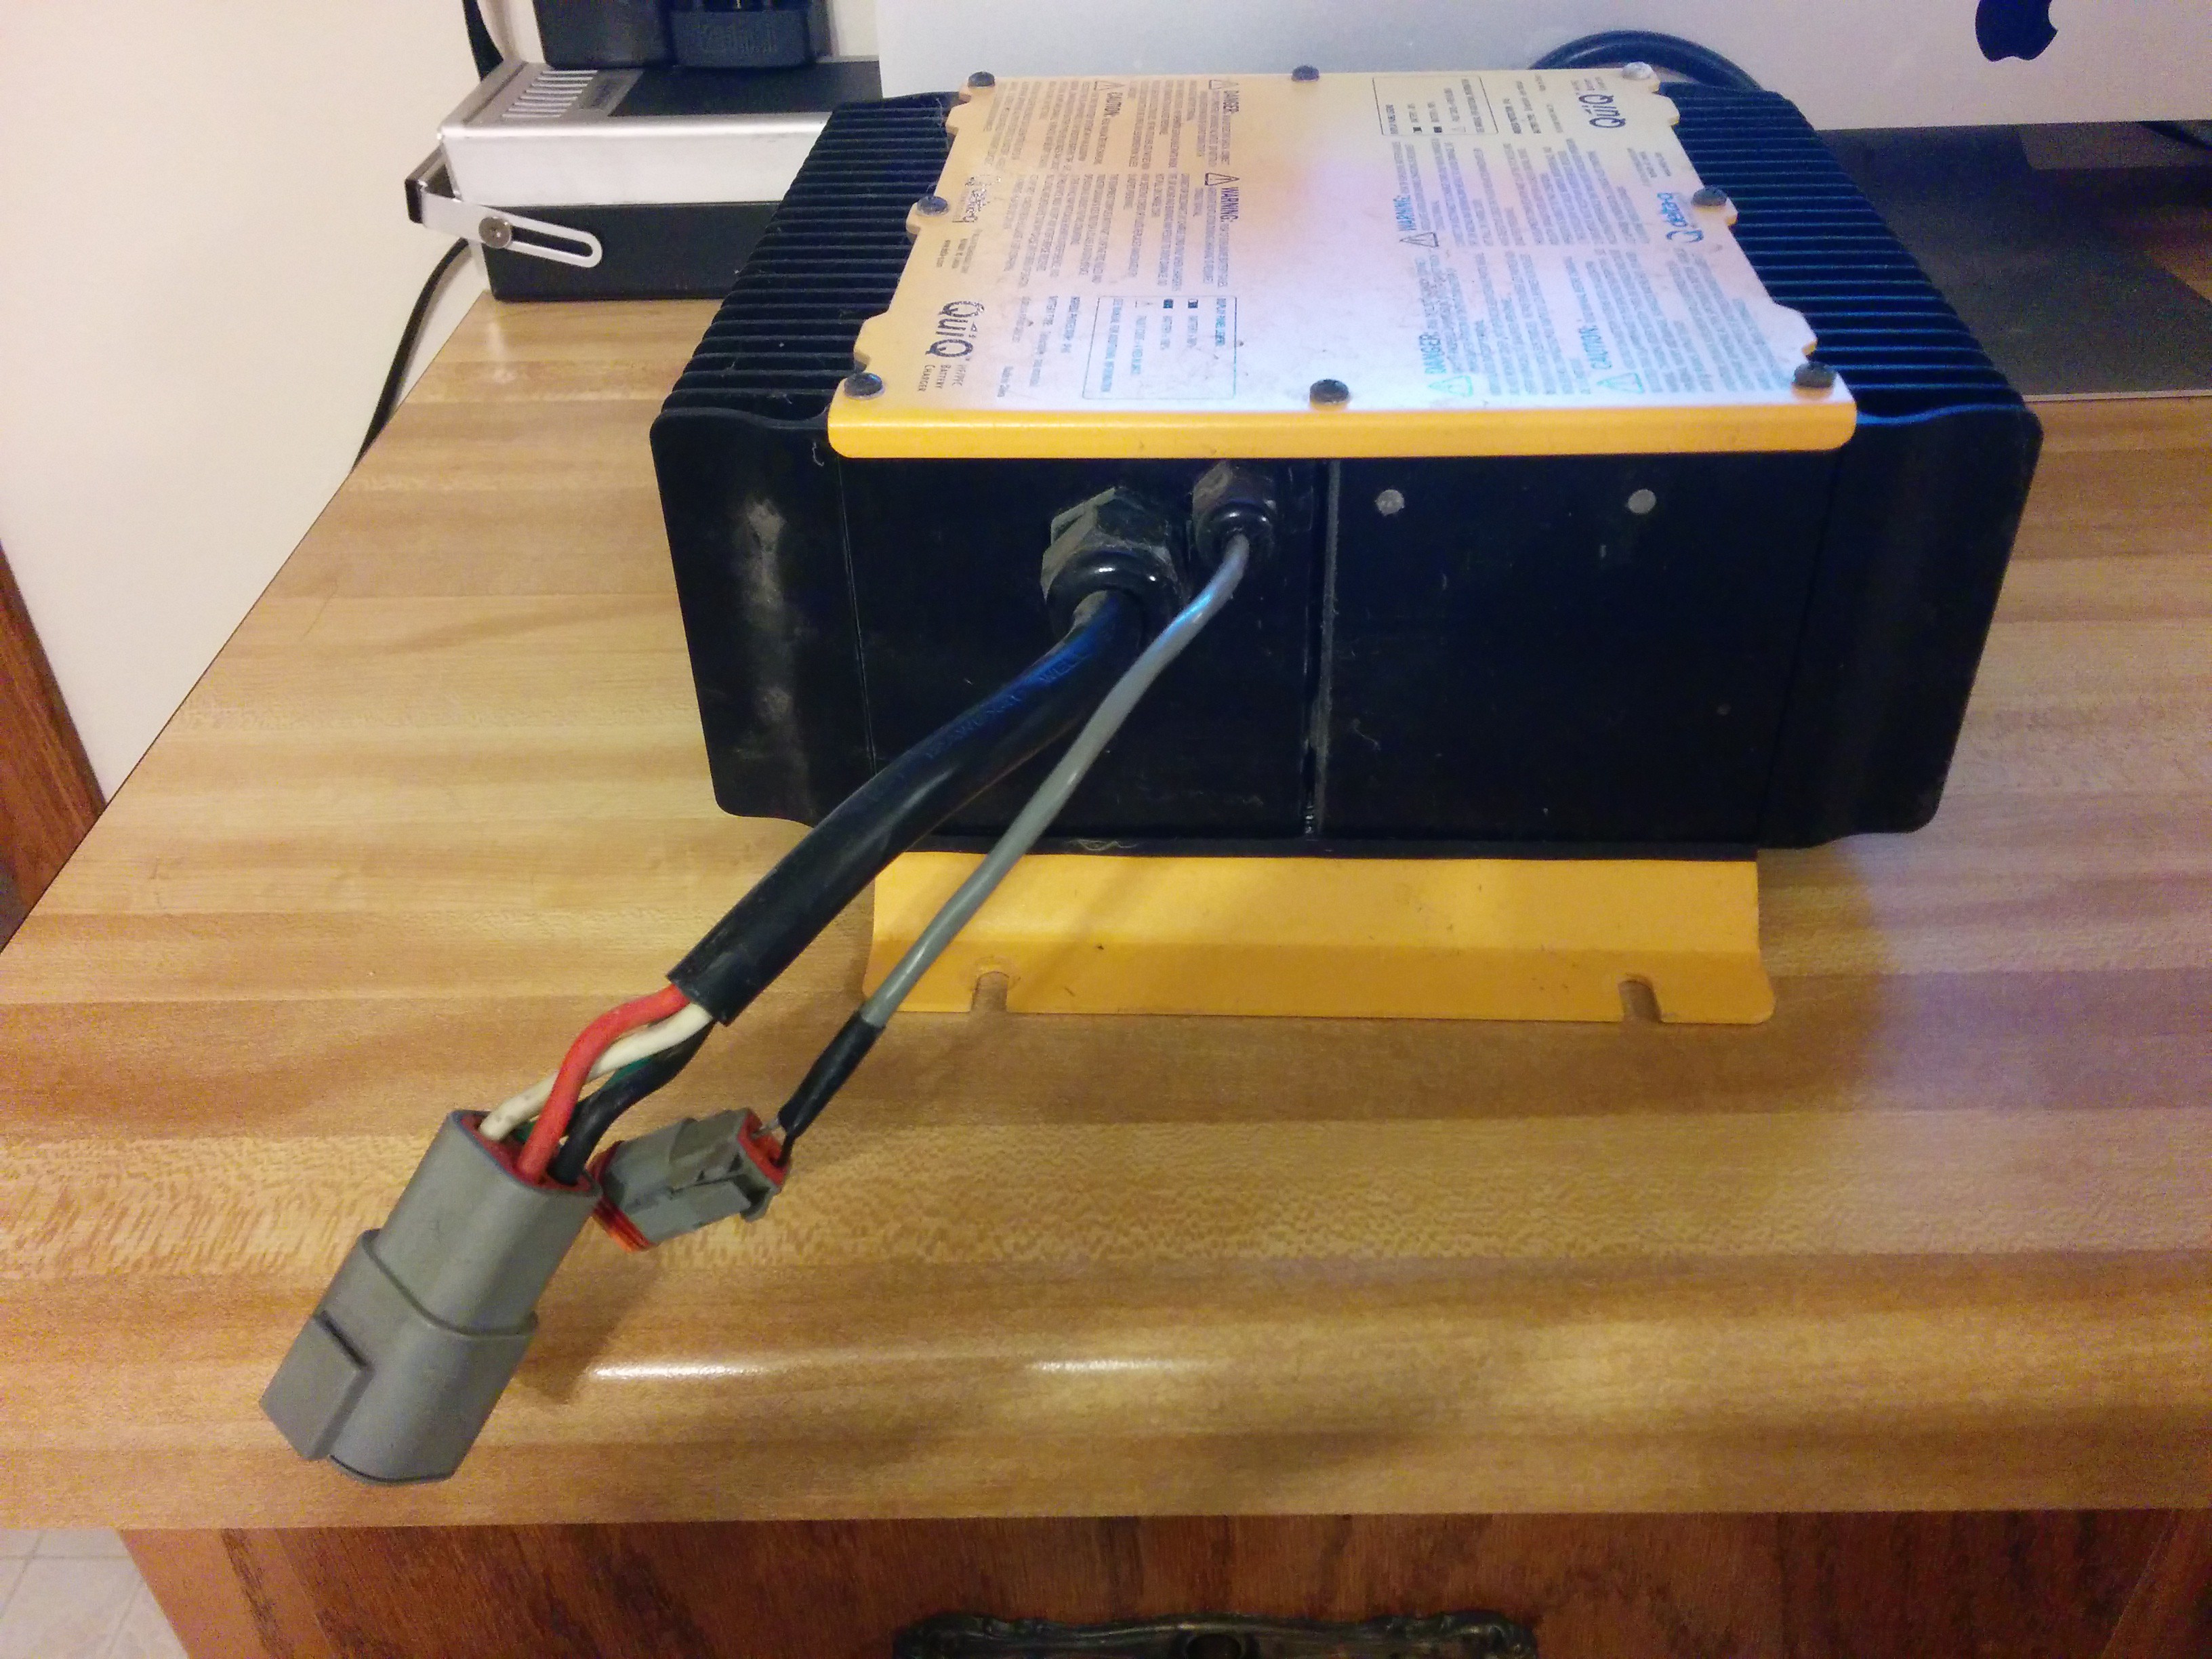
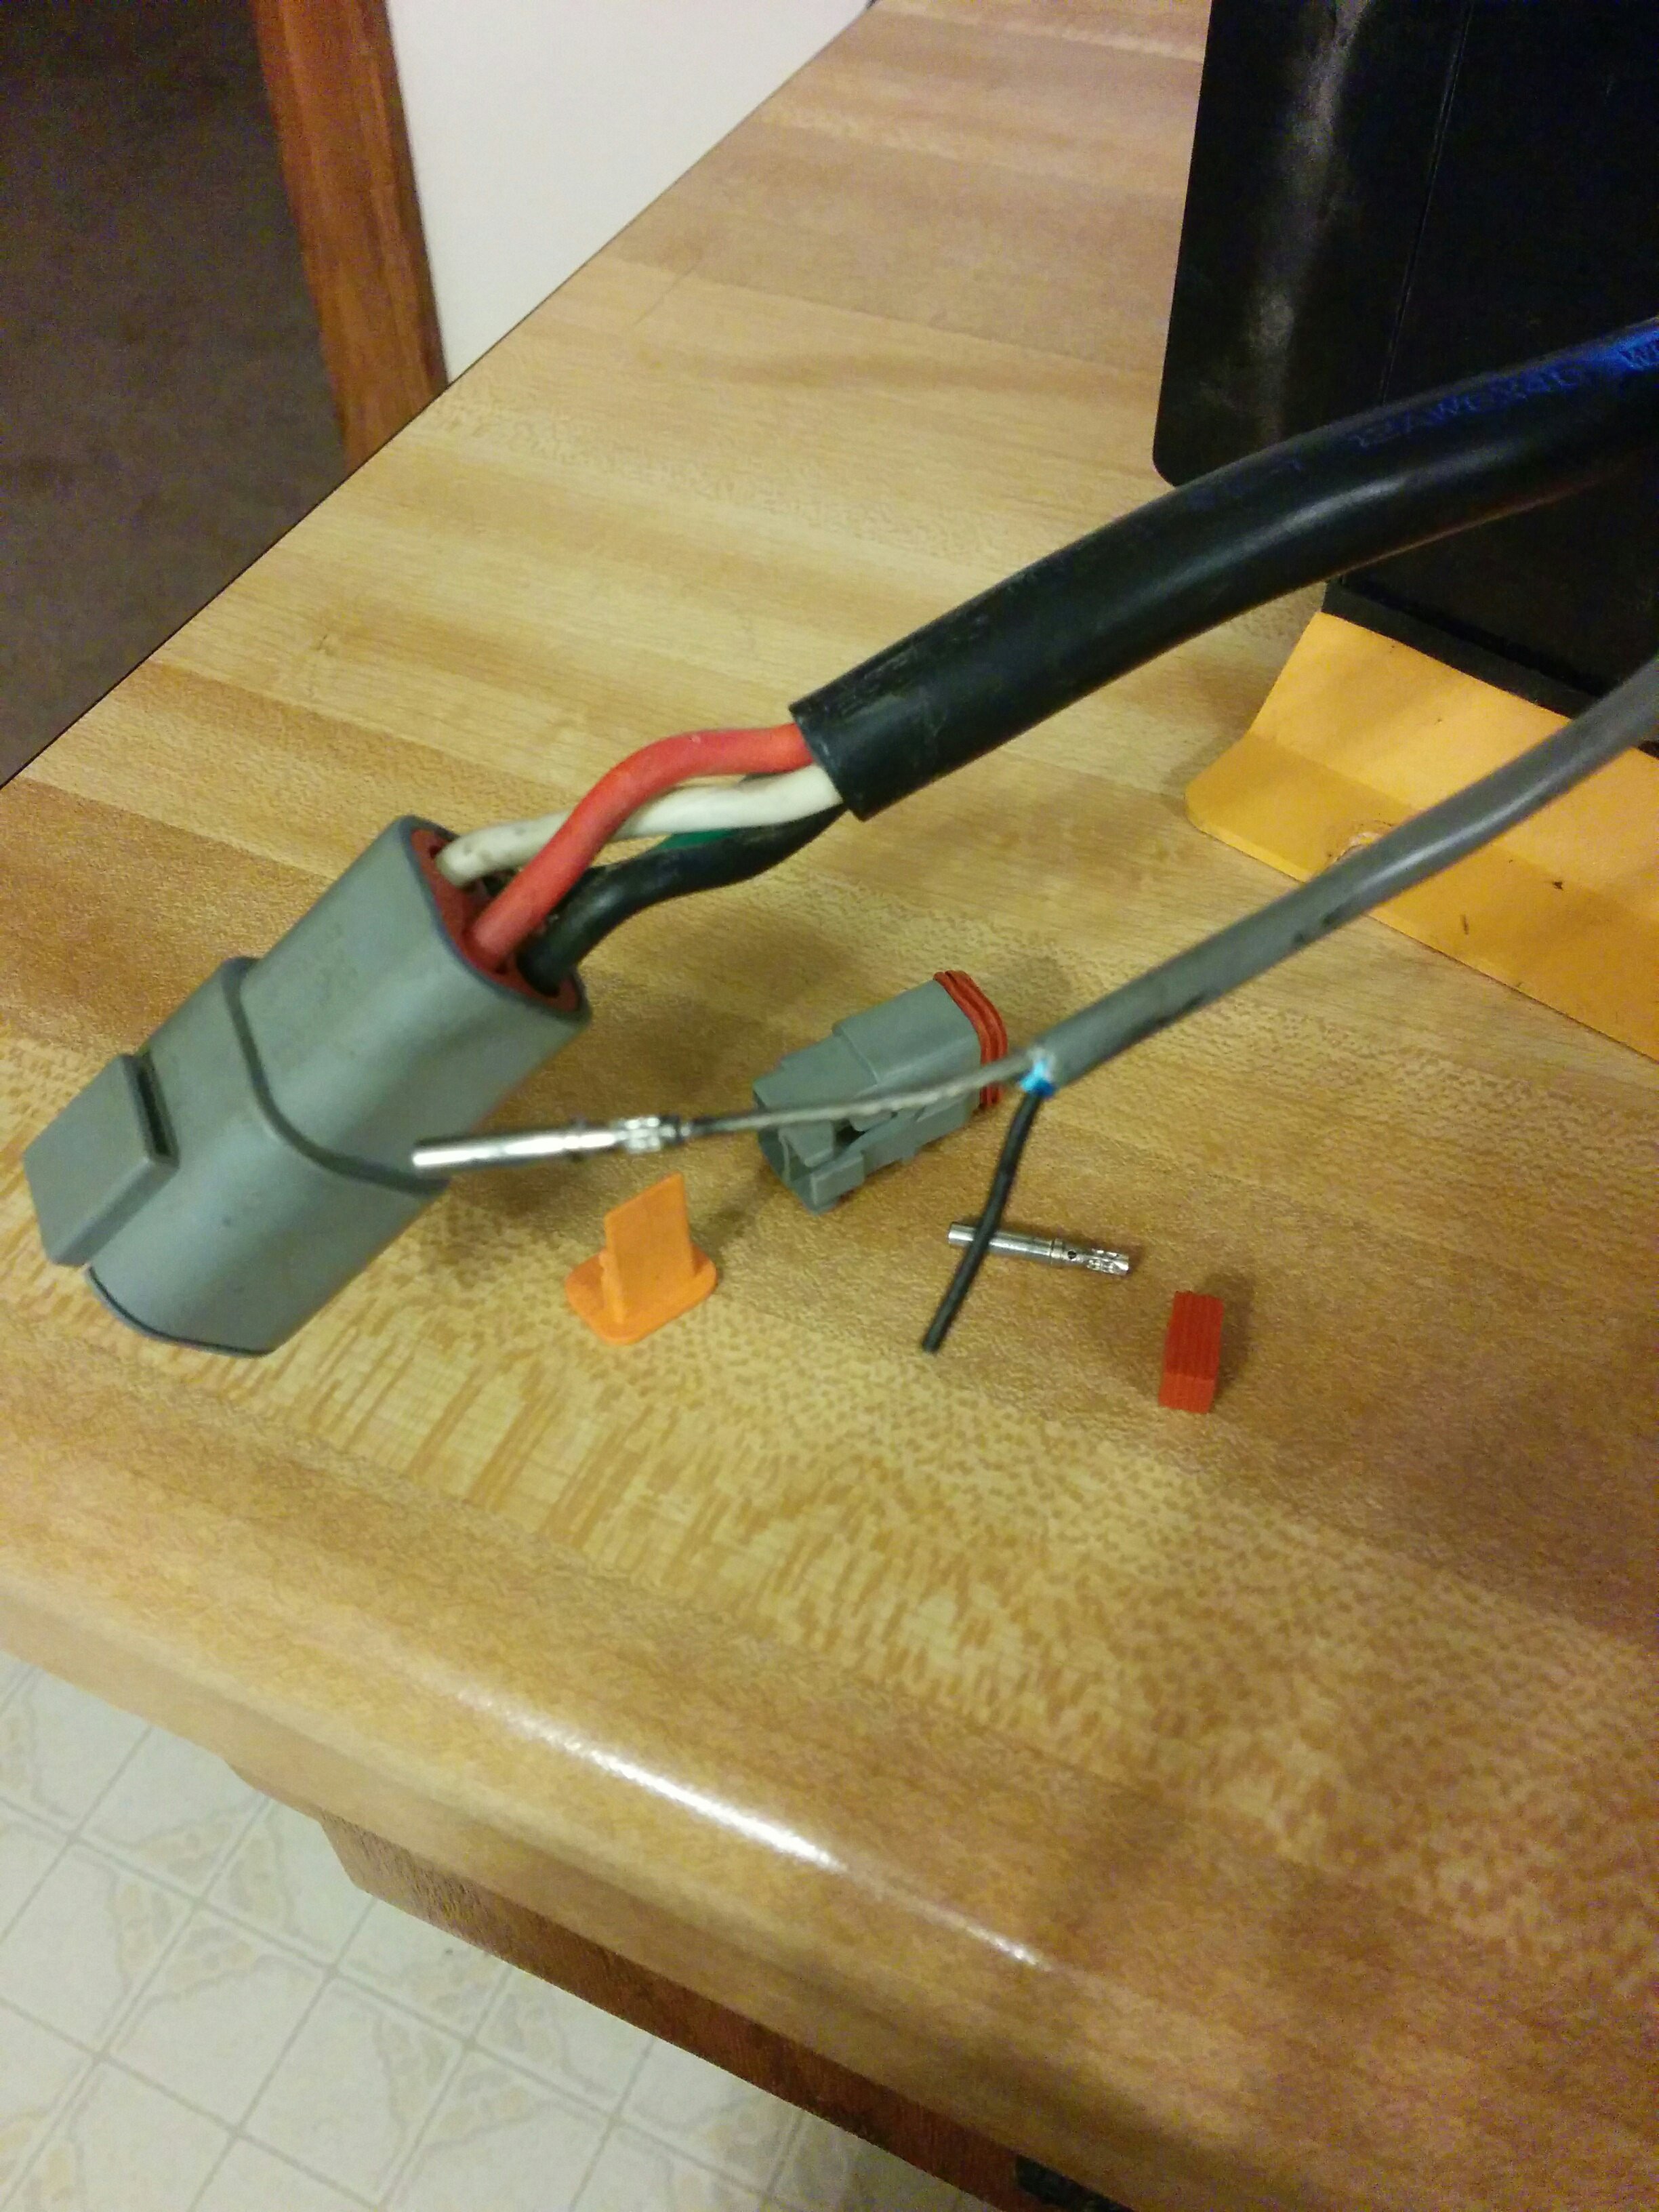
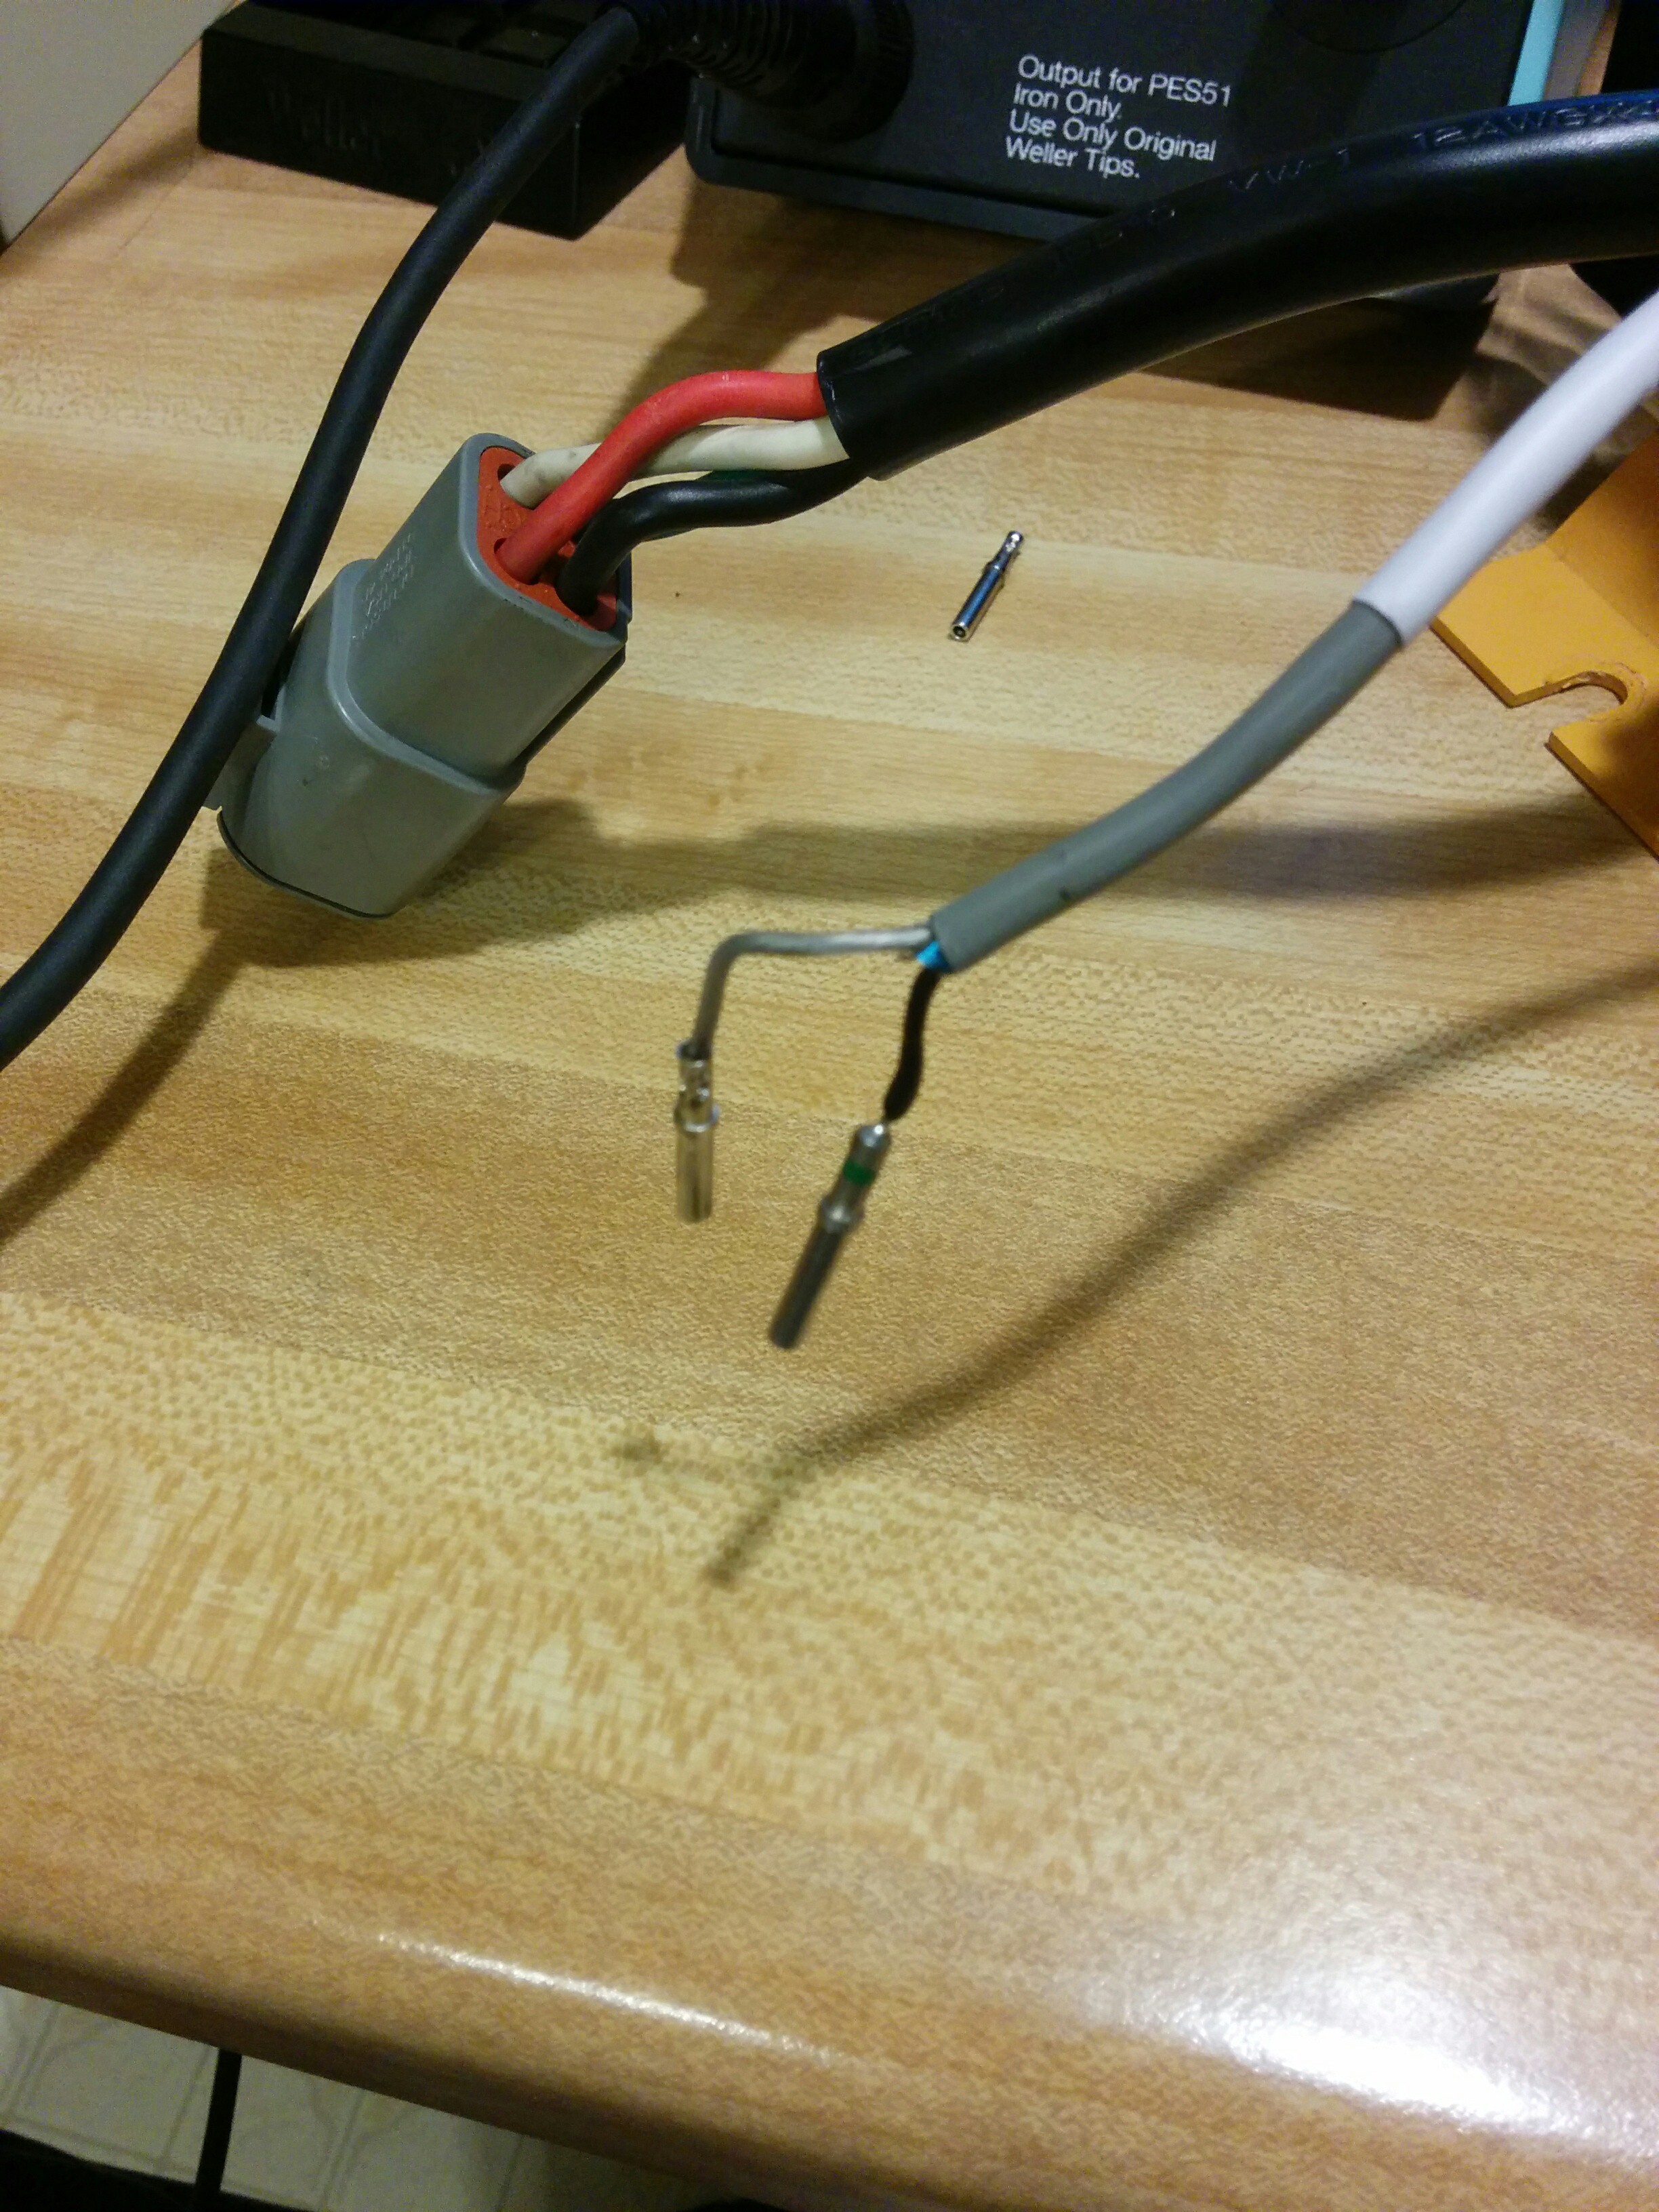
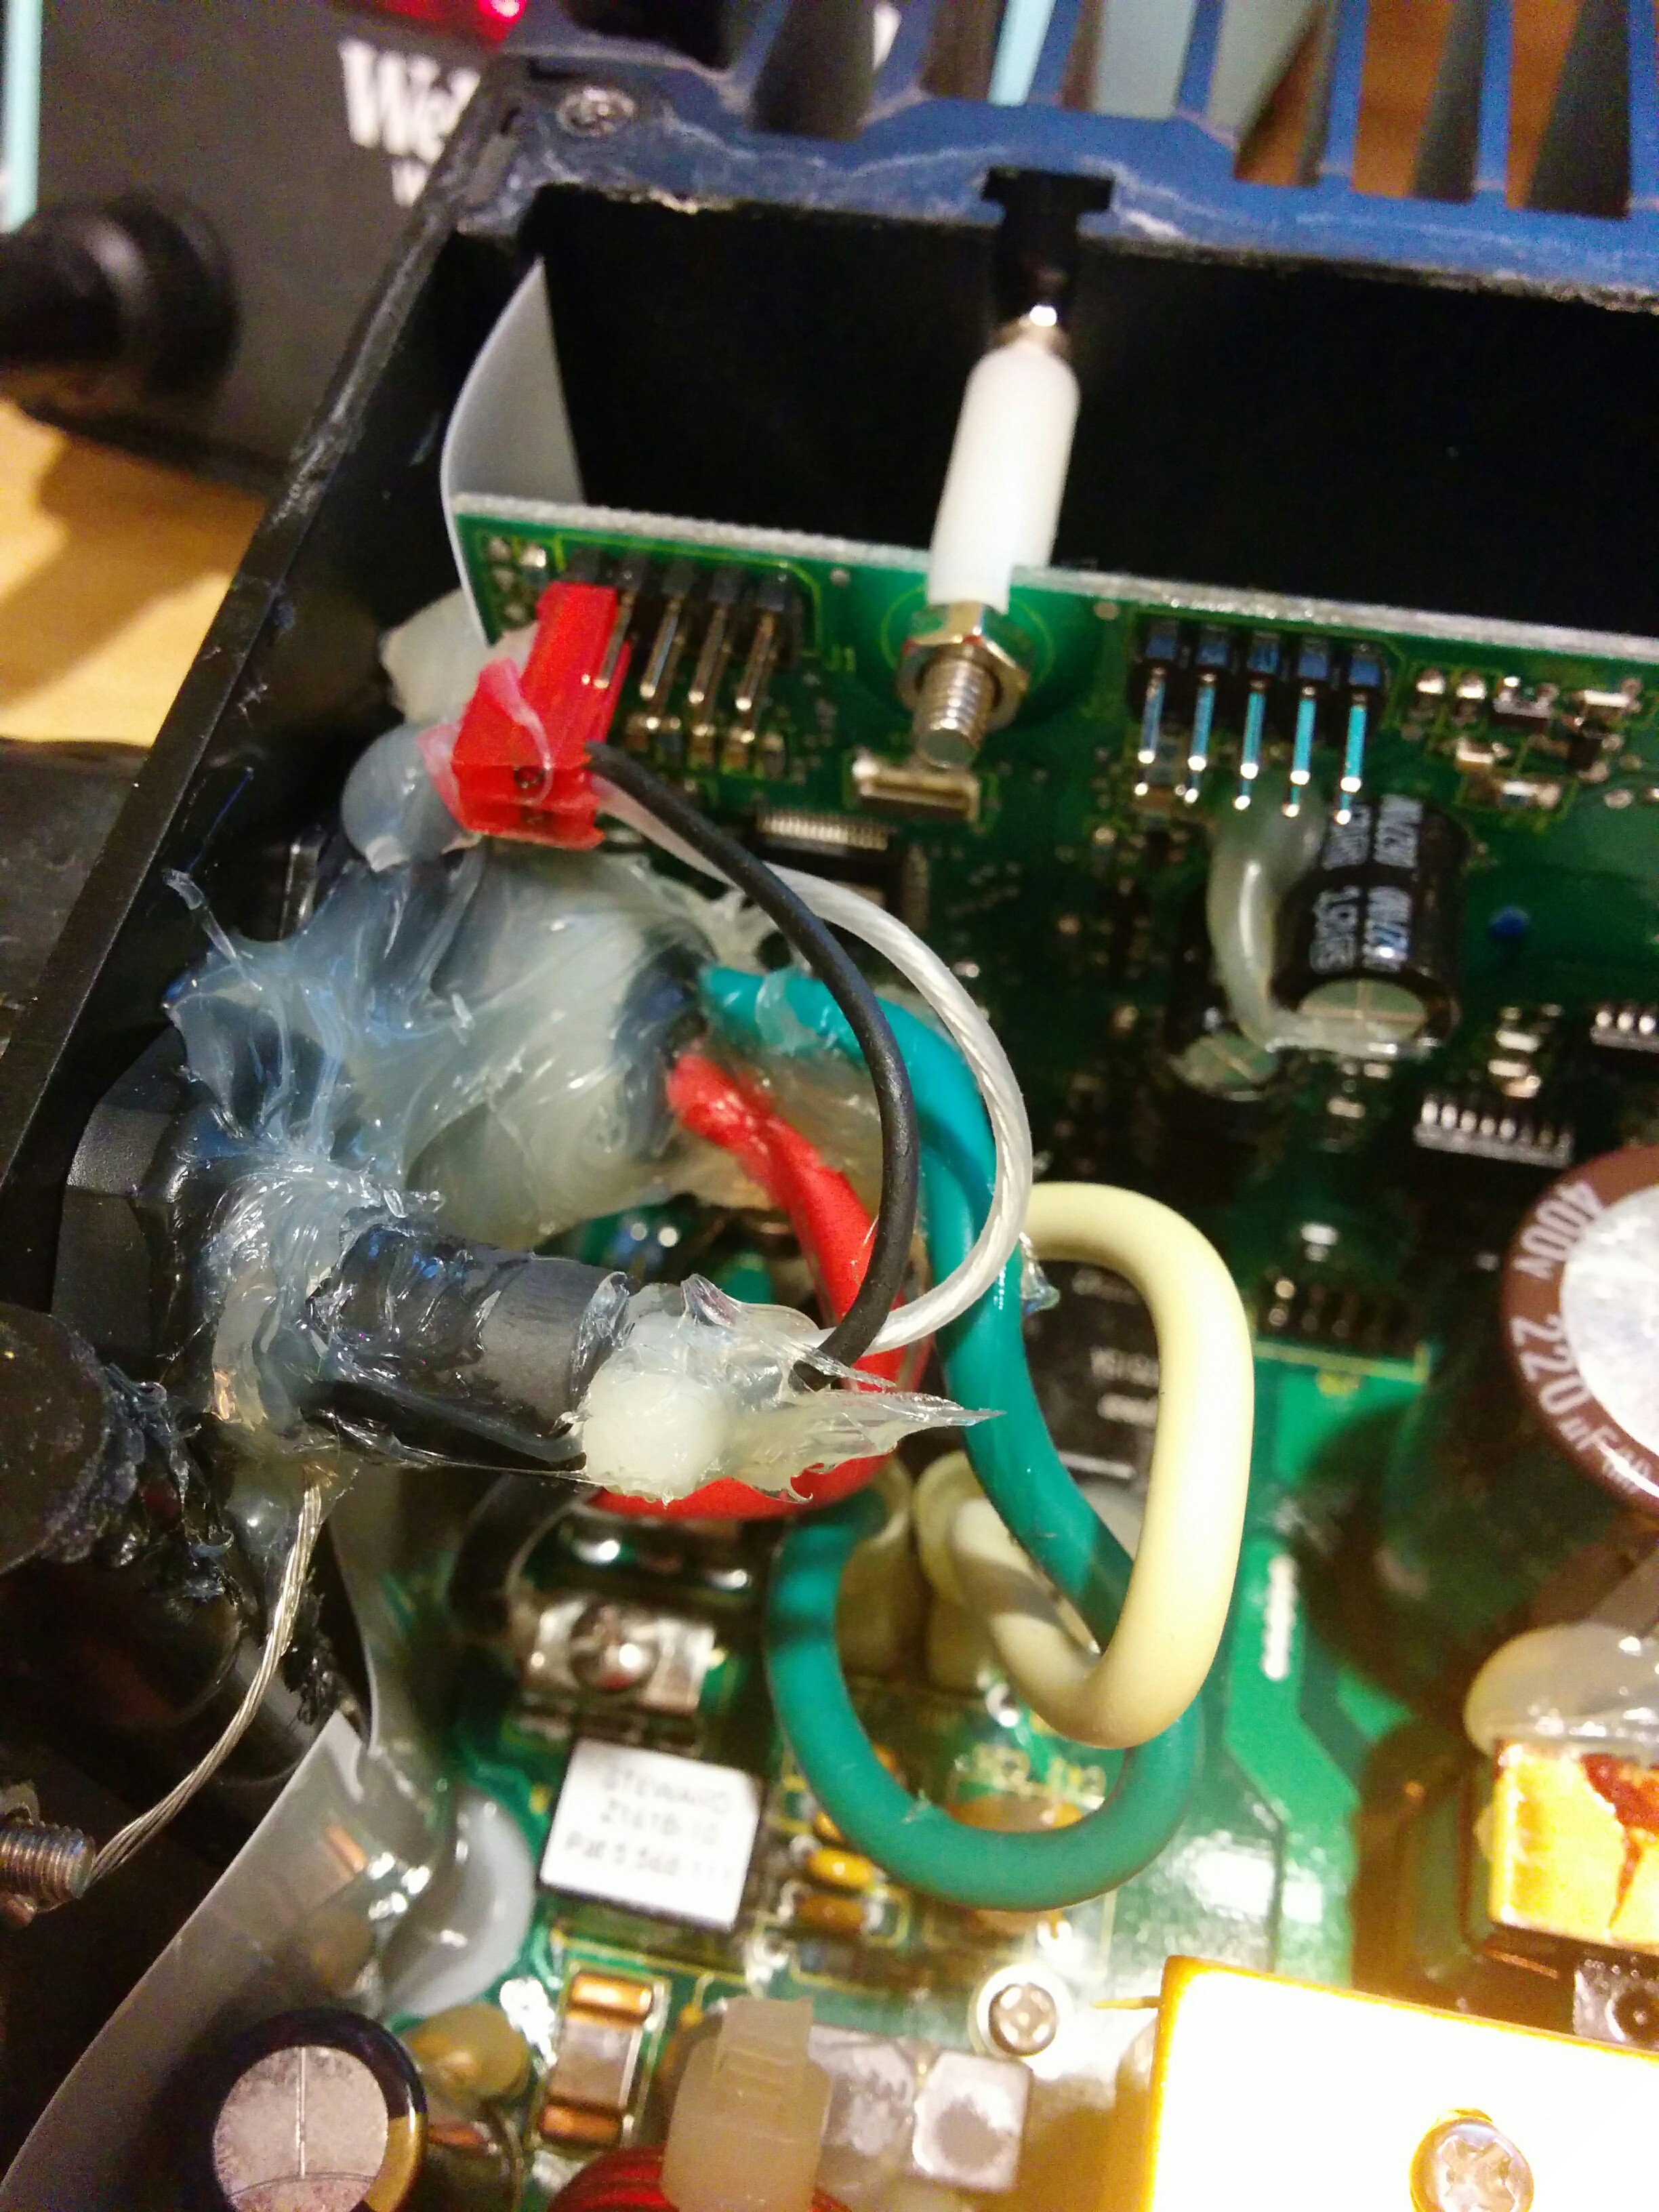
    Once I had the charger disconnected from the car, I brought it inside for the next steps. When I did, I noticed that one of the connectors, what I believe to be the temperature sensor, was broken. In the picture below, it was the black wire on the smaller 2-pin connector. It broke from the pin in the plug. I'm unsure if this was like this before, or if it was caused when I removed the charger from the car. Either way, watch the wires, you don't want to break anything!

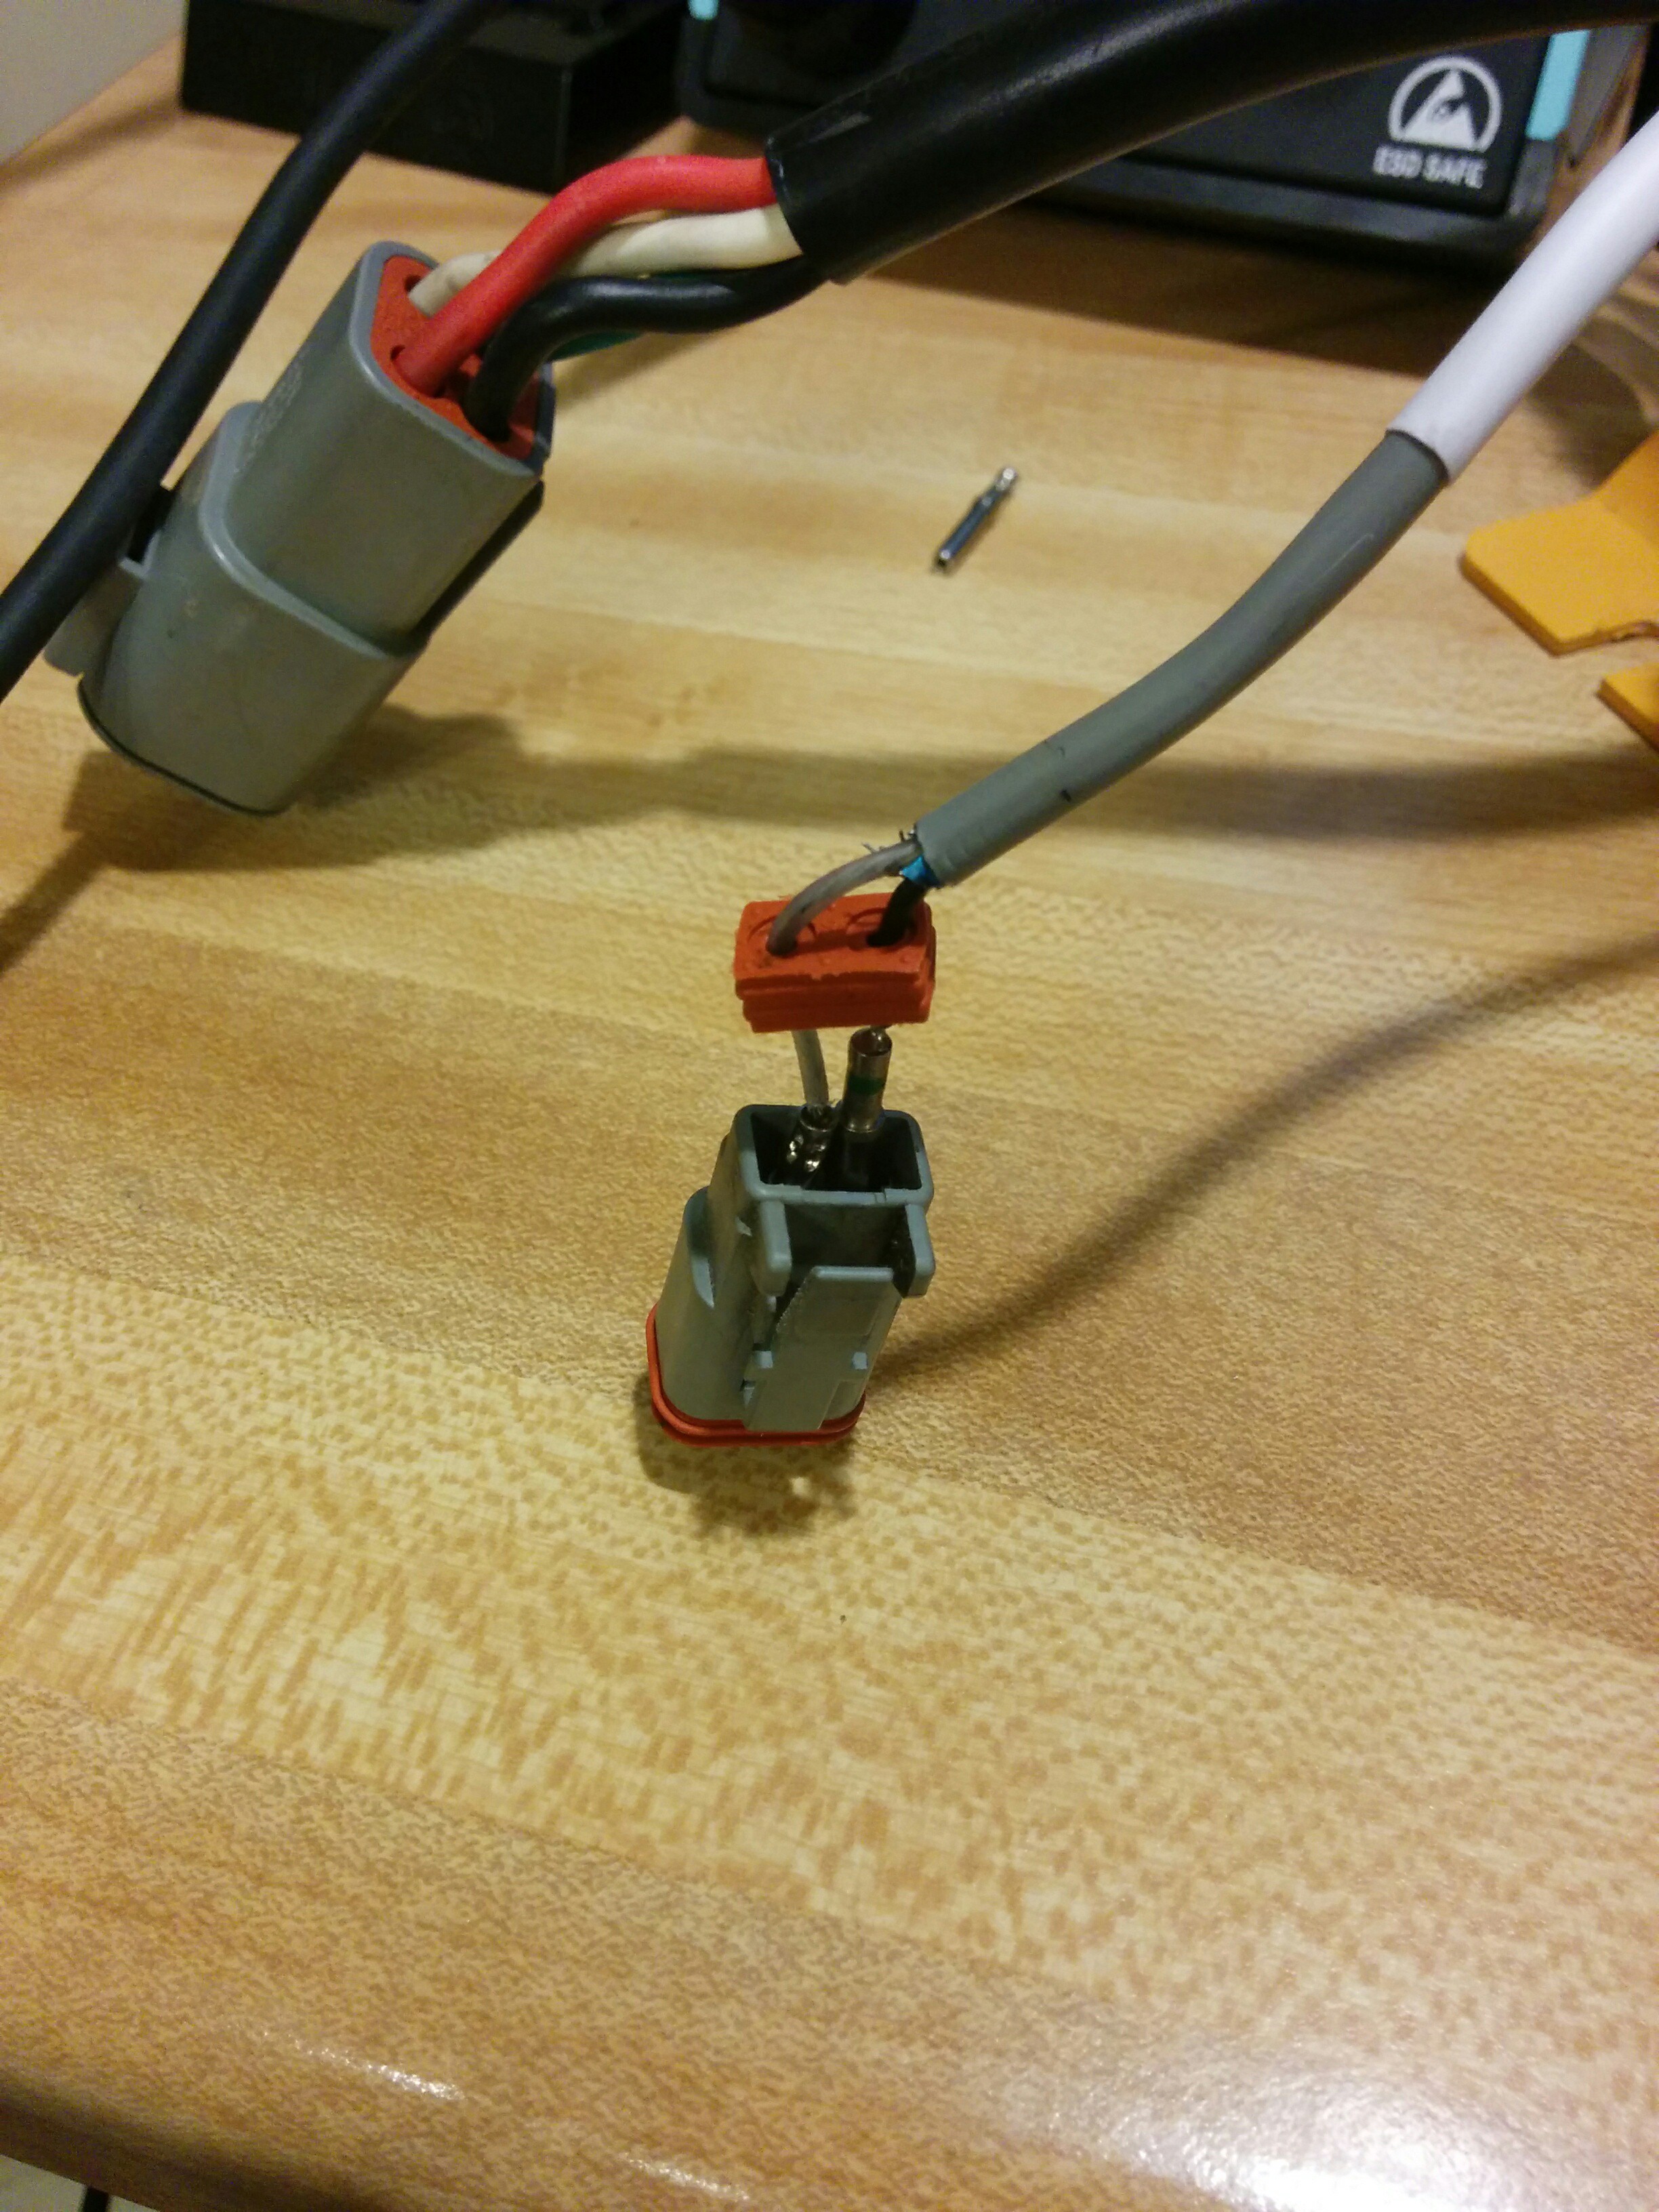
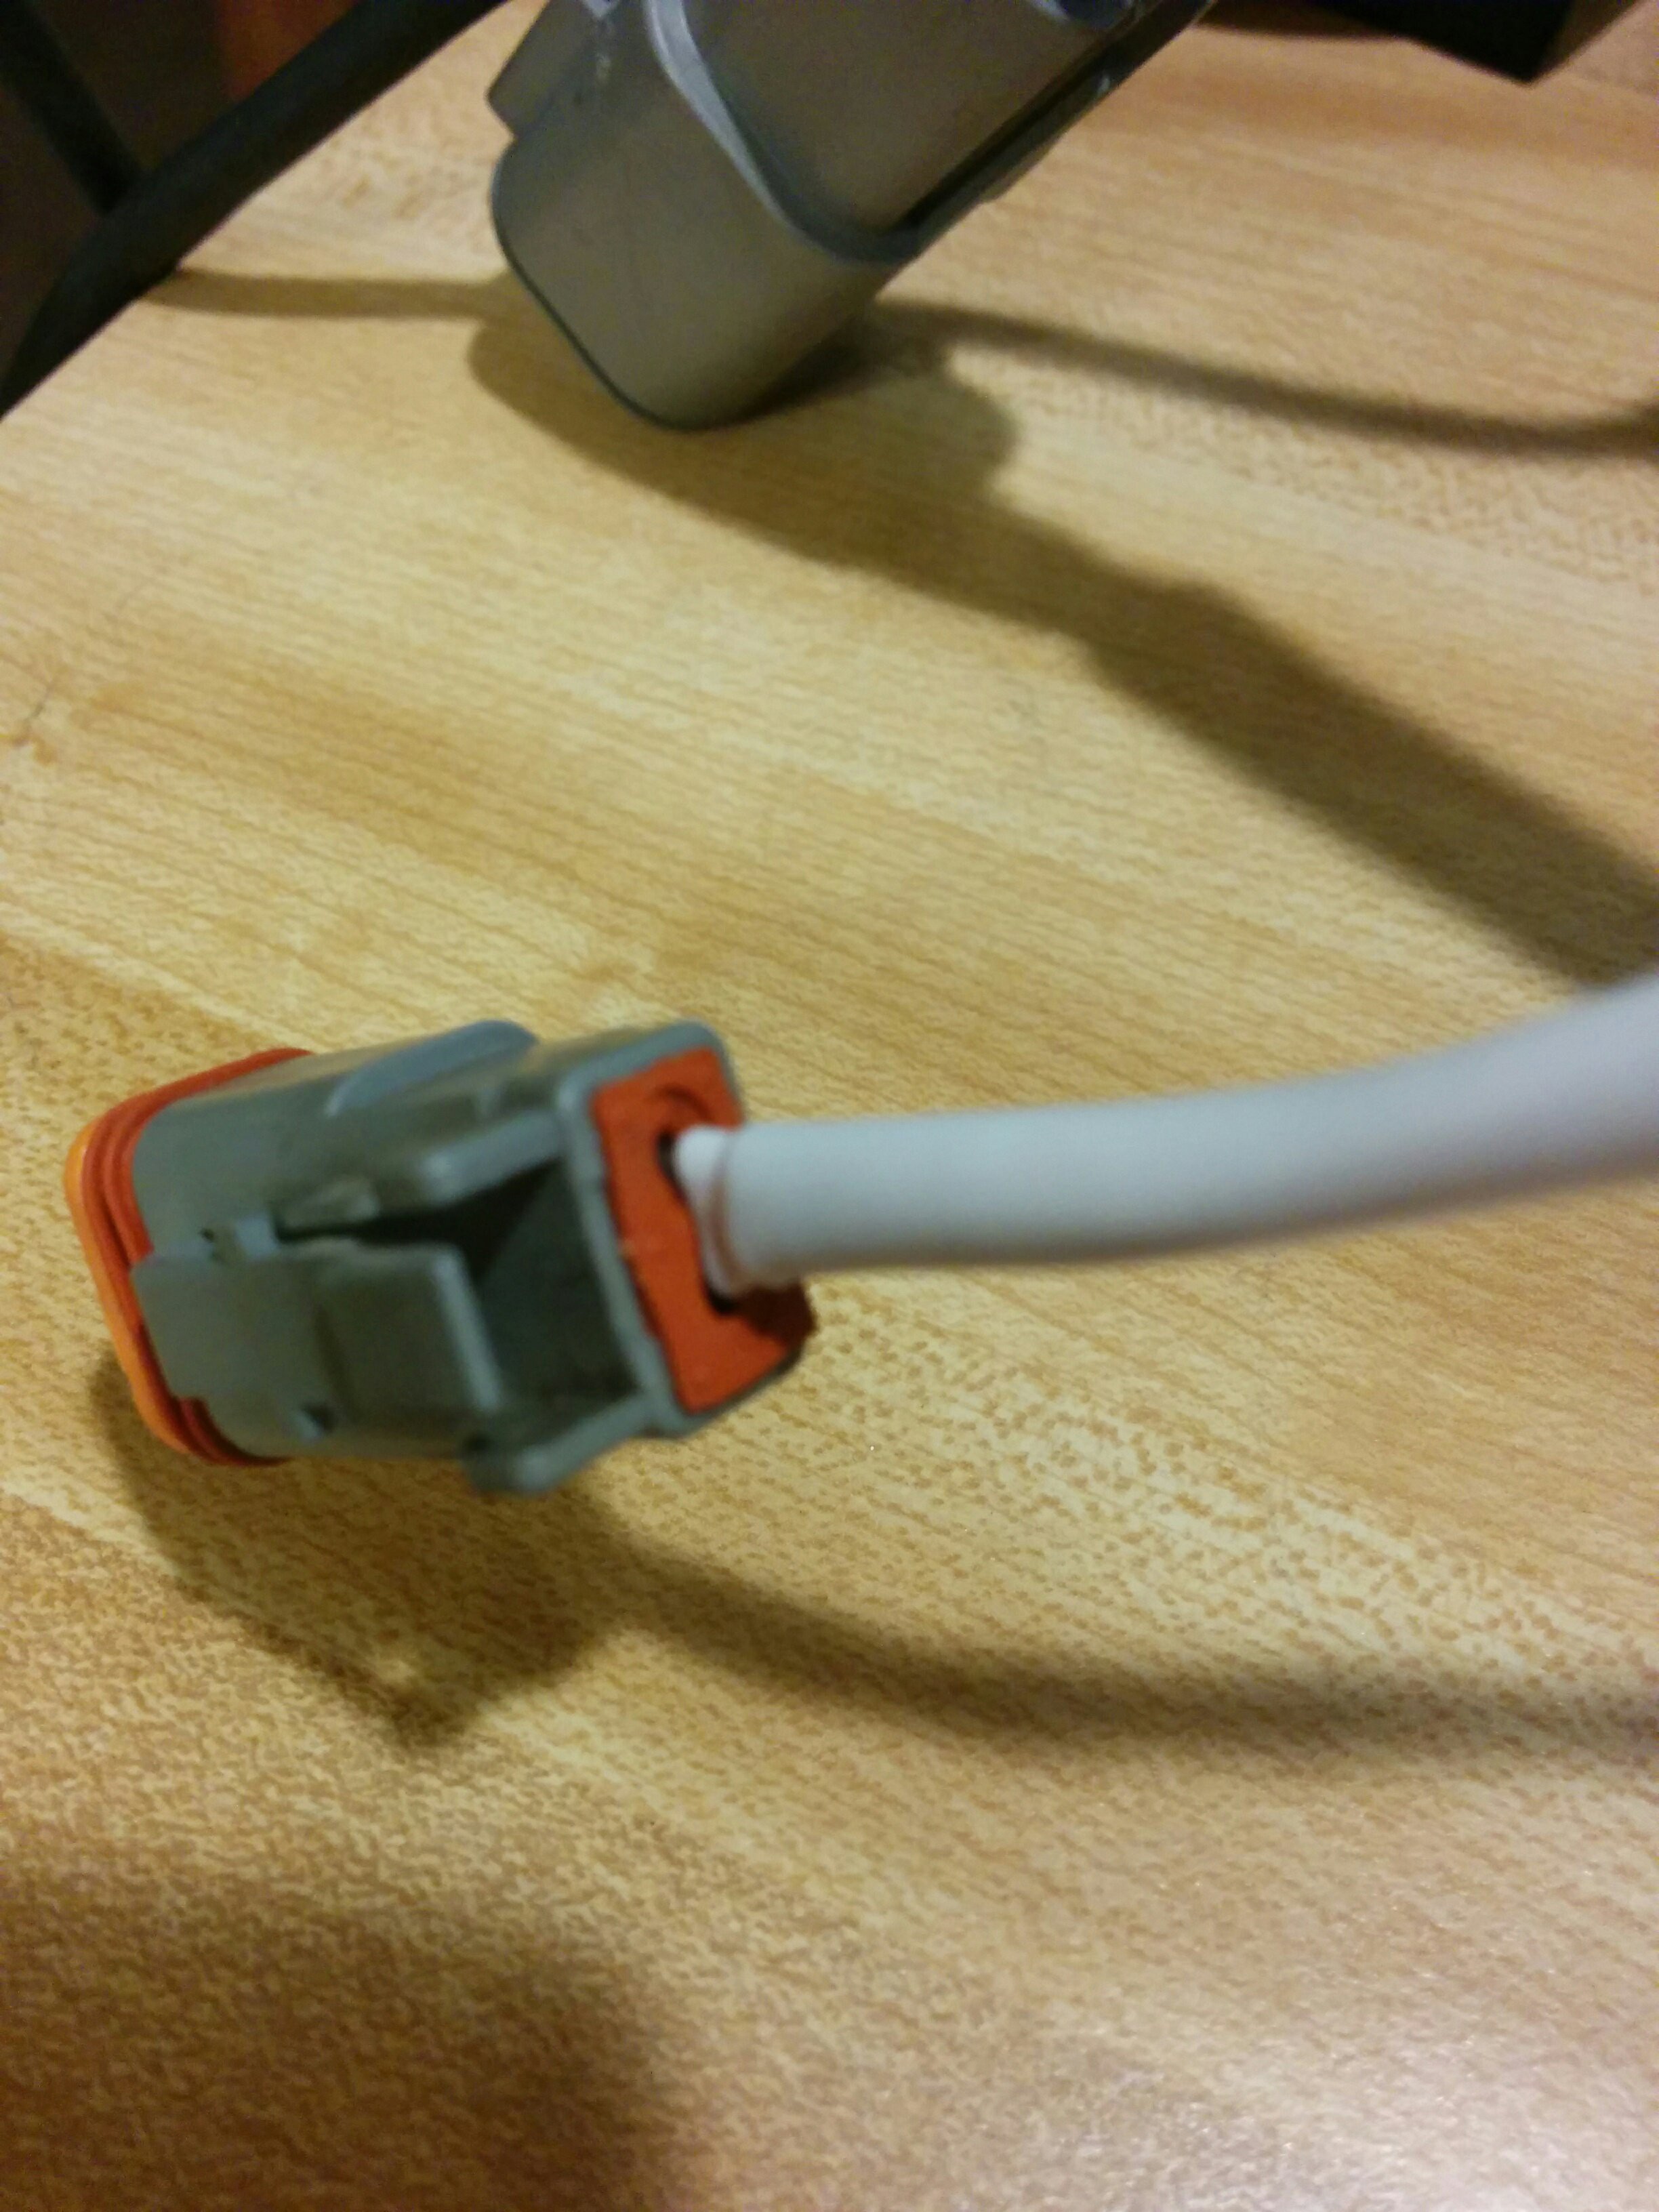
    The connector is what is called a Deutsch plug. These are fairly easy to repair. There are YouTube videos online that describe how to take the plugs apart to get to the individual connectors. In my case, I removed the orange plastic end-cap, and then used a pick to pry up the plastic latches holding the individual pins in place, the orange silicone seal came along with the wires. It was a clean break at the pin.

    There are a lot of ways I could have fixed this particular plug. I could have just soldered the wire back onto the end of the connector. I could have attempted to re-crimp the wire on, or I could just replace the pin. Amazingly enough, I actually had one of these pins, but only one. I didn't have a crimper though. Deutsch plugs get crimped with a special 4 way circular crimper, which I did not have. So I simply stripped the wire back and soldered it into the end of the pin. While I was at it, I slipped some new heat-shrink tubing onto the wire for use later.

    Once I had the new pin in place, I put the red seal back onto the wires and inserted the pins back into the plug in their original orientation.

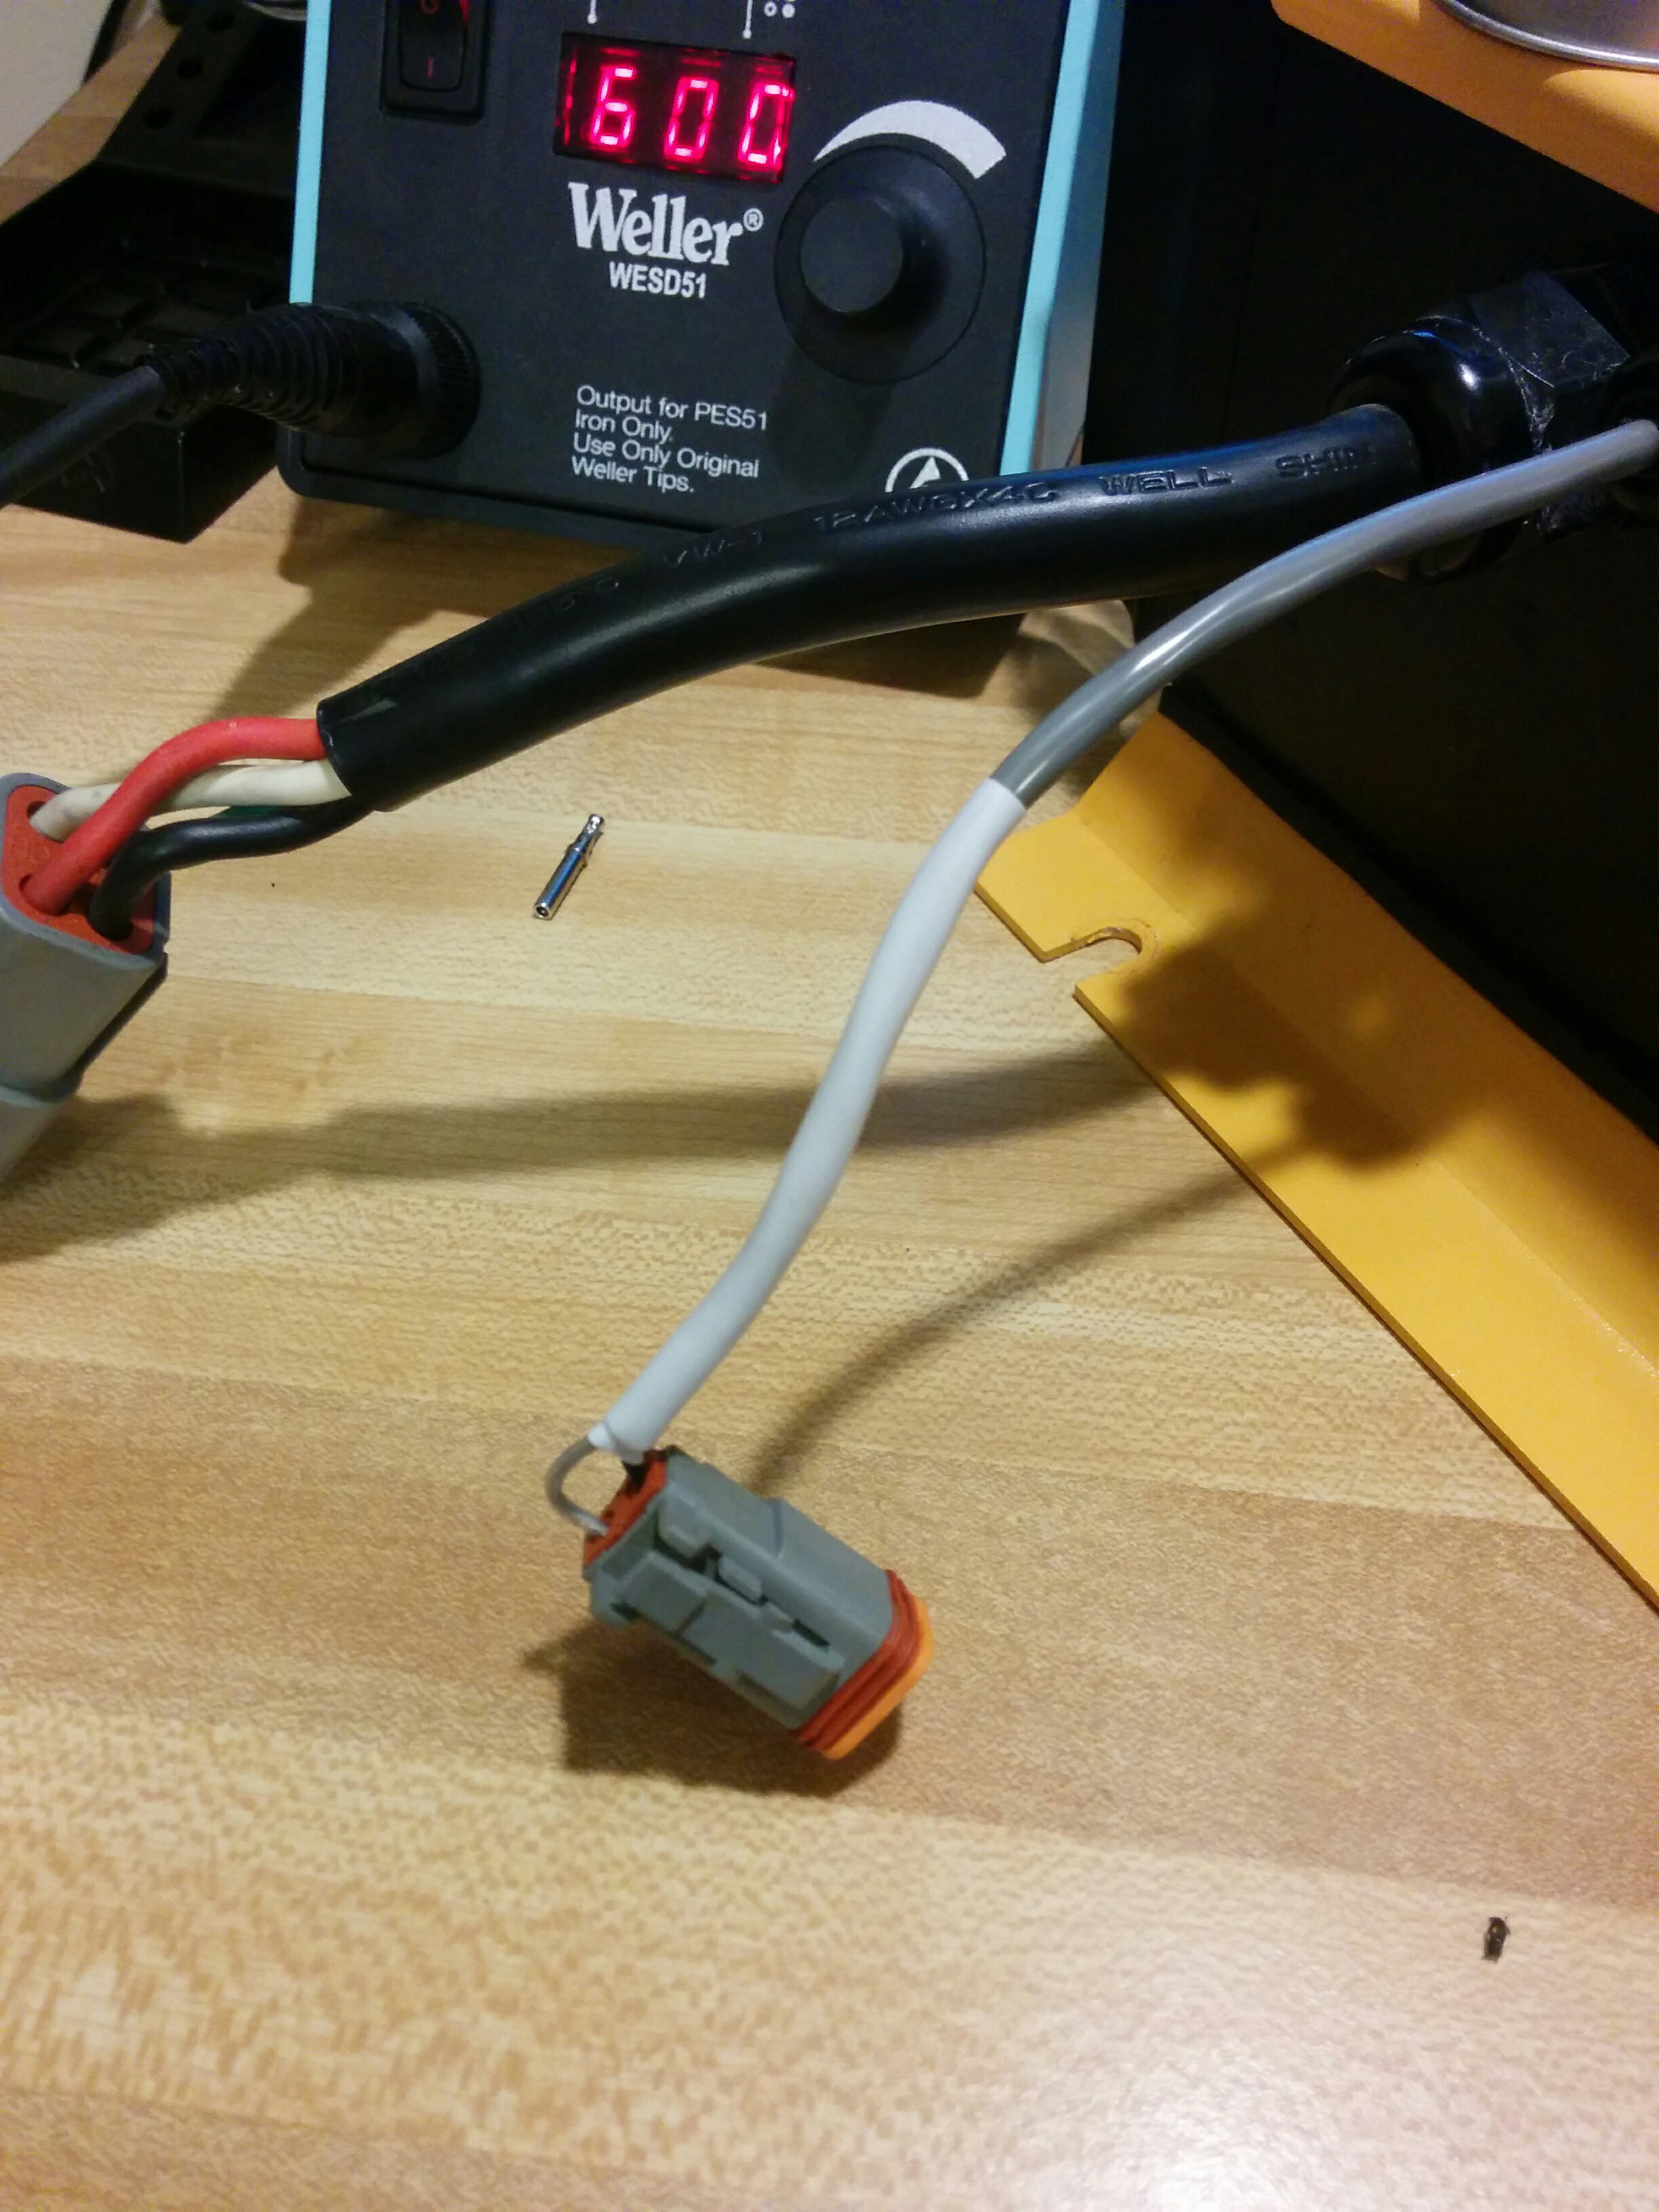
    Once I had the pins in place, I put the orange end back onto the connector, shrunk the heat-shrink, and called it job well done. However, you can see that the wires are slightly different lengths now. I fixed that, once I was in the charger, by simply pulling the clear wire into the charger until it was the same length as the black wire.

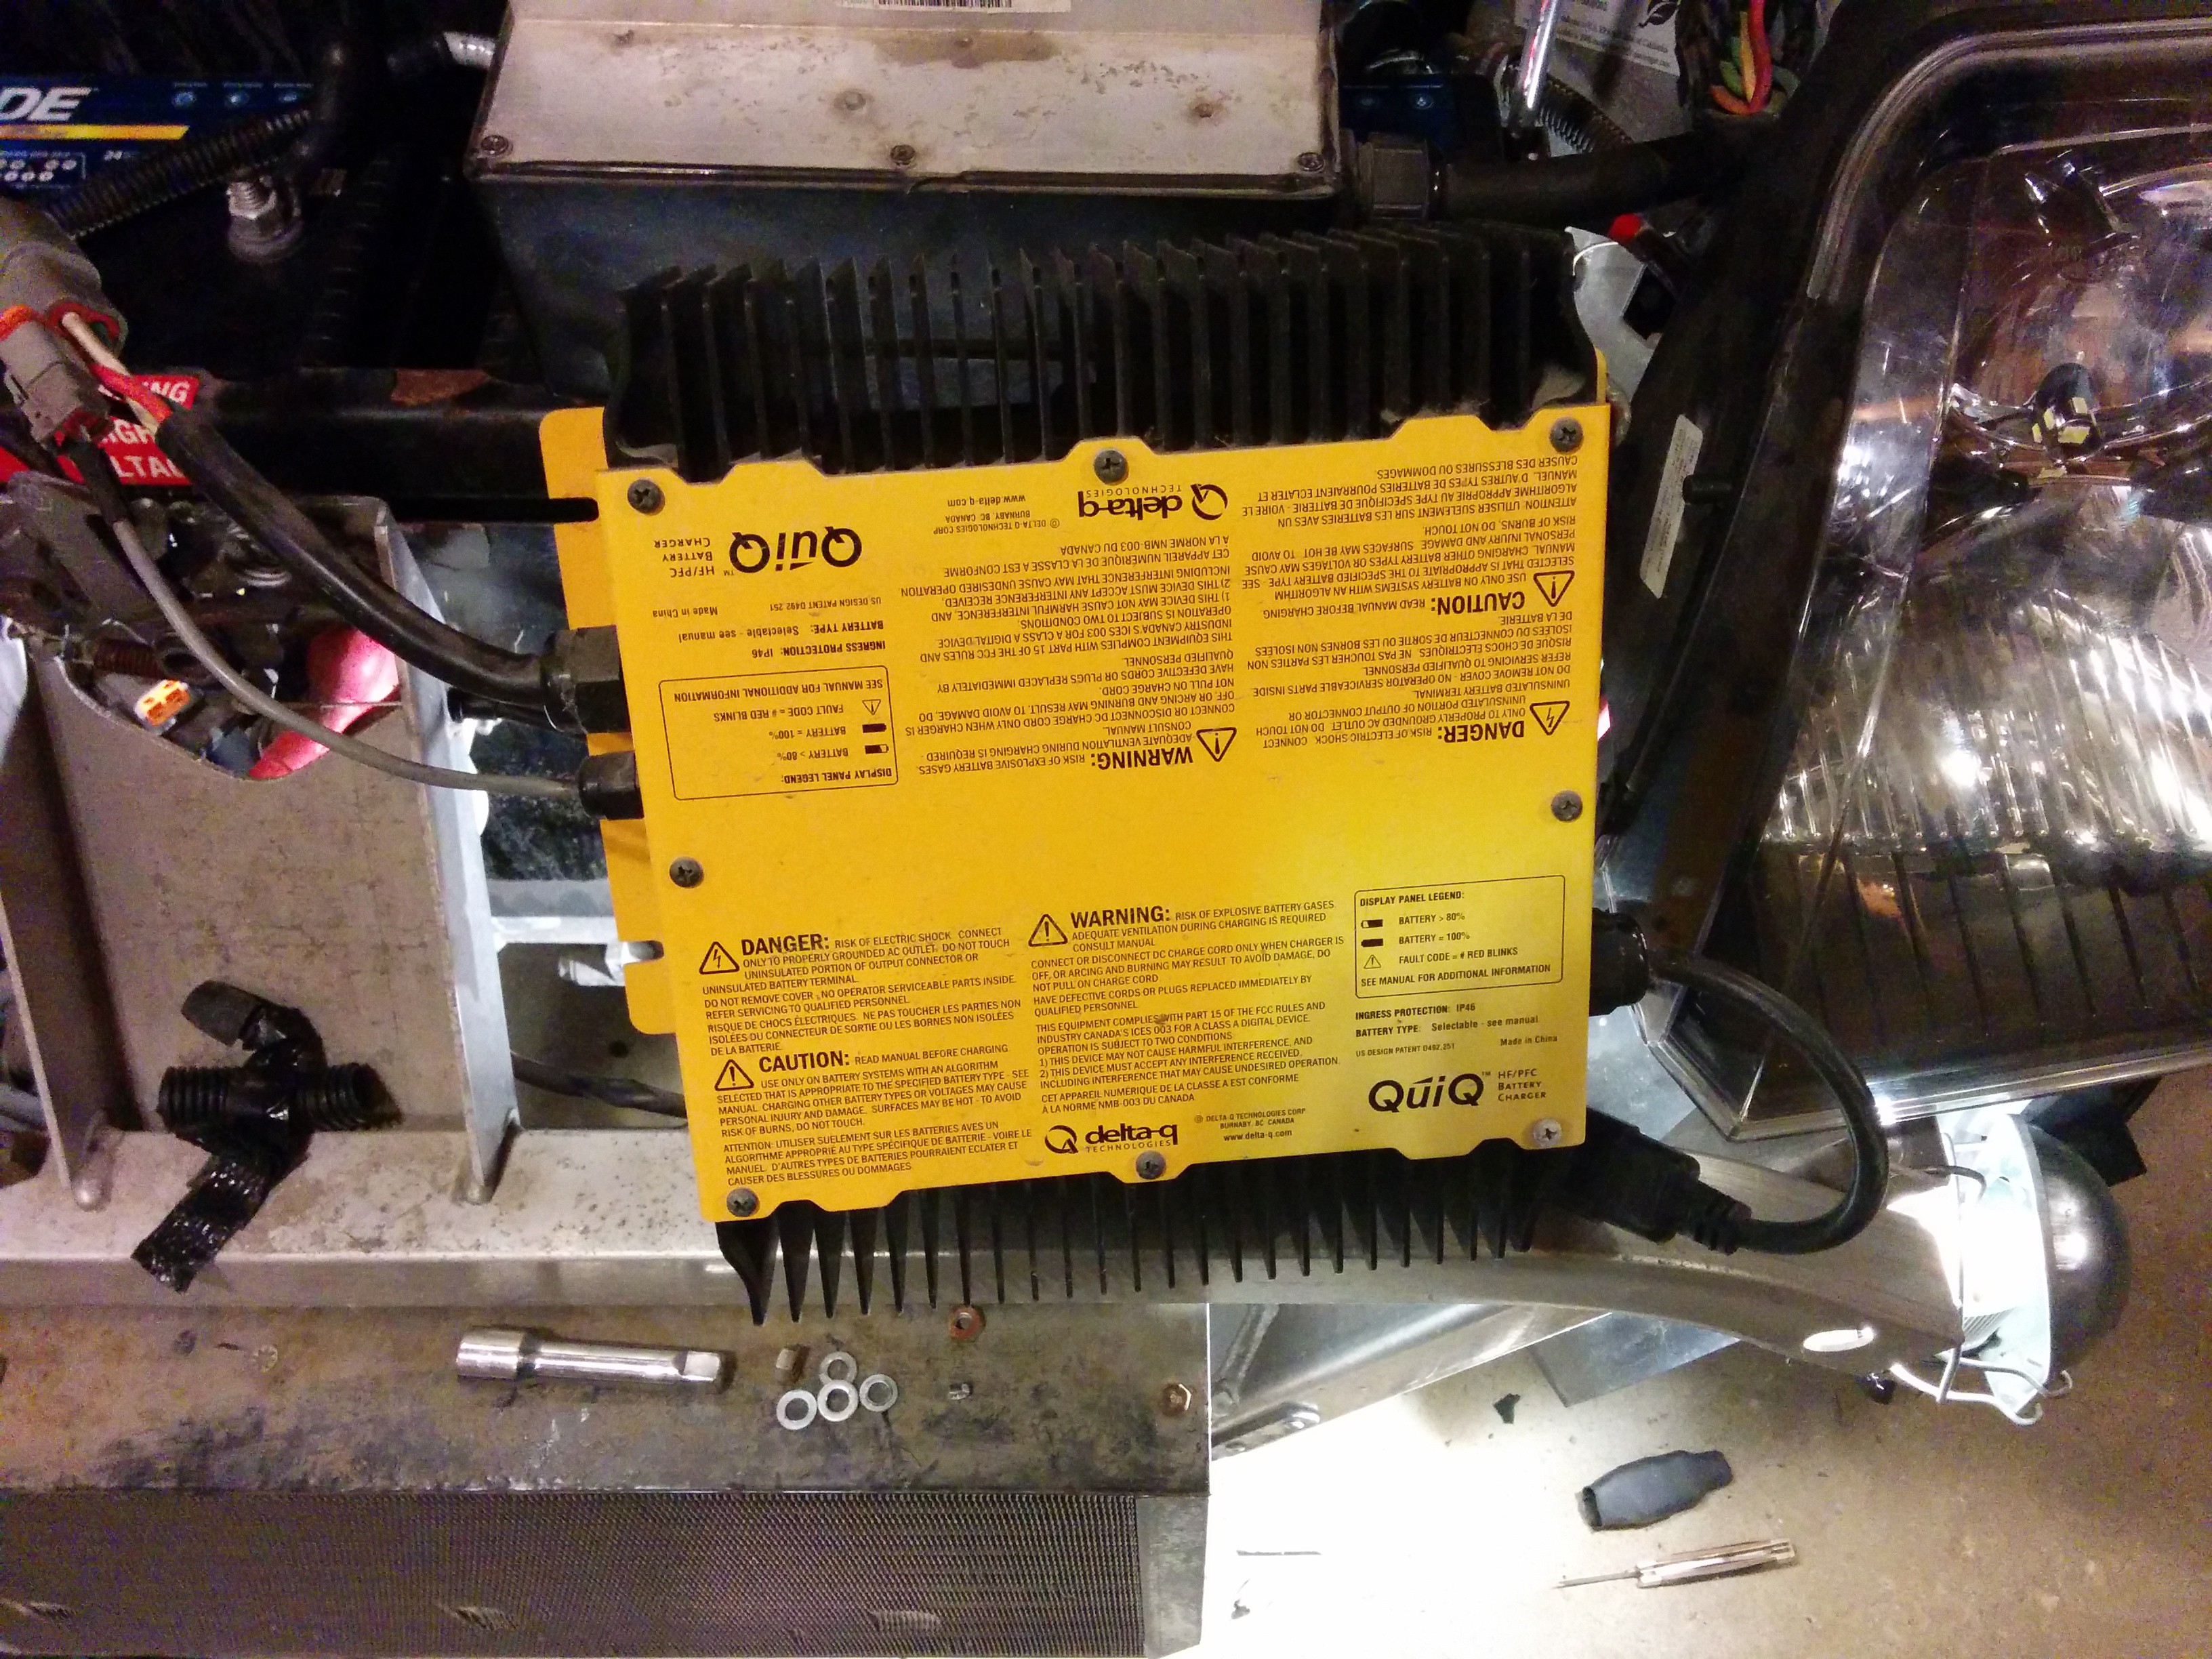
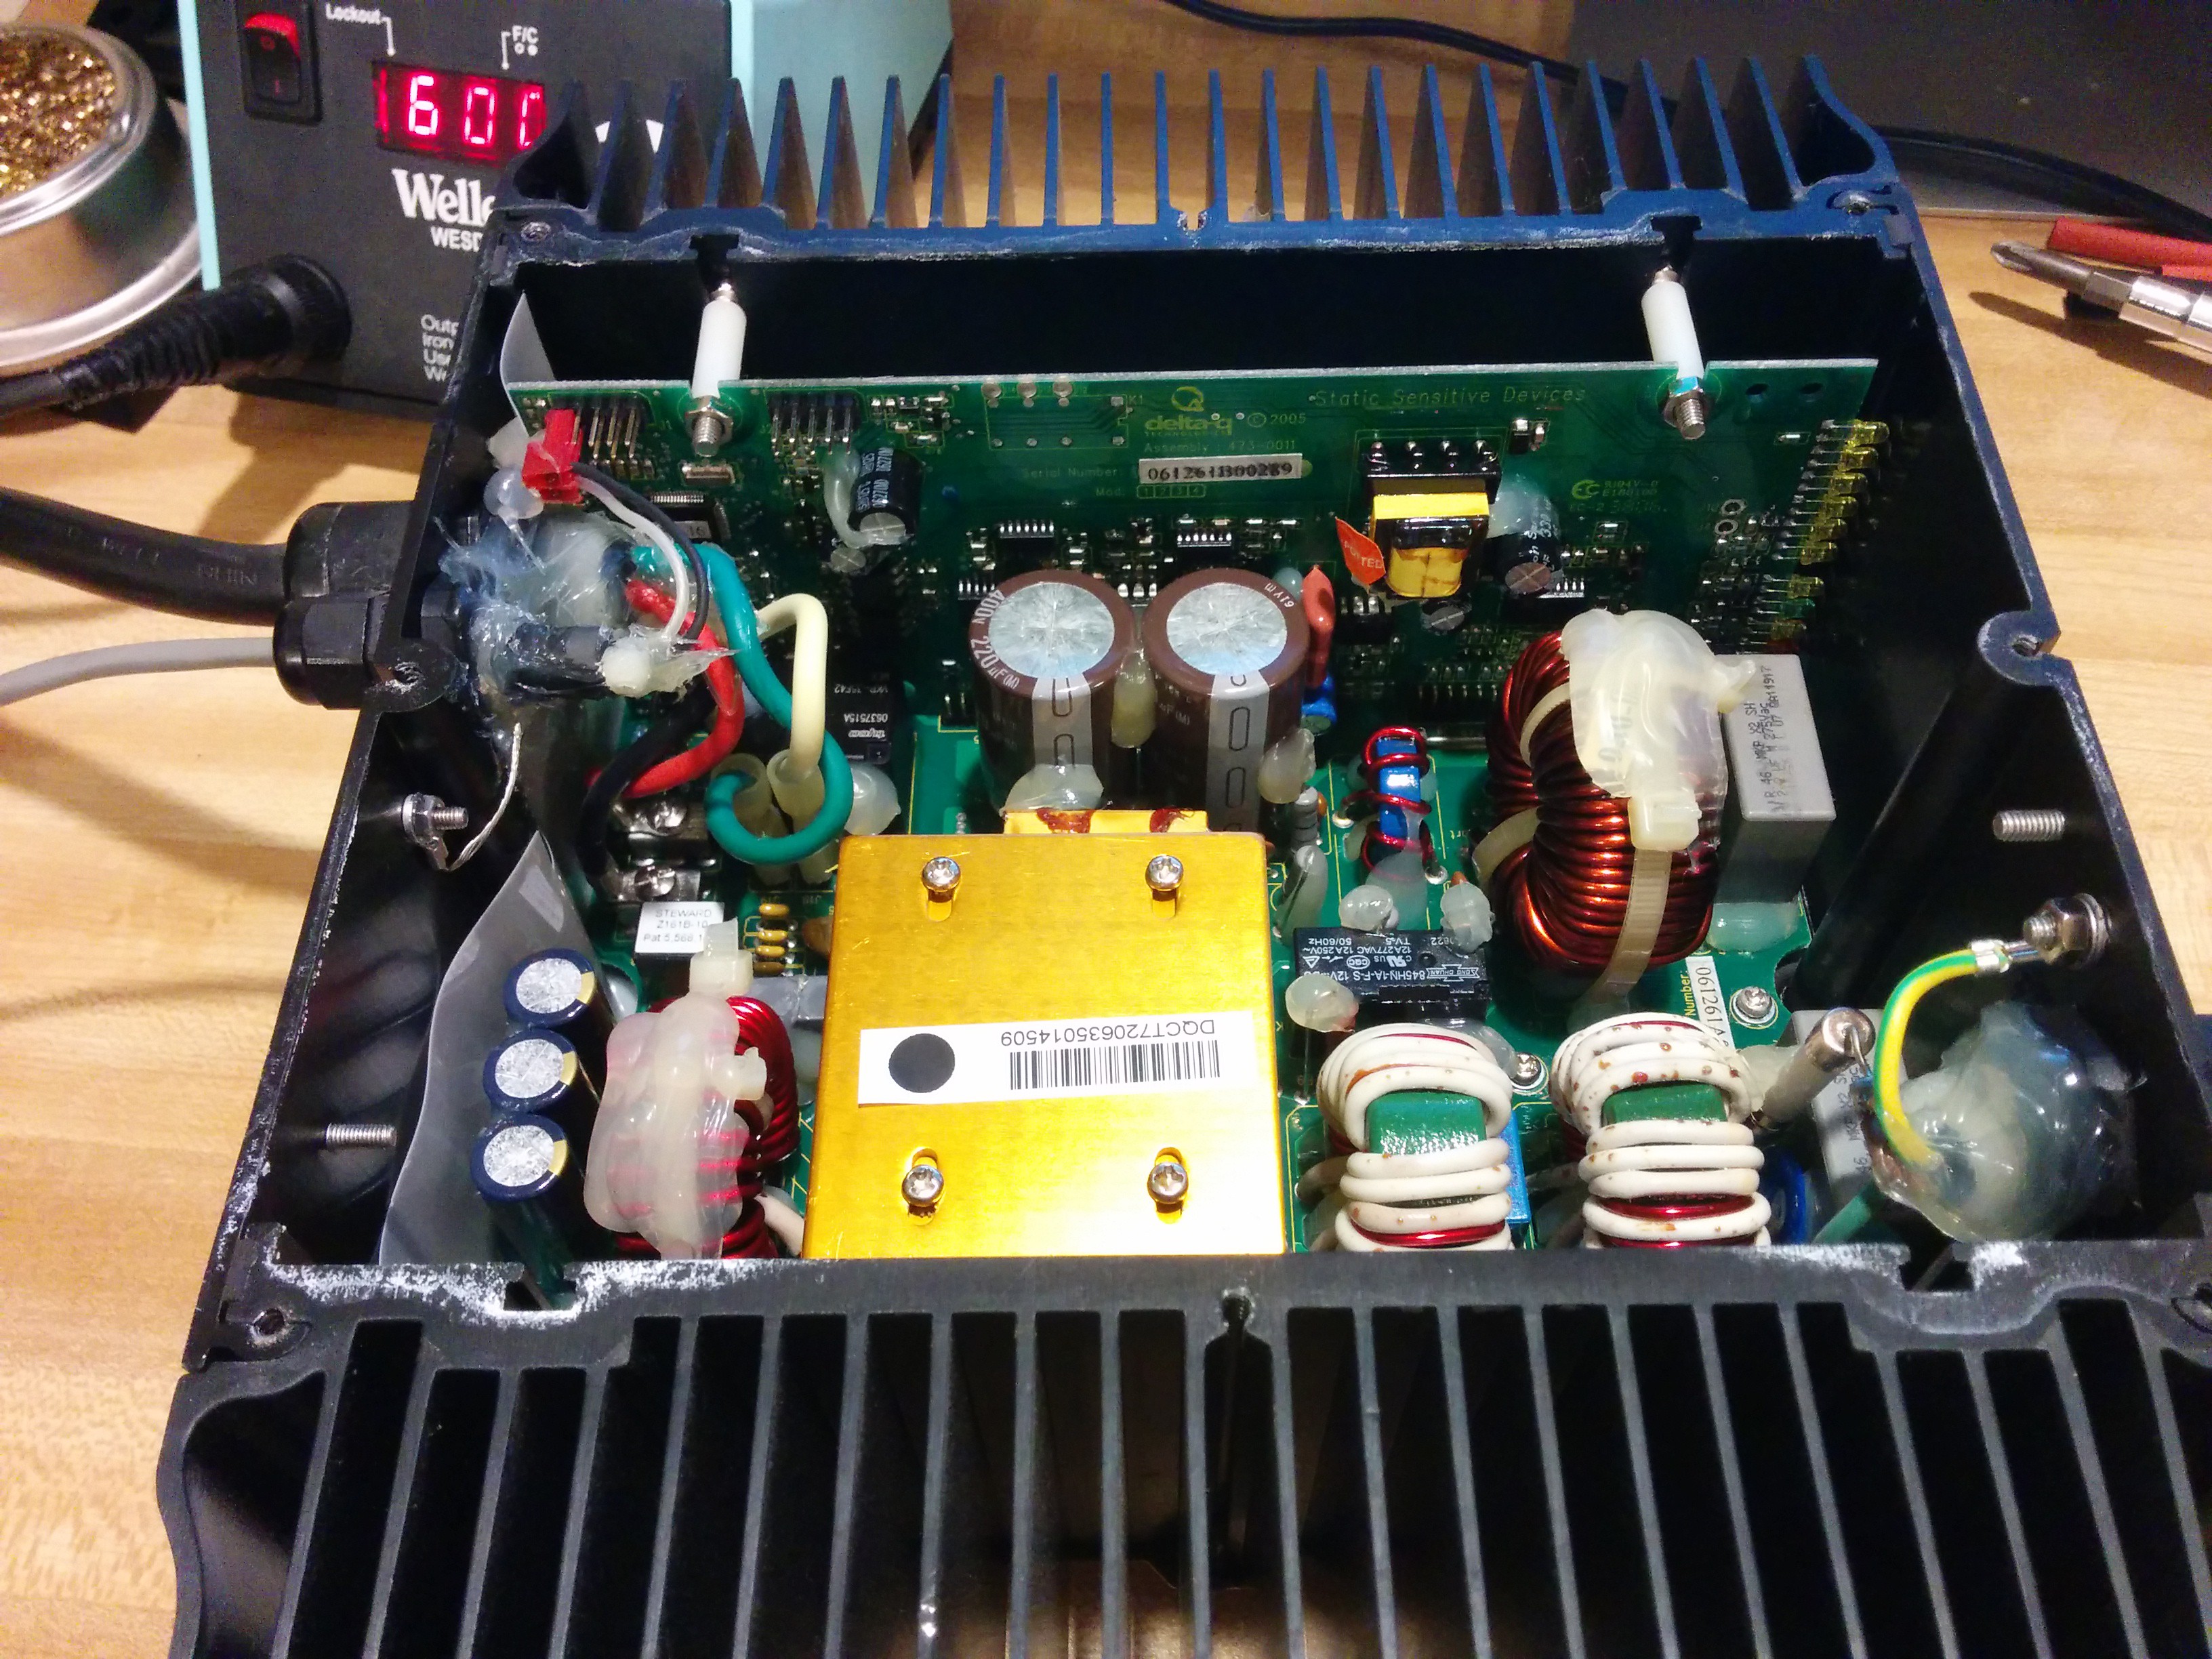
    Now it was time for step #2, open the charger. Remove the eight Phillips screws on the top of the unit, and the yellow cover will come off. It has a foam gasket, so it may be slightly stuck to the body of the charger.

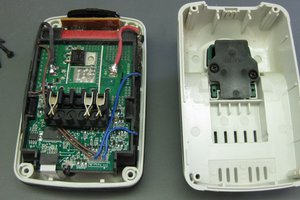
    You can see the charge and sensor wires entering the charger on the top left and the AC wires entering on the lower right. There is also a lot of silicone all over the boards to help prevent damage from vibration.

    Like I mentioned earlier, I pulled the clear wire on the sensor cable so that it was even with the black wire on the plug end.

    And this yielded a very nice looking sensor plug.

    Now, onto step #3, removing the AC panel. There are three screws on the bottom of the charger on the right side with the AC input wire. Remove them.

    This will then let the AC panel move around...

    Read more »

  • Problem Determination

    leadacid4412/04/2016 at 22:30 0 comments

    Like I mentioned in the previous log entry, the charger, while nice, didn't work. It was kind of strange, it would behave like it was working. The lights would blink, it would take *some* current (as shown by a Kill-a-Watt) but wouldn't actually charge the batteries.

    I took to using six independent 12v DC battery chargers while I was messing around with the charger. This let me keep going with the car for proof-of-concept testing. In fact, the car worked pretty darn good, so I was even more motivated to find out what was up with the charger.

    So like any good hacker, I took to the internet with a flurry of searches. I kind of half expected to see something about fuses, bad capacitors, and so forth, but it seems that there is a fairly common problem with the Delta-Q charger current-sensing shunts being badly soldered.

    http://www.electricforum.com/cars/golf-carts-neighborhood-vehicles-low-speed-vehicles/3202-bad-delta-q.html
    http://www.talkofthevillages.com/forums/all-about-golf-carts-things-156/delta-q-charger-repair-par-car-charger-63589/

    Considering the time when it was designed and built (circa 2005-2010) I wasn't terribly surprised by this. This was the time frame of RoHS, lead-free solder, and bad Chinese electrolytic capacitors. A bad solder job on the charger would kind of make sense.

    So like I said, I did some searching on the googles and found many references to 'repairs' that could be done on the charger. Apparently there was a current sensing shunt in it that had a known fault of a weak solder joint. If you whack the top of the controller, and the led lights changed their pattern, you had a likely candidate for repair. Okay, fair enough. Easy to test.

    In this video you can see me hitting the charger. You can hear the relays clicking and the lights flashing, and it sitting on the right-most LED. That indicates that it is sending the least amount of energy to the battery. (in this case, none). I then initially tried hitting it with a socket wrench, but that didn't have enough blunt-force trauma, and I didn't really want to damage the heatsink. So I just punched it. and as you can see the LED lights change. Essentially the shock of the hit causes the shunt to work properly for a few moments, causing the LEDs to go up (to the left), indicating more current being sent to the battery pack.

    Cool! Now I at least know what the problem is!

    The rest of the forums indicate that these are the 'repair' steps:

    Pretty much all of the instructions boiled down to these steps:

    1. Remove charger from vehicle,
    2. Remove 8 screws on top,
    3. Remove 3 bottom screws that secure the AC panel,
    4. Loosen the AC input panel and rotate 90 degrees to access the PC board,
    5. Locate the current shunt wire located where the PC board meets the LED board,
    6. There is a limited amount of solder on one end of the wire. Scrape the conformal coating until the wire is shiny and solder with 60/40 resin core,
    7. Reassemble by re-rotating the AC panel and install the bottom center screw until flush then complete the assembly.

    Sounds easy enough, let's get started.

  • The Delta-q QuiQ Charger

    leadacid4411/19/2016 at 21:58 0 comments

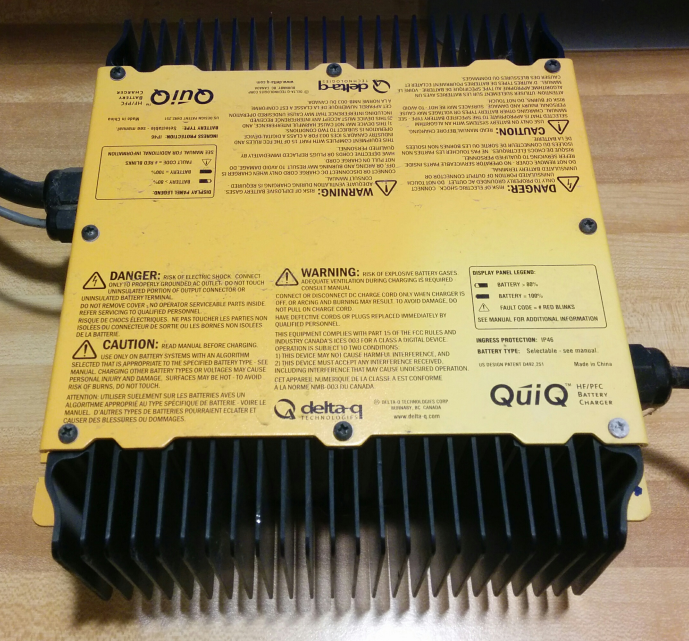
    The Zenn electric car comes with a delta-q QuiQ model 912-7200 battery charger. If mine weren't broken, I'd call it a pretty nice piece of equipment.

    This particular model is a 72v, 12A DC (~1000W) charger designed for lead-acid batteries. Delta-q sells a wide variety of different voltages and amperages. It is a so-called an intelligent charger, operating in several different modes to charge batteries intelligently. It also has the ability to support several different charge 'profiles', changing the charge behavior for different battery types.

    These chargers are, apparently, fairly common in electric vehicle applications. Examples include forklifts, golf carts, electric cars, and the like. And it is built in such a way as to support both on and off-board installation. Nice.

    On my car, it was using an interlock feature to prevent the car from moving while connected to AC power, and I believe a temperature sensor connection.

    There are more specs in the manual here.

    Operation of the charger works pretty much like you would expect. Plug it in, and it starts charging the attached battery pack. Leave it plugged in and it will go into a maintain/float charging mode. When plugged into AC power, it triggers an interlock preventing the car from driving away. However, in my case, it just makes a few clicks and ultimately does nothing. The interlock seems to work, and it appears to go through the paces of trying to charge a battery pack, but I see no increase in battery pack voltage, and very AC watts drawn, both of which would indicate charging.

    I initially thought that perhaps it was set for a very different battery chemistry, which would cause it to not charge, thinking that the battery pack was already full, or so low that it wouldn't try charging to prevent damage. Setting the battery type is a fairly interesting process. You start with the charger disconnected from the battery pack. Connect to AC power and wait for a few second, it will then use the LEDs on the side to flash the battery charge algorithm number. Once it does that, connect the pack for a few seconds to put it into a 'programming' mode, and then touch the battery connector for a moment to cycle one step through the installed battery profiles. Perform no action for about a half-minute to indicate you are done, and it saves the settings to its internal flash memory.

    So like I said, when I took a look at mine, I assumed it wasn't charging because of a different battery style. So I went through the programming process and found that it was configured for the 'Discoverer AGM' battery pack, #43. Which would make sense as that was the original battery pack sold with the car. However, that did not match the old Interstate flooded cells in the car. Apparently whomever put those in there didn't think (or even know) to change the battery charge profile from a gel battery to a flooded battery. Well, since mine was now a flooded cell pack, I changed it to the 'Trojan 31XHS' flooded battery pack model, #5, with float finish. This most closely matched my new Exide pack. There was also algorithm #62, which is a DV/DT finish, but my charger was not programmed with that one.

    Well, enough about the charger, why won't it work?

  • Introducing the ZENN Electric Car

    leadacid4411/19/2016 at 21:40 0 comments

    In late summer, a good friend of mine sent me a link to a CraigsList ad for a Zenn electric car about 30 miles from my house.

    Wikipedia has this to say about the car:

    ZENN (Zero Emission, No Noise) is a two-seat battery electric vehicle that was built by ZENN Motor Company of Canada from 2006 to 2010, designed to qualify as a neighborhood electric vehicle (NEV). It has a range of up to 40 mi (64 km) and is speed-limited to 25 mph (40 km/h).

    The vehicle is based on the Microcar MC2,in production in France since the early 2000s, and produced under license from Microcar's parent company Bénéteau. The Microcar MC2, and the short wheelbase MC1, are sold in Europe with 500cc diesel engines, and are considered "Quadricycles" there.

    Electric power is stored in six 12V lead-acid gel batteries, which has a recharge cycle of 8 hours. Valve regulated (low maintenance) lead-acid AGM cells were available at extra cost initially, then included as standard equipment in later models.

    Also optional were a retractable fabric sunroof, air conditioning, floor mats, and audio entertainment center. The vehicle originally was built with a DC motor and GE controller, and in 2008 was modified with an AC motor and Curtis controller. The AC motor was stated to be better for hill climbing, initial acceleration, and overall performance.

    The Craigslist ad was for a 2008 model Zenn that was in fairly rough shape. It needed new batteries, needed a new tail-light, had some body damage, and hadn't been powered on since 2011. It was untested and in unknown operating condition, mostly because we didn't have a pile of batteries laying around to test drive it.

    I was told that it had been used by a local public-works department for meter reading and had a little over 3000 miles on the clock. The best part? It was cheap. And I mean crazy cheap. Go look up what these things typically sell for today. Take a zero (or two) off the end of that price and you can see how cheap it was. The lady that owned it (second-hand from the utility) simply wanted it gone. (Also, if you happen to see the bonkers original selling price, you'll see why it failed as a product.)

    Well, I gave the lady a call and we agreed on a time to go over and take a look. I pretty much fell in love with it. I knew I wanted it, and I was willing to pay the price. A few bills exchanged hands and I was the proud owner of my newest money pit^h^h^h^h^h^h^h^h project.

    Getting it home was entertaining. I couldn't exactly drive it home, and I couldn't leave it there. I talked to my buddy and he agreed to help me transport it.

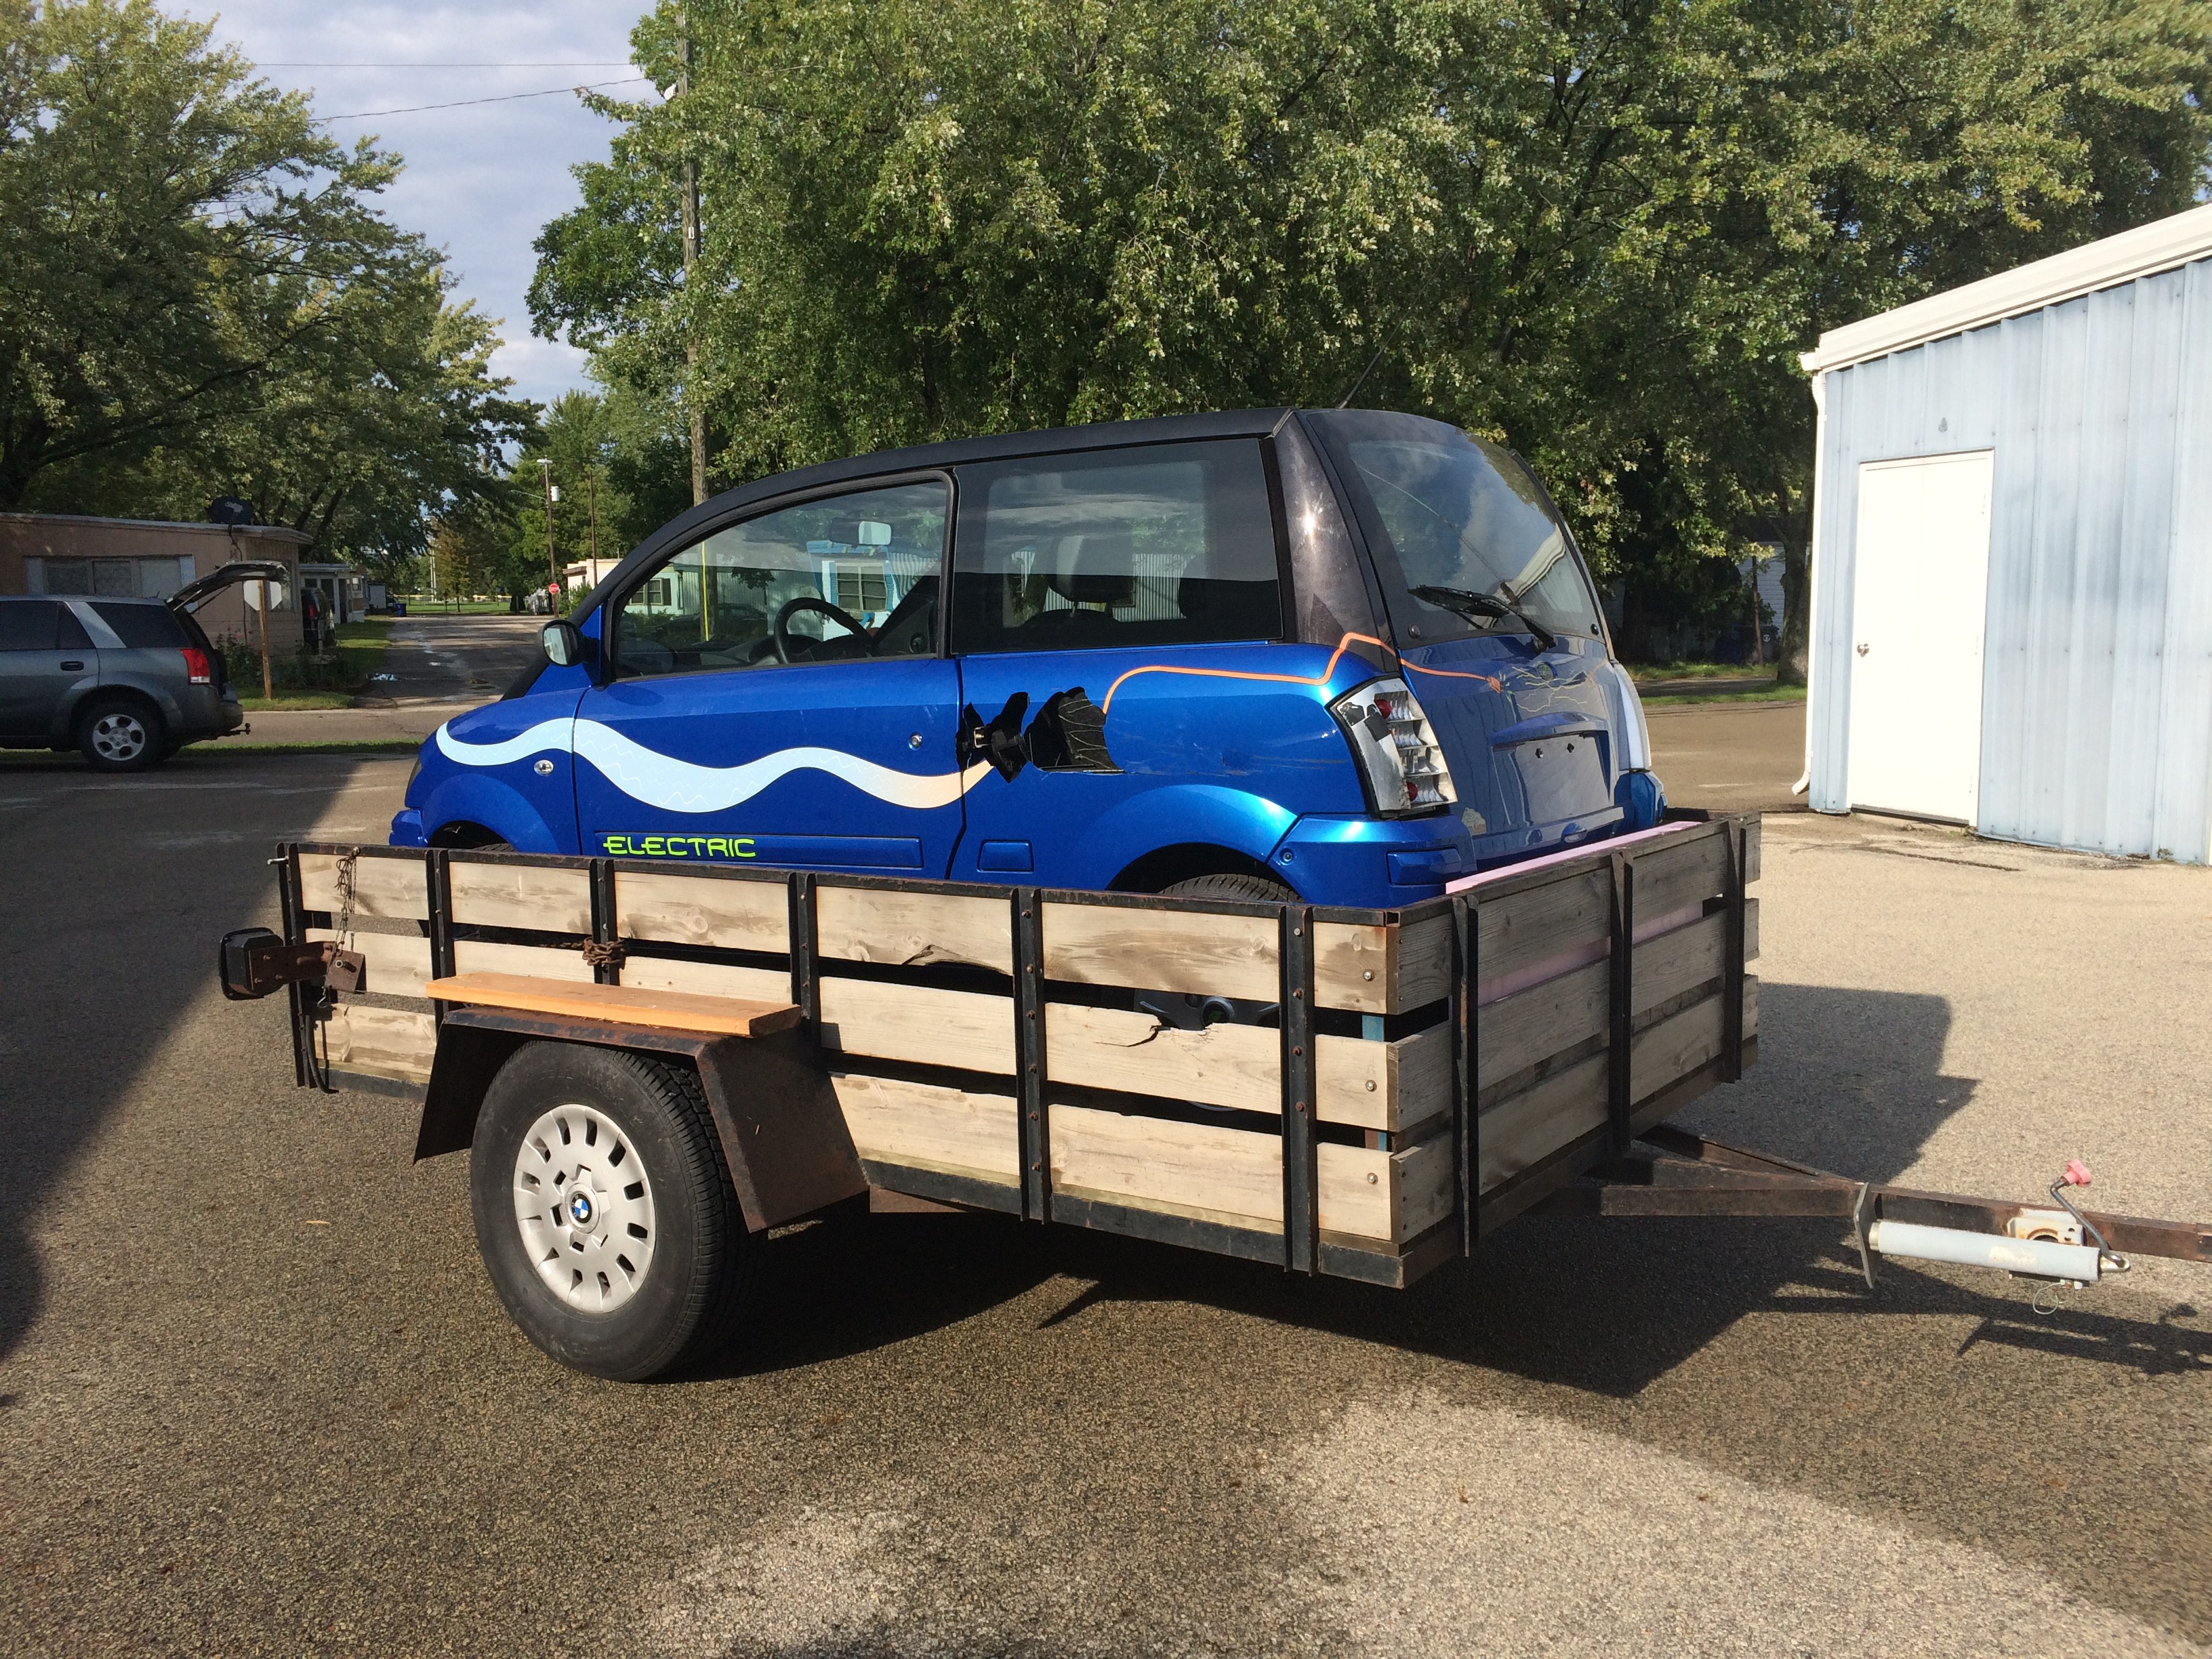
    Because of its small size, light weight, and the fact that you can roll it around in 'neutral' without electrics, we just put it on the back of a trailer! This picture is a great example of just how small it actually is.

    You can also see some of the damage on the driver's side by the door handle. Apparently at some point in its history, someone backed into it, breaking the plastic on that side.

    Once I had it back to my house, I got to digging into it. This is the new(er) model that has the AC motor and Curtis controller, rather than the older DC motor and GE controller. It has a Delta-Q QuiQ charger on-board. Has six 12v batteries ( two under the hood, four in the trunk) making up the 72v battery pack. It is about 10 feet long, 5 feet wide, weighs about 1800lbs, and has a 'space-age' frame made up mostly of aluminum, plastic, and glue. It seats two, and has a rear hatch with a surprising amount of storage space. It has heat, air-conditioning, a radio, seat belts, wipers, rear defogger, power windows, power locks, and central locking. It really does look like a real car. About the only 'modern' thing it is lacking is airbags. It has a top speed (governed) of 25 miles per hour, and with its original battery pack, should get 30 miles on a single charge.

    I farted around with it for a month or two while I investigated batteries. What to get? Lead-Acid? Lithium? Something more...

    Read more »

View all 5 project logs

Enjoy this project?

Share

Discussions

troy.pamungkas wrote 09/10/2020 at 14:41 point

Is there anyone can help me by assisting  how to fix my charger, since it doesn't work after lightning struck. Please.

  Are you sure? yes | no

paruelle wrote 12/25/2017 at 20:07 point

This posting along with the pictures was all I need to get my CarPac Delta-Q charger working again. It showed the same failure symptoms and thought this might work and it did! Thanks for the post.

  Are you sure? yes | no

Fred Frey wrote 12/07/2017 at 21:31 point

Thanks for posting this! I'm about to tackle the same project as the charger in my Western Golf cart has the same charger. I tap the charger with a block of wood to get it to charge at the moment. 

  Are you sure? yes | no

Similar Projects

Does this project spark your interest?

Become a member to follow this project and never miss any updates