 Splendide_Mendax
-
1Background of Model Training
![]()
The workflow of how TensorFlow (TF) lite works is quite simple:
- Firstly, we are using TensorFlow on Google Colab to train a deep learning model/algorithm,
- To generate a TF Lite for the microcontroller, this quantized model will be converted into a C source file that is capable of TF Lite.
- This converted model is light weighted and small enough to be computed by TF Lite that working on a microcontroller.
- Lastly, TF Lite will load this "model.c" file and do the real-time onboard computation.
This Hello World example is using a rather simple model
-
2Hello World Model Explaination
- This Model takes a value between 0~2PI as input
- The input data will be fed into a neural network model which can be treated as a magic “black box”
- Then output a value between -1 to +1,
In another word, this NN will be trained to model data generated by a sine function. This will result in a model that can take a value: x, and predict its sine result: y.
I have put the link to a detailed explanation of how to train the NN model for this example in the description below, feel free to check it out and train your own model: https://colab.research.google.com/github/tensorflow/tensorflow/blob/master/tensorflow/lite/micro/examples/hello_world/train/train_hello_world_model.ipynb#scrollTo=aCZBFzjClURz
-
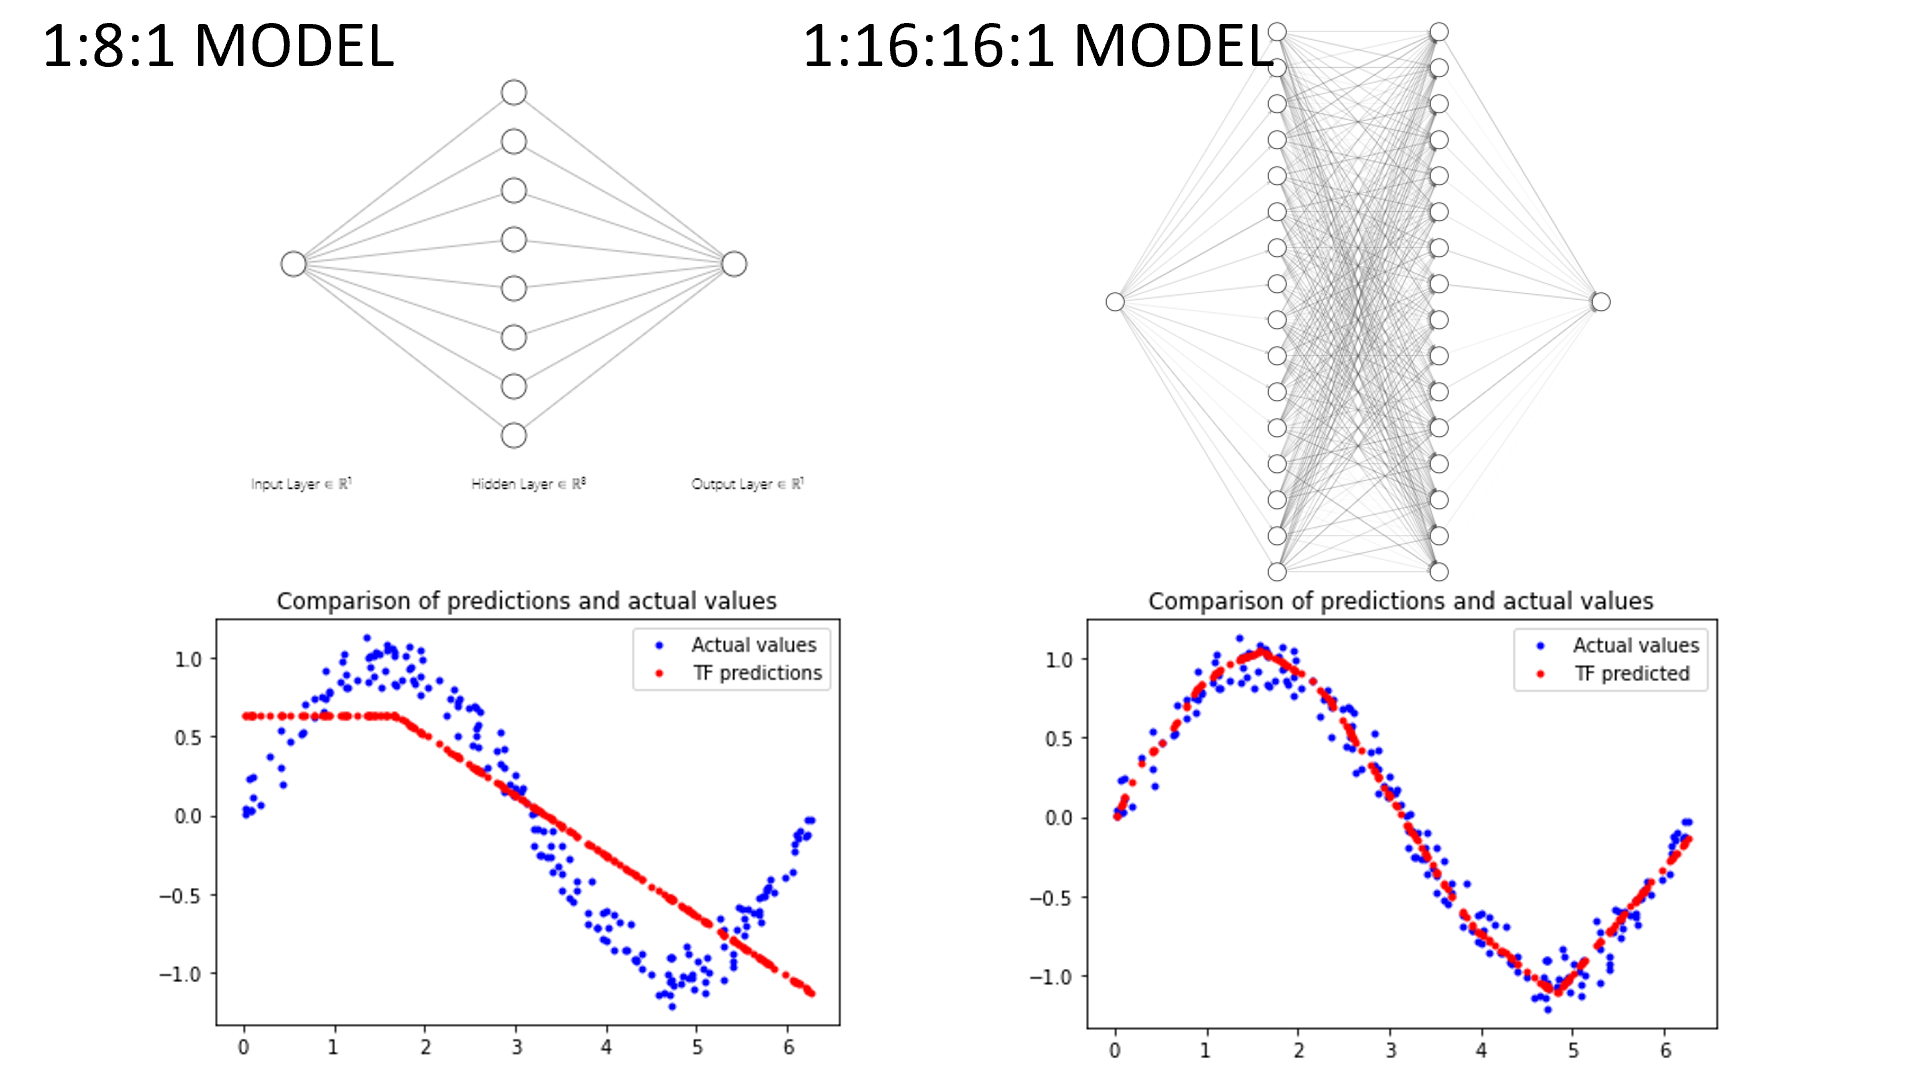
3Model Comparison
Deep learning networks learn to model patterns in underlying data
Both number of hidden layers and the number of hidden neurons will affect the prediction results.
The 2 images above are showing 2 different NN structures, the model on the left is using 1 hidden layer with 8 neurons inside
The model on the right is using 2 hidden layers, each hidden layer contains 16 neurons
Comparison of the prediction and actual values are shown in the 2 images below: the actual values are shown in blue dots, while the TF prediction is shown in the red curves.
Apparently, the prediction result of the model with more hidden layers and a greater number of hidden neurons has a better prediction result. But this statement is not always true, but it fits in our case. Therefore, we are going to use the model on the right for the hello world example.
PS: The model on the right is a better choice, but still not good enough. as you can see the prediction result between 4.6 to 6 is almost a linear relationship. This means this model can still be modified to a better version.
-
4Install TensorFlow Lite zipped library
Download the Ameba customized version of TensorFlow Lite for Microcontrollers library at https://github.com/ambiot/ambd_arduino/tree/master/Arduino_zip_libraries. This library is original from TensorFlow Lite GitHub, we have modified it to be capable of working with Ameba boards.
Follow the instructions at https://www.arduino.cc/en/guide/libraries to install it.
Ensure that the patch files found at https://github.com/ambiot/ambd_arduino/tree/master/Ameba_misc/ are also installed. -
5Compilation and upload
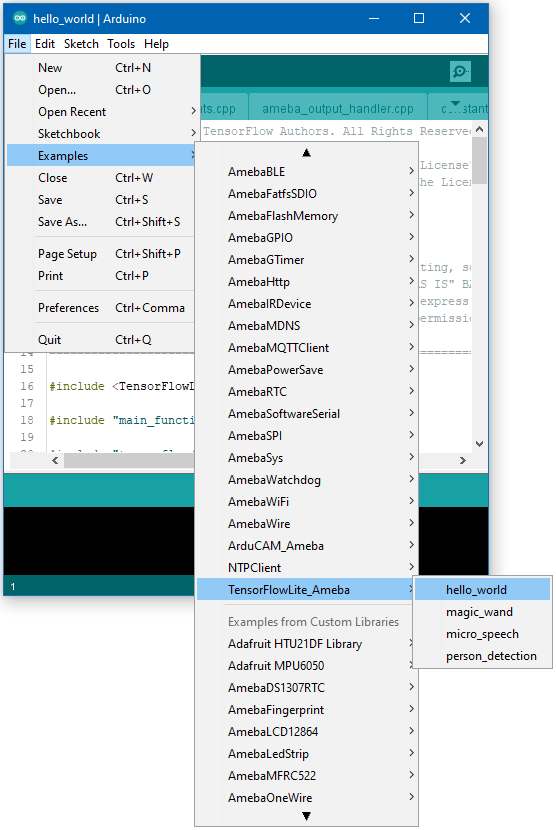
Open the example, “Files” -> “Examples” -> “TensorFlowLite_Ameba” -> “hello_world”.
![]()
Upload the code and press the reset button on Ameba once the upload is finished.
-
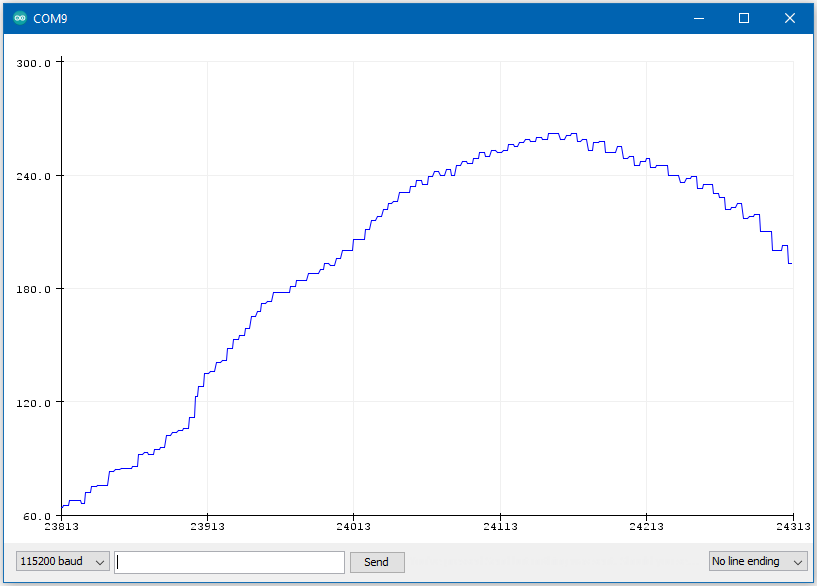
6Testing with LED
Connect the LED to digital pin 10 and ground, ensuring that the polarity is correct. You should see the LED fade in and out rapidly.
In the Arduino serial plotter, you can see the output value of the Tensorflow model plotted as a graph, it should resemble a sine wave.
![]()
-
7Code Reference
More information on TensorFlow Lite for Microcontrollers can be found at: https://www.tensorflow.org/lite/microcontrollers
-
8More References
Please visit the following websites for more details about the board & other examples:
- AmebaIoT Official Website: https://www.amebaiot.com/en/
- AmebaIoT Official FB Page: https://www.facebook.com/groups/AmebaIoT
- AmebaIoT Forum: https://forum.amebaiot.com/
AMB21/22/23 TensorFlow Lite - Hello World
This project demonstrated how to apply a simple machine learning model trained via Google Tensor Flow, and transfer it to AMB21/22/23 board

Discussions
Become a Hackaday.io Member
Create an account to leave a comment. Already have an account? Log In.