Daniel Karpantschof
-
PCBWay Sponsorship
02/18/2022 at 10:04 • 0 commentsHey there!
I was waylaid by covid and spent the past two weeks out of commission. Still can't taste coffee. Thankfully it still works.
Liam from PCBWay got sight of the project, and reached out to me. They want to sponsor PCB-manufacturing, which is really lovely! That should make things easier.
Looking forward to work with them :)
-
Display
02/04/2022 at 10:22 • 0 commentsThe SSD1306 16 x 2 LCD fits so well, but doesn't offer much in terms of functionality. Any ideas?
![]()
-
3.5mm Audio Jack
02/01/2022 at 12:41 • 0 commentsI'm considering adding a 3.5mm audio jack to the build.
While it would require modification of the Advisor chassis (which I really don't want to), it could add some neat features and functions, using the onboard DAC, such as using the device as Spotify/Google Music walkman.
Just a thought.
-
Controller, Language, Display and Power
01/31/2022 at 23:02 • 0 commentsController and Language
I've decided to go with a PyBoard Series-D. Micropython seemed like a good language for this project and wanting to support the Micropython project, I went with an original PyBoard.
Display
Upon tearing down the Advisor, I had hoped, and successfully so, to discover which LCD is being used, and ideally use the same one.
Alas, the DUREL 51052-E01 display is impossible to find support and tech specs for (it's 30 years old... not surprised).
I have ordered a handful of displays that seemingly fit both specs and dimensions, and will do some testing.
There are some dimensions that are annoying, but going with I2C for still gives us a good variety to select from.
Power
The chassis is designed for a single AAA battery. I would love to keep that form factor for power, but 1v5 doesn't give us a lot to work with. Even with a DC-DC step up converter, a single AAA traditionally provide is with ~1000 mAh. I'll probably end up with lithium based battery pack instead, but let's see what we can do.
-
Teardown
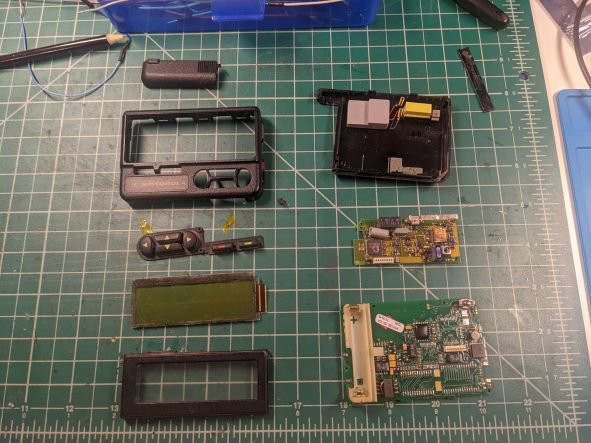
01/31/2022 at 22:43 • 0 commentsOpening the Advisor is super easy. It is built super robust, but also very easy to service.
![]()
In the left column you'll find the front, including the LCD display (DUREL 65R62890A02 5277 // 51052-E01).
In the right column, from the top, you'll find the backplate, with vibration motor and to spring connections, the comms board with POCSAG decoder, and at the bottom the mainboard and AAA battery holder.
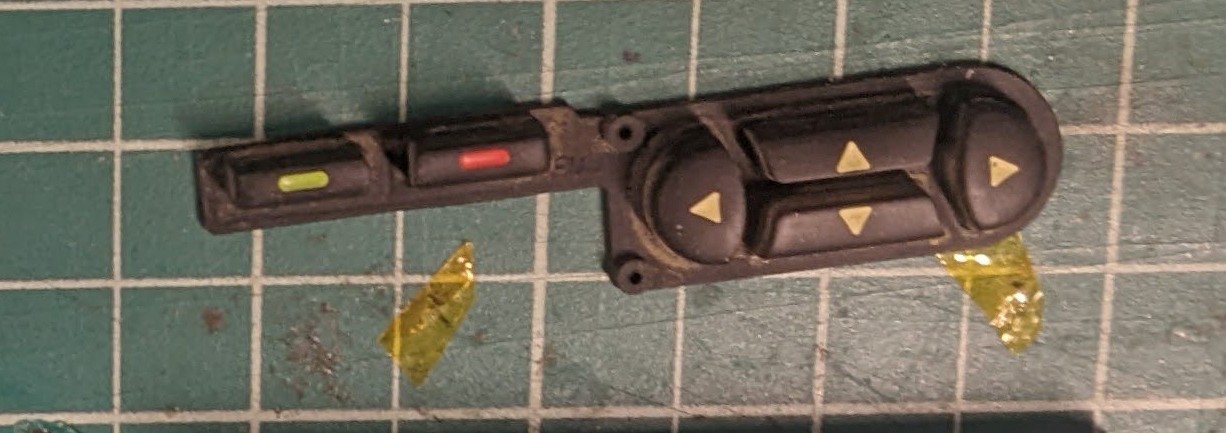
PCB Front
![]()
The front of the main PCB holds the pads for the membrane buttons. From left to right:
- Green Selection Key
- Red Escape Key
- D-Pad Left
- D-Pad Up
- D-Pad Down
- D-Pad Right
![]()
In the upper right corner you will find a cutout of the PCB to hold a small momentary switch for the main function key/power key
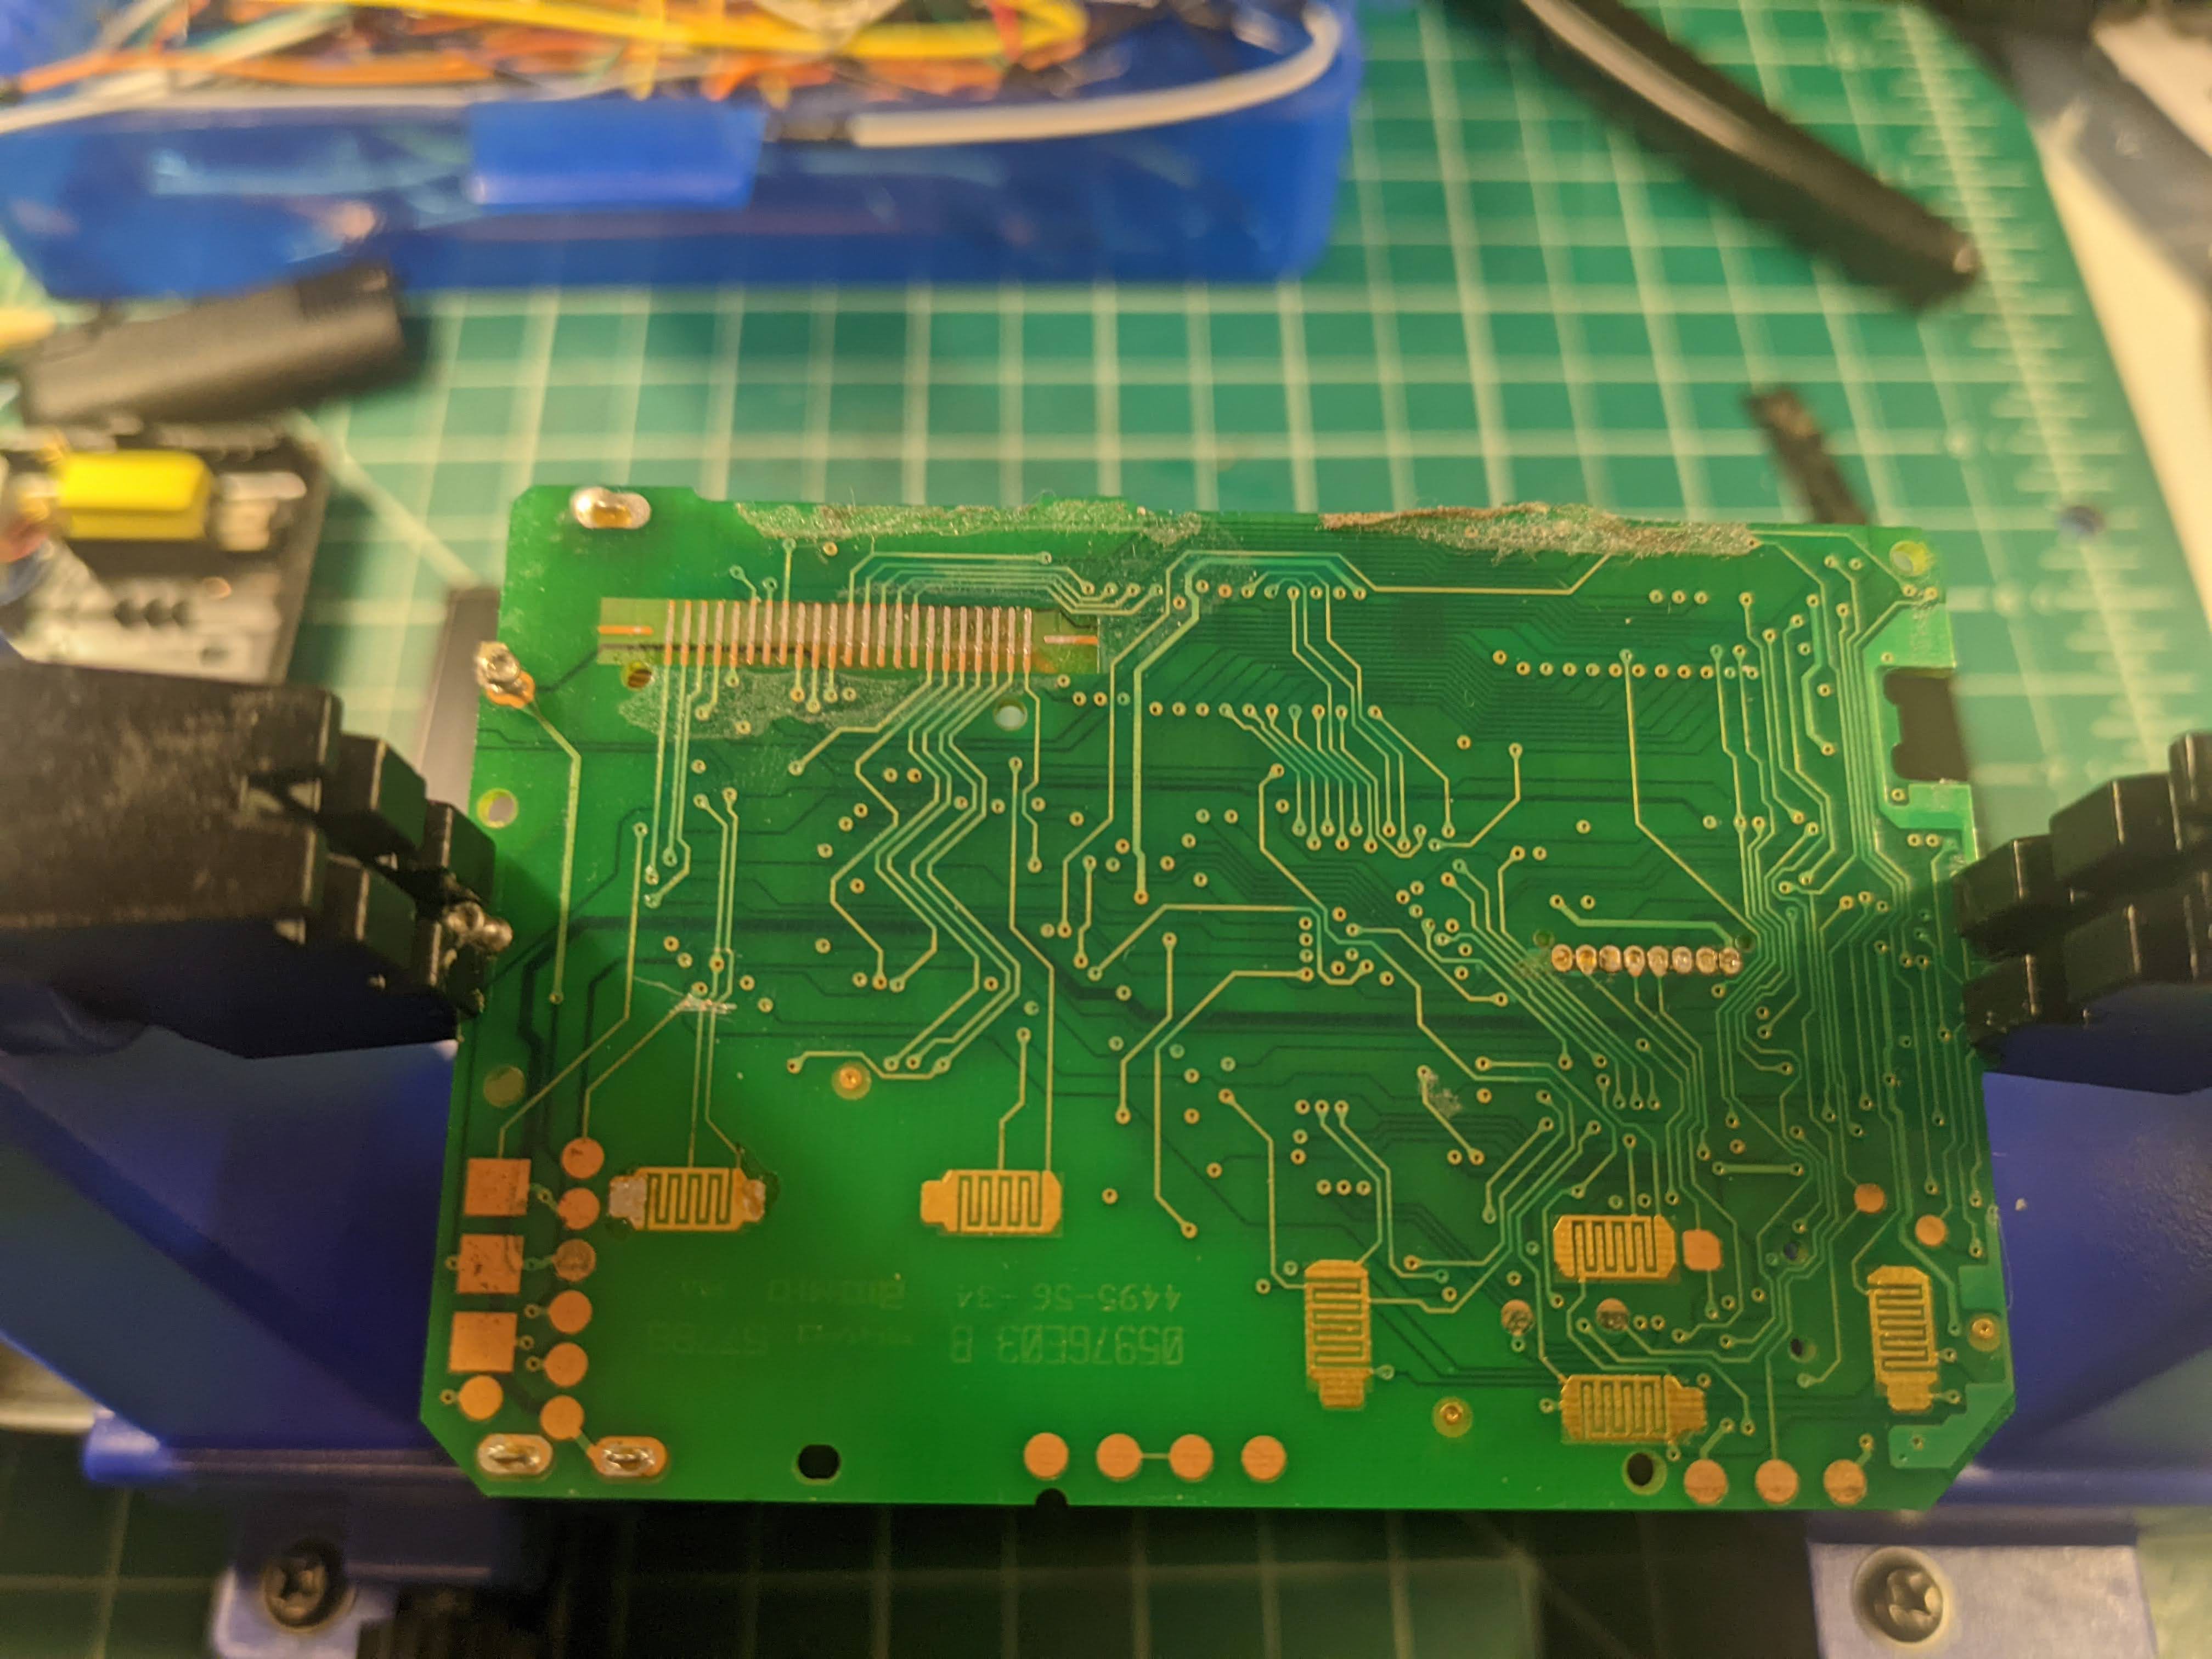
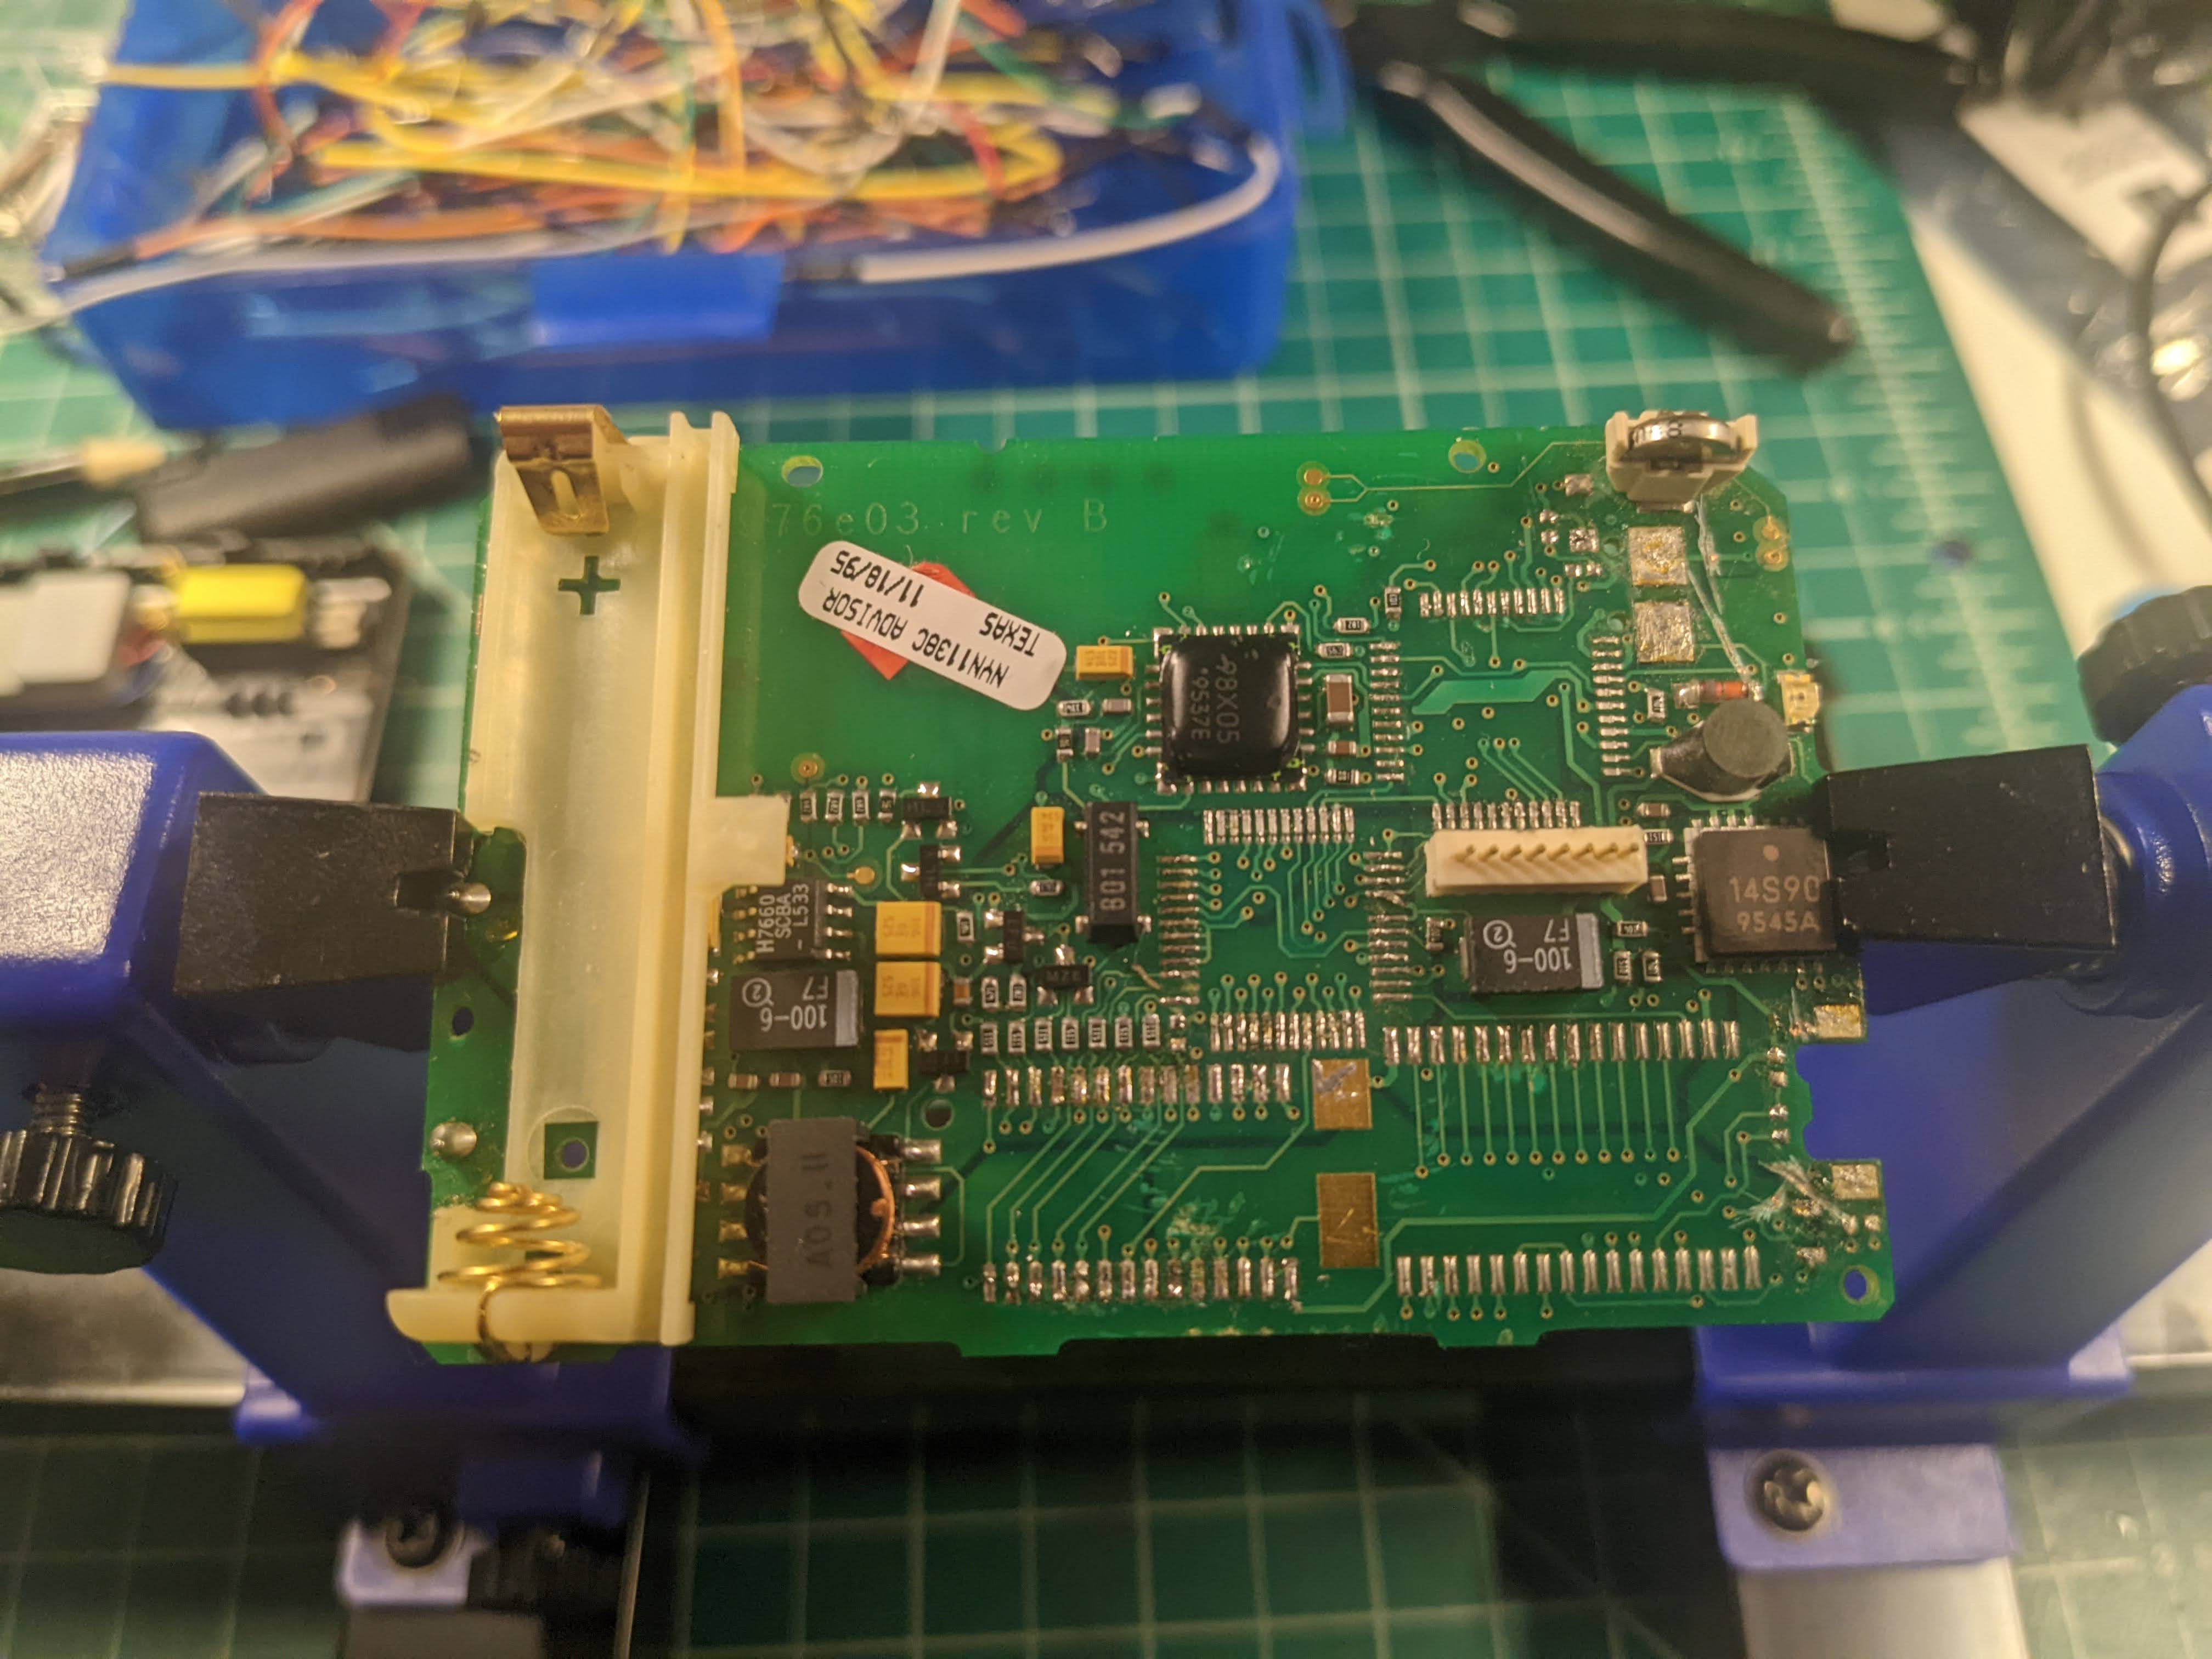
PCB Back
![]()
Notice: I've removed most of the ICs on the board.
The back holds the battery on the left. The white header in the middle, towards the right, is for the comms board.
There is a backup battery in the upper right corner, and just south of that, you will find the two solder pads for the piezo beeper (removed). Southeast of that is the onboard red LED and immediately south of that the cutout and two pads for the power button. West of that are two large pads for the connection to the vibration motor.
A more in-depth teardown can be found here: https://goughlui.com/2016/01/15/tech-flashback-motorola-advisor-pocsag-5121200bps-pager/ as well as how to reprogram the POCSAG board -- if that's your jam
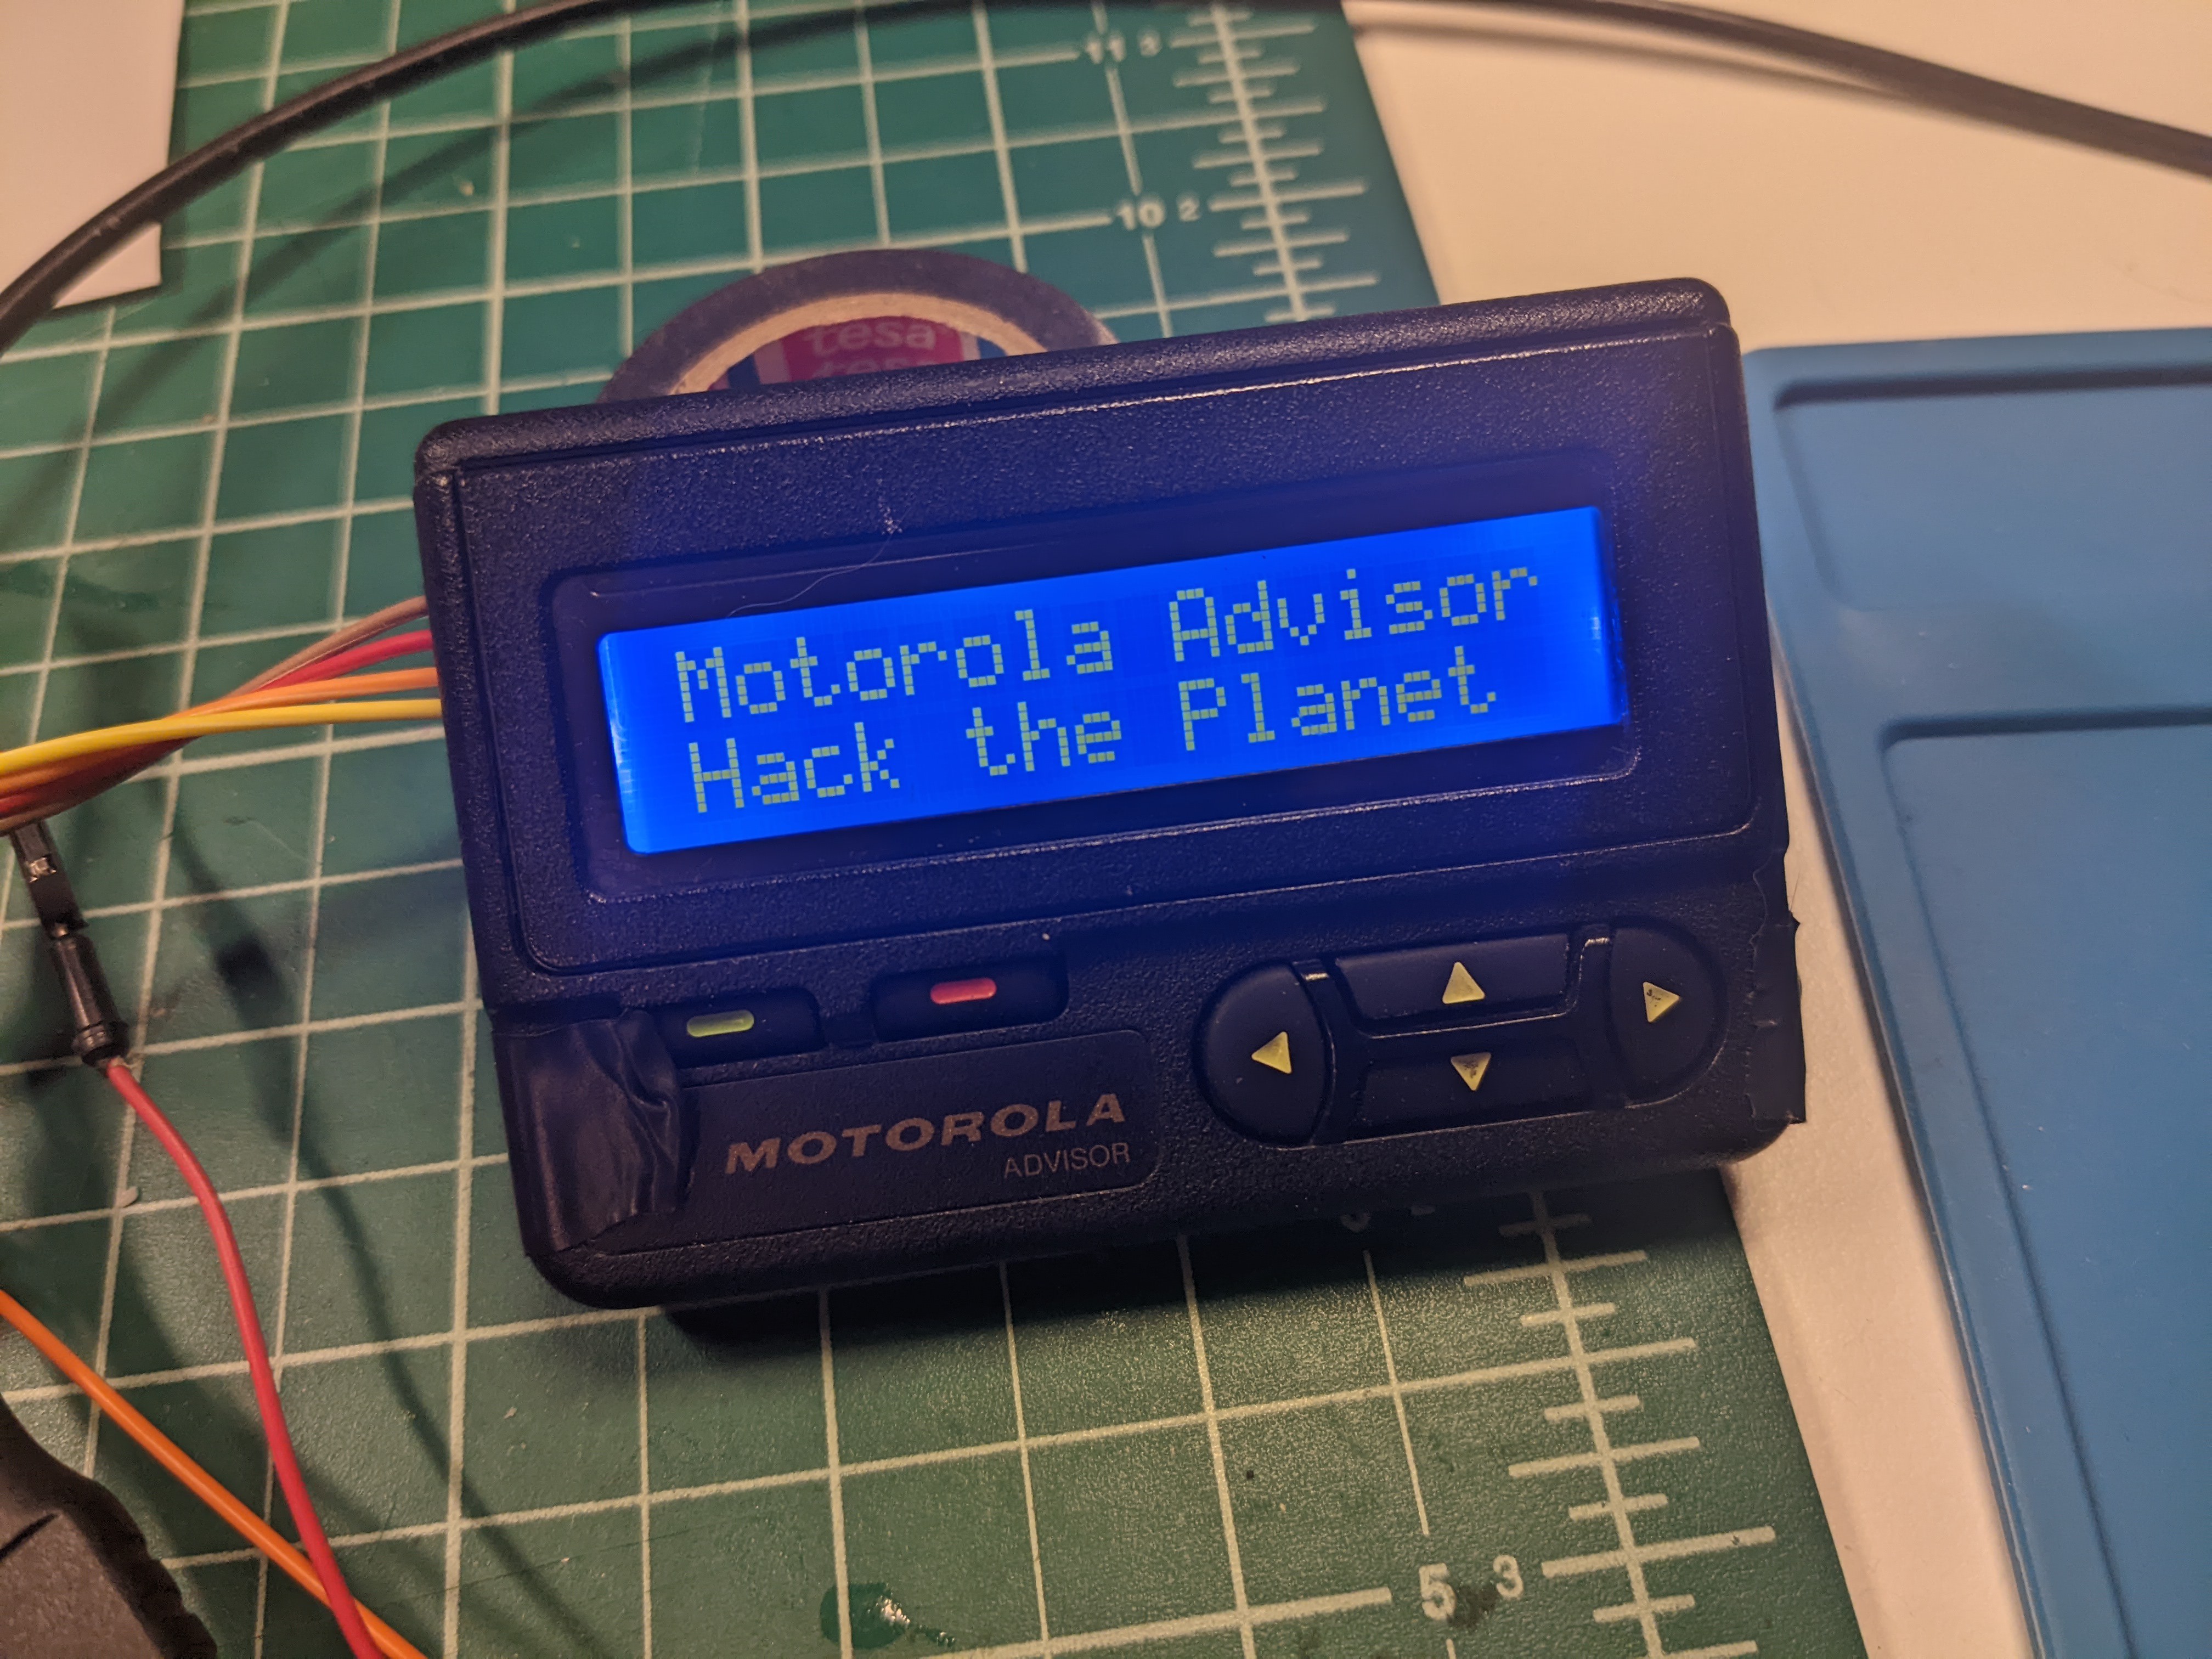
Motorola Advisor Connected Device
The Motorola Advisor was good enough for Cereal Killer, Acid Burn, Crash Override and The Plaque. Let's do something interesting with one.