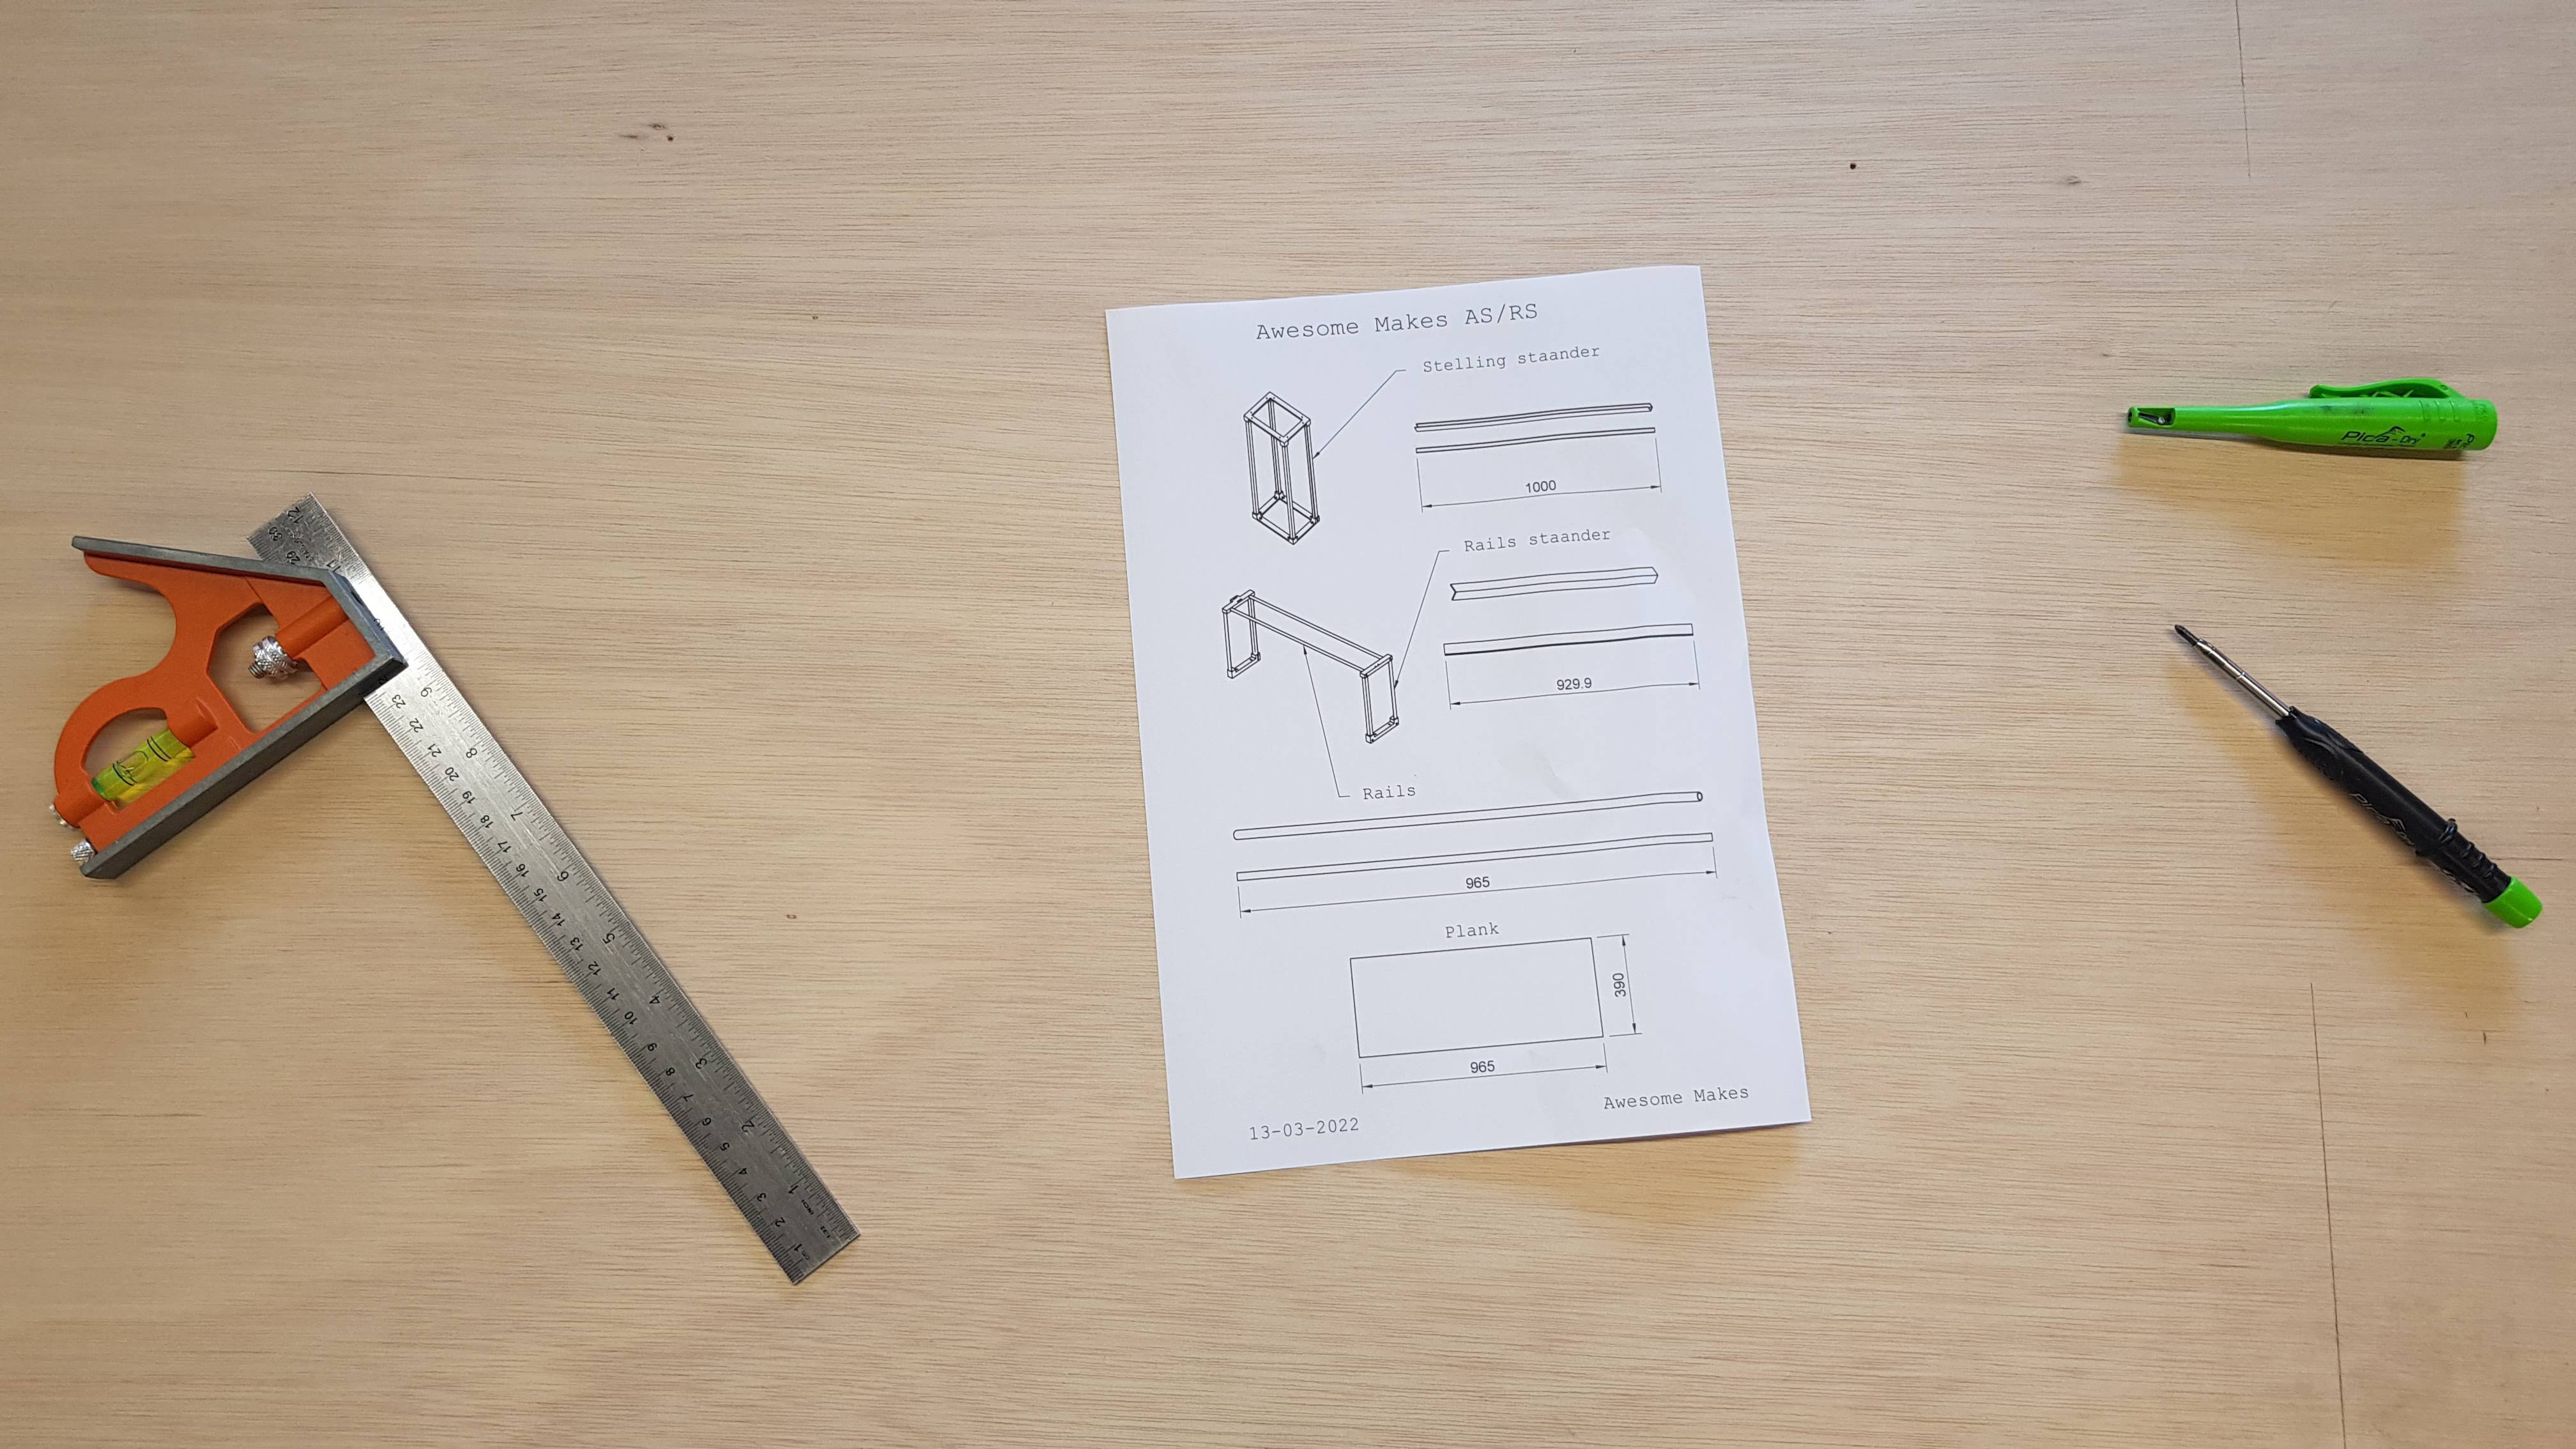
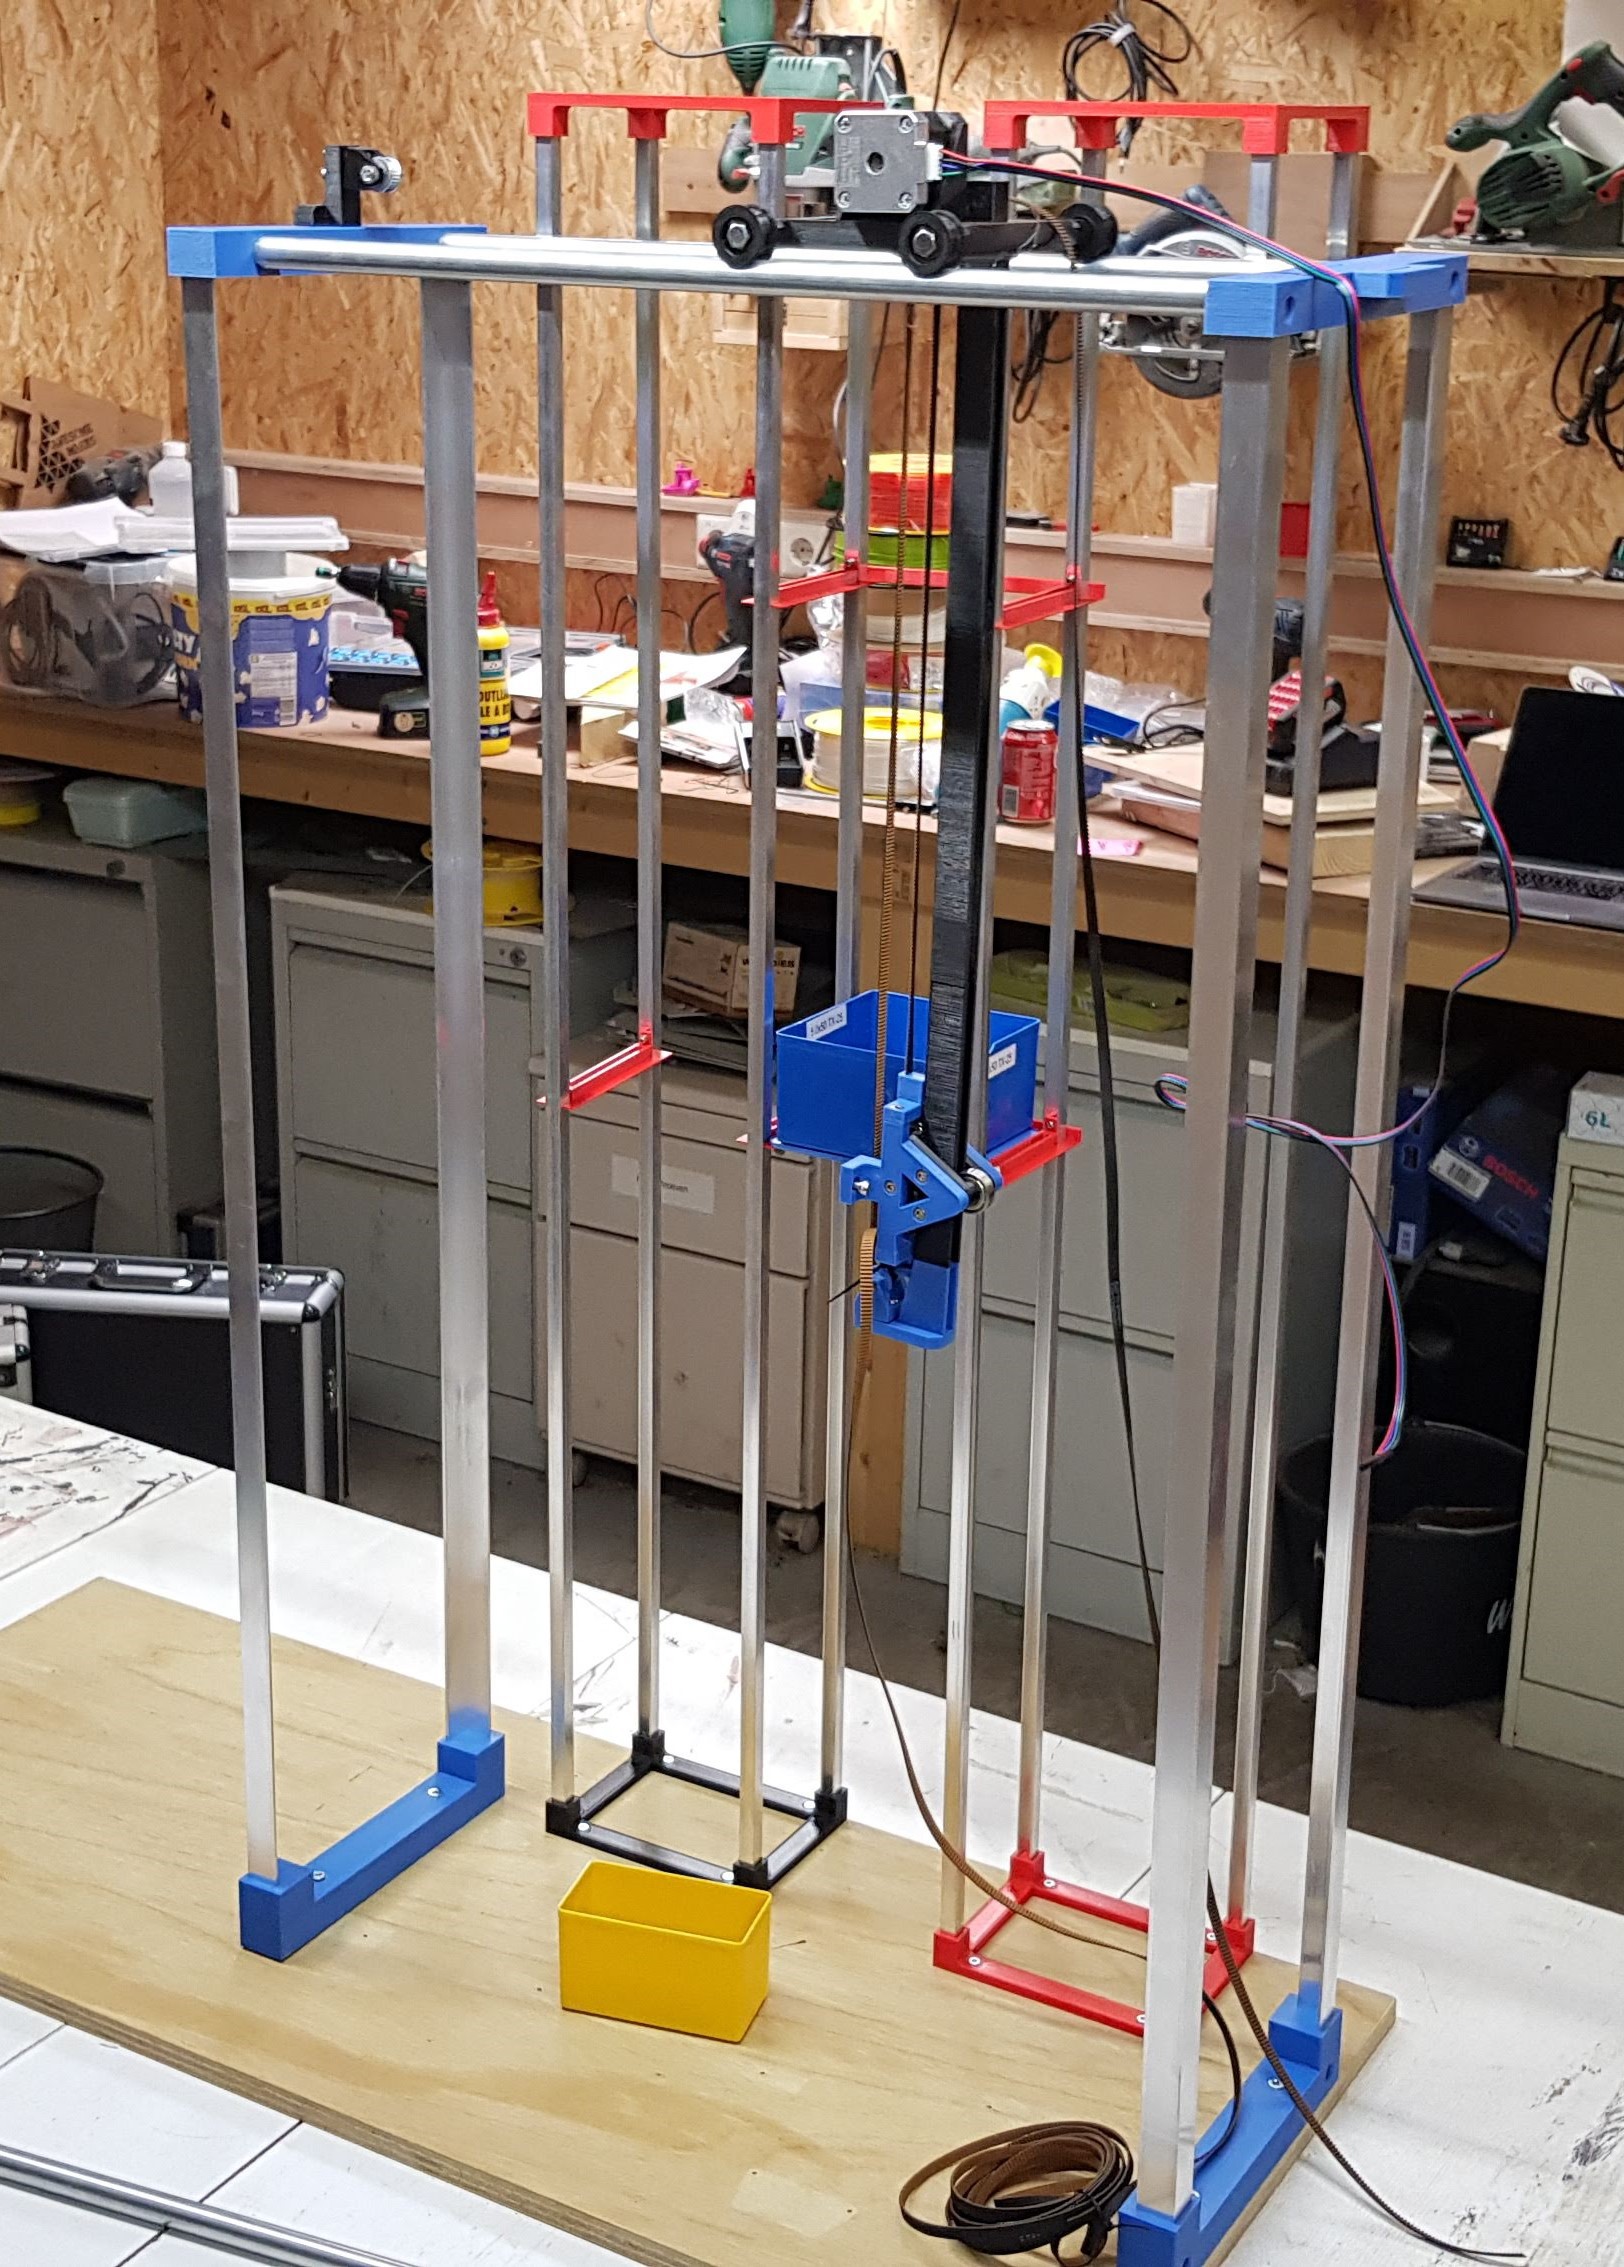
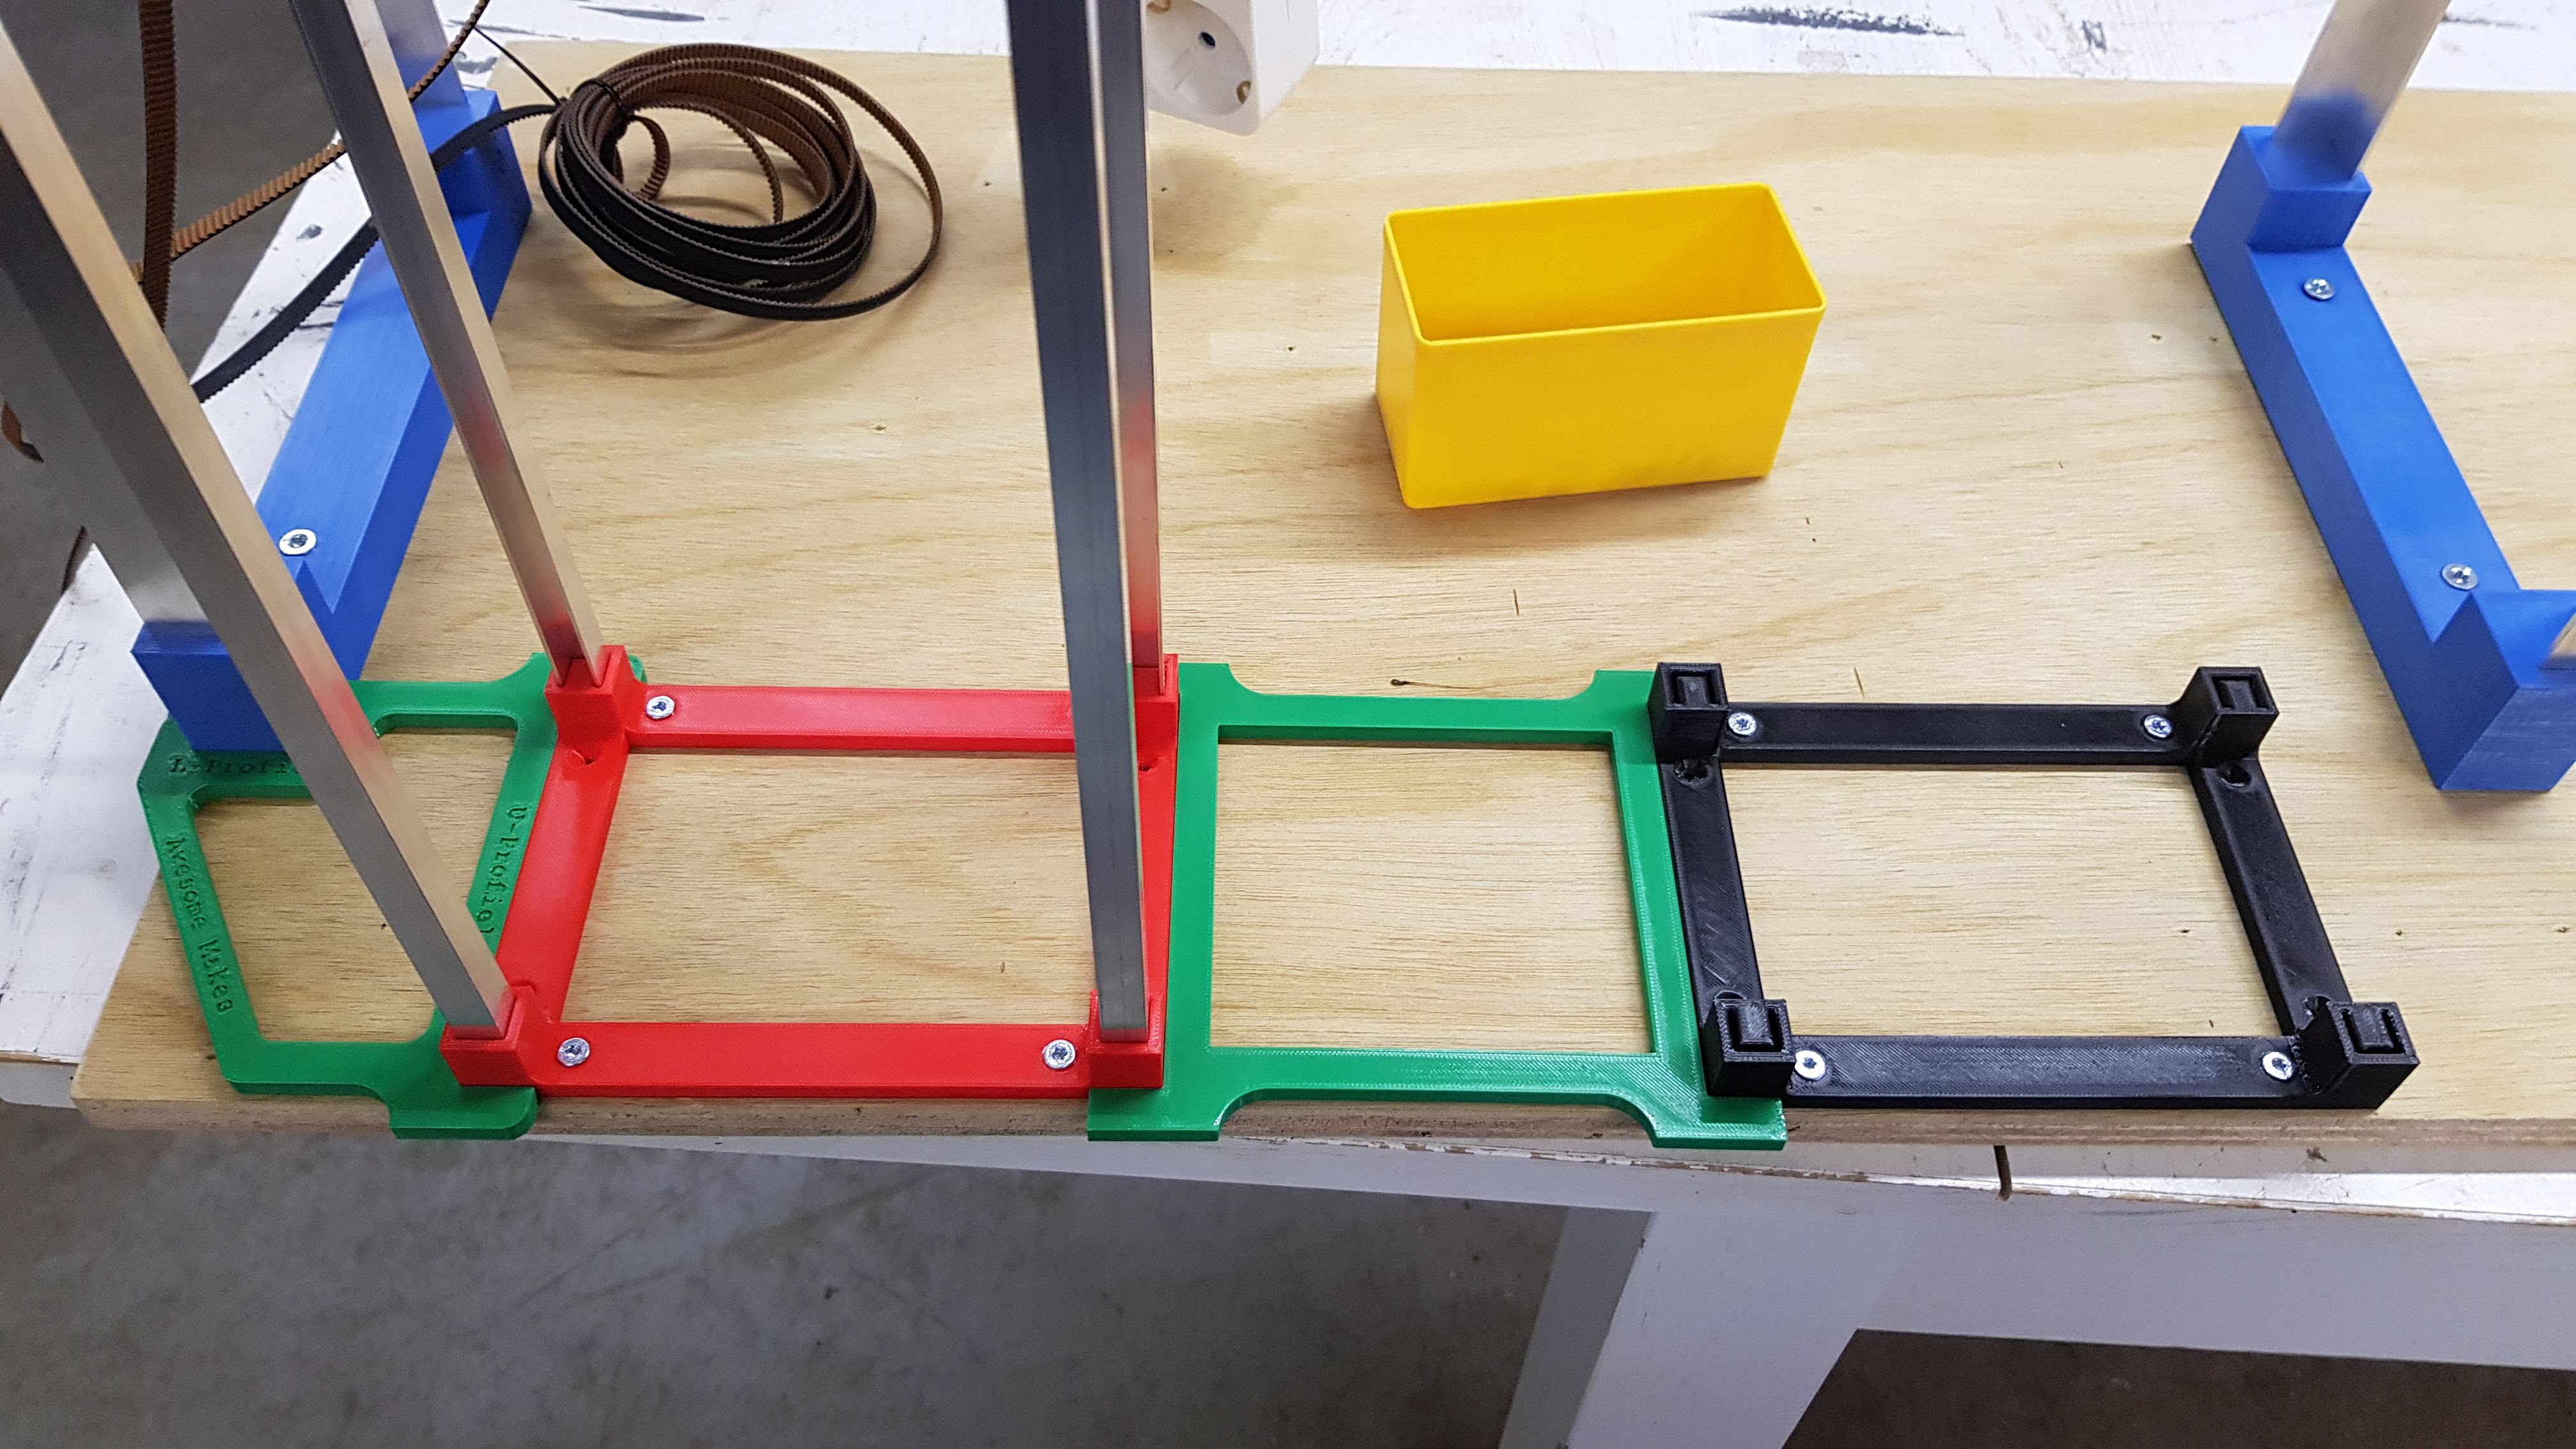
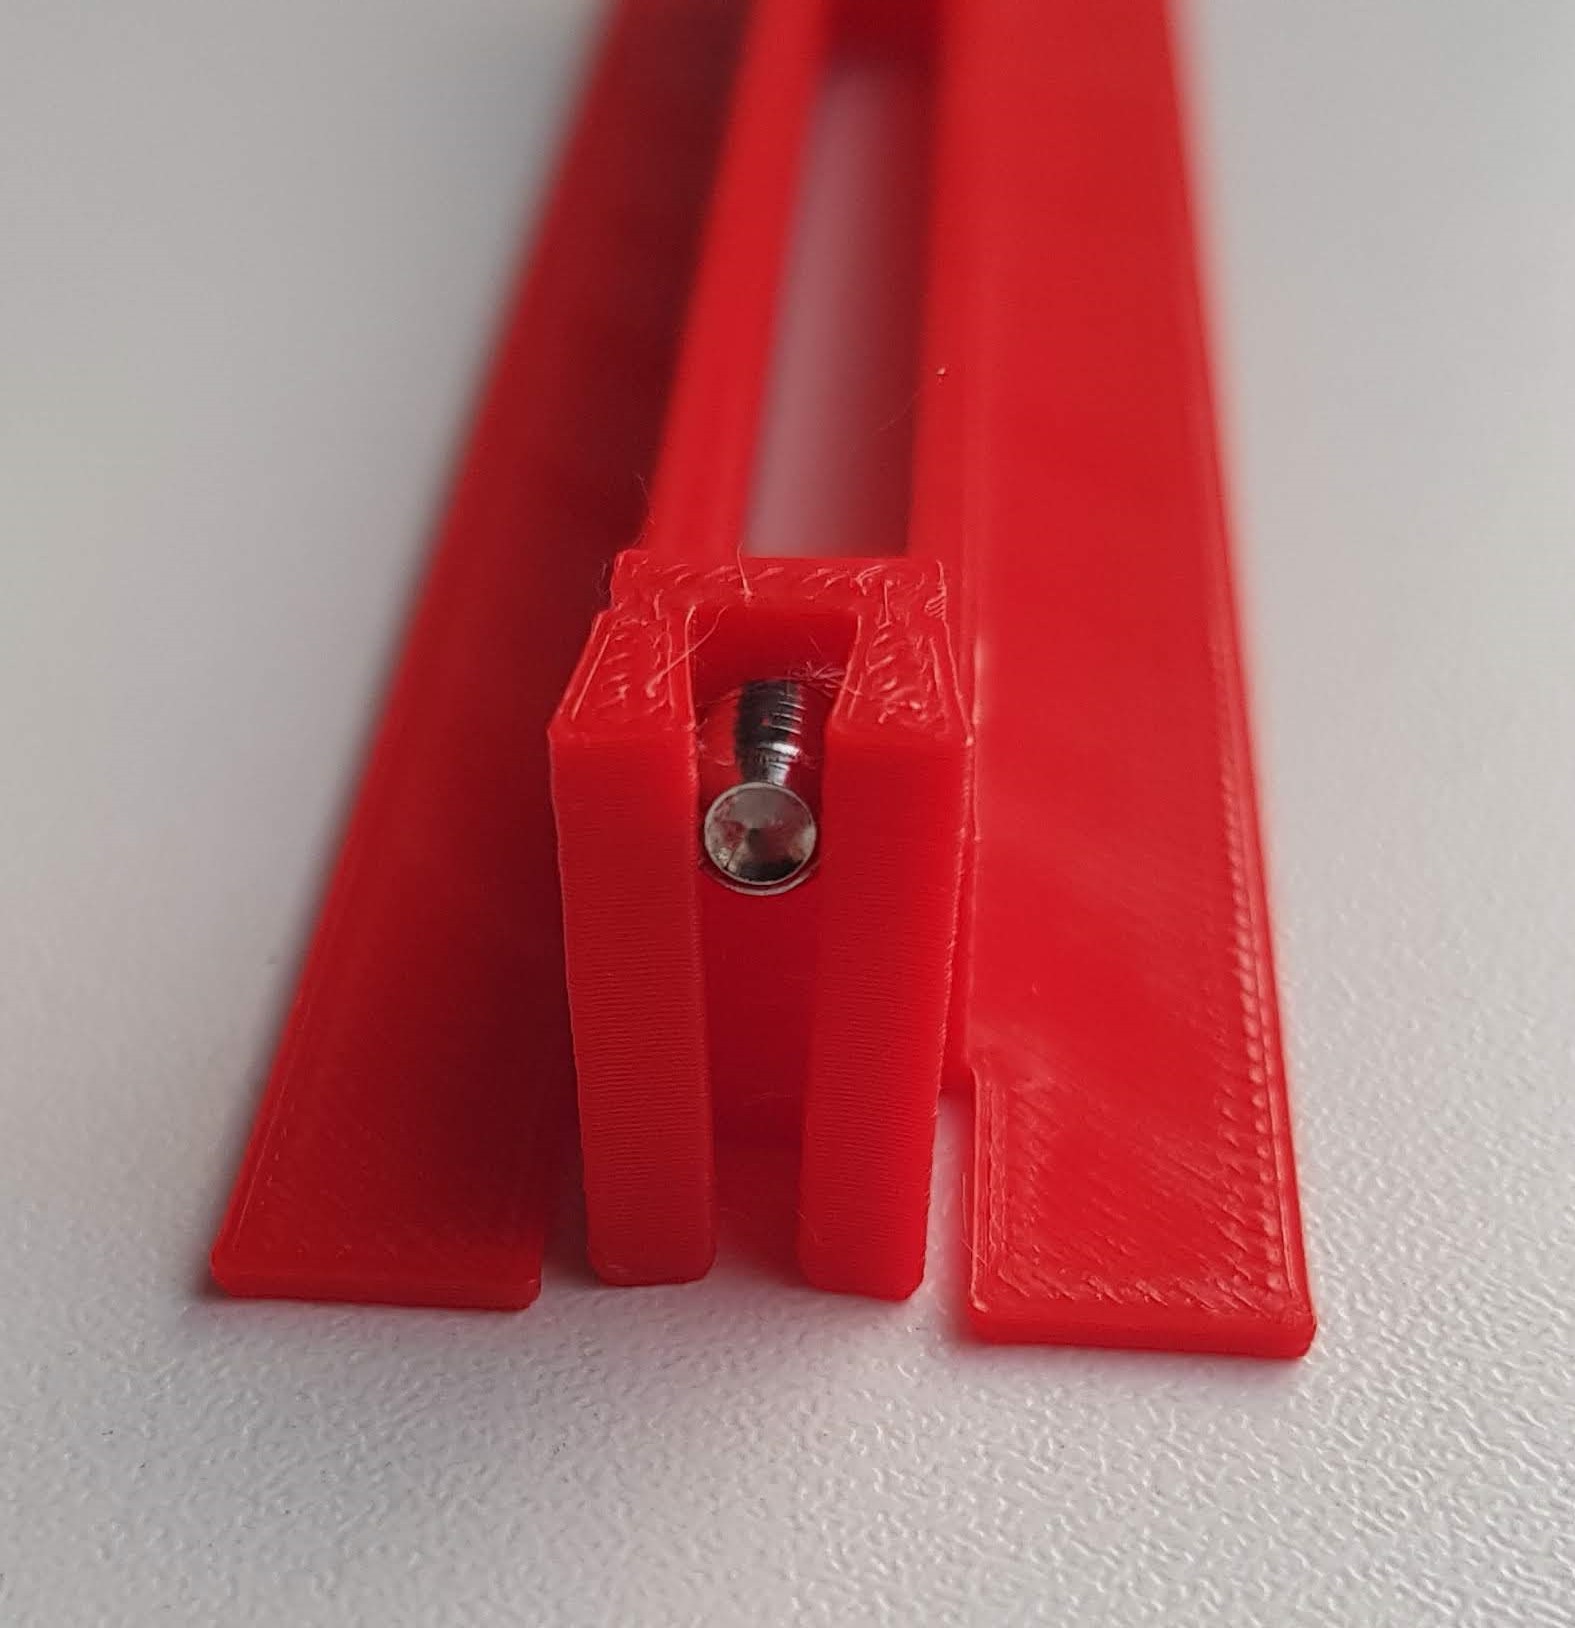
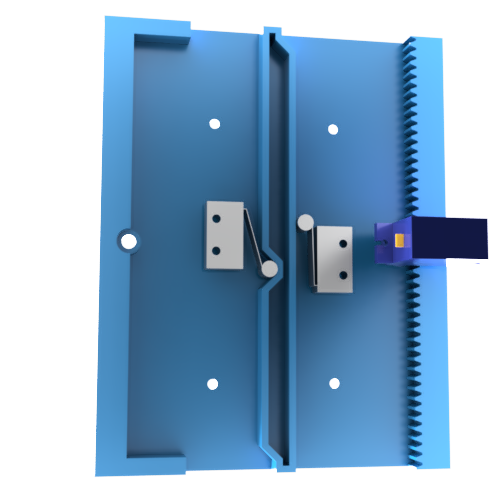
A system that automatically stores and retrieves small plastic bins. Made with 3D-printed parts, aluminum, stepper motors and Arduino
To make the experience fit your profile, pick a username and tell us what interests you.
We found and based on your interests.
Assembly v19.stlStandard Tesselated Geometry - 25.08 MB - 03/13/2022 at 09:17 |
|
|
lprofiel-staander-jig.stlStandard Tesselated Geometry - 566.29 kB - 03/13/2022 at 09:16 |
|
|
stelling-staander-jig.stlStandard Tesselated Geometry - 561.61 kB - 03/13/2022 at 09:16 |
|
|
buizen-houder-onder-v2.stlStandard Tesselated Geometry - 587.39 kB - 03/13/2022 at 09:16 |
|
|
verticale-geleider-onderkant.stlStandard Tesselated Geometry - 1.18 MB - 03/13/2022 at 09:16 |
|
After the first integrated test we needed a better rack with accurate dimensions so we could start testing the accuracy of the system.
To reduce costs and printing time we decided to use aluminum profiles which we connect by using 3D-printed parts. The aluminum profiles are press-fit into the 3D-printed parts. It took some iterations to get the tolerances just right.
We printed a drawing / partslist to cut the wooden board and aluminum profiles to the right length.
To cut the aluminum we used a miter saw with a suitable blade but you can also use a hacksaw.
After putting everything together it resulted in a surprisingly sturdy structure.
The “shelves” are slotted into the aluminum u-profile. We designed a system comparable to wall plugs to make sure the shelves stay in place.
By tightening the grub screw the two sides of the structure are pushed outwards.
To mount the brackets parts at the right position we printed some jigs.
The structure seems to be sturdy and precise but before testing it it looks like we need to design a new vertical rail. The 3D-printed version seems to have bent and cannot be used.
We did a lot of CAD design and before we continued tuning the design we wanted to do a basic test of the system.
We build a rig with some 3D printed parts, empty filament boxes and metal pipes. A temporary rack was made with some wood and 3D printed ridges.
Read more »We designed and assembled an extending platform that will be used to pick up the pallets. It took some iterations.
We first used a 28BYJ-48 stepper motor to drive the platform but found it too slow.
We then switched to a continuous servo. That worked better than the stepper motor but now we had no control over positioning of the platform. We first tried to solve this by using an ACS712 current sensor. This sensor would measure the current used by the servo. When the platform reached its end position the current draw would increase. This was fun to play with but could never work. Firstly, this way we would not be able to return to the ‘home position’. Secondly, when the platform would pick up a container the current draw would also increase making it difficult to callibrate.
Finally we settled on using a combination of the continuous servo and limit switches. The limit switches have a roller on the end. This roller rides on a track and the track has some recesses.
The video below shows the first test of the platform. We wrote some simple arduino code to control the platform using the serial monitor.
Create an account to leave a comment. Already have an account? Log In.
Become a member to follow this project and never miss any updates