 Milo Winningham
-
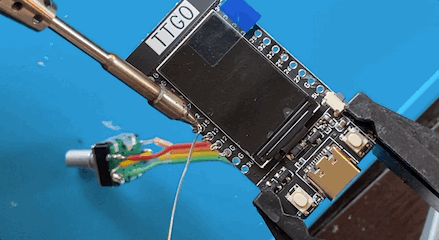
1Wire it up

- Connect the rotary encoder A and B pins to GPIO pins 12 and 13.
- Connect one pole of the switch to GPIO pin 15.
- Connect other pole of the switch and the encoder’s remaining middle pin to ground.
![]()
-
2Install the firmware
➡️ setup.knobby.net
The Knobby setup tool can flash the latest firmware and configure WiFi credentials over USB (requires Google Chrome or Microsoft Edge for Web Serial API support).
Alternatively, you can download the latest release and flash it yourself. You will need to have Python and esptool.py installed. With the USB cable connected, run the flash script in the directory of the extracted firmware zip:
- on Linux or Mac:
./flash.sh - on Windows:
flash.bat
- on Linux or Mac:
-
3Compile from source
- Edit
data/data.jsonand enter your wifi network information (if you want; it can also be configured later) - Build and upload with PlatformIO:
pio run && pio run --target upload && pio run --target uploadfs
If data.json is not configured or there is a problem connecting to your network, Knobby will enter configuration mode. Join the temporary WiFi network displayed on screen and wait for the configuration portal to appear or visit http://192.168.4.1. Enter your WiFi network information, then switch back to your normal WiFi network and visit http://knobby.local to continue.
- Edit
Knobby: a little remote, a lot of possibilities
Spin the knob to browse 5,000+ genres of music along with your own playlists. Knobby is a distinctive remote control for Spotify and more.

Discussions
Become a Hackaday.io Member
Create an account to leave a comment. Already have an account? Log In.