Having designed and printed several Blades from the previous Prototypes and experimented with them, I still wasn't happy with the results and knew that they could be more compact and efficient.
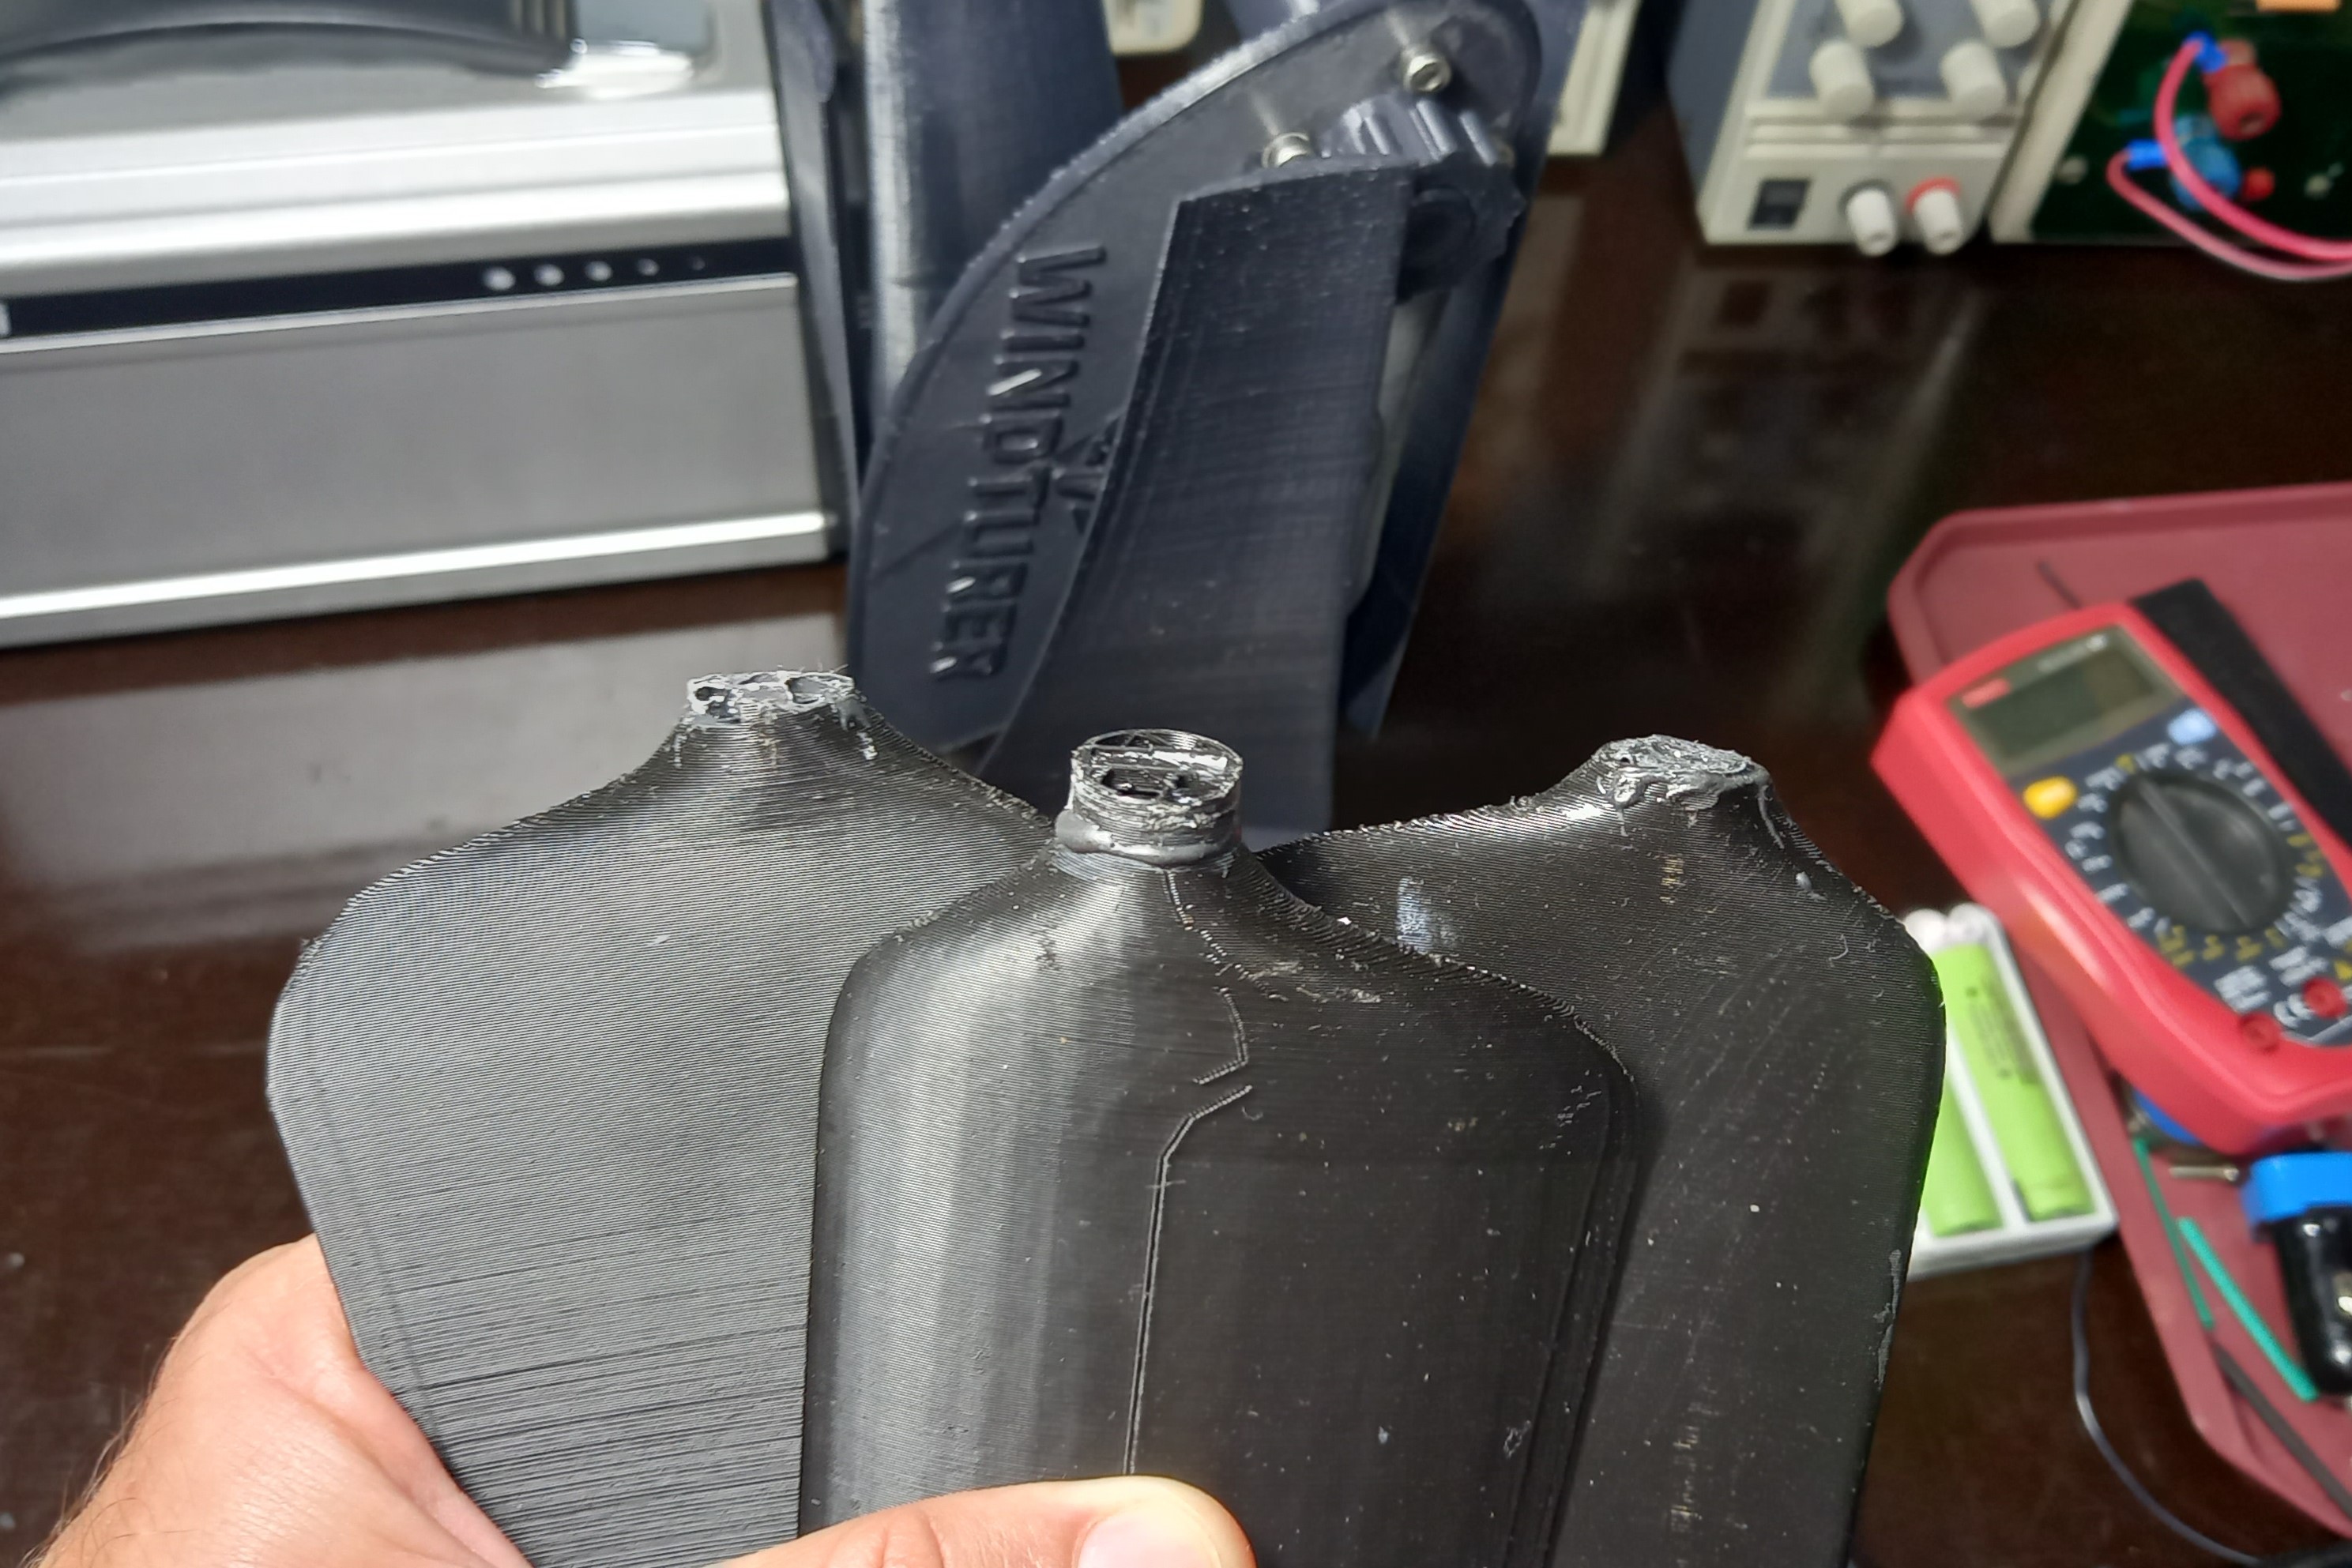
For example, the Blades of Prototype 1, which I call the "Intuitive Blades" were designed without the assistance of specialized programs such as QBlade and although their behavior was correct, their performance is much lower than the one I present here. Also, this Blade has a mechanical weakness and under reasonable stress they would always break in the same place. Below is a photo of this problem.
In the case of the Blades of Prototypes 3 and 4, they turned out to be very large for the objectives of this project and it is not very clear to me that they can withstand winds of about 35Km/h.
So that the Blades P2-P3 could be printed on an Ender 3-type printer, not exceeding the height of a 2-liter soda bottle, a kind of hinge was designed that joined the two parts of the Blade. This area is also prone to damage, especially since it is a larger Blade and the "centrifugal" forces during rotation are greater.
I do not rule out using this type of Blade in other projects if I use other types of more resistant 3D filaments, but I think that for the requirements of this Project they are a bit oversized and make manufacturing more complex and make the project more expensive.
The Prototype 4 Blades turned out to be the right balance I needed. They do not exceed 22cm in length and their performance is on wheels.
Let's analyze some images of the QBlade program where I designed them.
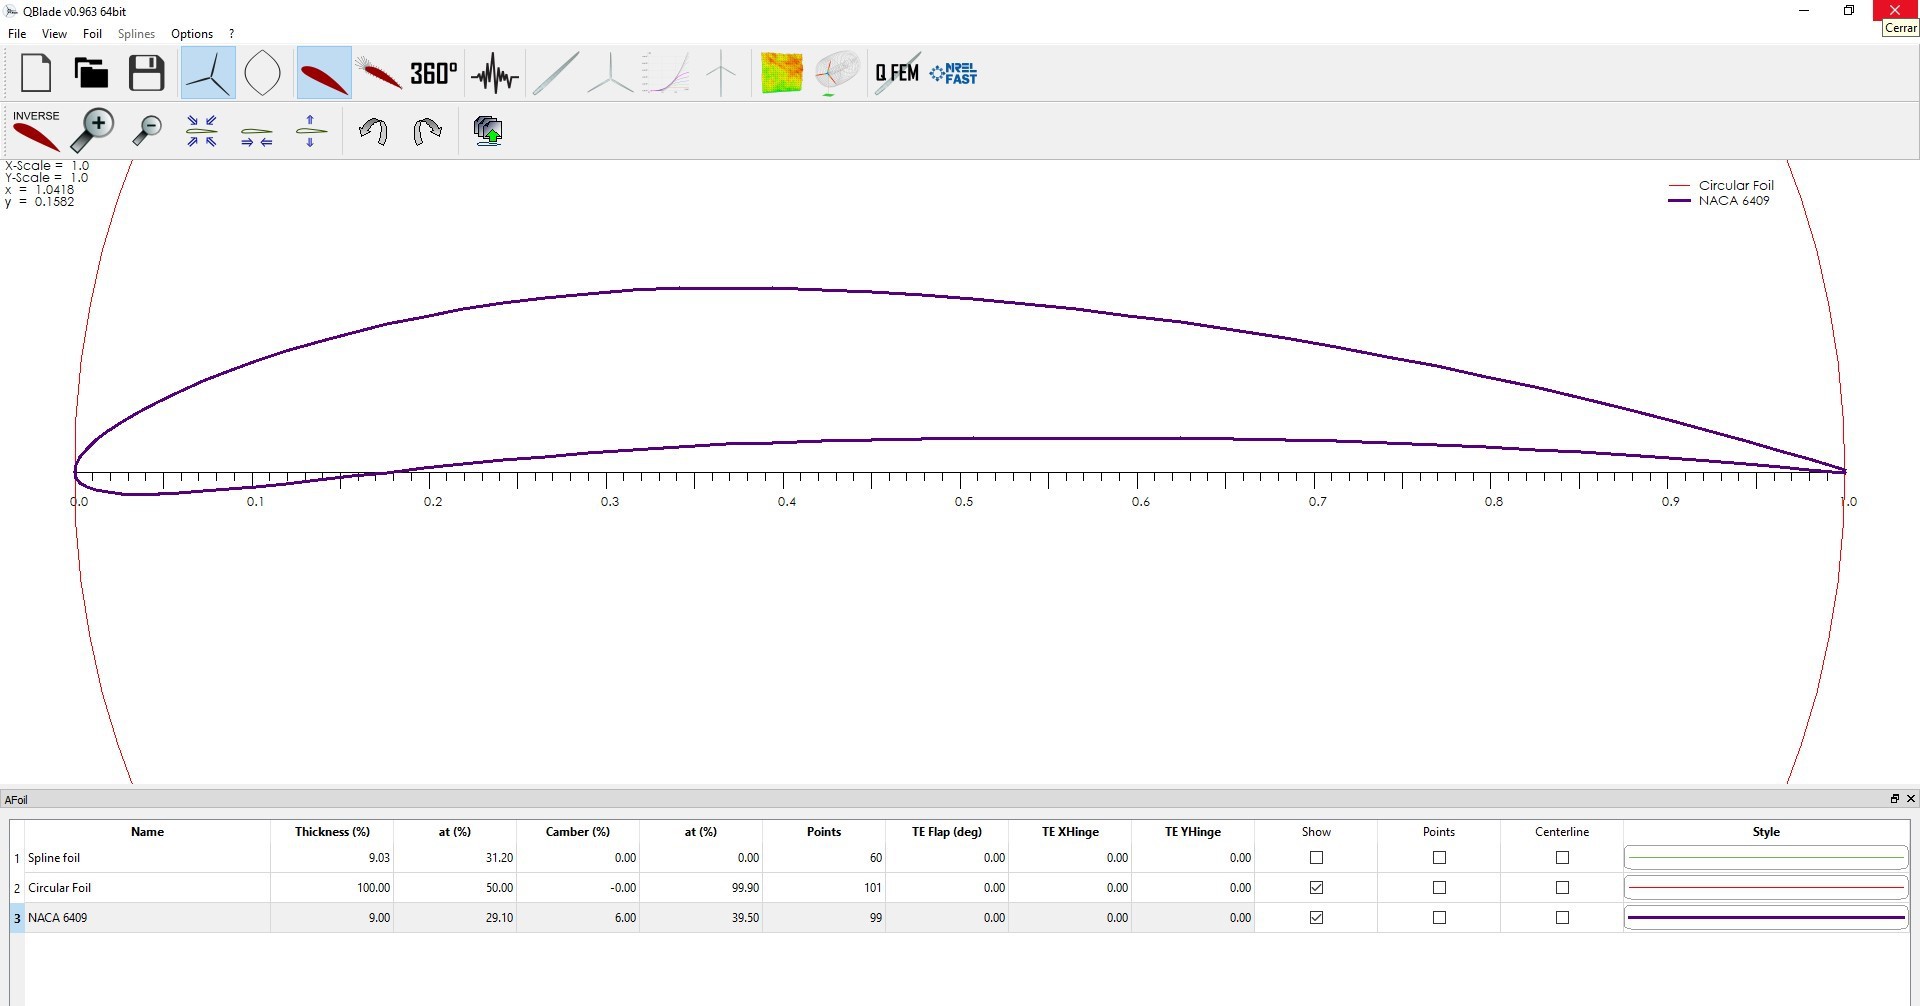
The Blade P4 is based on the NACCA 6409 airfoil.
One of the frequent problems in this type of fixed pitch wind turbines is starting at low RPM. In order for the Blades to do their job efficiently they must operate at relatively high rotational speeds. This type of profile has proven to be effective at low RPM and guarantees higher lift forces during starting. It is also a narrow profile that results in thinner Blades and lower mass which contributes to less material being spent when printing them and lower forces being generated during rotation.
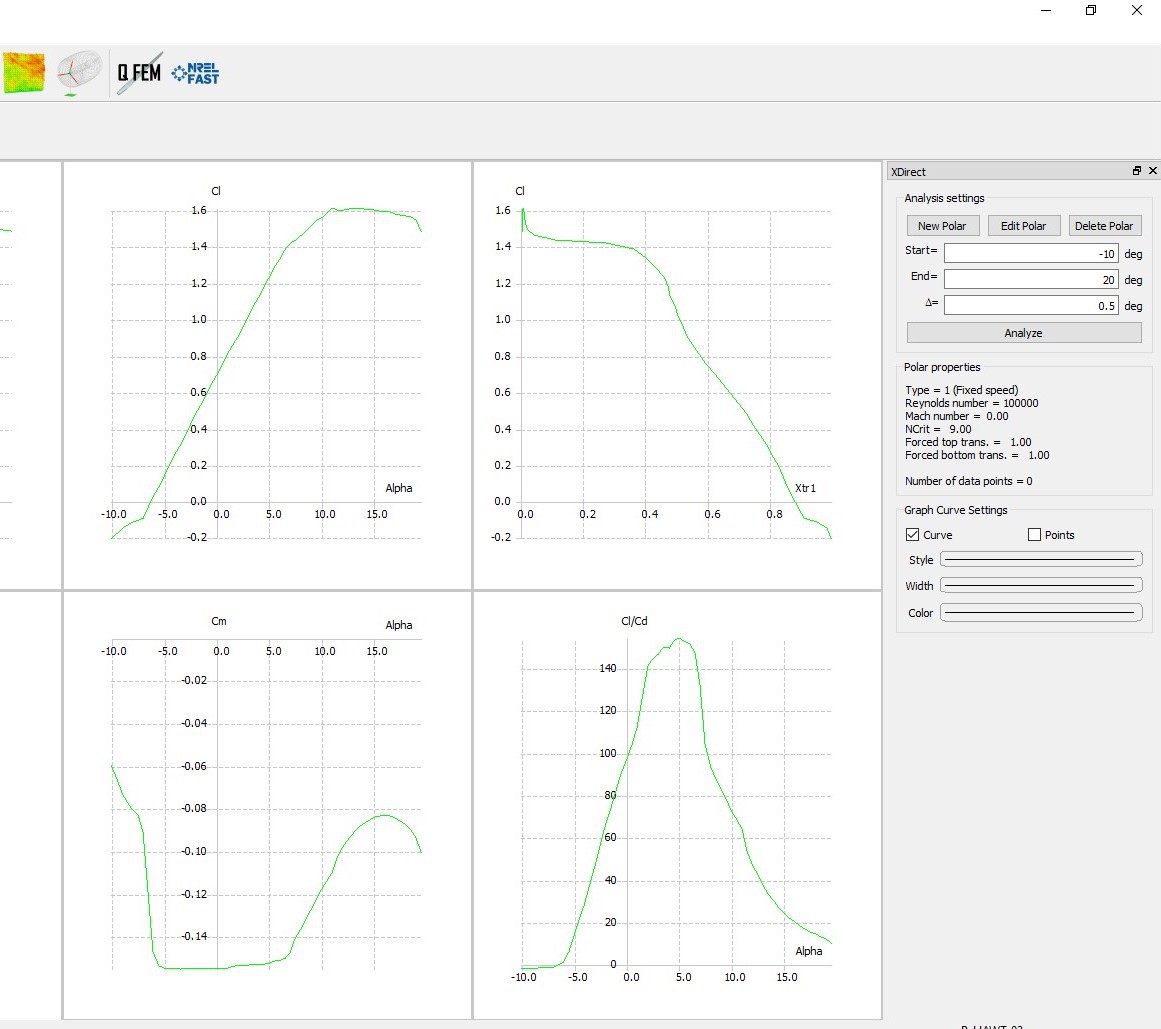
In the image above it can be seen that this profile reaches its maximum Lift coefficient (Cl) around 12 degrees of pitch, however we are interested in the angle for which the relationship between the lift and drag coefficients is maximum. The angle for which this occurs is around 5 degrees. When assembling the propellers with the rest of the set, the Blades must be rotated around this angle. All the simulations were made considering a Turbulent Flow (Reynolds Number 100000). This is due to the typical operating conditions of this wind turbine at very low height from the ground.
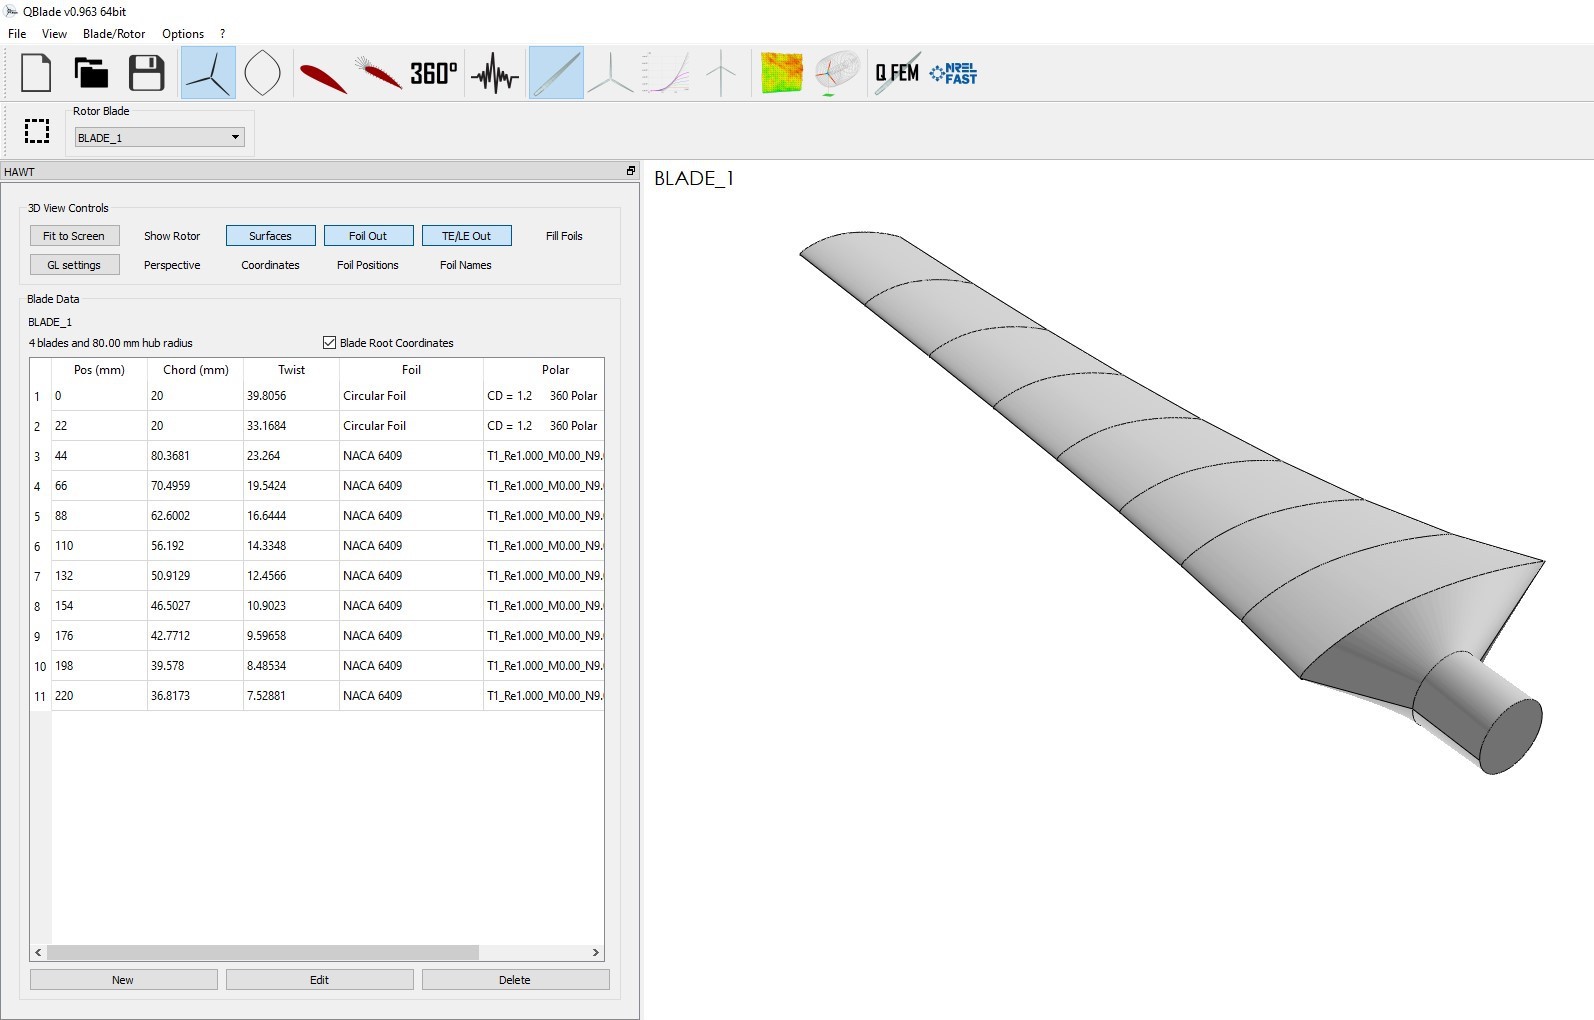
In the image you can see the position, chord length, angle of attack and type of profile data obtained after the Betz optimization for a Tip to Speed Ratio of 3. Knowing these values and the type of profile chosen, the Blades can be modeled in the 3D design programs. The Blade was sectioned into 11 parallel planes with a separation distance of 22mm between each. In the Files section, the analysis and design file of the Prototype 4 Blade is included.
QBlade is a public source, cross-platform simulation software for wind turbine Blade design and aerodynamic simulation. https://qblade.org/
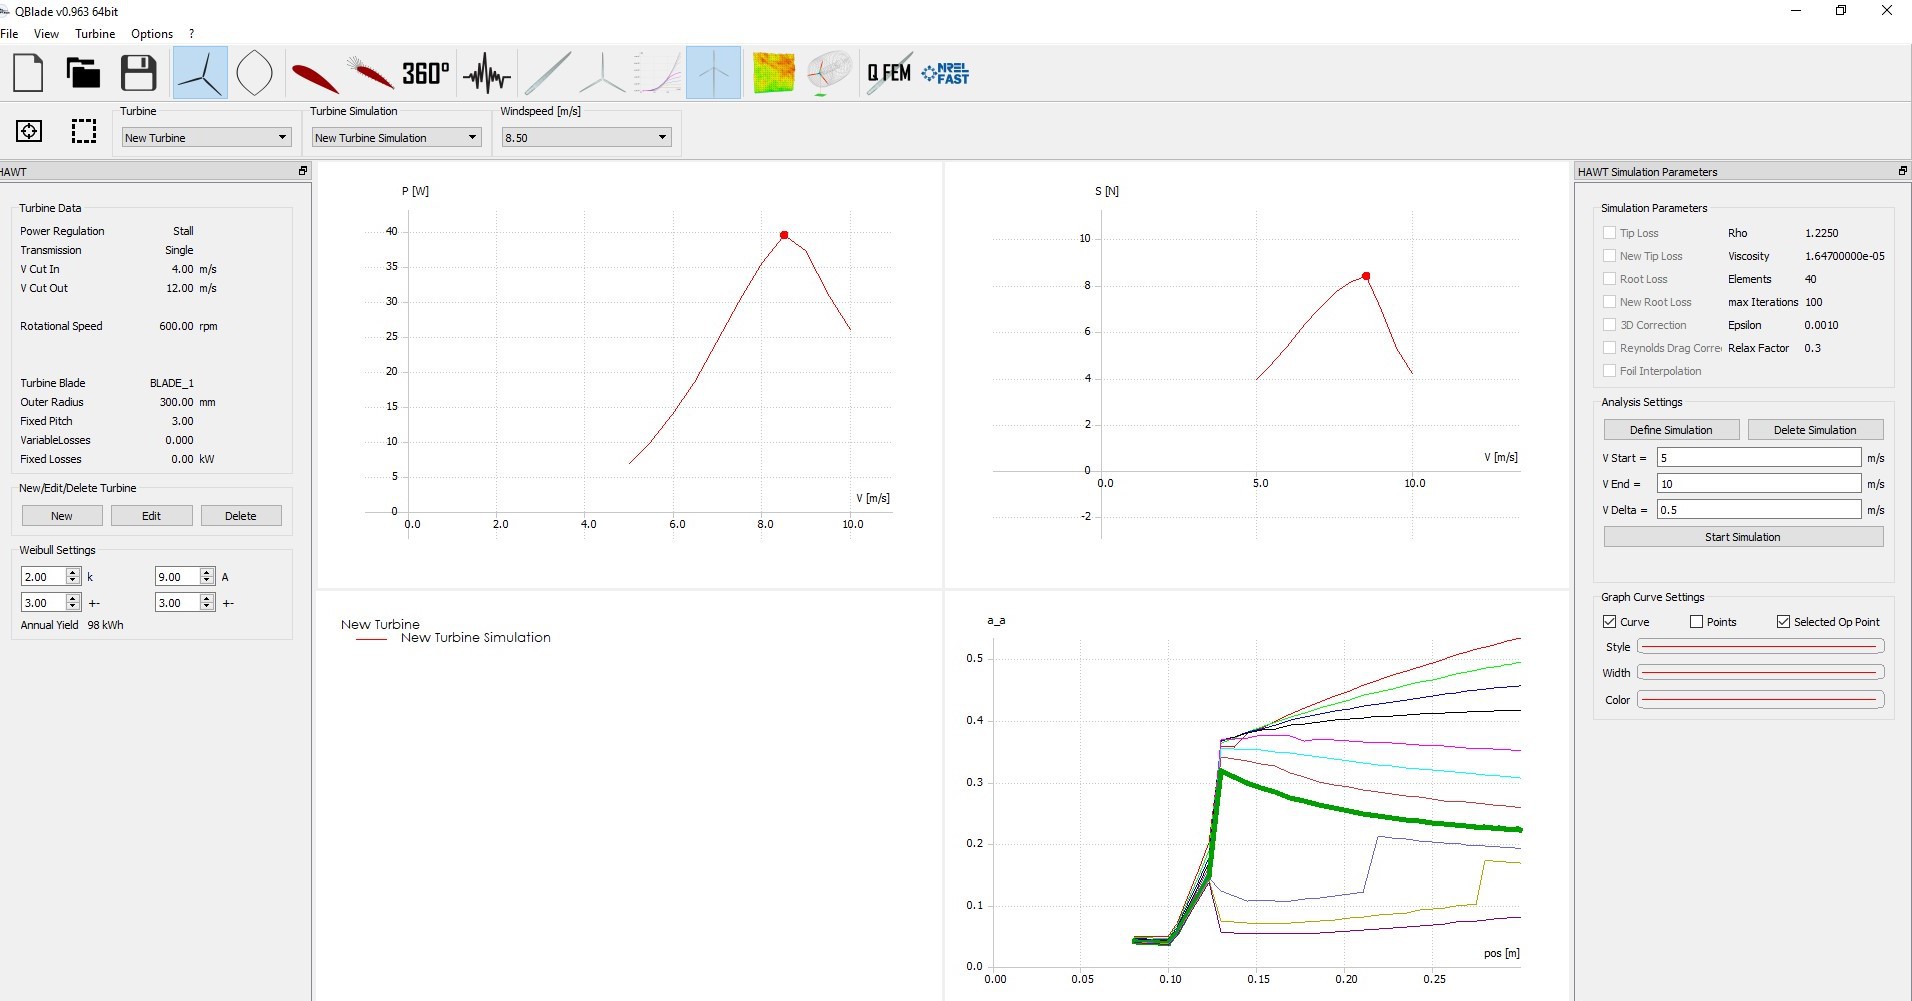
This simulation tells us that at wind speeds of 30km/h a maximum generation power of approximately 40W is obtained. At lower speeds and more common at low altitude, say 20 km/h we get about 12W. Although it could be stated that we have designed a 40W Power wind turbine, this statement is really not very transparent and only in exceptional cases could we obtain those values.
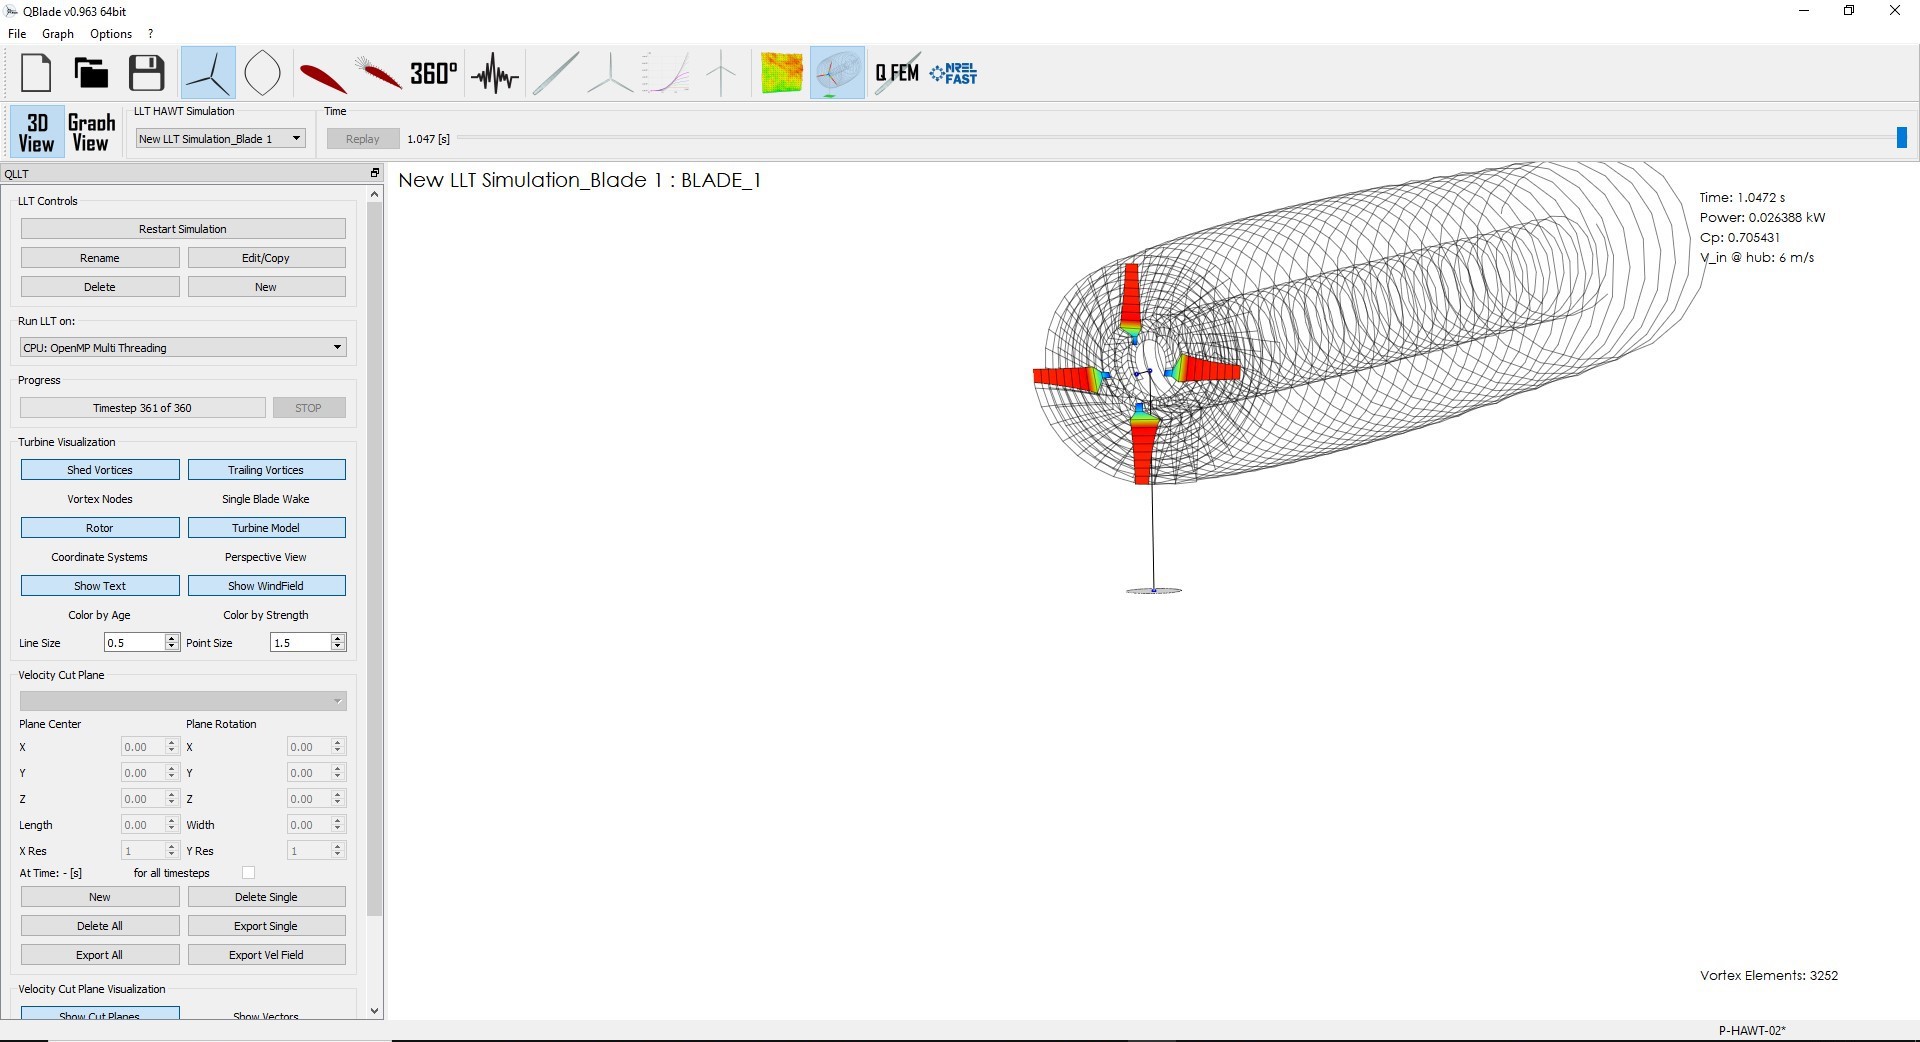
In this LLT (Lifting-line theory) simulation, the three-dimensional behavior of the designed Rotor is appreciated when it faces a wind flow of 6m/s (21.6 km/h), obtaining about 26.3W of power. In real conditions and considering the losses, a use of about 12-15W of power is estimated.
The QBlade file can be downloaded directly from the Files section of this Project. You can analyze it carefully from QBlade, you could even make new optimizations and generate your own Blades which you can then export and use with the rest of my STL files. As long as you keep the two 20mm diameter circular profiles in the Blade design, you can experiment as much as you want and the project will still be compatible with your own Blades.
That has been all for this Log. In the next Log I will present the chosen energy storage system. Thanks for keeping up, see you!
 adriancubas
Discussions
Become a Hackaday.io Member
Create an account to leave a comment. Already have an account? Log In.