deʃhipu
-
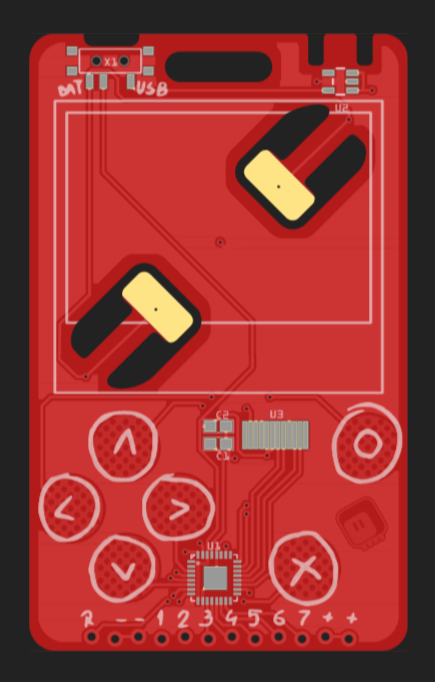
Power Switch
06/01/2022 at 22:19 • 0 commentsToday I had a bit of a discussion about the design of this device, and I realized that I have written here about removing various components to slim down the design and lower the costs, but I never really wrote about why I didn't remove the power switch, even though I could do it, with some compromises.
![]()
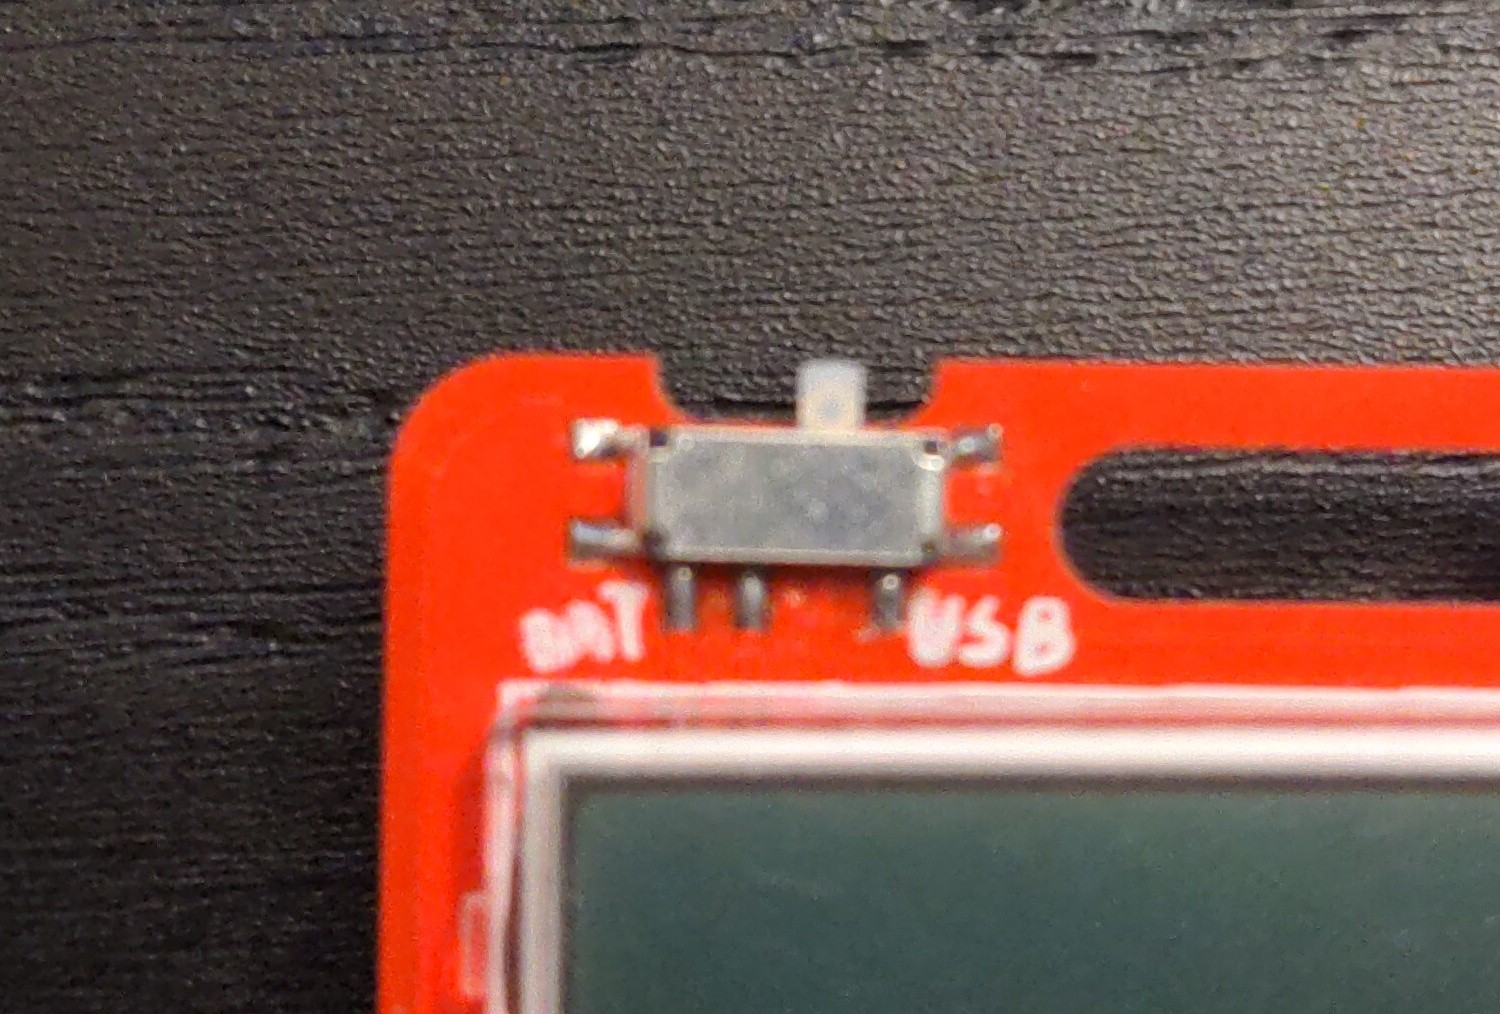
But first let me explain what the power switch actually does here. On most normal electronic devices, the power switch would be labeled "on" and "off", but in here, just like on the #PewPew M4, the labels say "bat" and "usb". What does it mean? This is because it's not really a switch that switches the power on or off, it's a switch that switches between two power sources: the battery and the USB socket. Of course, when the device is not connected to the computer, switching it to "usb" effectively switches the device off. When it's connected, you can't really switch it off, because switching it to "bat" will just make it run on battery power (even though it's still connected to the computer, it will use up the battery then).
This a bit quaint setup actually lets me avoid a lot of complexity. Normally, a device that can be powered both from battery and from USB has to, at the very least, protect those two power sources from each other — either using some low-voltage-drop diodes, a "perfect diode" circuit, or some kind of power management chip. This of course adds to the complexity, and in case of the simple diodes, wastes some of the energy from the battery. A simple mechanical switch can easily make sure that the two power sources never touch.
But what about removing the power switch? It could be done if I decided to also drop one of the two possible power sources. In fact, I did just that in the #PewPew Slim, which can only be powered from USB, since being a business card, it's too thin for a battery.
I could also go the other way, and remove the USB power option. This would not only let me remove the power switch, but also the 3.3V LDO that converts the 5V from USB to a voltage the device needs. The early versions of #PewPew Standalone were like that, even though they had the switch for cutting the battery, they didn't work with USB power. Later I added the LDO, because testing on living humans during actual workshops proved that it's really needed for this particular use case. But if it wasn't, I could drop the switch too, and since CircuitPython has now deep sleep support, and you can wake up SAMD21 from deep sleep on a touch event, I could make it simply wake up when any of the touchpads are pressed, and go to deep sleep (also disabling the display) if they are not pressed for some time.
In the end the switch turns out to be an optimization that lets me use both power sources without needing additional components for power management.
-
More Battery
05/28/2022 at 15:35 • 3 commentsWe have talked a little bit about the choice of batteries before in terms of the use cases, practicality and environment. But what if you need to this device to last longer than the two or three days you would normally get, and don't want to have to swap the batteries?
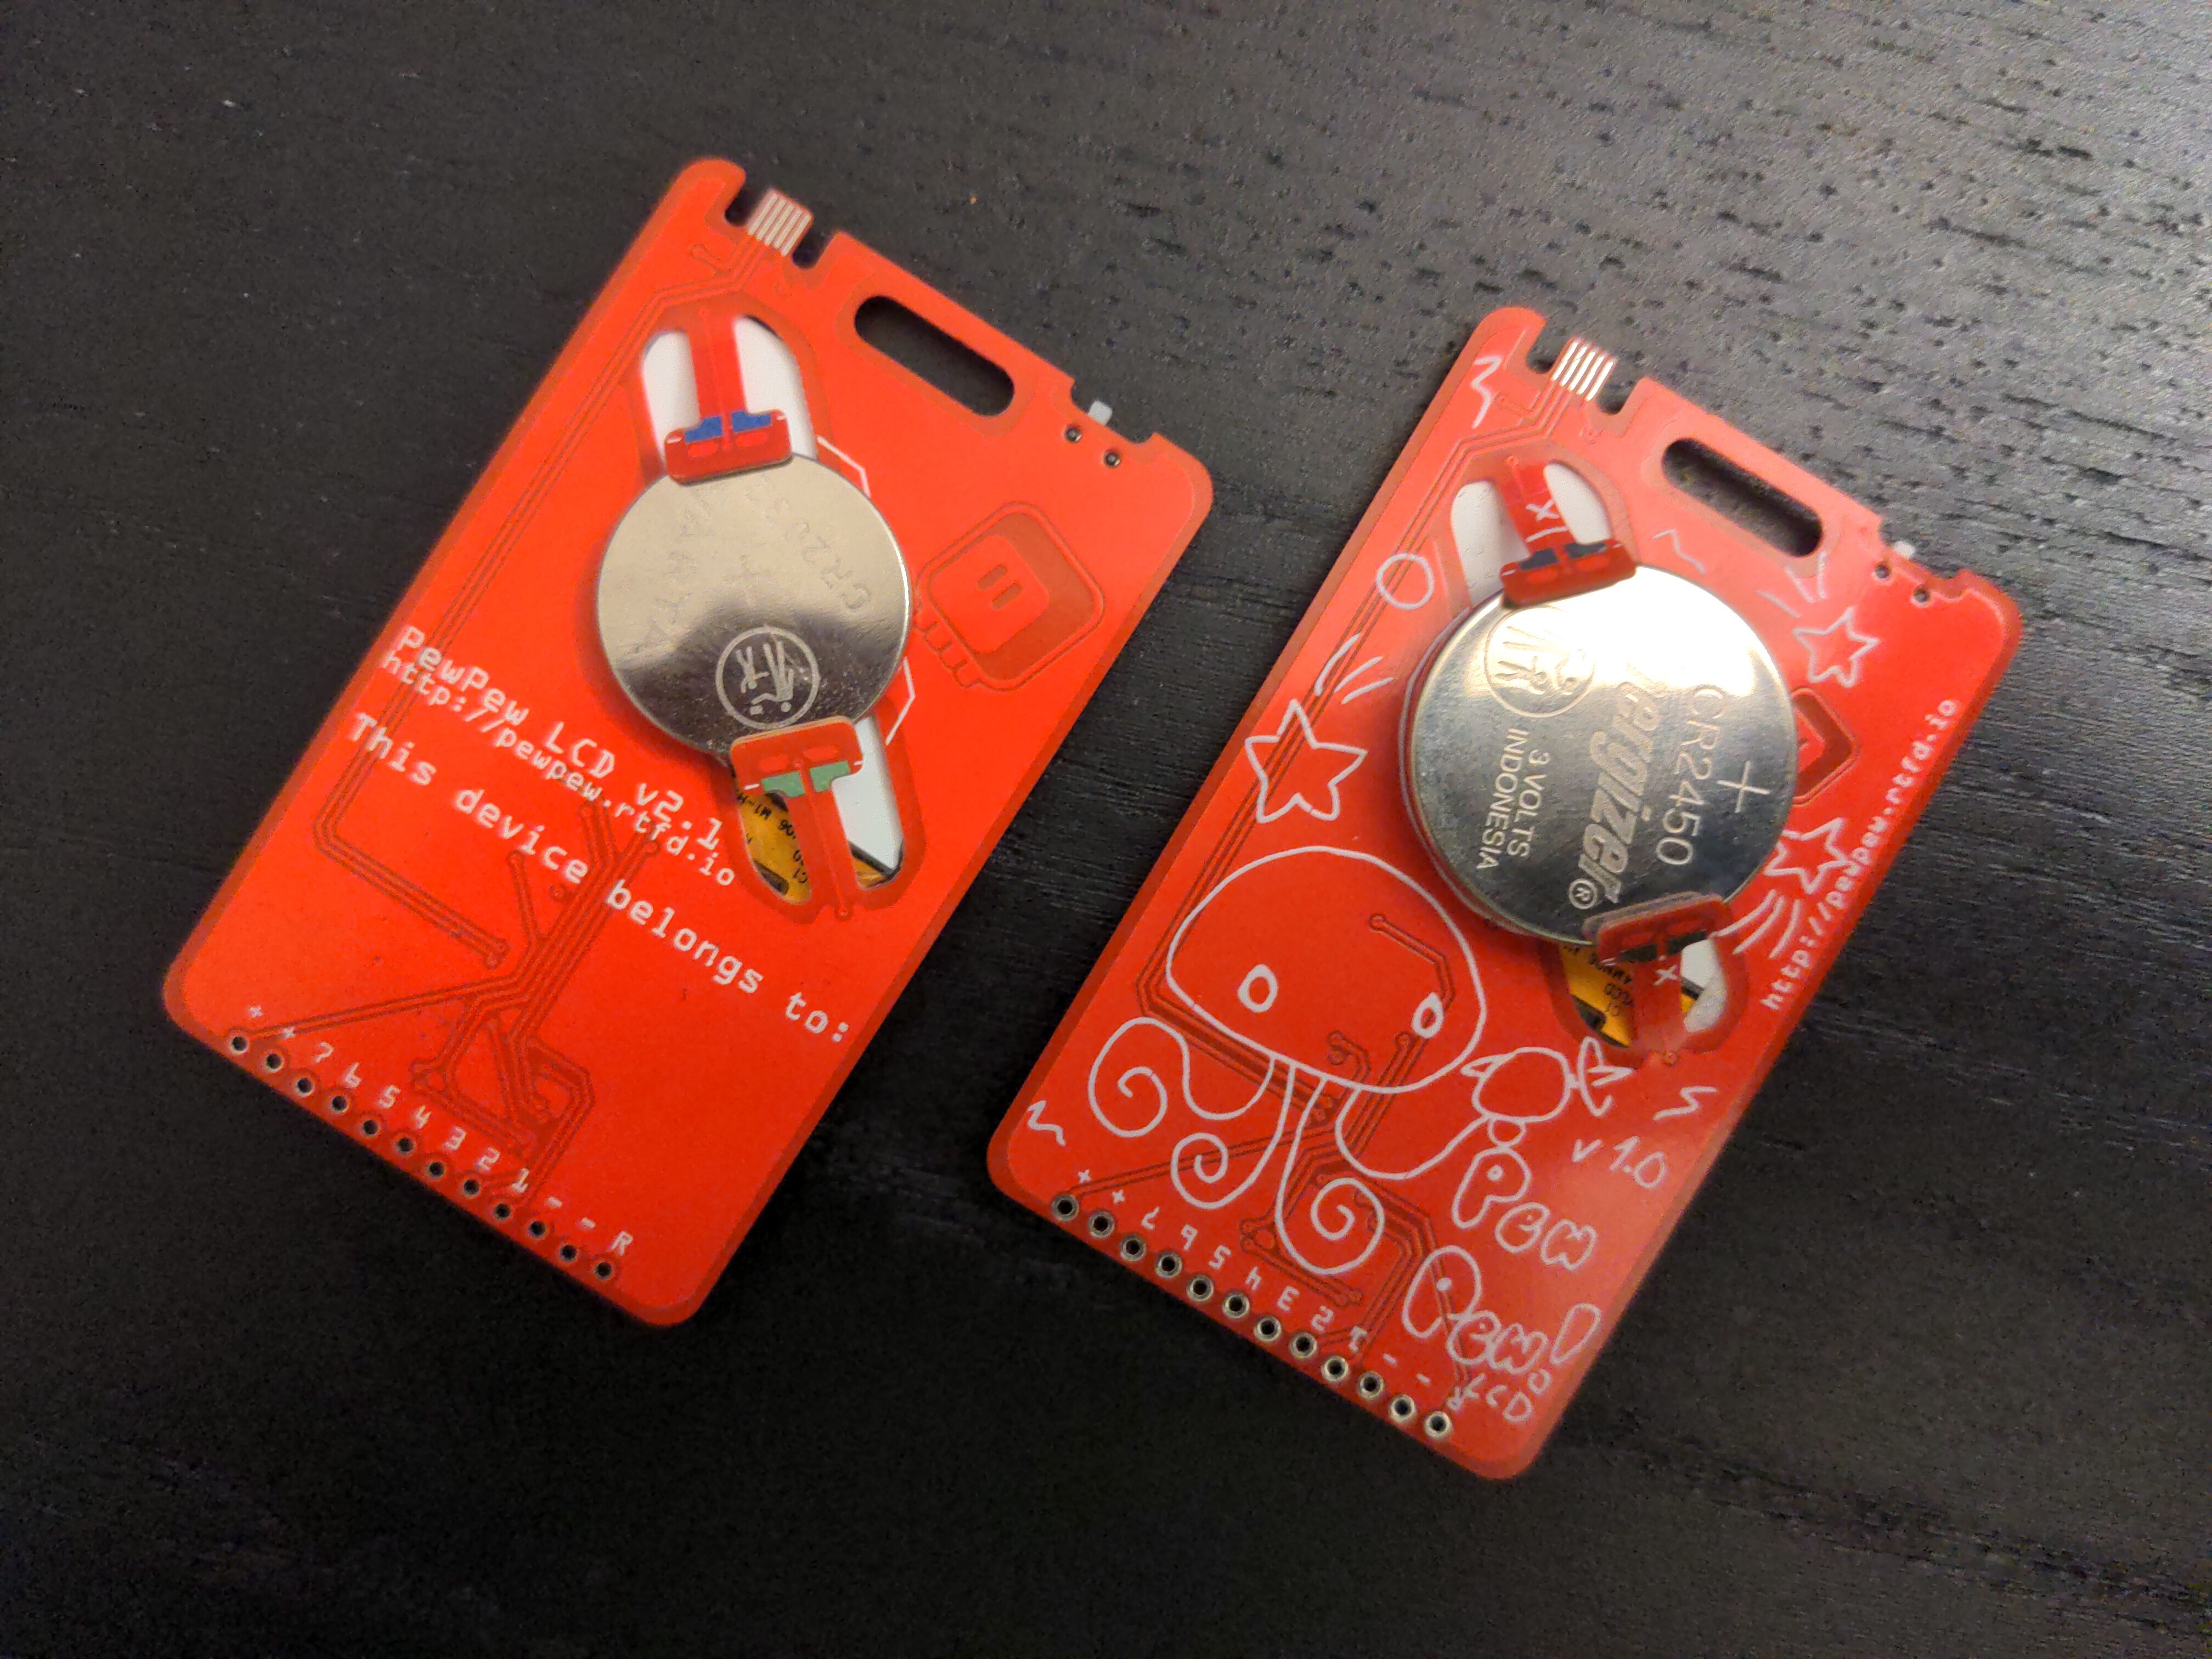
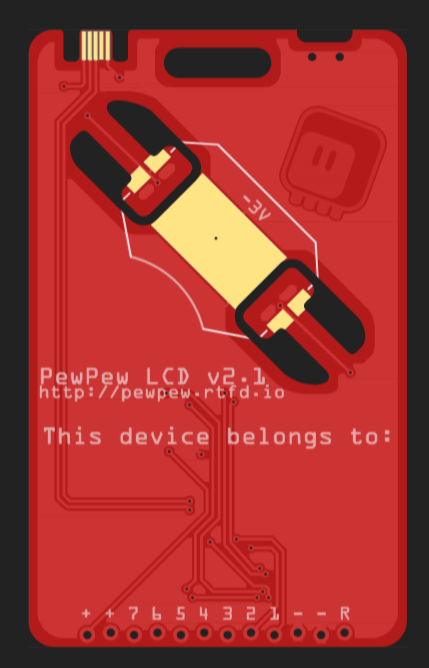
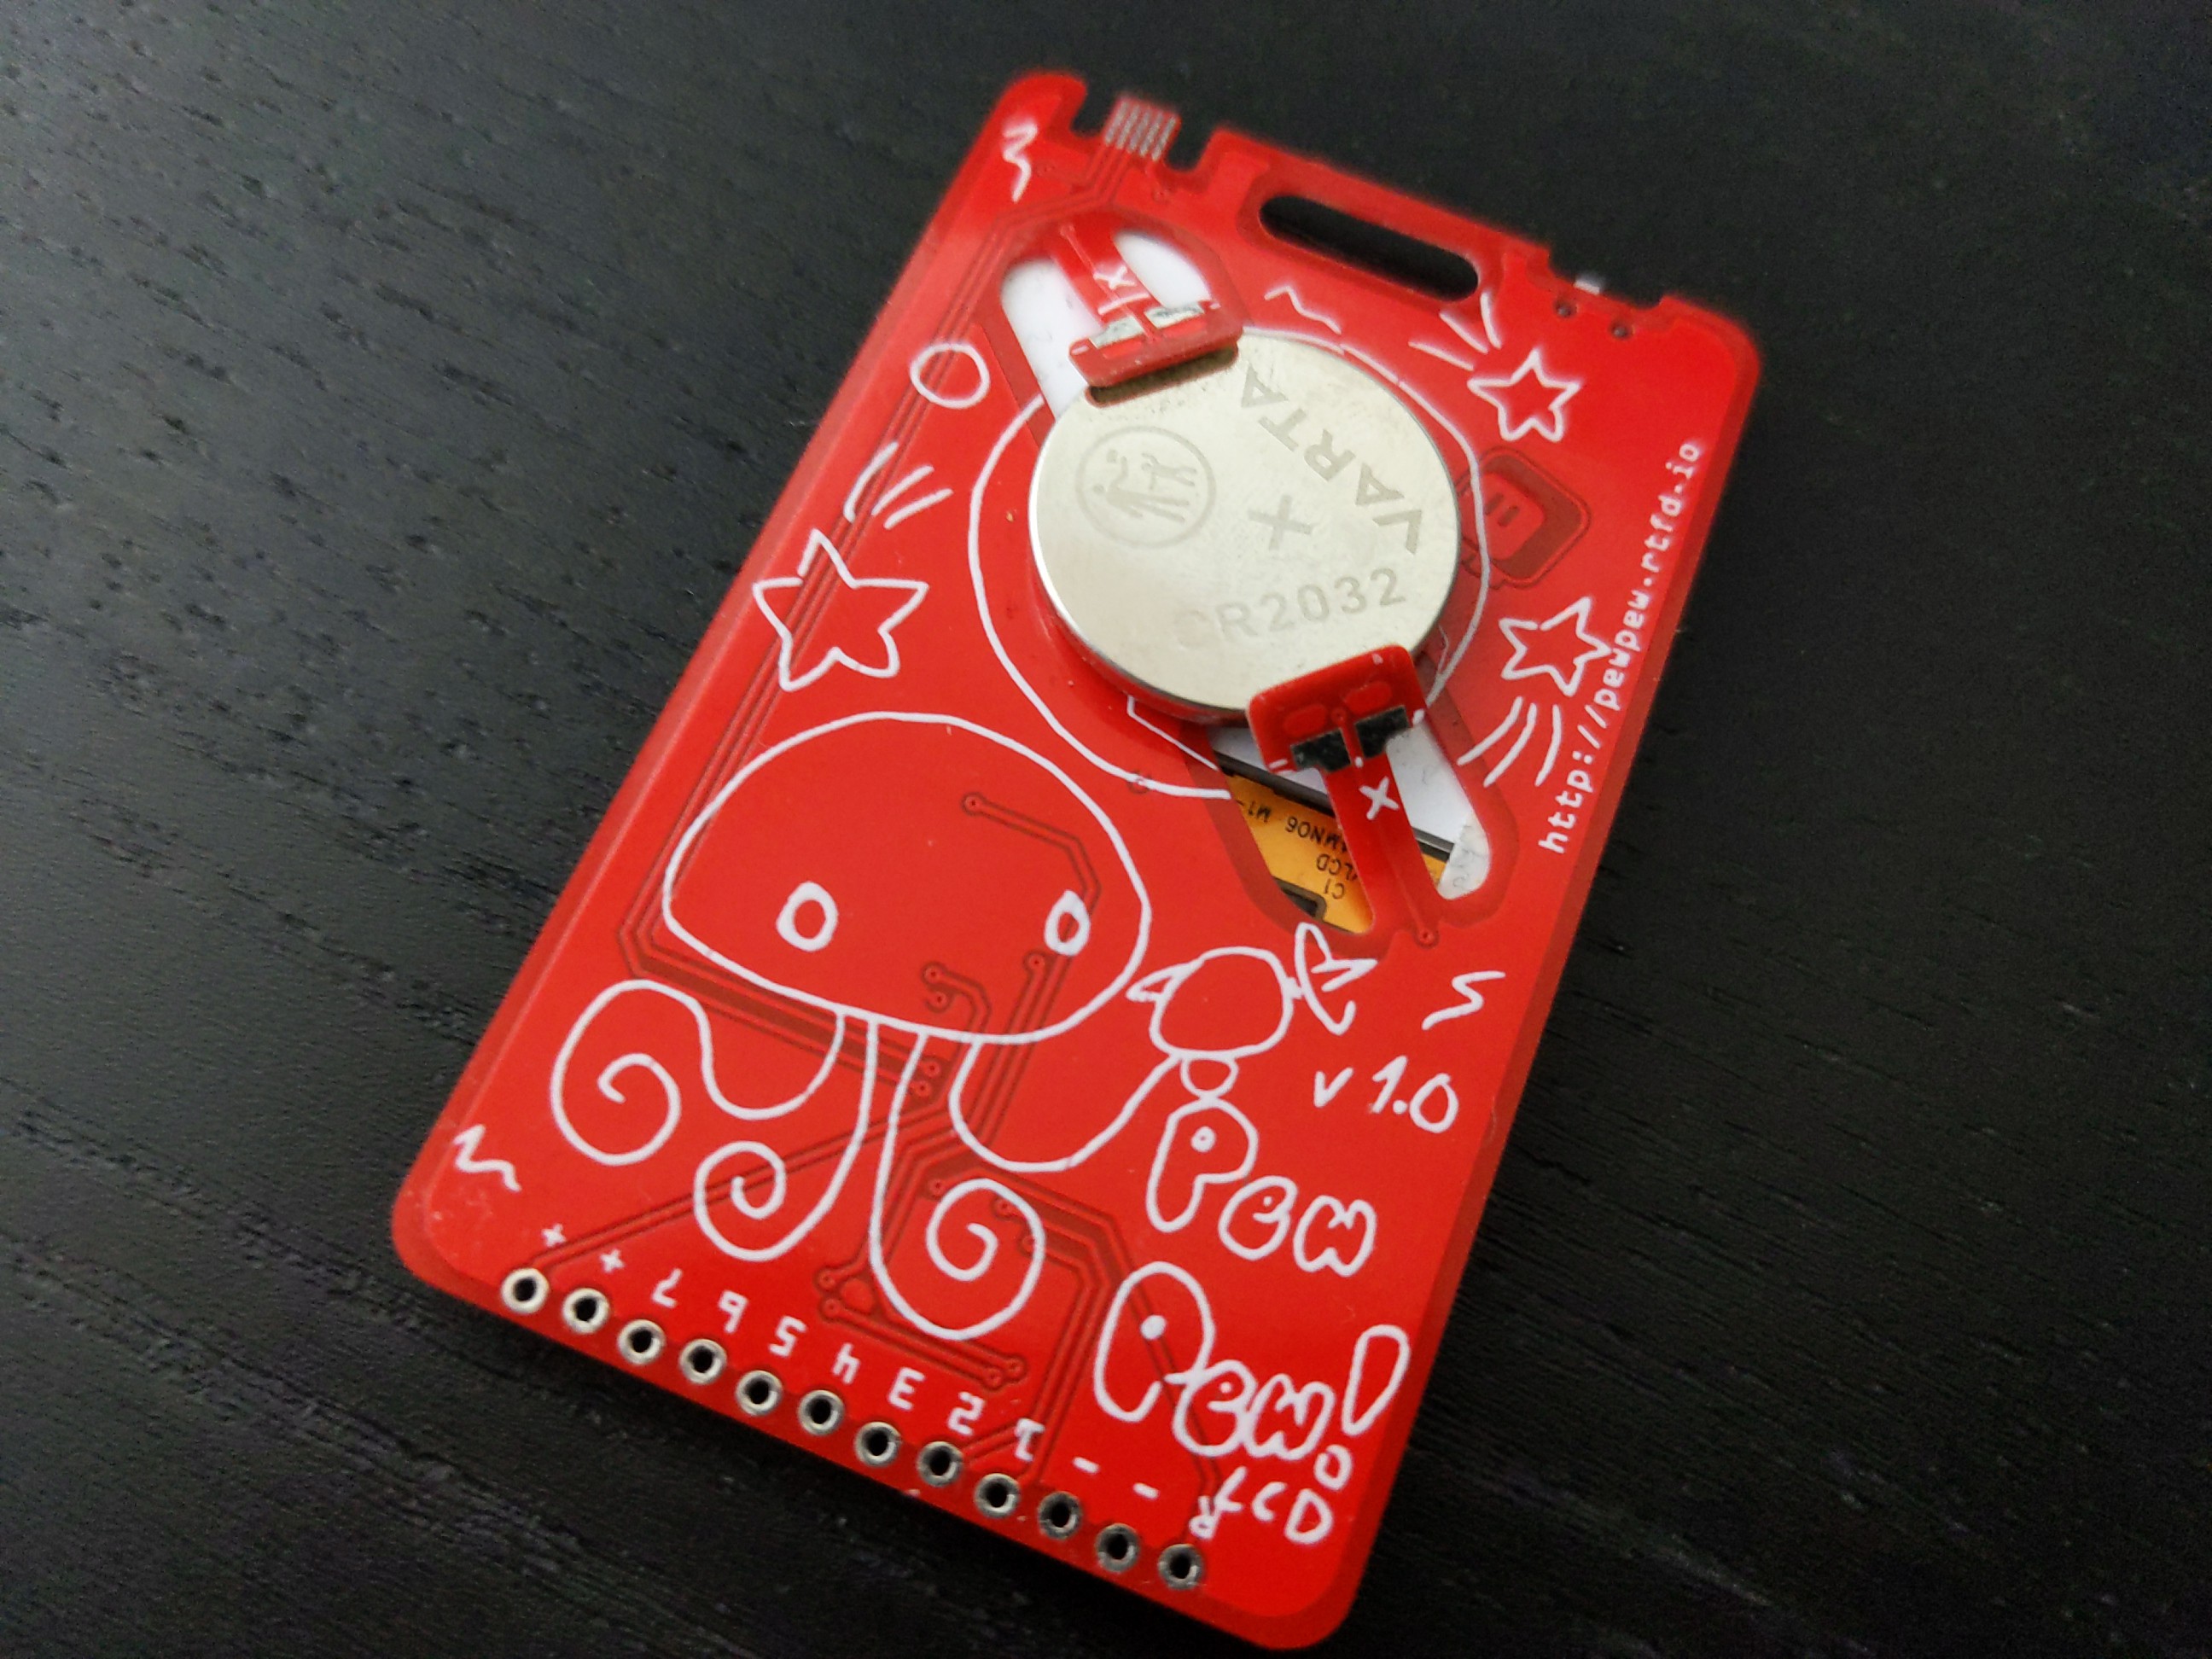
Well, turns out that using a cutout in the PCB in place of a regular battery holder has an unexpected advantage — it fits more kinds of batteries! Instead of your regular CR2032 cell you can fit a fat CR2450 cell in there, and it still works!
![]()
-
The PewPew Ecosystem
05/27/2022 at 14:45 • 0 commentsPewPew LCD is a very simple device: just a display and a microcontroller. The real power for it comes from the whole PewPew ecosystem, that has been growing over the years witch each new workshop.
There is a lot of documentation, starting with the pew library reference, through the basic bouncing ball tutorial, to the more advanced sokoban tutorial.
There is documentation for all the hardware devices, and also pewmulator, a program that lets you run PewPew games on your computer with regular Python.
And for those who want to extend the PewPew devices, there is a whole section on connecting various electronic components to the expansion connector, and controlling them from code. This lets you not only add additional effects to your games, or use non-standard ways of controlling them, but also lets you reuse the device for your electronic projects, whether it's a plant monitoring system, a smart home controller, or some kind of remote control for a robot.
Finally there is a community page, that links to the mailing list for the project, the repositories with code and hardware designs, and the CircuitPython Discord server, where you can get help.
Finally, in the repositories you can find all the games:
They can both give you inspiration and serve as starting points for your own games.
Hopefully, with further workshops and with more people discovering the joy of making simple games this ecosystem will continue to grow and improve.
However, on the PewPew LCD you are not limited to just the PewPew ecosystem! Because it comes with CircuitPython's displayio, you can use the display for anything, not just 8x8 pixels for simple games. And if you really want to, you could it even program it with Arduino or any other environment available for SAMD21, to really leverage the power of that tiny microcontroller — there is, however, no ready support for this, so you would be mostly on your own.
-
Version 2.1 Assembled
05/27/2022 at 13:49 • 0 commentsThe PCBs from @Elecrow arrived today, so it's time to assemble the new version. There were absolutely no surprised, and everything seems to be exactly as it should be:
![]()
The display aligns with the silkscreen properly now, and the traces for the buttons no longer get in the way of touching them, so there are no misclicks.
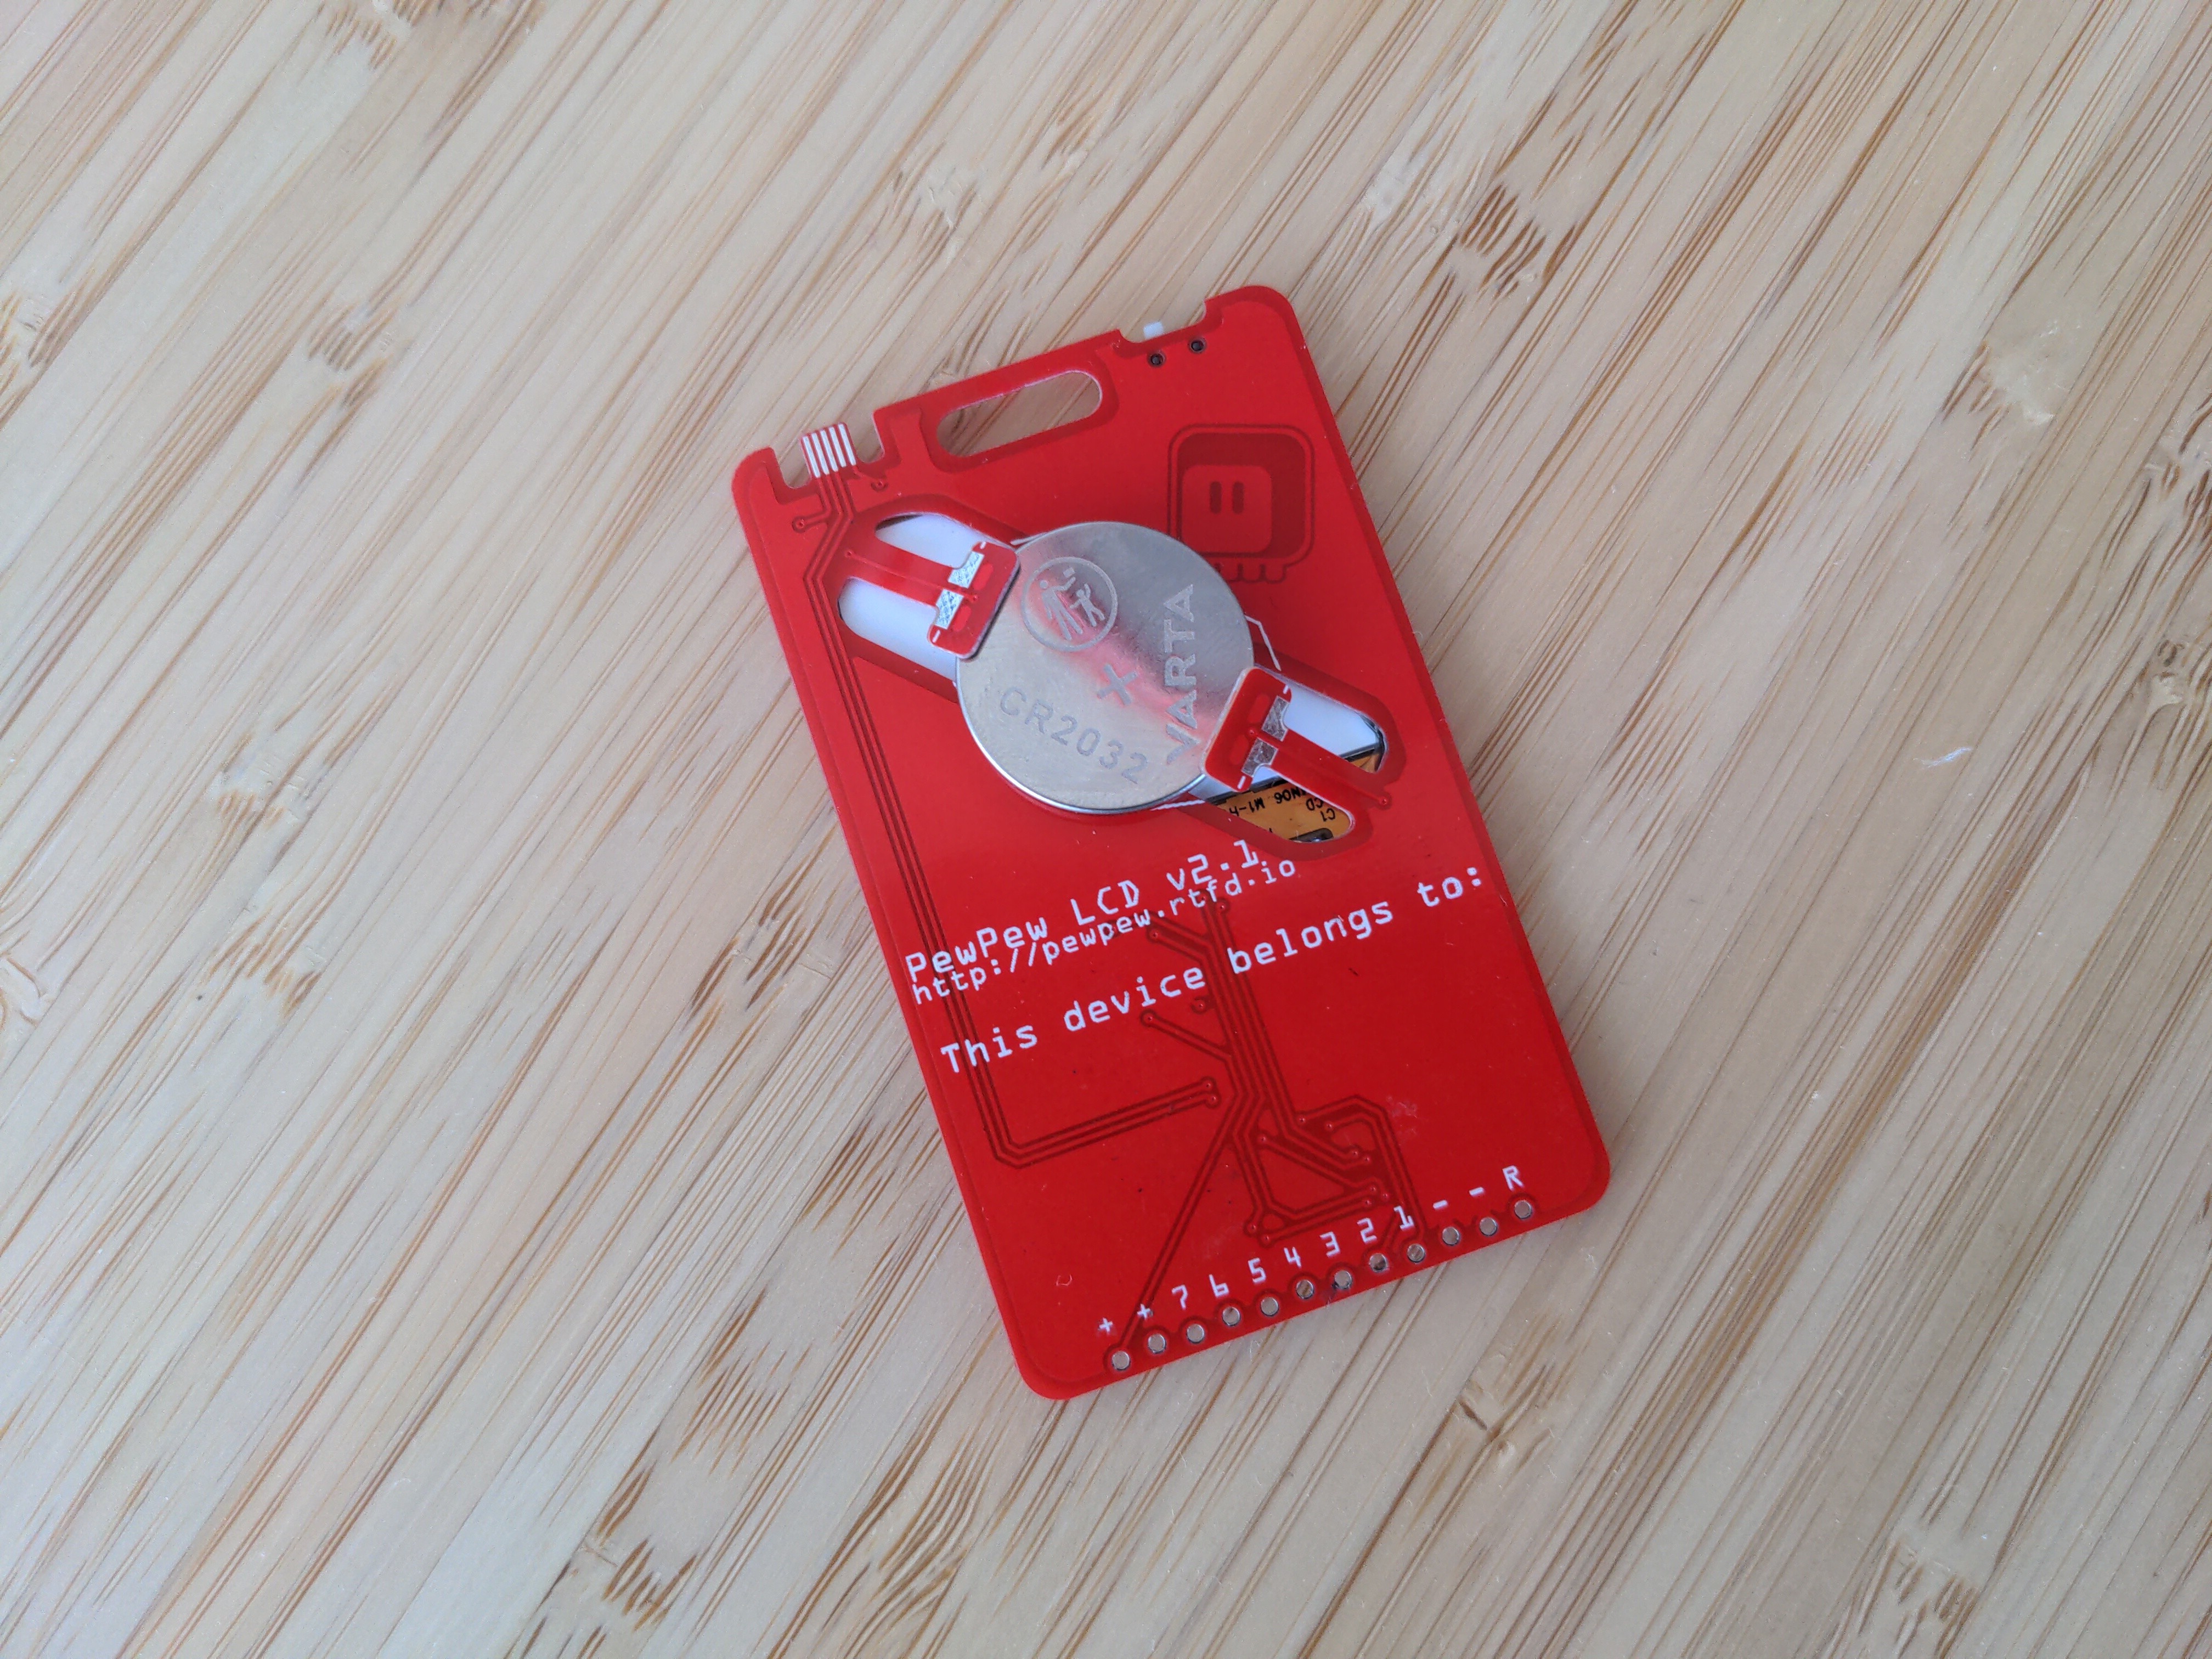
On the back there is room for your name:
![]()
Unless I'm missing something very bad, this is the final version of the device. Now it's just a question of the software for it.
-
Talk to the Display
05/24/2022 at 21:12 • 0 commentsWhile I wait for the PCBs to arrive (they are apparently already on their way, and should be here next week), let's talk a little bit about how the communication with the display actually happens. I already mentioned that it uses 9-bit SPI protocol, and that means that each time a byte is sent to the display, it's prefixed by an additional bit that tells it whether it should be treated as data or as a command. But what are those commands and in what format is that data precisely?
We can learn all about that from the datasheet for the STE2007 chip (PDF) that is used in that display. For those who have already some experience with OLED displays, it's very similar to the popular SH1106 chip. In fact, in displayio we use the SH1106_ADDRESSING flag for it!
Let's start with the commands. Table 18 of the datasheet details all of them, but we will only need to use a few. Right after powering on, the display is inactive — we need to send it some initialization commands to make it work. Those commands are as follows:
E2 reset
2F power on
A4 display normal
AF display on
First, we do a software reset, just to make sure we get a clean slate. This is theoretically not necessary, but there could always be some glitches on the communication lines during power on, which could potentially send some random commands to the display, and it doesn't really cost us anything to be careful (we do a hardware reset with a pin anyways).
The next command switches on the internal power for the liquid crystal. The chip contains all the necessary circuits to provide just the right voltage for this particular liquid crystal panel, but it's off by default (because there is also the option of providing that voltage from outside), so to get anything displayed, we need to switch it on first.
Next, we switch the display into the "normal" mode, as opposed to "inverted", where all the pixels are negative, "all off", and "all on", which are used for testing. The normal mode is when a 1 in the chip's memory gets translated to a black pixel.
Finally, we send a command that actually makes the driver chip start sending the pixel data to the liquid crystal panel — this is separate from the power on, since if we provided external power, we would still want to do the display on command without doing the power on command.
After sending those four commands, the display will start showing the contents of the chip's memory — initially it's just random pixels.
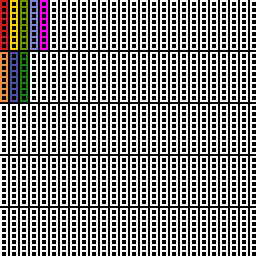
Next, we will need to send the data to be saved in that memory, and for this we need to understand how that data is arranged. We can visualize it roughly like this:
![]()
Since the display is monochrome, each pixel is represented by a single bit of memory. So a byte represents a set of eight pixels. In this case, it's a vertical line of eight pixels, as you can see on the image above — each of the colored "ladders" is one such set of eight pixels, or one byte in memory.
Furthermore, those bytes are arranged in what the datasheet calls "pages", and what we would probably call rows. Since the display is 96x68, we will have 9 rows of 96 bytes each (the last row is only partially visible). We select the row with the "page address set" command, which is actually 16 different commands, one for each page (there is a bit of redundancy there), from B0 to BF. The chip actually has more memory than fits the screen, and that can be used for vertical scrolling using the "start line address set" command 40-7F, but we are not using it in this case.
Each time we send a byte of data, it's getting saved to the current page, and then the "cursor" is advanced by one horizontal position. This means we can simply just stream 96 bytes for a row. Then we need to switch to the next page, and stream the next 96 bytes. If we didn't need to update the whole width of the display, though, we can also move the cursor horizontally using the "column address set" commands — there are two sets, 10-17 for the top three bits of the address, and 00-0F for the lower 4 bits. That gives us addresses of up to 127 — again, the chip has some redundancy.
And that's it. That's all the commands we need. You can see that it's very convenient for us to use 8-pixel high blocks for the PewPew "pixels", because they just fit in the pages that way. If we picked any other size, we would need to combine data from two rows for every byte that is sent to the page, which is not much more work, but can get a bit annoying. This way for each large block we just send one of those strings, depending of which "color" we want:
b'\x00\x00\x00\x00\x00\x00\x00\x00\x00\x00',
b'\x44\x11\x44\x11\x44\x11\x44\x11\x44\x11',
b'\x55\xaa\x55\xaa\x55\xaa\x55\xaa\x55\xaa',
b'\xff\xff\xff\xff\xff\xff\xff\xff\xff\xff',
And that's it. That's all we need to know about this display.
-
Why not Recycle Everything?
05/17/2022 at 12:05 • 0 commentsWith both the screen and the battery being chosen with their impact on environment in mind, you are probably wondering what about the remaining components, especially the microcontroller?
The quick answer to that is that the chip shortage has cleared any old micrcontrollers from the warehouses quite well already, so there isn't really much surplus we could draw on here.
The more detailed answer is that the main and overriding goal of this project is to remove as many obstacles between you and the game you are going to write, as possible, and the older microcontrollers simply don't have the resources, in terms of memory and speed, to run a Python interpreter. They often don't even have native USB peripheral on them, which means you would have to muck about installing toolchains, compiling your programs, and using special dongles and programs to flash them onto the device. This is simply unacceptable.
As for the other components, they are really generic, and you could easily use recycled ones if you are building this by hand. But for producing hundreds of the devices, the additional effort in hand-placing them and doing quality checks to make sure they work, with added risk that they might stop working at any time anyways, is simply not worth it.
So we will have this mixture of old and new technology — ancient screen with a advanced microcontroller, traditional battery with a modern voltage regulator, generic switch with new capacitors.
Oh, and I also looked into using paper PCBs, but it seems the technology is not quite there yet.
-
Version 2.1
05/14/2022 at 09:53 • 0 commentsToday I couldn't sleep, so I did what I do when I can't sleep: designed a PCB. As I previously mentioned, version 2.0 is very close to what I want, but there were some small details I wanted corrected. Those changes are not really enough to warrant a whole new version, and I'm not going to do a new certification for it.
![]()
![]()
I removed the unused resistor footprint, and moved the capacitors away from pads, so that they don't get in the way. I centered the display, so it will now fit the outline properly. I moved around the traces for the touch pads, so that you are less likely to touch a trace and activate a touchpad when you didn't mean to. I removed the doodles to make it look a bit cleaner, and on the back I added a place to sign the device, to make it more personalized. I also covered the expansion connector pads with soldermask, so you are less likely to touch exposed solder with your fingers.
I will order the PCBs from @Elecrow once again, and I will publish the design files once I have tested and verified that they work.
-
CircuitPython
05/13/2022 at 18:44 • 0 commentsThe board definition and code is now merged into the CircuitPython project, and both the bootloader and the firmware can be downloaded from https://circuitpython.org/board/pewpew_lcd/ (or rather, the firmware will appear here as soon as there is a release). Thank you to the CircuitPython developers for reviewing and merging it so fast.
-
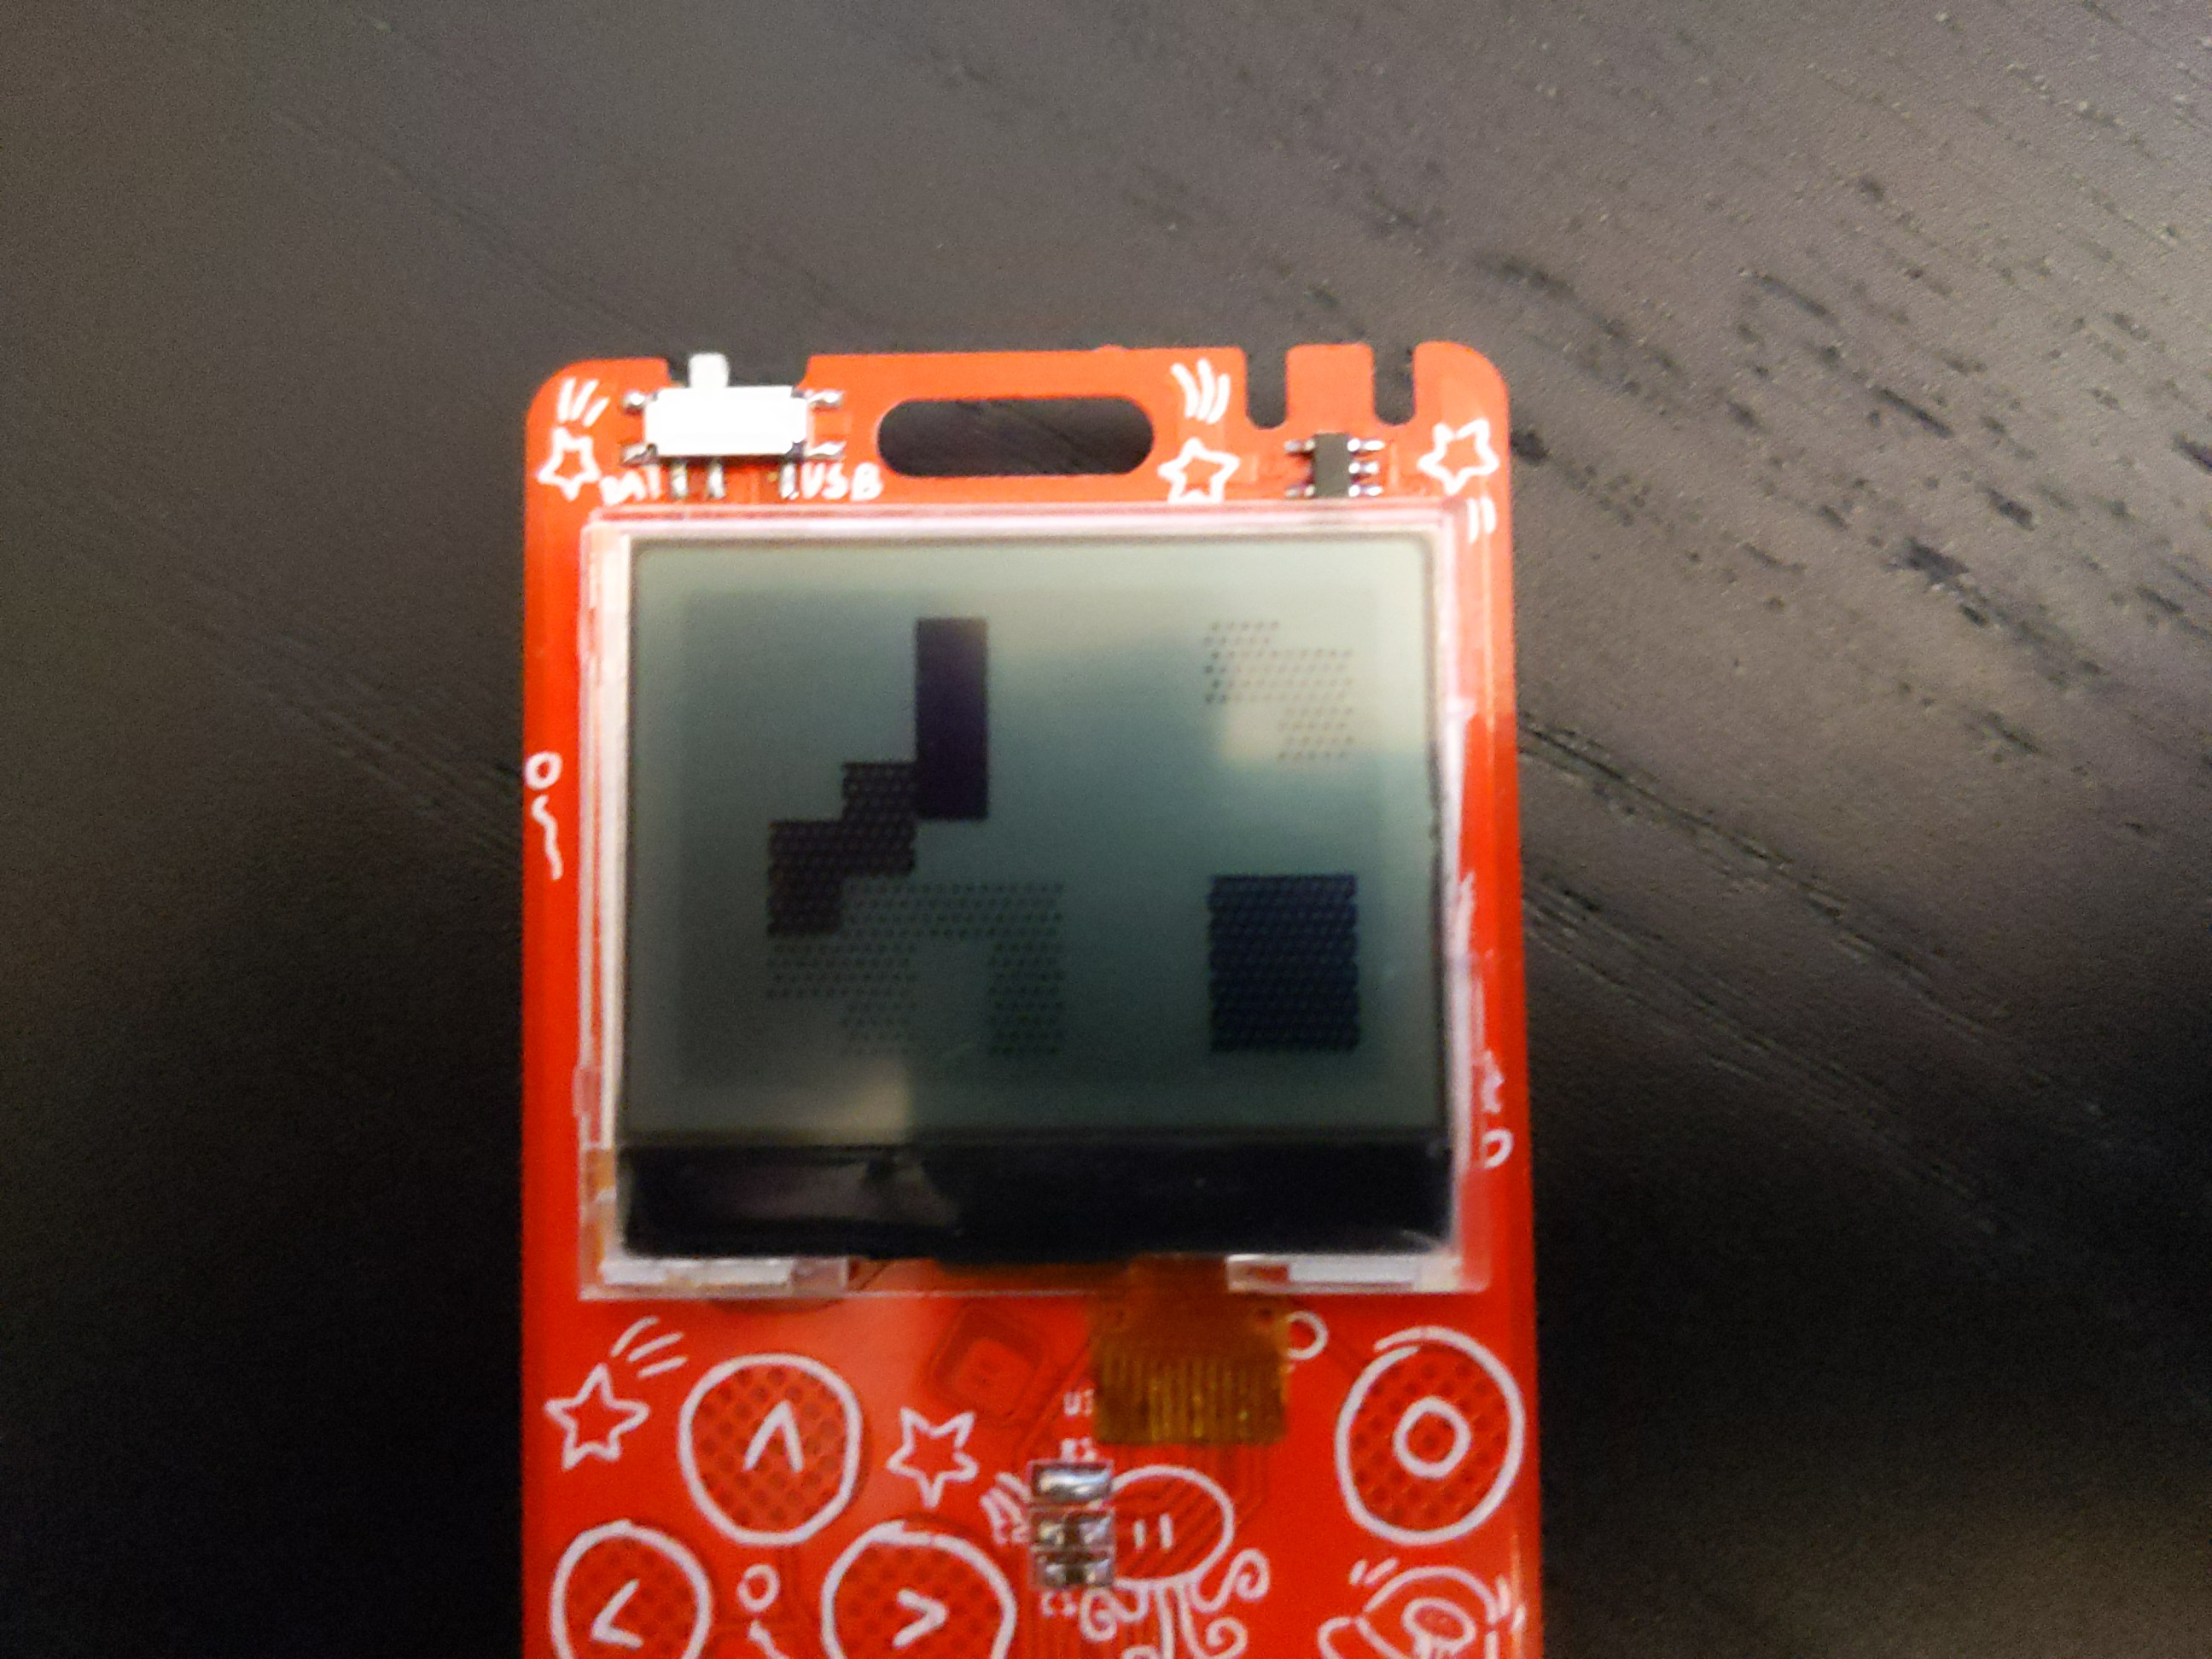
Dithering About
05/13/2022 at 09:21 • 0 commentsIt's time to look a little bit closer at the software. The display has resolution of 96x68, and I need to display a grid of 8x8 pixels in four shades on it. A quick calculation tells me I can have blocks of 12x8.5 pixels. Of course that's wrong, because I can use half of a pixel, and that block would be very much not square. But I don't have to use the whole screen. With 8x8 blocks, I use 64x64 area in the middle — the blocks are square, but the empty area on the sides looks bad. By experimenting I settled on 10x8 blocks — this is stretched enough to only leave 8 unused pixels on each side, but not as bad as to make the blocks visibly flat.
![]()
Next, I needed to figure out the best patterns for dithering those blocks. Of course the 100% and the 0% ones are easy, the ones in the middle though require some thought. Theoretically, they should be around 33% and 66% to give an uniform distribution, but there is no good way of arranging the pixels in the block without creating obvious patterns like that. Even if we make it 9x8 instead of 10x8, to be divisible by 3.
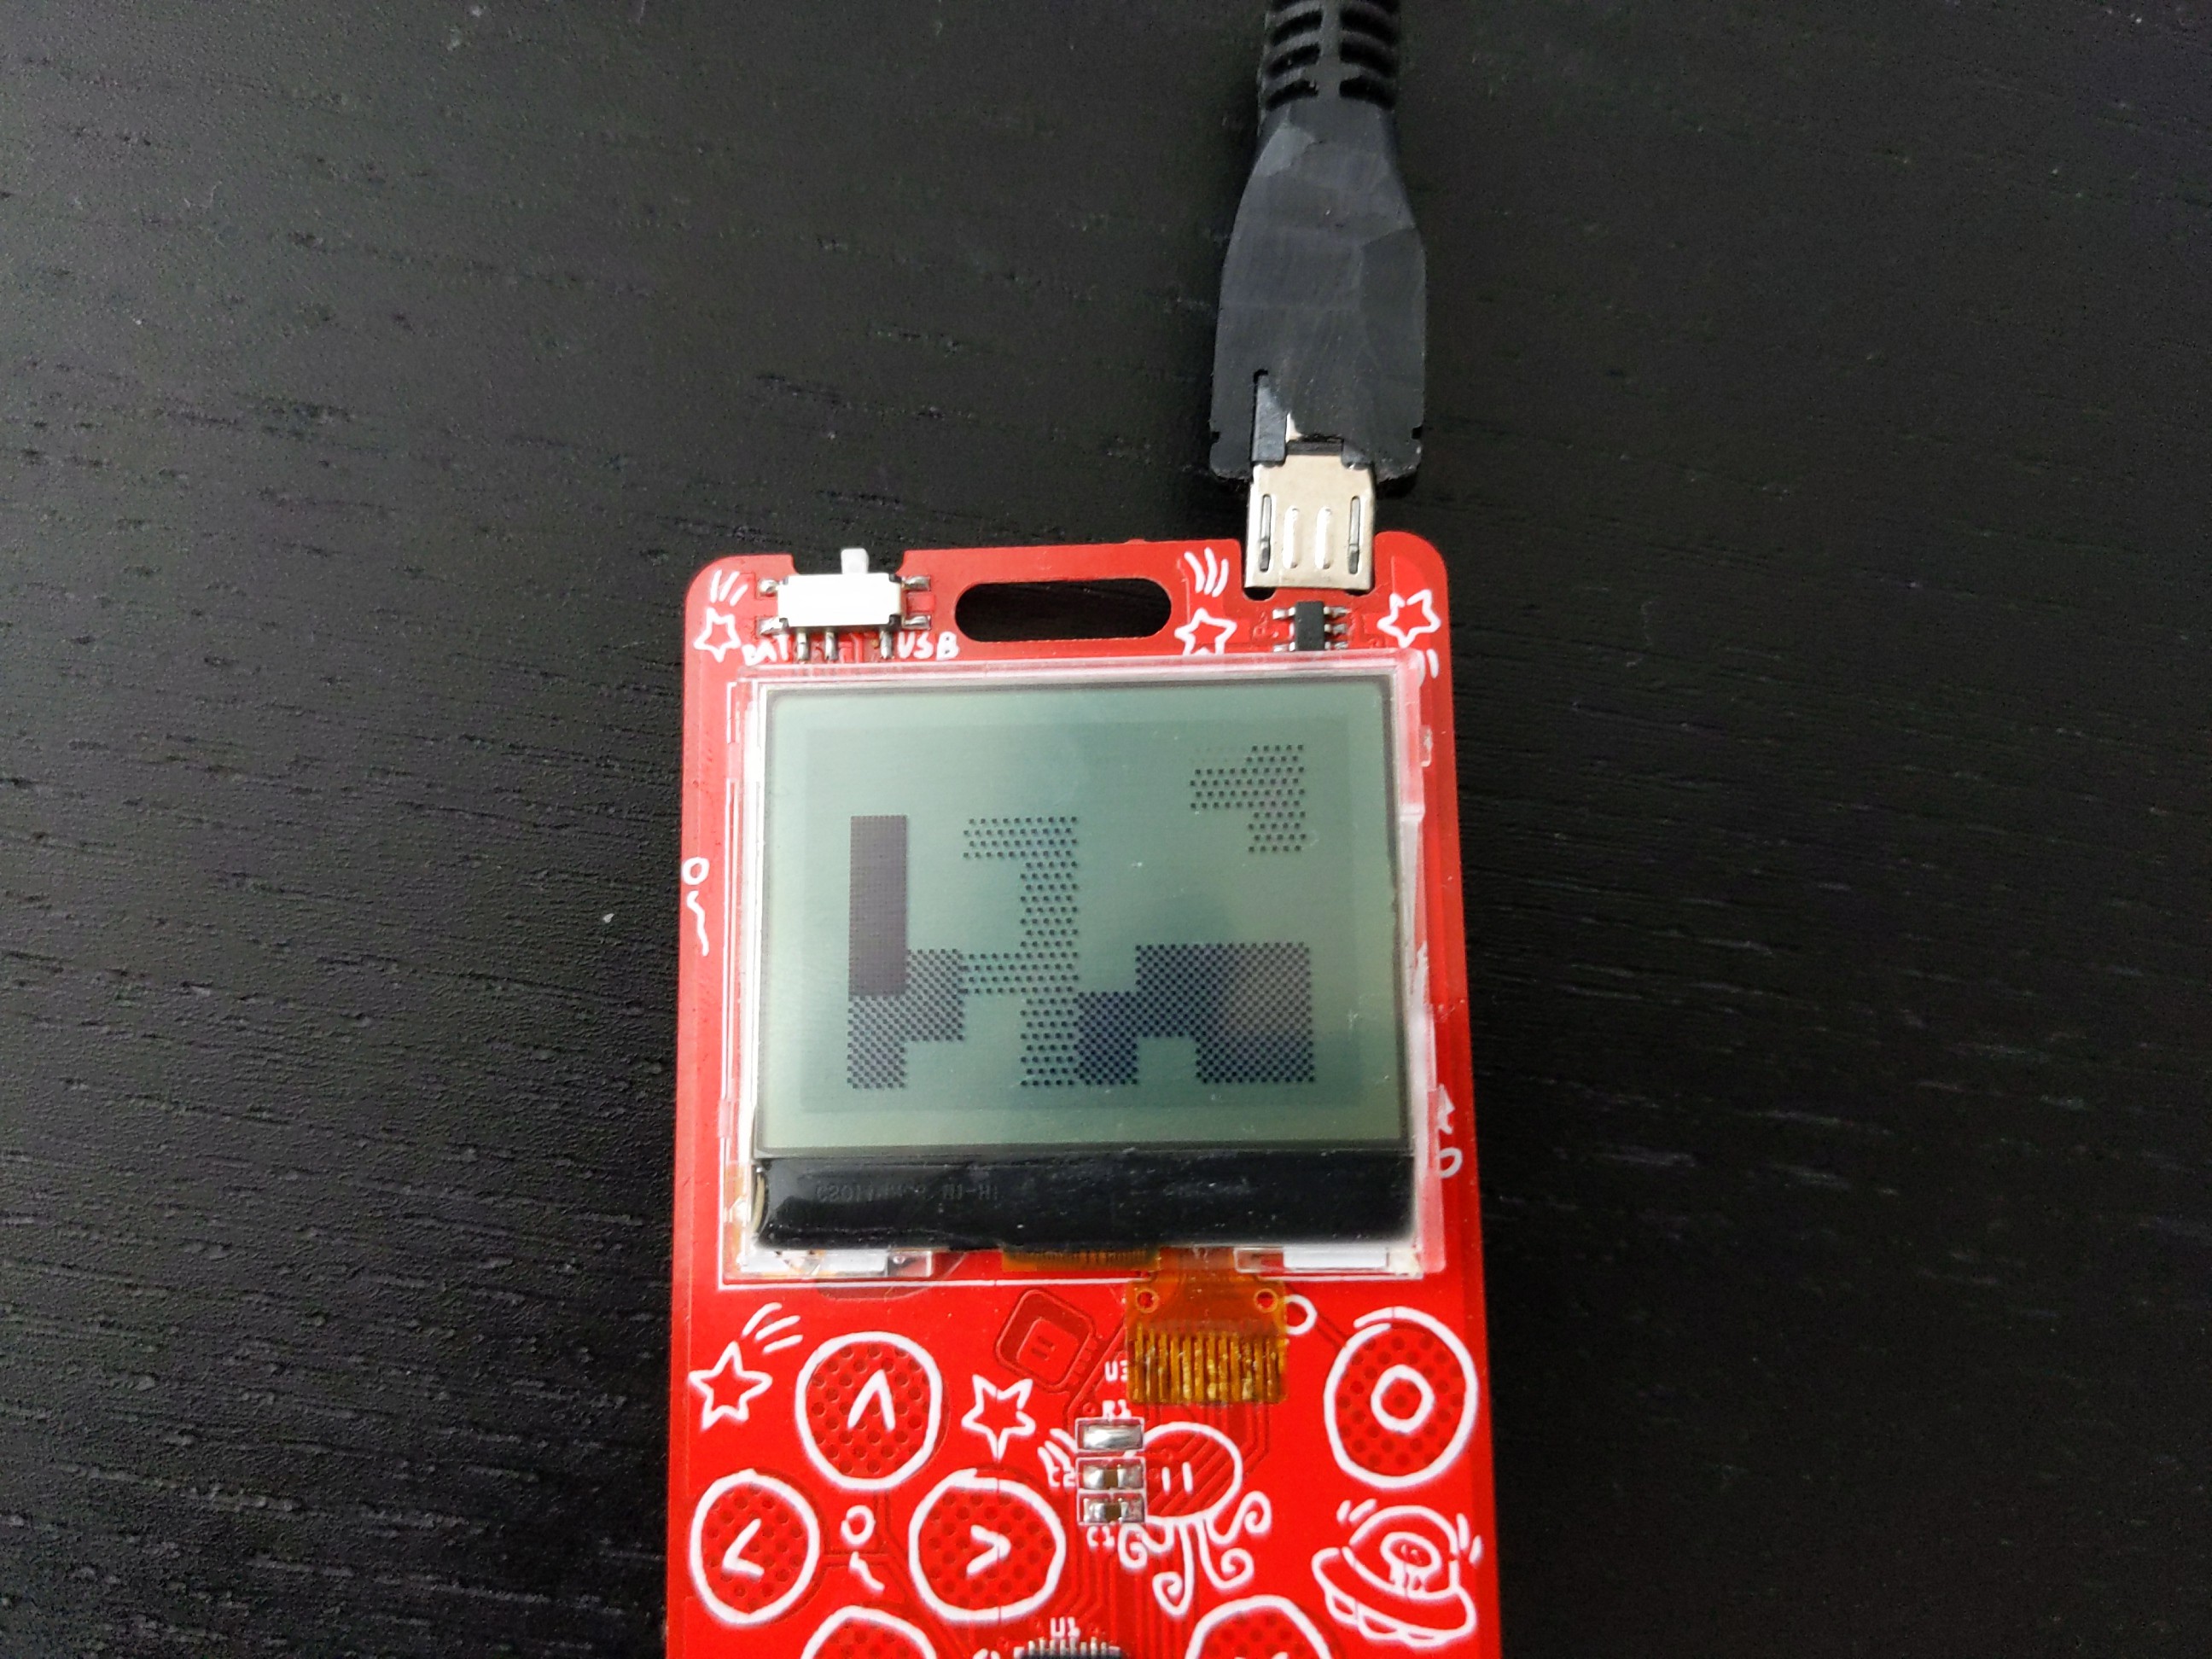
So as you can see in the image above, I initially went with 25% and 75% dithering. They are pretty uniform, and one is just a negative of the other, so the look is very consistent. However, I still wasn't happy with how the dark grey looked almost like black. So finally I settled on 25% and 50%, to make the blocks easier to tell apart:
![]()
I'm pretty happy with how that turned out.
By the way, it was suggested I could try PWM-ing the pixels, to get my shades of grey without dithering, but since this is an SPI display, I don't really control every frame of the image, and keeping consistent timing would have been hard. It would also require constant updating, taking away microcontroller time from the user's program, and making it slower.
-
On Batteries
05/12/2022 at 08:36 • 0 commentsIf we are talking about the environment, then let's talk about the only consumable part of this device: the battery (by "consumable" I mean it needs to be replaced once in a while, please don't eat batteries).
The very first PewPew FeatherWing used a lithium-polymer rechargeable battery, simply because all Feathers use such batteries. I didn't think much about it back then, and I didn't have a clear use case in mind at the time, I just went with what was the default on the platform.
Starting with PewPew Standalone, all devices use primary cell batteries — that is, non-rechargeable. Why? Surely rechargeable batteries must be much better for the environment, since you get to reuse them, and primary cells are just thrown away when they are spent? It's not that simple, and you have to consider how the device is used.
![]()
PewPews are designed for workshops. That means that you are most likely going to receive your device on a workshop, use it intensively for a couple of hours, then take it home with you, maybe carry it around for a few days to show to your friends, and then put it in a drawer and forget about it for a couple of years. Hopefully, once in a while you will find it again, resurrect it and have some fun with it again, or give it away to the neighbor's kid to play, at which points the whole story repeats. You might also incorporate it as a control panel in some bigger project, at which point it will be probably powered from that project.
In any case, if you think about the power profile of such use, it's exactly what kills rechargeable batteries. They are good for things you use all the time and keep charged, like smartphones or laptops (through they don't like to be topped up all the time), and lying for years without a charge in a drawer is really bad for them — to the point where they can burst in fire when you try to charge them afterwards. So you would have to replace them anyways, but replacing such — usually somewhat non-standard — batteries is not as easy as buying a pack of batteries in a nearby kiosk.
With primary cells you don't care — they will get you through the initial intensive use, and when you find the device in your drawer years later, you will just clean whatever spilled from them and replace them with standard cells that are cheap and widely available.
The second problem this solves is transportation. The workshops are likely to happen some distance from where the devices were first produced, and getting them there might involve shipping or flying. Both of those means of transportation have rules about lithium-polymer batteries, and if you want to take 20 of such batteries with you, there might be some problems with that. With primary cells this is not a problem — you ship them without the batteries (which also makes them lighter and the shipping costs lower), and buy the batteries when you get there. Easy. This way you are also reasonably sure the batteries are fresh and were stored properly.
And third problem is recycling. You might think that primary batteries are bad for the environment, because when they run out you throw them in the trash. However, where I live that is illegal, and I firmly believe it should be illegal everywhere (and we are getting there, with laws slowly changing to cover that). Primary cells — mostly alkaline and coin cell batteries — are collected and recycled. And they really are getting recycled, unlike the lithium-polymer batteries, which are only collected, since recycling them is not economically viable.
How come, you ask? Well, the alkaline and coin cell batteries have been around for a while, without much of a change to their construction or chemistry. Sure, the manufacturers are trying to improve the production process and raise the quality, but those designs are practically stable by now — there is very little changing, if at all. This means there was also time to develop efficient procedures for recycling the batteries, and recovering the valuable chemicals from them. The lithium-polymer batteries are not like that. There is a constant innovation in construction and chemistry of those batteries, and a battery you buy today is going to be considerably different from a battery you bought five years ago. They are also pretty complex inside, with all sorts of complex processes used to make the electrode surfaces bigger and the batteries more efficient — which also means the different parts of the battery are difficult to separate. You can't just grind the whole thing into powder and soak it to remove the chemicals, like they do with alkaline batteries.
So in the end, in this particular use case, primary cells seem to be much friendlier for the environment and more practical.