Steve Smith
-
Working on an update
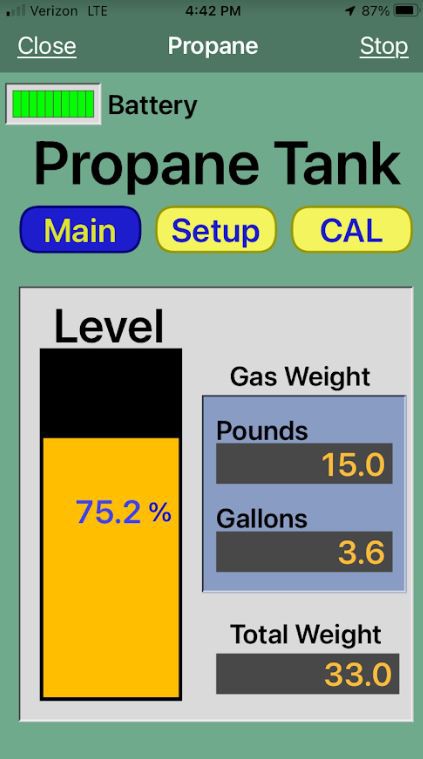
12/06/2023 at 23:48 • 0 commentsHave been using my propane weight scale hack for over a year and it is awesome! Life caught up to me and I didn't get to finish my hack logs, but I will have more time now to make more entries about the software in the last few weeks of December....so stay tuned.! In the mean time...here's a shot of one of the iPhone screens that I designed using RemoteXY application....it's amazing...!
![]()
-
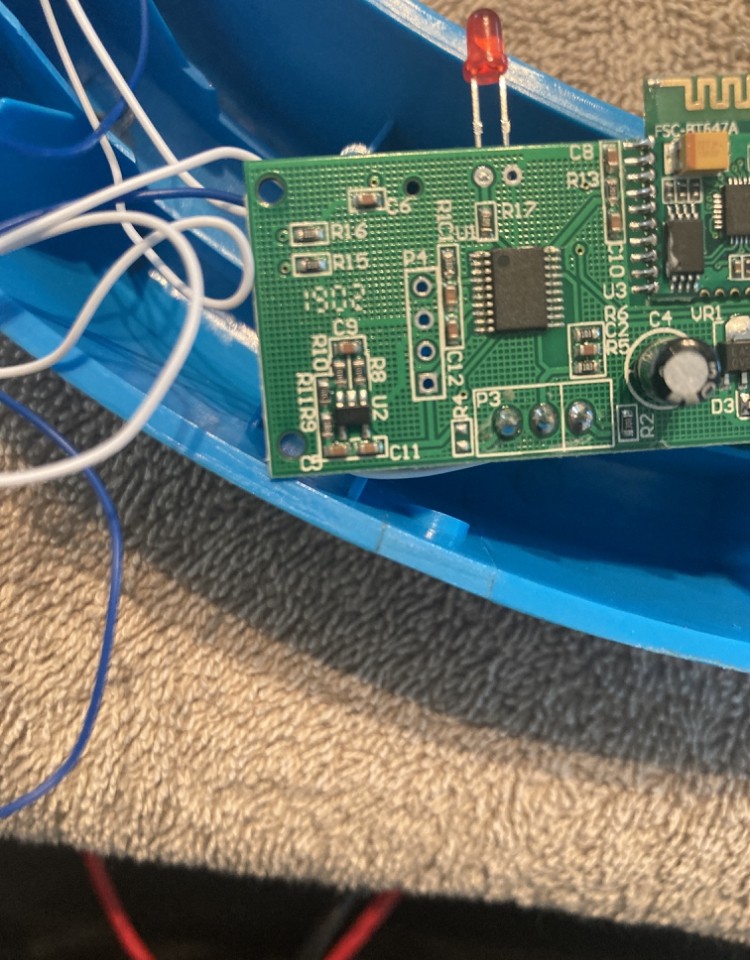
HX711 wiring and the TinyPico ESP32
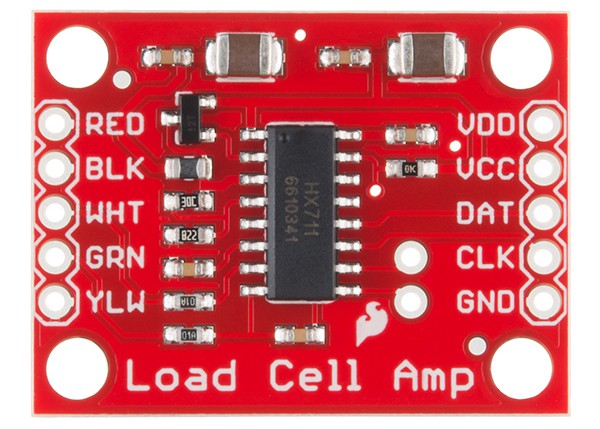
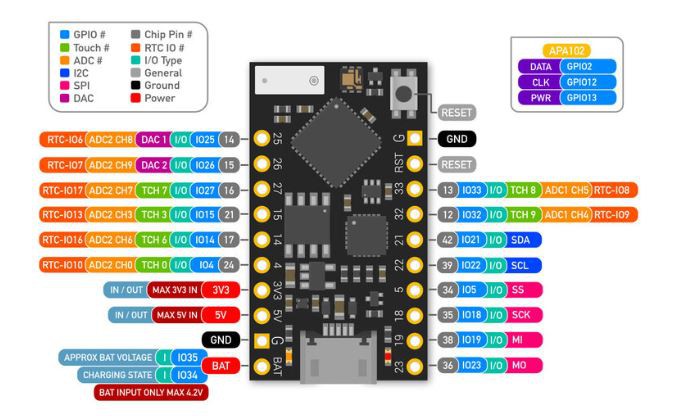
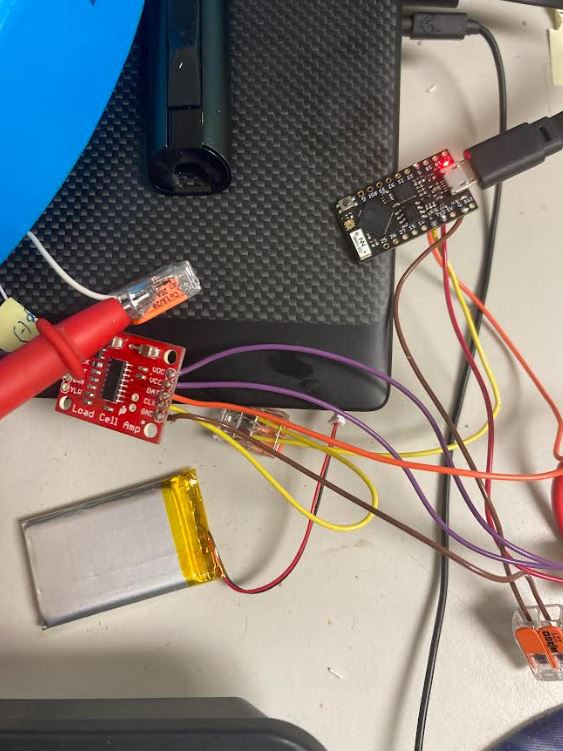
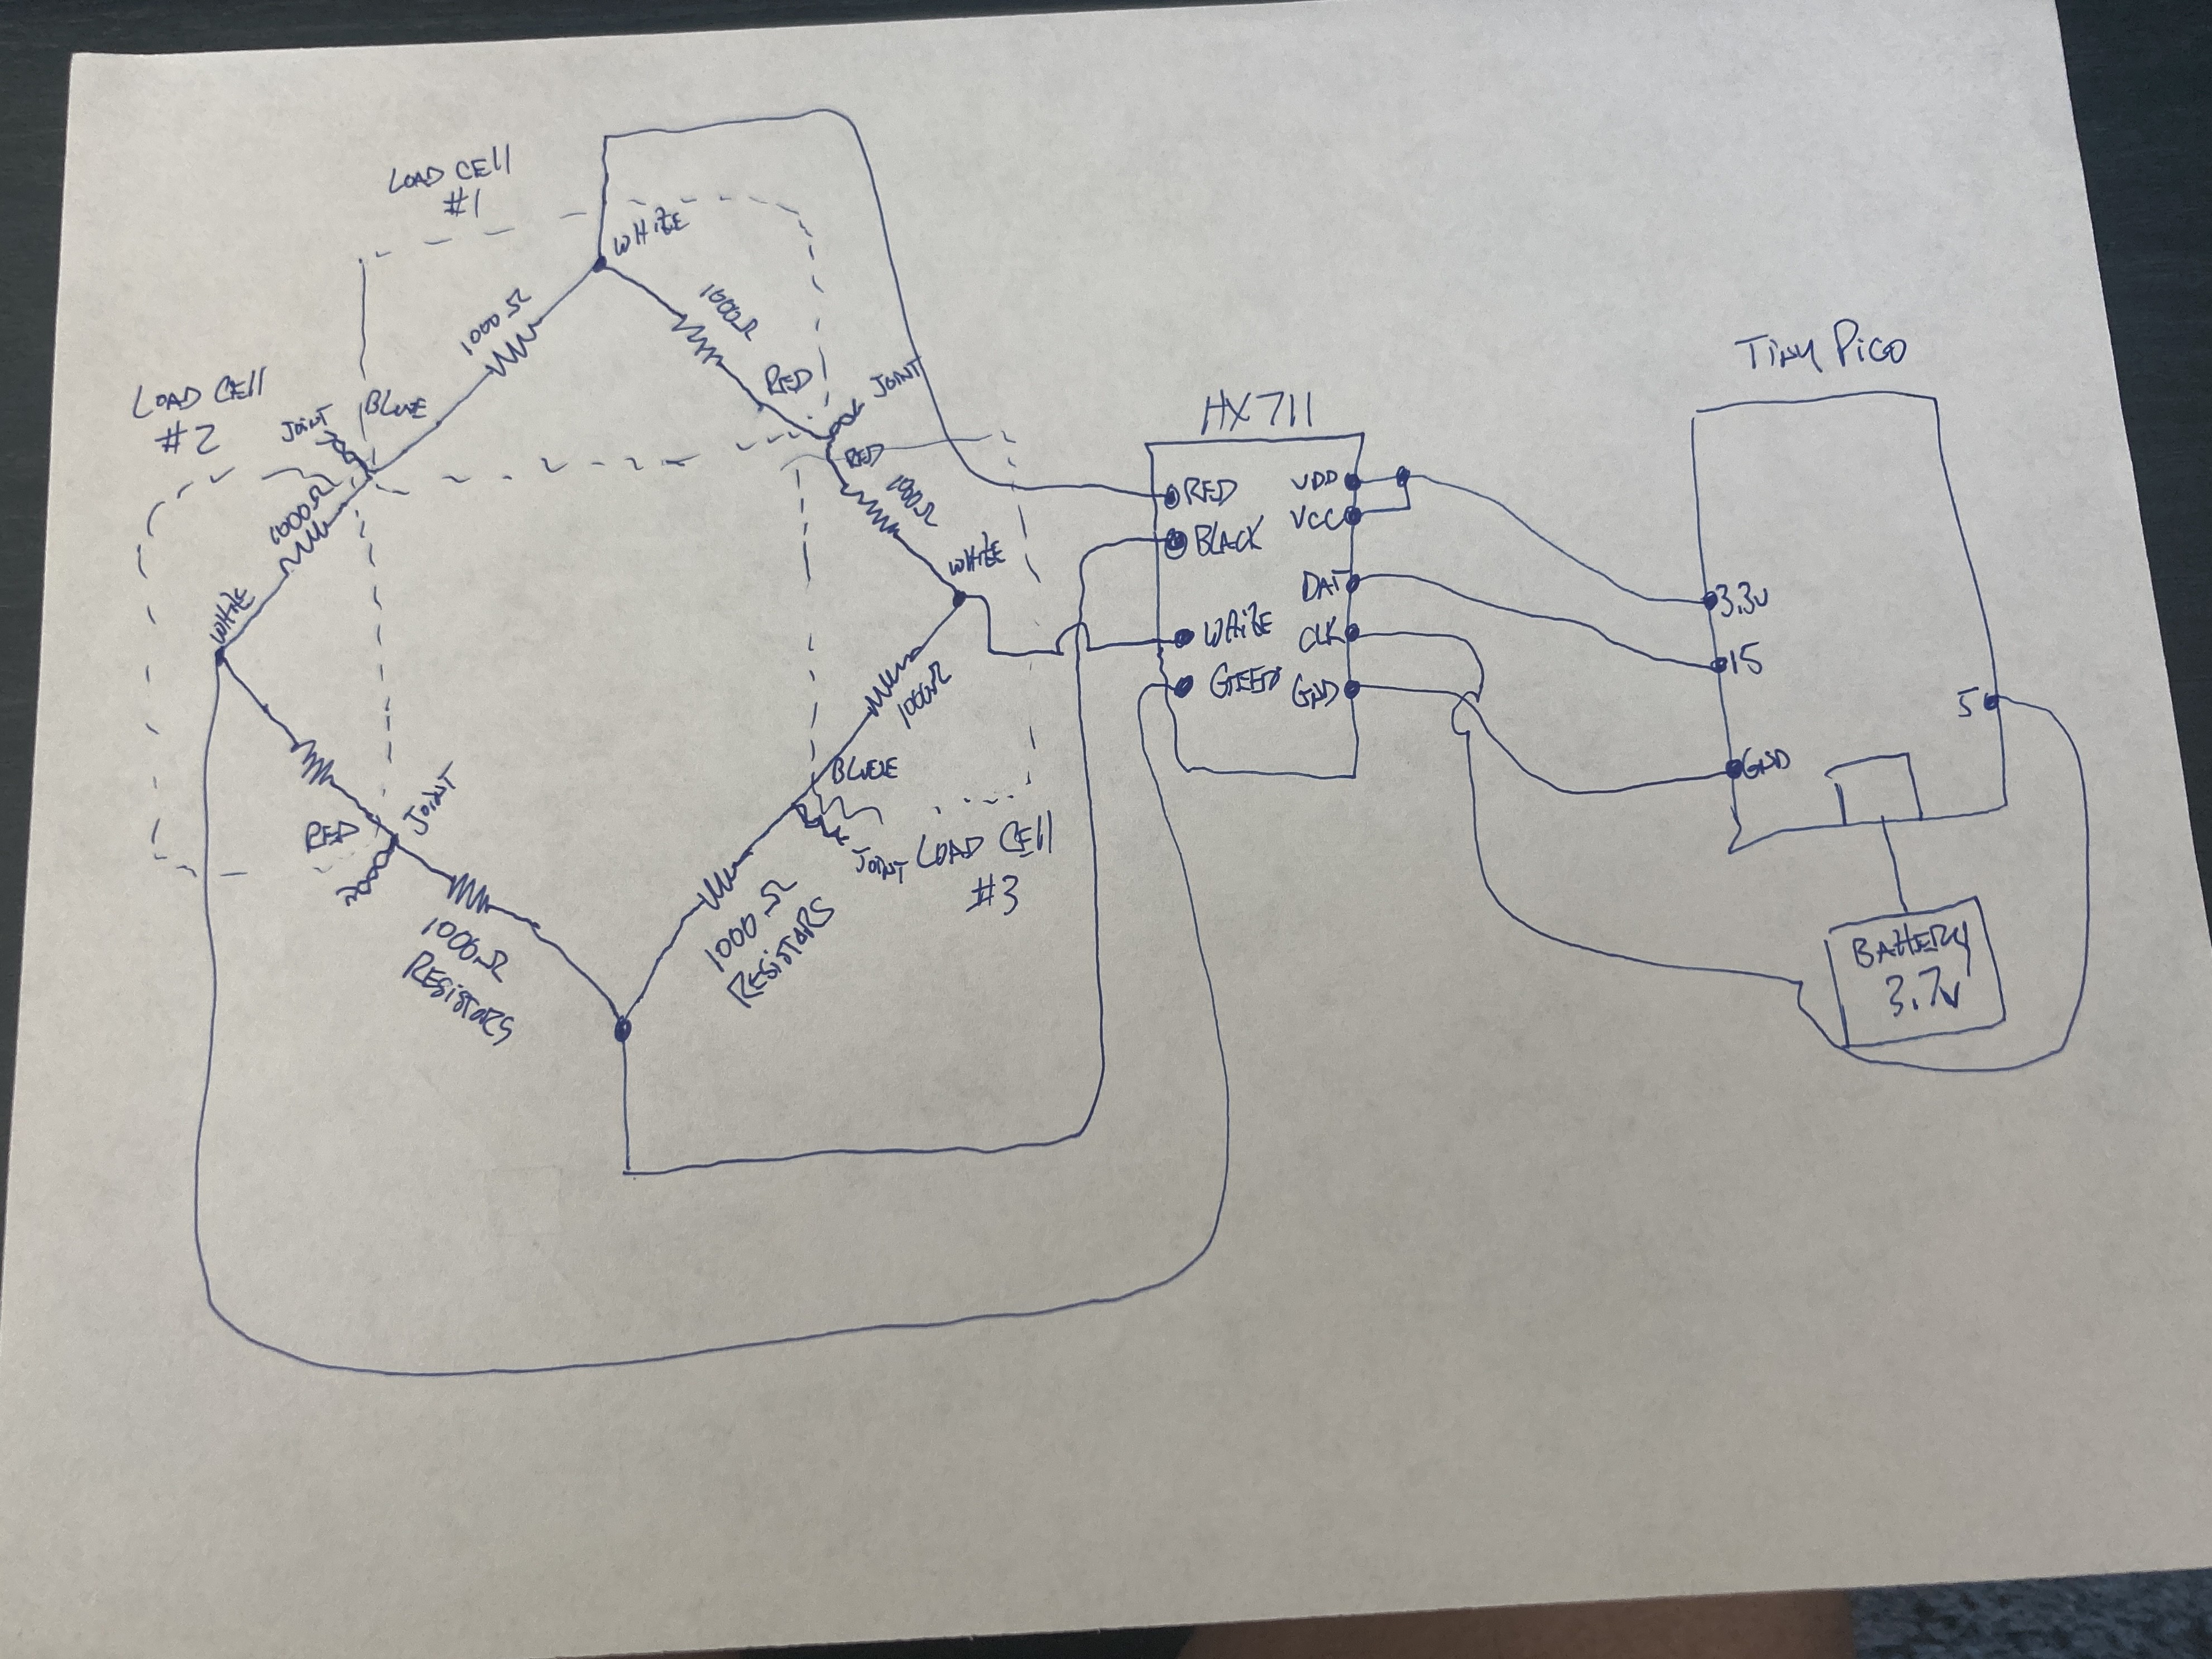
06/03/2022 at 18:06 • 0 commentsNow that I had the Wheatstone thought out, I connected it to the HX711 and wired it as per the example schematic. I had to add the two fixed 1000 ohm resistors per the diagram to make the Wheatstone a full four cell bridge. I added in the color codes of the load cells to the sketch and it is wired internal just like this really Ugly hand sketch shows. Having found the HX711, I went looking for an ESP32 type chipset that was the smallest unit that I could find that was in stock and available. I stumbled into the TinyPico.....it is a full ESP32 with WiFi and BLE and extremely small. I will take more pictures of the installation in future log entries. But I was able to wire it up and tested it and it worked with the example sketches...!! A lot of software work needed to be done....and I was still on the lookout for a way to communicate with an iPhone. The hunt for that continued......
![]()
![]()
![]()
![]()
-
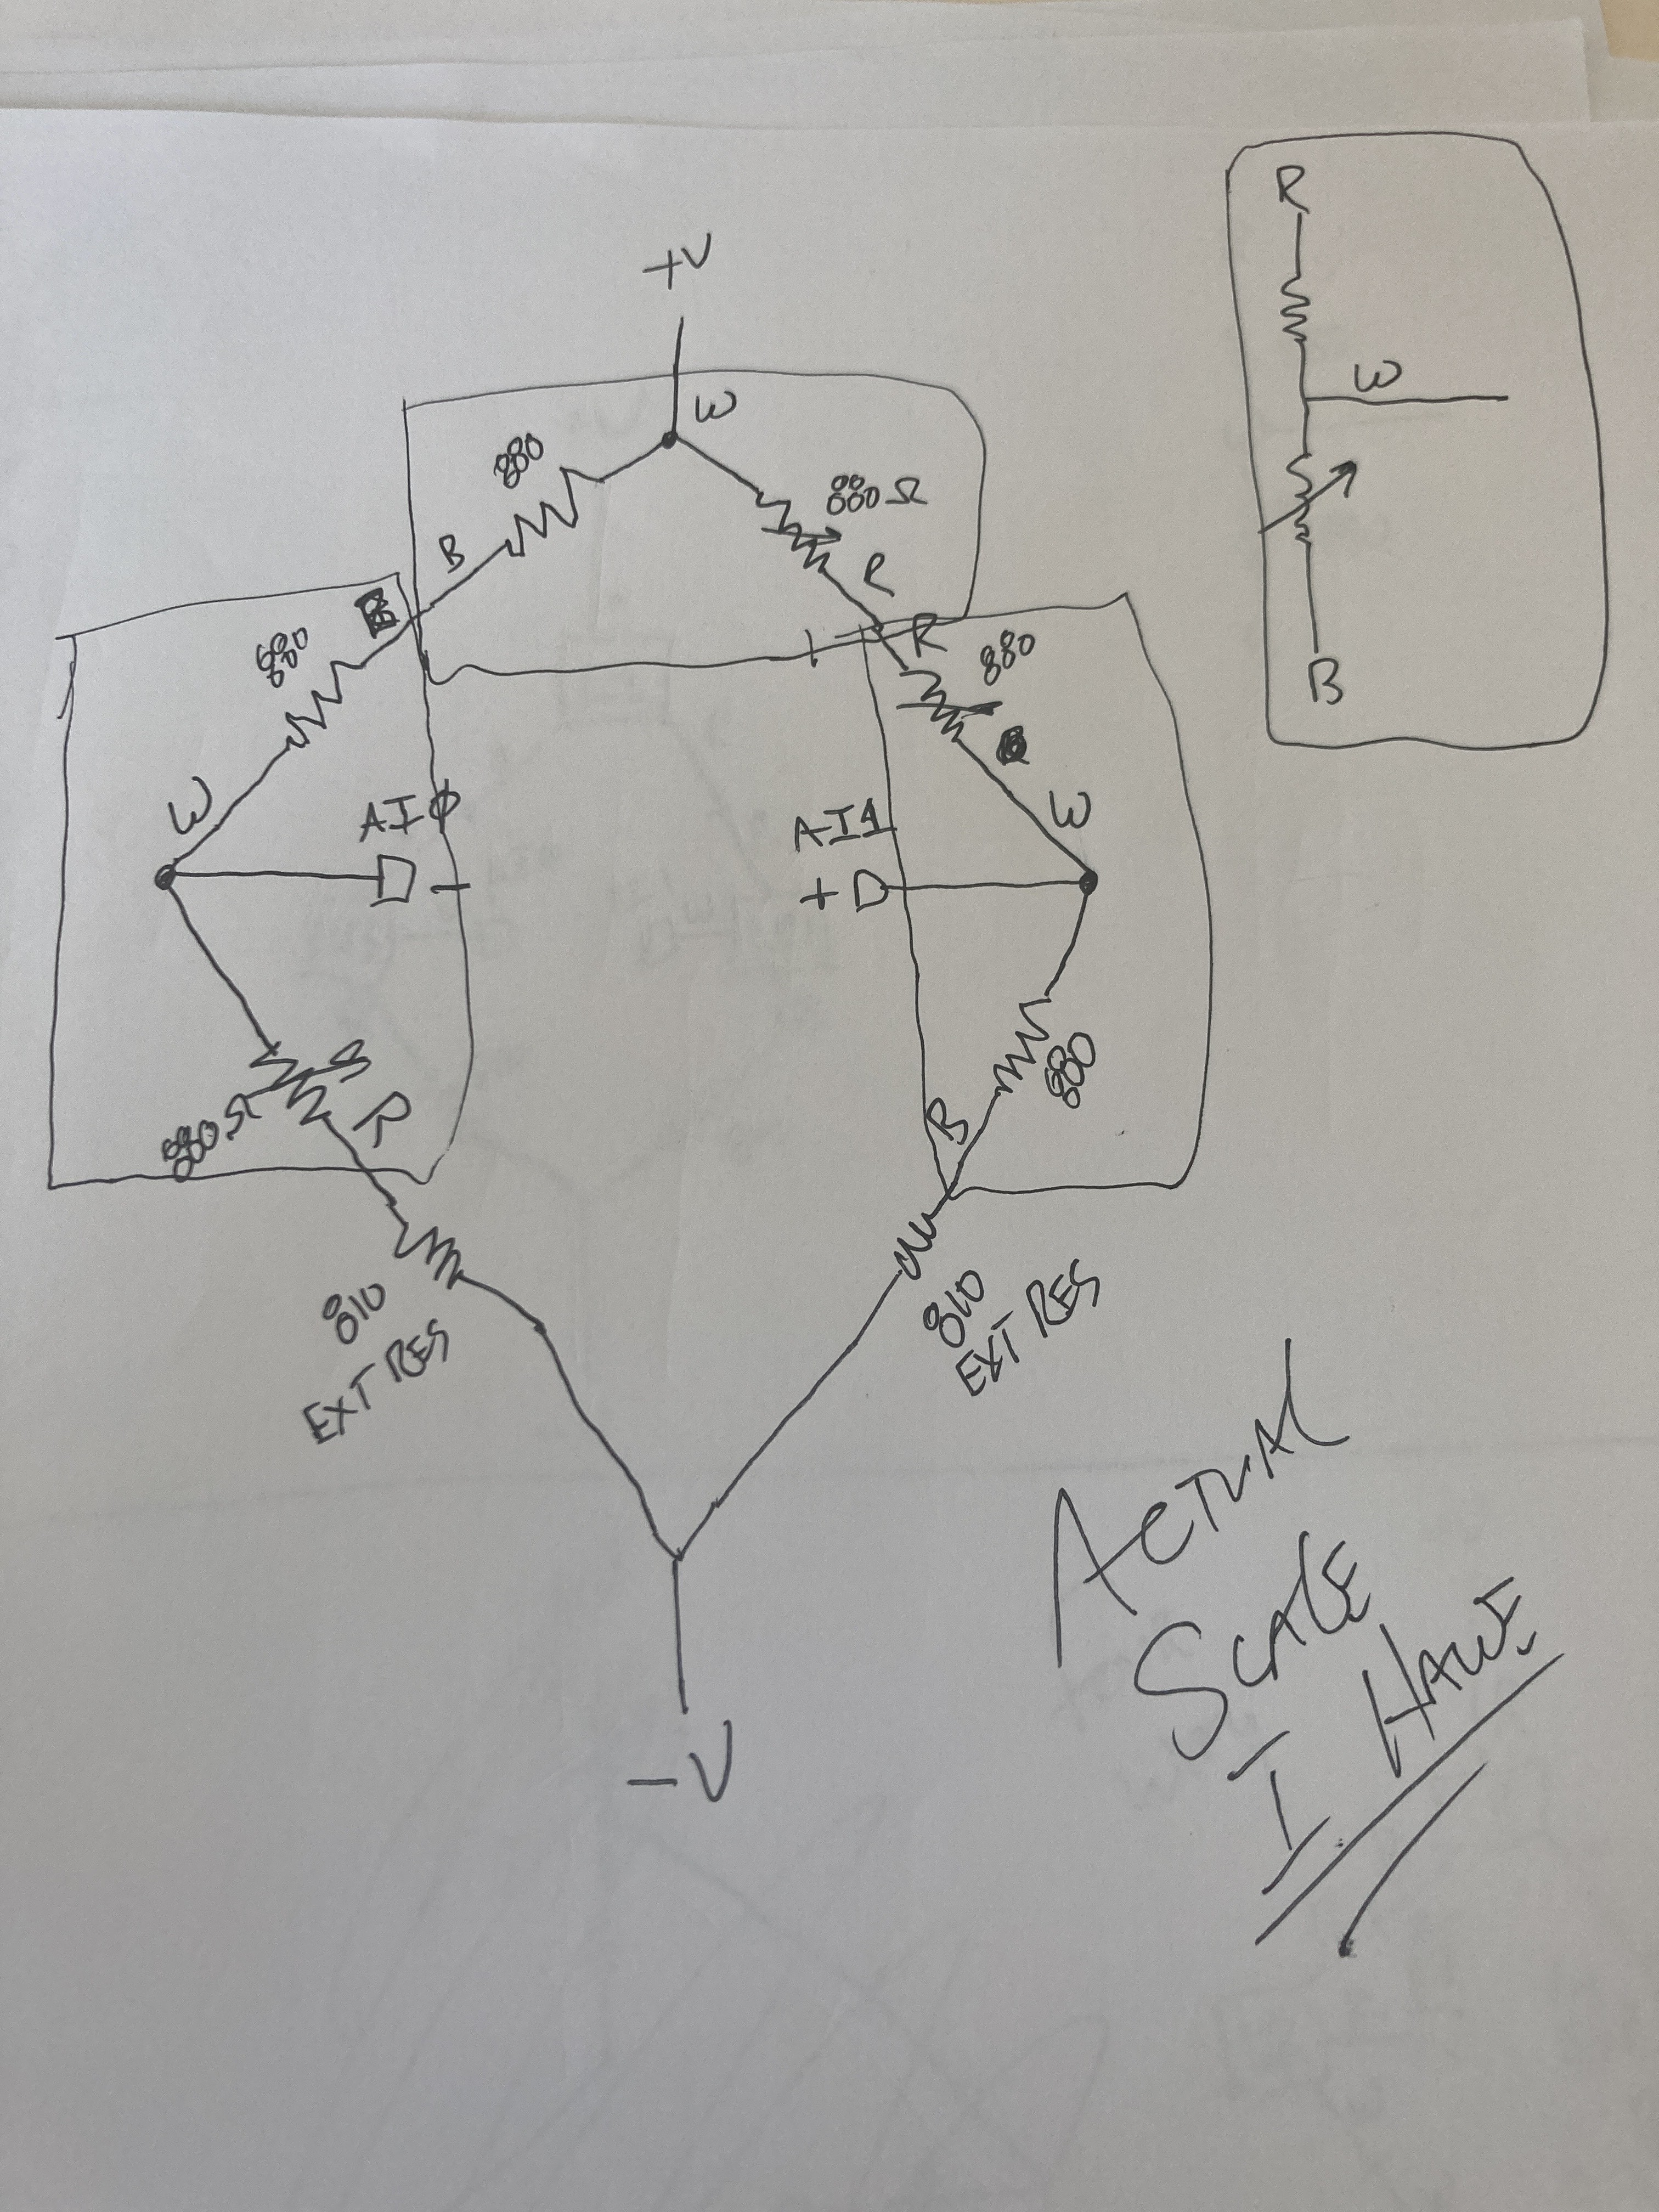
Drawing out the Wheatstone Bridge with Resistors. Amplifier selection.
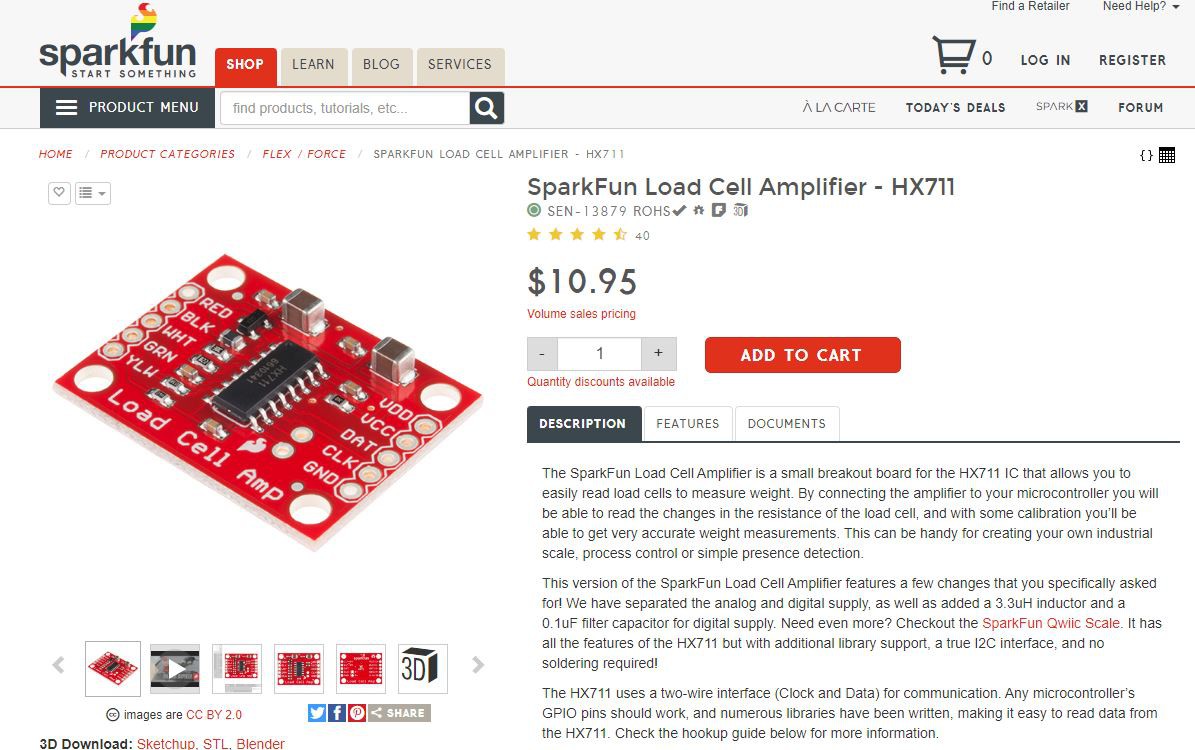
06/03/2022 at 16:46 • 0 commentsHaving drawn out the main PCB portion....I measured the load cells and did another Ugly Sketch of just the Strain Gauges and how they configured into a wheatstone bridge. Knowing this would allow me to add my own load cell amplifier to this circuit and then output to an AVR type microprocessor. Since I didn't need to recreate the wheel here....I ended up using the HX711, which already had libraries that were well documented and were usable in ESP32 type chips.....which I wanted to use because of their WiFI and Bluetooth capabilities. Wiring diagrams are on the SparkFun page....but I will do a full diagram when I am done with the project.
![]()
![]()
-
Decipher and Sketch PCB Strain Gauge Connections
06/03/2022 at 16:11 • 0 commentsI started off this project by trying to understand how the existing scale platform was electronically connected. So I just started drawing a sketch based on iphone pictures that I took of the PCB and load cell wiring. It was an UGLY view into basically a 3 way Strain gauge wired as a WheatStone bridge of sorts. The big ah-ha moment was that there were few 3 strain gauge load cell wiring diagrams on the internet......but after deciphering their PCB, I noticed that they filled in the fourth strain gauge with just passive resistors that were trimmed to equal the series resistance of the other 3 strain gauges. So I had a VERY UGLY but preliminary sketch and that was a good start!
![]()
![]()
![]()
Propane Weigh Scale Hack
Loved the Flame King Propane Scale form factor, but it needed a HUGE update. Here is my first HackAday project!