Adam Guilmet
-
Alas, 'tis no more...
08/21/2017 at 19:10 • 1 commentWell, so much for that. -
Juicing up the ISI-100A Scanning Electron Microscope - Power Supplies
12/26/2016 at 03:43 • 0 commentsLooks I've stacked quite the array of old power supplies here! Coincidentally, I've got the same high-voltage power supply Ben Krasnow used in his SEM build (3rd from the top.) I think all these should cover the various lower voltage supplies I'll be needing. I've got a power supply for the filament heater, the physical vapor deposition rig (that's going to be a separate project unto itself), the photomultiplier tube, and the Everhart-Thornley detector's grid. The 10 kV phosphor screen supply is still needed, but I've building that one. Next up is the 30kV acceleration supply...
![]()
-
Roughing up the ISI-100A Scanning Electron Microscope
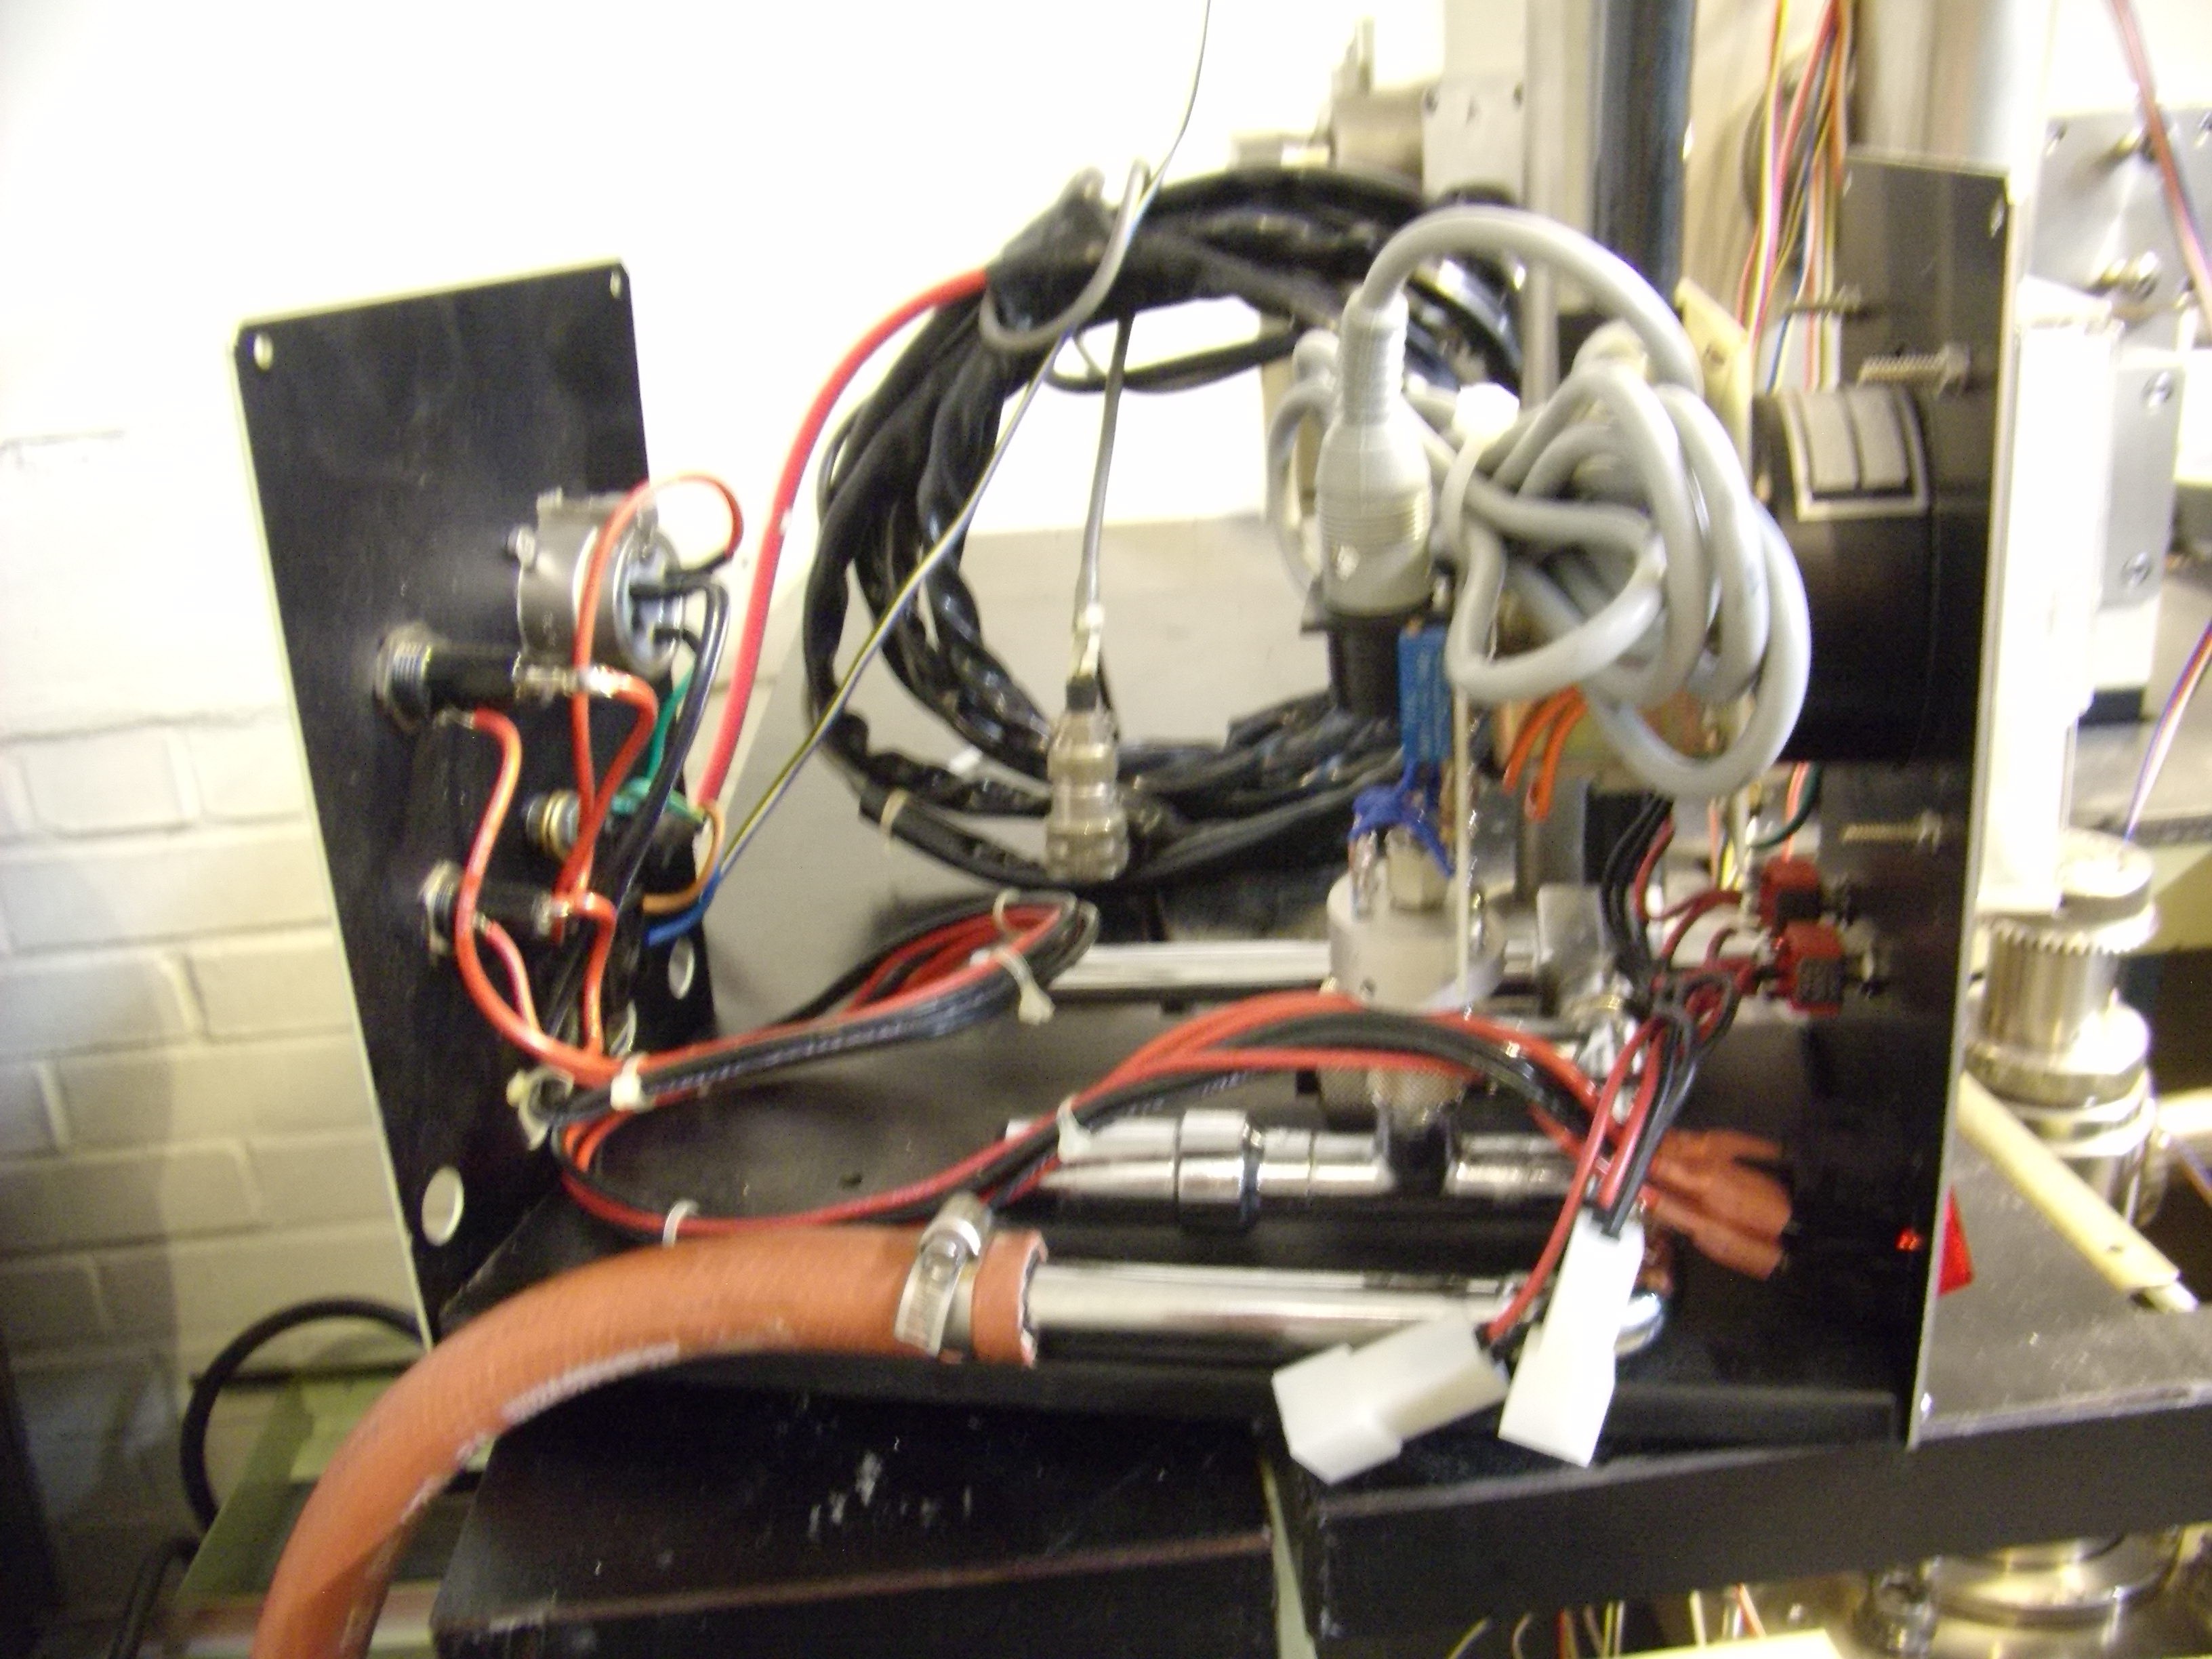
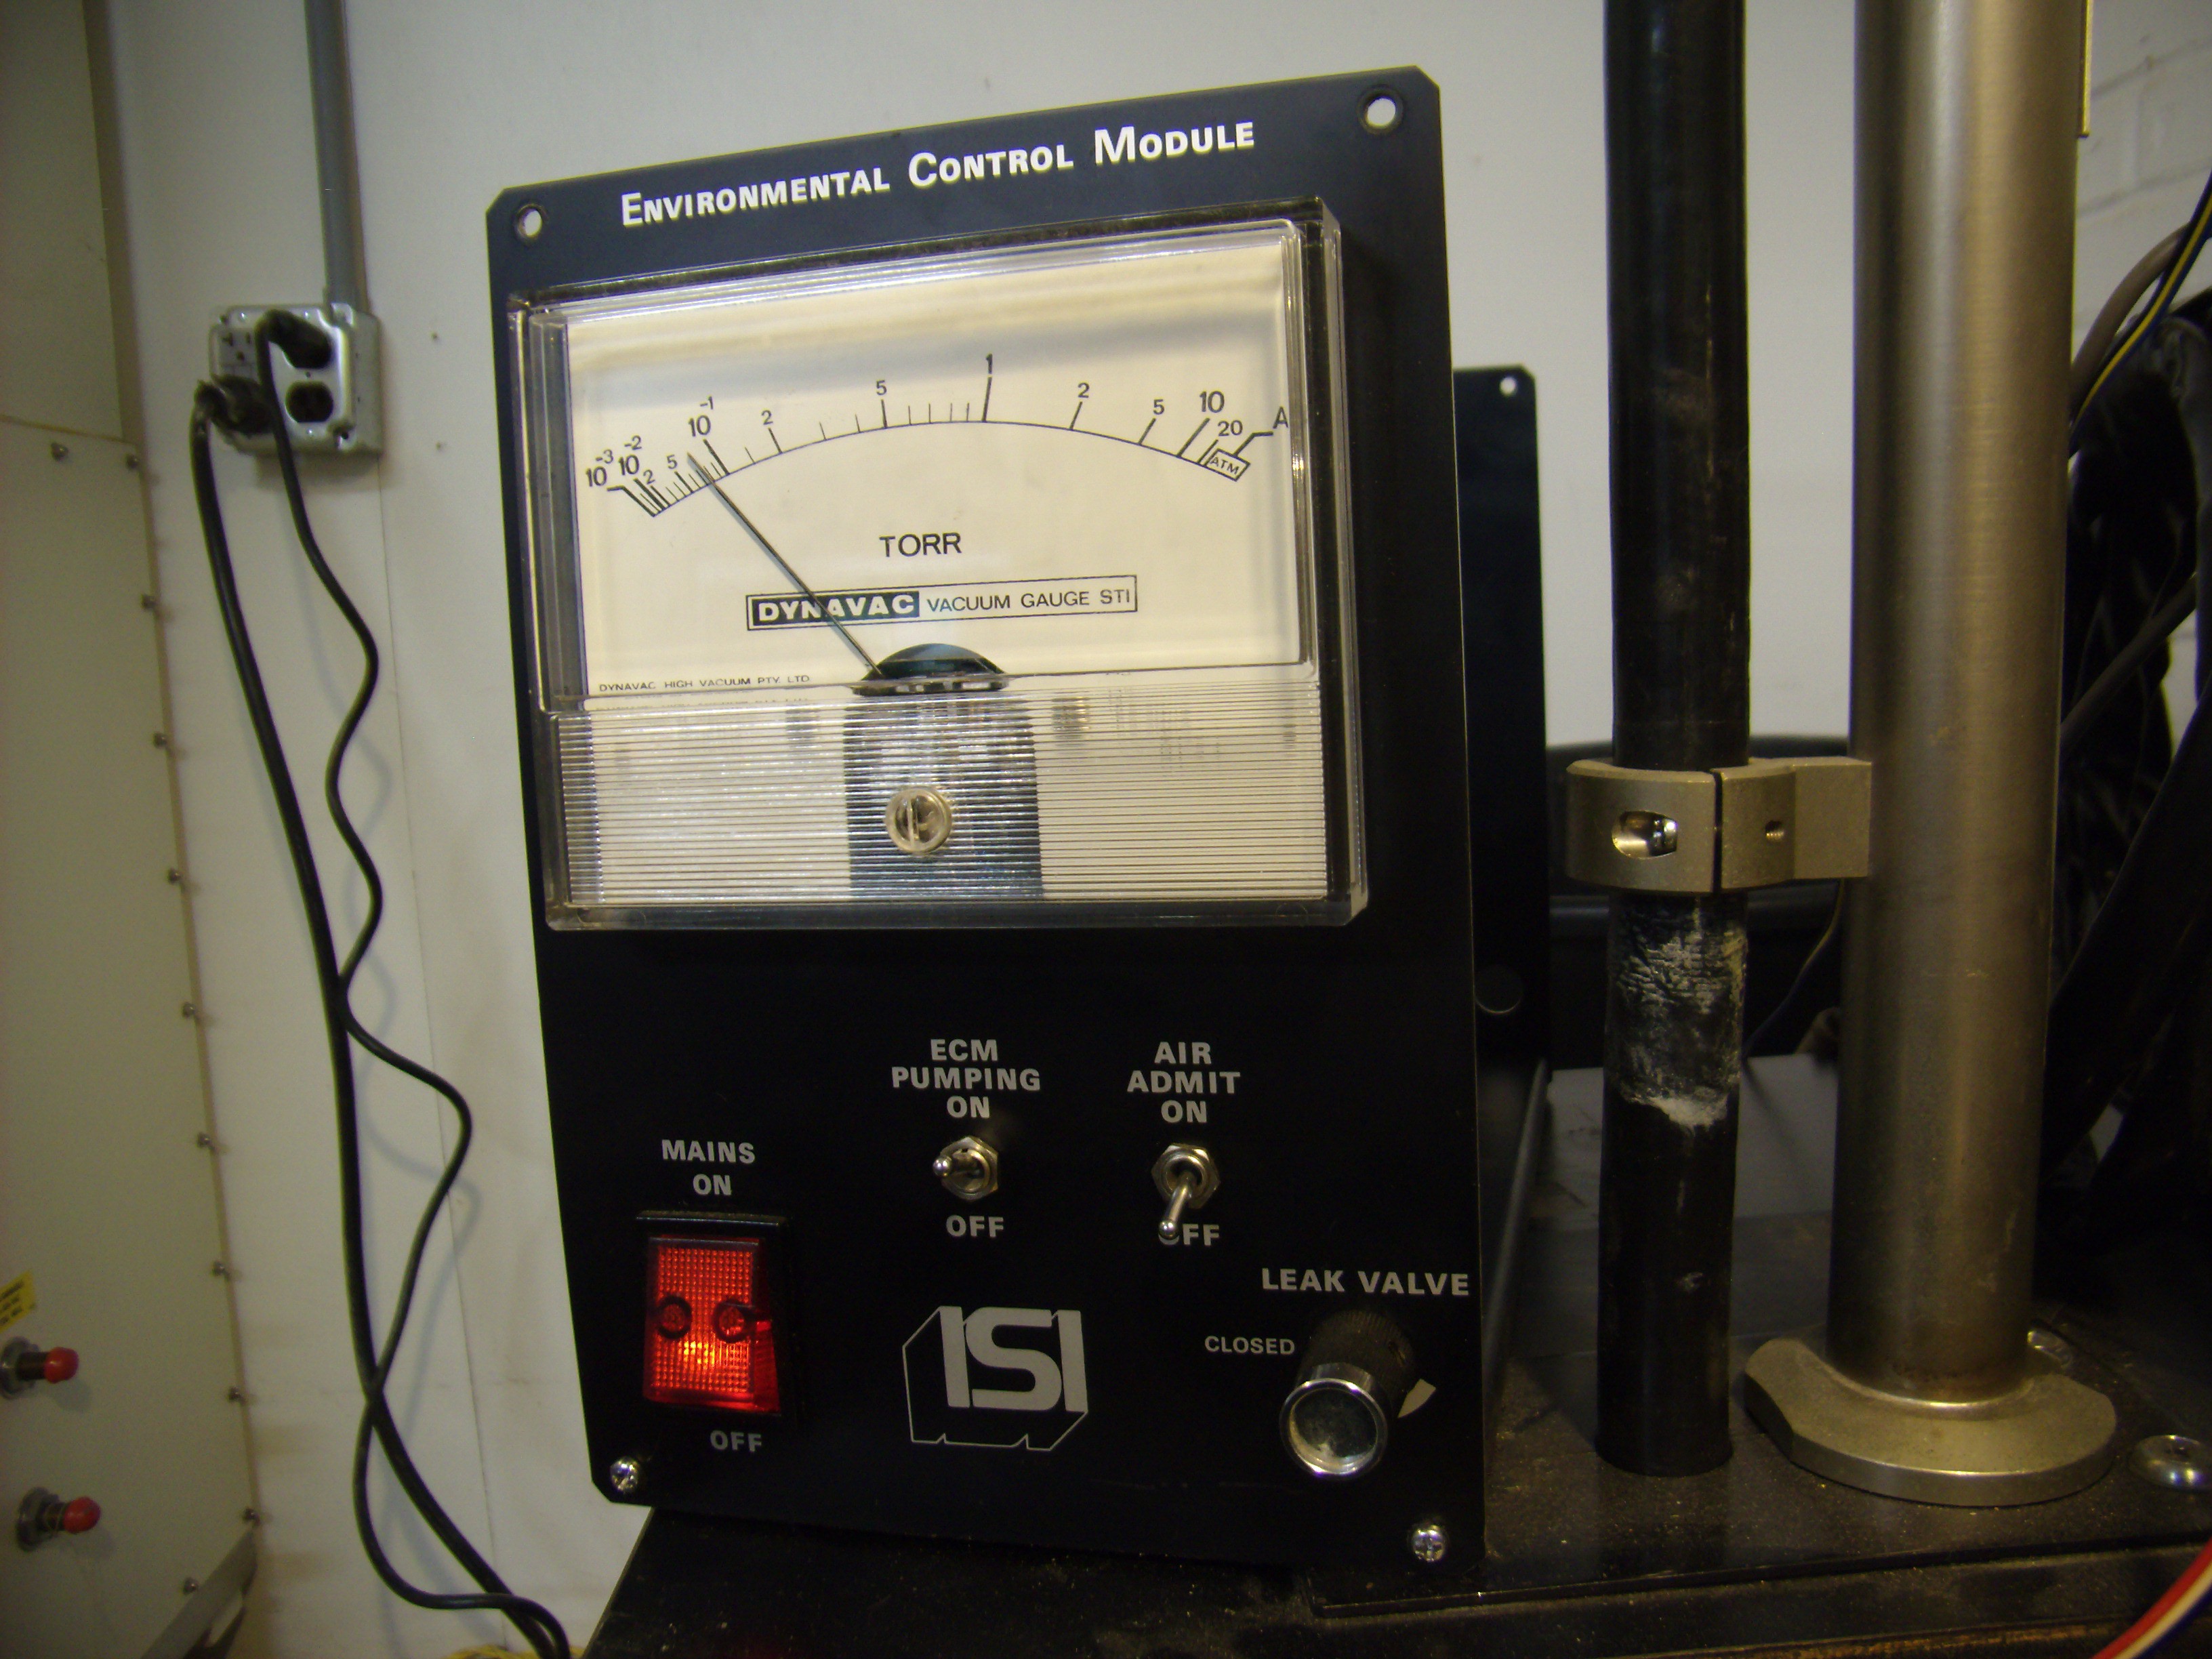
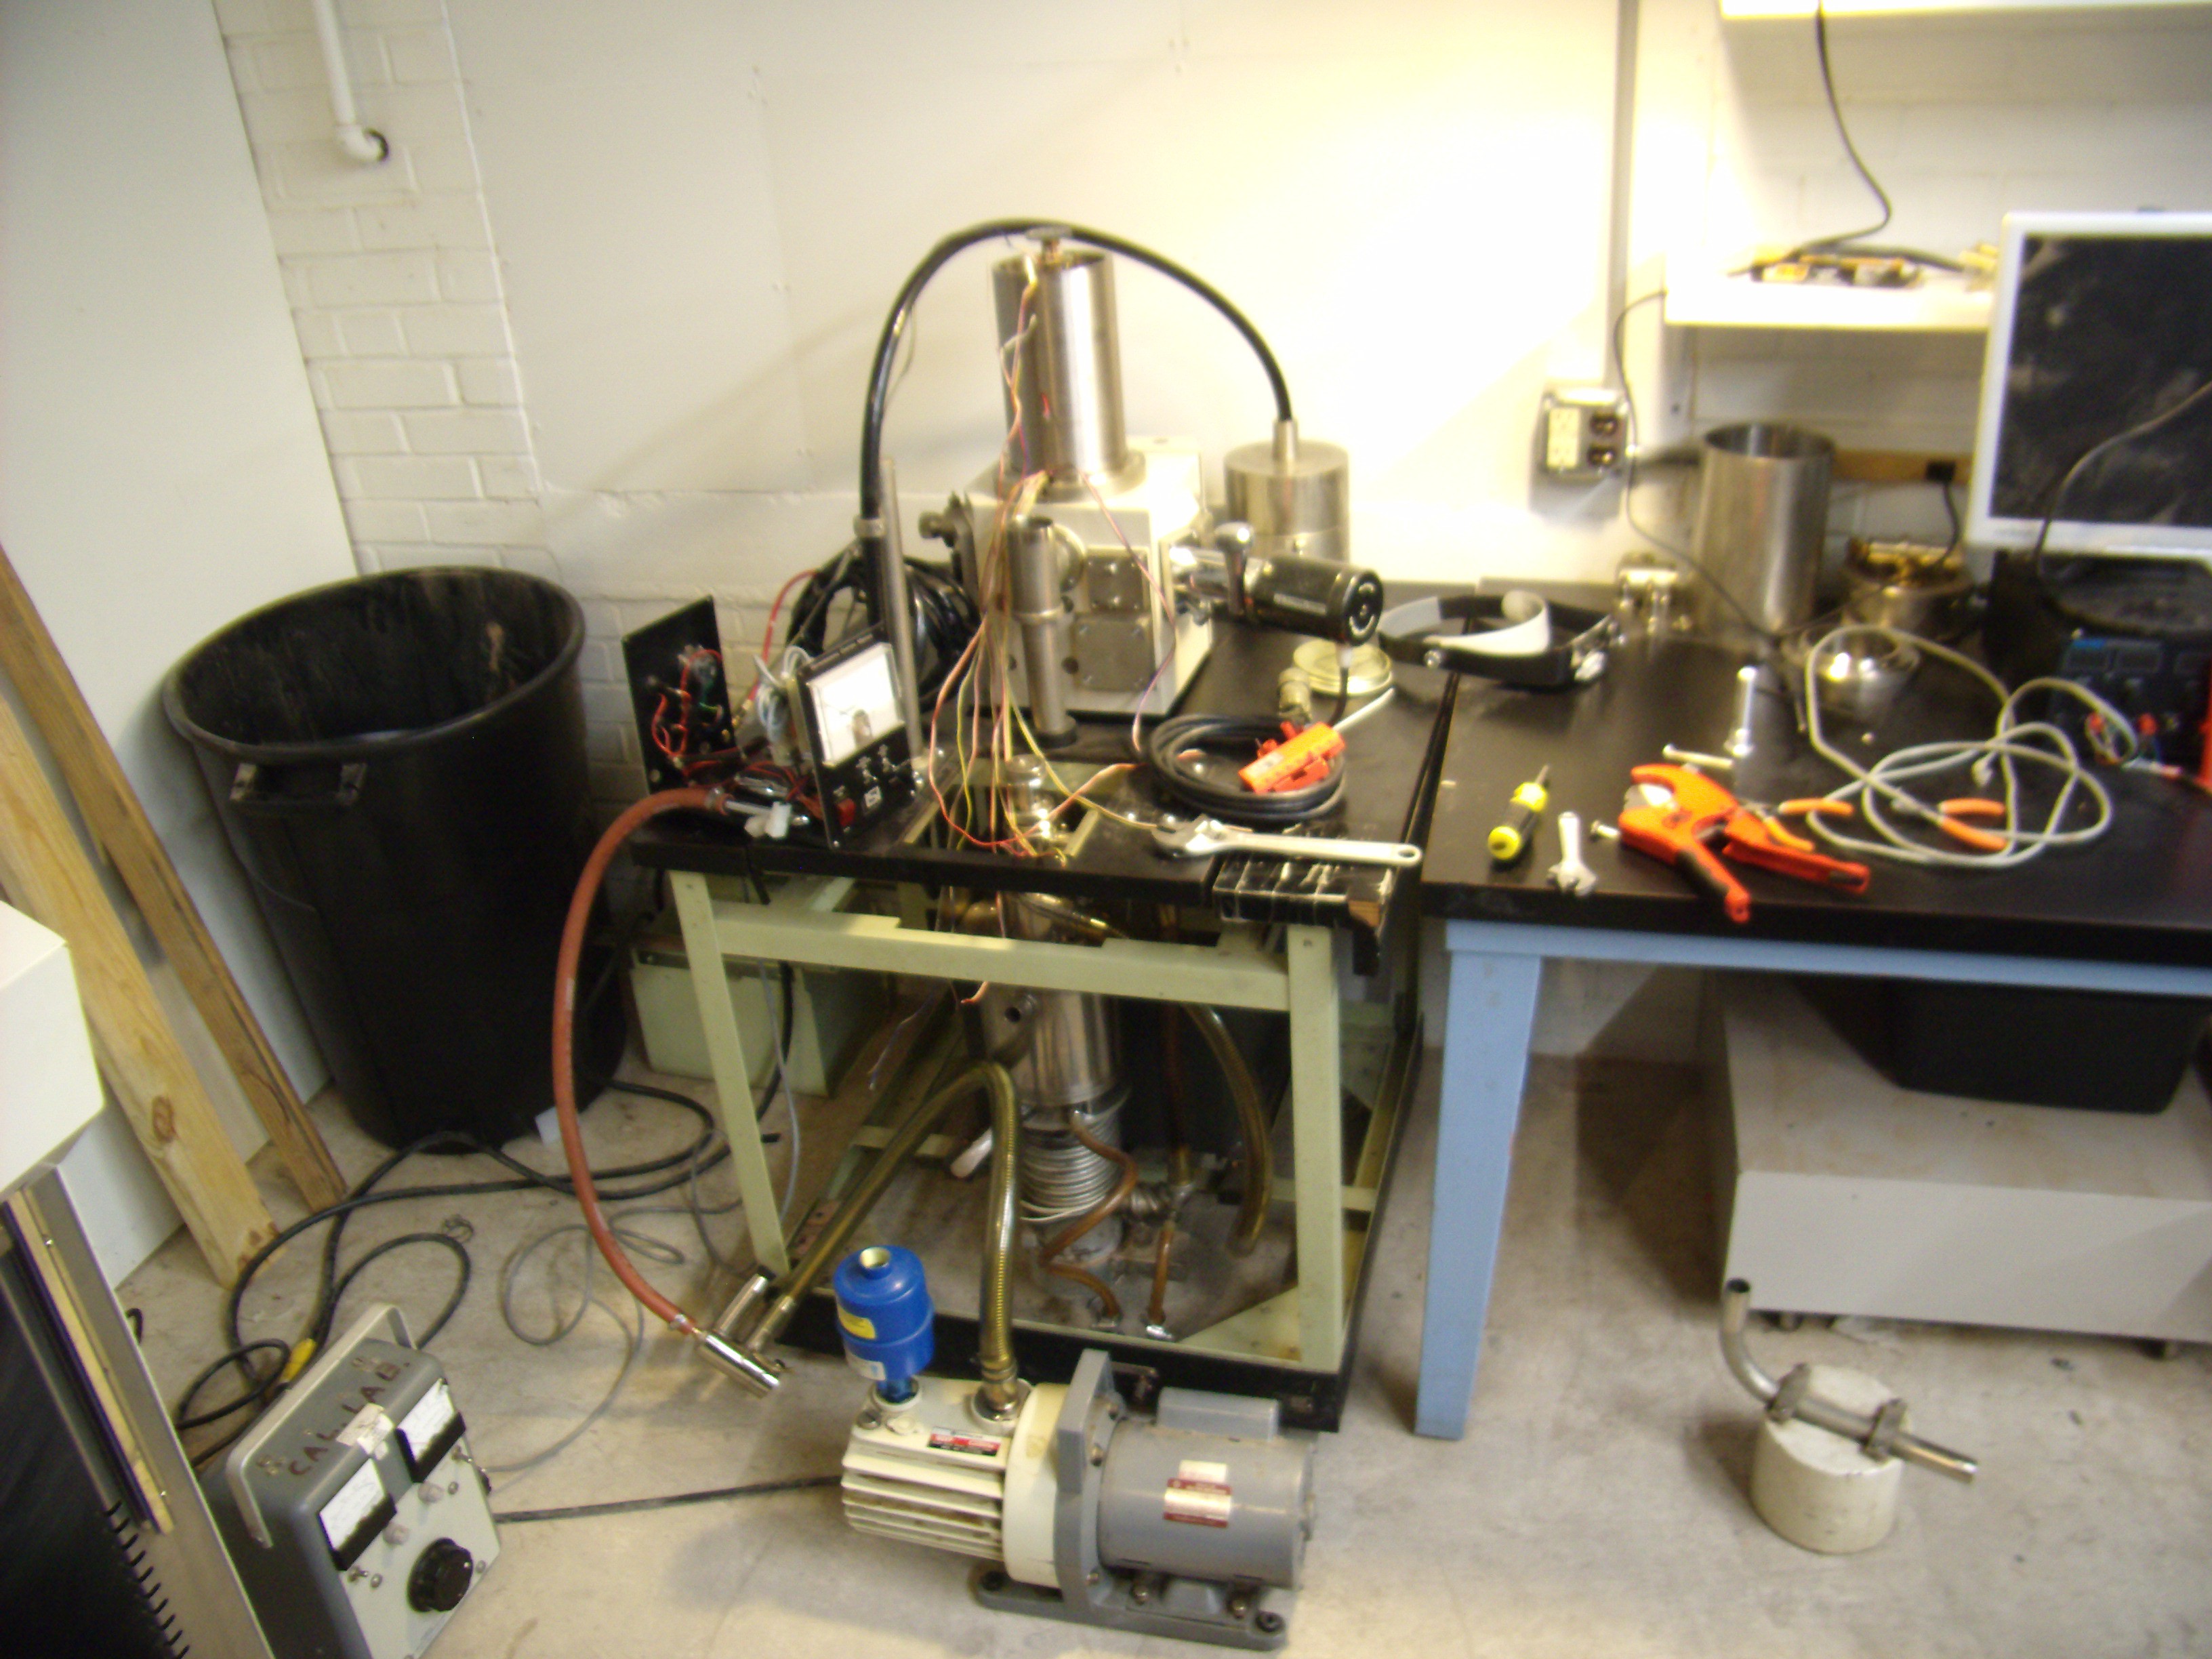
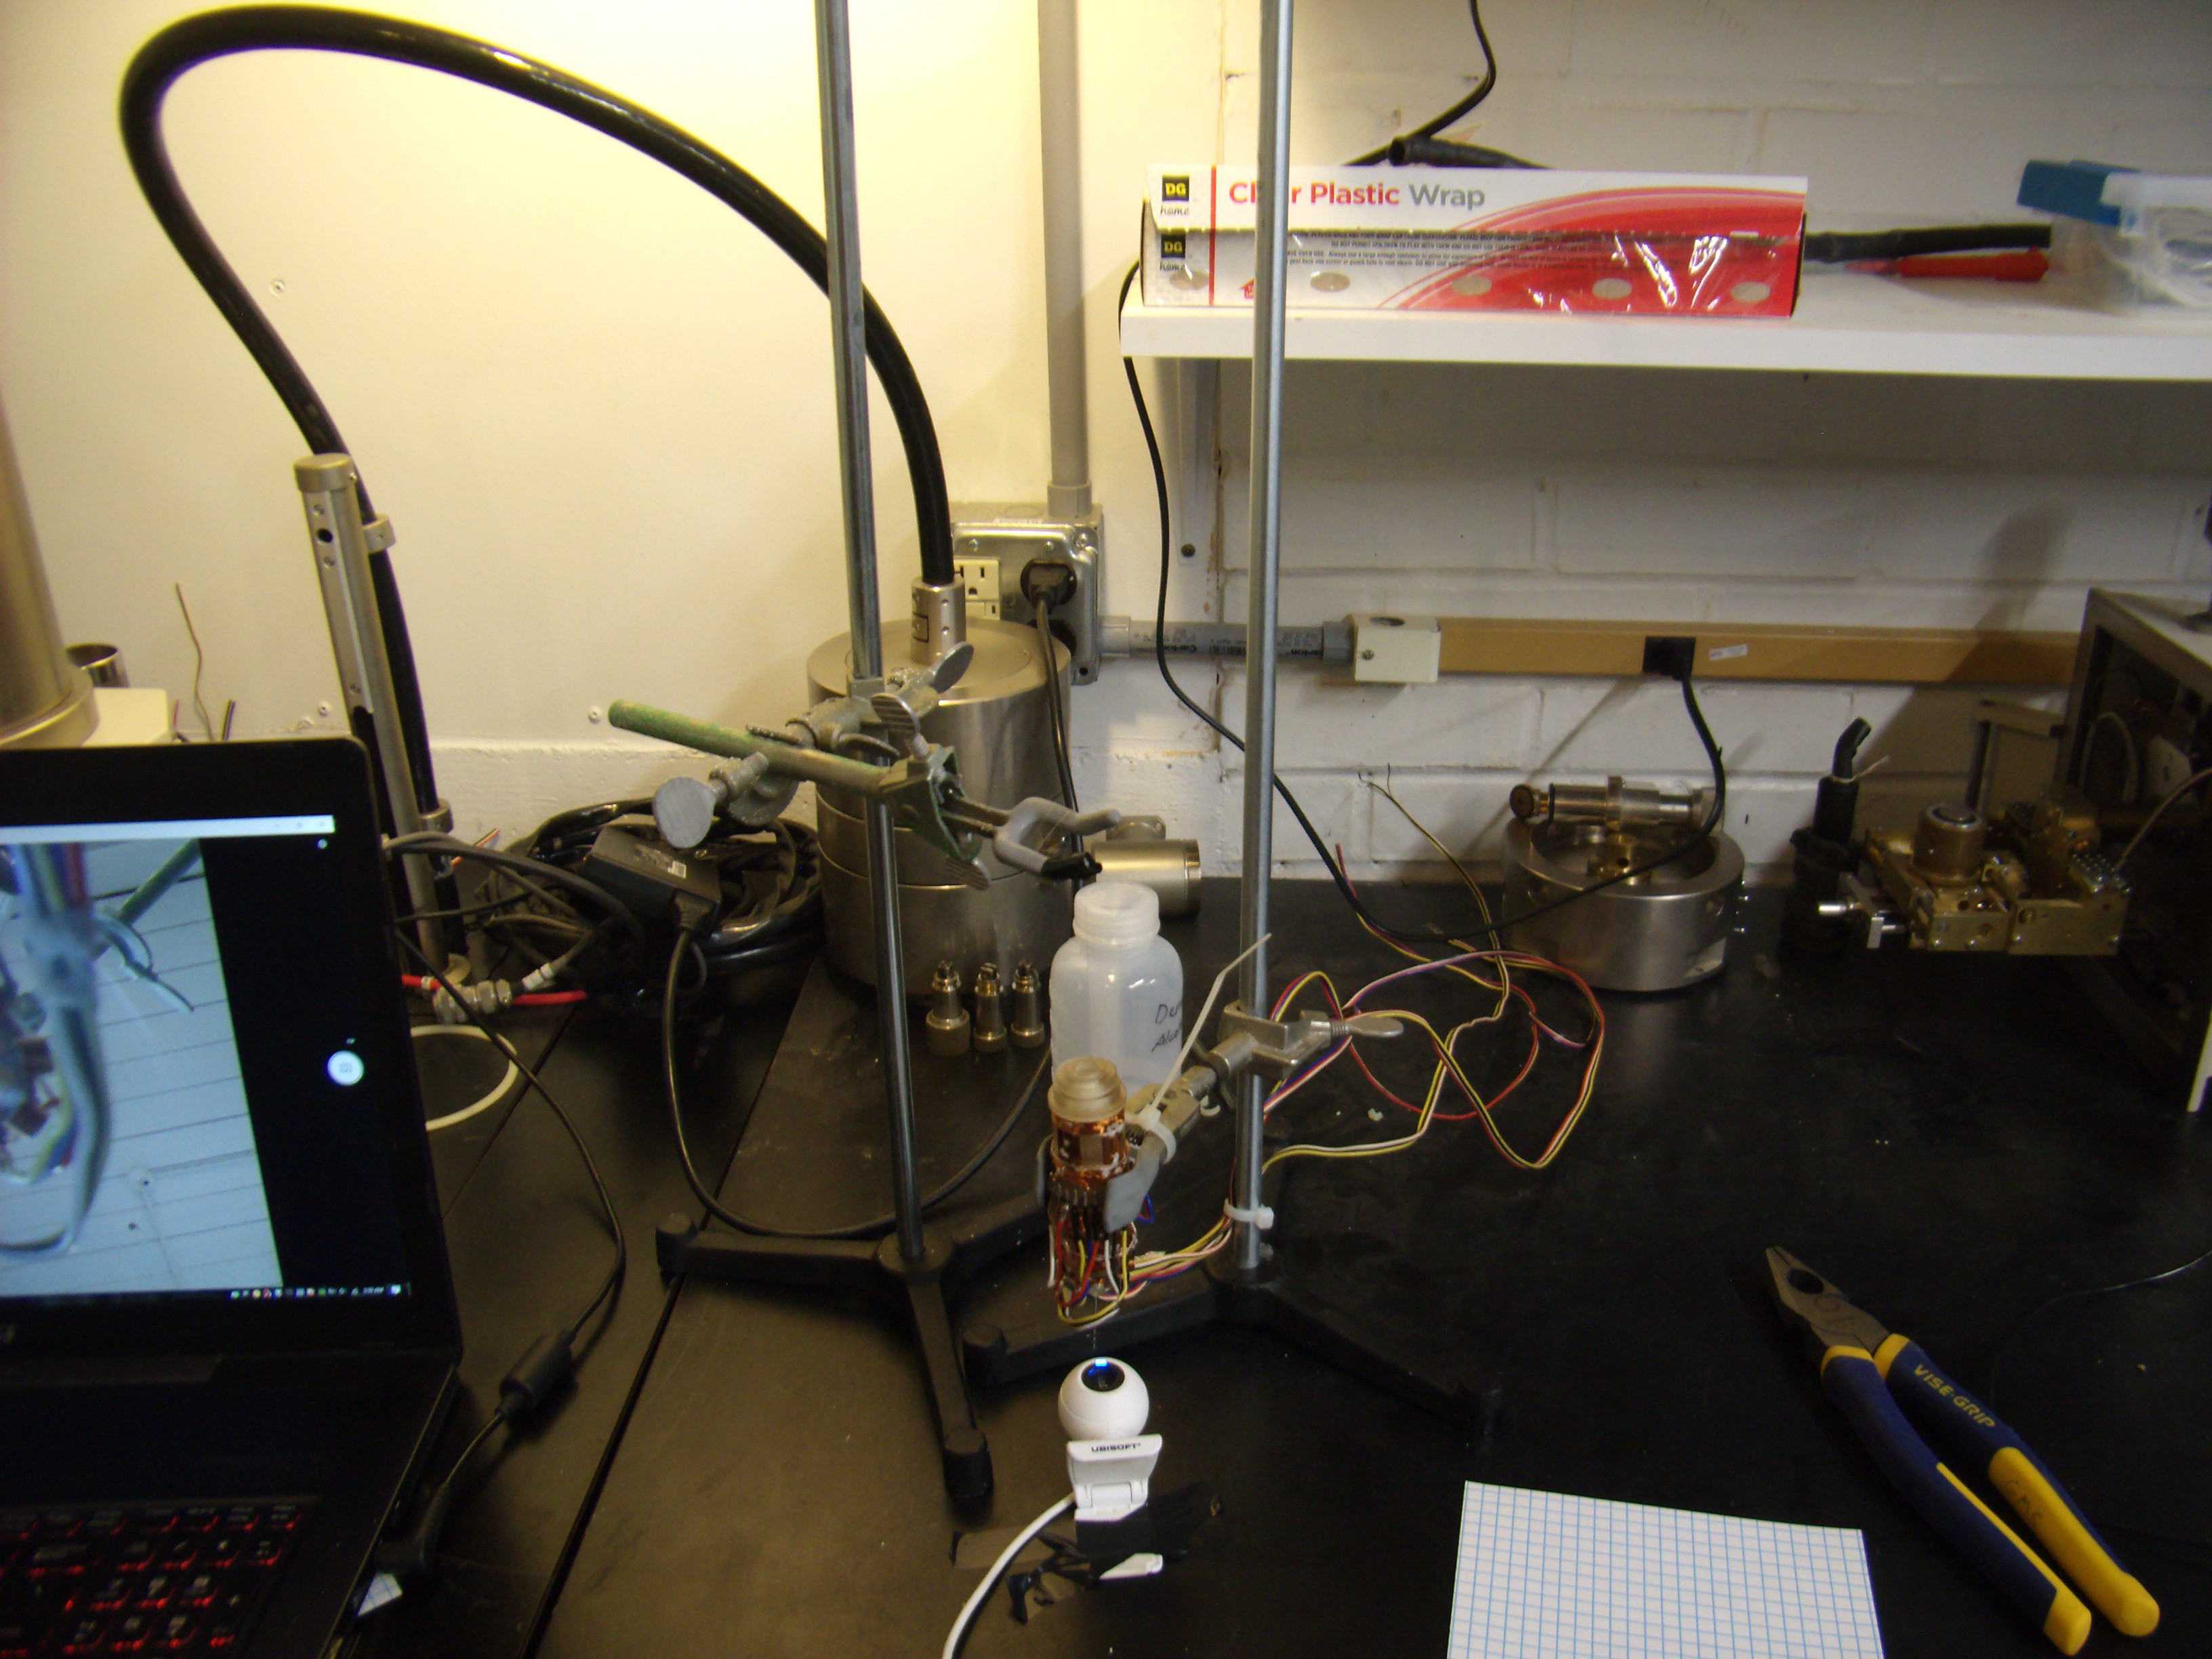
12/03/2016 at 01:58 • 0 commentsNow to get the vacuum system plumbed and get a roughing gauge hooked up. The scope originally had an 'Environmental Control Module' but the strange thing was that there was no way it could be actually connected. I think it must have be used with a matching vacuum deposition rig or something. So I just tapped a fitting on the anti-suckback valve that way I can actually save some trouble and just use the ECM's gauge and venting solenoid
![]()
![]()
Now all I have to do is turn it on and pray I didn't anger the vacuum gods somehow.
![]()
SUCCESS! I was dreading roughing this thing down for the first time, and NO LEAKS! That's some serious luck right there. Seems like the major surgery went OK. I don't want to test out the diffusion pump just yet, though. I first have to locate a high vacuum gauge and a known good low vacuum gauge because I have absolutely no idea how accurate this one is. Hopefully, it's not too far off. Damn, what a mess. Now to clean up and hope that I don't cause any leaks....
![]()
-
Hacking the ISI-100A Electron Microscope - Scanning Coils and Stigmator
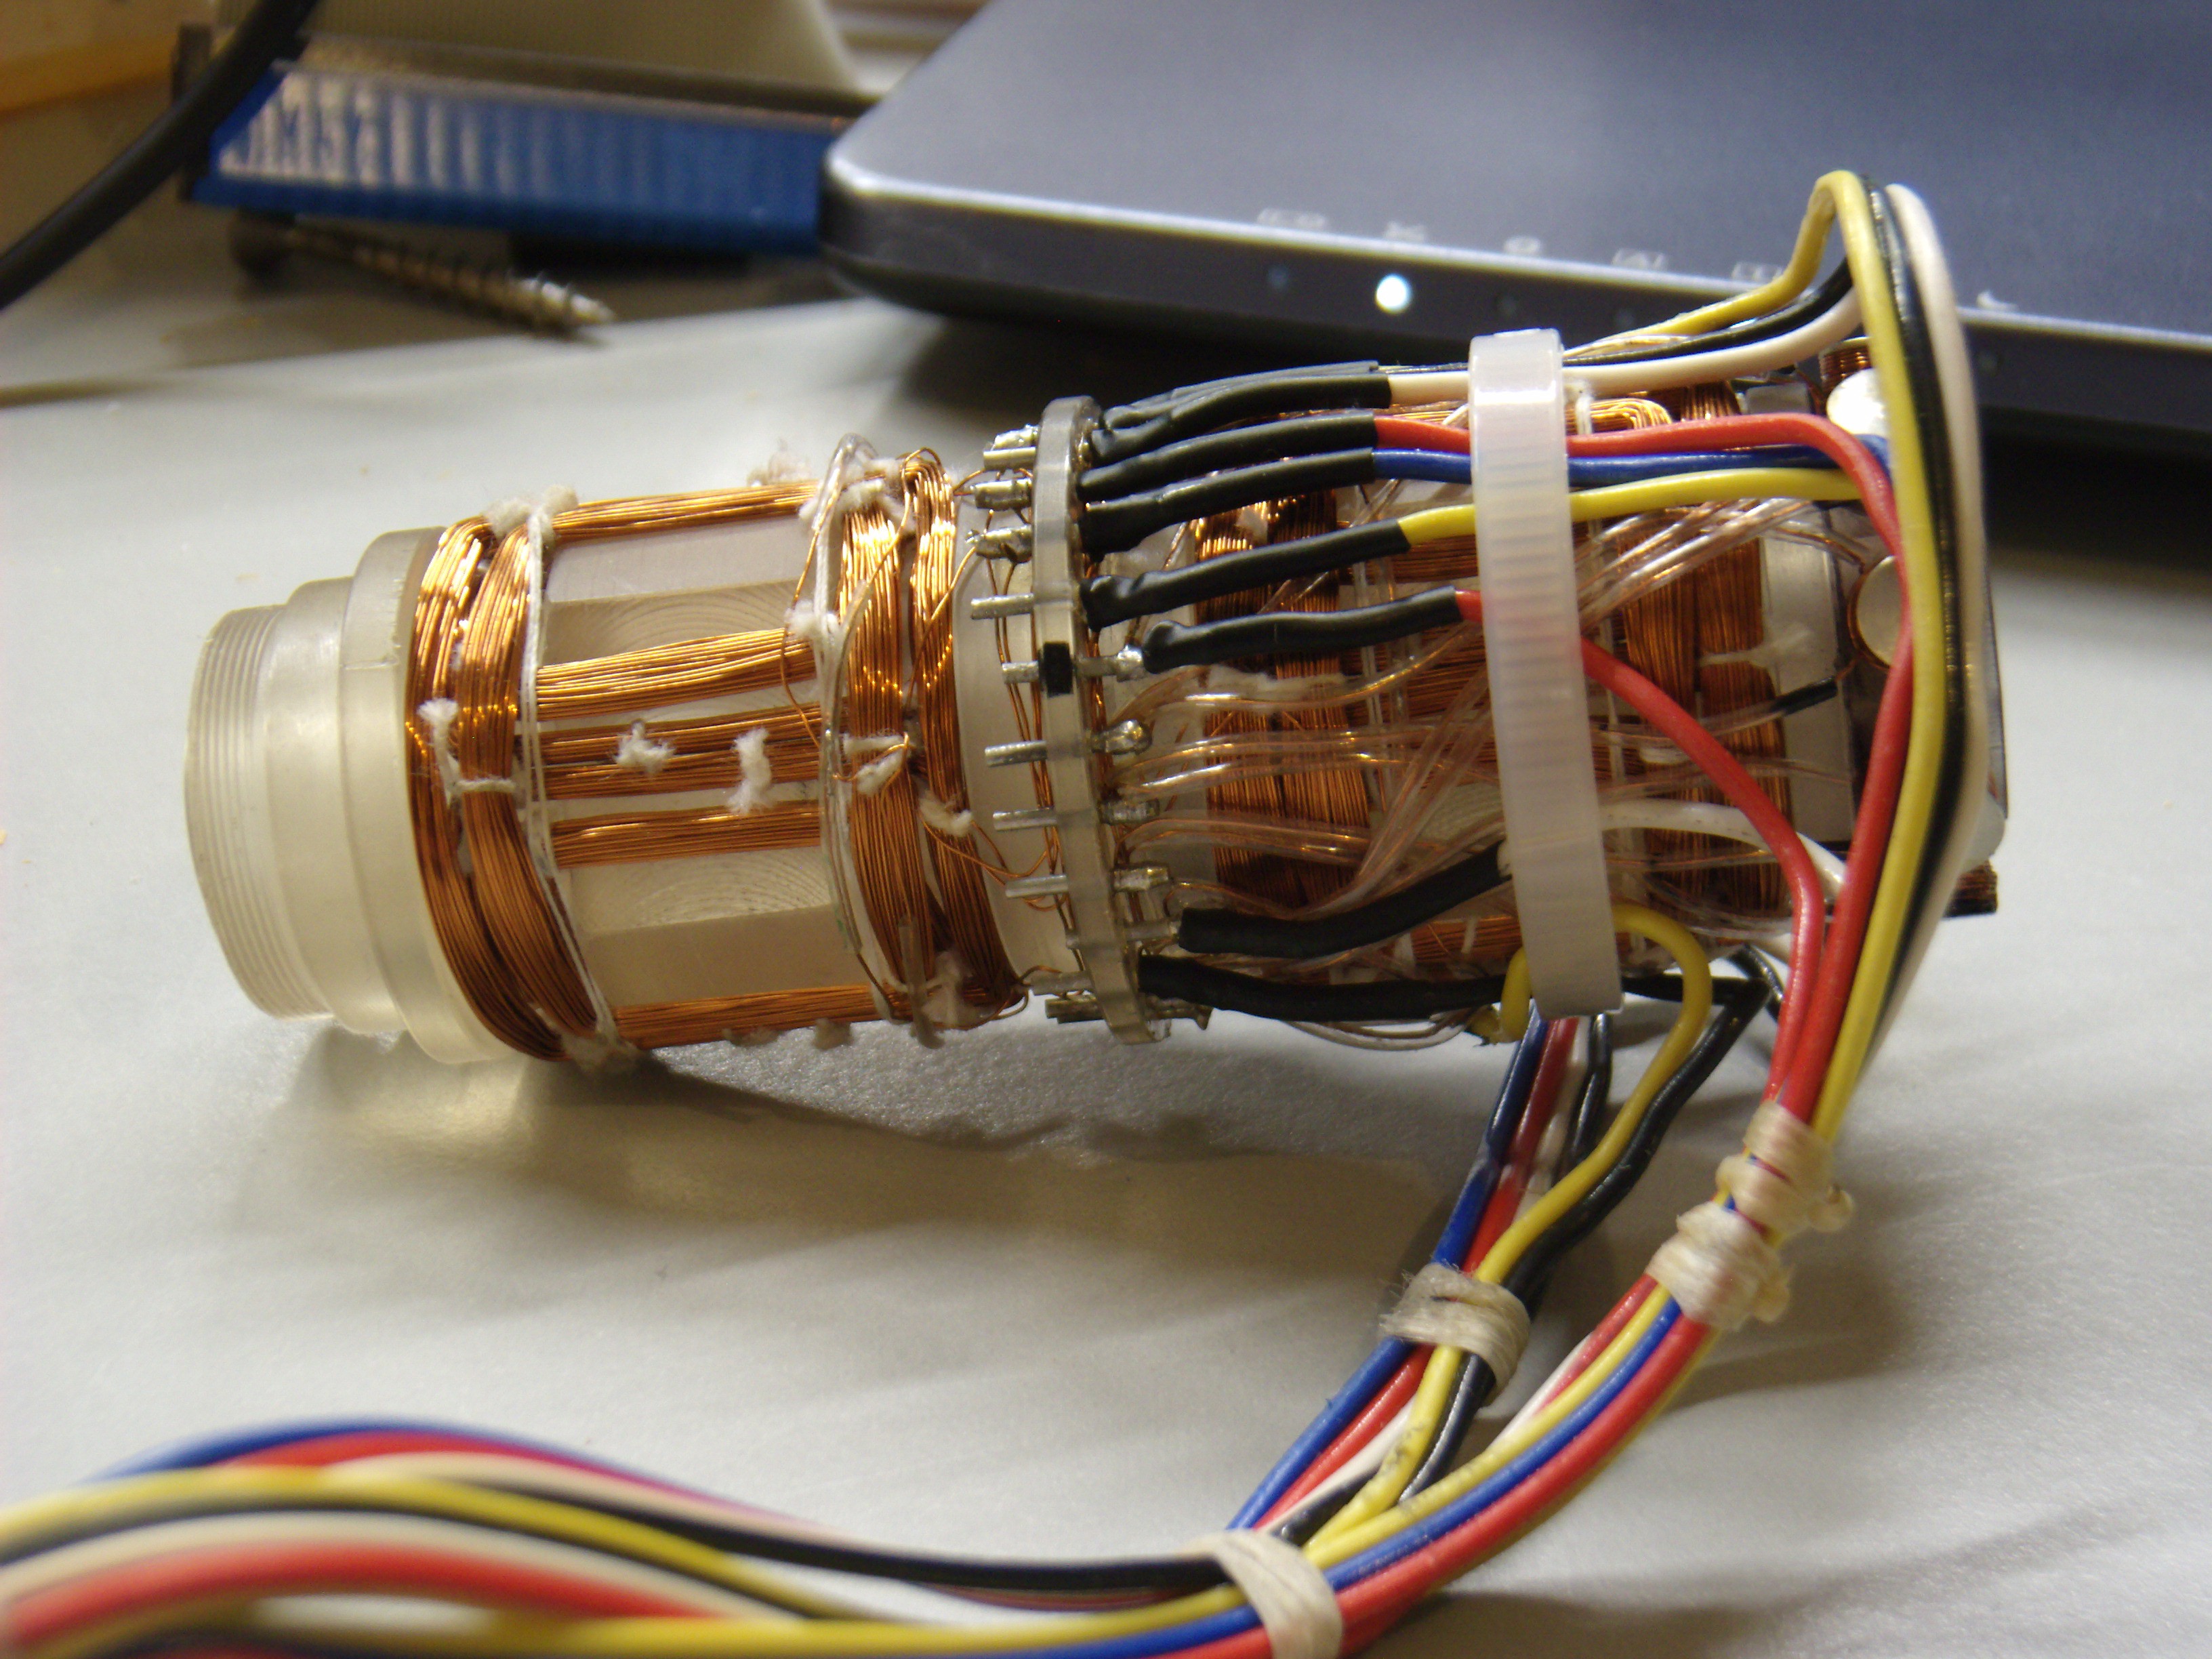
11/30/2016 at 15:24 • 7 commentsNow part that turns this from high-energy flashlight into an SEM; the scanning coils. Once the beam has been through the condensing coils, it passes through the scanning coils. These are saddle shaped coils that guide the beam from in a rectangular raster pattern across the the sample stage.
![]()
You'd think there'd be only two coils; one for X and one for Y, but I'm not so lucky. On this particular unit, there's eight scanning coils. The designers must have hated the assemblers, because of all the small heatshrunk connections and tied up with wax string. Whole lot of nope; probably would have destroyed it moving bundles out of the way to see underneath. It's hard to see in the picture below, but with the help of a long strand of hair I stole from another member, a drill bit and webcam, it was a simple matter to just brute force it.
![]()
Voila! Drill bit electron beam!
![]()
It is exceptionally difficult to create a magnetic system with an acceptable beam without some form of correction. Those eight small coils at the bottom actually have nothing to do with the scanning; they are the stigmator. It serves to correct the misshapen beam, which is pretty much unavoidable. They stretch and squash the beam to help to get as close to a circle-shaped spot to trace across the sample.
In the first photo above, there are actually two sets of scanning coils, one upper and one lower. I really don't have a clear reason why they are separated like this. My gut tells me that it's to reduce the inductance and allow for a faster scan speed, or since it had a fully analog scan system, maybe it had something to do to with helping correct for distortion that couldn't be easily done otherwise, but I don't really know for sure. Are there any SEM engineers out there that can shed some light on this?
-
Hacking the ISI-100A Scanning Electron Microscope - Focusing Coils
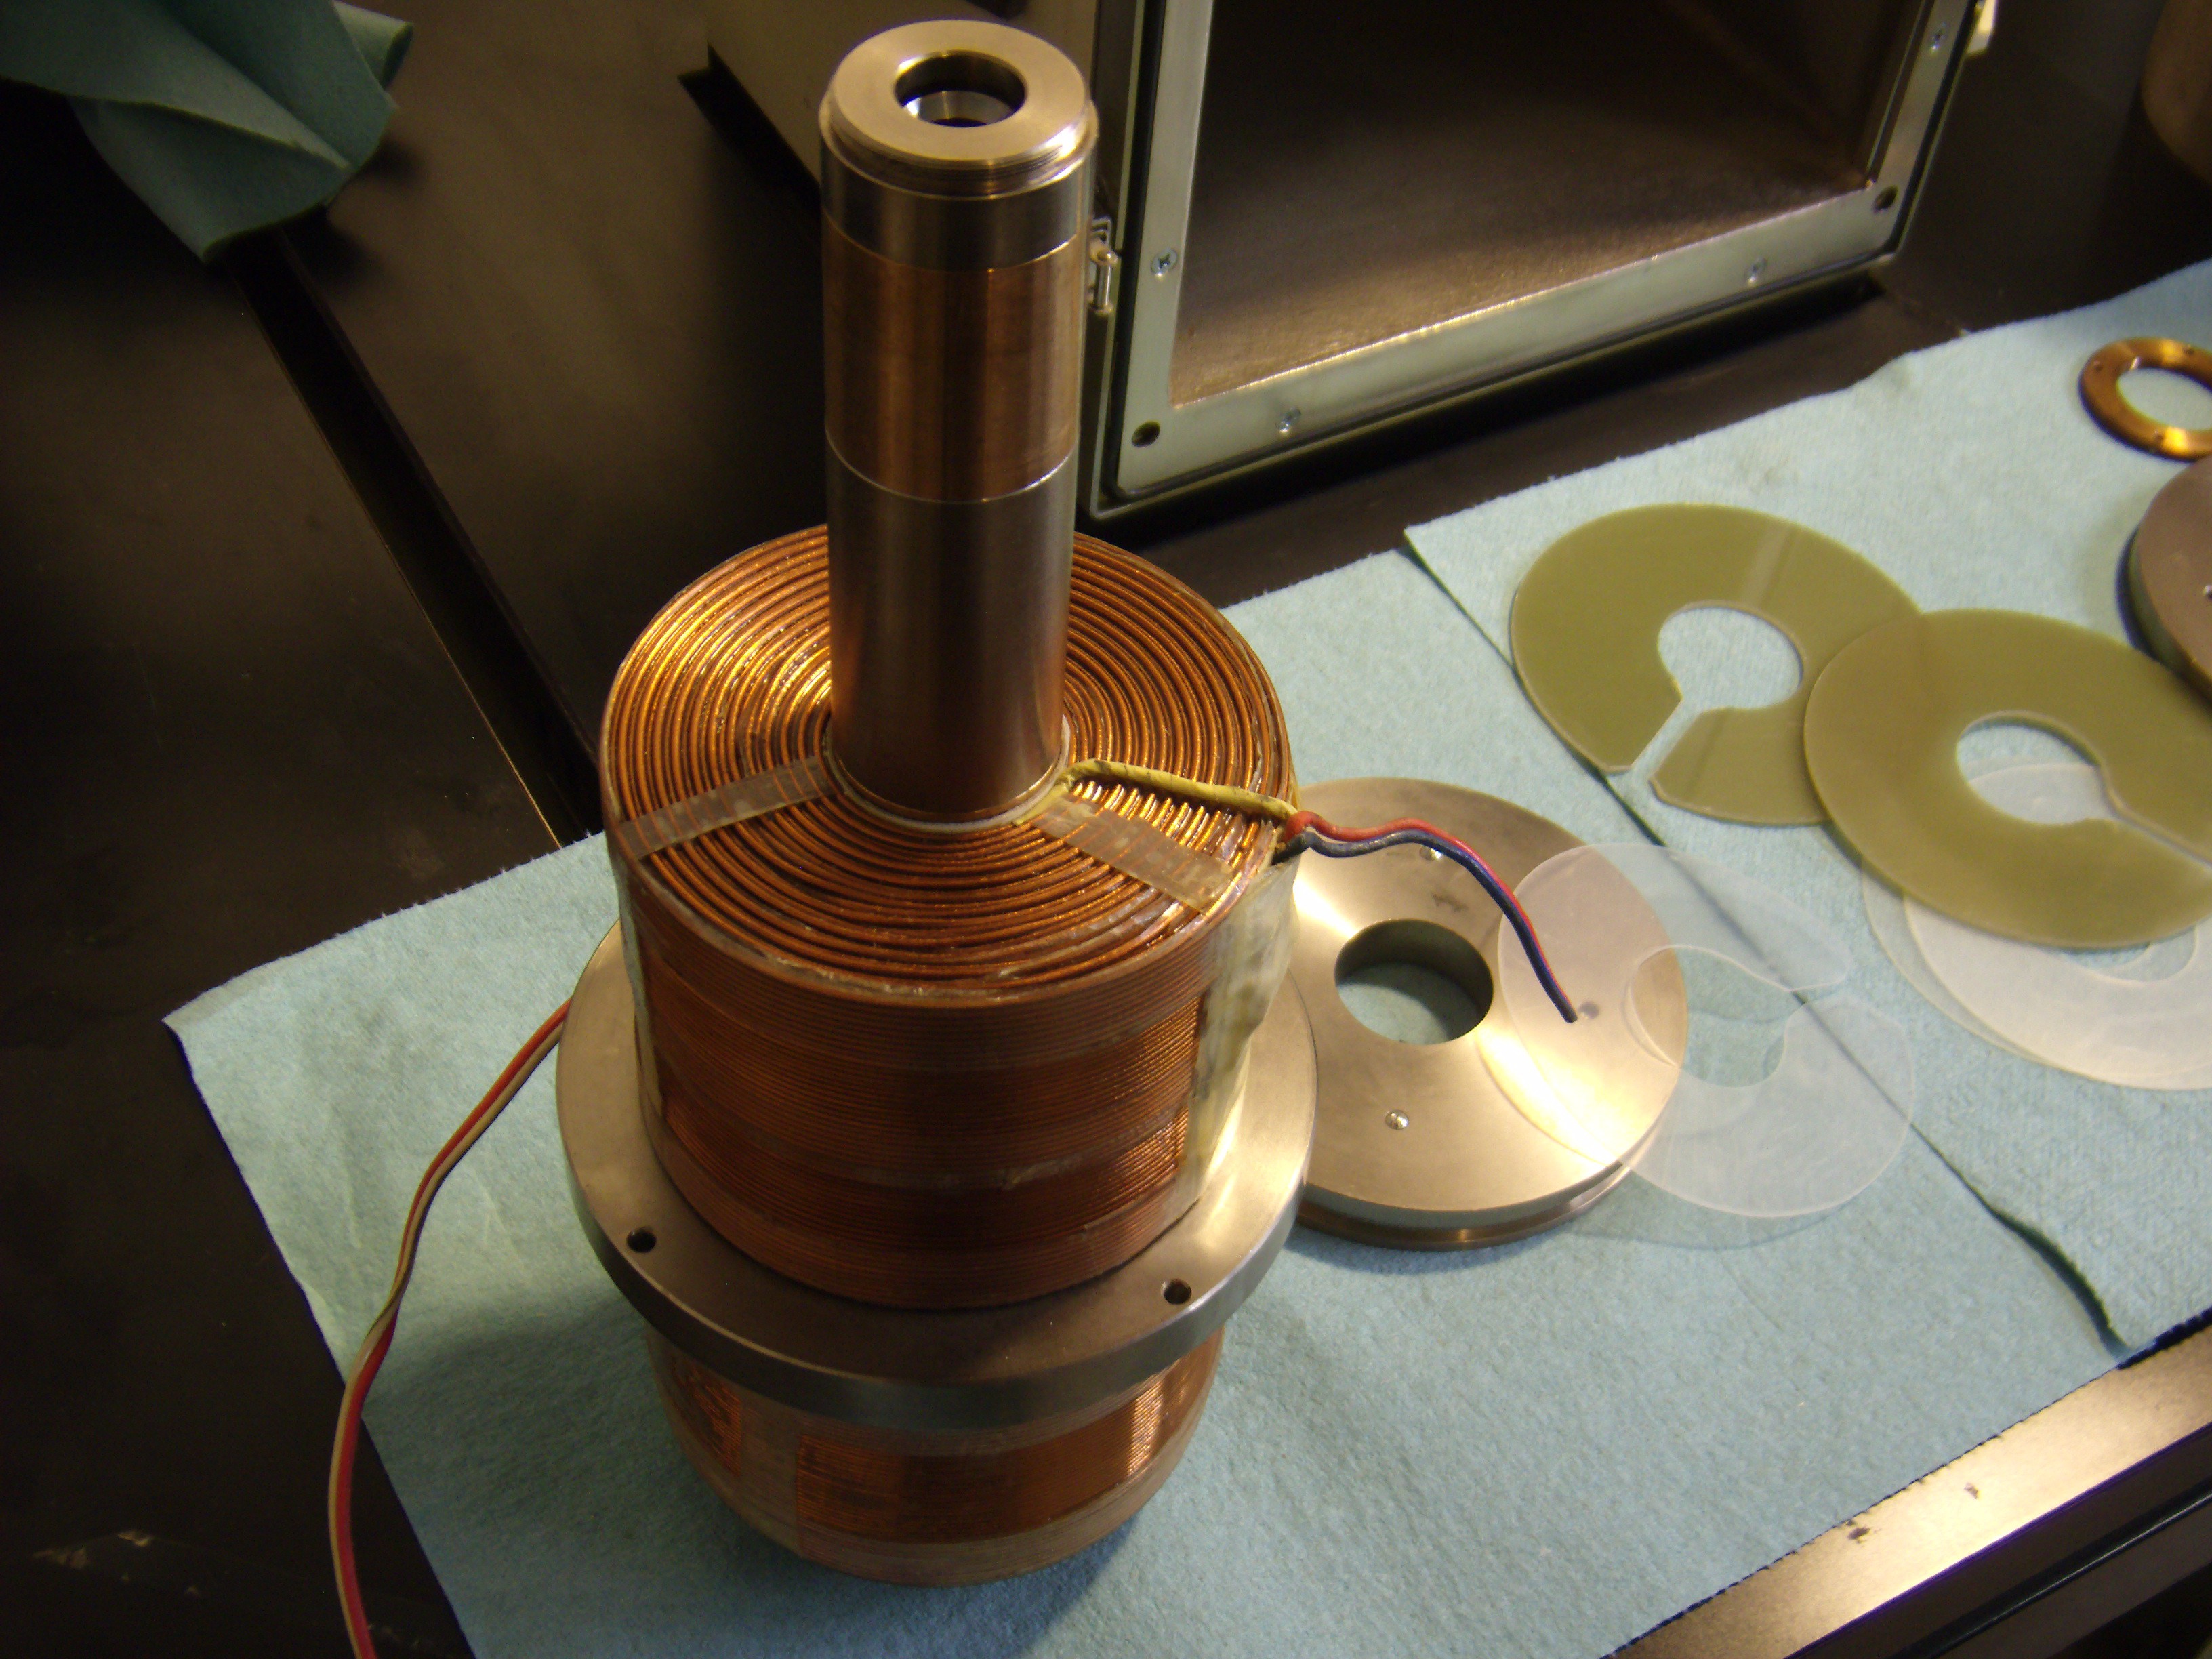
11/30/2016 at 07:12 • 0 commentsSo first thing on the way to getting this thing operational again is to figure out what the hell all these coils actually do. In the photos below, you can see the objective and the two condenser focusing coils. The coils look beefy but I'm guessing each of these coils would carry a maximum of a couple amps, as the feeding wires are only around 20 gauge and had a 8 foot run back to the original controller. As I have ZERO information on this SEM, most of the specs for the electronics is going to be pulled out of my nether regions and tweaked until it works, so if anyone has any better starting parameters, please share!
![]()
The assembly of the these is fairly straight forward; everything just stacks together on the steel beam tube. The great thing is that the only section in this assembly actually carrying high vacuum is this tube.
![]()
This is the business end of the stack. The entire stack is then inserted into a quite thick steel liner. The deflection and stigmator coils(more on those later) fit right inside the objective coil here. As of now, I'm still figuring out the pinout, field shape, etc.
![]()
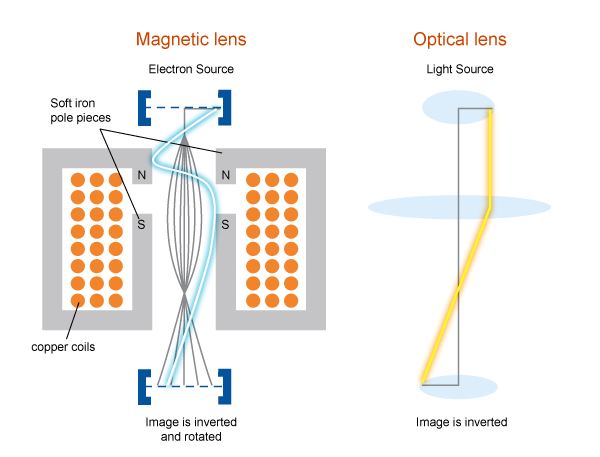
Notice the coils are each fully surrounded by the steel jacket on the outside and the steel discs on the top and bottom, and that tube at the center is made of sections of a high-permeability copper alloy and steel. The copper affects the magnetic field relatively little so it effectively acts as the gap in the picture below. The gap is important to effectively 'shape' the electron beam to a tight point.
![]()
(from http://www.ammrf.org.au/myscope/tem/background/concepts/lenses/poleandcoil.php definitelyGO HERE if you want to learn more)
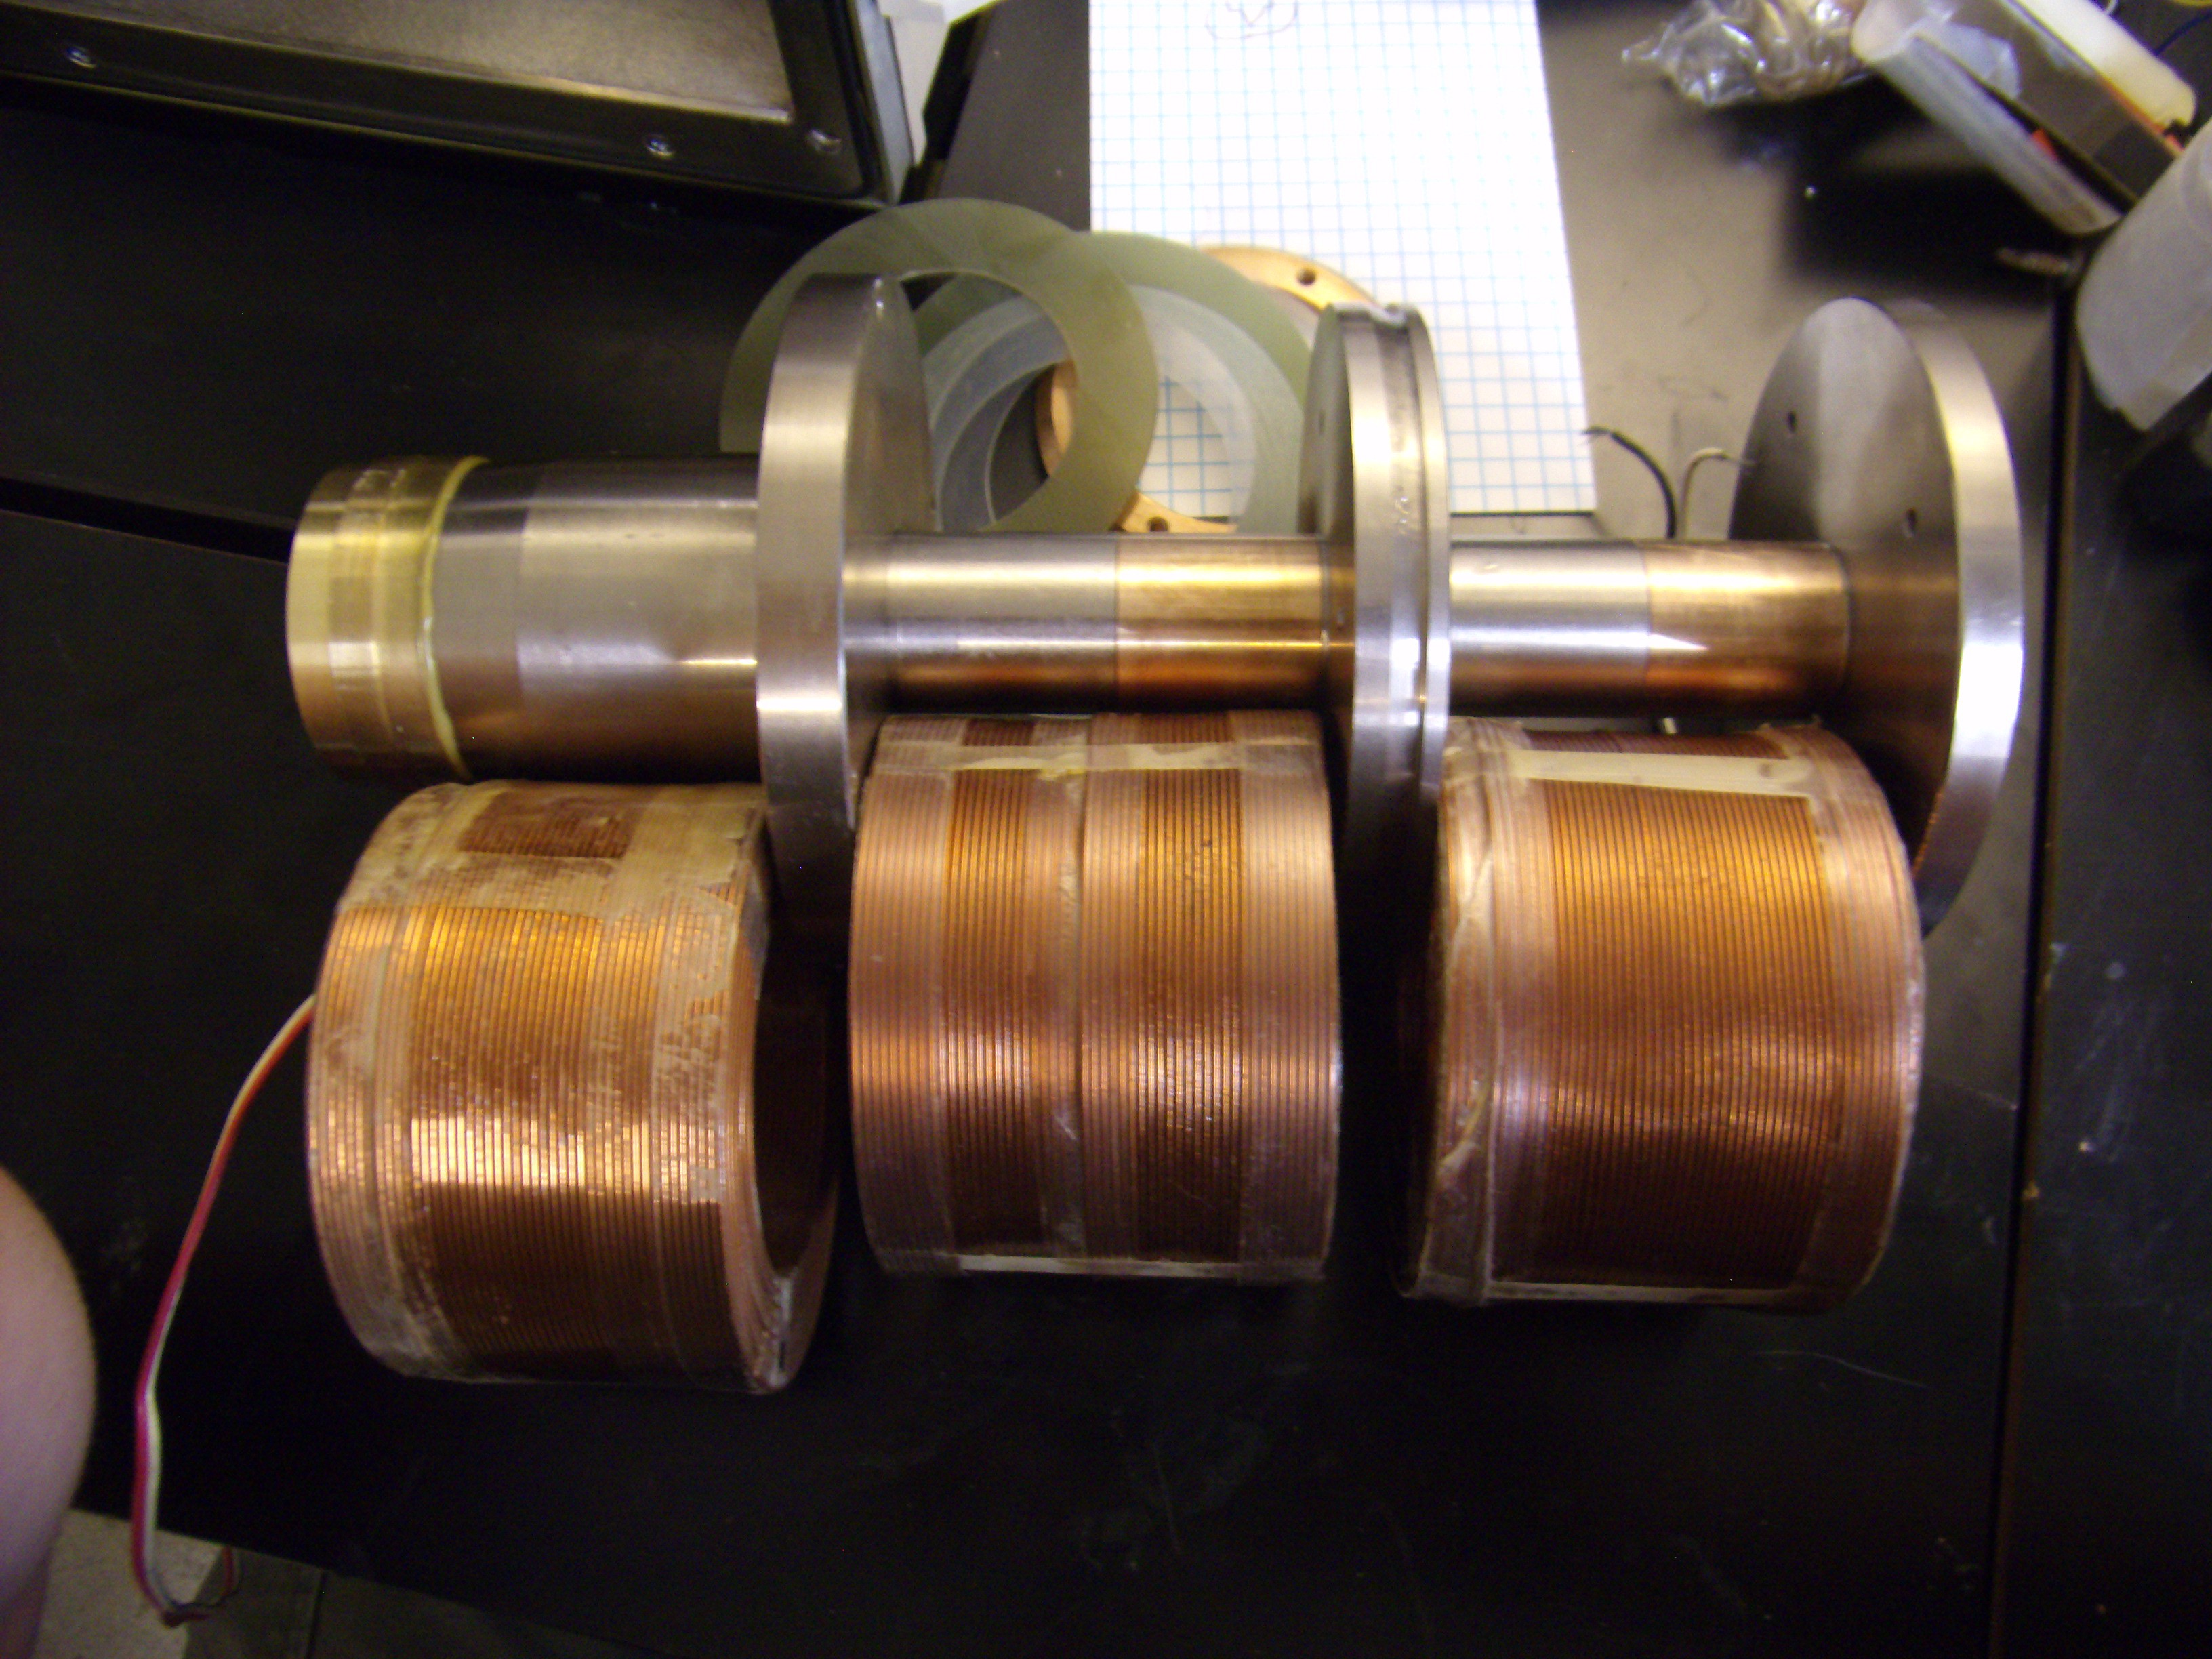
EDIT: Here's a better photo so you can see what I mean about the copper gaps
![]()
-
Restoring the ISI-100A Scanning Electron Microscope - Pregame
11/29/2016 at 10:53 • 0 commentsBeing around 35-40 - years old and being neglected for almost half that, there is quite a bit to work on to just get the microscope to a point where I can work on the real man's stuff:
-Full teardown to replace o-rings and grease
-Cleaning the god-awful, ancient gunk out of the diffusion pump. Then cleaning everything sticky around me.
-Making a couple port covers; one with a mount for a vacuum gauge
-Fixing the broken cage on the secondary electron detector.
-Quite a bit of other small stuff
Most of that stuff was finished before I started using Hackaday.io, so sorry, no pictures or anything.
Open Source Freakin' Scanning Electron Microscope
You read that right.