Riley
Riley-
It's done!!!
10/07/2022 at 04:08 • 0 commentsI finished the video about the final assembly of my typewriter! There's a sound test at the end in case you want to hear the keyboard on its own, I hope you enjoy!
-
Finishing touches
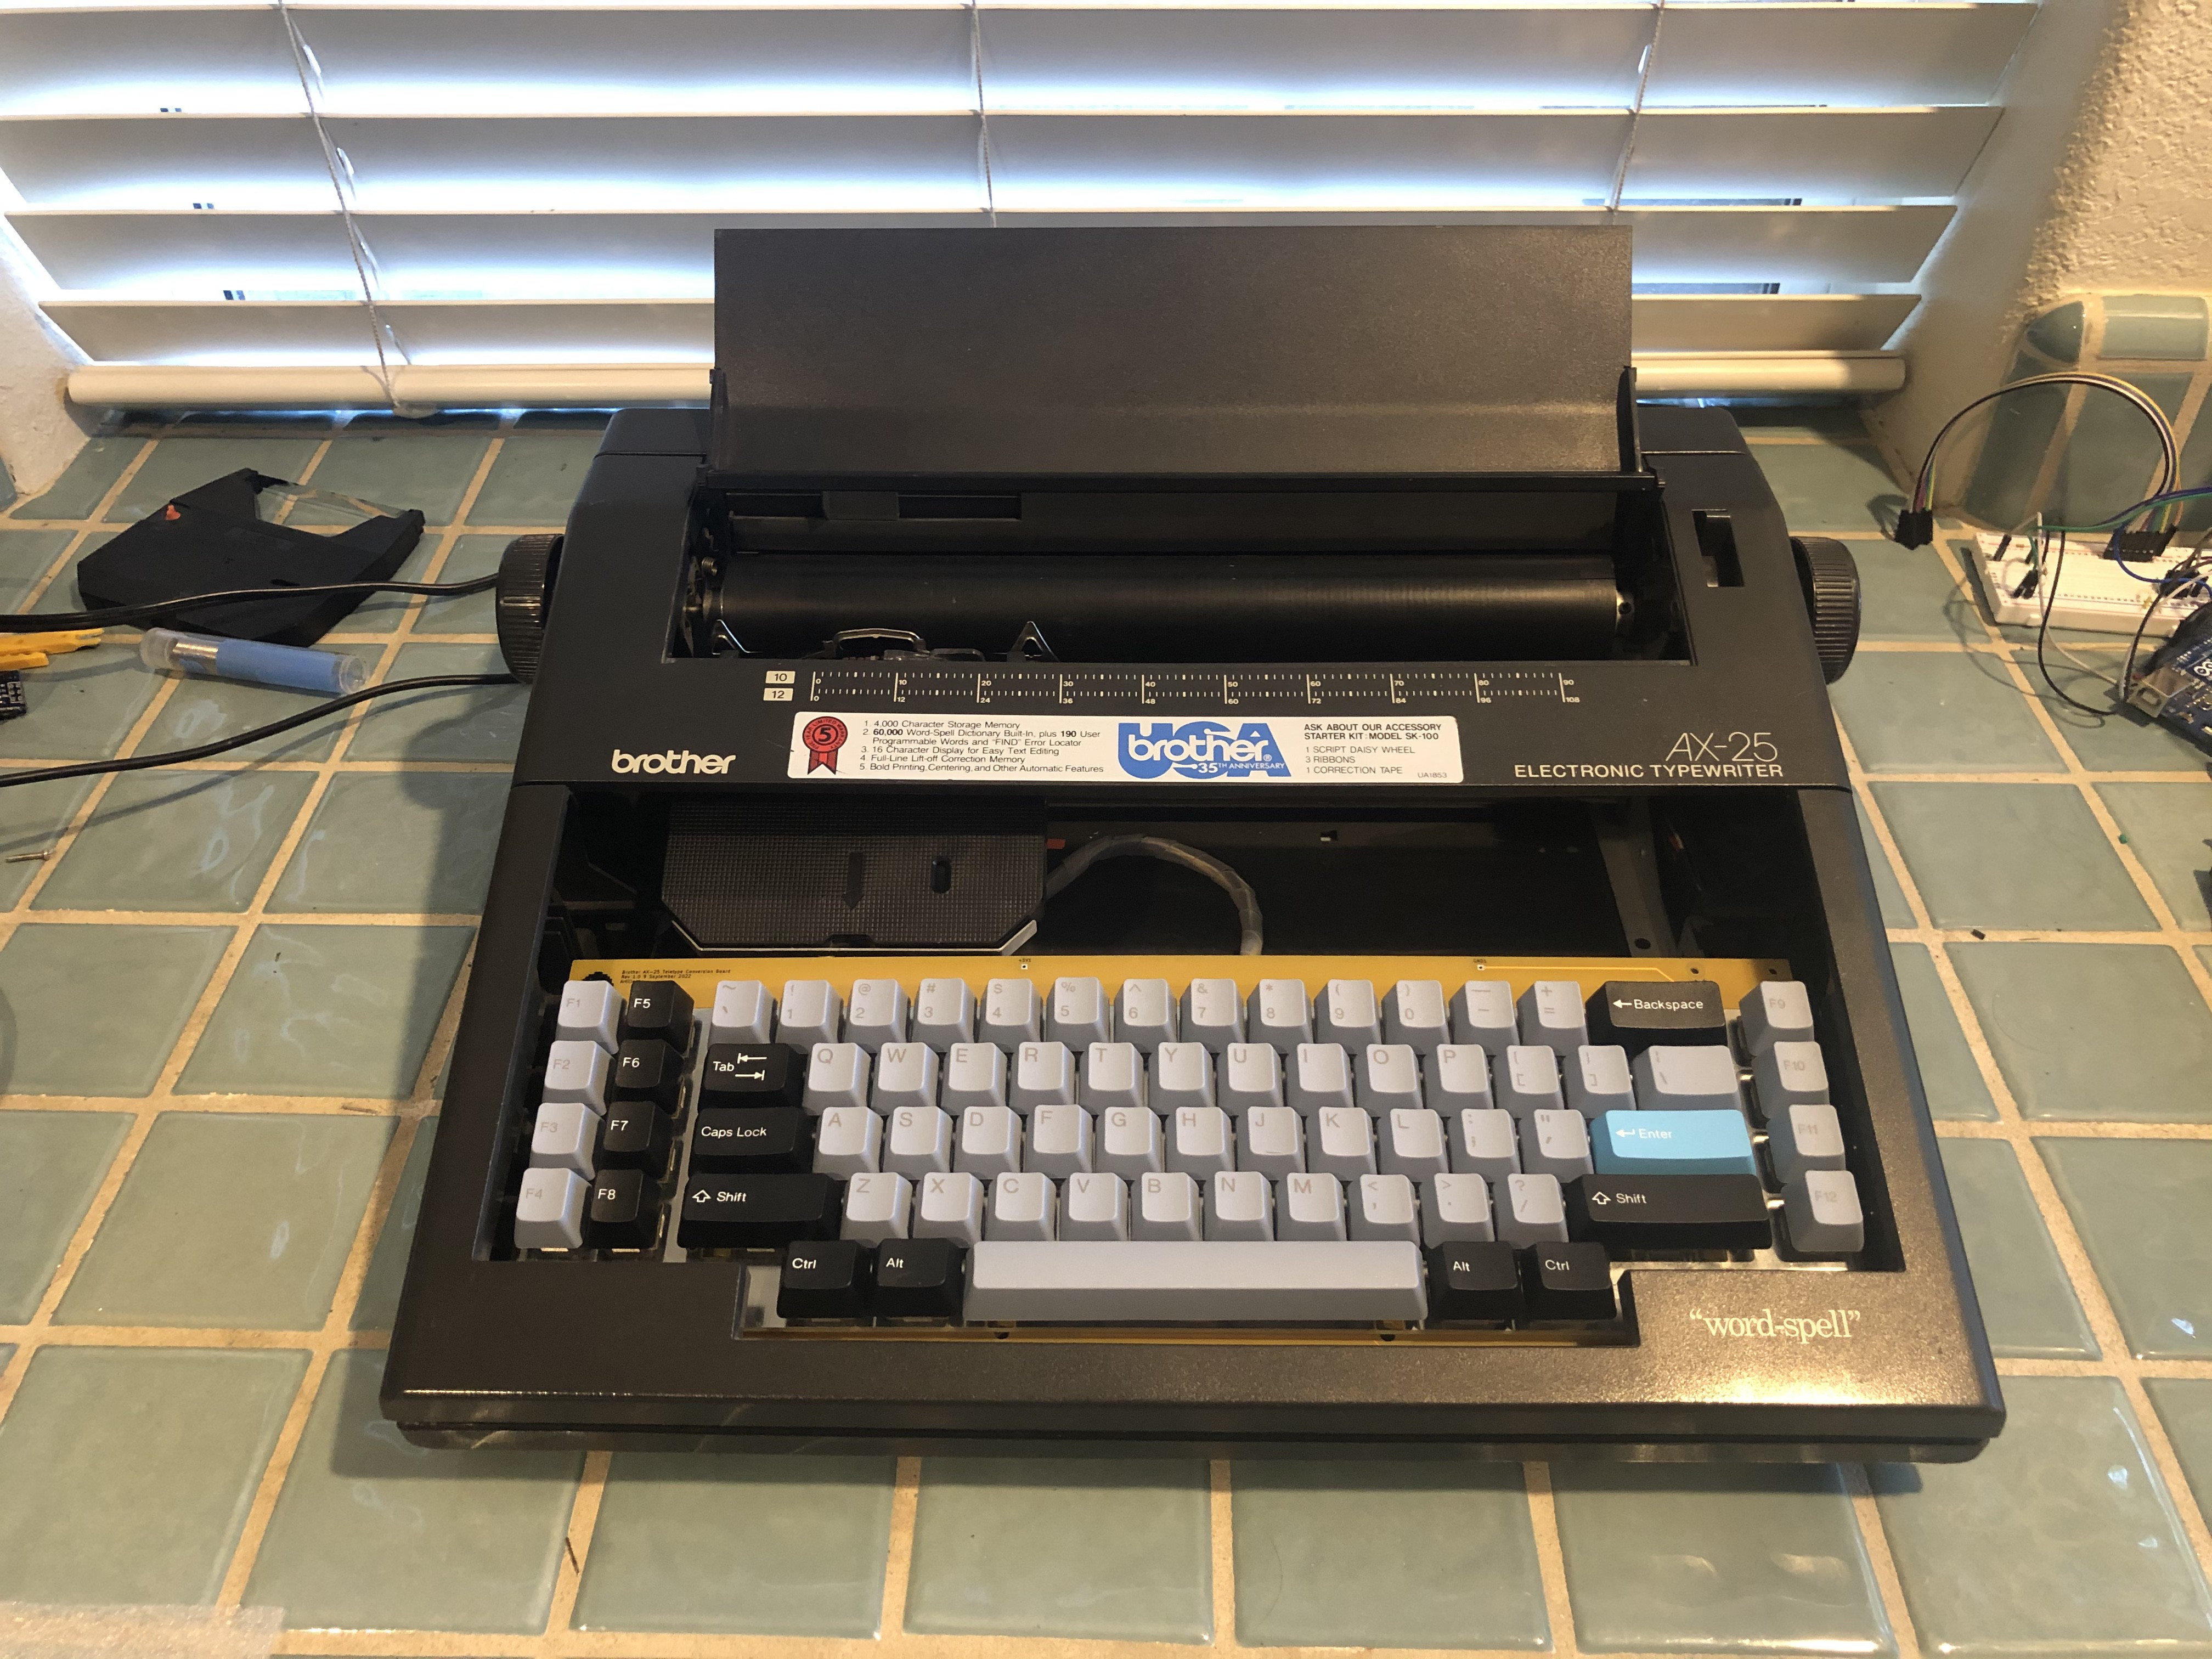
10/02/2022 at 18:32 • 0 commentsYesterday I put the finishing touches on my typewriter and closed it up! Now I can use it on the go!
I used a piece of foam core poster board to fill in the gap from the old keyboard's faceplate. I'm going to start recording the video about it now, so keep an eye out for that!
-
On the home stretch!
09/30/2022 at 23:06 • 0 commentsI did another livestream on Monday where I continued wiring up the multiplexers
Once I got the keyboard multiplexers all wired up, the keyboard worked perfectly after some debugging!
I finally got my custom mechanical keyboard for my typewriter working with my @arduino! Still have to iron out a bunch of issues but it’s getting there pic.twitter.com/ak3JnExO8u
— Artillect (@ArtillectYT) September 28, 2022I the next day, I decided I'd work without streaming so I could get more done, and I got the typewriter multiplexers wired up!
![]()
After that, I put the keycaps on and put the top shell of the typewriter back on!
![]()
You can see my typewriter in action in this tweet I posted on Twitter
I just put the keycaps on my typewriter’s new keyboard and closed it up! Still have to figure out where exactly I’m gonna fit the @arduino and @Raspberry_Pi but I’m almost done! pic.twitter.com/NxZ6bt4SOQ
— Artillect (@ArtillectYT) September 30, 2022 -
Using jumper wires to avoid soldering SMD components
09/25/2022 at 23:34 • 0 commentsI like to think I'm pretty good at soldering, but these tiny multiplexers were an absolute pain to work with. Luckily for me, I broke one of them, so I can't use them anymore!
To make my life easier, I decided to wire up the multiplexers I used in the breadboard prototype with a bunch of jumper wires.
The multiplexers' channel pins are connected to the columns and rows of the keyboard's matrix, and I went through the PCB blueprint to find which pads to solder the wires to. I still need to wire up the rest of the columns and the control pins for the second multiplexer.
Wiring up the typewriter control multiplexers should be much easier, hopefully. I'm going to solder some headers onto the nano, and use some jumpers wires to connect the multiplexers. -
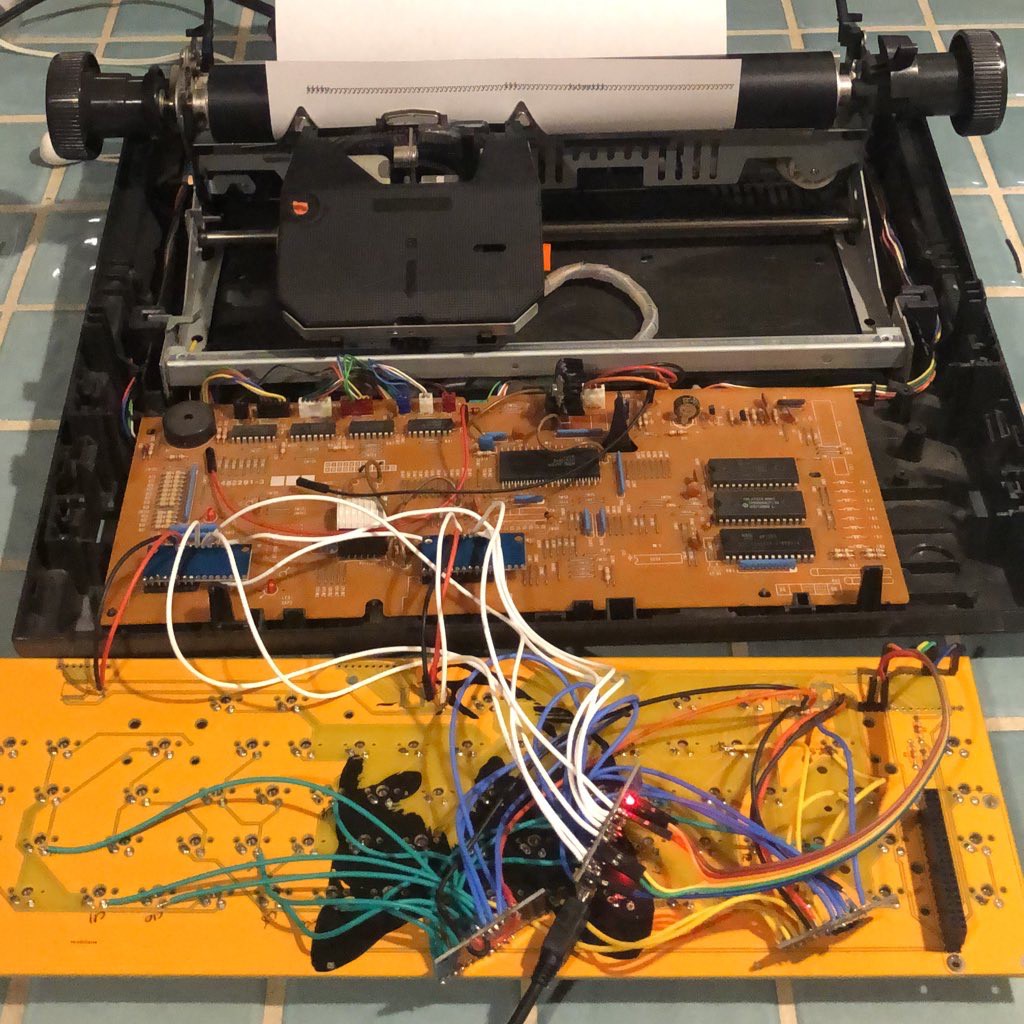
Assembling the keyboard
09/25/2022 at 02:26 • 0 commentsThe parts for my typewriter finally arrived!
My first attempt at assembling one of the PCBs was a failure. I broke one of the SMD multiplexers, and soldered another one at an angle, but I managed to solder one of them correctly. After this attempt, I decided I needed to take another approach.
For my second go at it, I decided to forgo the SMD multiplexers altogether, and wire up the multiplexers I used in the breadboard prototype using the silicone wire I got. I got the keyboard mostly assembled, but ran out of solder before finishing it.
Tomorrow, I'll be finishing the assembly of the keyboard, and hopefully have everything working!
-
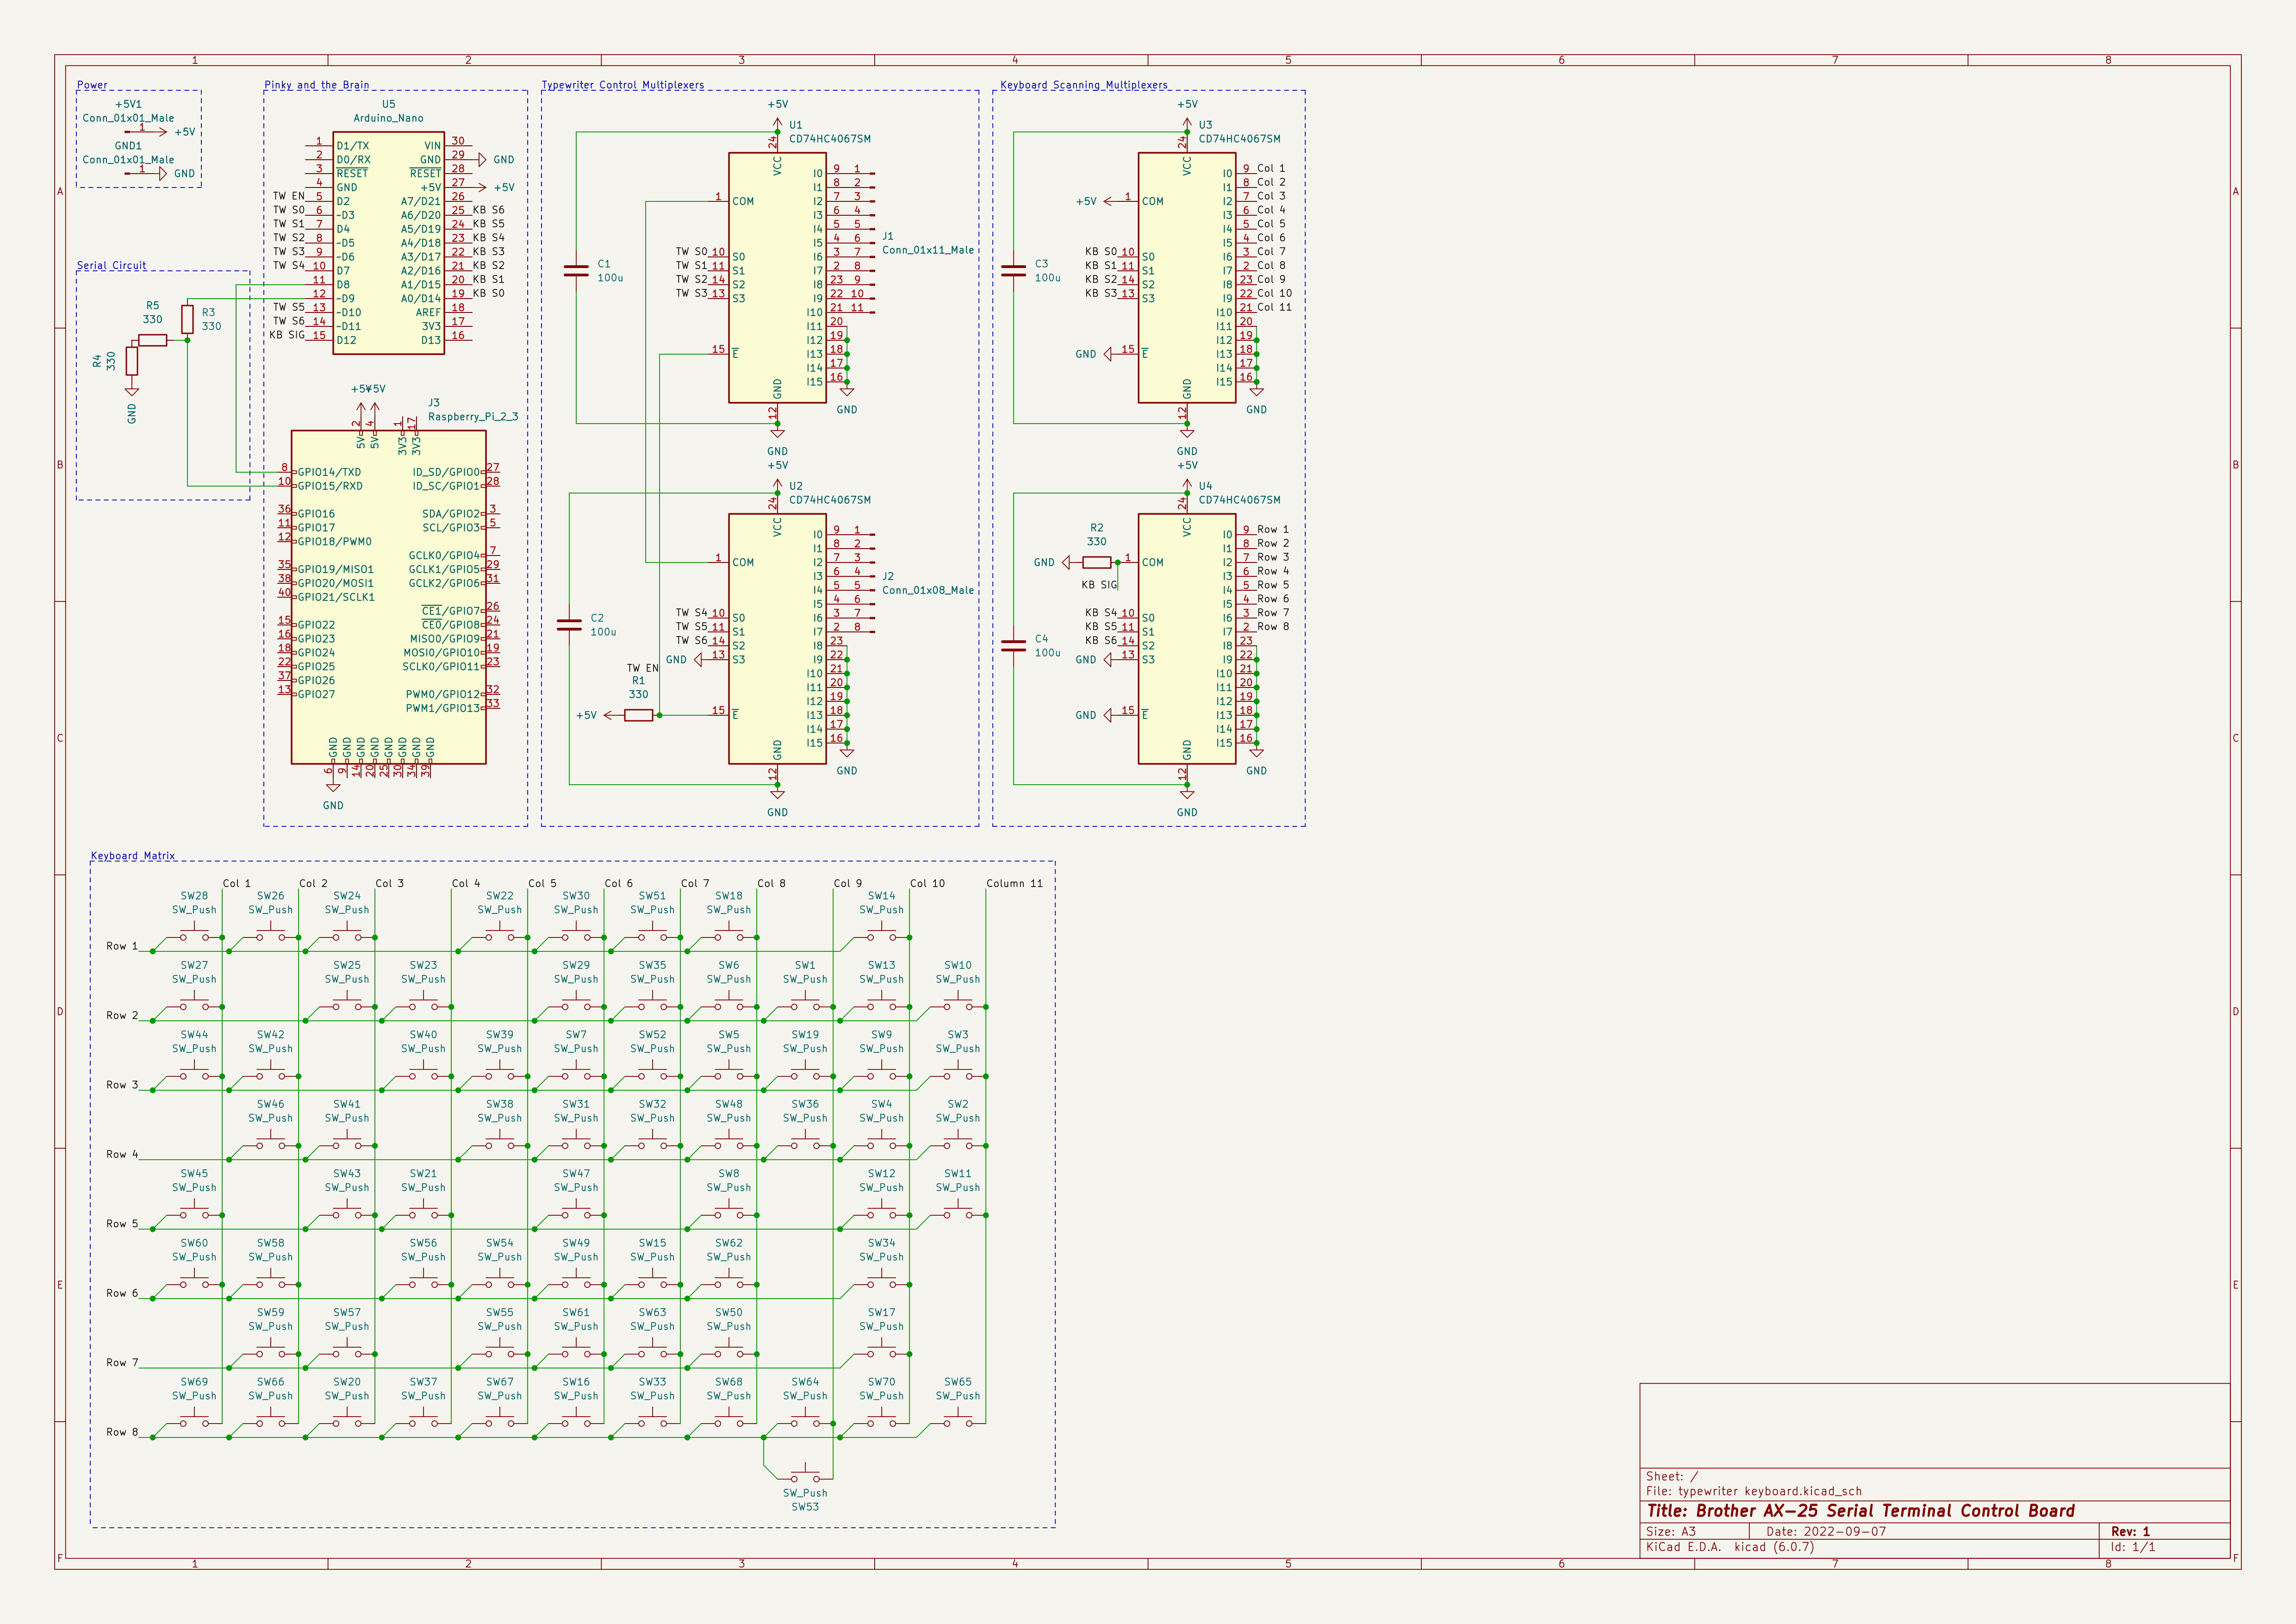
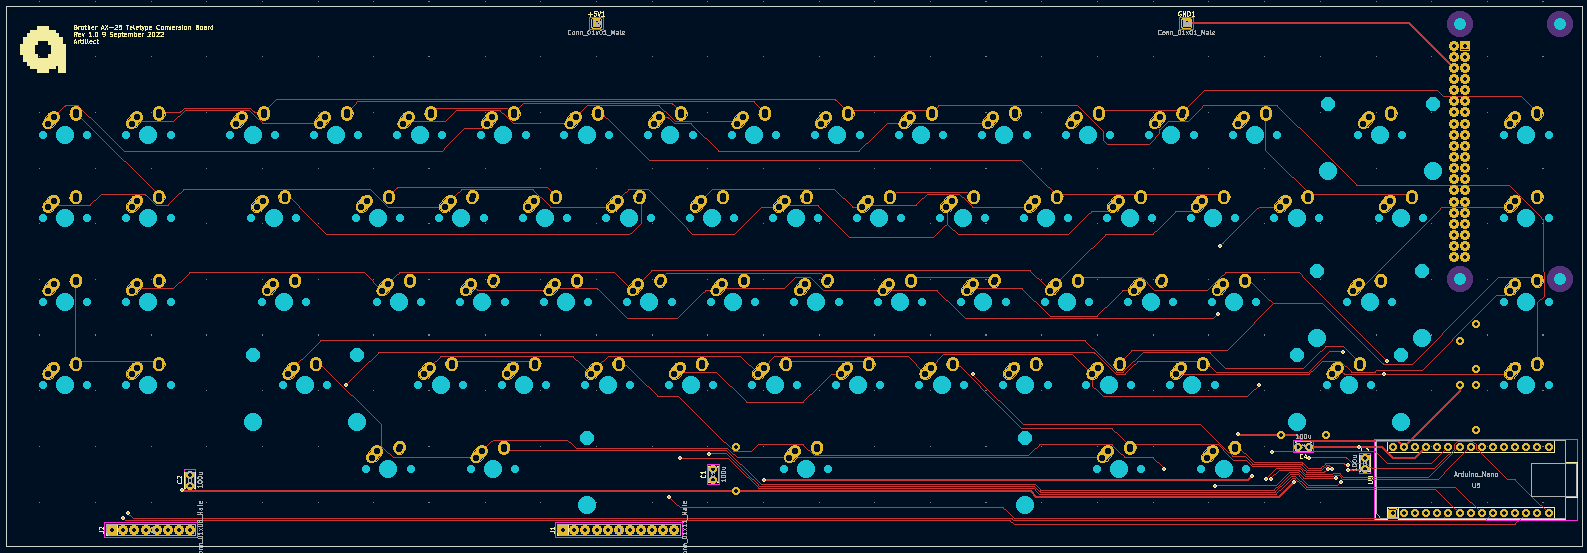
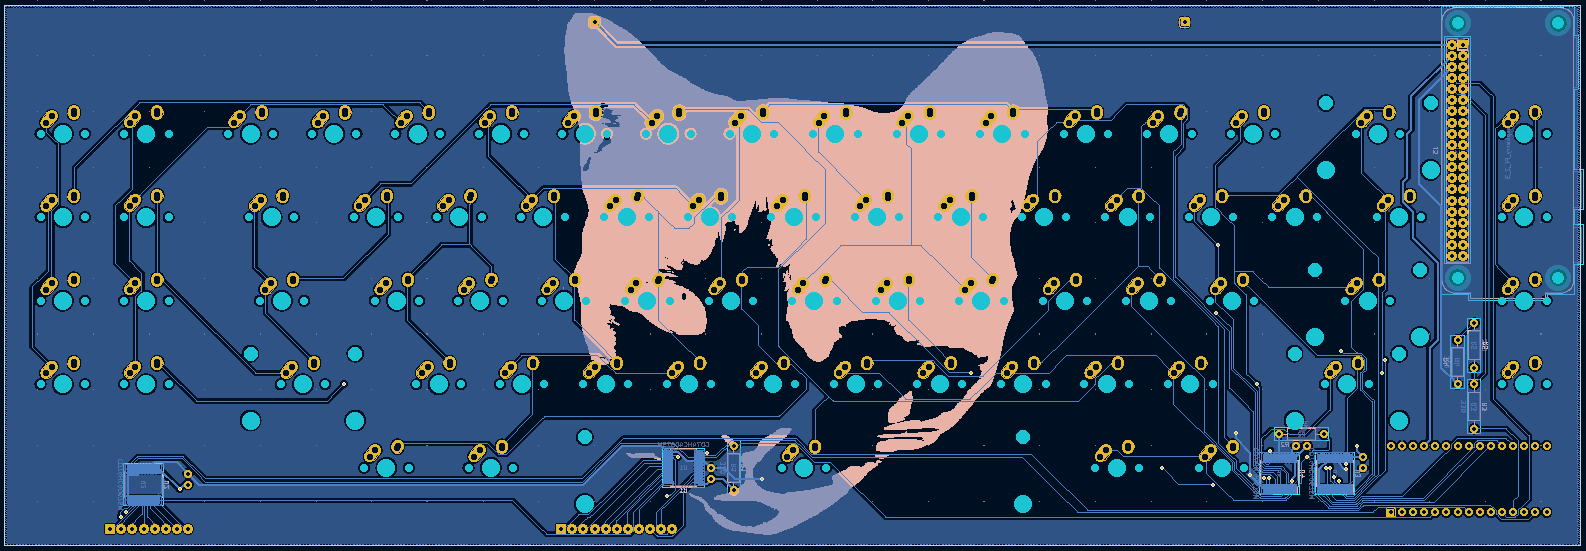
Designing and ordering a custom PCB
09/14/2022 at 19:03 • 0 commentsLast week, I spent a few days working on the design for the PCB I'm going to replace the typewriter's keyboard with. I livestreamed the whole design process on YouTube, and after all that, I now have a pretty solid design! The KiCAD project files are available on GitHub. I've ordered the PCBs, and they should be arriving about a week from now!
Schematic:
![]()
All Layers:
![]()
Front copper:
![]()
Back Copper:
![]()
80s Typewriter Linux Terminal
I'm using an Arduino and a Raspberry Pi to turn a Brother AX-25 typewriter into a fully-functional Linux terminal
 The multiplexers' channel pins are connected to the columns and rows of the keyboard's matrix, and I went through the PCB blueprint to find which pads to solder the wires to. I still need to wire up the rest of the columns and the control pins for the second multiplexer.