-
1Cutting the plates
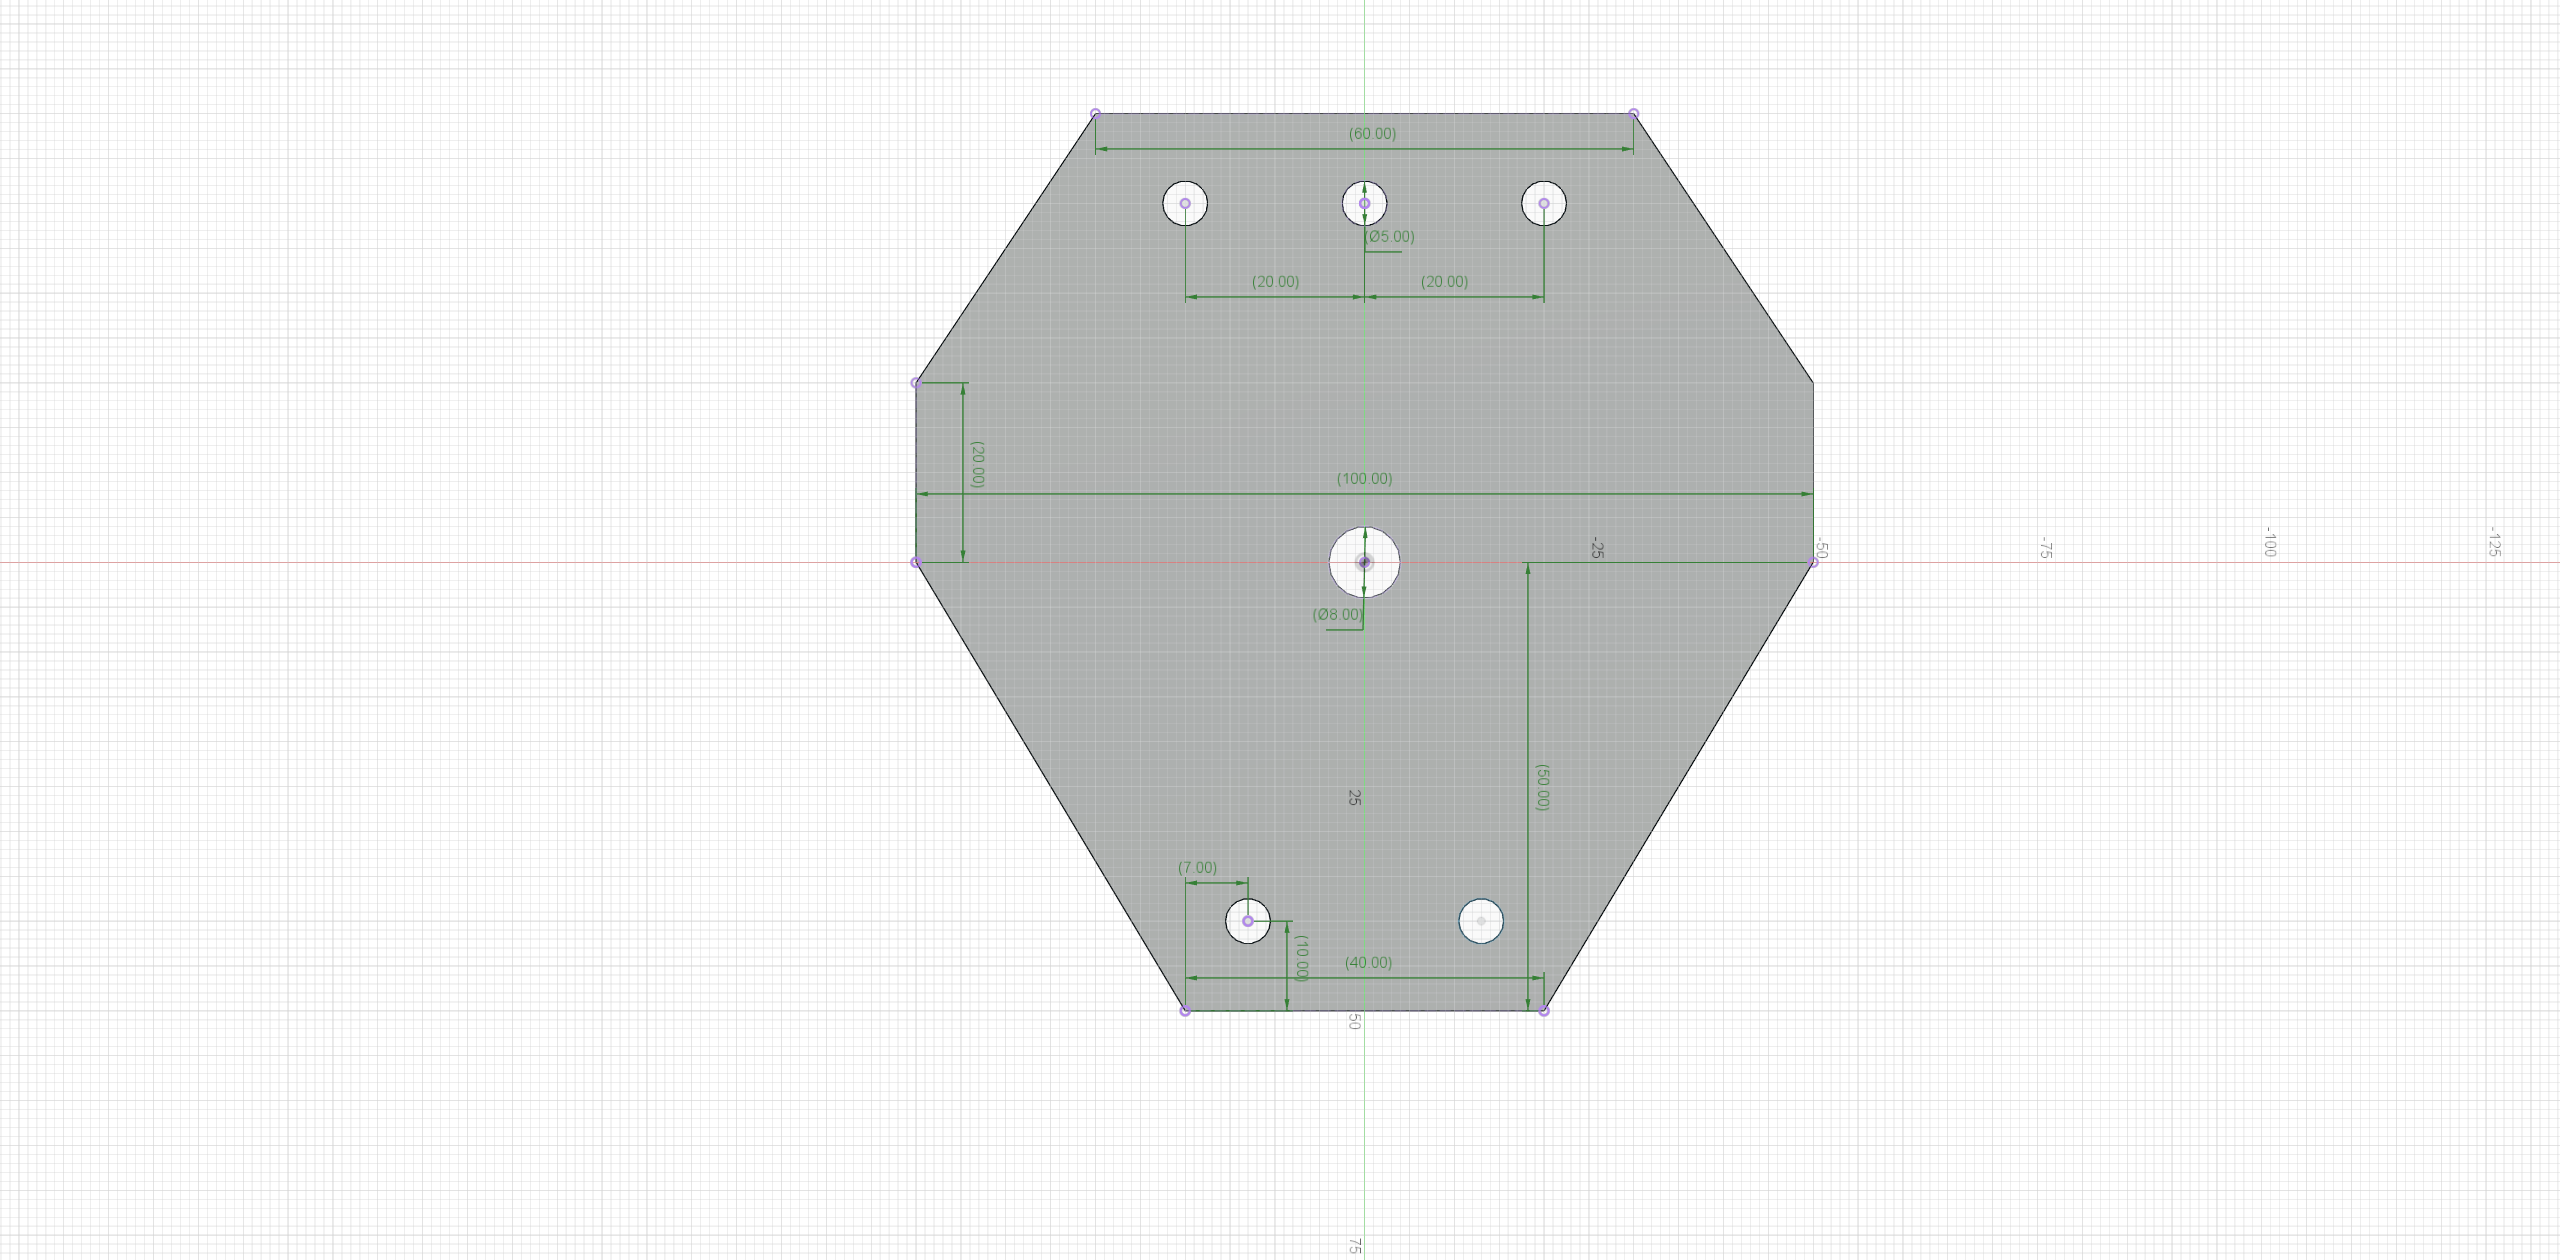
For the platers i'm going to reuse the ones I cutted and drilled when I built and HHO generator (https://hackaday.io/project/186364-hho-generator), the shape can be modified for better results but it is what I had at hand at that time.
The corners are cut diagonally and three holes at the top and two at the bottom are drilled to hold the plate against the glove. An 8mm hole is cut in the center of the plate aswell for the tube to come out.
![]()
-
2Cut and drill the brackets
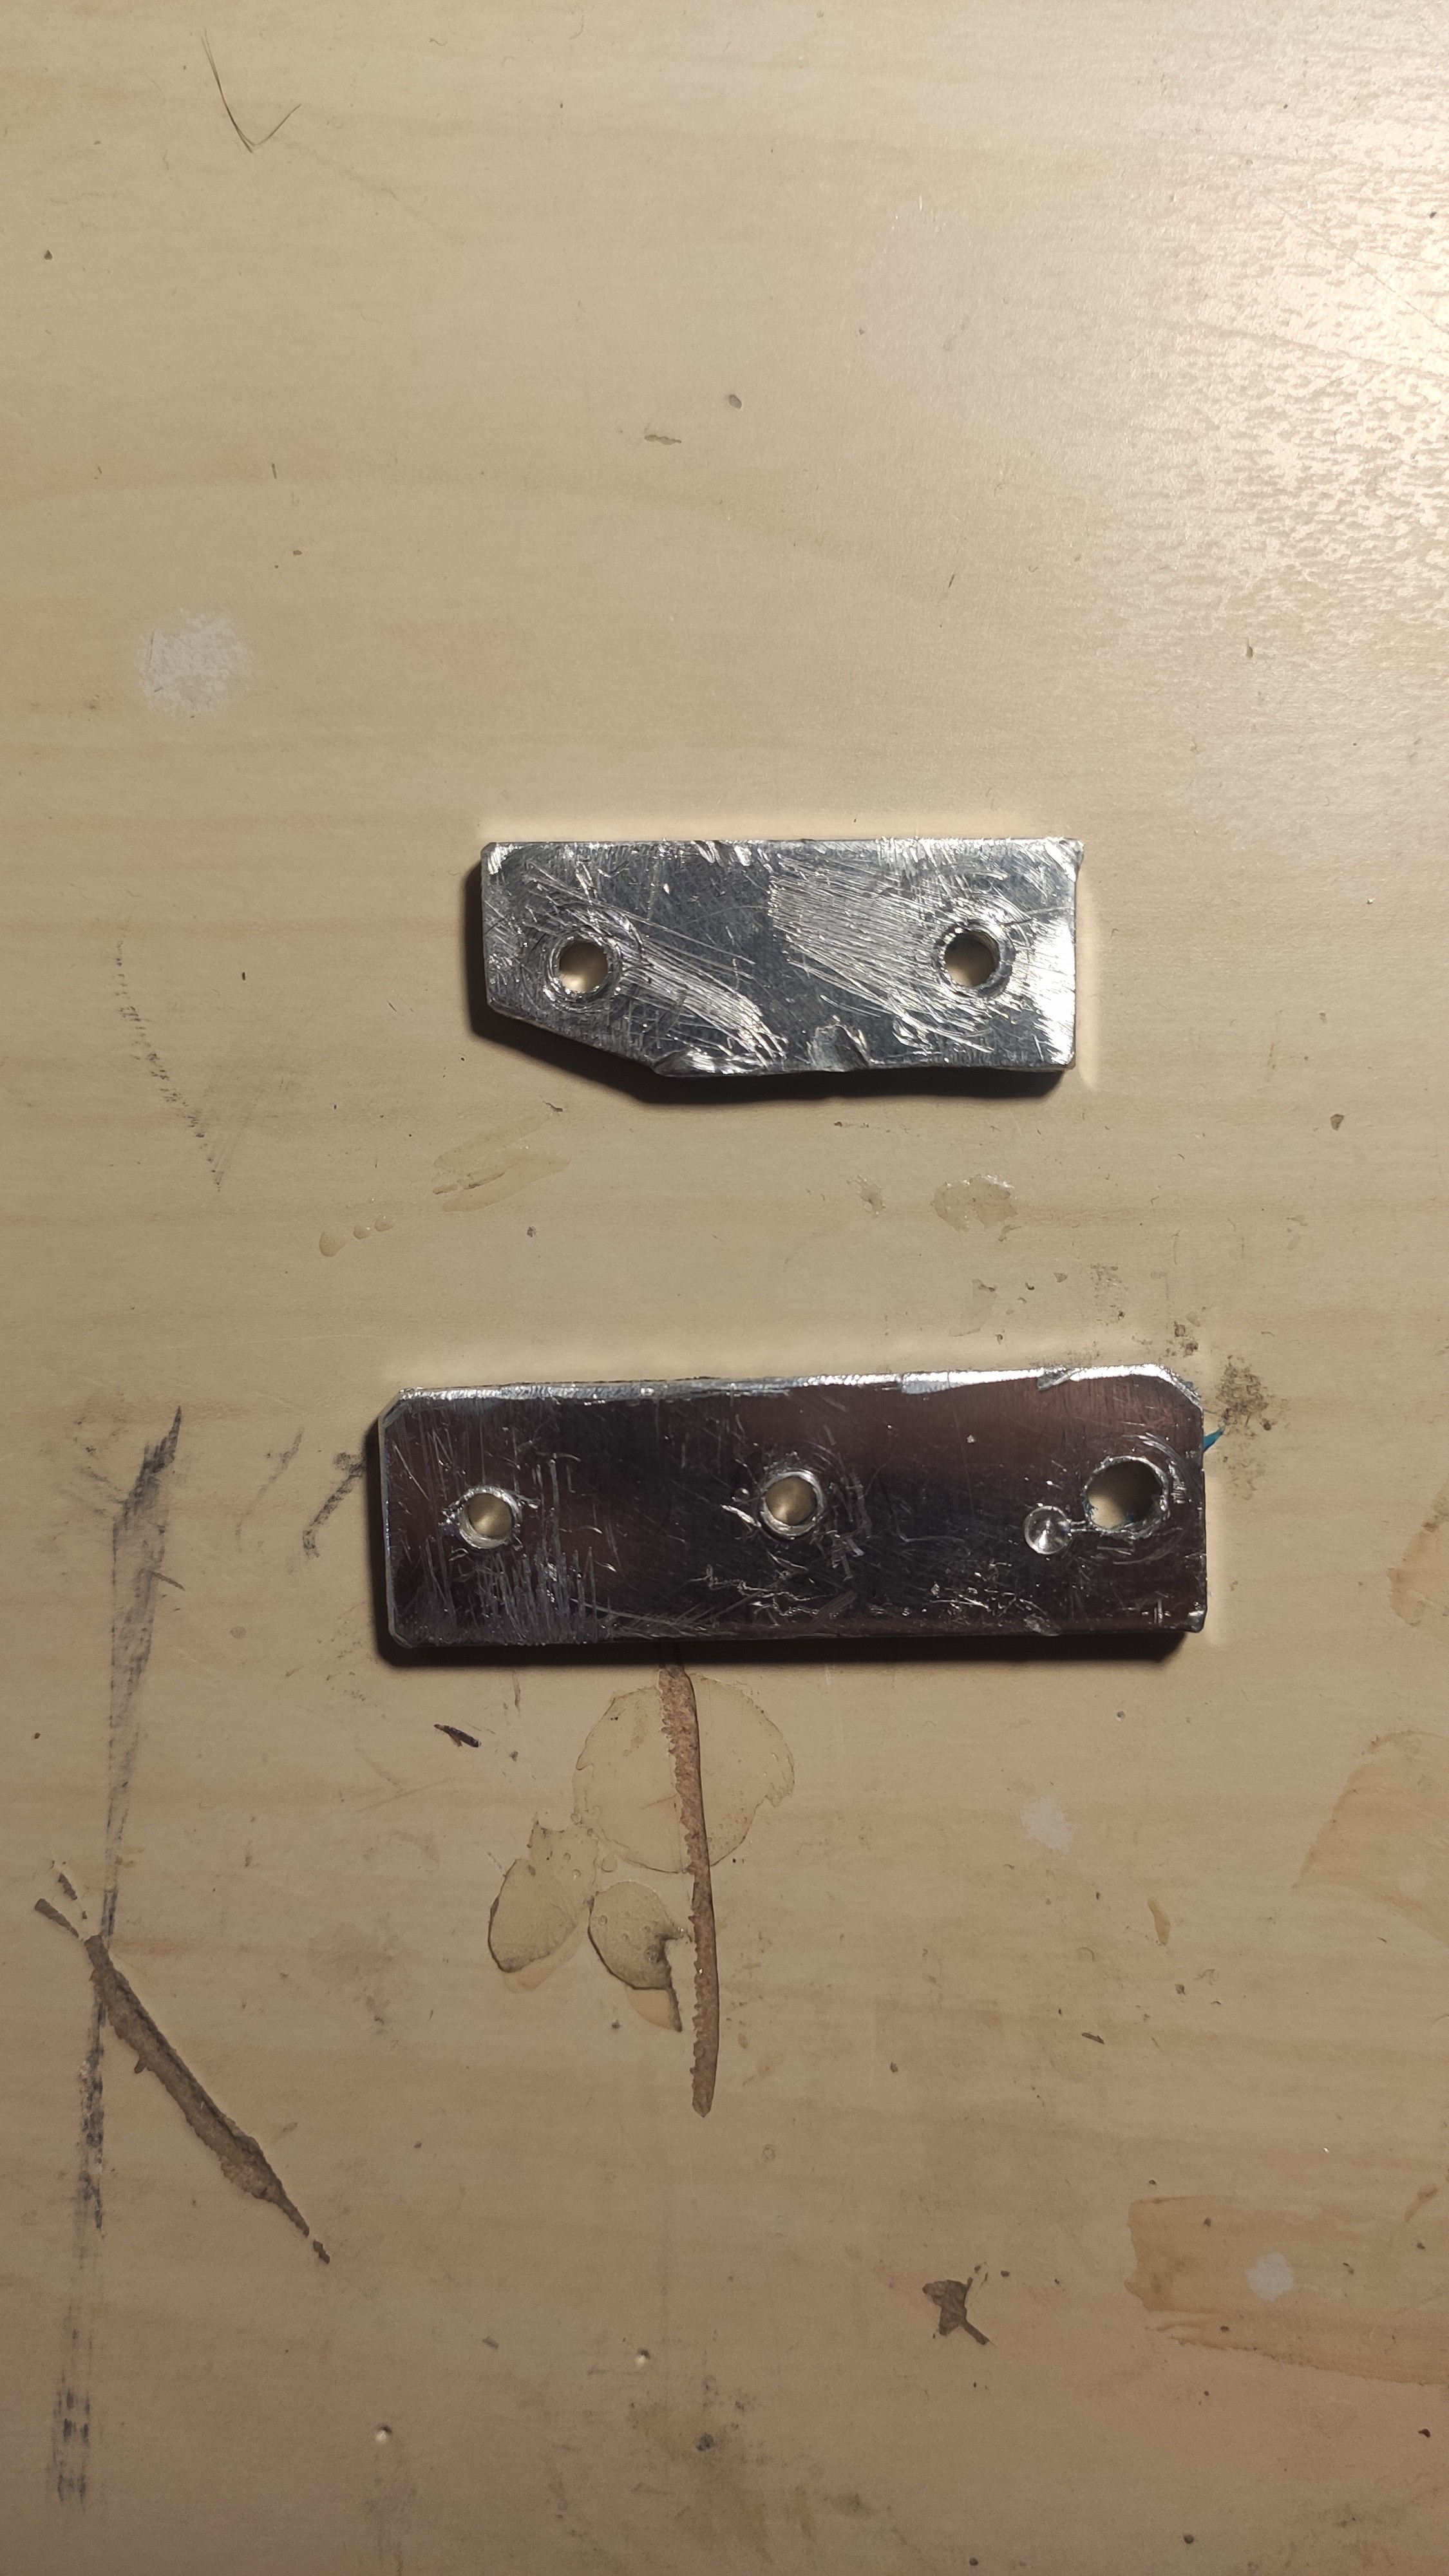
With the leftover metal from cutting the corners of the plate cut and drill some rectangular plates with the same hole distance as the top and bottom holes on the plate.
This bracket will screw from the back and inside the glove to attach the plate to the glove.
![]()
-
3Add screws and tube
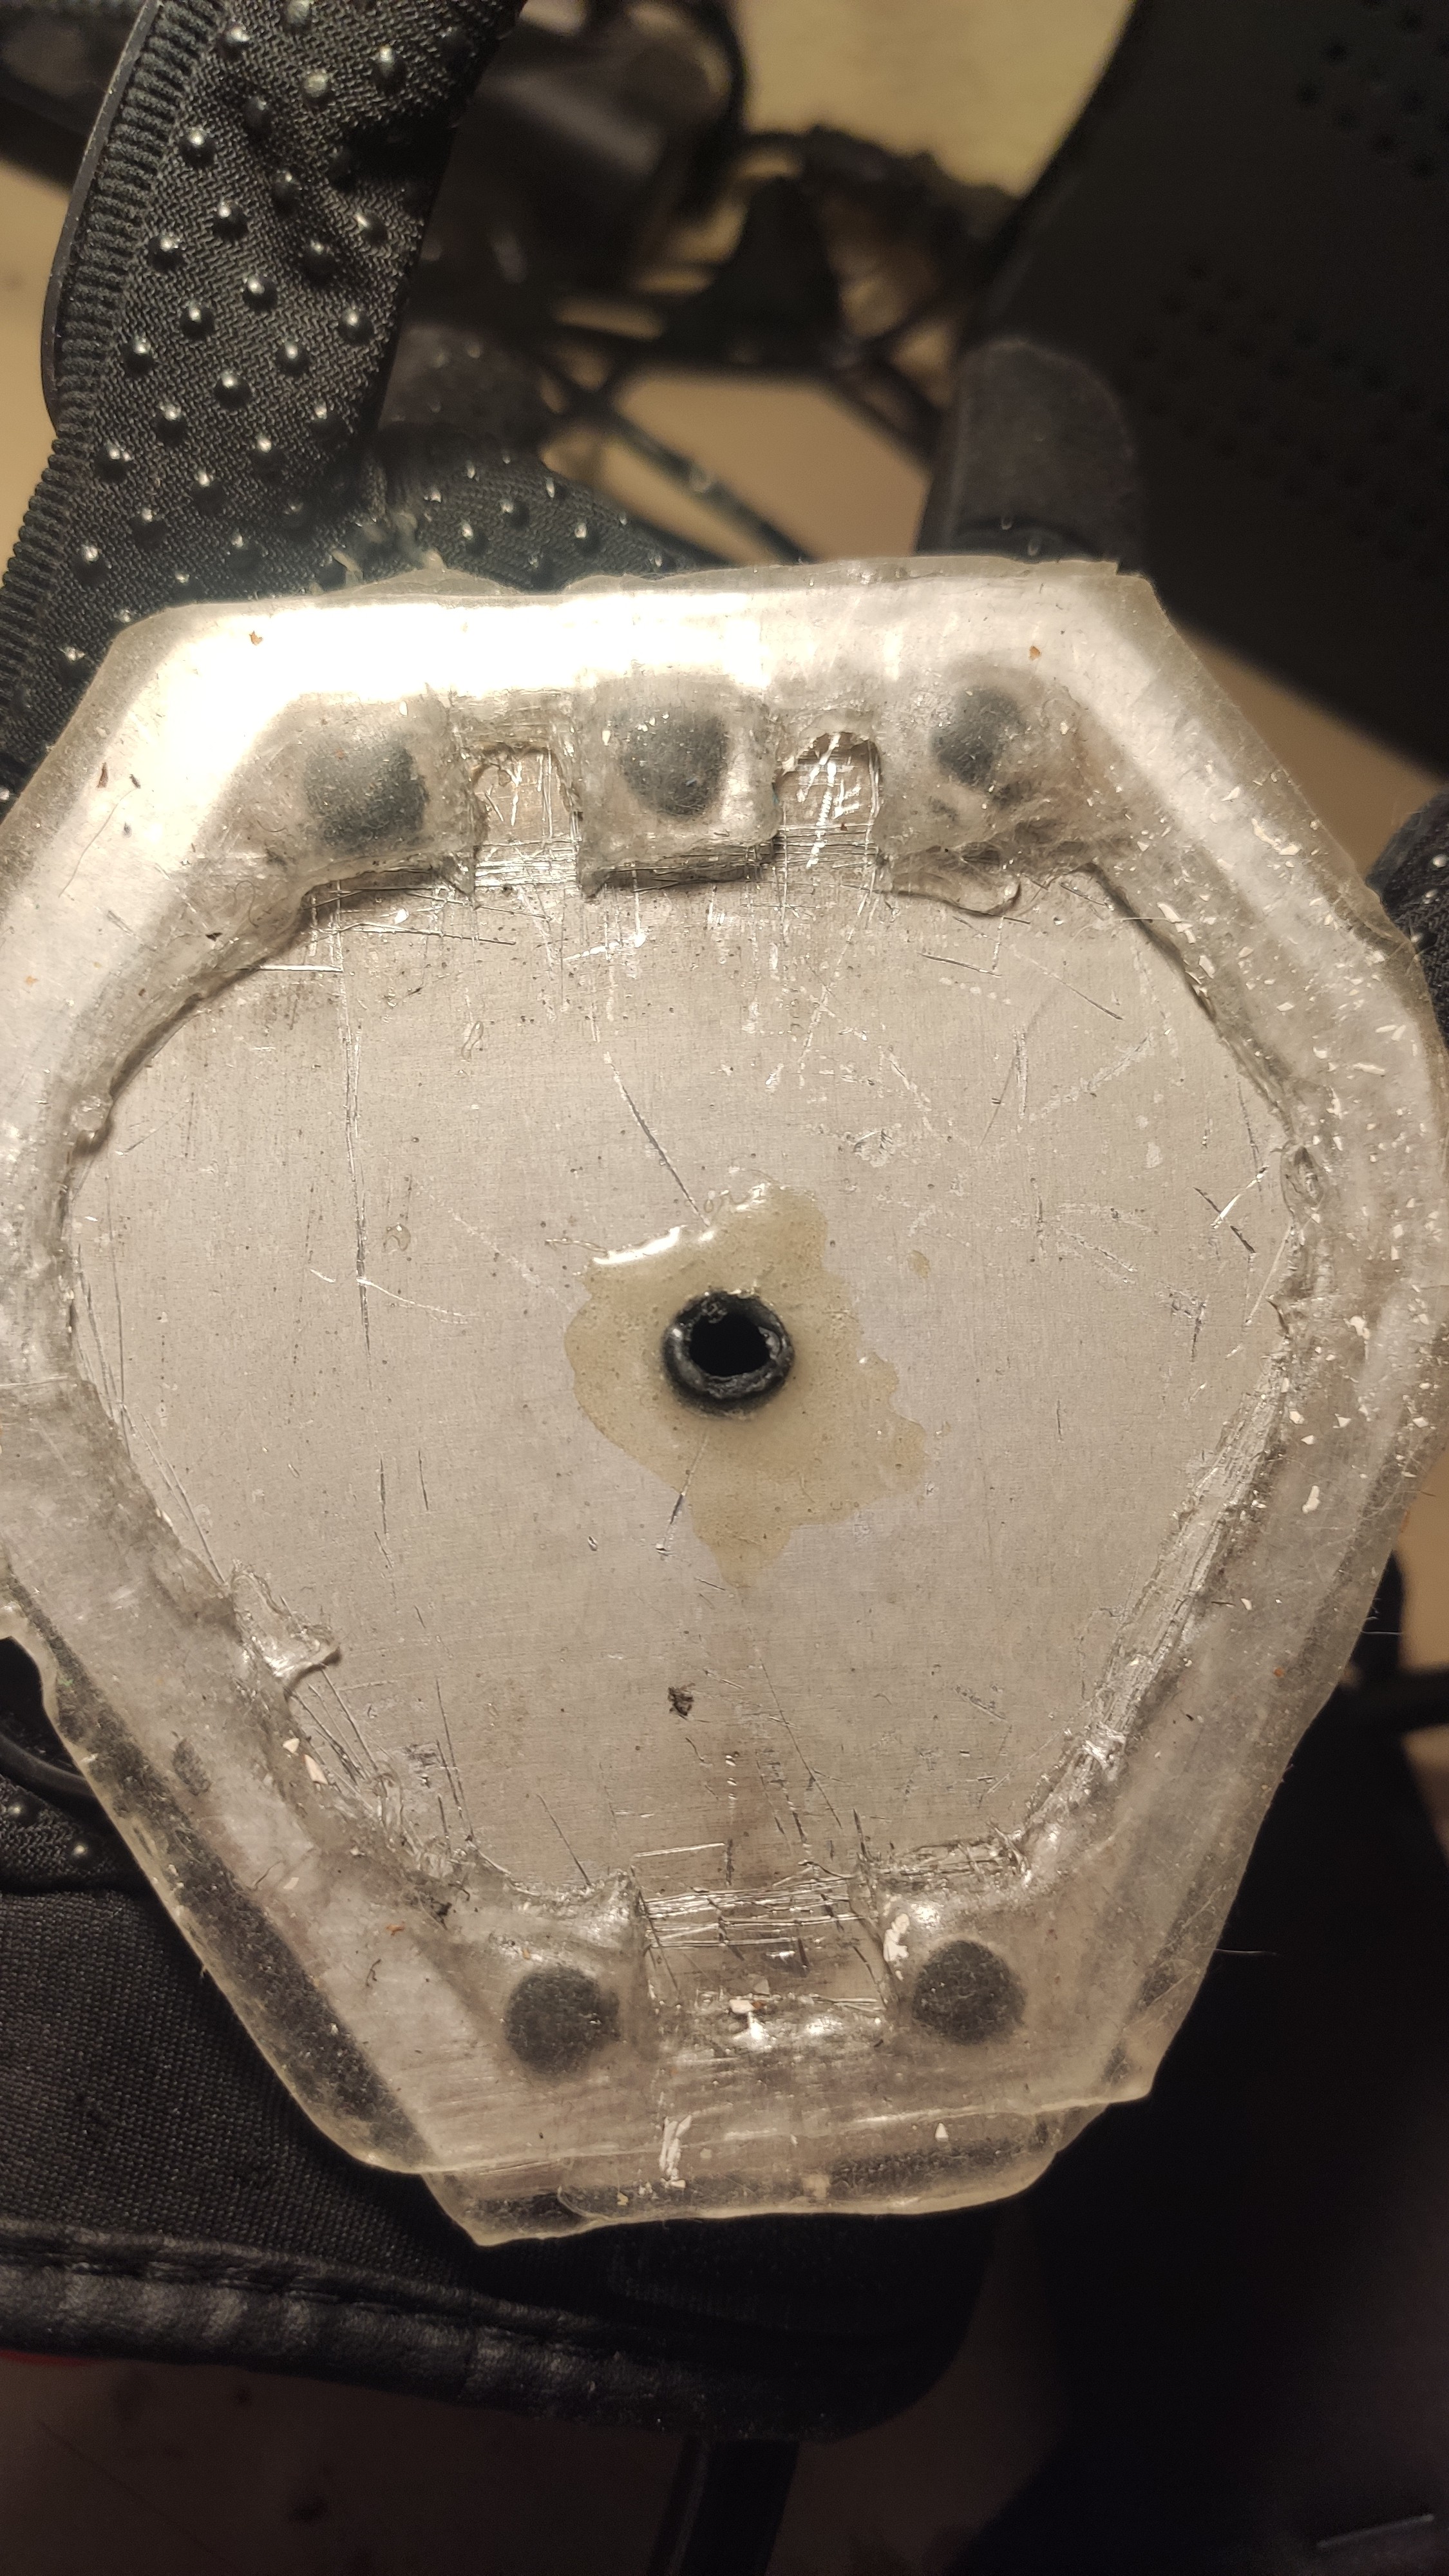
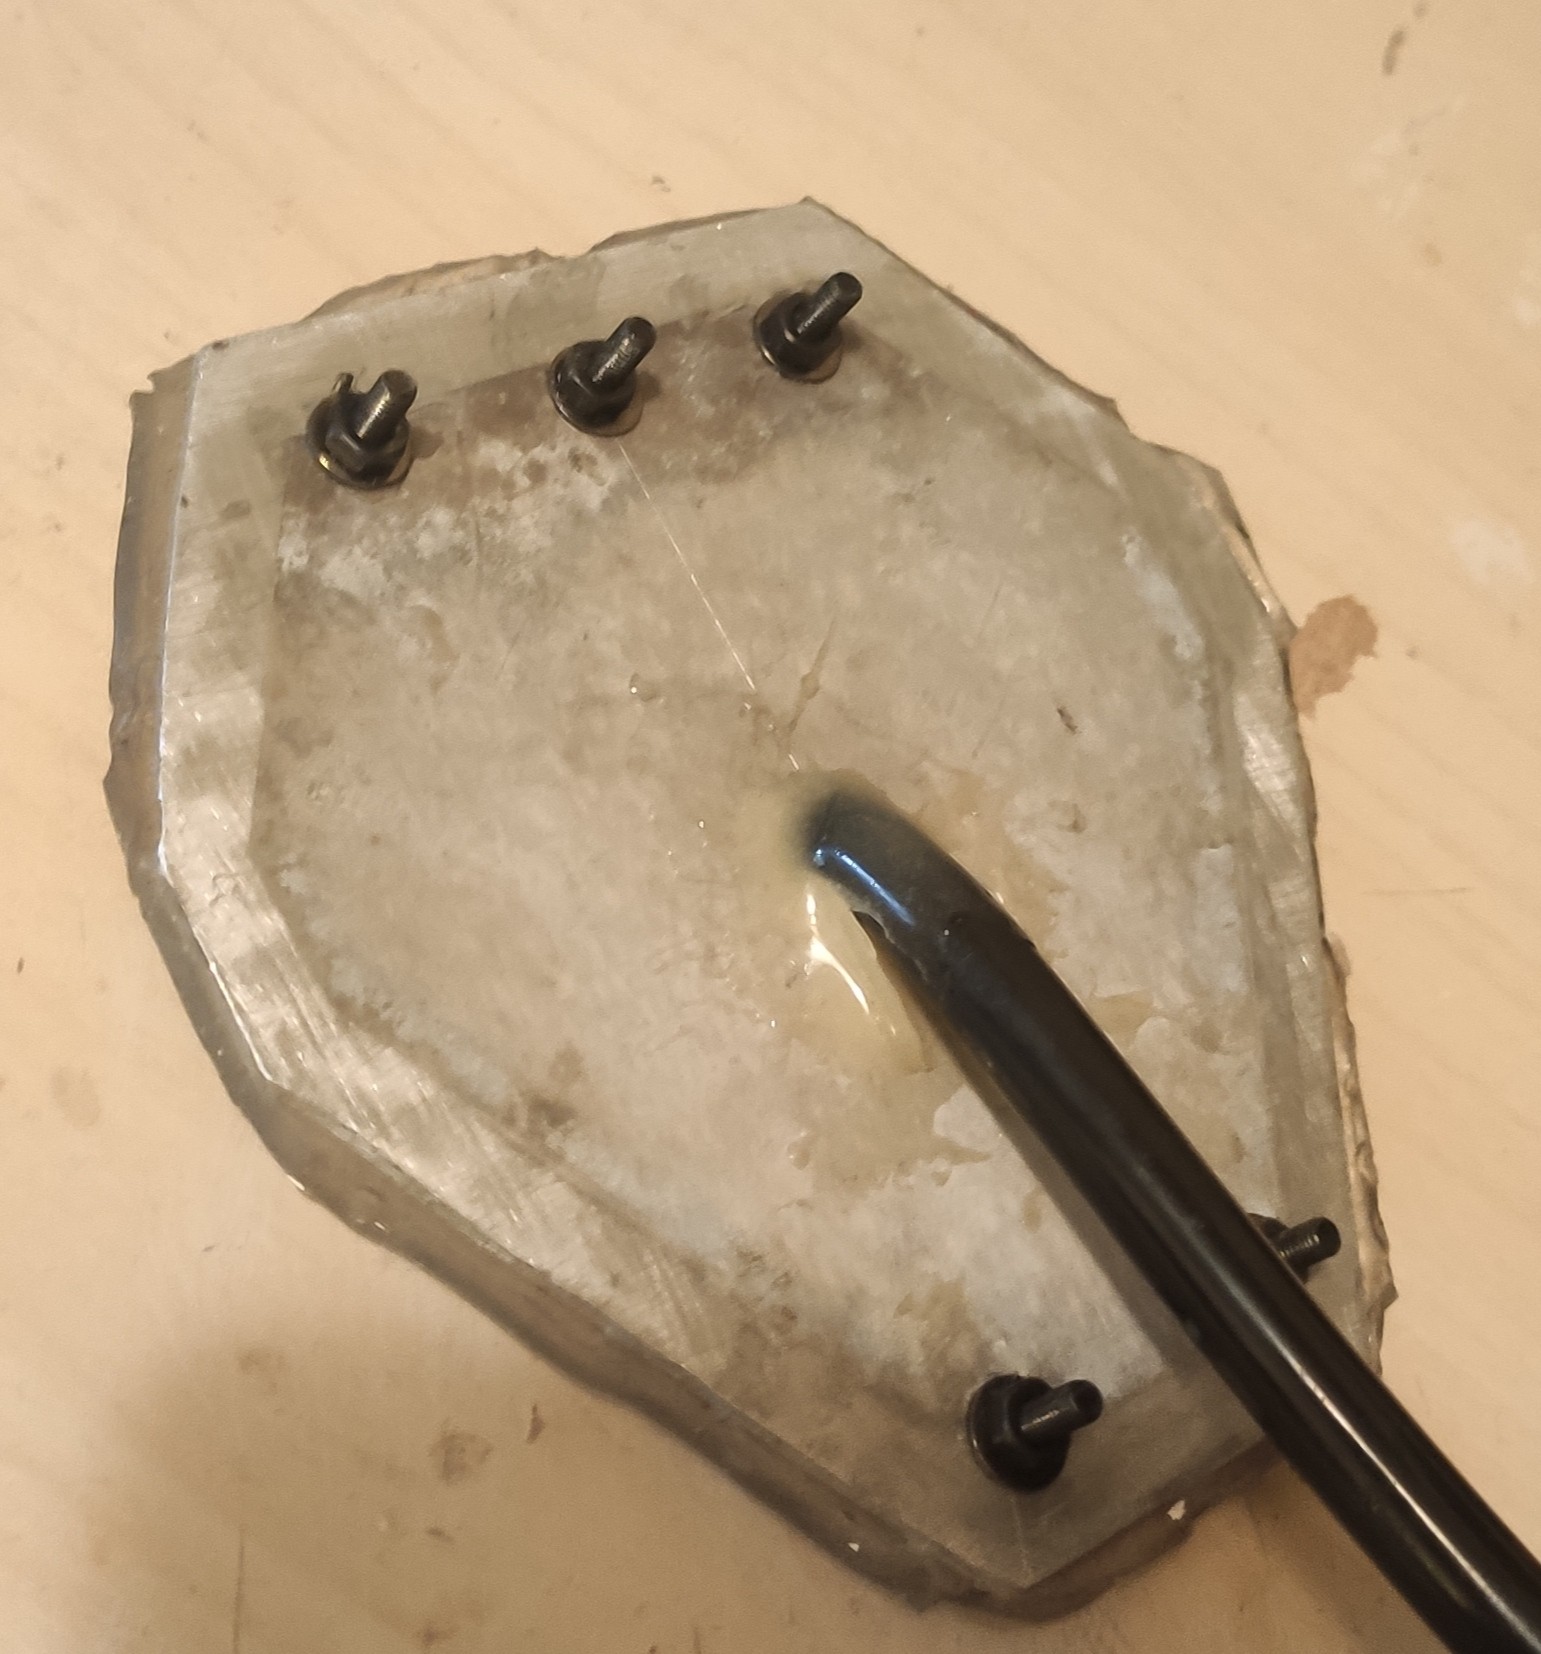
Bolt screws to the holes of the plate and insert the 8mm OD (Outer Diamater) tube in the center hole.
Heat the tube to bend it as tight as possible and glue it in place, also add glue to the front of the plate to seal it.
I used flat hexagonal screws so they dont stick out too much:
![]()
![]()
-
4Attach the straps
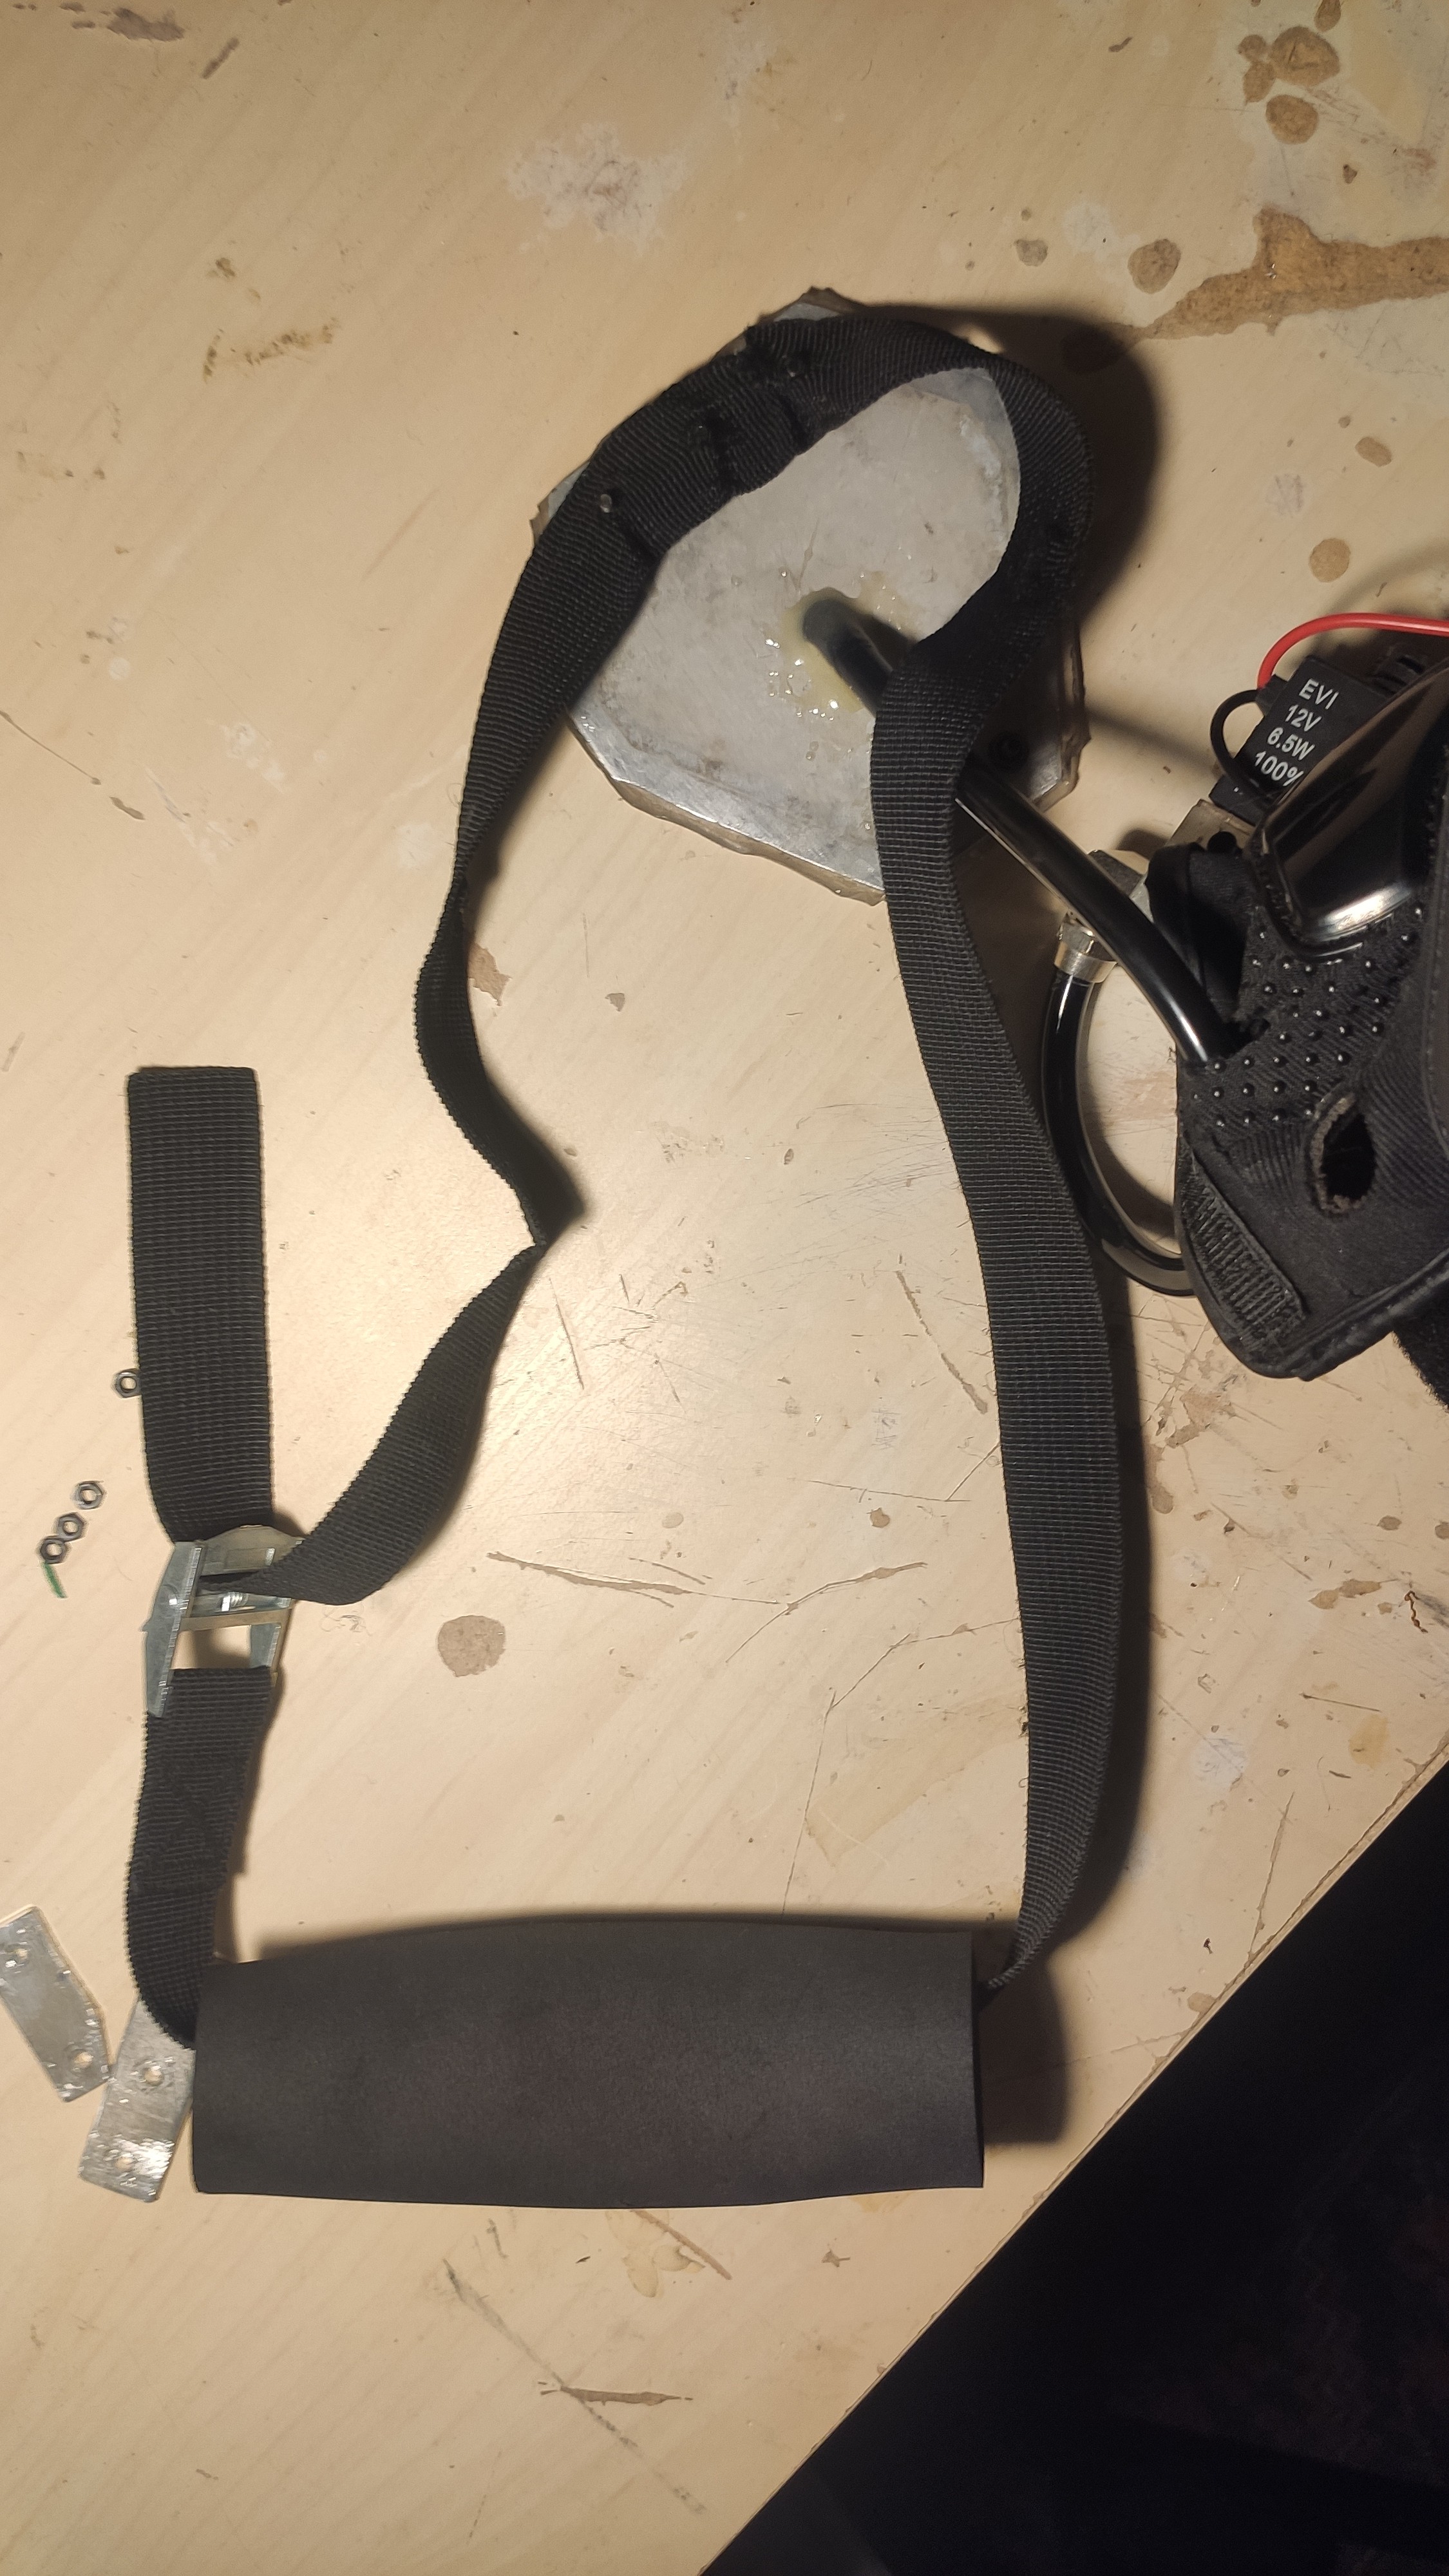
The glove would tear if all the weight is put to it so we are going to attach the straps to the plate and make a loop to rest your elbow.
Cut small holes on the strap and run the three top holes into it, leave the buckle side of the strap close to the hand so that it can be adjusted for different arm lengths.
A small cylinder of sheet foam is added to rest the elbow more comfortably. Cut a rectangle of sheet foam, roll it, and staple it together.
![]()
-
5Attach the plate to the glove
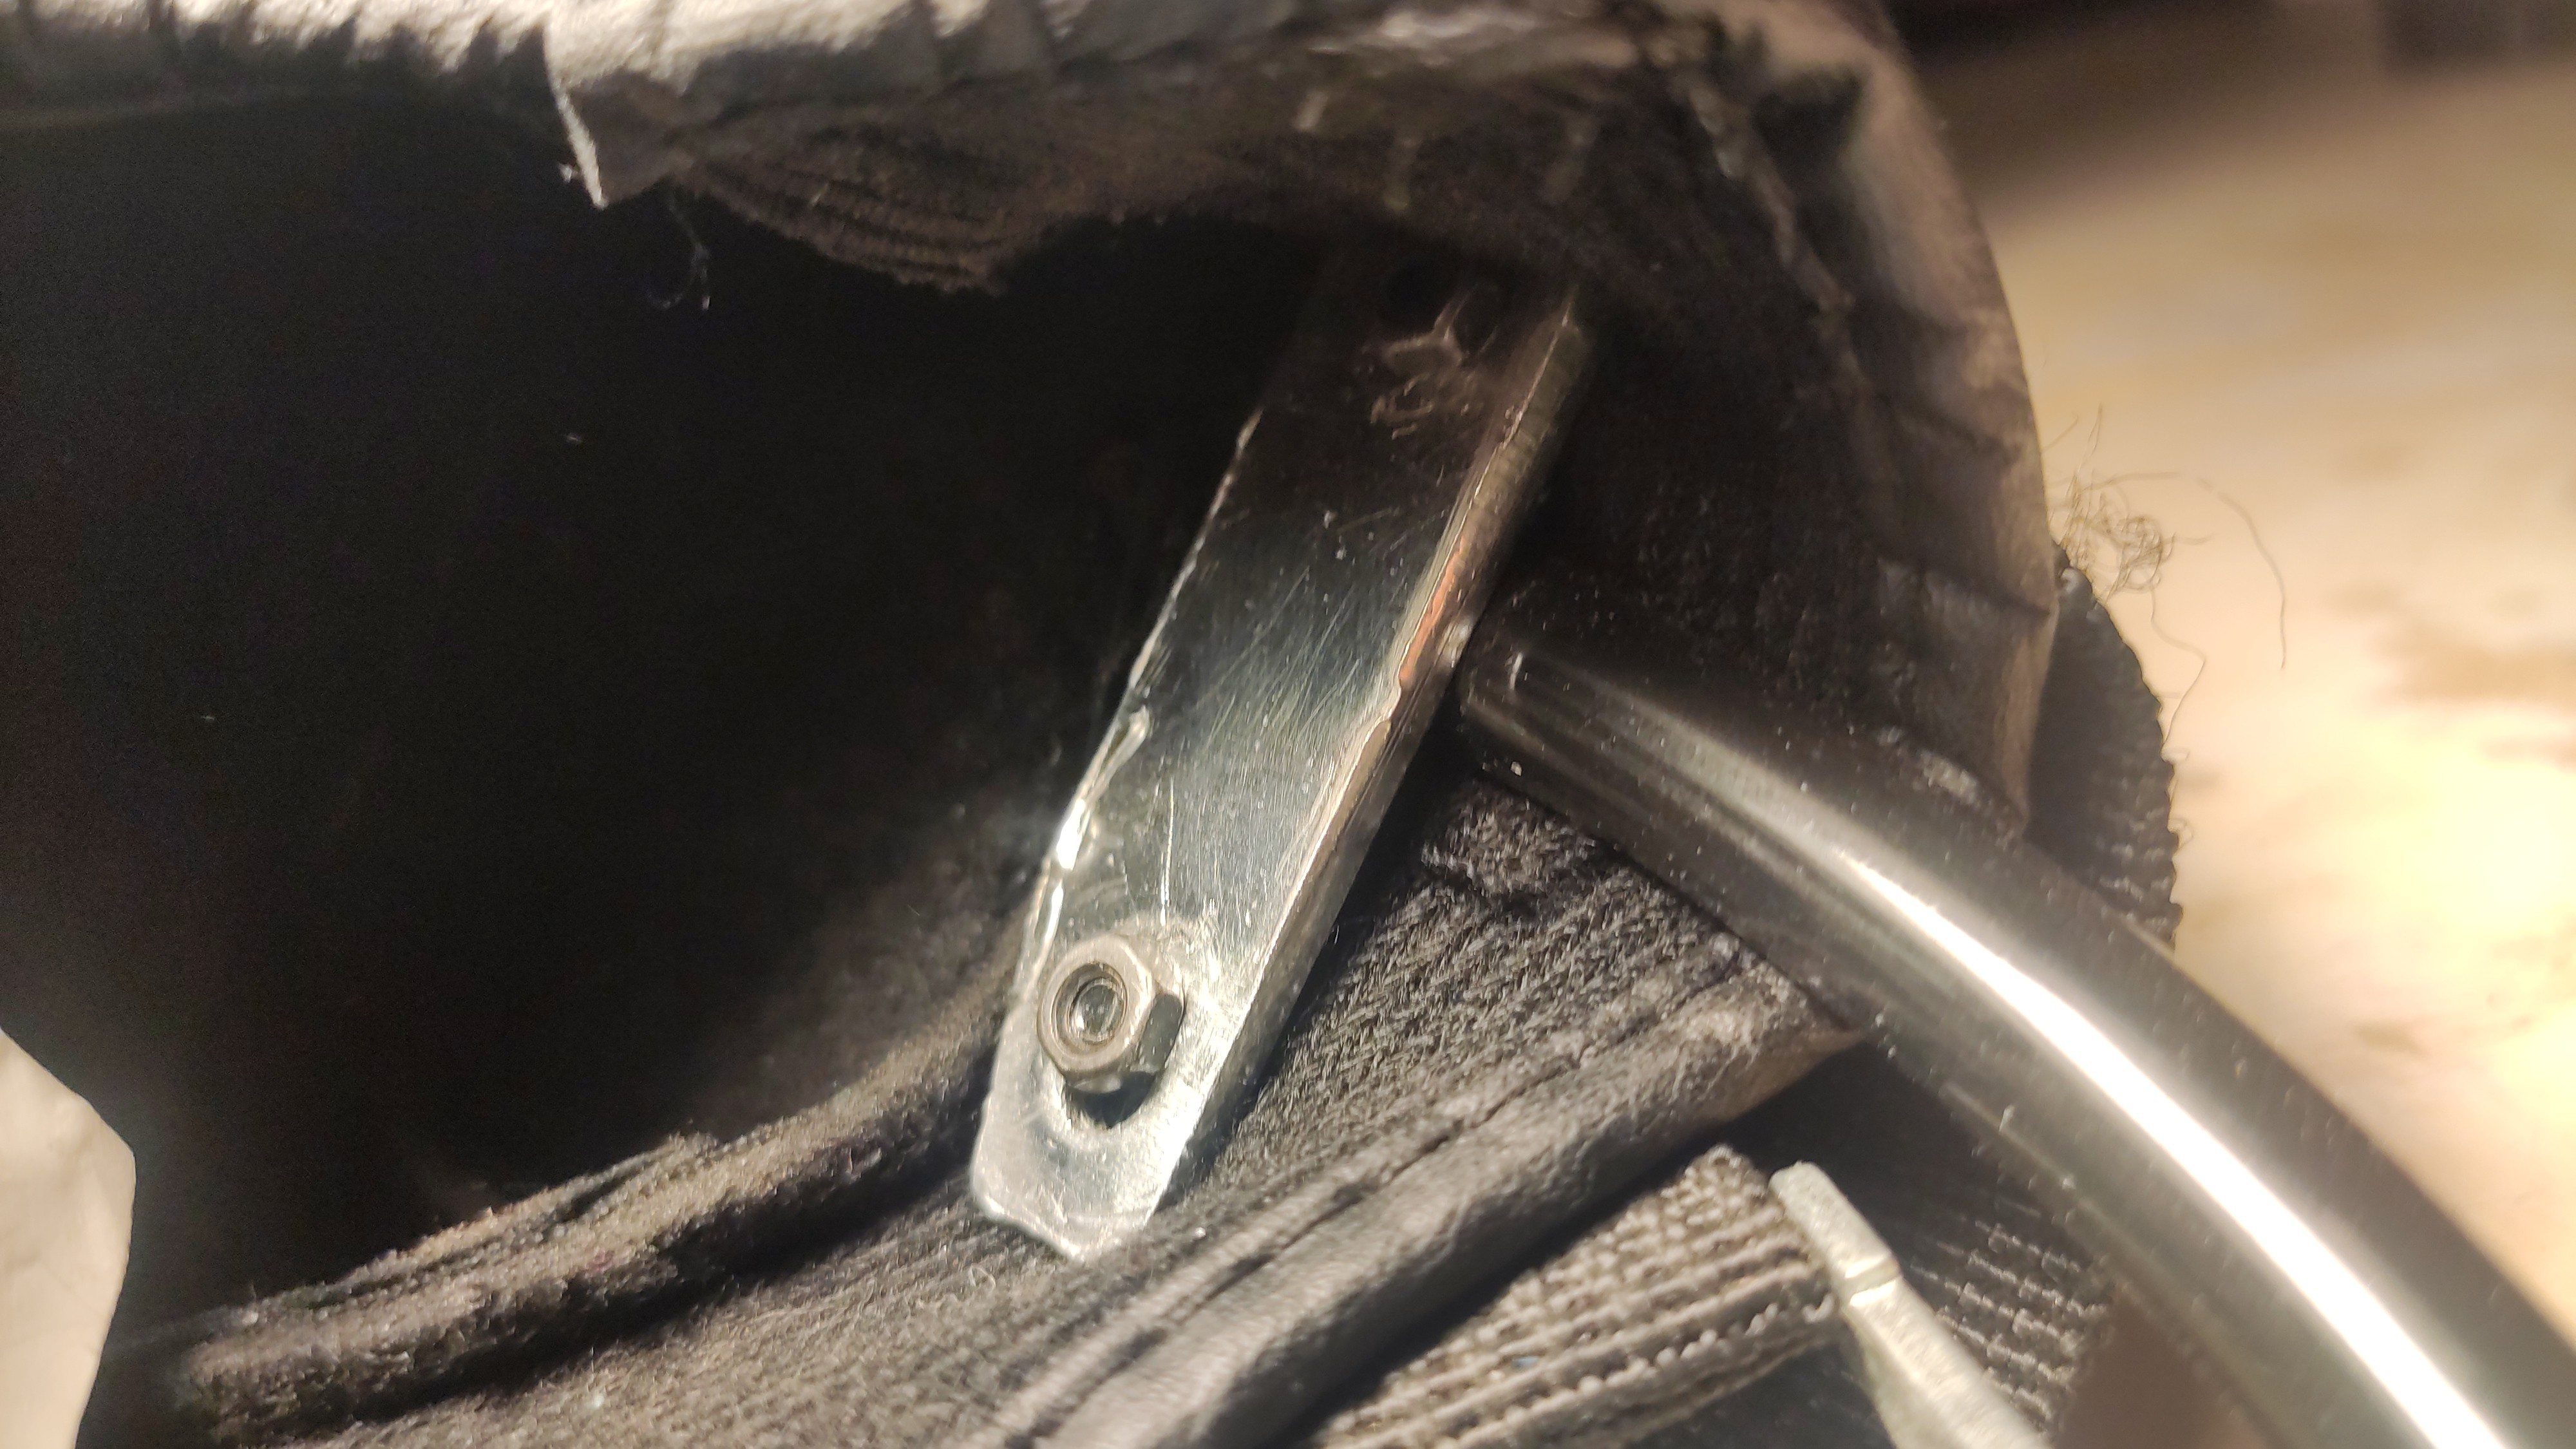
Cut small holes on the palm of the glove and use the brackets to hold it in place from inside of the glove, make sure you have ~25 cm of tube sticking out.
Screwing the nuts from inside the glove is tricky but with some patience is more than feasible.
Make sure to secure the top and bottom screws with the brackets.
![]()
-
6Attach the pumps
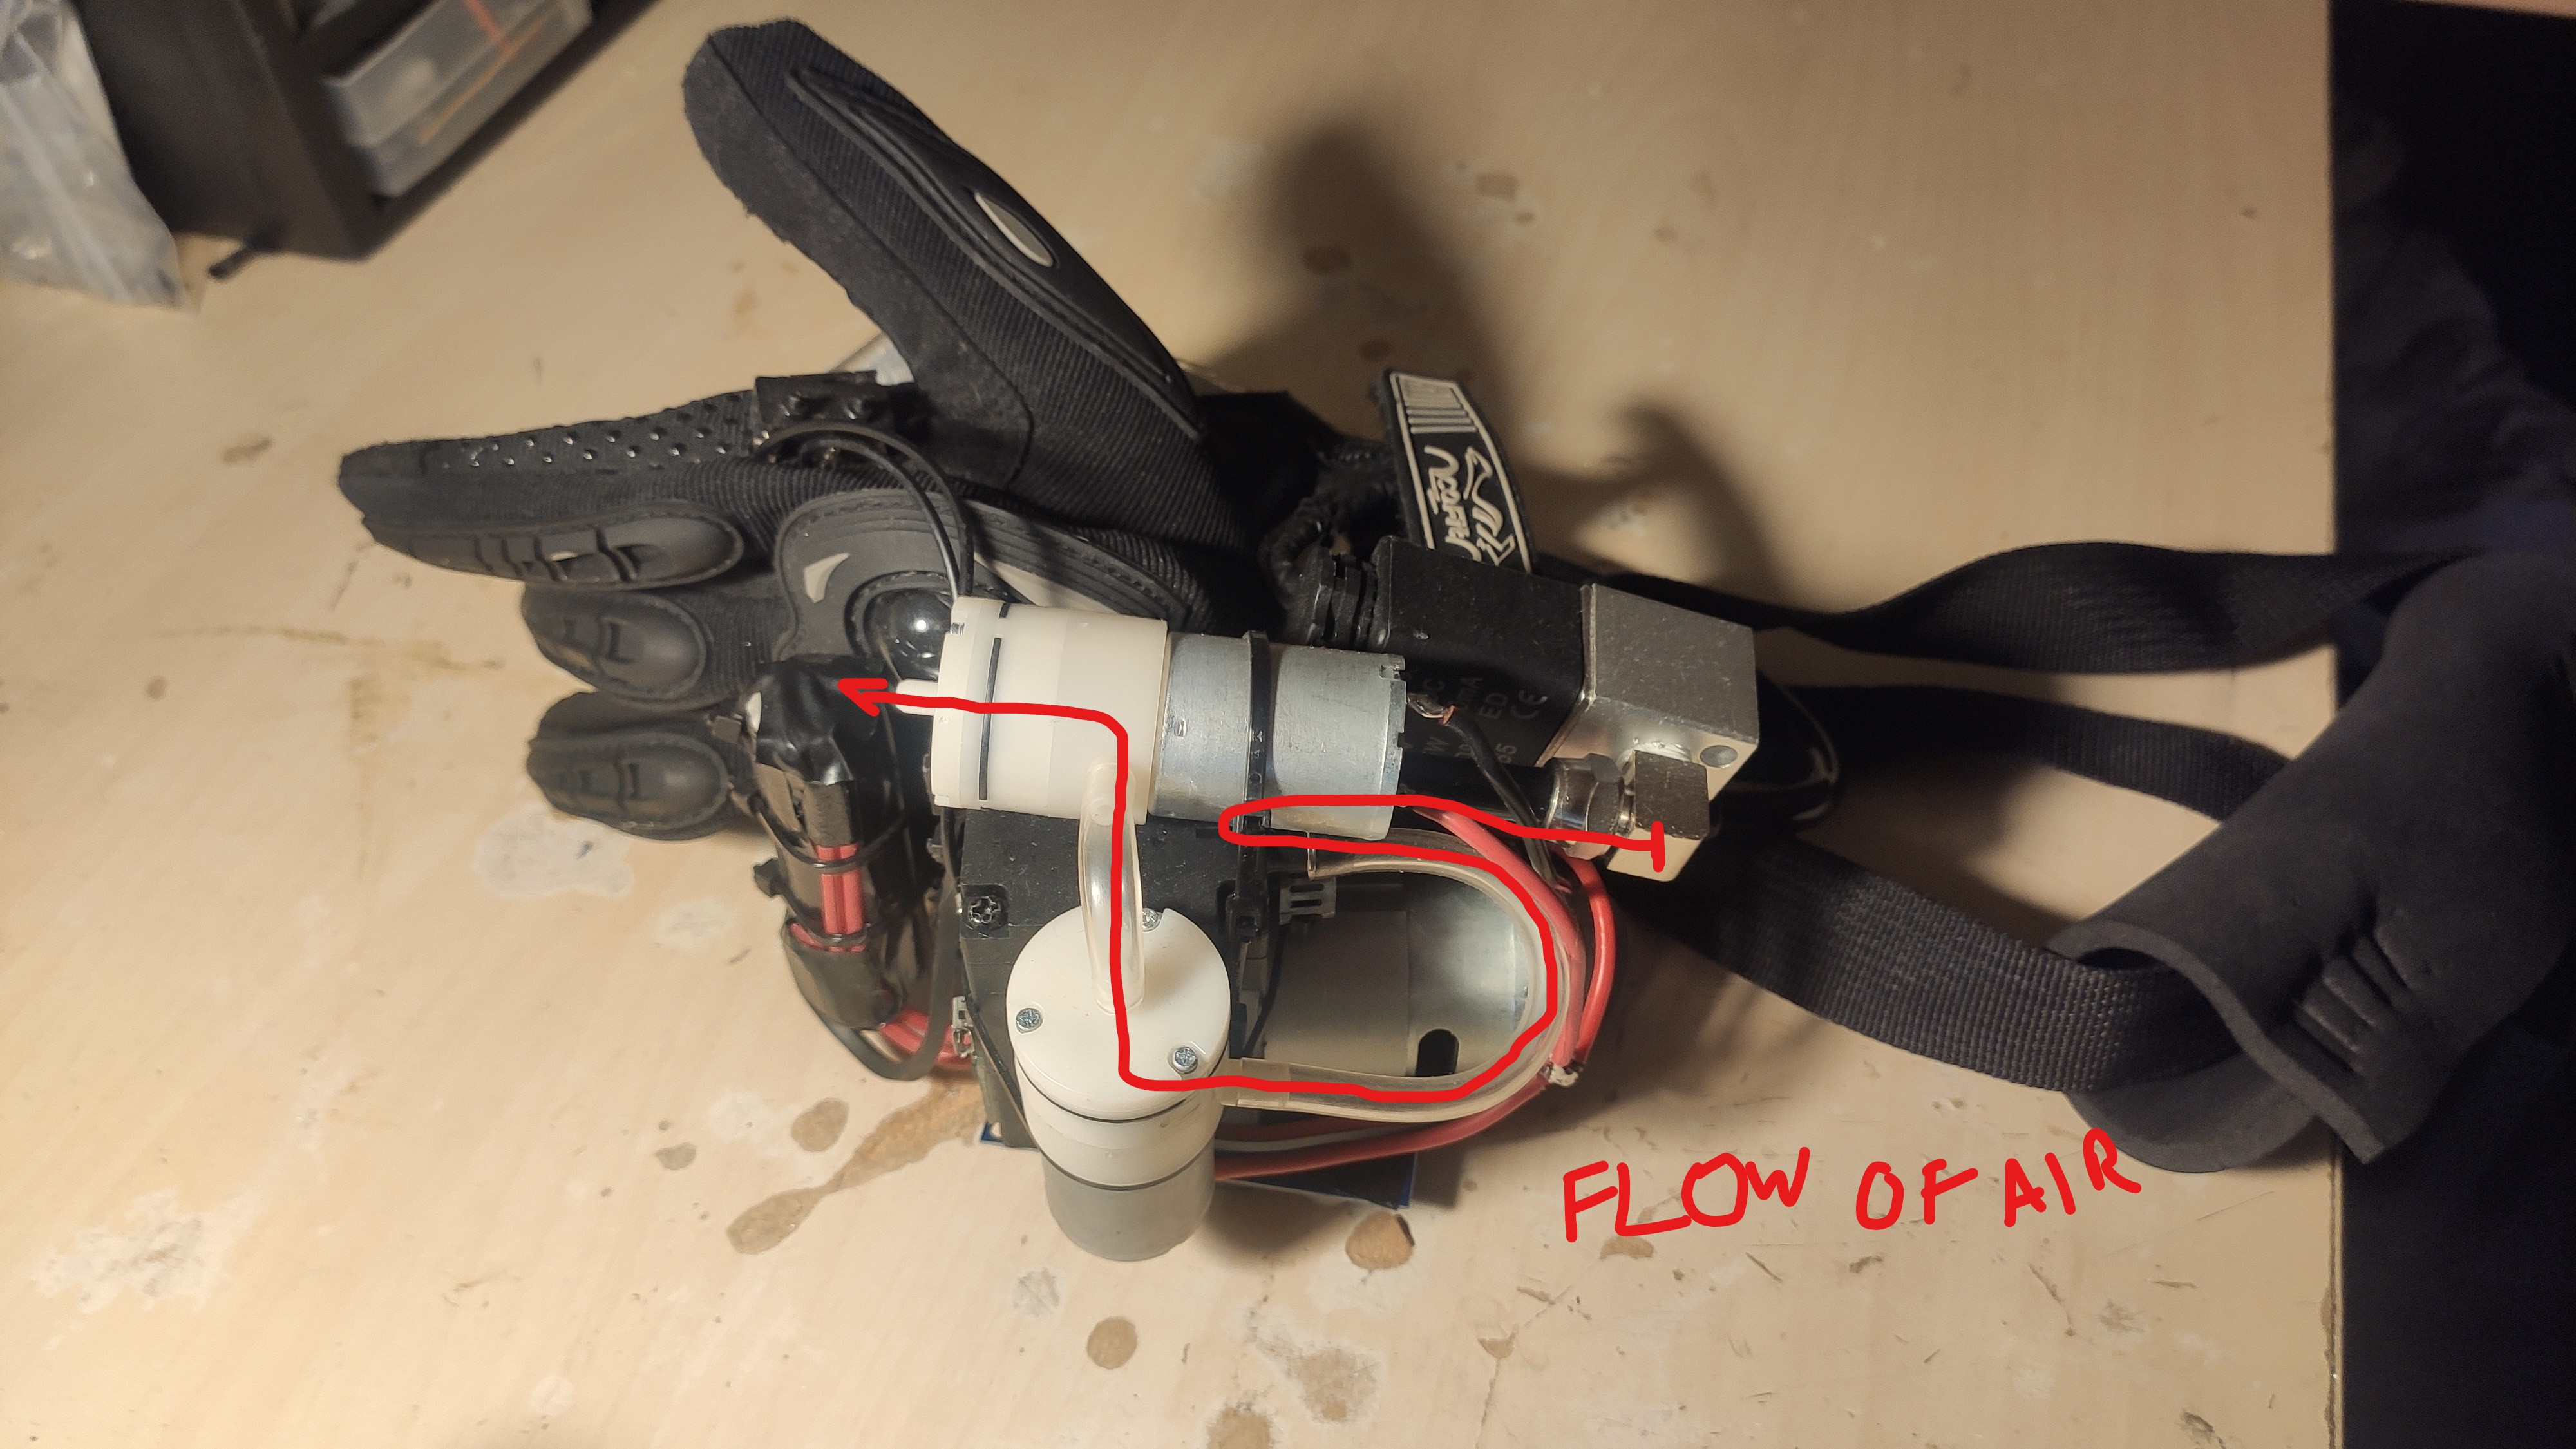
First the big pump is attached with some zip ties to the hard plastic knuckle protections, I drilled some holes to run the zip ties and hold it in place.
Then the two small pumps are zip tied to the sides of the big one and and connected in series using the 6mm OD tube.
Connecting the pump in series means taking the output of the big pump and connecting to the input of a smaller one, repeat this step with the remaining small pump.
![]()
-
7Attach battery
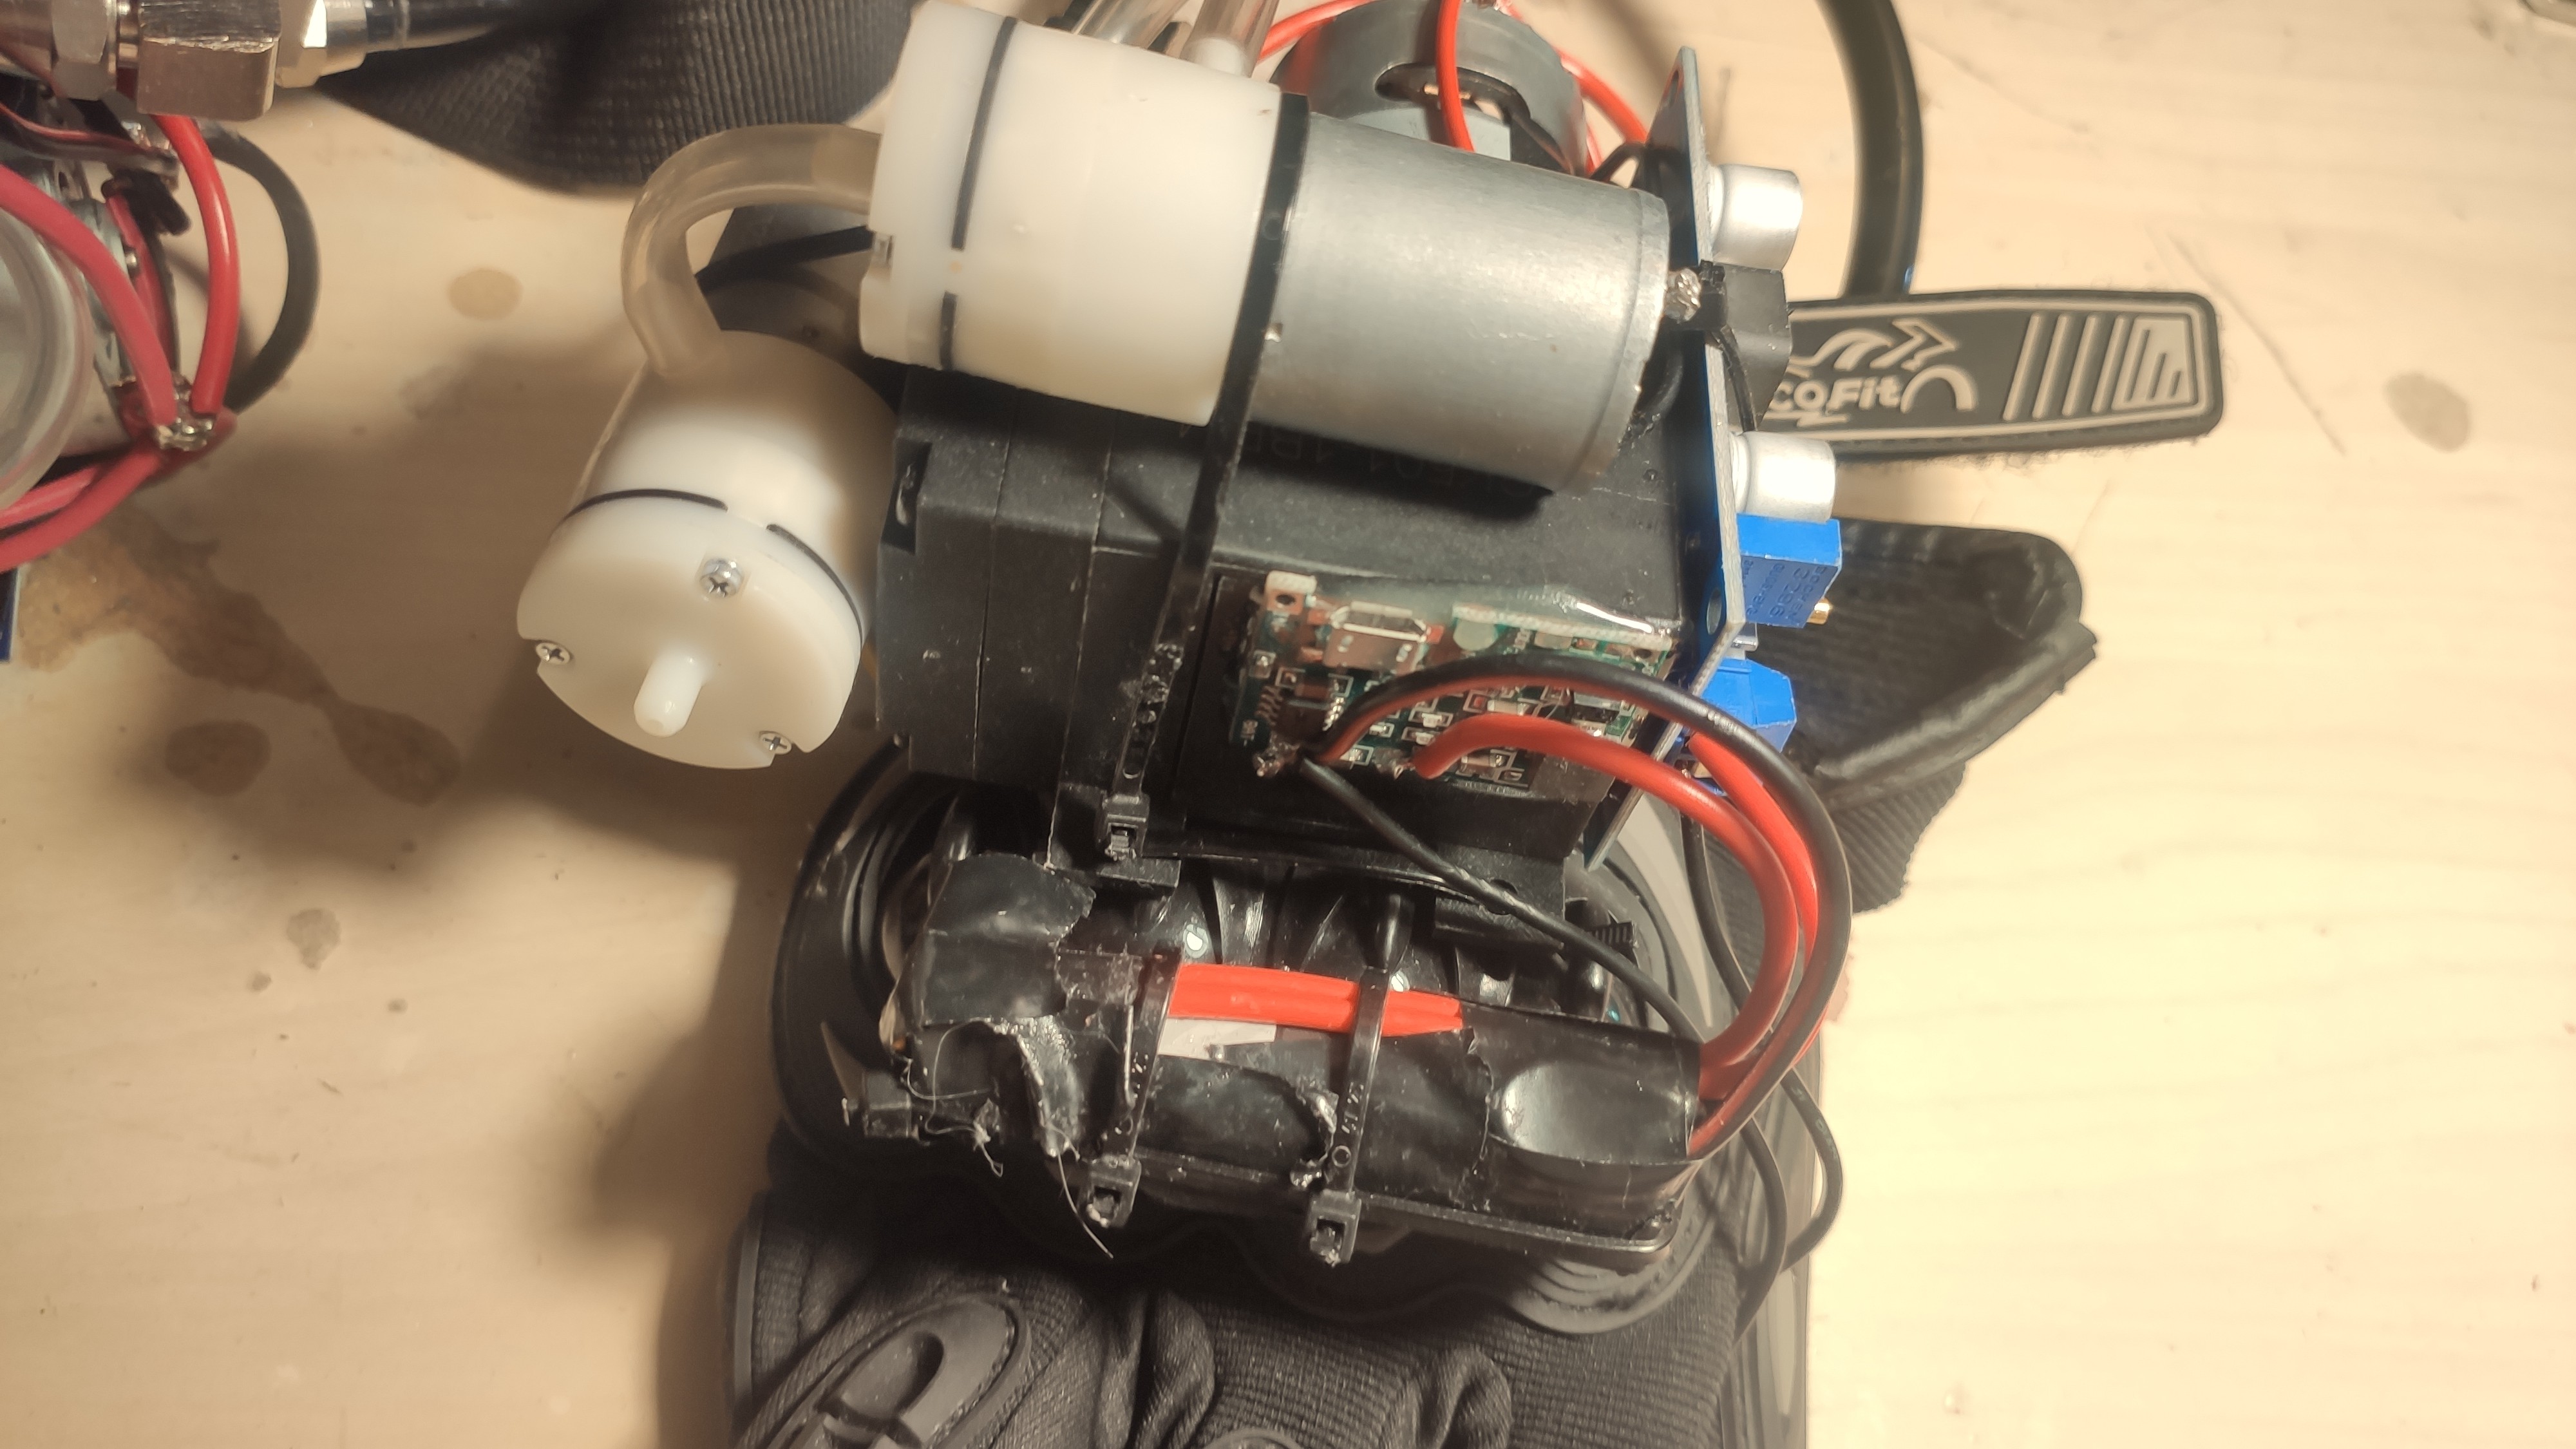
Take the 18650 battery and solder 2 positive cables and one negative, cover it in electrical tape and zip tie it to the top of the knuckle protection.
Glue the charging module to the top of the big pump and solder the negative and one of the positive wires of the BAT - and BAT + pads.
![]()
-
8Place the boost converter
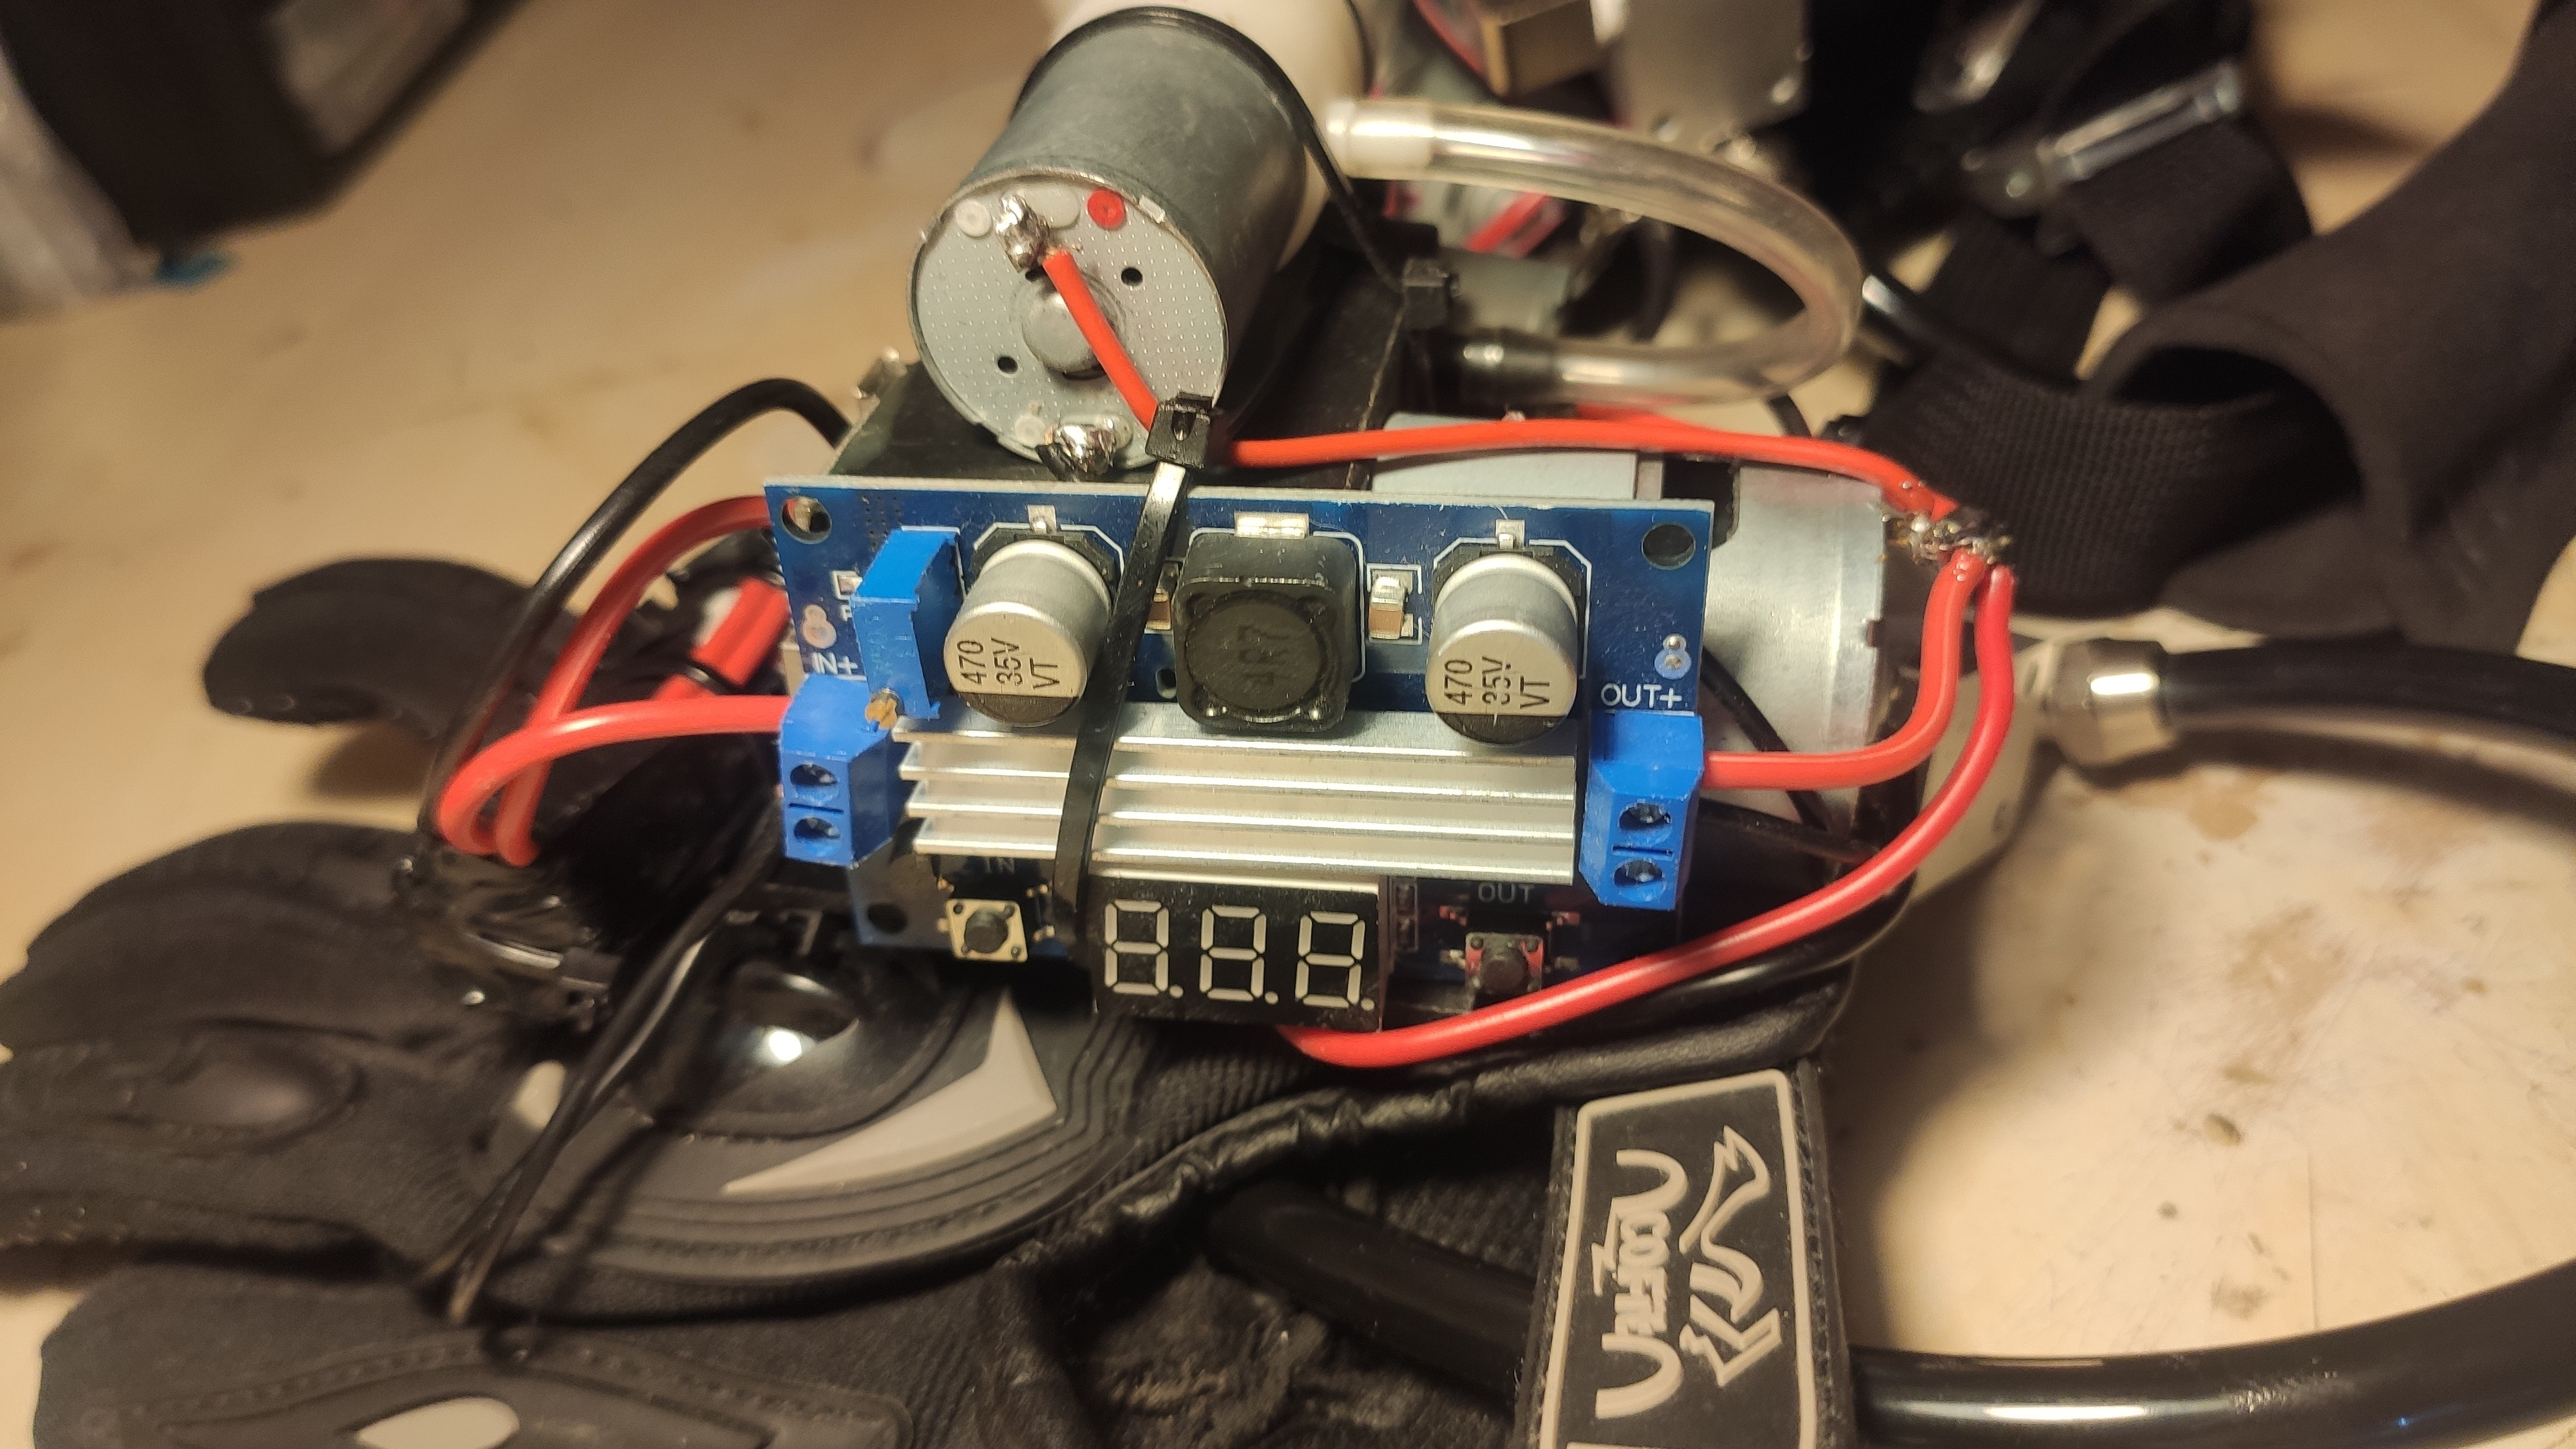
Place the boost converter on the remaining side of the big pump, zip tie/ glue it.
Screw the remaining positive wire from the battery to the IN+ port of the boost converter.
![]()
-
9Place limit switch
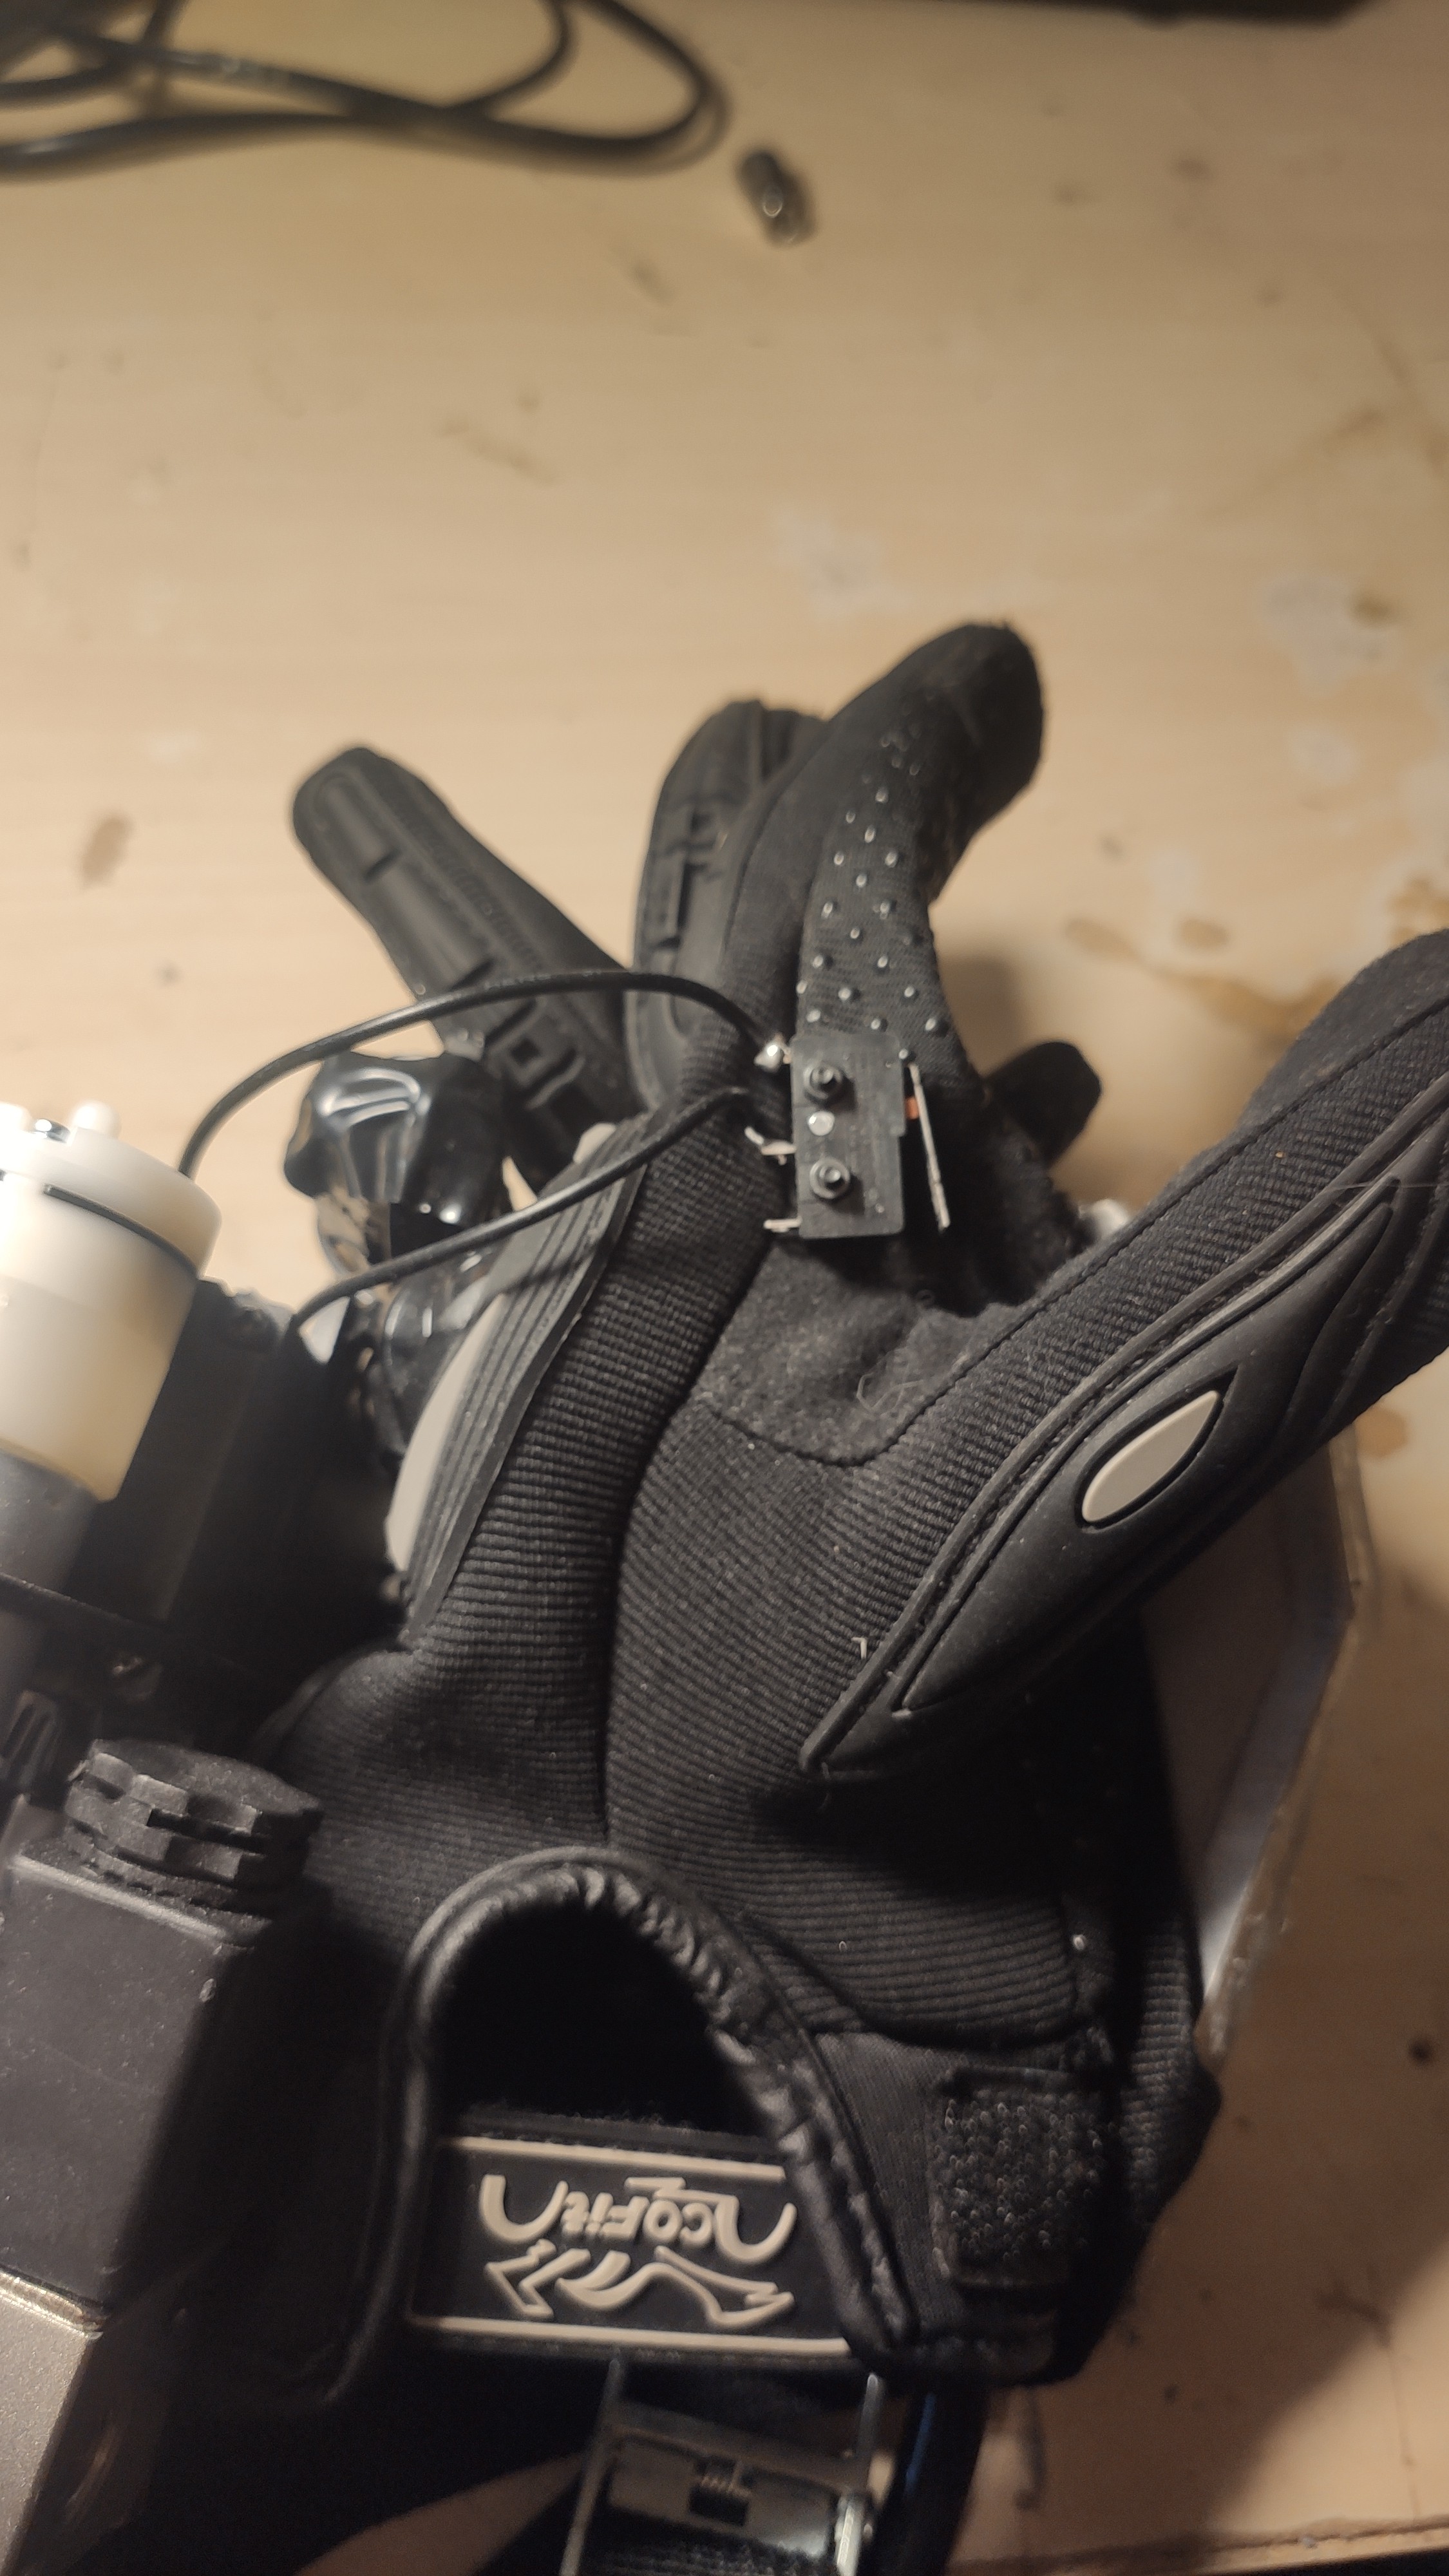
The switch will be located on the side of the hand between the thumb and the index finger so that it can be pressed with your thumb.
The switch is attached to the glove by two small screws and two nuts.
![]()
Solder one cable from the switch to the BAT- pad on the battery charger module and solder another one from the other pin of the switch to the IN- of the boost converter. ATTENTION!! I'm not sure that you can run the glove and charge the battery at the same time, DO NOT DO IT unless you are very experienced with working with Lithium Ion batteries
-
10Place solenoid valve
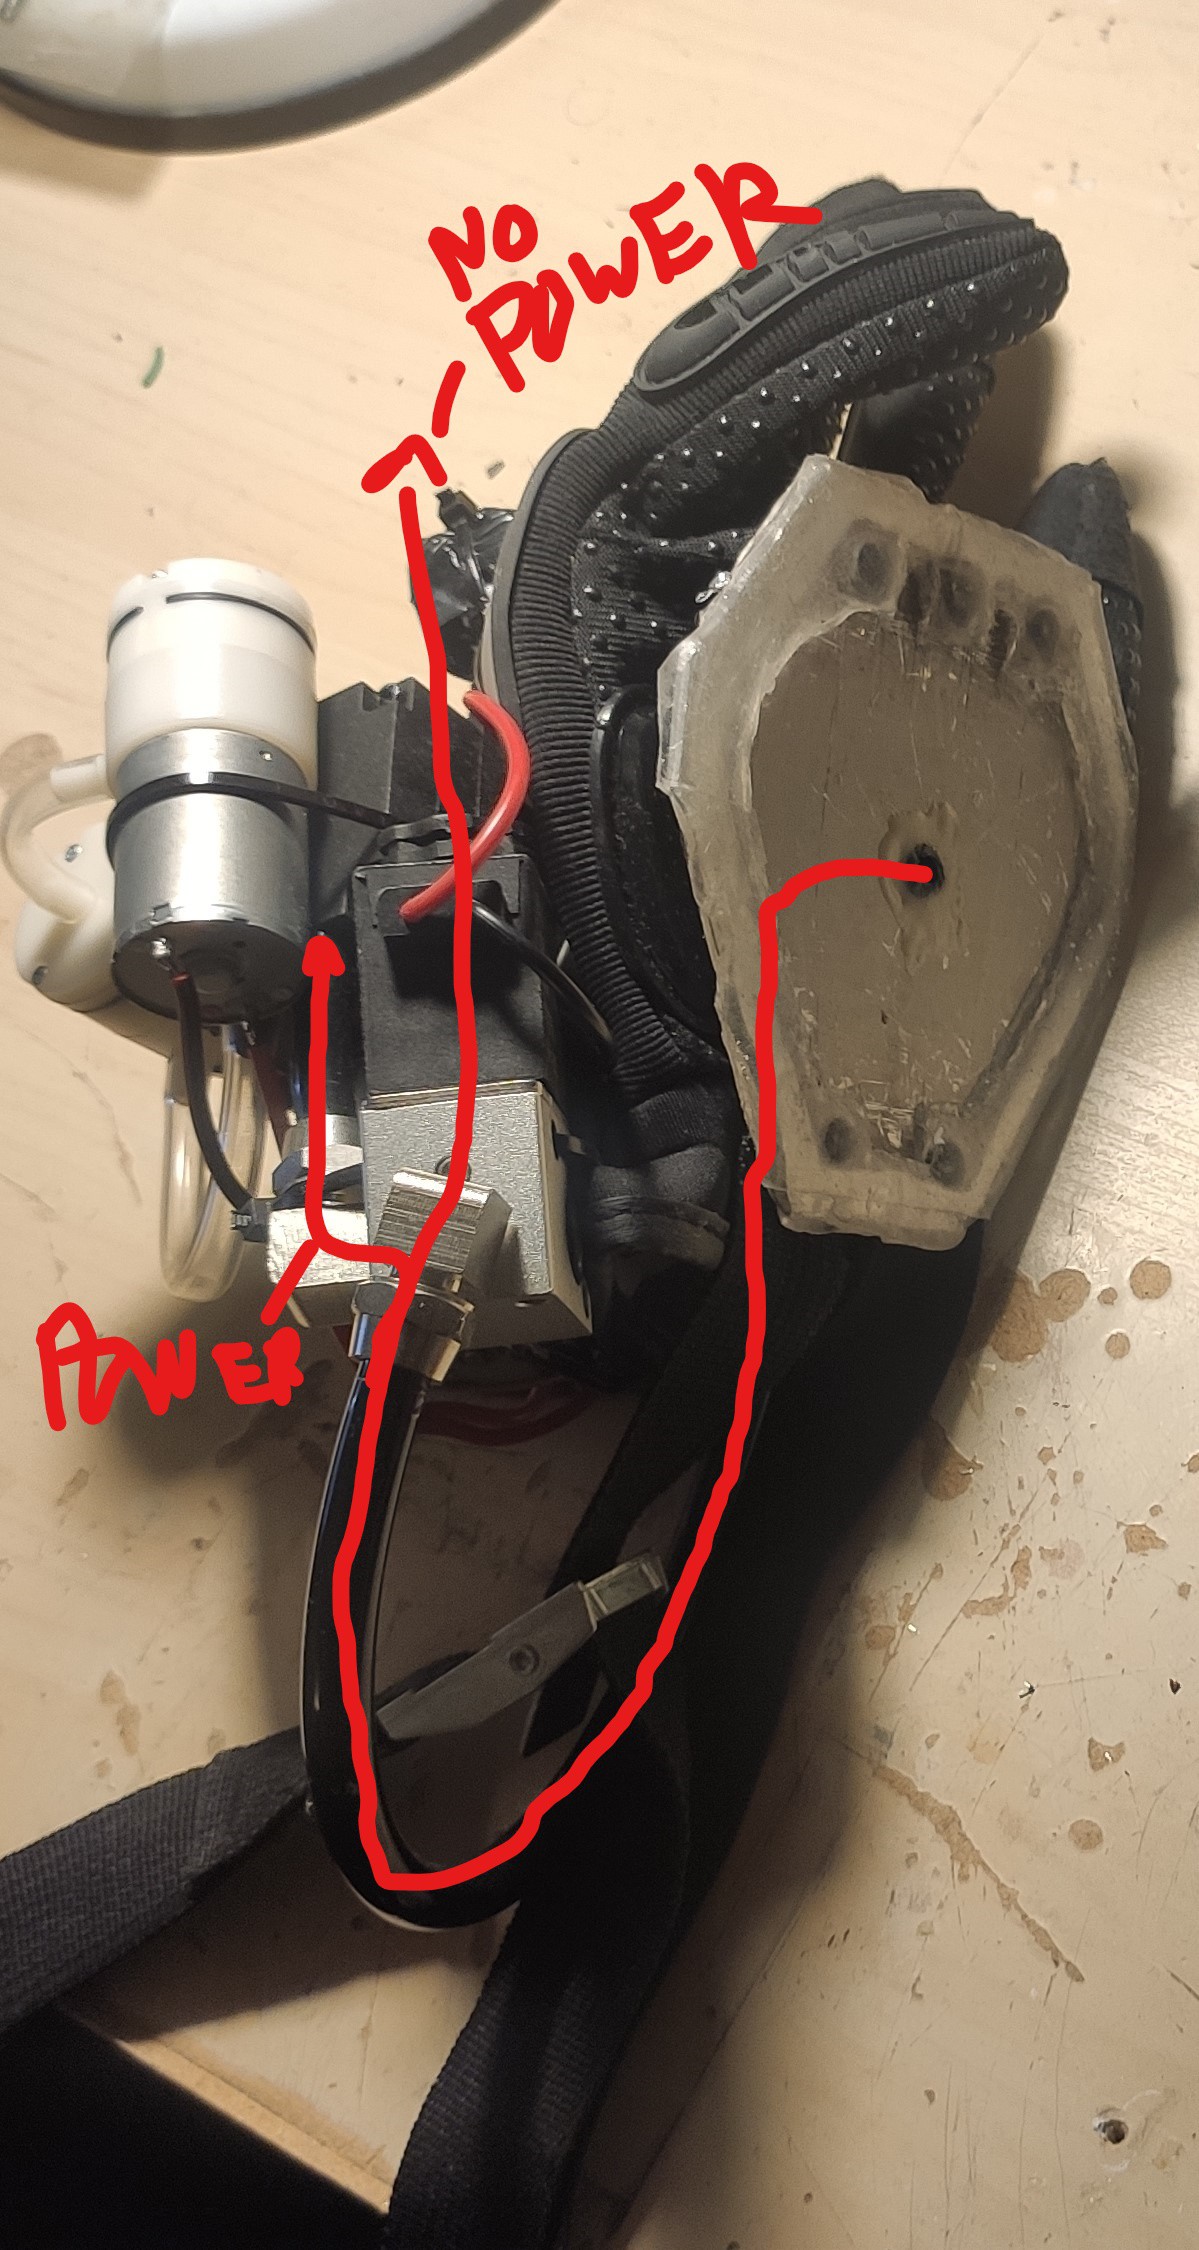
The valve is added to remove the vacuum once the switch is released, otherwise the hand would get stuck for a long time since the air would trickle in slowly.
Add the right angle connectors to the valve, screw them with some teflon tape. Connect the valve such as that when it is not powered on the tube that goes to the hand is connected to open air, but when the valve is energised it connects the hand tube to the pump.
![]()
Suction gloves v1
Wearable suction gloves that allow you to hang to flat and not-so-flat surfaces
 NicLamrlr
Discussions
Become a Hackaday.io Member
Create an account to leave a comment. Already have an account? Log In.