 Brian Wyld
-
1build the firmware
Follow the instructions in the github project to clone the projects to your PC.
Build the firmware using the "hex_maker.bat" script (Windows 10 PC) and the targets 'mynewt_wbasev2_bootloader'", then 'mynewt_wbasev2_eu868_river_dev'. This should create a 'built/wbasev2_io_eu868_river_dev.hex' file.
-
2build the config
Using the command line tool in the project (flash_config.bat) create the config with a LoRa devEUI and appKey. Note you need to have java7 or later available on the PC as the tool uses a java app to create the binary file. This should create a file called 'config_<devEUI>.hex'
-
3configure the lorawan LNS
You can use any LoRaWAN 1.0.2 compatible LNS / gateways - I used TTN with an existing local gw. Depending on the LNS used, the config method will vary, but generally you must add the device with the devEUI, its secret appKey, and the correct version (1.0.2) and region (eu868).
-
4flash the W_BASEv2 board
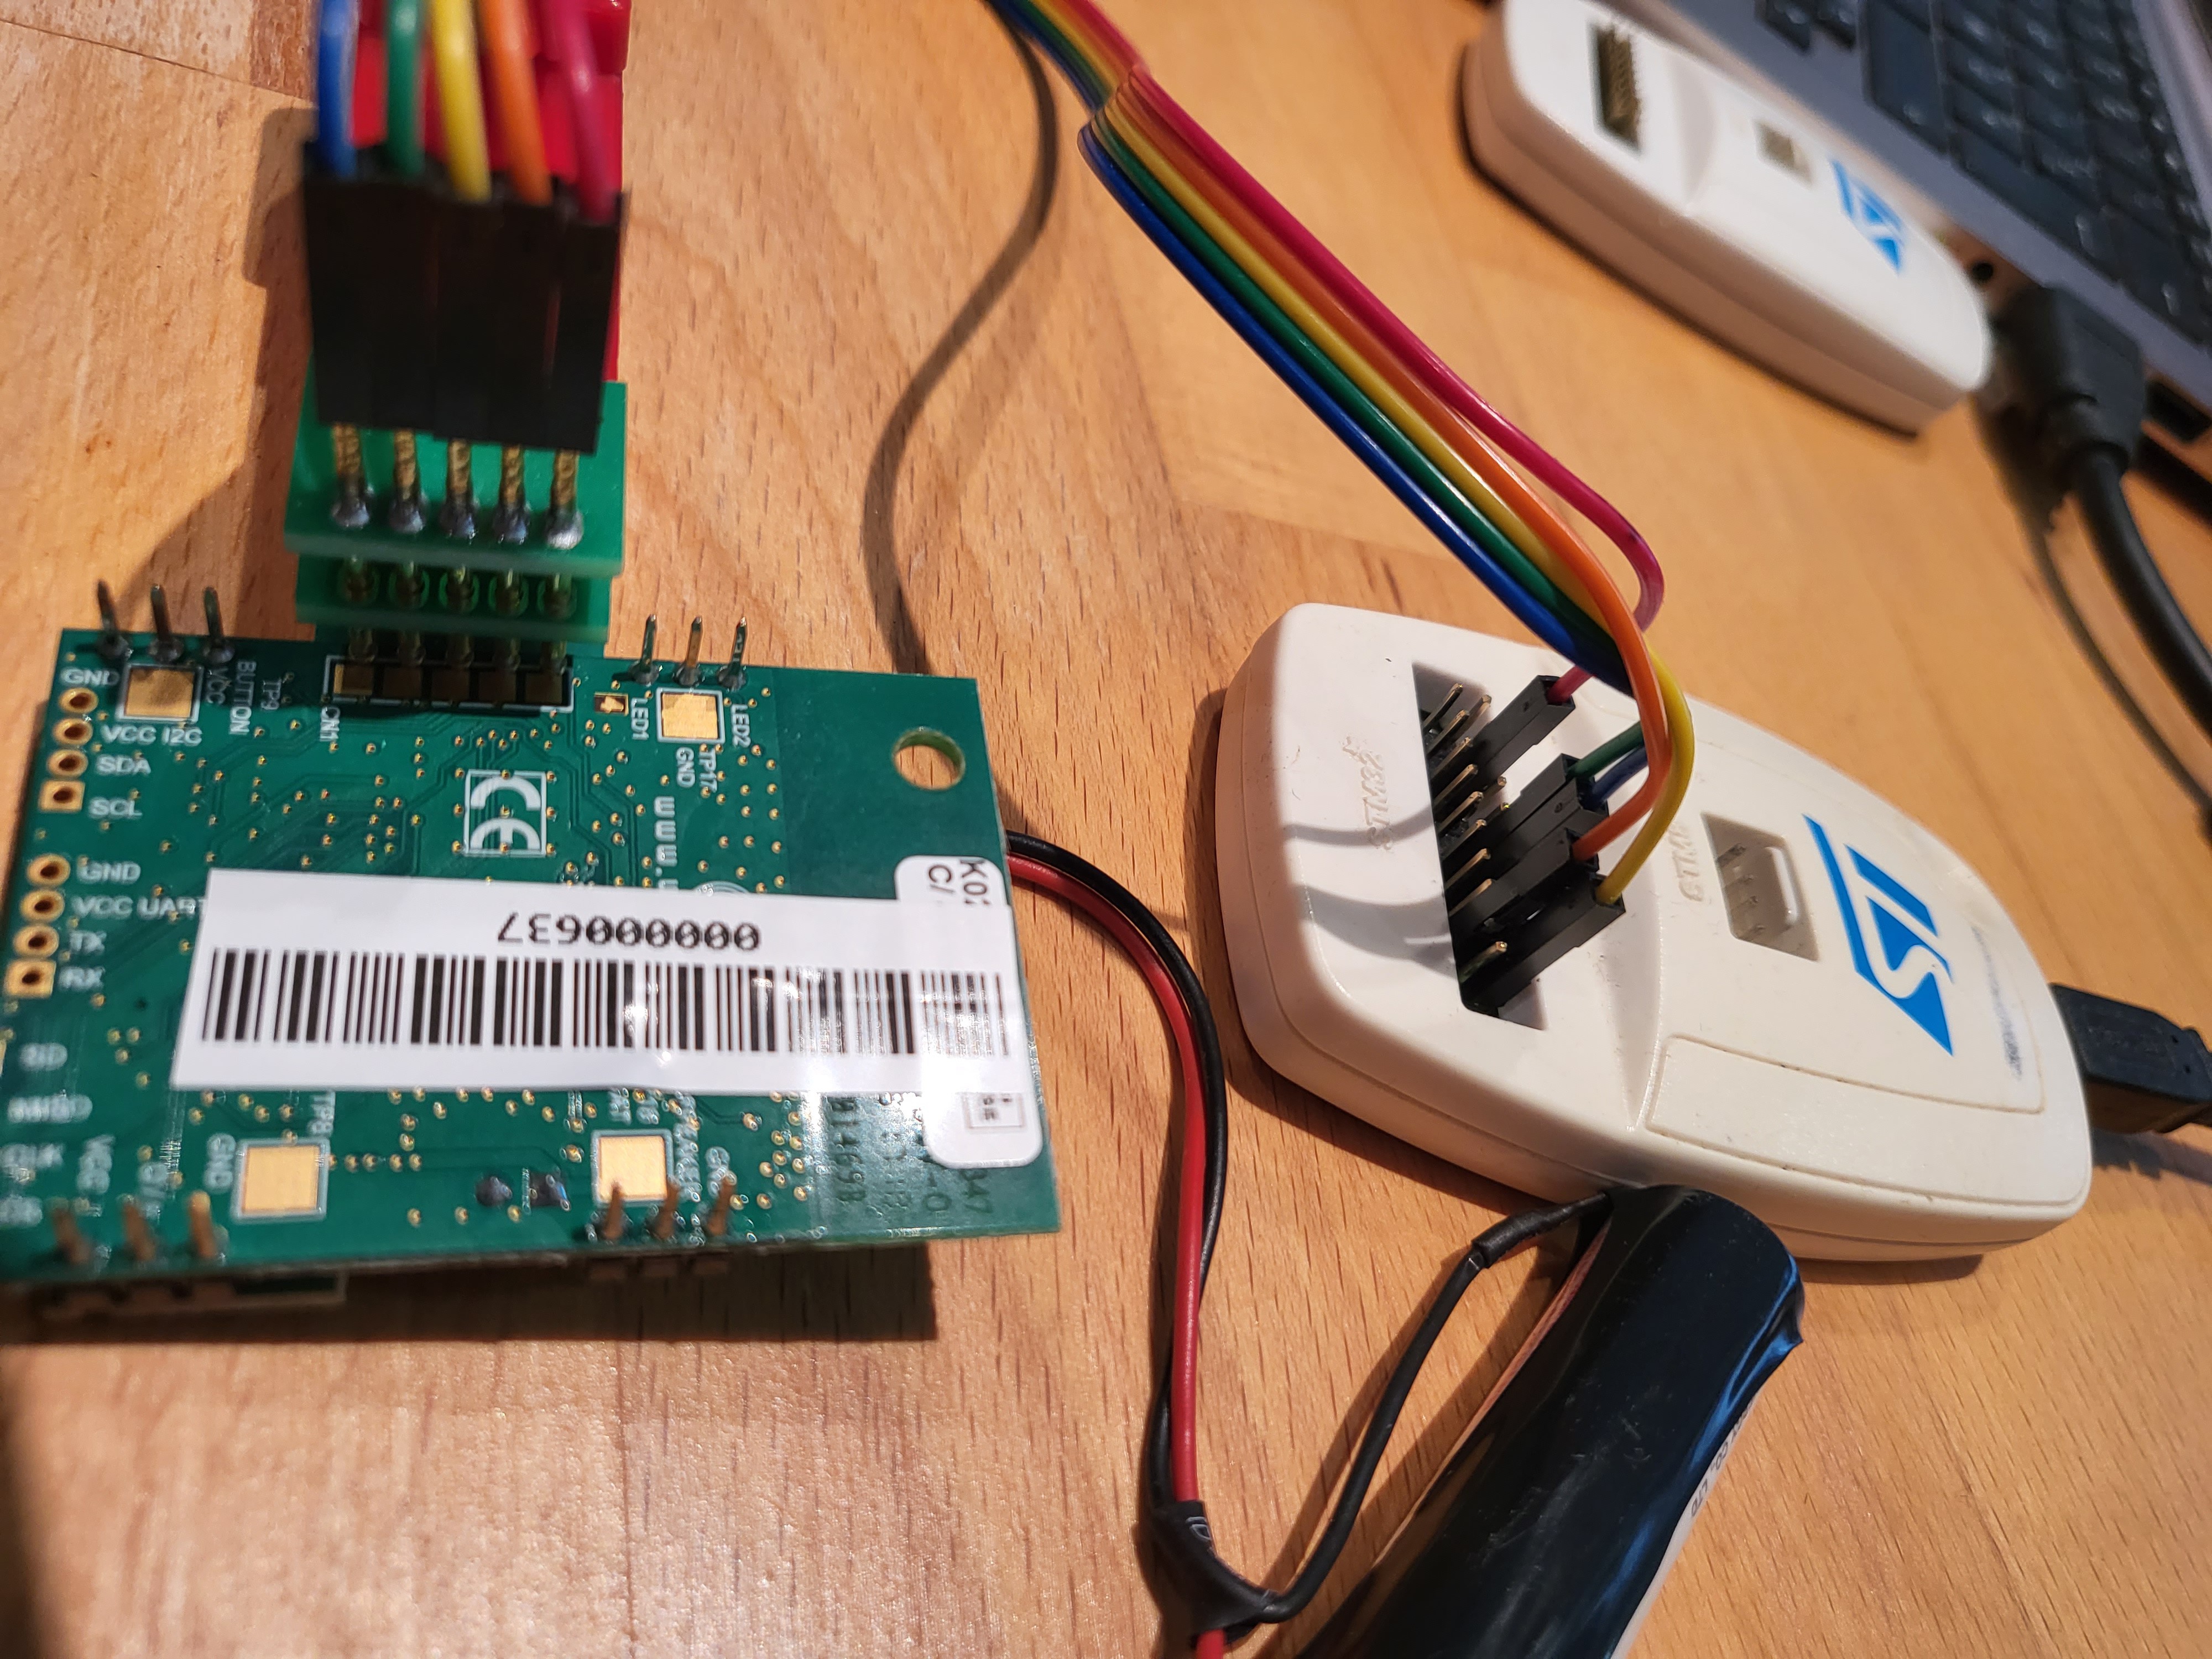
I used an ST-Linkv2 programmer, and the ST "STM32 ST-Link" tool to flash the 2 .hex files (firmware, config) to the card. The .hex files are already set at the correct addresses, no need to do anything except load/program them.
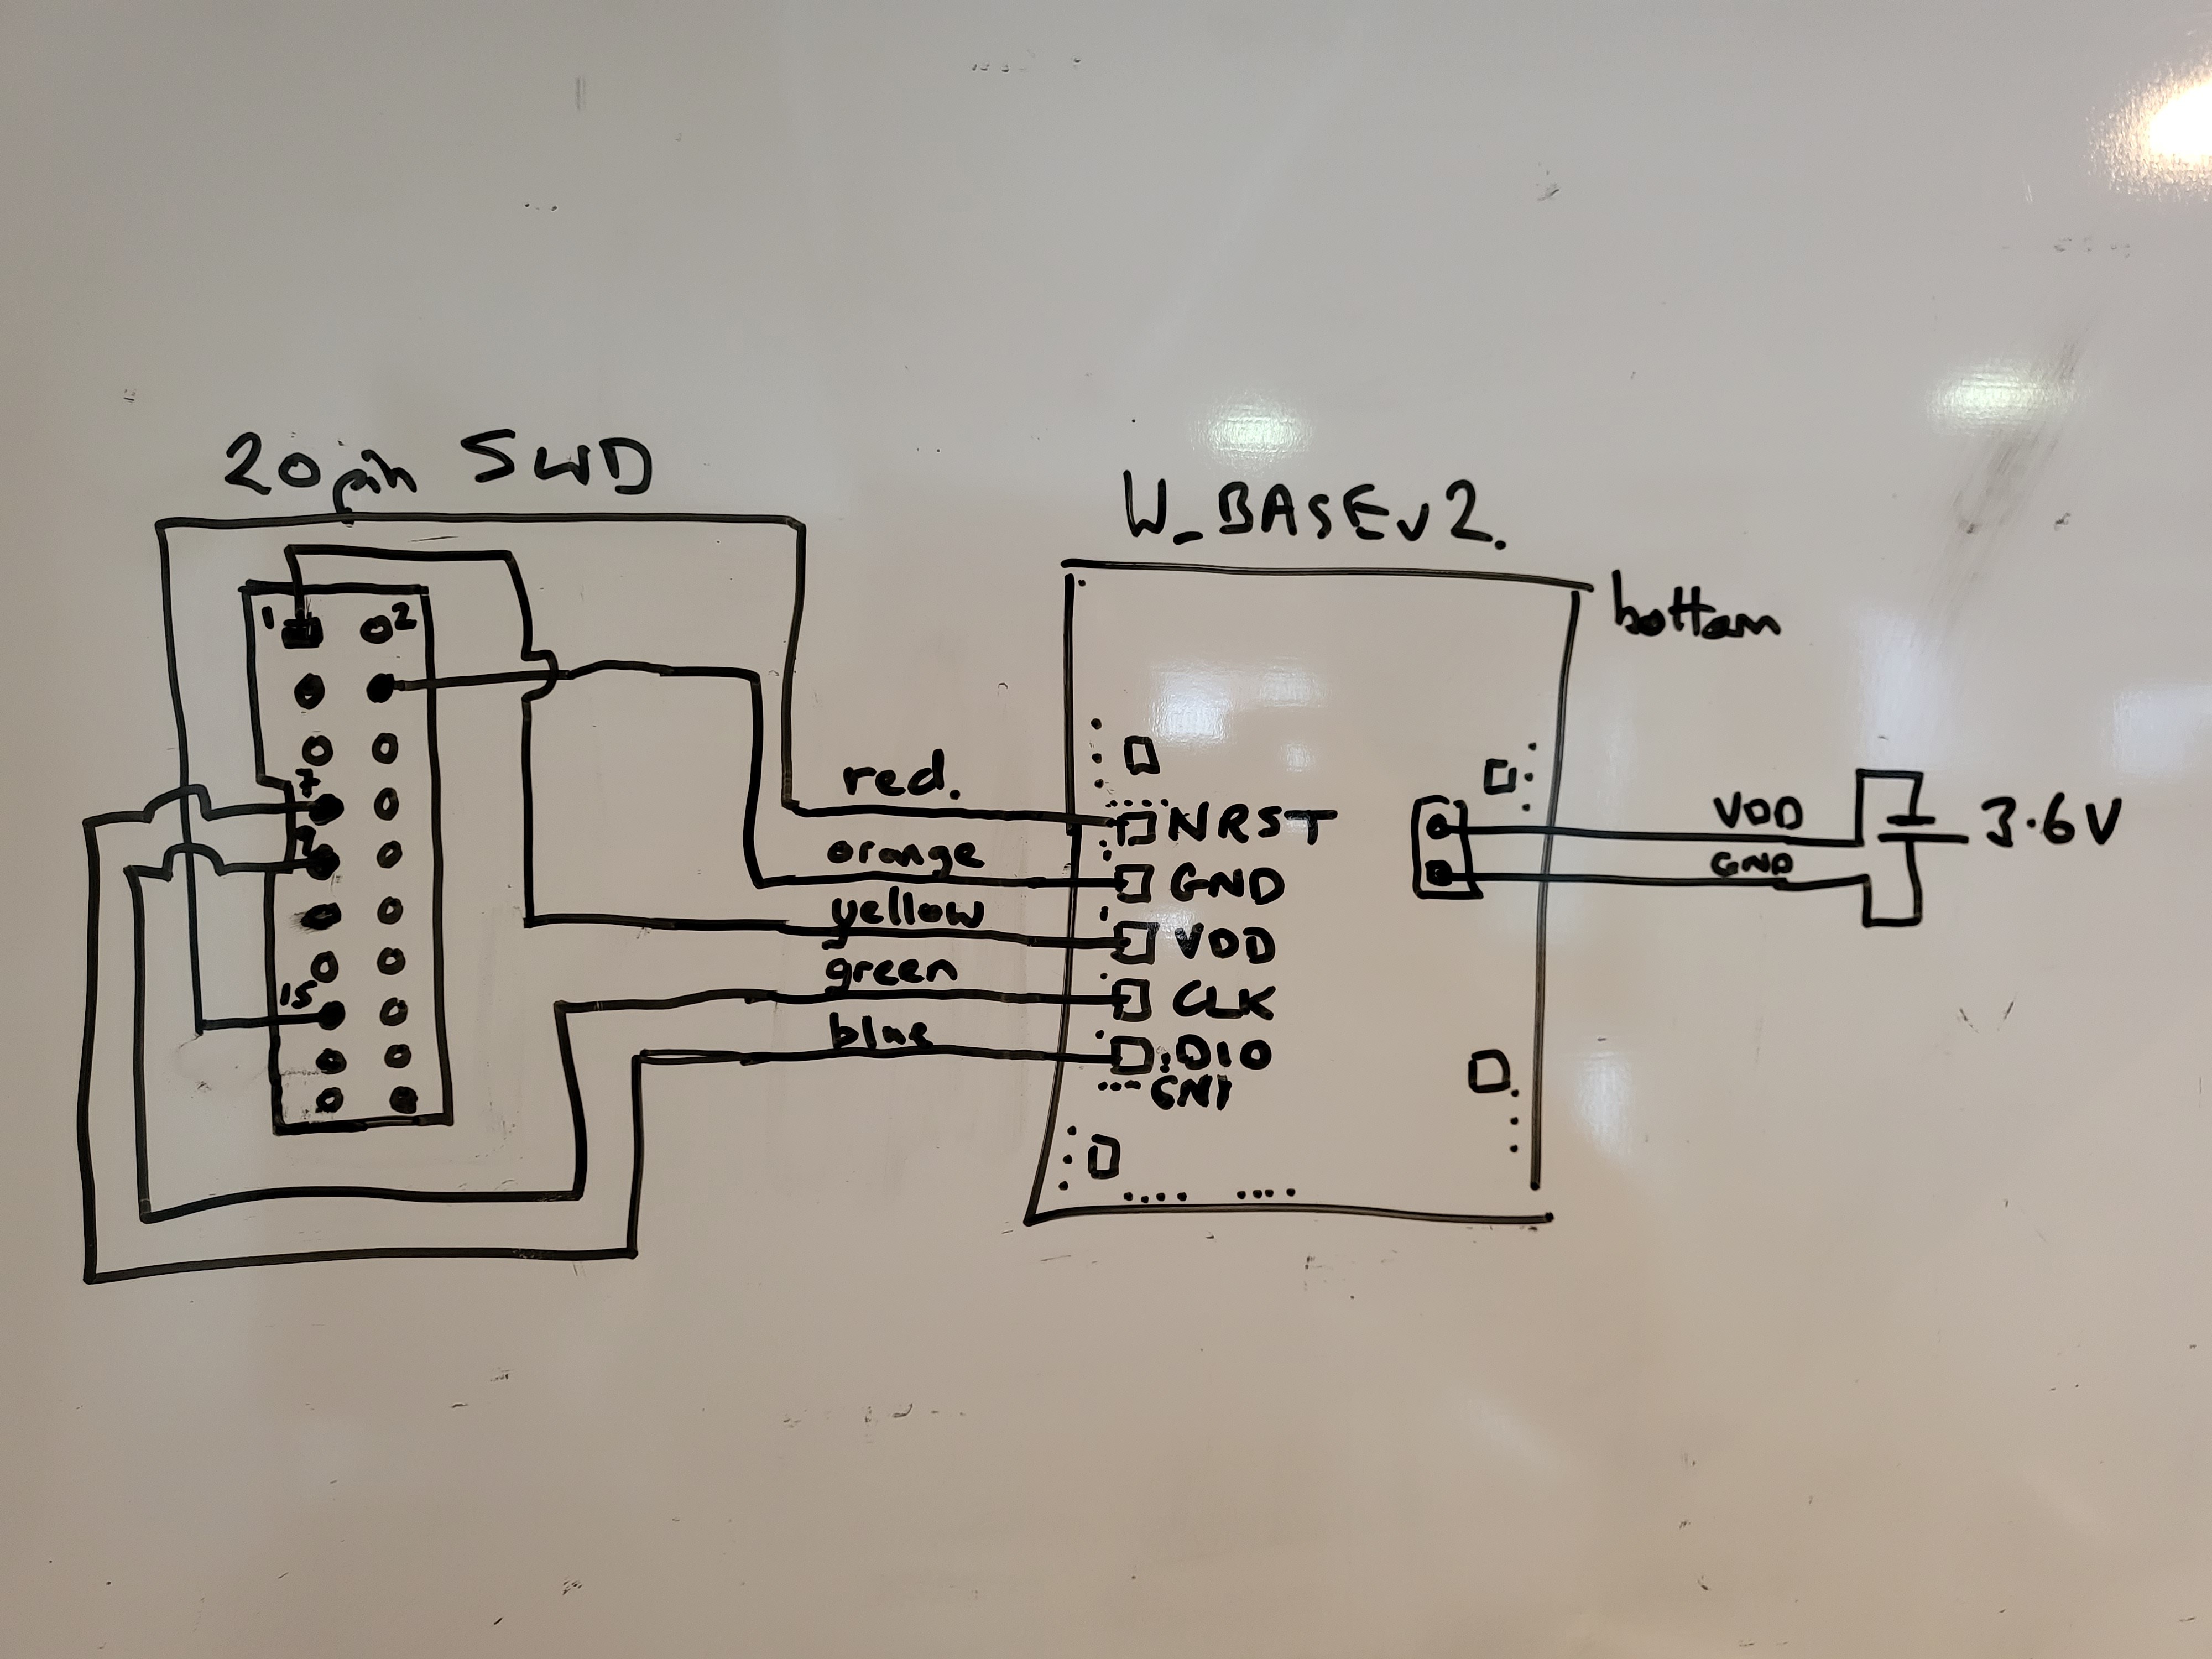
To connect the ST-LINKv2 (or another programmer), I used a 5 pin clip (as shown in the photo) I bought from aliexpress ( https://www.aliexpress.com/item/1005001409579446.html) or you can just solder on a 5 way header to the 5 pads. I power the board using a separate battery, not using the ST-Link provided 3.3V...
The cabling is:
CN1 : ST-Link 20 pin
pin 1 (SWDIO) -> pin 7
pin 2 (SWCLK) -> pin 9
pin 3 (VDD) -> pin 1 (VApp) : required to tell ST-Link target has power
pin 4 : (GND) -> pin 4
pin 5 : (nRST) -> pin 15
![]()
![]()
If using another programmer refer to its pinout and the hardware schema for the pin matching.
-
5validate it can JOIN the lorawan network
Power up the board. It should flash its LEDs (see the various github projects for the boot sequences) and JOIN the LNS.
If it doesn't JOIN / start sending sensor data packets, then something went wrong...
If you built using the 'dev' target, then logs should be generated to the UART port (the middle grove type 2mm pitch 4 way header at the bottom of the board). This UART port also should be a basic console during the first 30s after reset, so can be used to check/update the config... -
6put the bits together
Attach the battery, put the board and battery in the case, screw together (making sure the battery wires are neatly under the board and not trapped in the join).
Source a suitable pole for the vertical fixed mount (not required if you intend to attach the hinge/swing point to an existing structure) and a 1m long bar for the swing arm. This should have a hole on one end for the swing bolt. The length of 1m (between the swing point and the end of the float) will mean that the calculations to map the angle to the depth in the python script will work 'out of the box' - otherwise you will need to edit the script accordingly.
Clip the device into the mount, and zip-tie this to the arm (or screw it). ziptie or screw on the float (I used an empty 500ml plastic bottle), making sure the distance between the 'float point' (ie the water level) and the 'swing point' (ie the fixed hinge) is 1m long.
Attach the arm to the fixed pole with a long bolt, using at least 2 washer and blocked nuts to let it swing freely. -
7setup the backend
If you are using the 'ttn-msg-proc' backend, then clone the project to a docker capable system.
Edit the .env file to correspond to your server and TTN setup.
Run the docker-compose (the run.sh script will do this on a basic linux install). Once running the grafana UI should be available and you can add the data sources from the local influxdb. Normally the python script that gets the raw data from TTN and creates the depth values should create a influxdb data called 'depth'. If not, the python script will generate logs for debugging...
-
8install and test
Find a river, / lake / loch / sea / whatever, hammer in the fixed vertical pole so that the float is in the water at an angle that is 'good' for the current water level.
Restart the device and check it can JOIN/send data.
Water level lora sensor
Detect liquid level using a float to rotate battery powered device with accelerometer to detect inclination, send data using LoRaWAN radio
Discussions
Become a Hackaday.io Member
Create an account to leave a comment. Already have an account? Log In.