-
Calibrating the Voltage Regulator
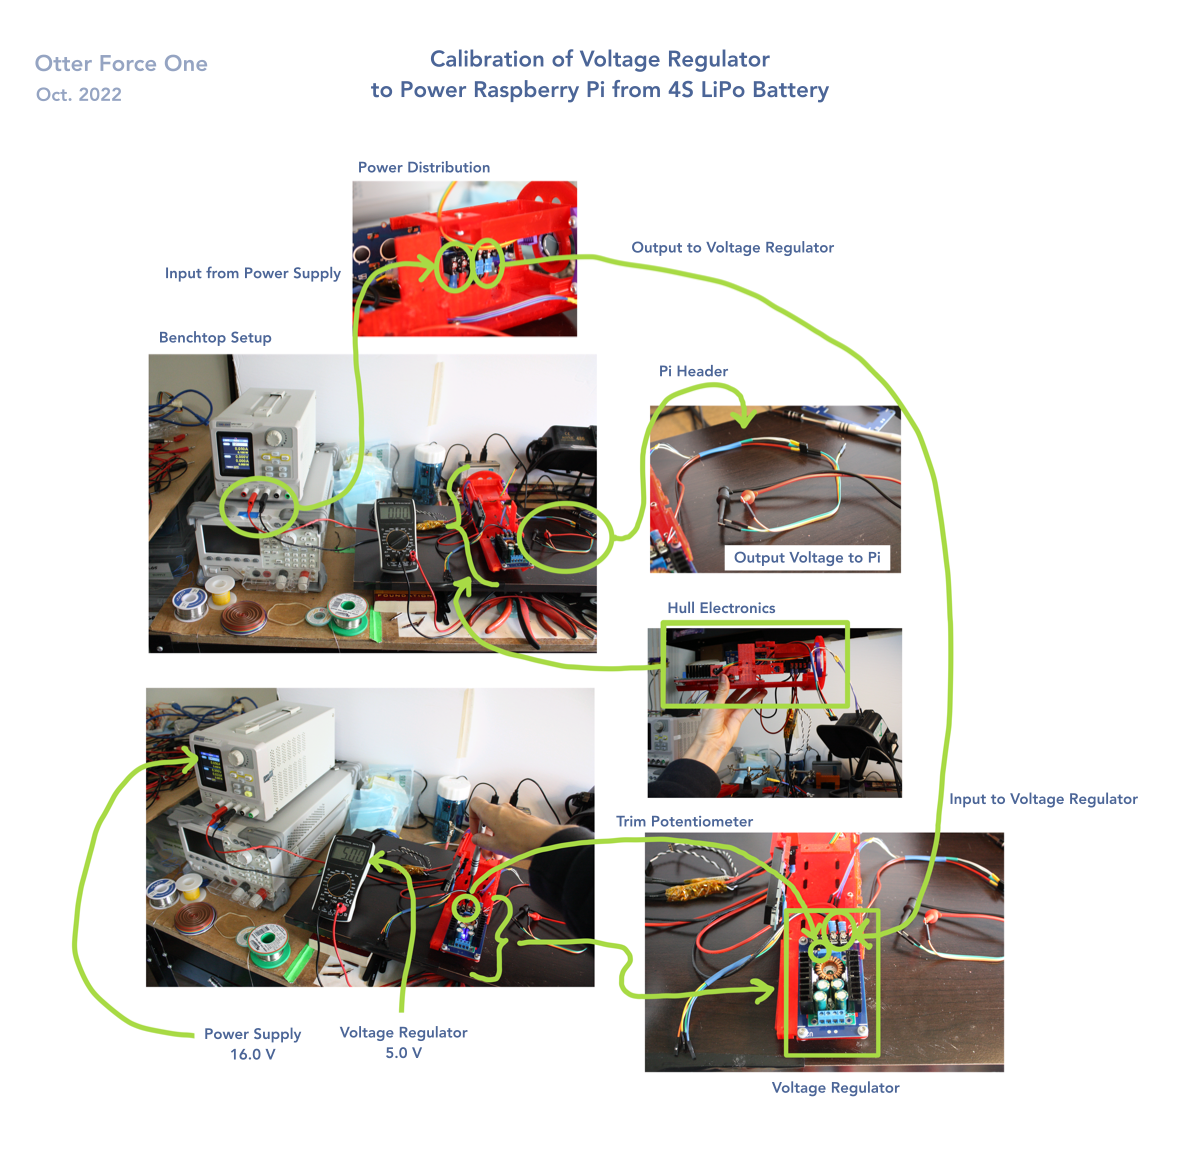
10/27/2022 at 03:01 • 0 commentsBefore moving further along with placing the electronics on the 3D printed pieces, the voltage regulator has to be dialed in. It will output 5.0 V for powering the Raspberry Pi. This would be supplied by the 4S Lipo battery. In this setup, a benchtop power supply is used.
![]()
Here are all the electronics on the 3D printed pieces that will be inserted into the hull:This is the voltage regulator. It is a switching module soldered onto a custom pcb that has a 4 pin barrier block for easily attaching wires with crimp connectors to. The trim potentiometer on the left is what changes the output voltage. The trim potentiometer on the right changes the current that the LED lights up with red - by default it is blue under that current amount.
Here is dialing in the voltage regulator - by reading the output on the multimeter while spinning the potentiometer.
The result: Powering up the Raspberry Pi from the 4S LiPo battery with the voltage regulator worked!
-
Potting the Connectors
10/25/2022 at 02:11 • 0 commentsThe thrusters have cables that need to go inside the waterproof enclosure. To do this, cable penetrators are used. The cable goes through the hollow of the penetrator, which gets filled with marine epoxy. The penetrator is then compressed with two small o-rings against the acrylic panel that encloses the sides of the hull.
Supplies needed:
- Potting kit (https://bluerobotics.com/store/cables-connectors/tools/tool-potting-kit-r1/)
- Marine epoxy (https://www.canadiantire.ca/en/pdp/lepage-marine-epoxy-adhesive-25-ml-0671441p.html)
- Cable penetrator (https://bluerobotics.com/store/cables-connectors/penetrators/wlp-vp/)
- Shop towels (https://www.canadiantire.ca/en/pdp/blue-shop-towels-0396641p.html)
Be sure to pay attention to the cure time for the marine epoxy. In the one I purchased at Canadian Tire, the cure time was only 8 hours. Whereas some other types online require a full 36 hours.
I haven’t seen many guides online that really showed all the steps of the process. I think this could help makers who are also trying to do something similar. So, here are photos of every single step of the process.
^ Supplies are ready
^ Setting up clamps to hold the penetrators perpendicular to the ground. Third hand tools help to keep the angle of the wire proper. The chassis of OFO is covered in shop towels.
^ View from an angle
(Click read more to continue)
---------- more ----------^ Closer up view
^ Setup for the larger cable
^ Setup for the smaller cable
^ Cleaning the cables with IPA to remove any dirt and grease. Other sources online recommend using acetone in order to roughen the surface a bit, providing more grip for the epoxy. (I didn’t have acetone on hand)
^ This is the marine epoxy. Cut the tips and depress the plungers to get it started.
^ It requires a lot of force. Try to make both sides even. This is going in to a little mixing cup.
^ This is what it looks like before mixing. This is just under 10 mL.
^ After mixing, it becomes a uniform colour.
^ Now the mixture needs to be transported into a syringe, so that way it can be added to the penetrators. Pulling back on the plunger provides suction to move the epoxy. Found that pulling back and releasing repeatedly helped to make it travel faster.
^ This is the end result amount.
^ Here is a better view of the end result amount. 7 mL.
^ Now the process begins to pot the connectors. Going with the smaller cable first. Pushing down on the plunger to expel the epoxy.
^ Here is the first portion filled. Moving the cable up and down coats it all. Everything should be coated, and there should be no bubbles or gaps. Once this is complete, filling the remainder area can be done.
^ View from an angle. You can see the cable sticking out from the end that also has epoxy coated on it.
^ Now filling the entire pocket with epoxy.
^ Here it is, complete.
^ Next up onto the larger cable. The same process was followed. This one was a bit different because the black cable sheath was larger than the diameter of the penetrator. This meant the three cables were coated in epoxy by moving them through the hollow repeatedly.
^ Here you can see that process. Trying to coat the wires with epoxy to ensure no gaps. This is important, because if there is trapped air while under water, it could fracture the epoxy.
^ Filling up the pocket.
^ Here it is complete. This one had a little too much epoxy added at the top, but it worked out fine. You want to add enough but not too much such that it might overflow and spill onto the threads.
^ View from an angle.
^ Closer up view.
^ Overhead view after the potting is complete.
^ This is how much remains, 3 mL. Started with 7 mL, so this means 4 mL was used.
The cable penetrators with epoxy worked, and there was no shattering under water. Be sure to not use the epoxy as a strain relief. If the cable is a tether, use a mechanical strain relief on the chassis (or 3D print an adapter).
-
Hackaday Prize 2022 Update
10/23/2022 at 03:39 • 0 commentsThere were only 4 days between the announcement of the Wildcard winners (Oct. 19) and the deadline for the grand prize (Oct. 23). It simply is not enough time to complete both the prototype and all the requirements by that deadline (especially compared to other categories that had months).
Sorry everyone about the missed opportunity. Hope everyone following the project will keep on, as there will be more updates posted.
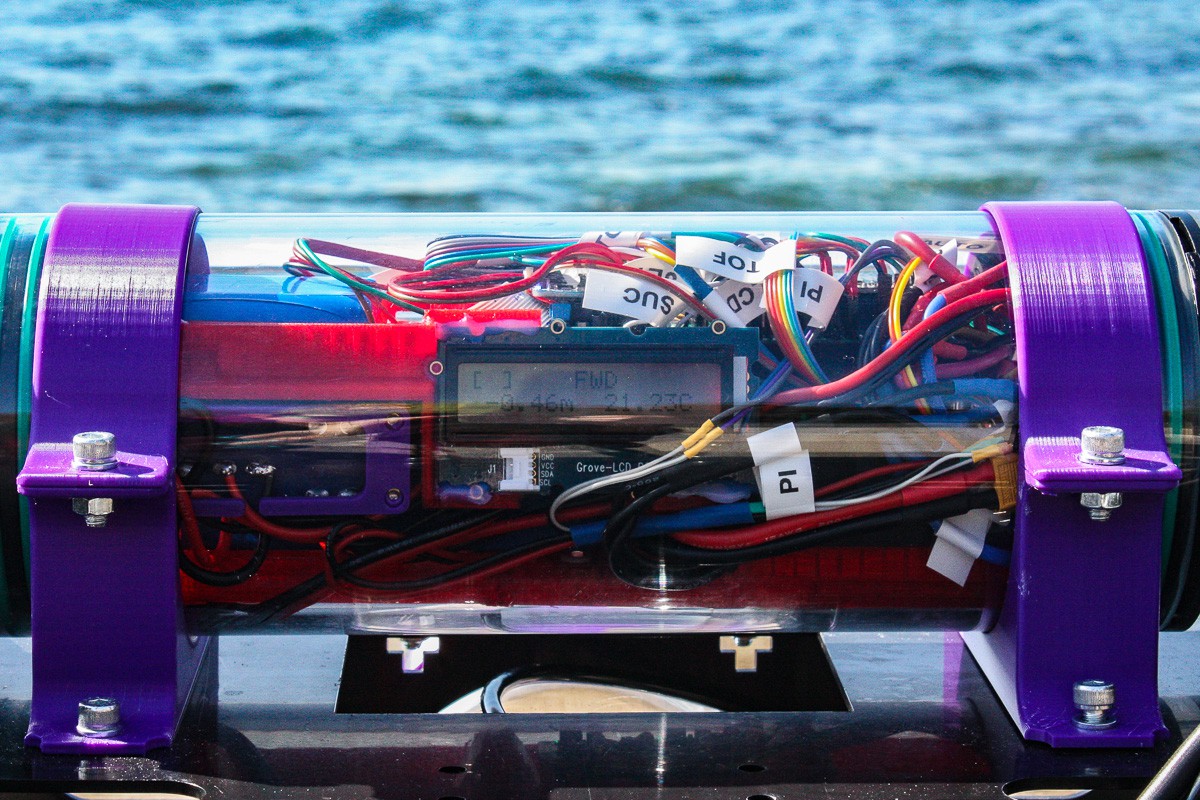
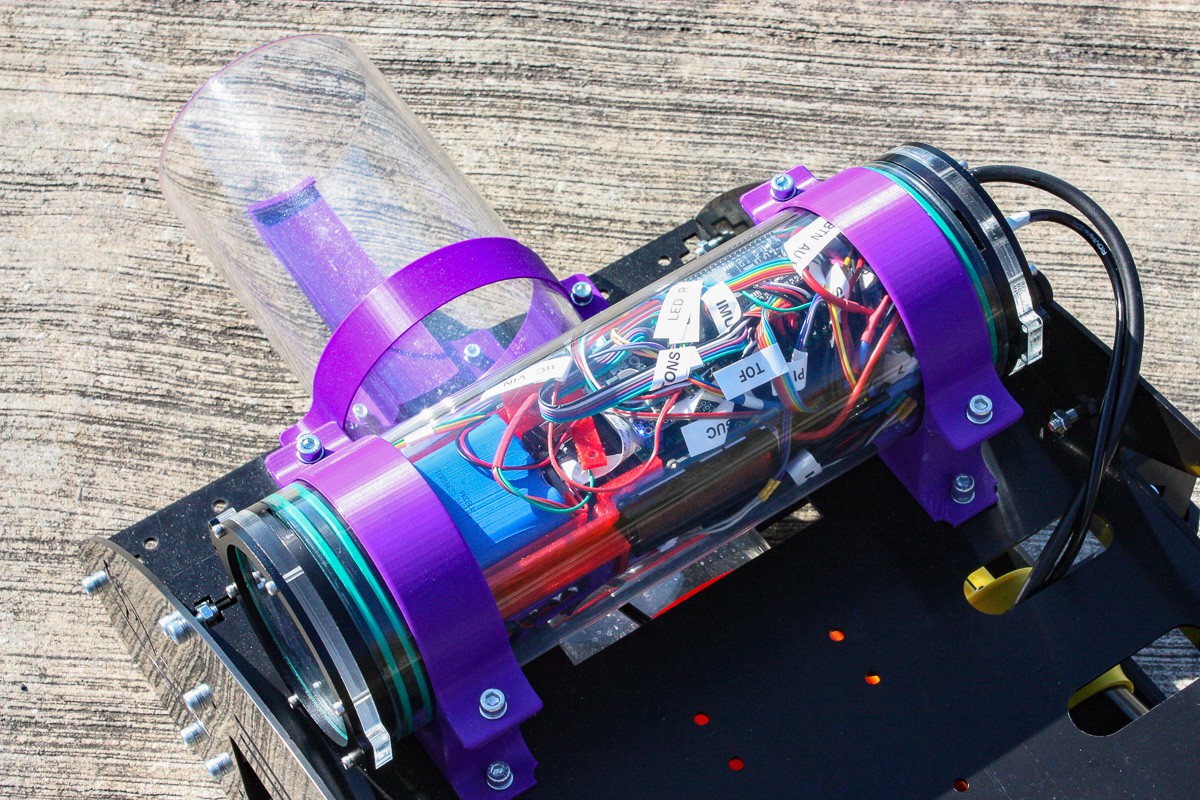
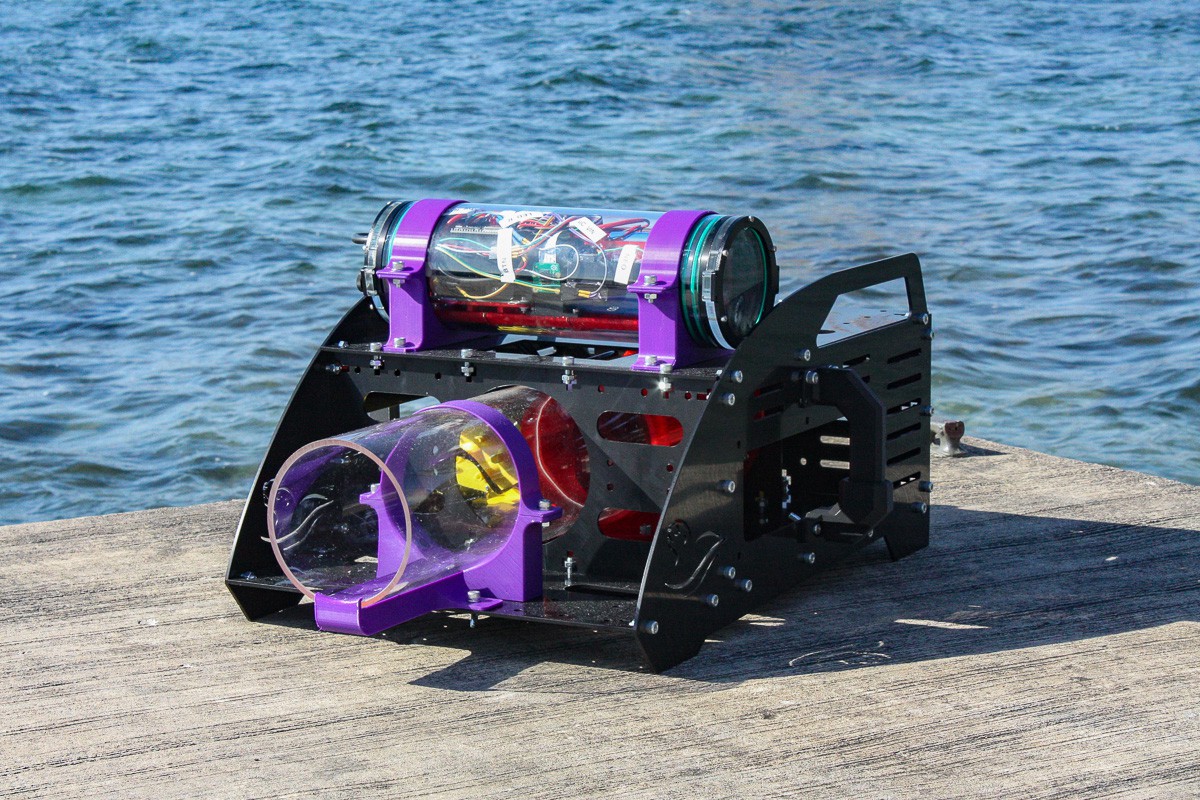
Please enjoy this video of the functional electronics prototype being tested — outdoors, in frigid waters:
Photos:
![]()
![]()
![]()
![]()
-
Prototype Hull Electronics
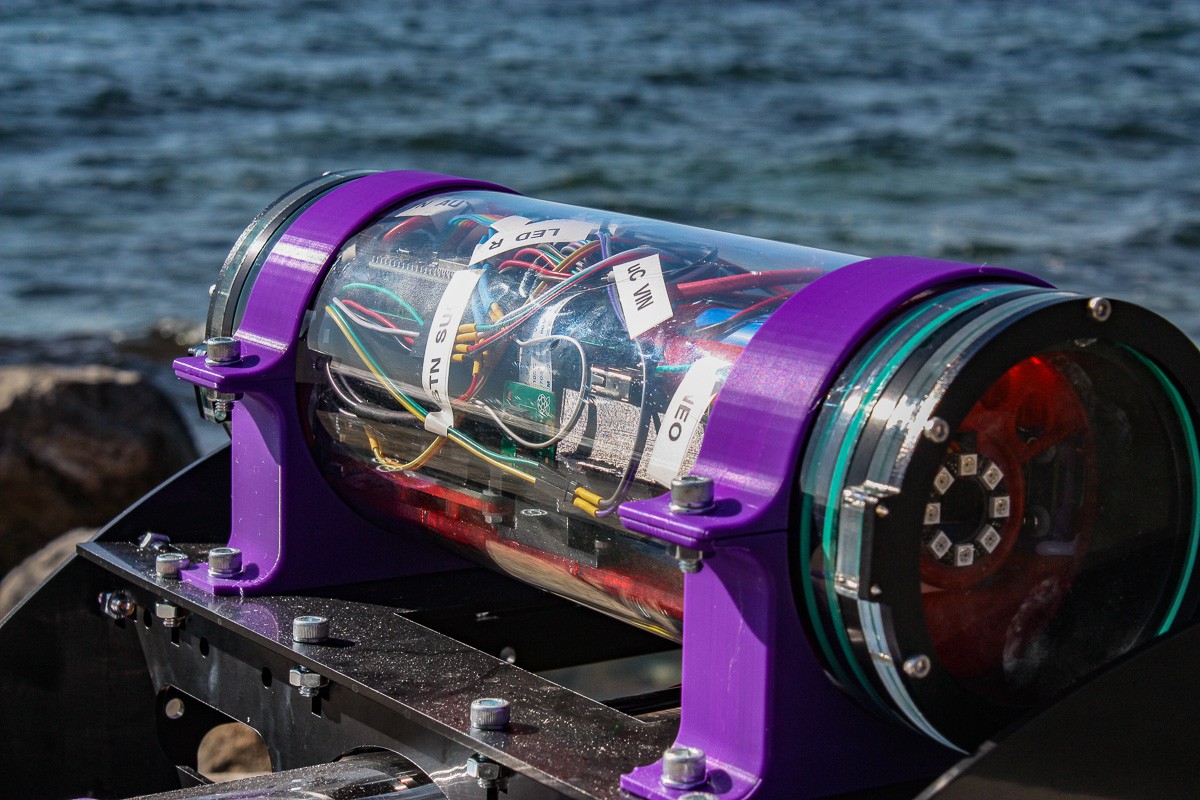
10/09/2022 at 06:09 • 0 commentsThe prototype electronics have been installed into the hull for a test fit. The diver would have the LCD with a RGB backlight in view as they are diving.
Back view:
To the side, the bubble wrap is covering a MS5837 pressure and temperature sensor. This will penetrate the hull and be located on the exterior. The corresponding depth value can be displayed on the LCD.
Front view:
The front is where the camera and LEDs will be mounted. The camera connects to the Raspberry Pi, running the Tensorflow Lite model trained for urchins to run object detection live.
Here is a look at the electronics as they were a work in progress.
Testing the sensor:
Back of the proto board:
Structure assembled and with electronics running:
Top view:
The top view shows the packing of the 3D printed structure and electronics inside. There are still more components to be added, such as the microcontroller 1S Li-Ion battery, the 4S Li-Po battery, the Raspberry Pi, and some additional peripherals.
Compared to the CAD model, there were only a few as-built modifications where fastener heads were protruding more than anticipated.
Front view:
This shows the LEDs, camera, voltage regulator, and 4S battery
Back view:
This shows the LCD, the power input distribution board, and the ESP32 microcontroller board in the background
The next step is to continue with firmware development for all the peripherals, such as the sensors and thrusters.
-
Object Detection Training
10/05/2022 at 23:54 • 0 commentsIn order to detect the urchins, object detection will be used. The model will be running on a Raspberry Pi with a Pi cam. Information about this will be sent back to the microcontroller (ESP32-WROOM) via UART. 3W RGB LEDs will be beside the camera to illuminate the surroundings underwater. All of these electronics are housed inside of the hull, which sits on top of the device’s chassis.
Object detection allows for counting multiple urchins in a single image, giving the position and dimensions. This count of urchins would eventually be used to help audit and track where there are less than 2 urchins per square meter, indicating it is a prime location for kelp forest restoration efforts.
To accomplish this, the task is divided into multiple parts:
- Dataset collection and tagging
- Training and testing
- Running on the device
- Analysing results in the real world setting
This log covers step #1 and the start of step #2.
A list of objects of interest was created:
- Purple sea urchin
- Fish
- Kelp holdfast
- Kelp stipe
- Kelp blade
- Kelp float
- Ground
These are the elements in kelp:
To test the concept, urchin would be the first object that is trained. In the future, as more data is collected on the device, the additional list items can be trained.
For the first round of training images need to be collected. The images were collected manually from searching the internet. Although a scraper could be used, it could have negative consequences such as being blocked, which I did not want to risk.
The process was as follows:
- Search purple sea urchins on Google Images
- Follow the results that were interesting
- Save the images into /train or /validate or /test
- Remove duplicates with same file name
- Convert .webp to .jpg
- Run a program to detect visually similar images
- Change width to be 1200 px maximum for /train and /validate
- Change filenames to be image-NNN.jpg
- Annotate with LabelImg
To detect the visually similar images and remove duplicates, Duplicate File Finder (https://nektony.com/duplicate-finder-free) and PixCompare (https://www.lakehorn.com/products/pixcompare/) were used.
If the width or height exceeded 1200 px, this was resized to 1200 px using an AppleScript with Automator (https://discussions.apple.com/thread/253308106). There could be other ways of doing this, such as with Python.
Check if any files are named .jpeg and change them. See the files with this command:
ls -d *.jpegRenaming the files to be sequential was also completed using Automator. Another way of doing so would be with a bash script.
LabelImg was installed and run to label all the images. Commands:
sudo pip3 install labelimg

labelimg
By annotating urchins in many different settings and angles, it will help the model.
Total images = 108. This was divided up into 68 images for train, and 40 images for validate.
Edge Impulse object detection was used to train the model quickly. In order to convert the annotated images from LabelImg to Edge Impulse’s format, I wrote a Python script:
https://github.com/RobotGrrl/OtterForceOne/blob/main/Scripts/labelimg_to_edgeimpulse.py
The script worked, as demonstrated by the bounding boxes on the image:
Here’s a look at preliminary testing on the model.
Further investigation is needed, as indicated by this table.
Next steps will include training the model again, using @Evan Juras ‘s (https://hackaday.io/Edje13) Colab Python notebook found here:
There is more information on the repository here: https://github.com/EdjeElectronics/TensorFlow-Lite-Object-Detection-on-Android-and-Raspberry-Pi
Onwards!
-
Outdoors Test
09/04/2022 at 05:57 • 0 commentsThe device chassis is assembled, with the thrusters installed. An outdoors test would be able to confirm the lack of buoyancy, as well as give valuable information regarding transportation logistics and deployment.
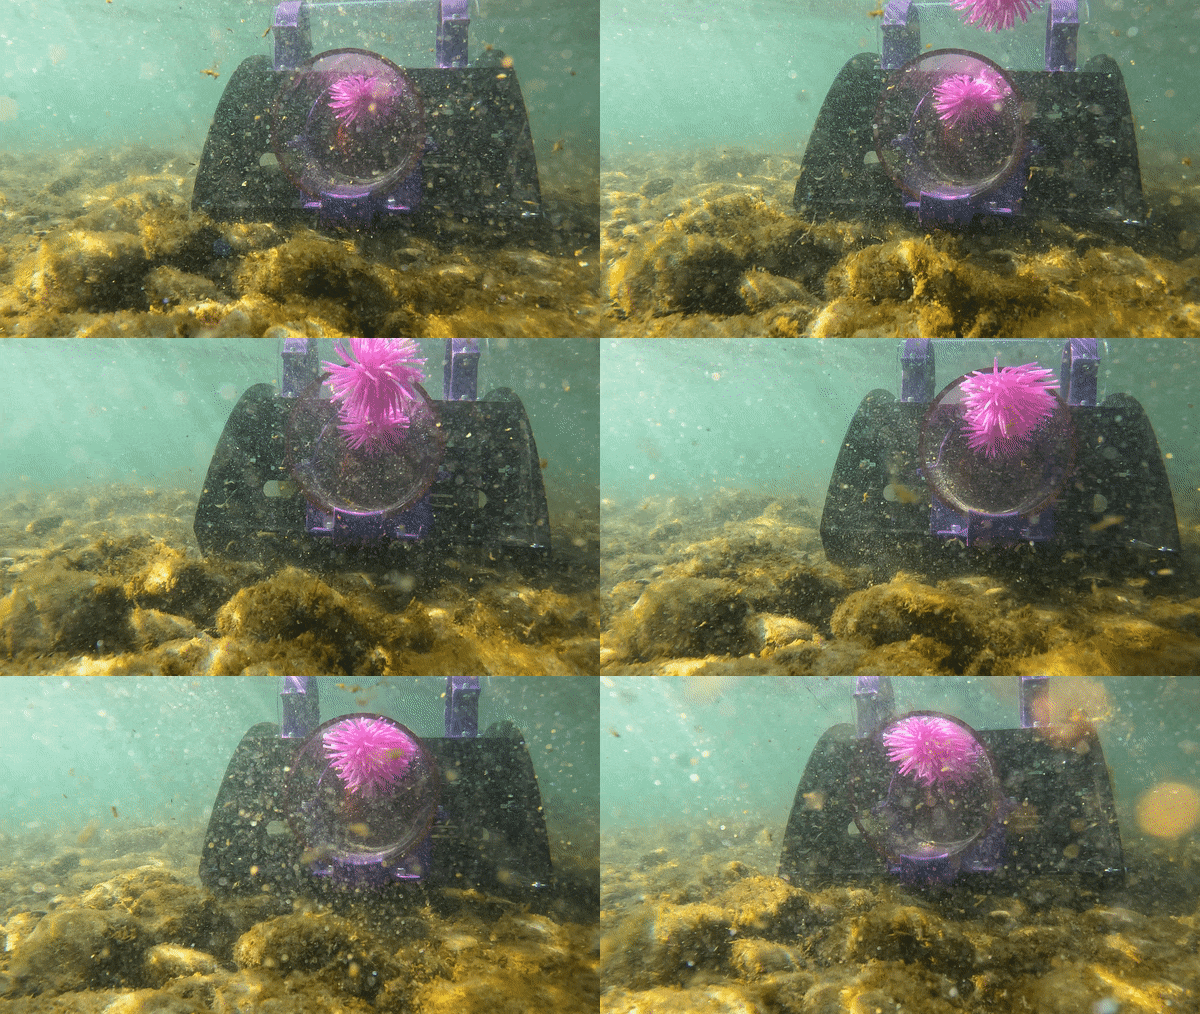
Here is an example purple sea urchin replica moving in to the suction tube. This illustrates the premise* of the device.
![]()
*Note: In reality, the purple sea urchin would be attached to the bottom - not originating from the top.
When the urchin is suctioned back towards the coupler, it will pass by an opening of the top plate where the hull can see it. This is where the count of the number of urchins caught will take place by the hull electronics.
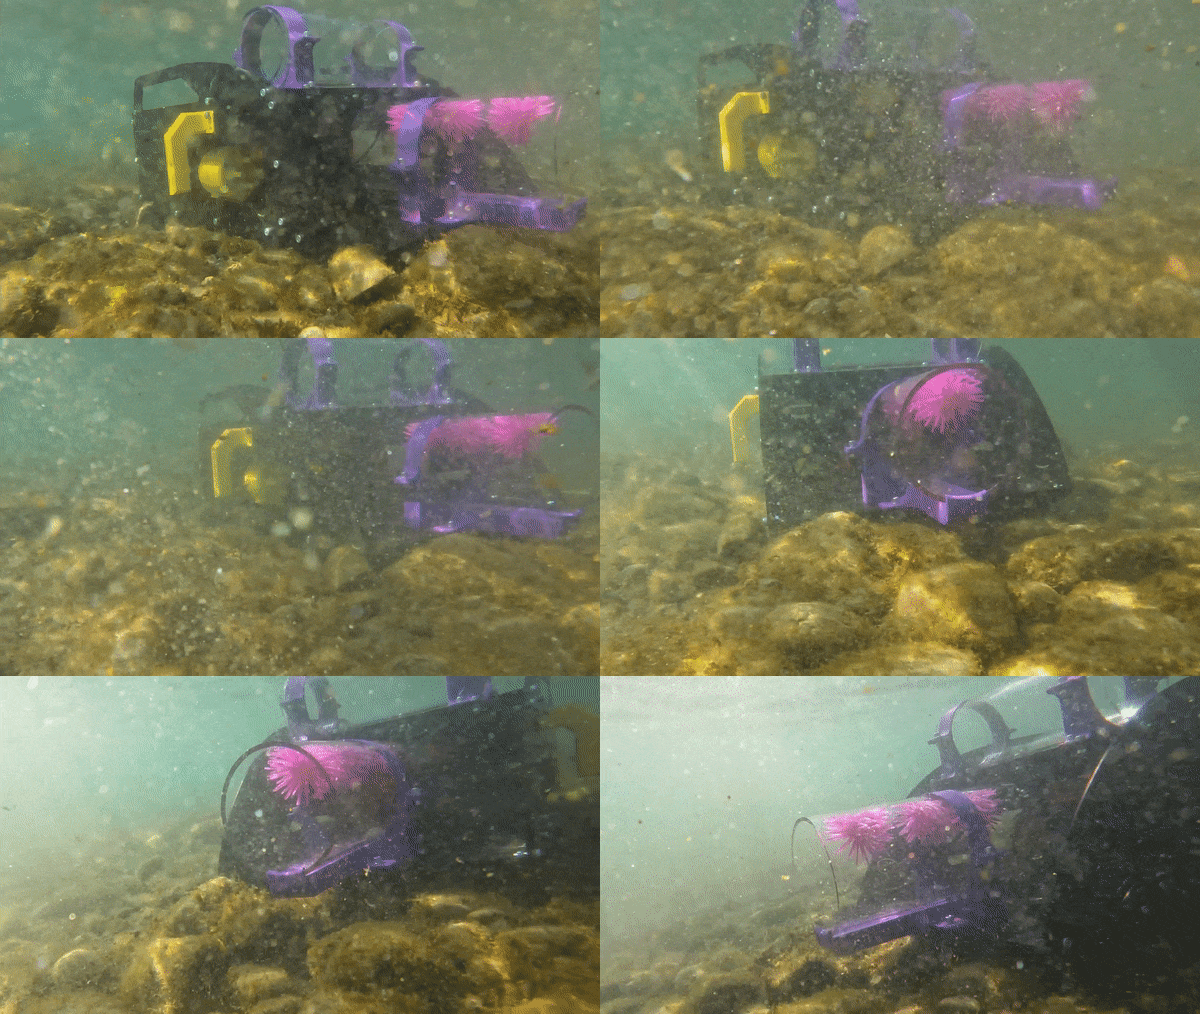
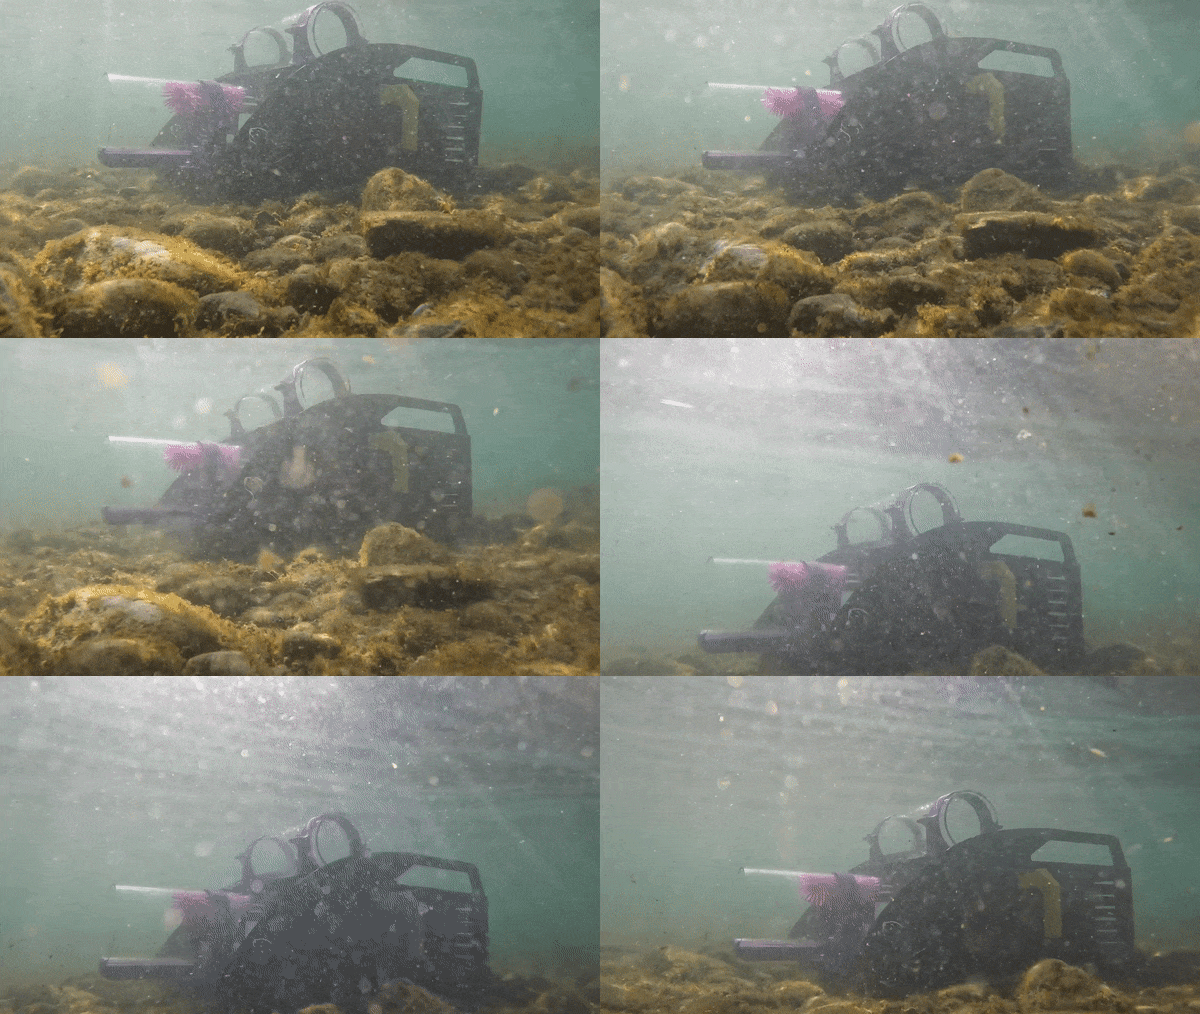
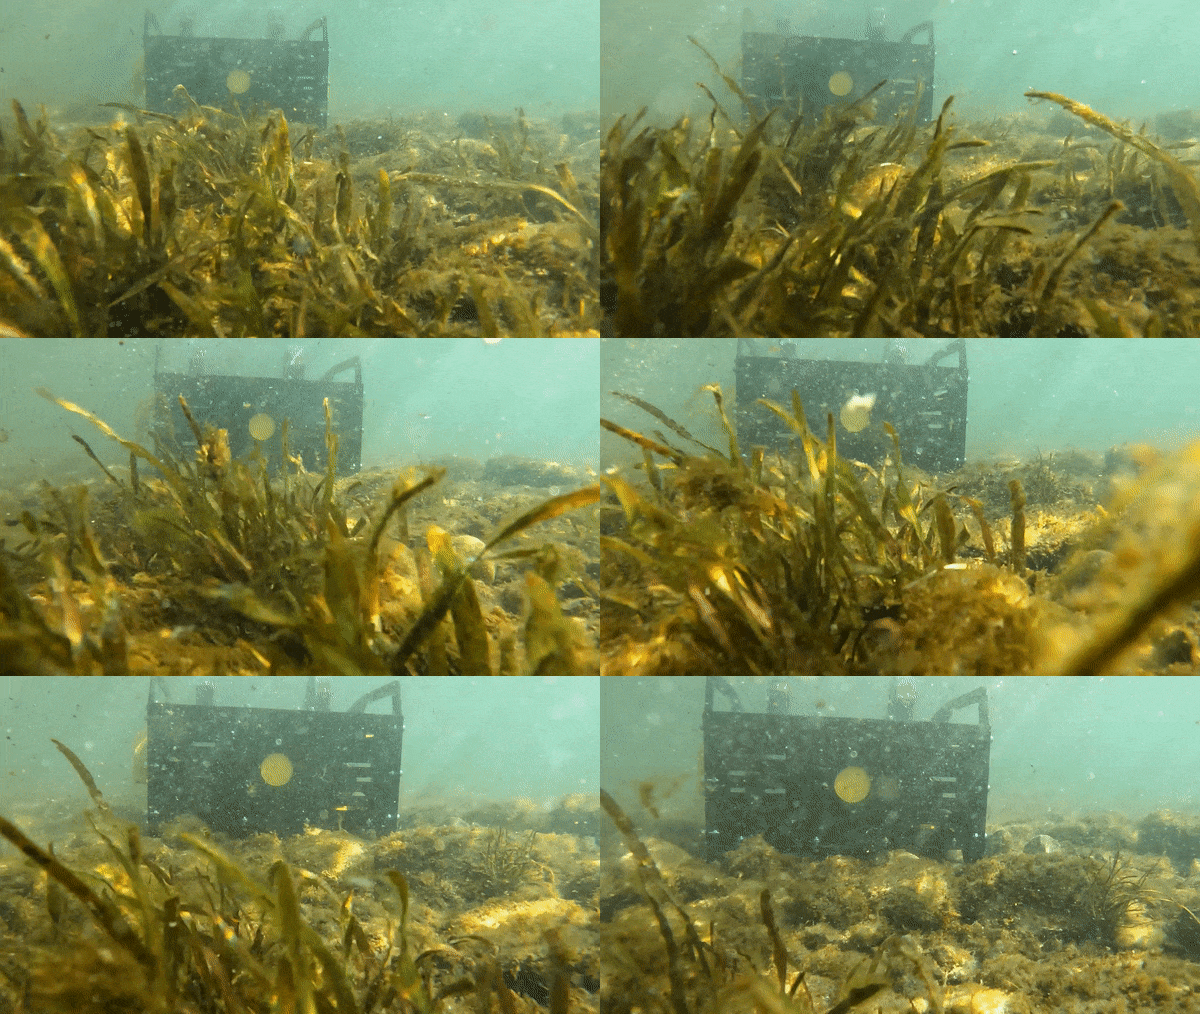
The water had quite a bit of particulate matter suspended in it today. Here is a tour around the device:
![]()
An observation was that the device may need to have additional weights when in standalone. The current catches the side panels and could tip it over. This will become even more pronounced when the hull electronics are added, including the battery, which will raise the center of gravity even higher.
![]()
When the device is on the seabed, it would be in the standalone configuration protecting newly planted kelp seedlings. It could look similar to this:
![]()
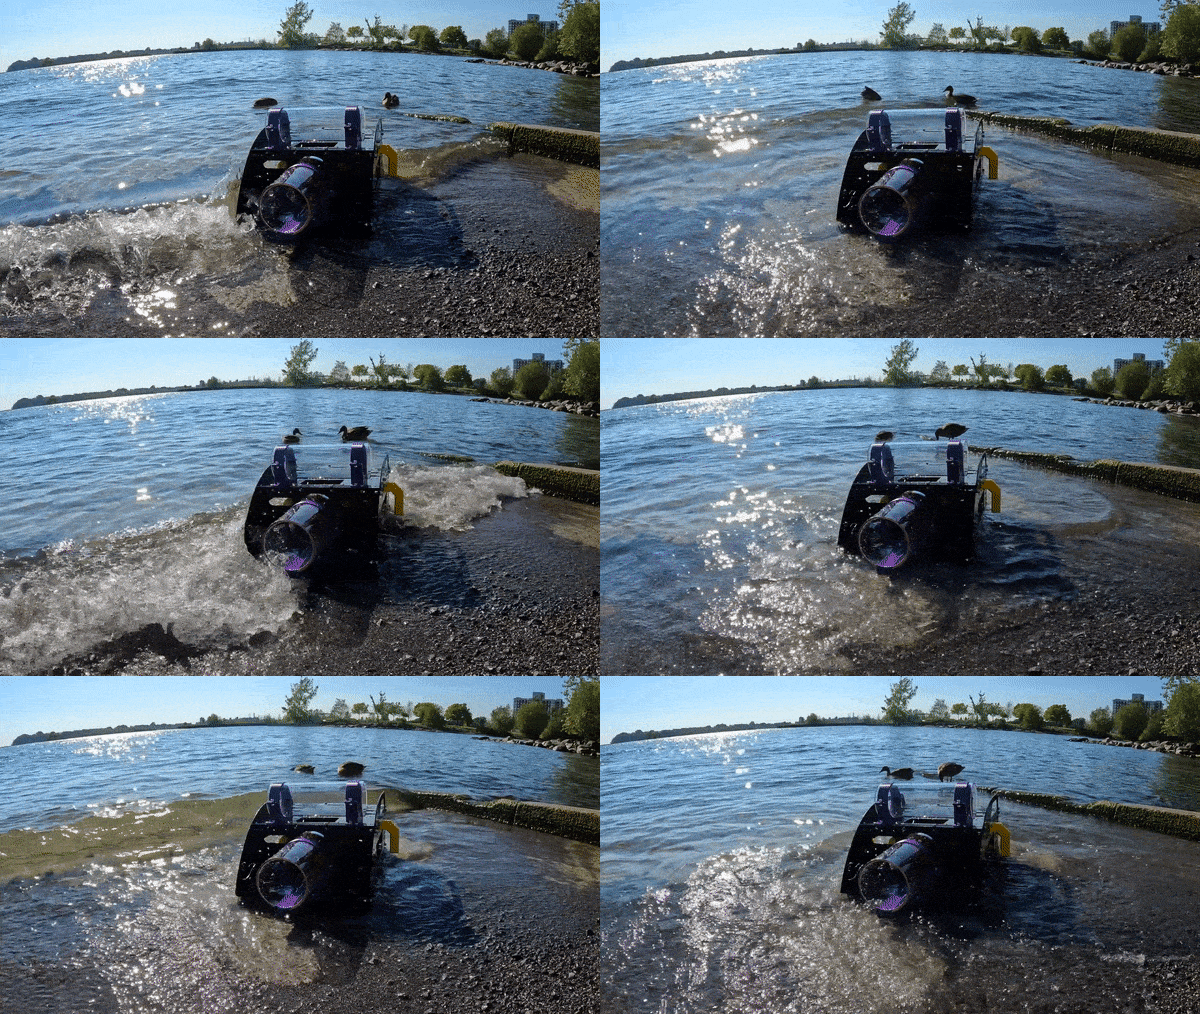
Here are photos of the device prototype:
Can you spot the thrusters installed?
As for the surrounding nature, ducks were curious about the device:
![]()
Regarding transportation logistics, the device was placed onto a skateboard, with a towel to avoid scratches. This was then rolled down to the water.
Next time when the device has all its electronics, it will be ready for “Do a kickflip!”.
Progress continues!
-
Initial Thruster Test
09/04/2022 at 04:36 • 0 commentsThe initial thruster was met with difficulties, but did show signs of progress.
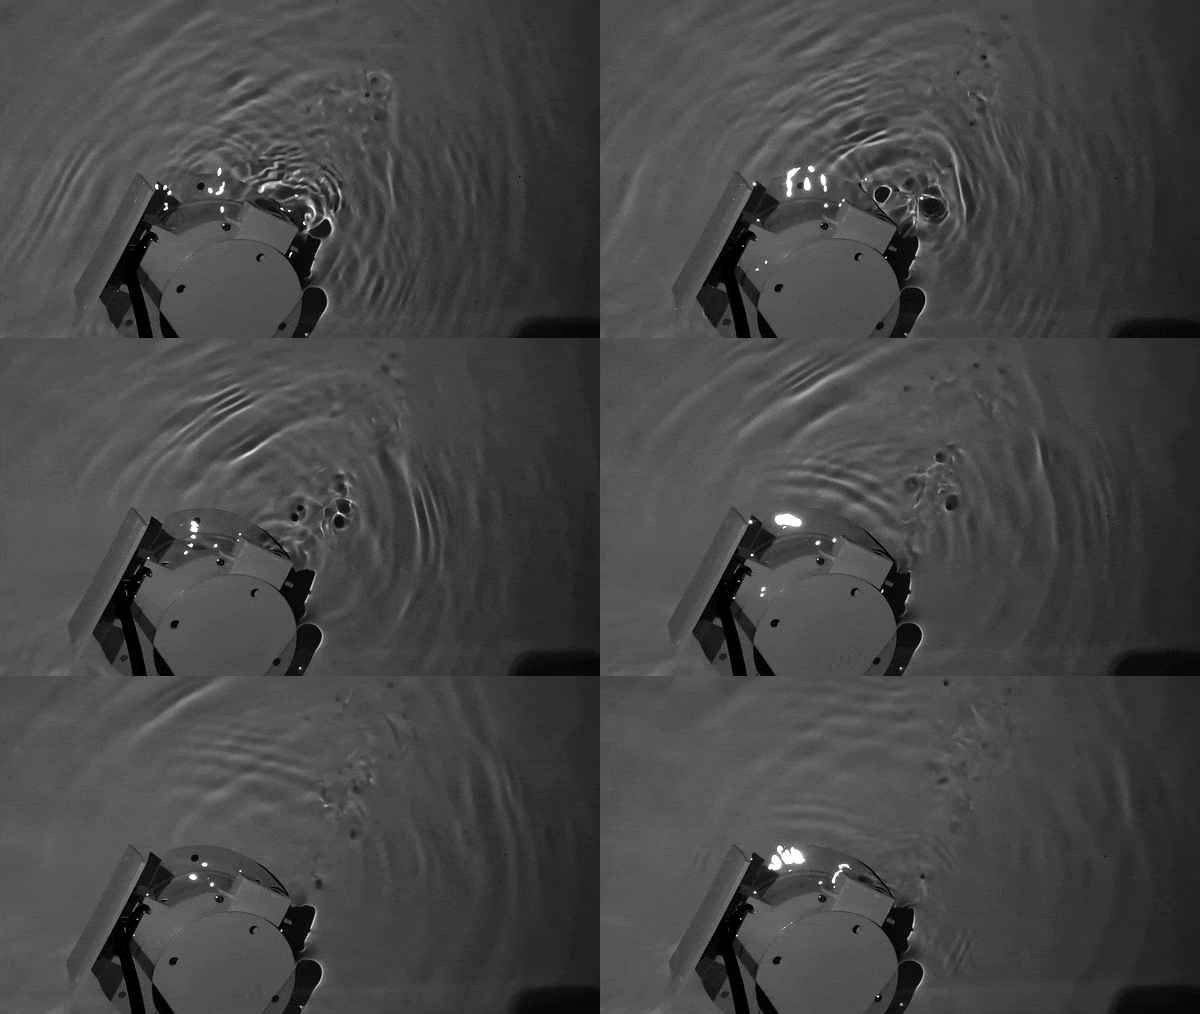
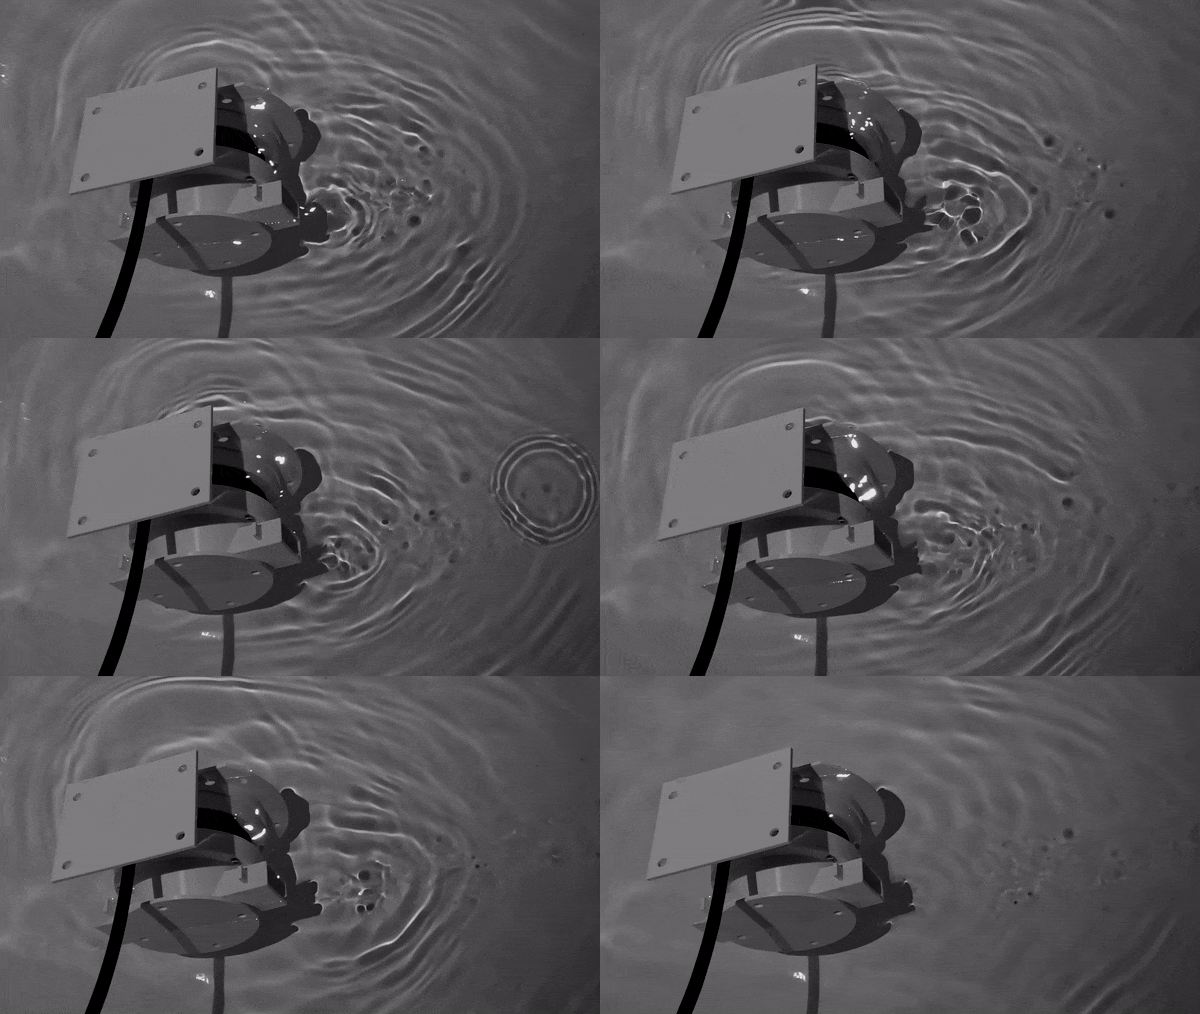
The testing conducted was with the larger thruster for the suction tube. Here is a look at the thruster producing movements, albeit slower than anticipated:
The thruster is shuttering, then stops. As it stops, the flow of the water can be seen as redirected by the 3D printed piece. Here it is slowed down 50% and in greyscale with higher contrast:
![]()
![]()
In the previous project log (https://hackaday.io/project/186901/log/210446-preparation-for-thruster-test), this flow redirector piece was mentioned with a bit of a hypothesis. From this initial test, the results look promising that it could work. Once testing with full strength, this will be able to be known.
The difficulties while testing included:
- Placing in water = thruster stopped. Removing it = thruster started.
- The connections moved when doing so
- Wiggling the connections would produce a shuttering movement from the thruster
- Could be power related? Debugging power would rely on the above point being solved. So, start there first.
- The ESC has an arming sequence. Sending 1500 us pulse to it a few seconds after it starts up is required
- There was no documentation for this
- A power up sequence was determined as well: connect power source to ESC, then connect power to microcontroller.
- The ESCs brown out
- Cause unknown, working on investigating this
- Problem was evident on a CC and CV power supply
- Problem was evident on a 20 C 2650 mAh 4S Lipo battery
- Using a 10 A fuse inline with the Lipo would intermittently not start the ESCs
- Removed this solved the problem
- But comes with a higher risk when working with electronics near water
- Could try a greater fuse value
- Overall setup of the experiment
- Sometimes splashes would sprinkle water close
- Crouched down with laptop and electronics on boxes
- Tried separate container with water, makes a mess
- Dripping faucet into water sound
- Difficulties with smaller thruster for waterjet
- Appears to be out of commission. Need to triple check
Overall, this test demonstrates that the electronics are working to send the correct control signals to the Electronics Speed Controllers (ESCs). There is a bit more work to do on debugging to get it working as expected. The next step is improving the connections.
Onwards!
-
Preparation for Thruster Test
09/02/2022 at 02:16 • 0 commentsThere are two thrusters on the device, one for suction and the other for a water jet. The water jet is used to dislodge the urchins, and the suction is used to non-destructively bring the urchins through a tube and into a bag.
Before continuing on with the assembly, it would be good to test the thrusters to validate they are working as expected. Both of the thrusters have custom pieces that attach to their mounting points and around the shell.
Electronics
The first step was to prepare the electronics:
An ESP32 was selected for rapid prototyping. There are two Electronic Speed Controllers (ESCs). Suction gets 30 A, and water jet gets 20 A.
The thruster cables will be connected to the screw terminals. The screw terminals were chosen to make it easier to disconnect when the watertight penetrators are installed onto the hull end caps.
A protoboard was used for this initial revision. Future versions will use a custom circuit board.
The power will be supplied by a 4S Li-Po battery. The ESP32 will be connected via USB to access the command line interface during testing.
Suction Thruster
The suction thruster sub-assembly consists of 6 pieces that are fastened together.
The flow redirection flange contacts the back plate of the chassis. The rectangles move the outflow of water to the sides in order to not cause distractions to the diver.
Based on the specifications, at 2000 rpm the motor will produce 2.0 kg of thrust and 75 W of power. Going up to 3000 rpm, the motor will produce 4.0 kg of thrust and 200 W of power. There is a difference in orientation of the thruster, with forward being greater than backward.
Here is a look at the thruster with the collar that uses heat-set inserts:
Water Jet Thruster
The water jet thruster was designed to have interchangeable face plates for more or less outlets to be added. The strength from the outlets must be enough to dislodge a purple sea urchin.
Rubber tubing will be attached onto each of the barbs to direct the jets closer to the entrance of the suction tube.
Side view of the water jet thruster sub-assembly.
Based on the specifications, this thruster can withstand up to 300 m in depth. The max power is 150 W, and the max current is 10 A. The max thrust at 16 V is 1.4 kg at 170 W, and the min thrust is -1.2 at 160 W (operating in reverse).
Upcoming Testing
A rotary potentiometer will be used to adjust the speed of the thruster, by modifying the pulse width of the PWM sent to the pin the ESC is connected to.
The firmware (https://github.com/RobotGrrl/OtterForceOne/tree/main/Firmware/OFO_ThrusterTest) has the following modes that can be input as one character:
h: Help

1: knob off

2: knob: suction fwd

3: knob: suction rev

4: knob: water jet fwd

5: knob: water jet rev

p: print knob
The test must be conducted in water as the thrusters have bearings that are lubricated by water. Running them in the open air risks damaging them.
The goal for the test is to confirm the following:
- Suction thruster operational in fwd / rev
- Water jet thruster operational in fwd / rev
- The pulse width microseconds time for minimum and maximum
The test will be conducted tomorrow. It’s going to be exciting to see the first bits of this robot come alive!
If the results meet the criteria, the next immediate step would be to start potting the thruster connectors into the watertight enclosure penetrators with marine epoxy, as this may take 24 hours to cure.
-
Fabrication and assembly is underway
08/27/2022 at 03:48 • 0 commentsThe tubes for suction and the hull have arrived, along with the cut pieces for the device. Brackets, mounts, and structural elements are being 3D printed around the clock. Let’s take a look at what has been created so far:
Coupler
The coupler routes the incoming urchins to the bag. It attaches the suction tube to the suction thruster to the device, then to the bag.
Coupler in device with side panel and top panel removed
Coupler split into 4 pieces in CAD
Coupler cross-section view
The model was split into 4 in order to be printed. The total print time was ~30 hours. The pieces were attached together using 100% rtv silicone.
Coupler curing outdoors
Applying silicone
The mesh to protect the suction thruster was cut from a template from the CAD model and attached using 100% rtv silicone.
Applying silicone to the screen mesh
Front view
Back view
Another way of fabricating this could have been with PVC pipes. This route was not chosen due to lack of space and tools for cutting and gluing. The advantage that 3D printing gave was an all-in-one assembly, with the mesh screen mount being included. In a production setting, this piece would be injection moulded.
Device
Preliminary CAD model:
Front view
Top view
The material selected was 1/8" black delrin. This was chosen because of its performance in fresh and saltwater, as well as the malleability of the material as it might need some adjustments.
This first iteration of the design does not use interlocking tabs and slots because of modifiability of the plates. In the future, implementing this into the design would increase the sturdiness.
Side pieces attached! Testing the handles
M6 fasteners were selected
Attaching the pieces together
As each side panel was attached to the base, the less it would warp and bend.
All four side panels attached to the bottom piece
There was a small error in the design. The side entrance of the fastener (the rectangle, as opposed to the hole), was 2 mm too small for the width of the fastener. In order to remedy this, a dremel was used to shave off the small amount. Safety glasses and a guard were used while cutting with the dremel.
Dremel with guard
Dremel with a conical sanding bit
Two brackets have been completed so far, which are supports for the suction tube:
Water Jet Thruster
Water jet thruster sub-assembly CAD model
Cross-section view
The design of the water jet thruster is such that a collar is attached to the mount which has heatset inserts in order to attach a plate to it.
Inserting the heatset inserts to the 3D printed collar part
Front view
Side view
Through a submersion water test, it will be determined if the fasteners are strong enough for the water force as applied by the thruster.
Hull
Here’s a preview of the internal hull without the electronics:
These pieces are printed, and will be assembled in the near future. More about the internal hull in a future update. Until then, check out the hardware block diagram in the project description.
—--------
The current goal ahead of the Sept. 4th deadline is to demonstrate the suction working to collect an example urchin prop. Stay tuned for further updates on the progress!
 EK
EK