 sdfgeoff
-
1Hardware Assembly
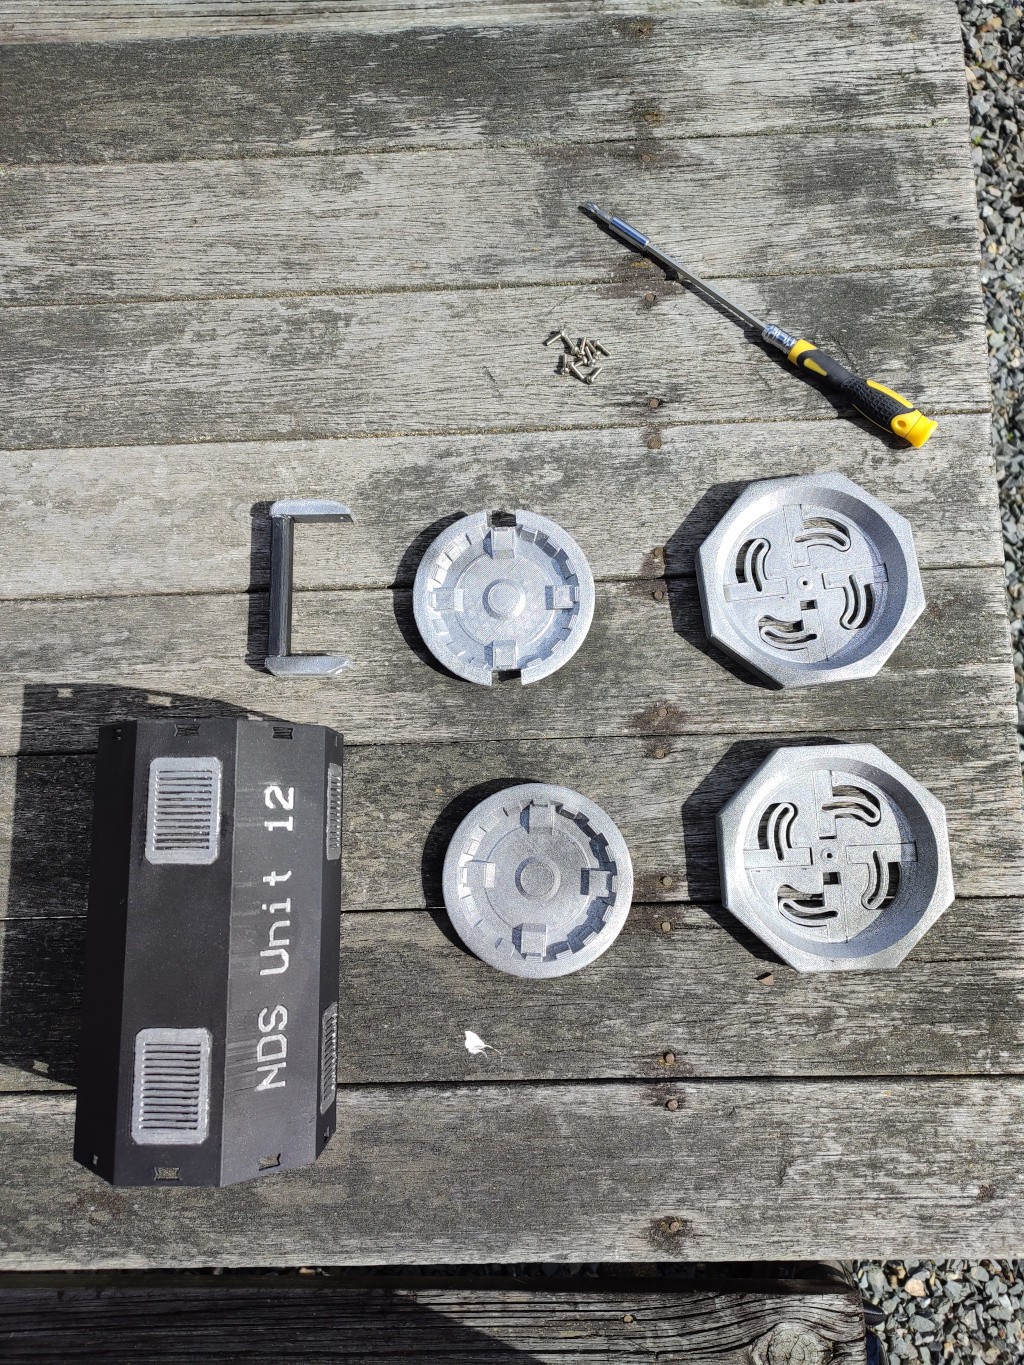
Parts:
- Raspberry Pi
- HDD/SSD + cable
- Power Bank
- Printed Parts (available at https://github.com/sdfgeoff/network_detached_storage/tree/master/generated/stl ):
- 2x Suspension Plate
- 2x Lid
- 1x HandleTooled
- 1x HandleWithHandle
- 1x HandleWithHandleHandle
- 1x Shell
- 1x InnerMountHDD
- 1x InnerMountPowerTechInc10000mah (or modify InnerMountBlankLarge to fit your powerbank)
- 1x InnerMountPi2 (or InnerMountAnyPii or modify InnerMountBlankSmall to fit your SBC)
- A bunch of M3x10 bolts and nuts
3D Printing Notes
Print out the parts.
- All the parts are oriented for Z-up.
- You may like to add a brim to shell.stl if you are worried about adhesion. Shell.stl takes ~9 hours and is the largest part
- I suggest printing the LidMechanismTest.stl to check your printer tolerances. The two parts should be able to slide.
- No support needed on any part
-
2Paint your Parts
Make your prints look cool. I used matt black and metallic silver spray paint. I only bothered to paint the external parts
![]()
-
3Assembly of the Exterior
HandleWithHandle
Bolt together the HandleWithHandle and the HandleWithHandleHandle. The bolt taps straight into the plastic.
![]()
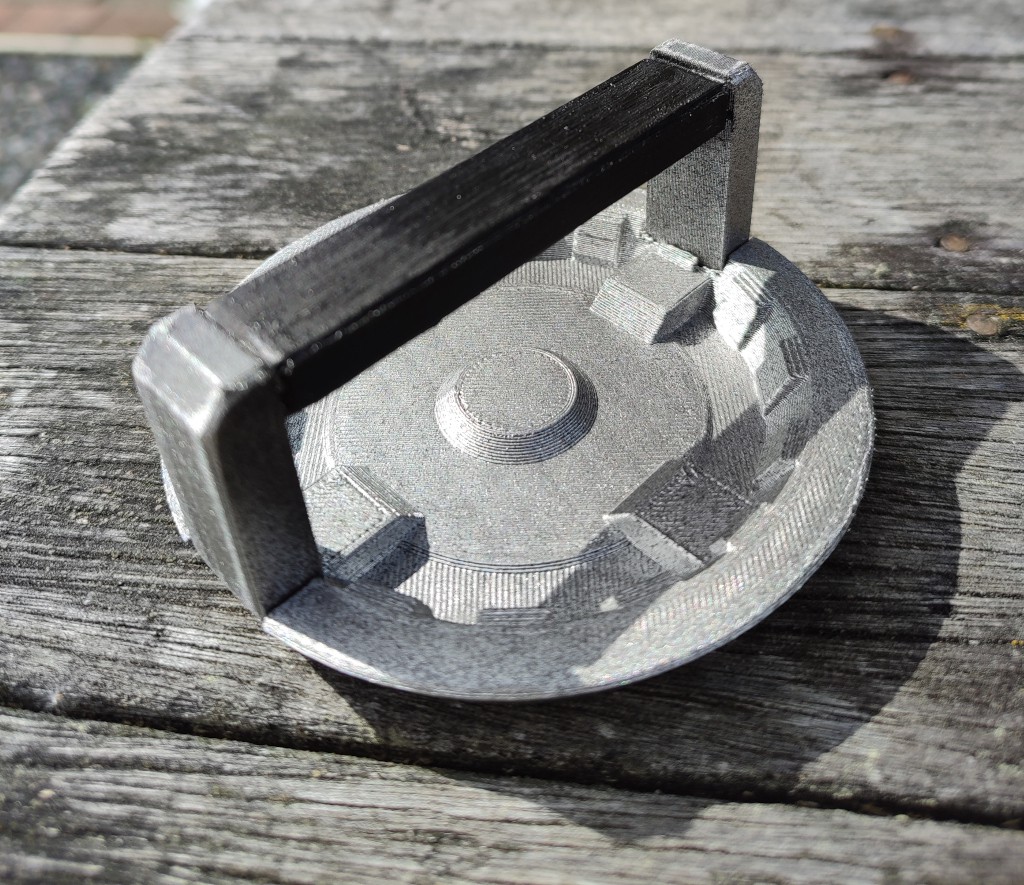
Lids
Take the the HandleTooled.stl and the Lid.stl and use 5 bolts to bolt them together. The bolts tap straight into the plastic. Don't do them up super tight because the middle one has to rotate and the other four have to slide.
![]()
Yeah, I only put in four because one of my sliding parts was fused in place! At this point rotating the Handle relative to the Lid should retract/extend the sliding pins.
Repeat this assembly with the other lid mechanism.
Test fit with the Shell
You should be able to push the lids onto the shell and lock them in place by twisting the handles. The sliding pins slide into the bow-tie shaped holes in the top/bottom of the shell.
-
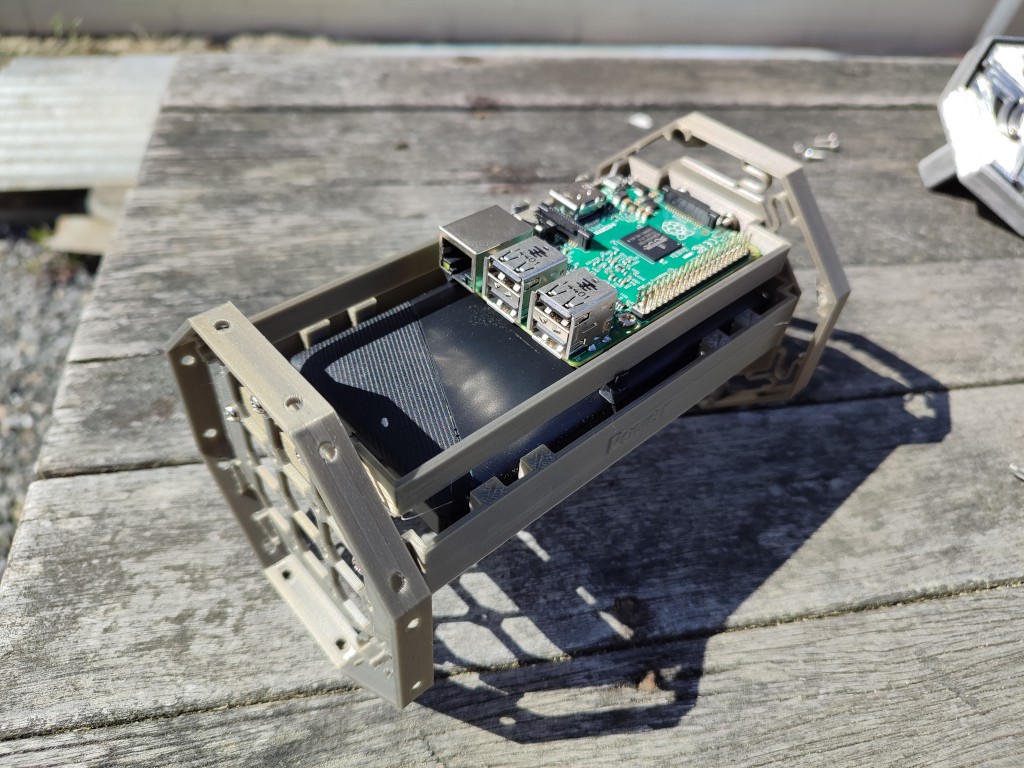
4Assemble the Interior
The interior is made from the two SuspensionPlaces held together by the various InnerMount pieces. I suggest putting the battery bank in the middle. This leaves the Pi on the top and the HDD on the bottom - making both of them easy to access:
![]()
I haven't attached the storage/cables yet in the above picture, but hopefully you get the idea of how it's meant to go together.
-
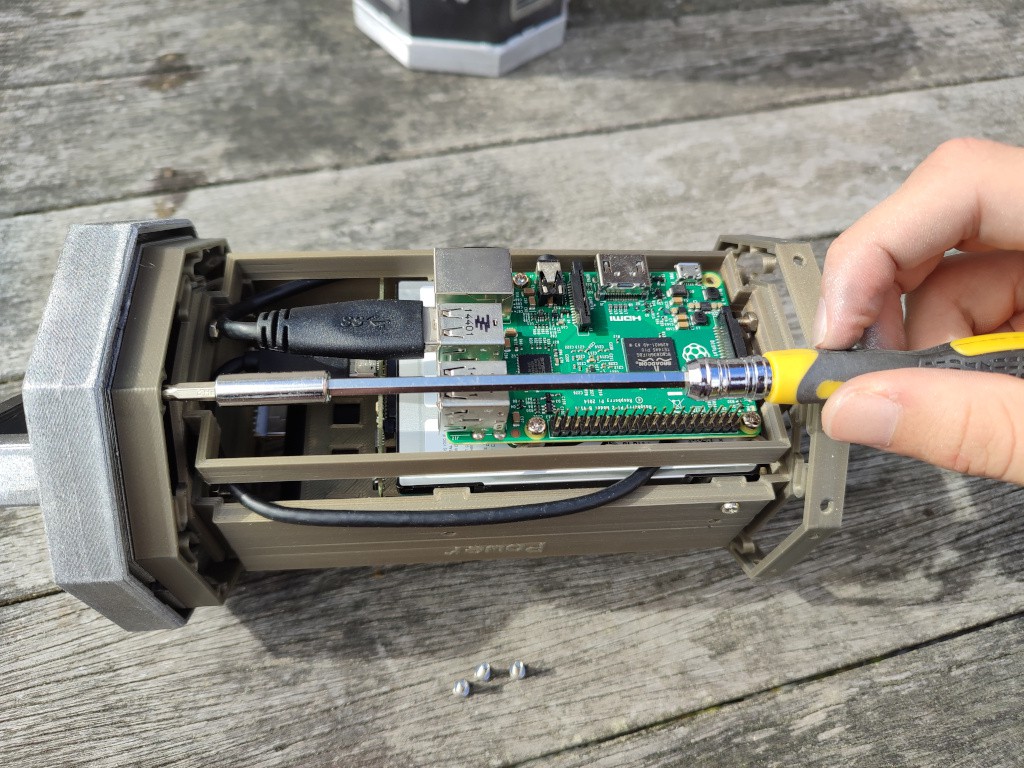
5Attach Interior to HandleWithHandle
There are four screws that tap into the plastic. You need quite a long screwdriver to get in at them.
![]()
-
6Slide the interior into the exterior and twist to lock
You're done assembling the hardware!
![]()
Network Detached Storage Device
Ever wanted a self-hosting NAS robust enough you can throw it in your rucksack and forget about it?


Discussions
Become a Hackaday.io Member
Create an account to leave a comment. Already have an account? Log In.