 Michael Gardi
The case parts printed well. There were a couple of places where the print pulled up a tiny little bit in the corners, despite a 10 brim, but not very noticeably. I joined the pieces to together with M4 x 12 mm bolts and nuts.
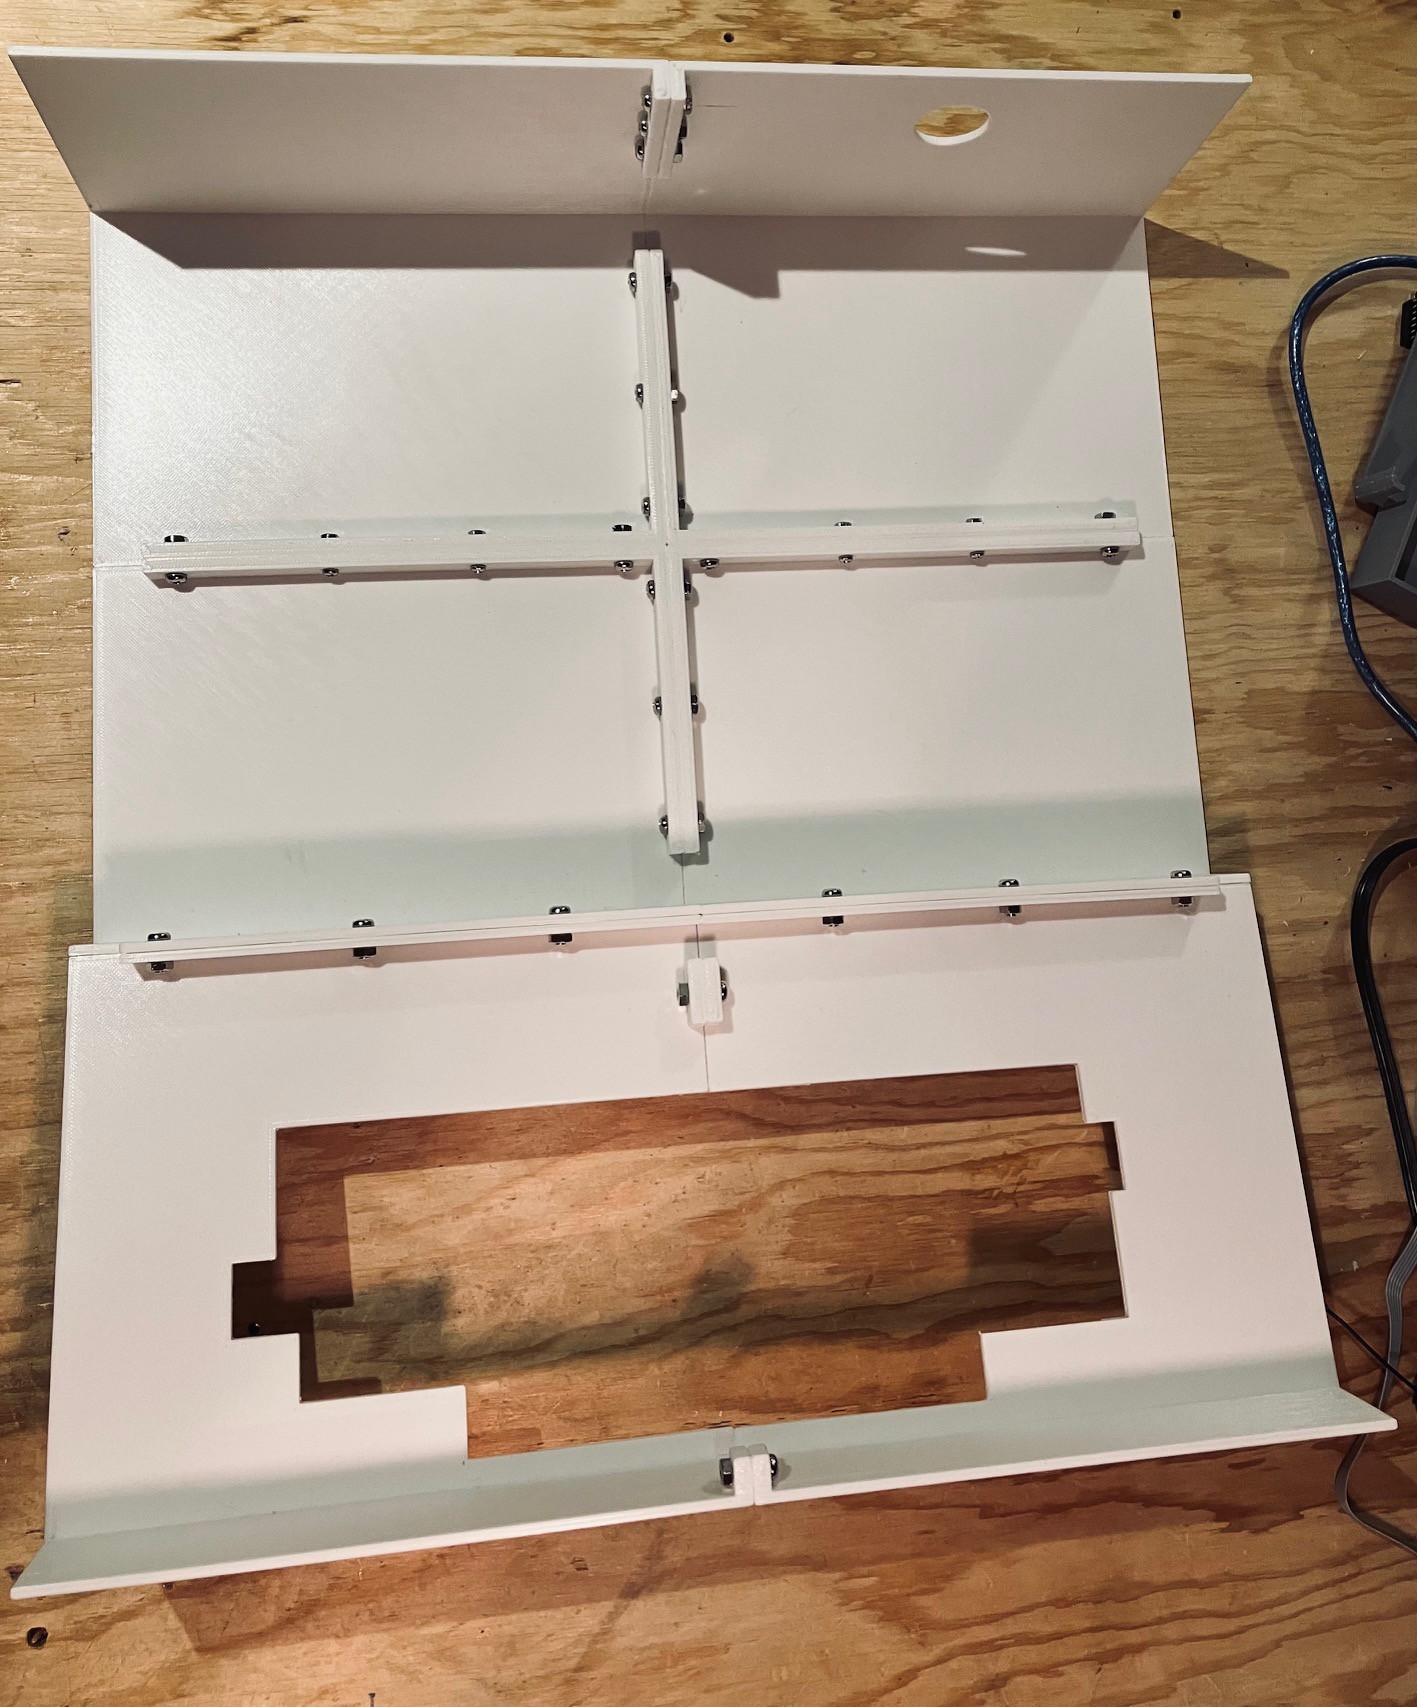
Then I fitted "skin" onto the frame. With the skin on I was able to adjust the keyboard to fit inside of the cutout and screw it down. To Steve's credit (the measurer) and Dave's (the keyboard maker) it fit perfectly. All I had to do then is 3D print a logo and voila!
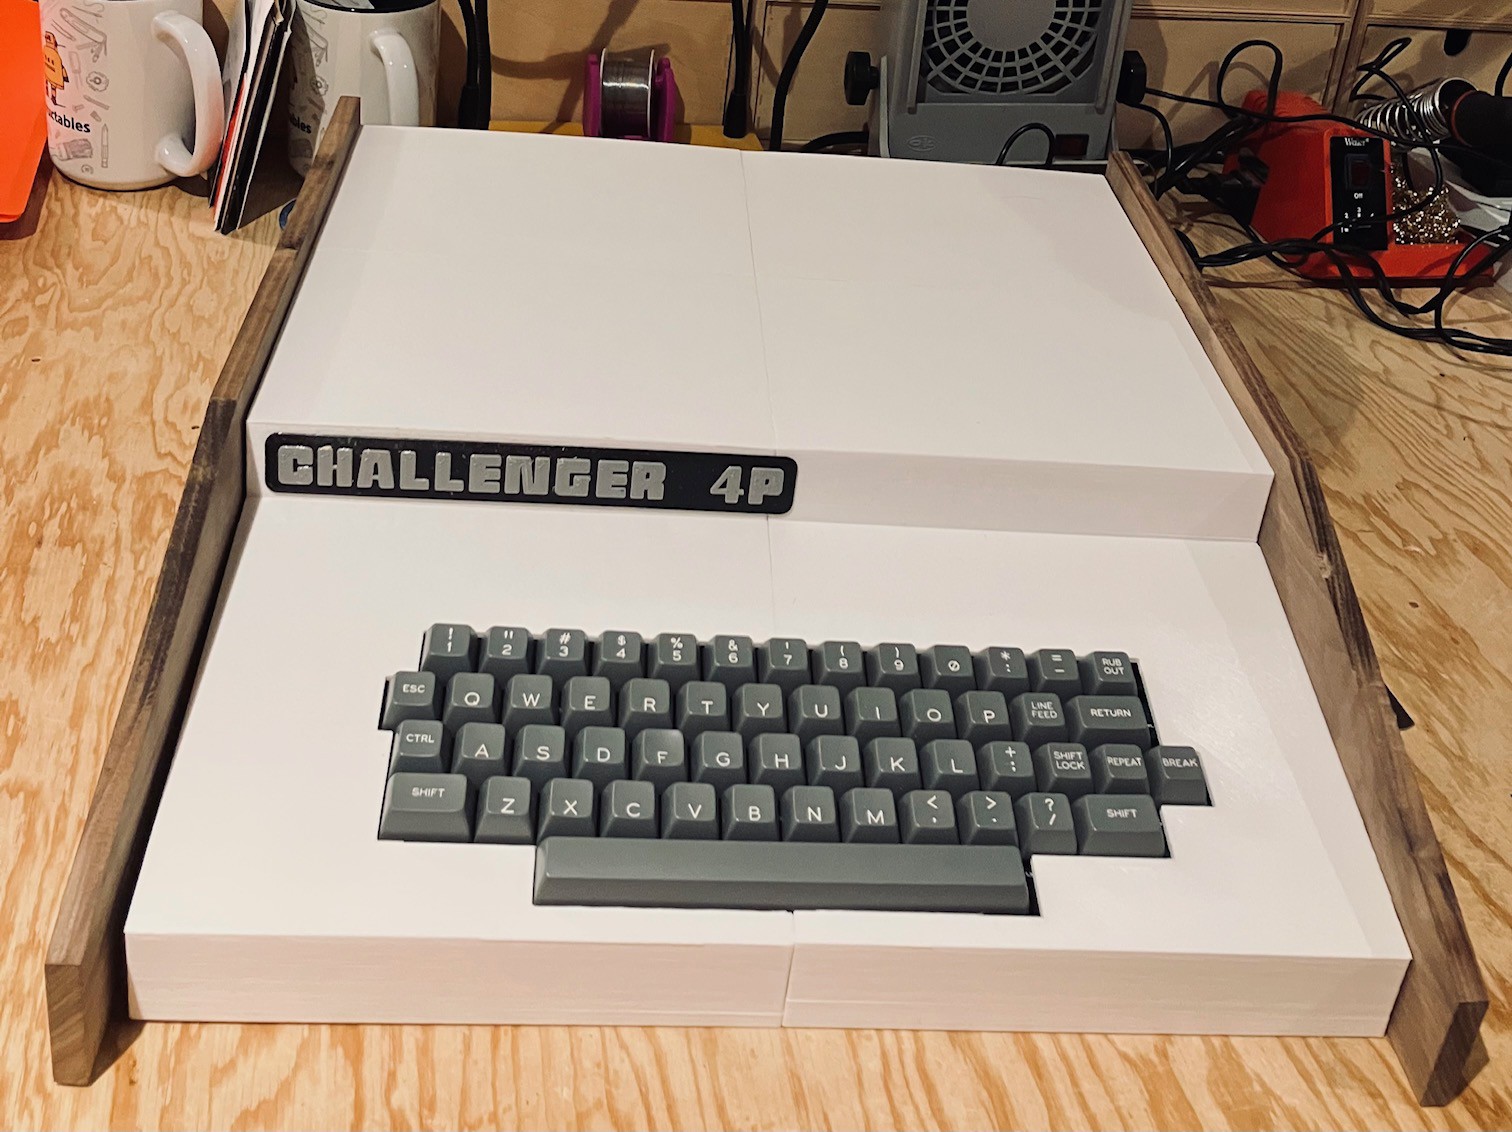
Even though not necessary, for authenticity I thought about adding the 14 or so screws that can be seen on the top of the original's case, but in the end decided that I liked the cleaner look of what I have.
So this marks a milestone in my project. With the case complete I was able to change the primary photo for this project post to be my reproduction's, replacing the original's photo that I was using as a place holder.
Discussions
Become a Hackaday.io Member
Create an account to leave a comment. Already have an account? Log In.
You did it again ! What a fine reproduction. I do think that by now you may be running out of space for all these full size computers...
Are you sure? yes | no
Thanks Cees. Ya for sure. I need to do more like your ZX80 or my KENBAK 2/5 scale reproduction.
Are you sure? yes | no