Close
0%
0%

Taz 5 BTT SKR 3 Refit

Lulzbot Taz 5 rebuild with a BigTreeTech SKR 3 and 5160 Drivers
Similar projects worth following
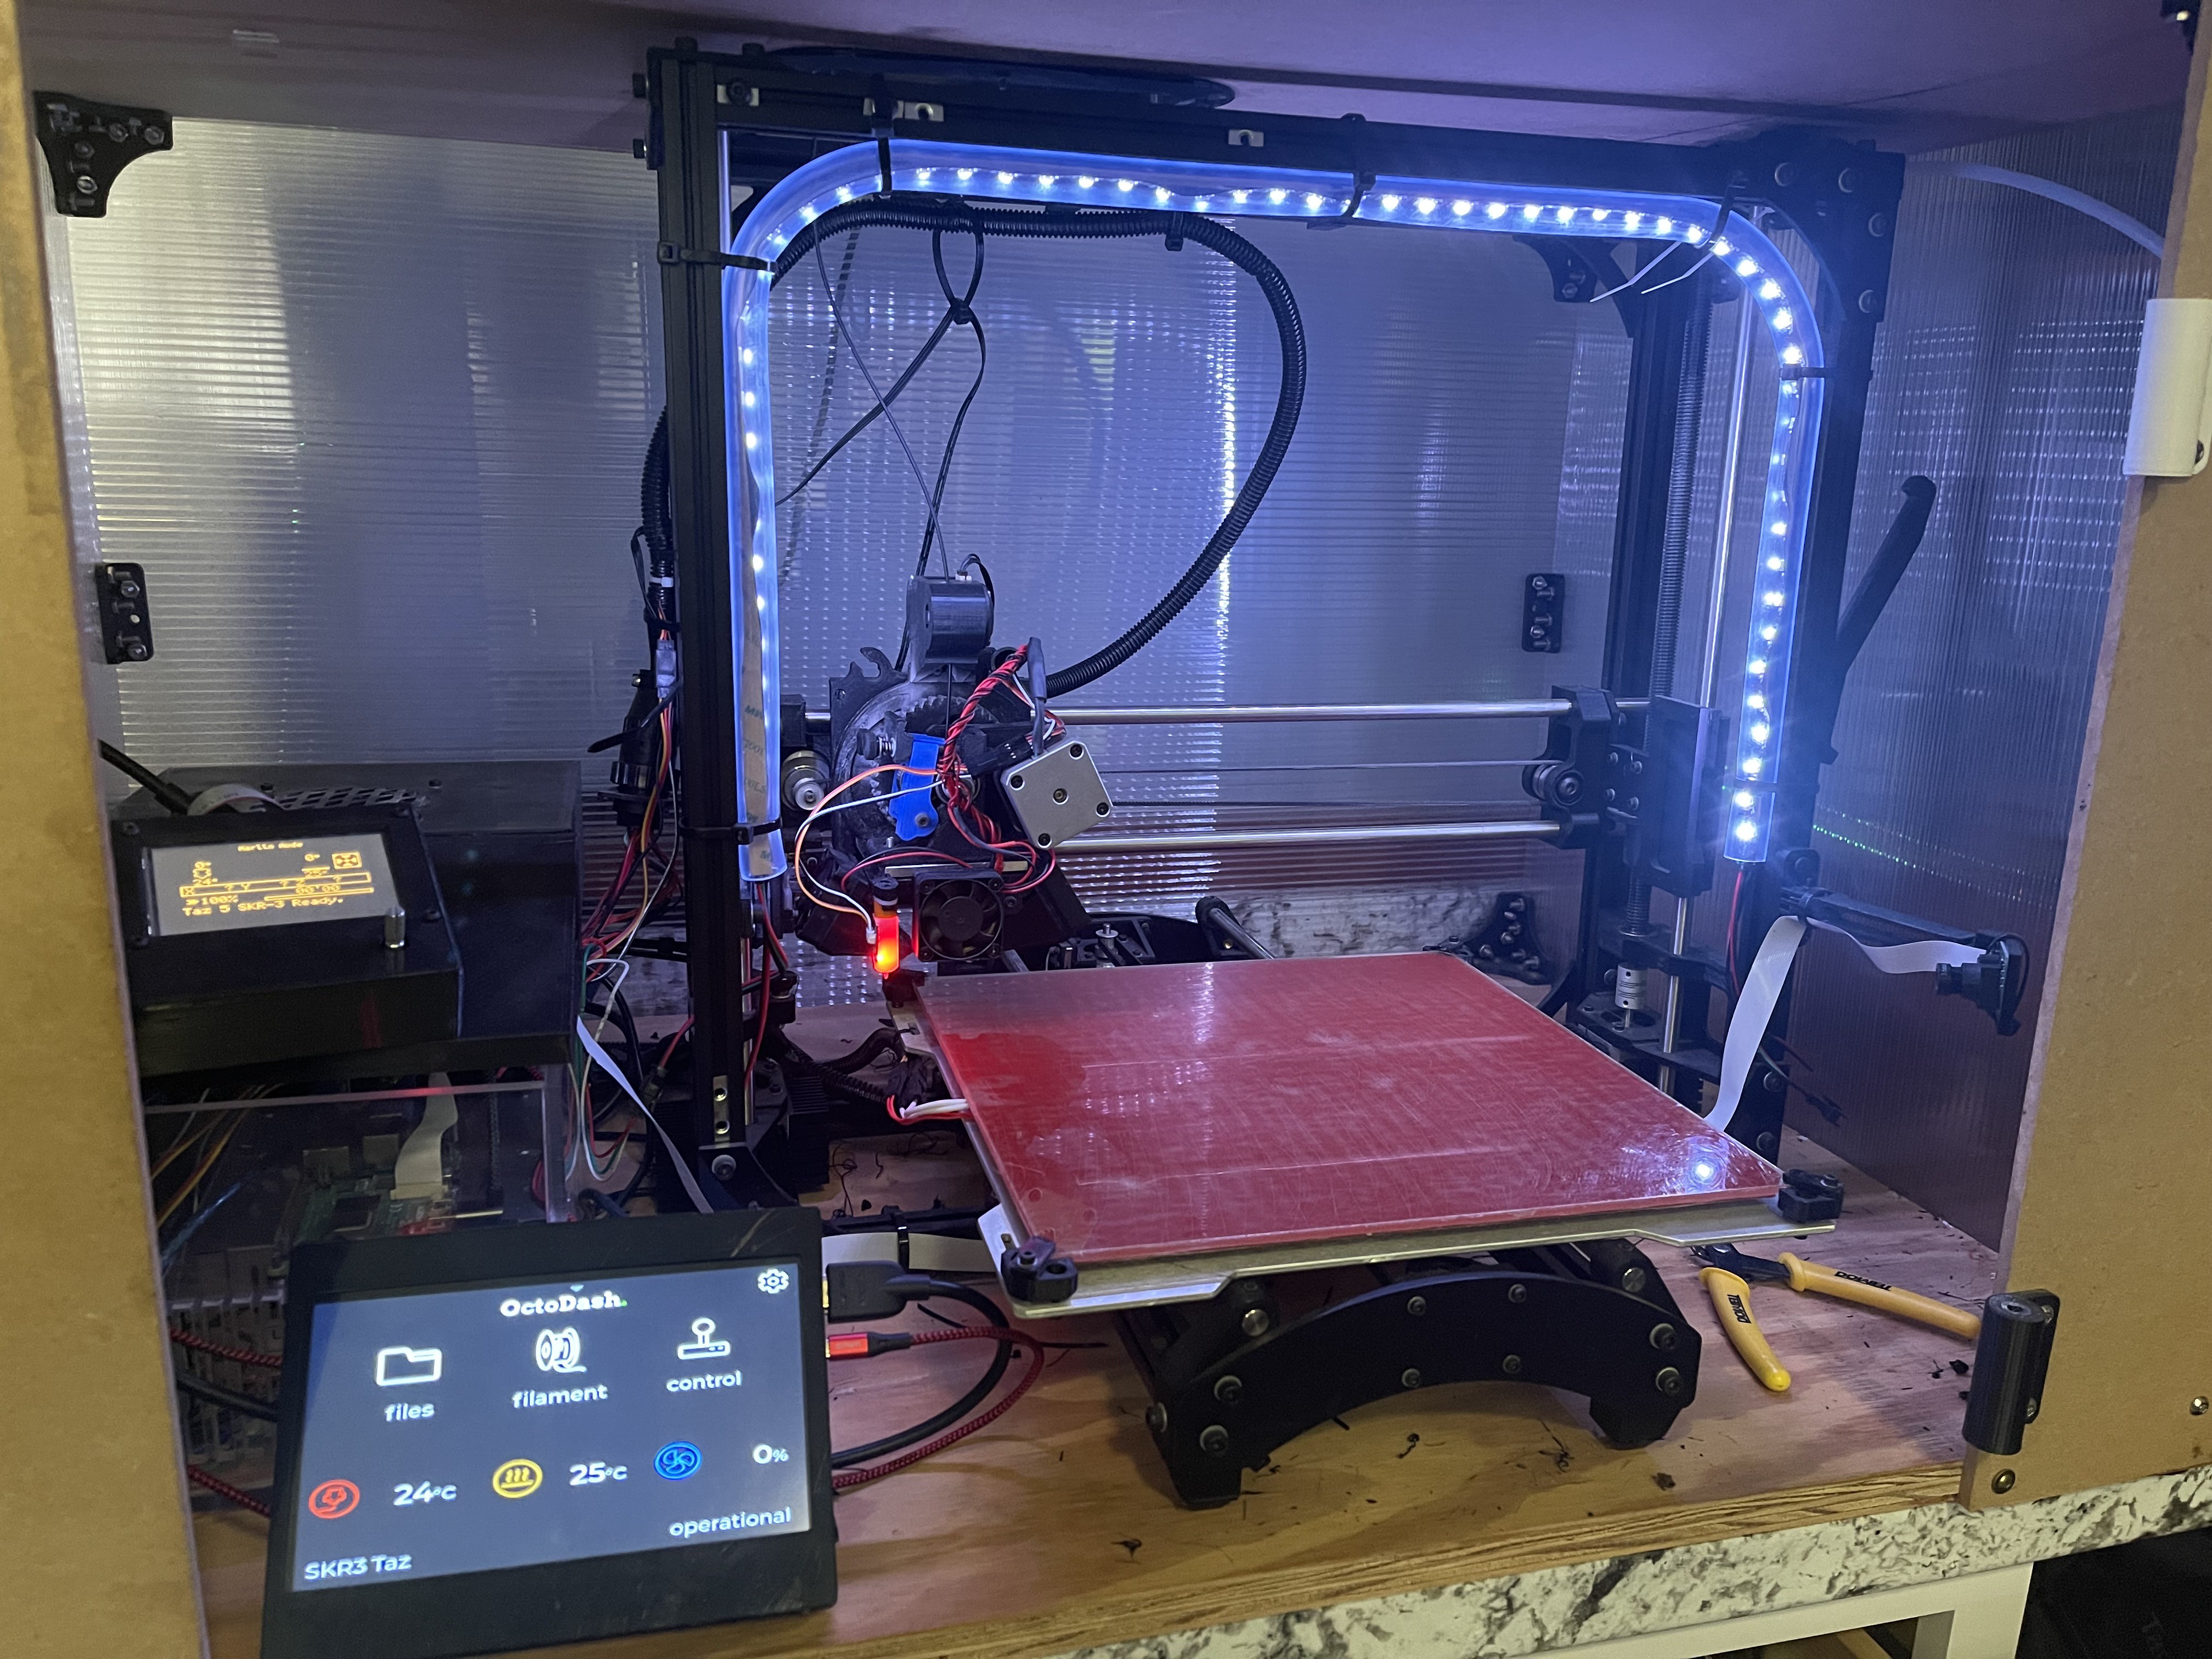
After years of loyal service and what must be miles of filament my faithful Lulzbot 5 RAMBO board Z Axis driver has burned out. It is a sad day, but as opposed to replacing with the same hardware I'm taking the opportunity to install a more modern hardware system from BigTreeTech. This project will chronical my journey and pitfalls through this process in the hopes of helping someone else later.

If you are working on a similar system, here is a link to the GIT Repository for my Marlin. I went with a Clone as opposed to a Fork. I'm only planning to apply hardware specific changes and once the printer is working as desired, not update again. That is unless something AMAZING is added to Marlin.

AardvarkMan/Marlin_Taz5_BTT_SKR3

  • 1 × Lulzbot Taz 5 The patent in this transplant operation
  • 1 × BigTreeTech SKR 3 EZ Control Mainboard As of the the of this project, this is the latest board from BigTreeTech with a new driver installation that uses slot based drivers.
  • 5 × EZ5160 Drivers These new super quiet drivers can run up to 48volts.
  • 1 × BTT FFT35-E3 V3.0 Display Color display for the printer controller
  • 2 × BLTouch V3.1 BL Touch for bed leveling

View all 12 components

  • Closure in an Enclosure

    Marcel Chabot09/14/2023 at 16:59 0 comments

    It has been a while from my last update, and everything has been running great.

    I've run through many spools of filament over 100's of hours of operation and it runs better then when I got it new. I'm going to call this project a success.

    Thank you for reading about my project, if you have any questions, please feel free to reach out.

  • After the Brain Transplant, why not the heart?

    Marcel Chabot12/06/2022 at 22:38 0 comments

    After finishing with the electronics, and getting everything calibrated, I started having flow issues on the extruder. 

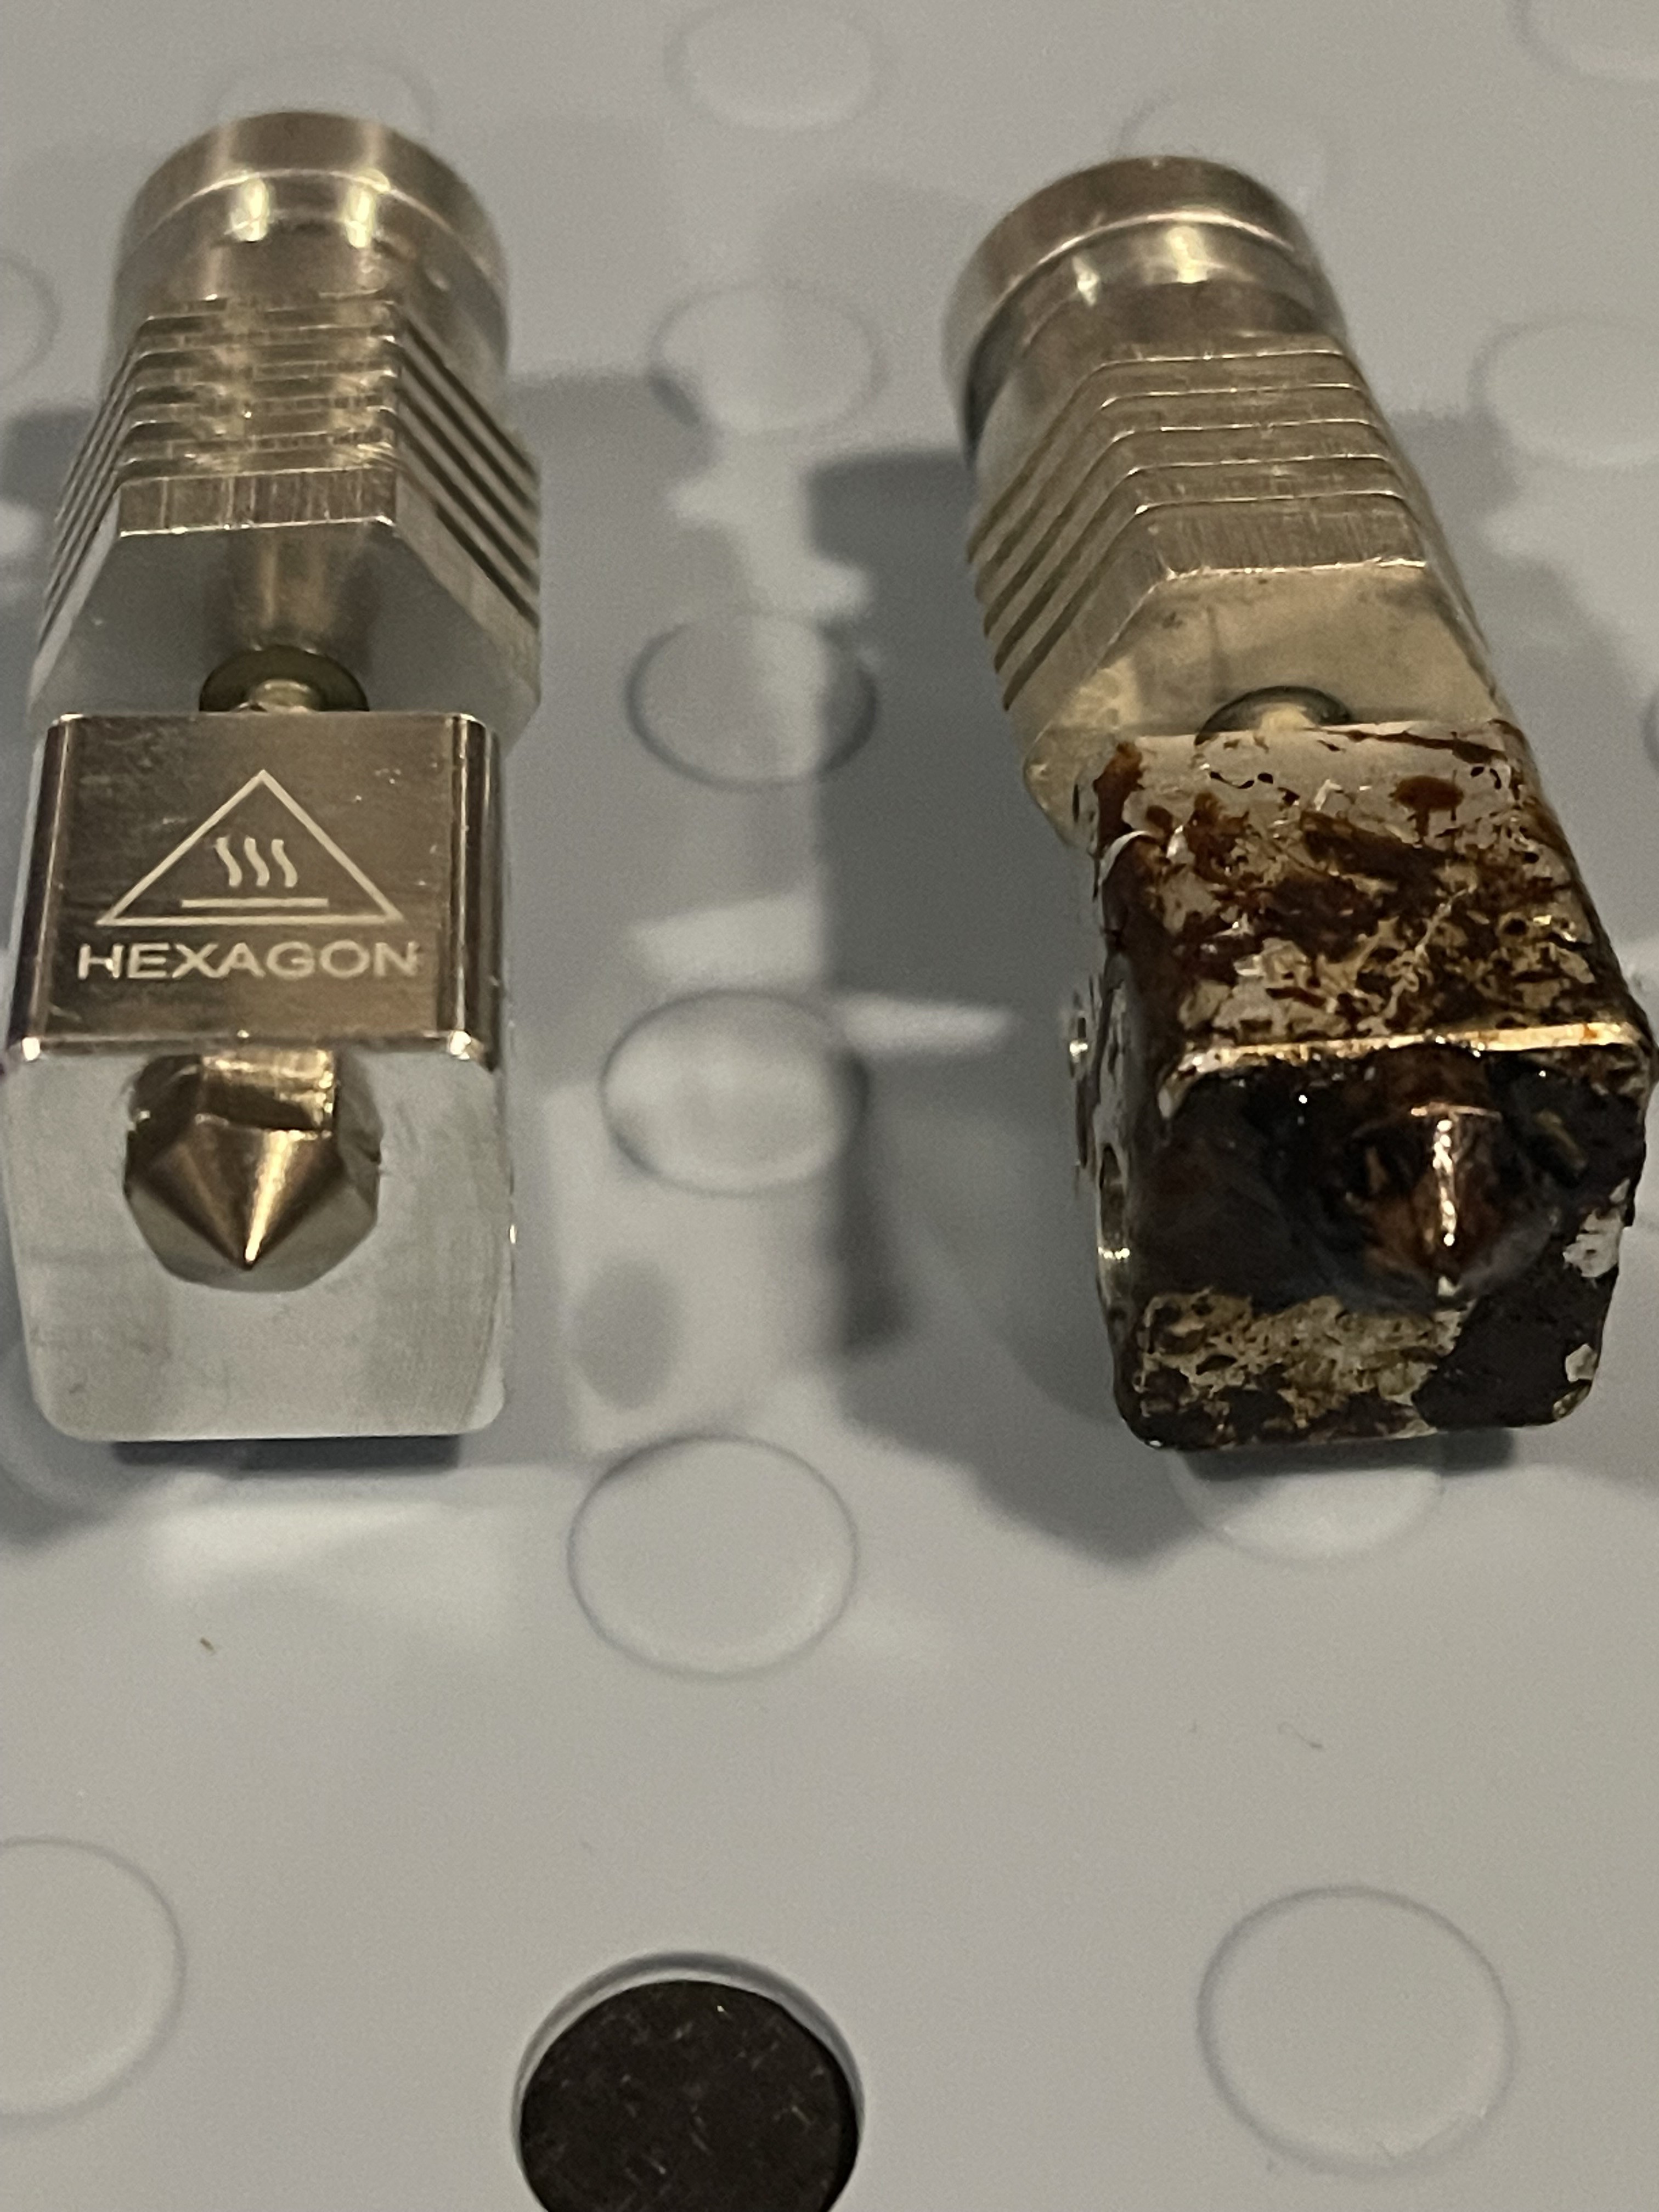
    The Hexagon hot end I have is a 3.0 mm filament unit with a 3.0 mm OD and 1.75mm ID PTFE Tube stuffed down the barrel to convert it to 1.75 mm so I can use all the filament the cool kids do. Just being honest, 3.0mm filament doesn't get the love, or flash sales, that 1.75 does. My extruder has seen a lot of filament over the years, I might as well replace it.

    The folks at 3d Printers, Toolheads and Parts for Lulzbot, Filament, Repairs and More!! - IT-Works 3D (itworks3d.com) sell just the bits I need. I have two extruder sets so I purchased the same Hexagon hot ends I have, but in 1.75mm inner diameter, as well as 0.5 mm and 0.3 mm nozzles. I went with the Micro Swiss plated nozzles for extended wear protection.

    While it didn't say, the hot ends came preloaded with 0.3 mm brass nozzles. Using my heat gun to heat the tool head to 400 degrees, and a little more torque then I would have expected, I got the supplied nozzle off, and the Micro Swiss ones installed. I moved the heater and temperature sensor from the old hardware to the new hardware and everything worked like a champ.

    The folks at IT-Works 3D are amazing. I accidentally ordered the wrong nozzles, 3.0 mm ID not the 1.75 mm ID and they helped me find the right ones. Fast shipping, great support. 

    Everything appears to be printing like new again.

  • It's alive, IT'S ALIVE

    Marcel Chabot11/17/2022 at 01:07 0 comments

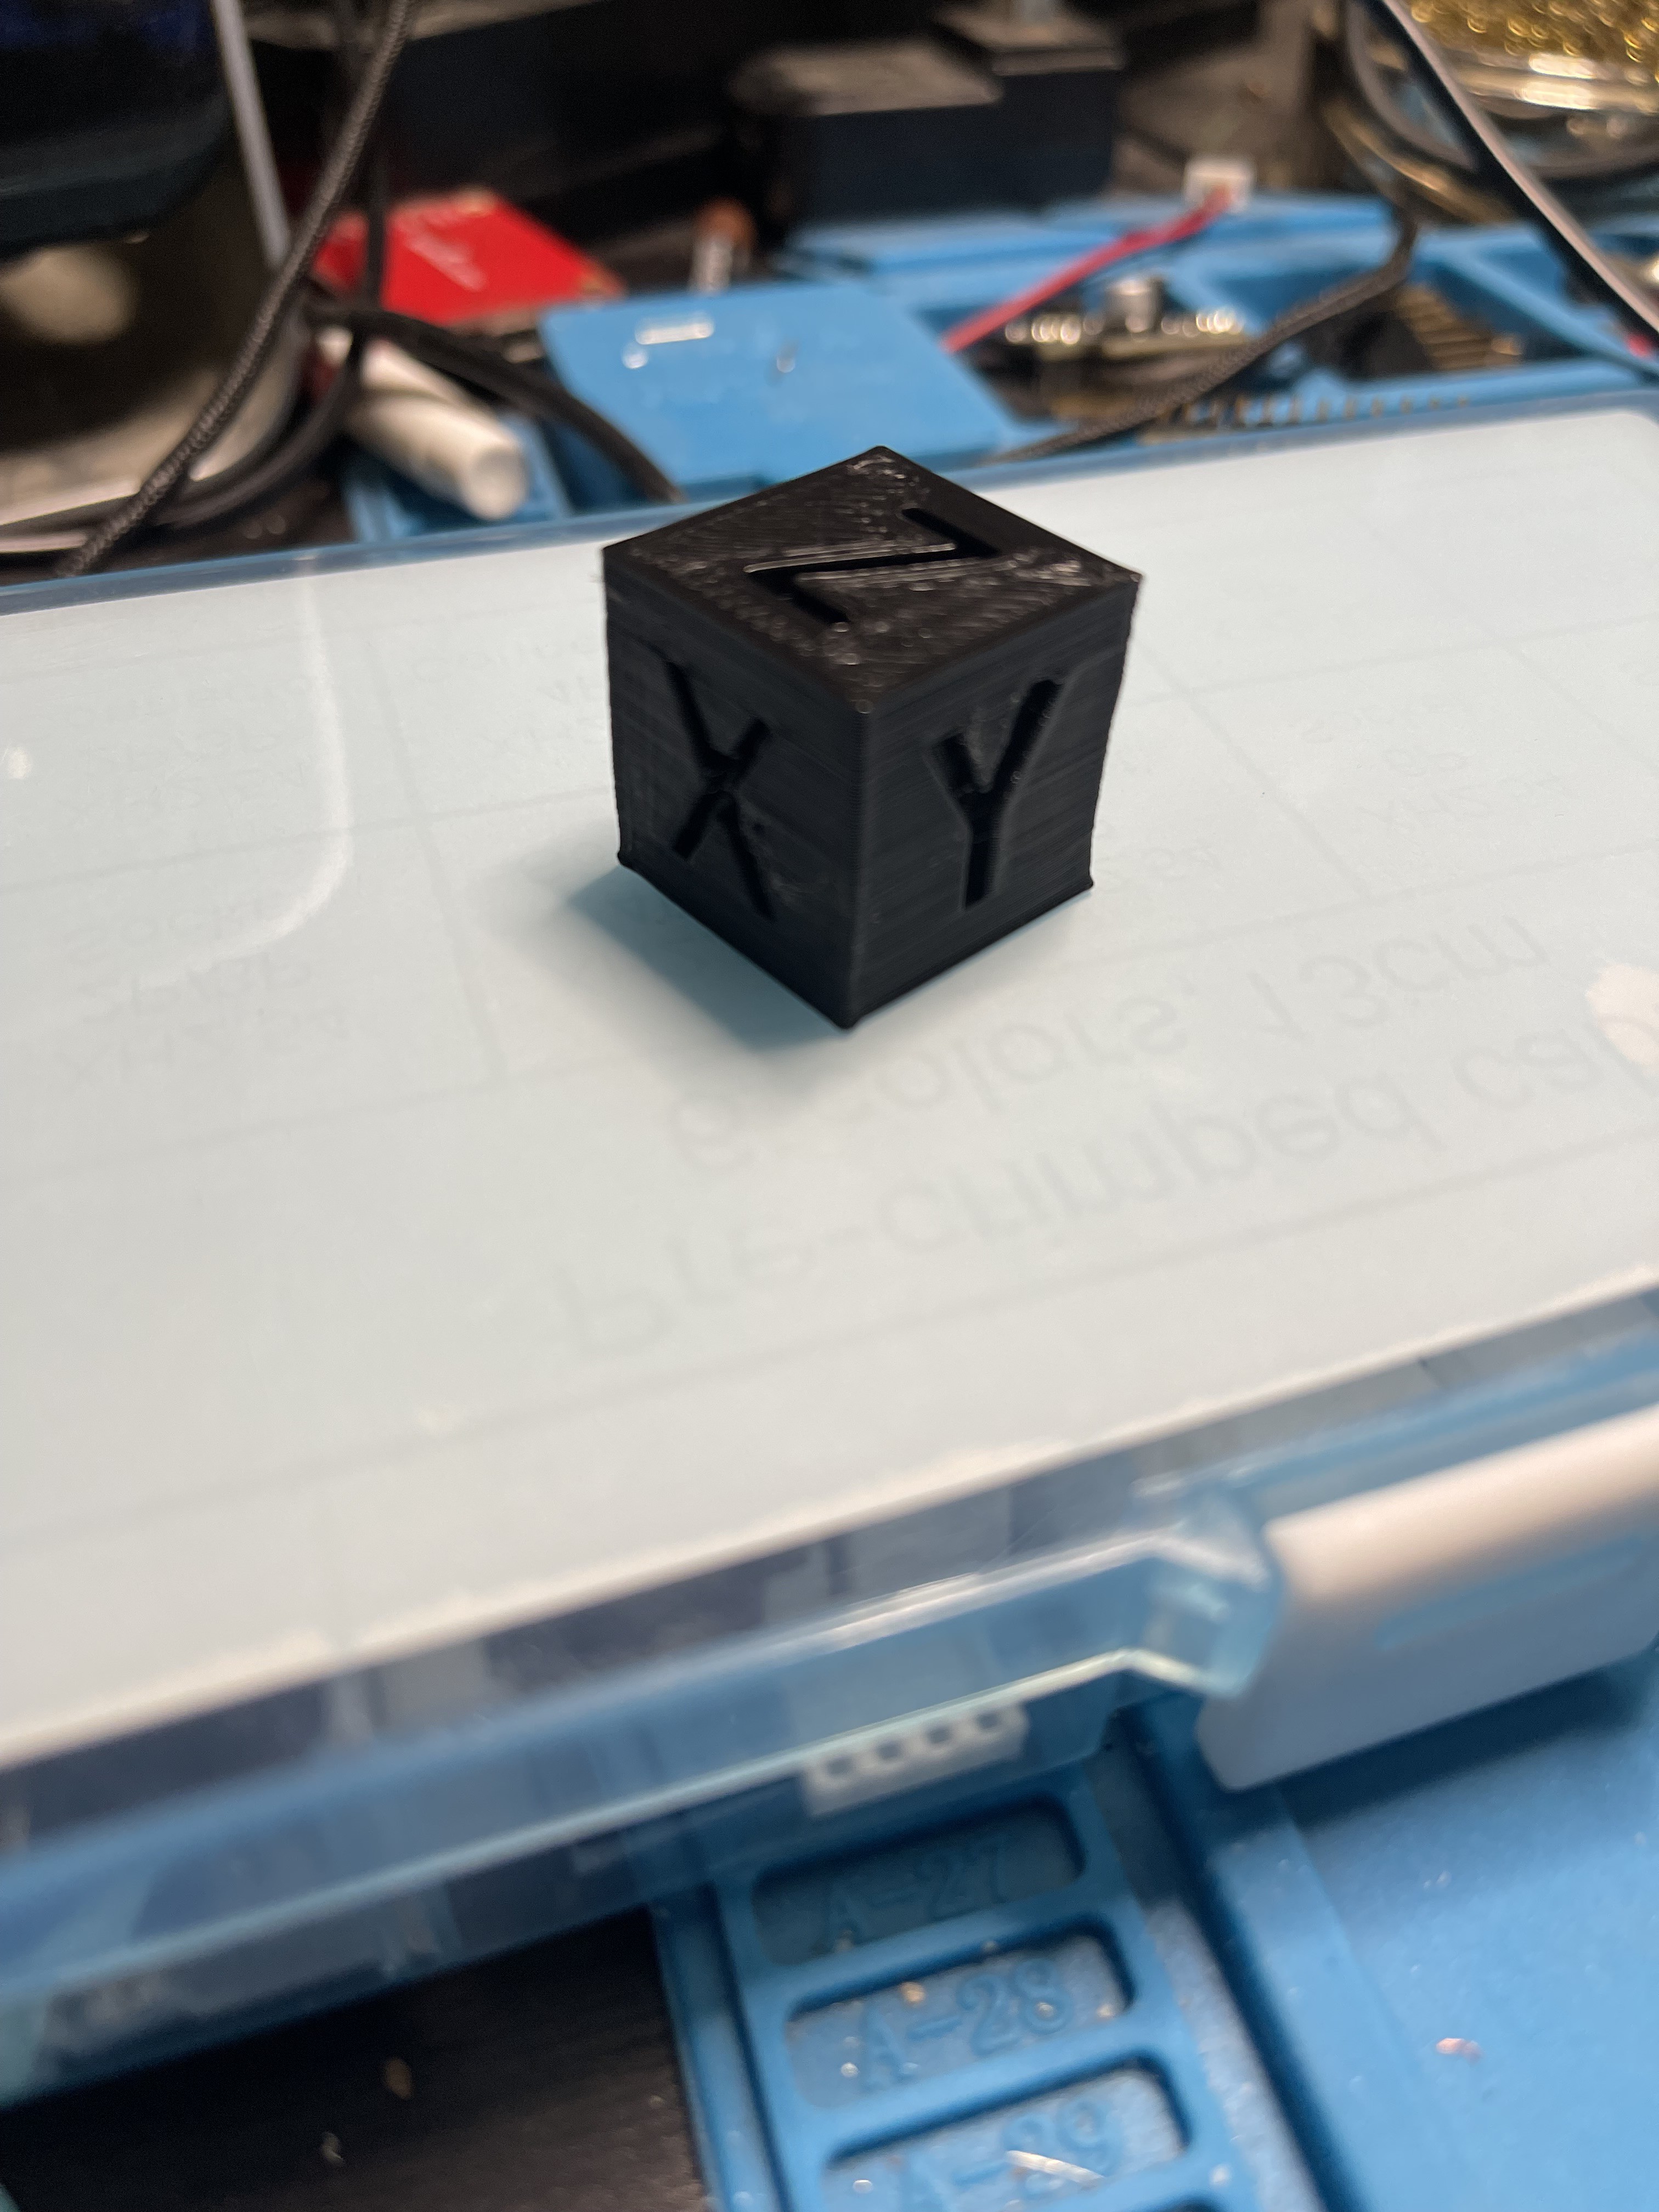
    Never has a single piece of dimensional plastic made someone so happy.

    If you don't look too closely, it isn't half bad. I started a little too close to the print bed, and the filament has been sitting out in my workspace for a few months absorbing moisture, so there is a bit of under and over extrusion. The extruder is also retracting WAY to fast... but for a first print, I'll take the win!

    The printer ran smoothly, the new drivers are nice and quiet.

    The case fan isn't in the final configuration.

    RGB Lights are working, but I want better control, so I'll have to add some G-Code to my start and stop scripts.

    Octo-Print came online like a champ, a few updates and I was running.

    I think my Z-Probe Offset is a little too close, but I can play with that.

    All in all, I'm super happy. I have a bit of tuning to get back to the quality I had before, but nothing drastic.

    Today is a good day.

  • Baby (Micro) Steps

    Marcel Chabot11/15/2022 at 18:01 0 comments

    It has taken a little time, but I've crafted an enclosure. I don't like it, the holes are in the wrong positions, there isn't enough clearance in some places, too much in others, but it is good enough for me to keep things contained.

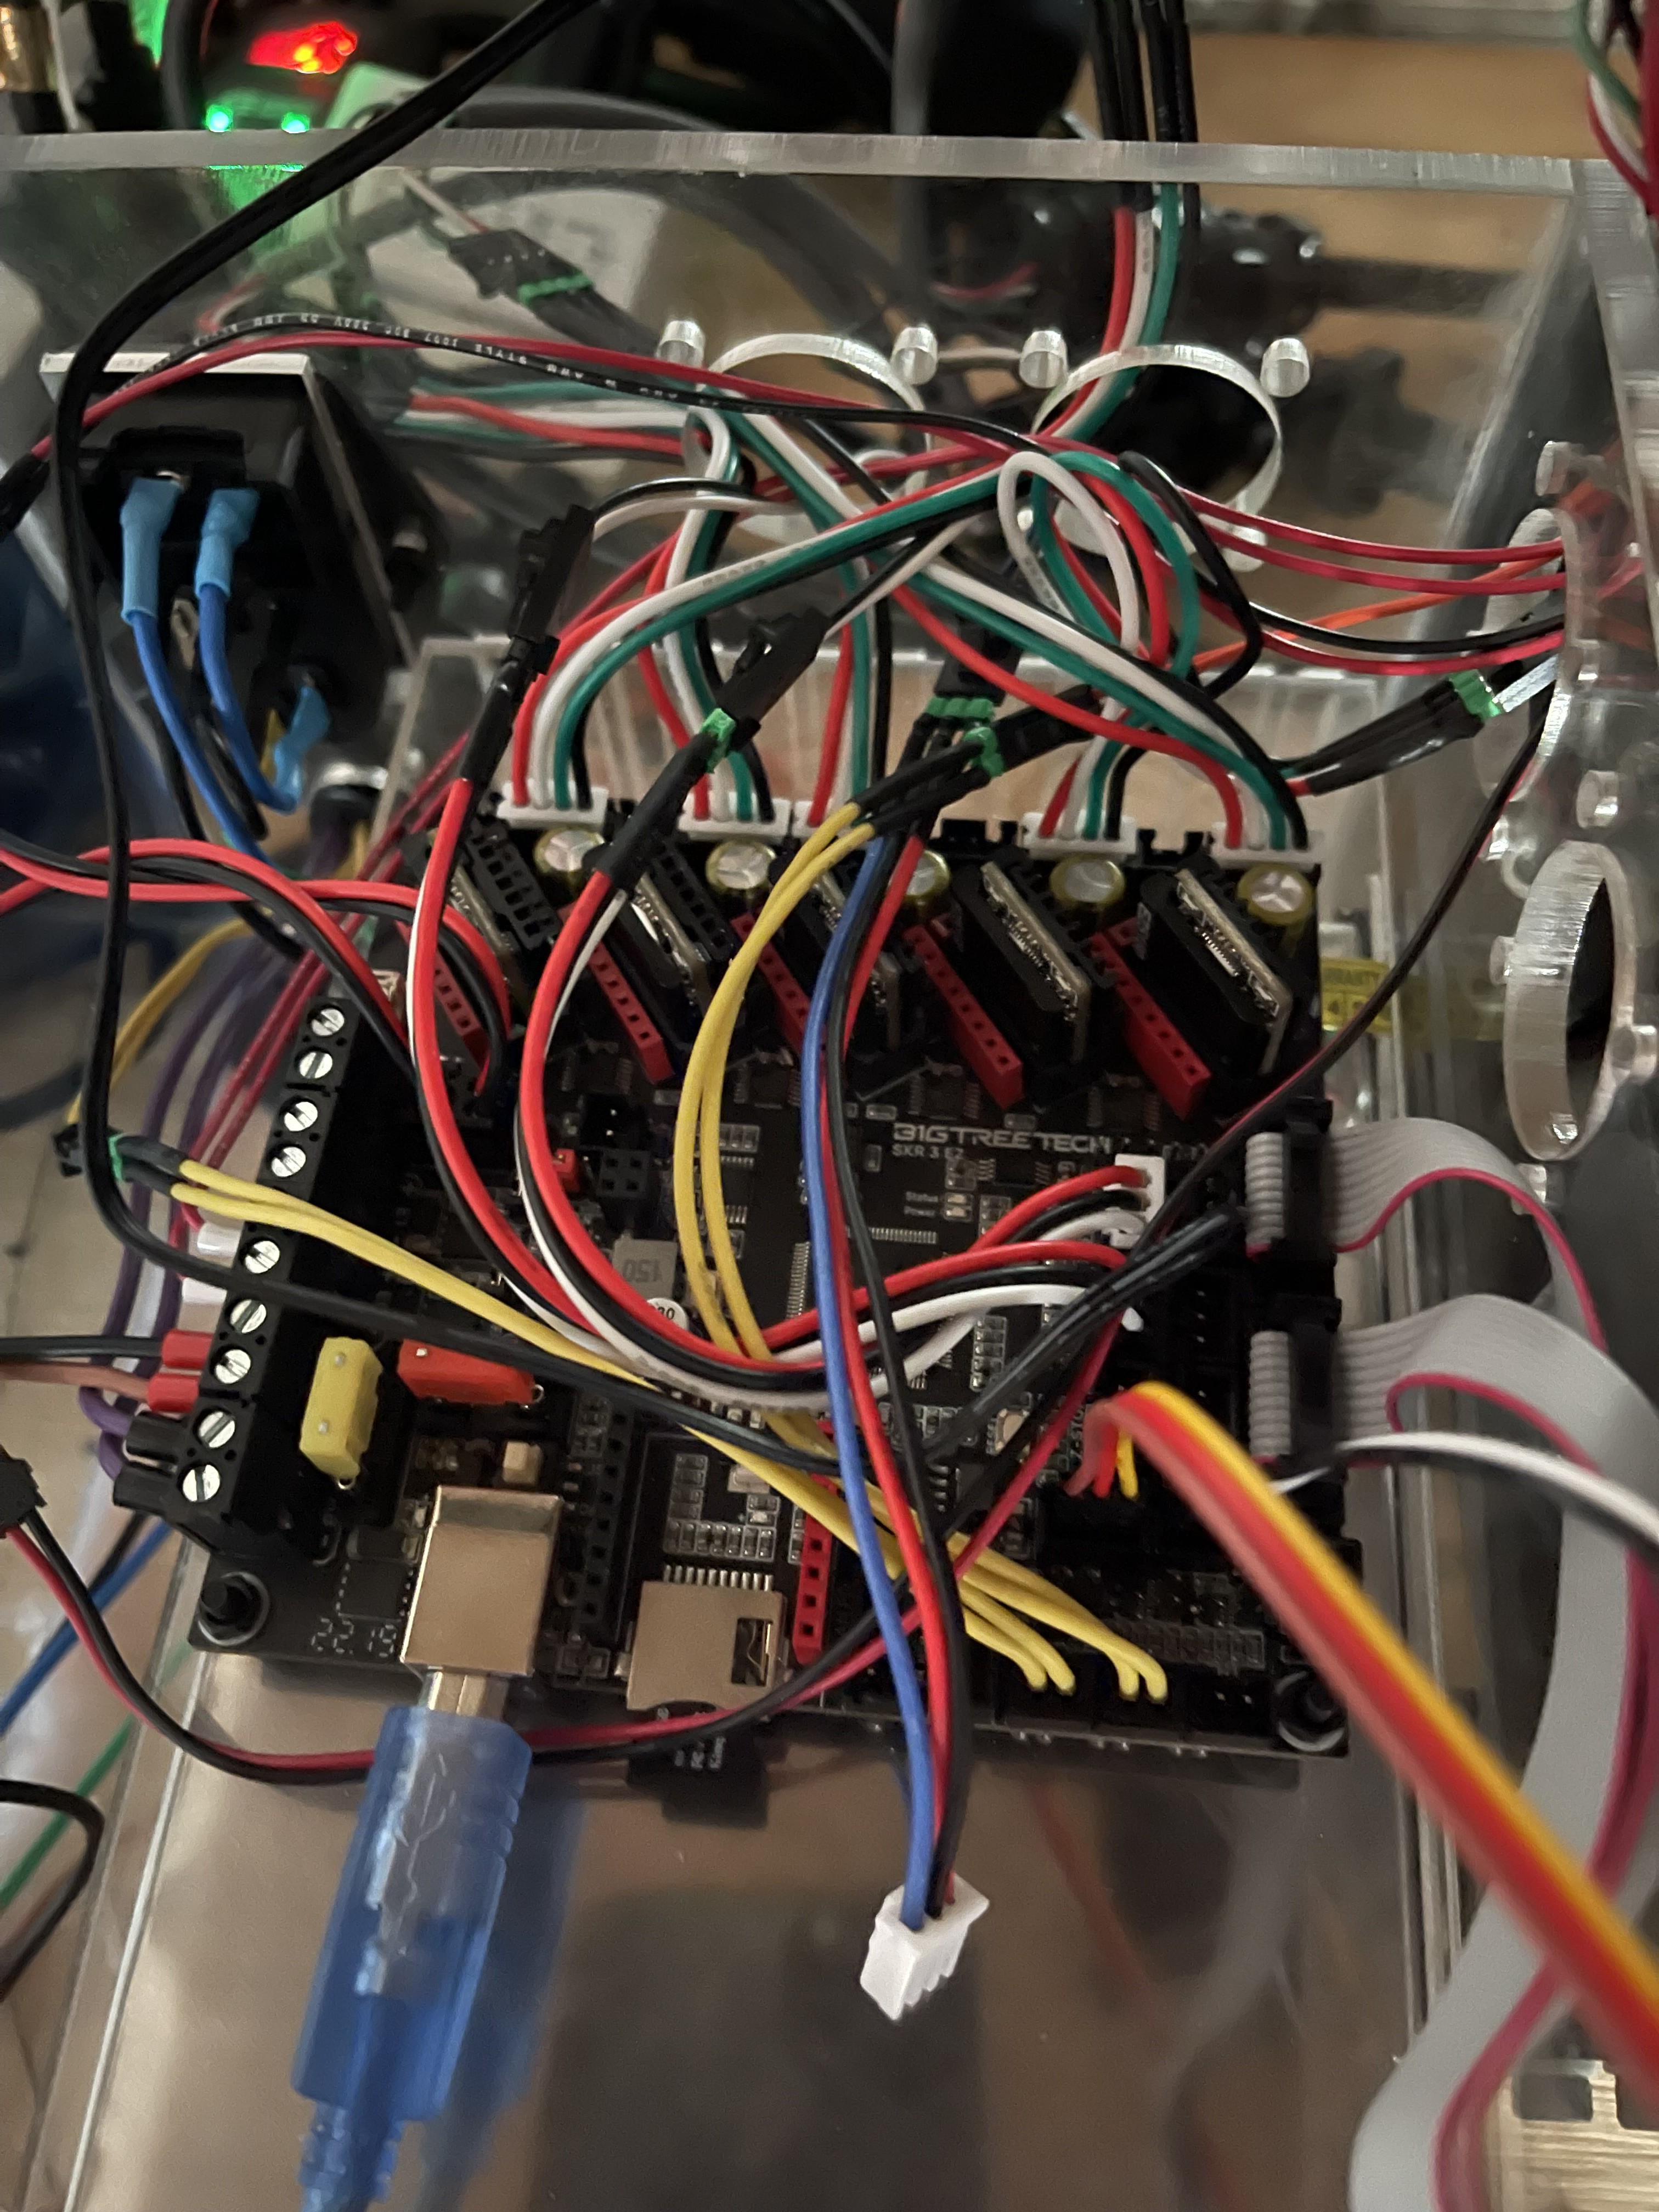
    Here is the controller in its box. Most of the time has been me and Marlin working together to solve some problems.

    Challenges:

    One of the two BL Touch units I have is bad. It goes into probe mode, but when making contact with the bed doesn't trigger. My other one triggers just fine. I have two extruders I'm configuring so I can live with one while the other is replaced.

    Some of the driver modules I have from BTT are reporting a TMC Communications Error, I'm working with BTT to get those replaced. I have an extra module so I'm able to continue.

    Progress:

    All Steppers are moving! Better yet, moving in the correct directions.

    I've configured the system for dual Z steppers. I don't have a dual extruder, nor do I intend to add one. I've configured the second extruder channel to be a second Z axis stepper. The board supports one Z stepper driving 2 motors, but why have that extra load on the driver. Additionally, that enabled me to auto tram the Z and X axis.

    BL Touch is working. I have auto bed leveling and am using the BL Touch as the Z Axis probe.

    Things I have left to do:

    1. Case Fan

    2. Finish the BL Touch calibration

    3. Filament runout sensor configuration

    4. RGB Light configuration

    5. Connect in with the Octo-print system I had before

    6. Calibrate all the other printer bits.

    A lot to do, but progress is being made.

  • Power to the People

    Marcel Chabot10/13/2022 at 01:58 0 comments

    My original plan was to use the power supply from the Lulzbot Taz. It has a lot of hours on it, and while I'm taking things apart, why include an older element. I only assume the cause of death for the old RAMBo controller was simple age. 

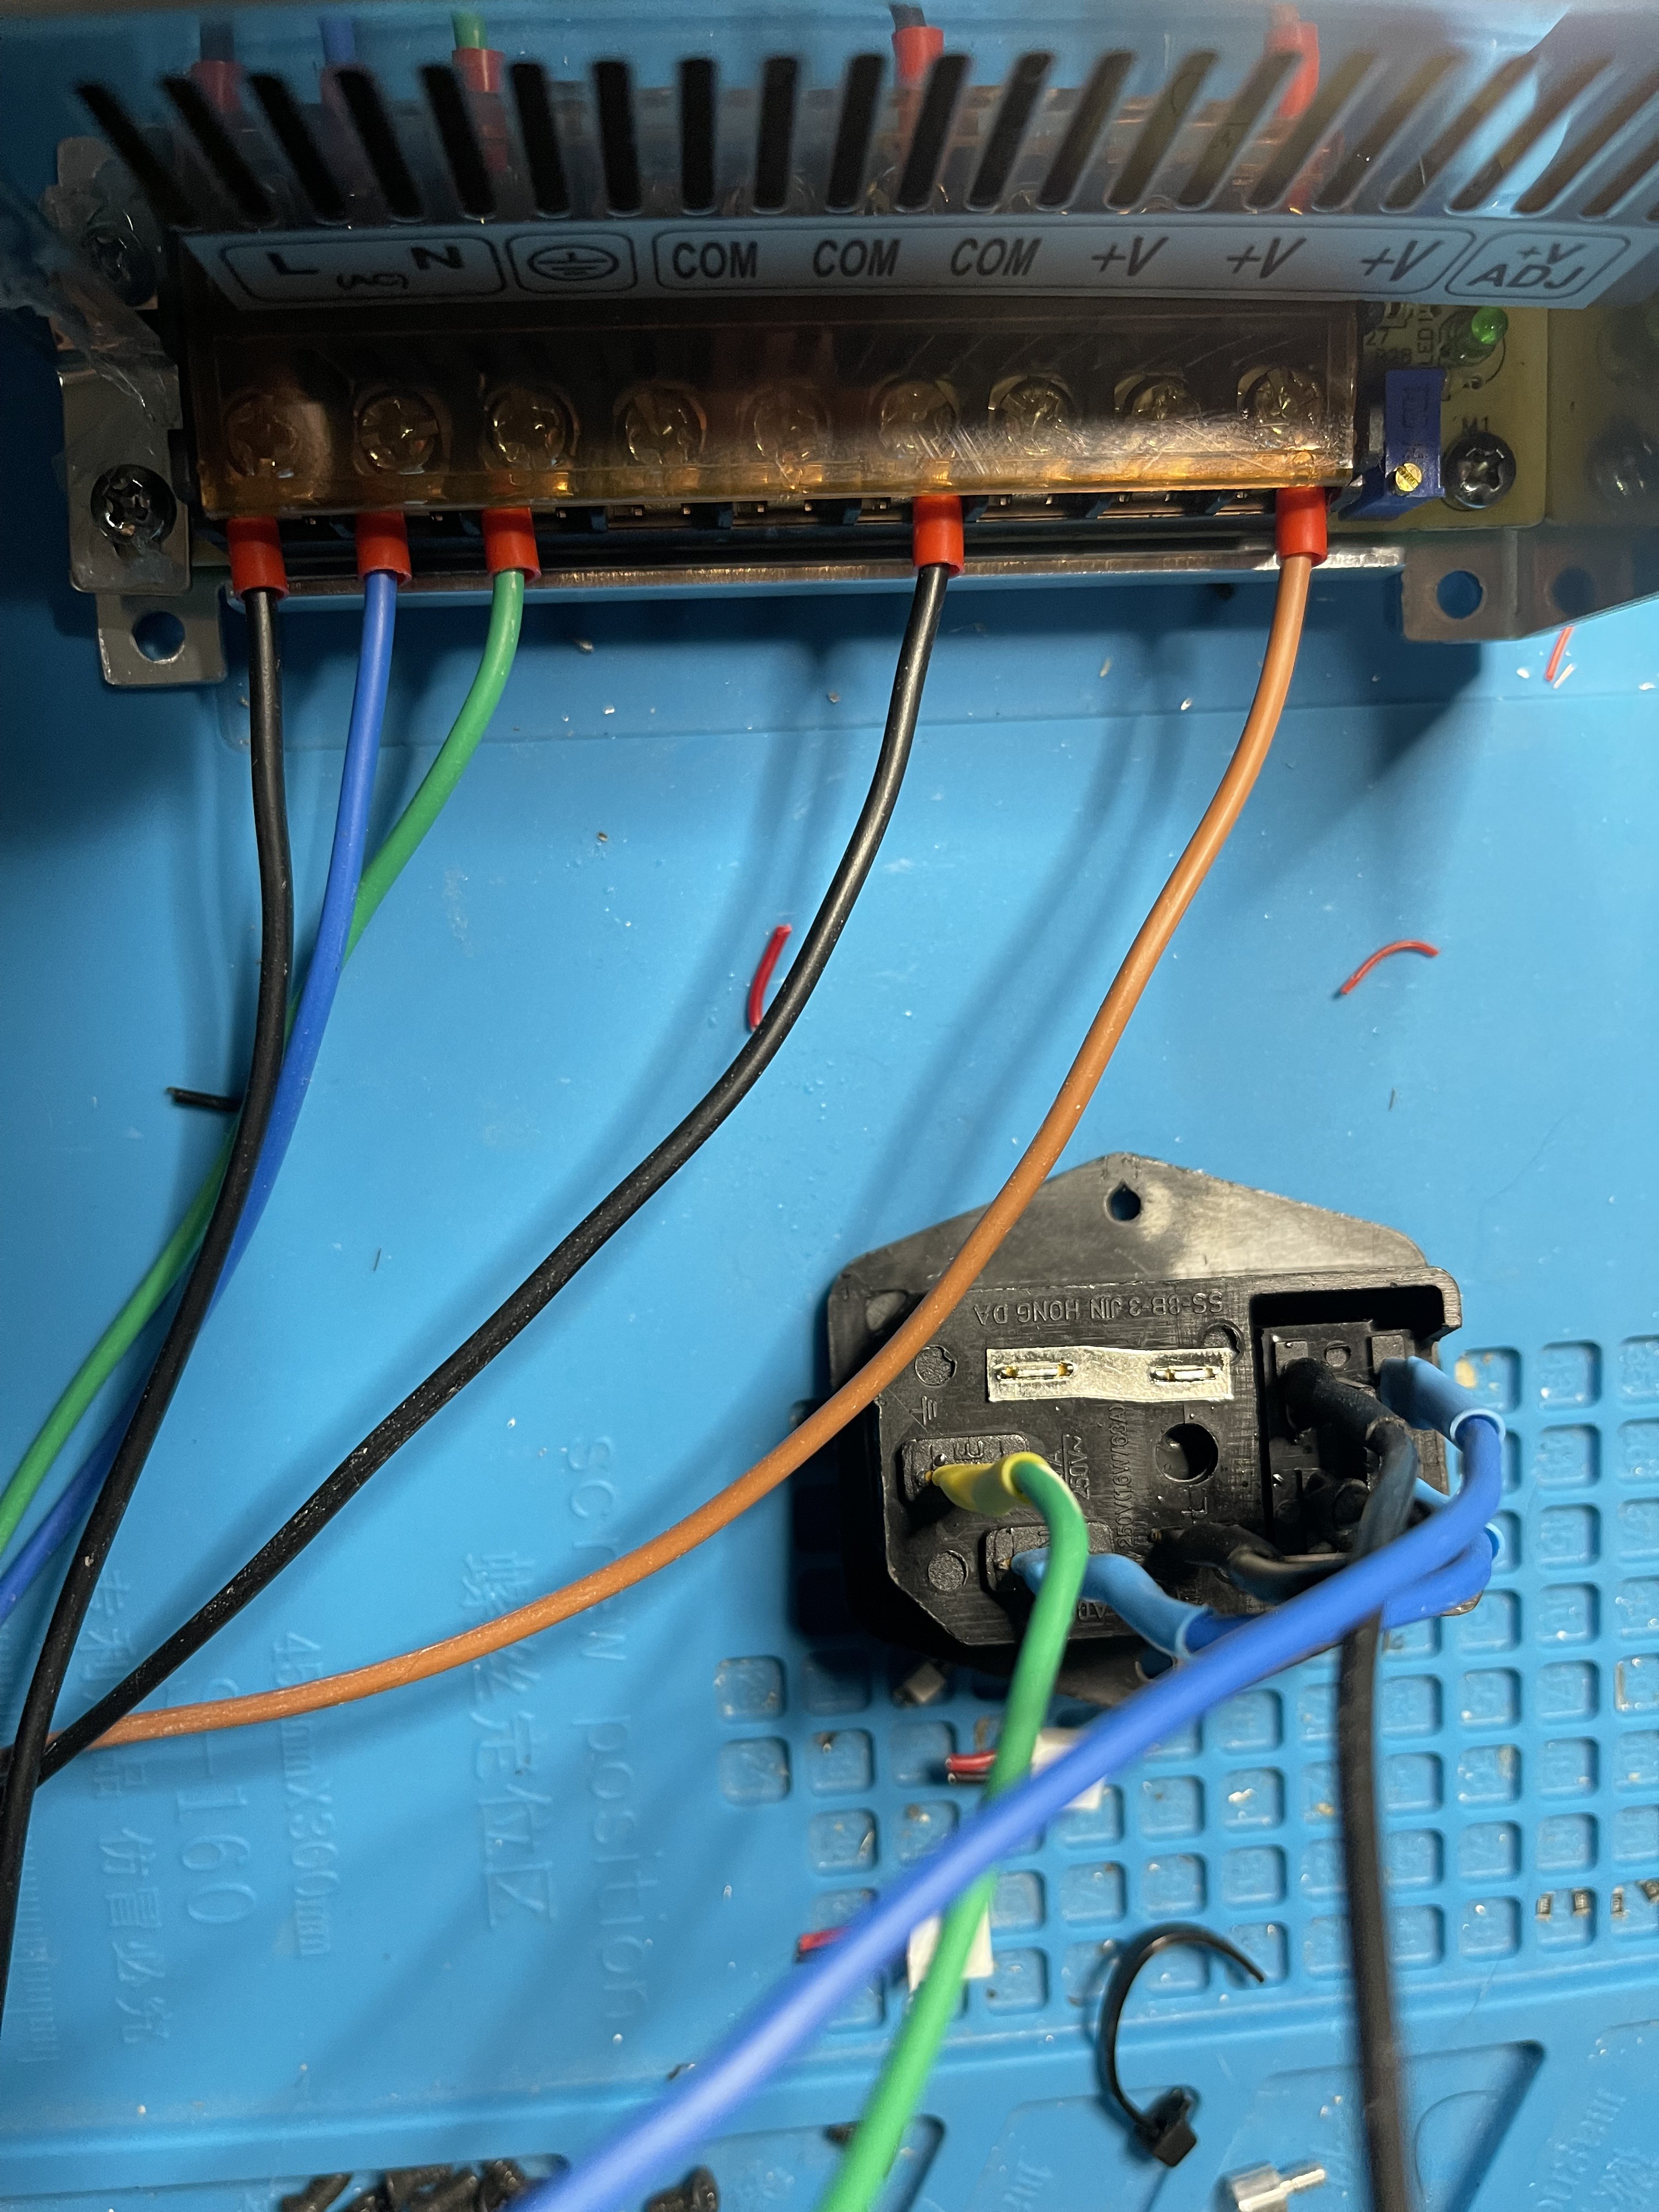
    New 24 volt, 500watt power supply, and a switch to turn it on and off with.

    I had used this switch module before years ago, and ordering it again, nothing had changed. For one the switch is installed backwards, I needed to pop it out, and turn it around so the wires lined up nicely. The switch lights up, so the power must go in on one side and out on the other and with the original orientation the lines had to go diagonal, and I didn't like that.

    The other thing I don't like about this switch is how the fuse is implemented. There is that strip across the back of line voltage, just open to the world. I plan to put this in an enclosure, but while bench testing this can be a real hazard.

    I recently purchased some wire ferrules and a 4-point crimper. It makes wiring to screw terminals nice and clean, and there are no stray wires. While the ferrules are rather generic, get a good crimper. I've used ferrules where I had to crimp in several places for them to hold, and it was a pain. A good crimper makes installation super simple.

    I tuned the power supply to 24 volts exactly with a Fluke 87v. I might have a voltage display in a box somewhere that I may add to the system just to have another readout.

  • Your Biggest Fan

    Marcel Chabot10/13/2022 at 01:43 0 comments

    In an effort to get everything to as native a voltage as possible, I planned to swap out the fans on the extruder to run at 24 volts, and therefor simplify my life. Well, that's exactly what I did.

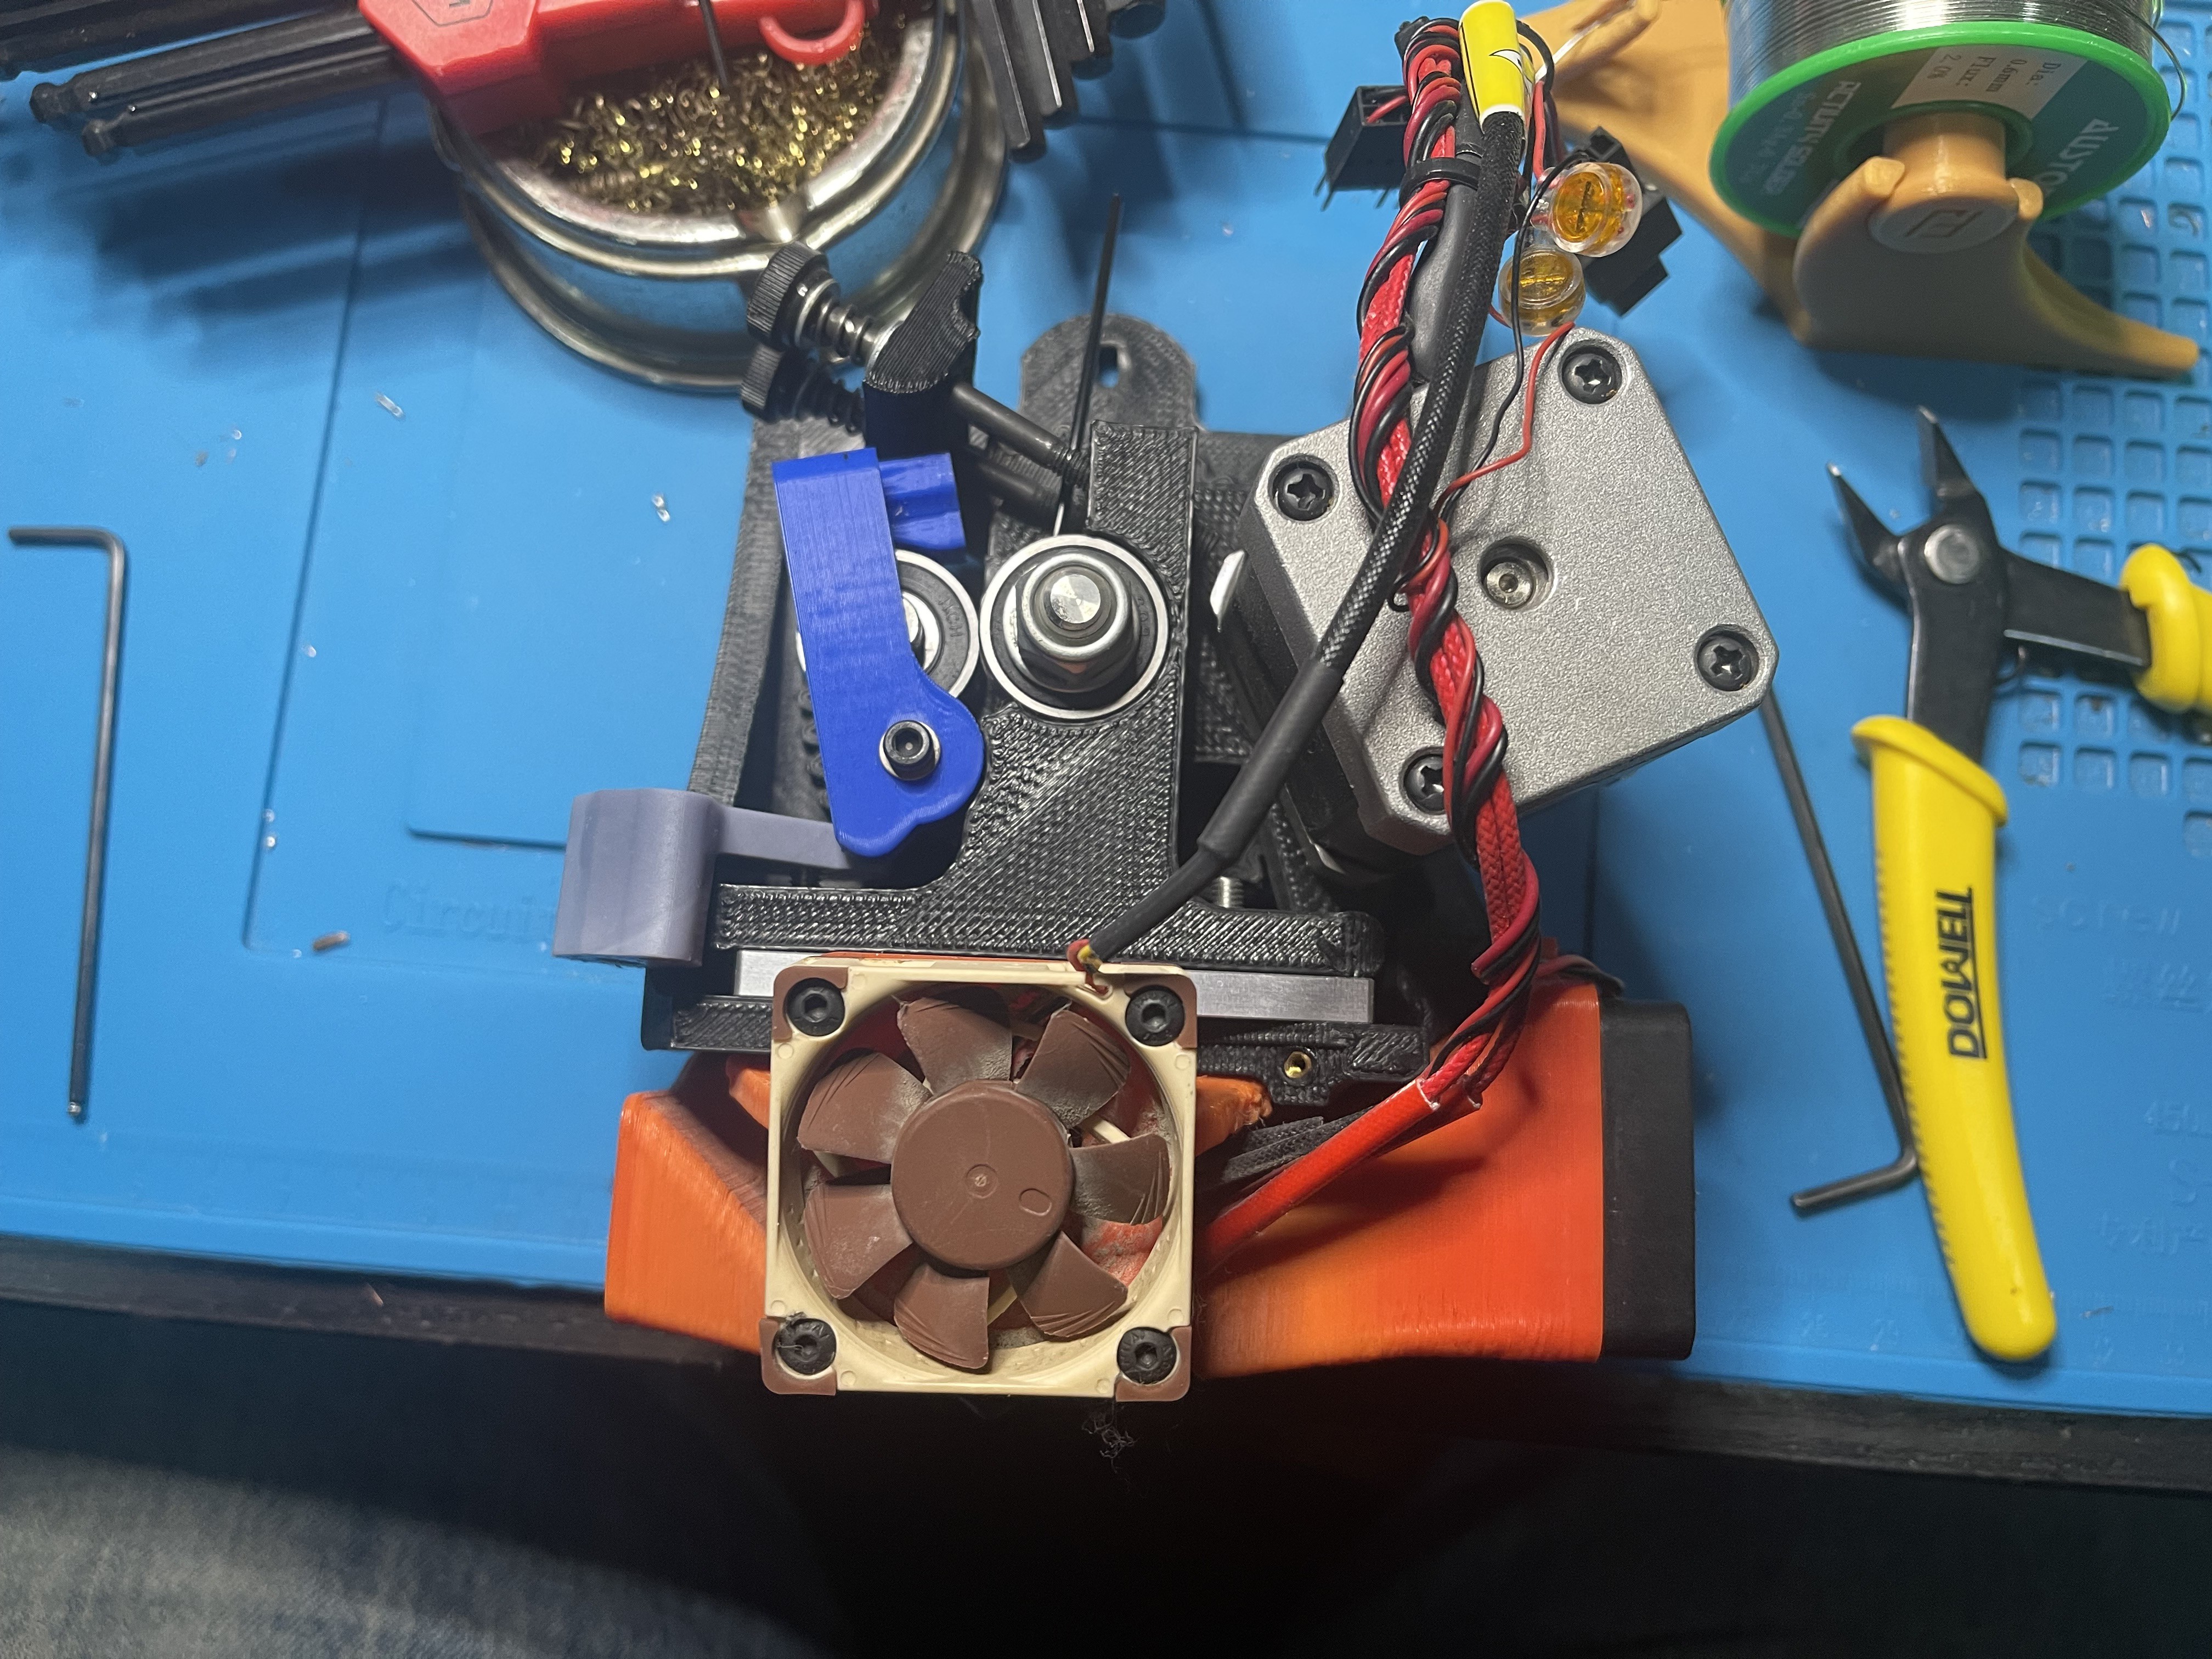
    Here is where I started, the extruder is already heavily modified. The original small squirrel cage blower style fan on the head break has been replaced by the larger Noctura fan in classic brown. The part cooler fan ducting has been replaced with split ducting. The extruder has been fitted with 1.75mm PTFE tubing and a different clamping arm to facilitate printing in 1.75mm filament.

    I switched to 1.75mm filament because so many of the lower cost 3D Printers use it, which makes it in demand. Because it is in demand, there are lots of manufacturers creating interesting filaments, and there are filament sales on 1.75 more often then I see for 3mm. That means that the extruder design here is WAY overkill as it is designed to move and heat 3mm filament, but so far, the performance has been good with 1.75mm.

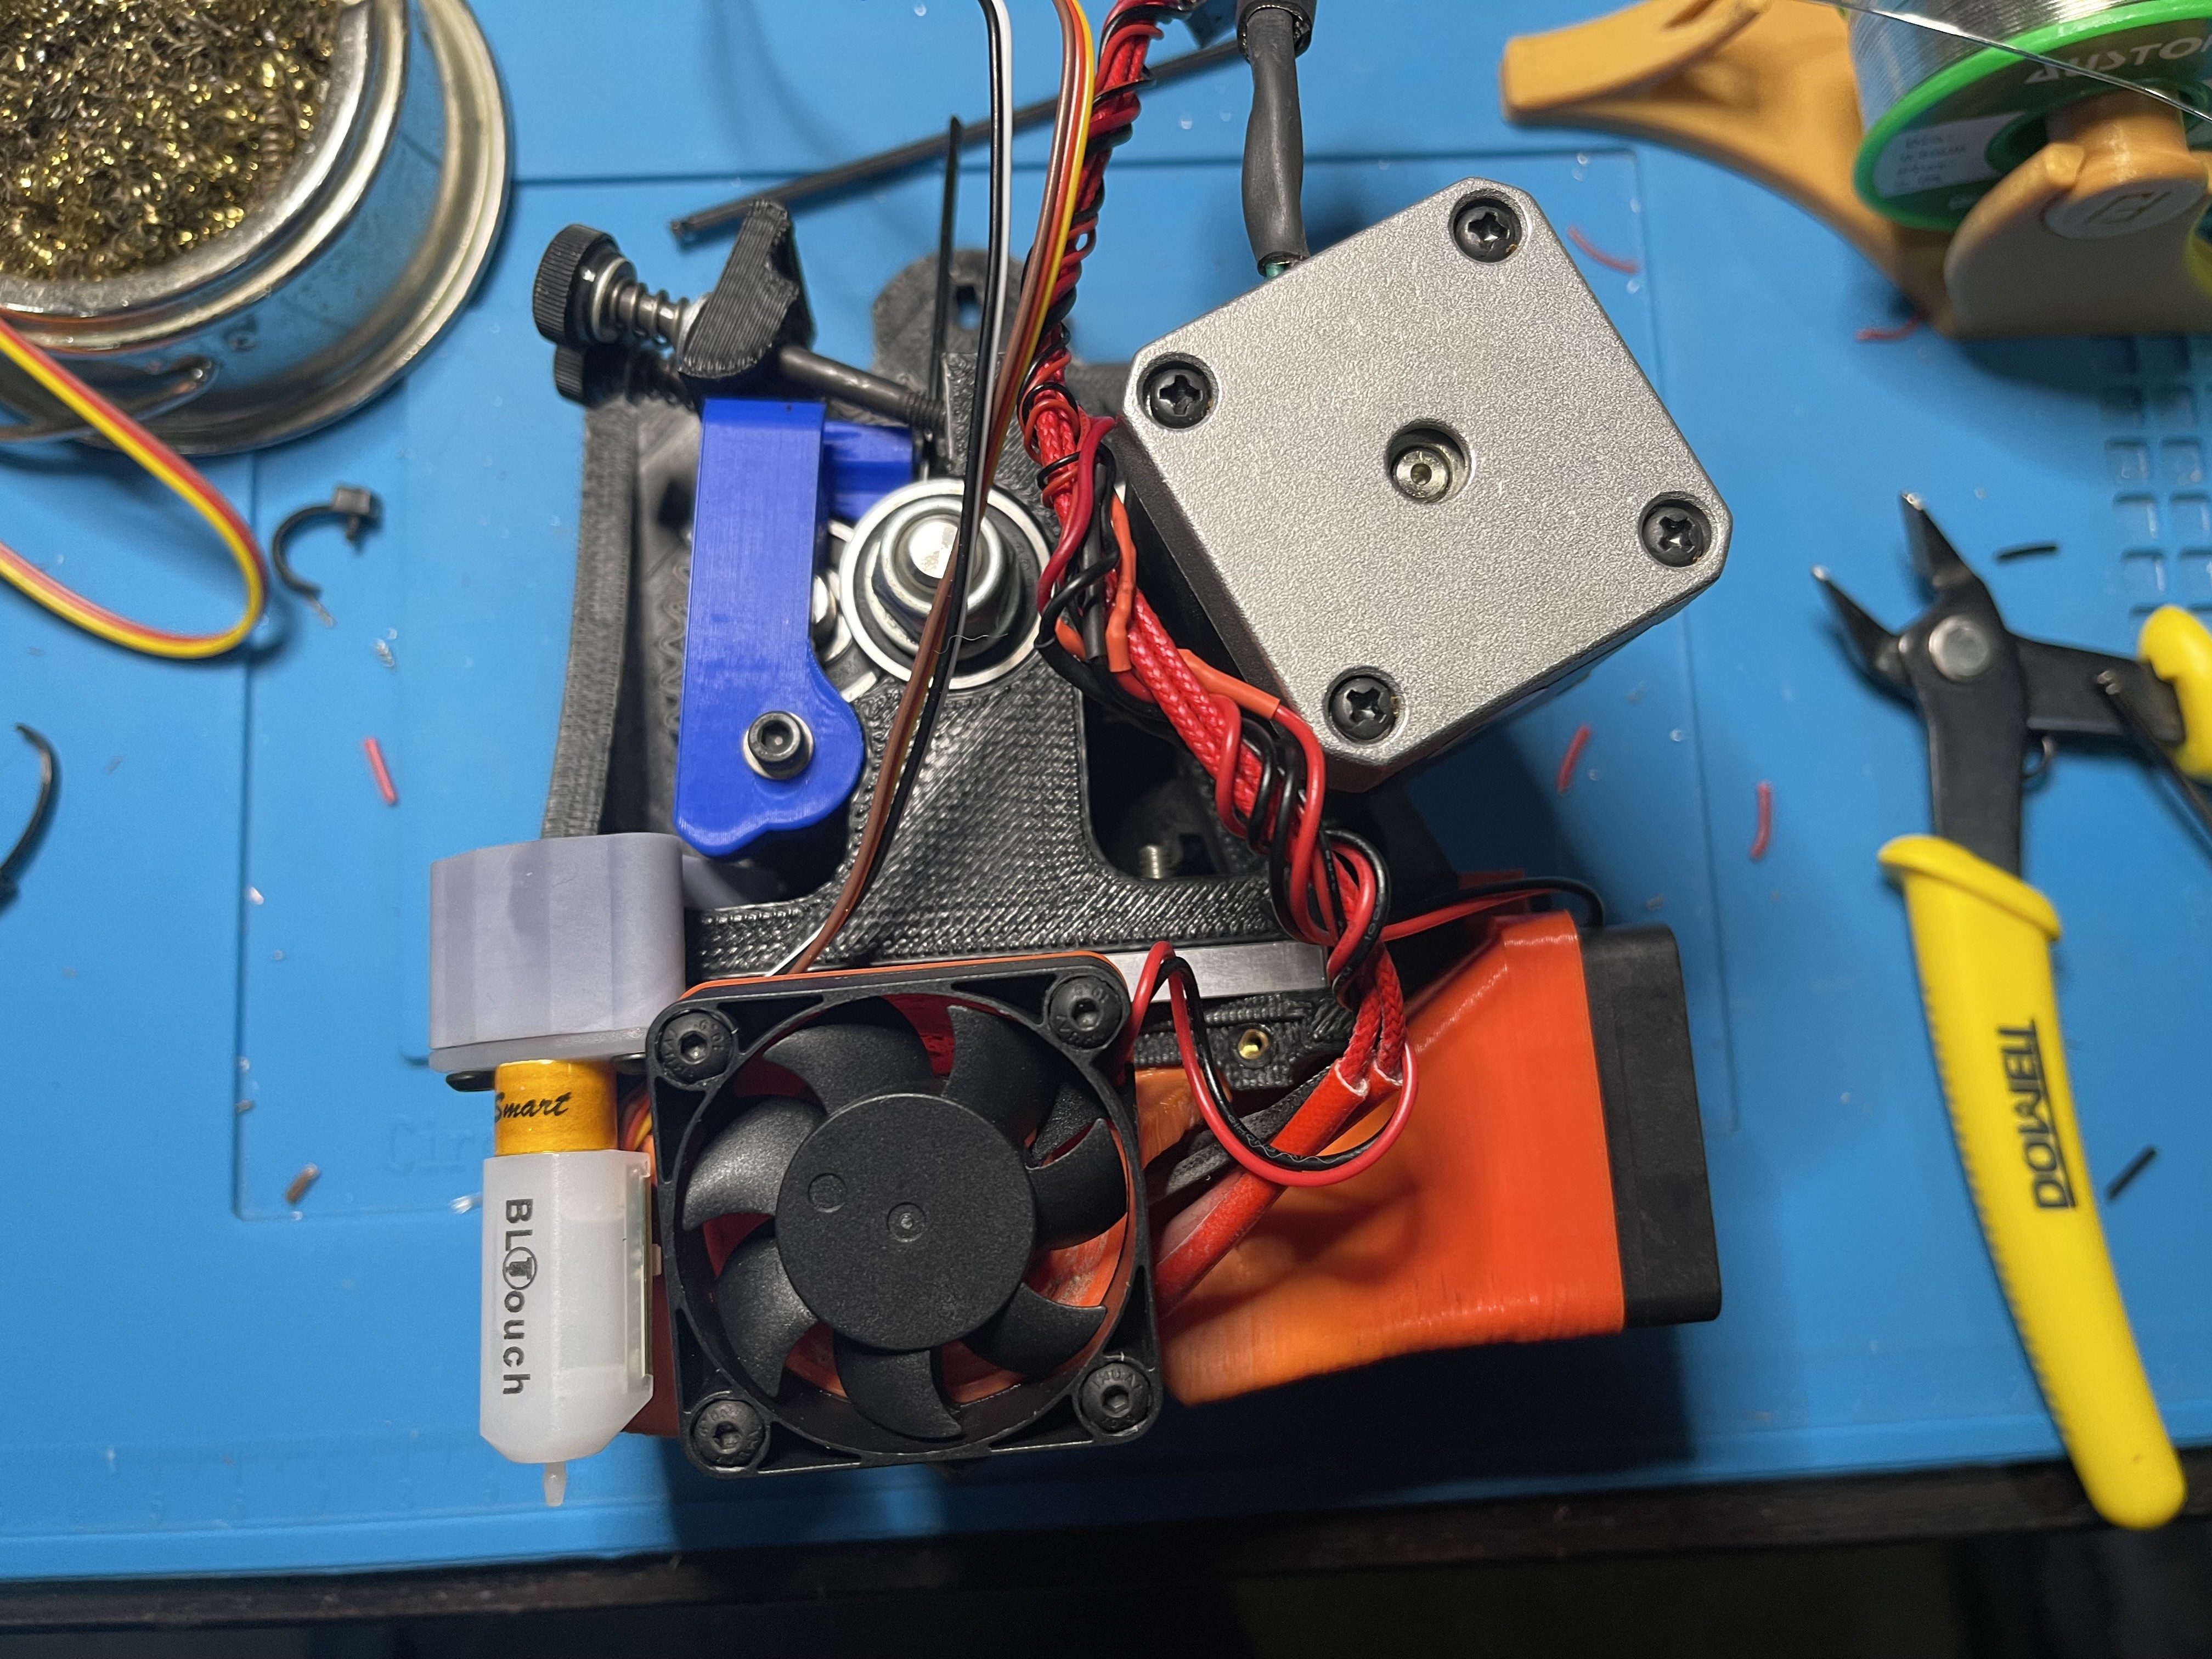
    You can also see the test fit of the mount for a BL Touch that I printed in resin on my Elegoo Mars 2P. It's not strange to have more than one 3d printer. Totally normal.

    Here we are all assembled. Not much to show but a bit of a color change, the BL Touch in place and some heat shrink for the eagle eyed among you. I'll do a little wire management with some black zip ties, and we should be good to go!

  • Going Native

    Marcel Chabot10/10/2022 at 21:30 0 comments

    While waiting for a replacement board I decided to do a little more redesign of the system. Currently the mainboard cooling fan is a 24-volt fan, and the two fans on the extruder for the heat break and part cooling are both 5-volt fans.

    The SKR 3 has two sets of fans, Normally On fans which run at the power supplied to the mainboard, and CNC Fans that can be commanded on and off, which run at mainboard voltage or can be adjusted with additional hardware, but all CNC fans must run at the same voltage.

    Here is the fan breakdown and how I want them powered:

    40mm x 10mm Heat Break 5-Volts: Normally On

    40mm x 10mm Part Colling 5-Volts: CNC

    Case Fan 24-Volts: CNC

    This is the worst possible configuration. The Normally On fan is too low of a voltage and the CNC fans don't agree on a voltage. I don't want to mess with buck converters or anything to change the voltages around.

    The answer is to swap the two 40mm x 10mm fans for 24-volt versions and run all the fans at the native voltage of the system. Fewer parts, less complexity, and the fans are really old, so they could use a change out.

    I'll have to enable the USE_CONTROLLER_FAN option in Marlin and configure that to one of the CNC pins. This will turn on the loud board fan only when a movement has been commanded and will automatically turn it off after a delay.

    Technically I would be able to add the heat break to the CNC fans and have it only activate when the extruder is hot, but I have my 3D Printer in an enclosure, and I might want to use the third fan for the enclosure. As it is right now, the entire printer shuts down when the print is complete, which makes turning off the heat break fan redundant.

    I've also ordered a new 24-volt power supply. The Lulzbot one is old, and while I have things taken to bits, I might as well replace it too. This leaves only the frame, extruder, and steppers from the original Taz in place. The Taz frame has always been its best feature.

    More parts should appear this week.

  • Total Failure and a Significant Setback

    Marcel Chabot09/24/2022 at 21:41 1 comment

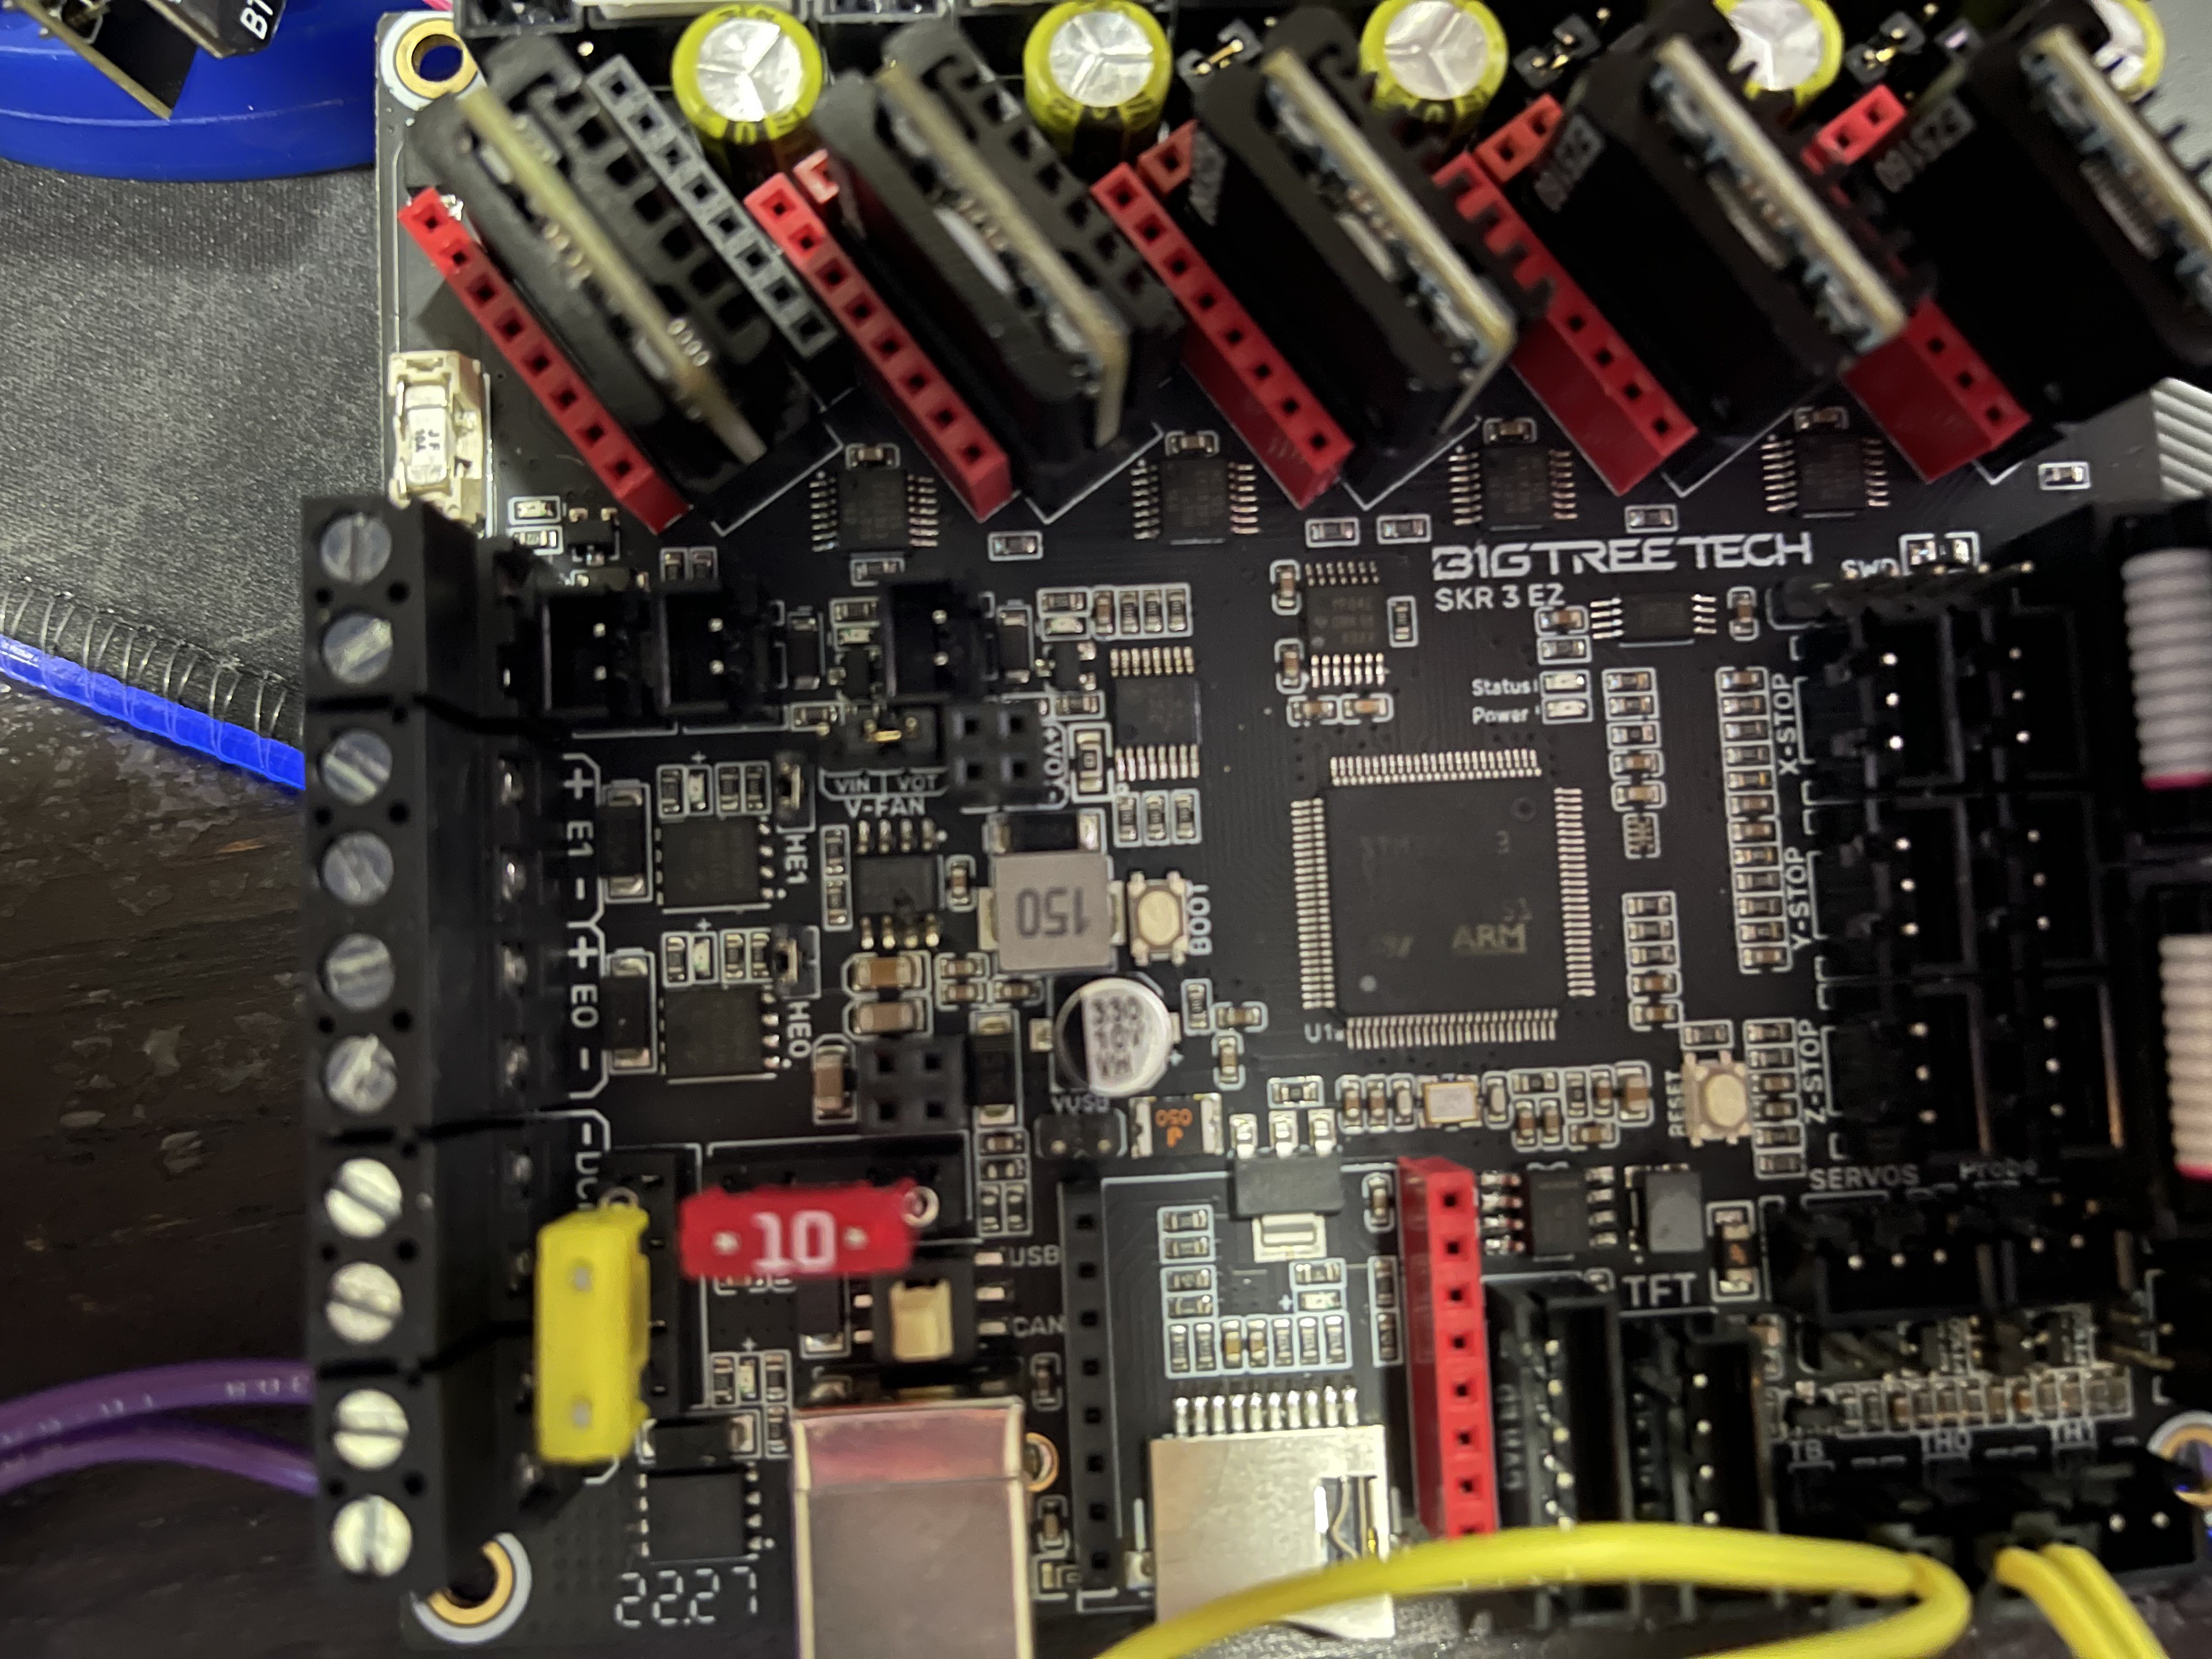
    After wiring everything up, verifying twice against the silkscreen and the manual, verifying that the power supply was 24v, I powered it up. Then the magic blue smoke came out.

    The keen eyed reader will be able to spot the hole in the IC up and to the right of the 10 amp fuse.

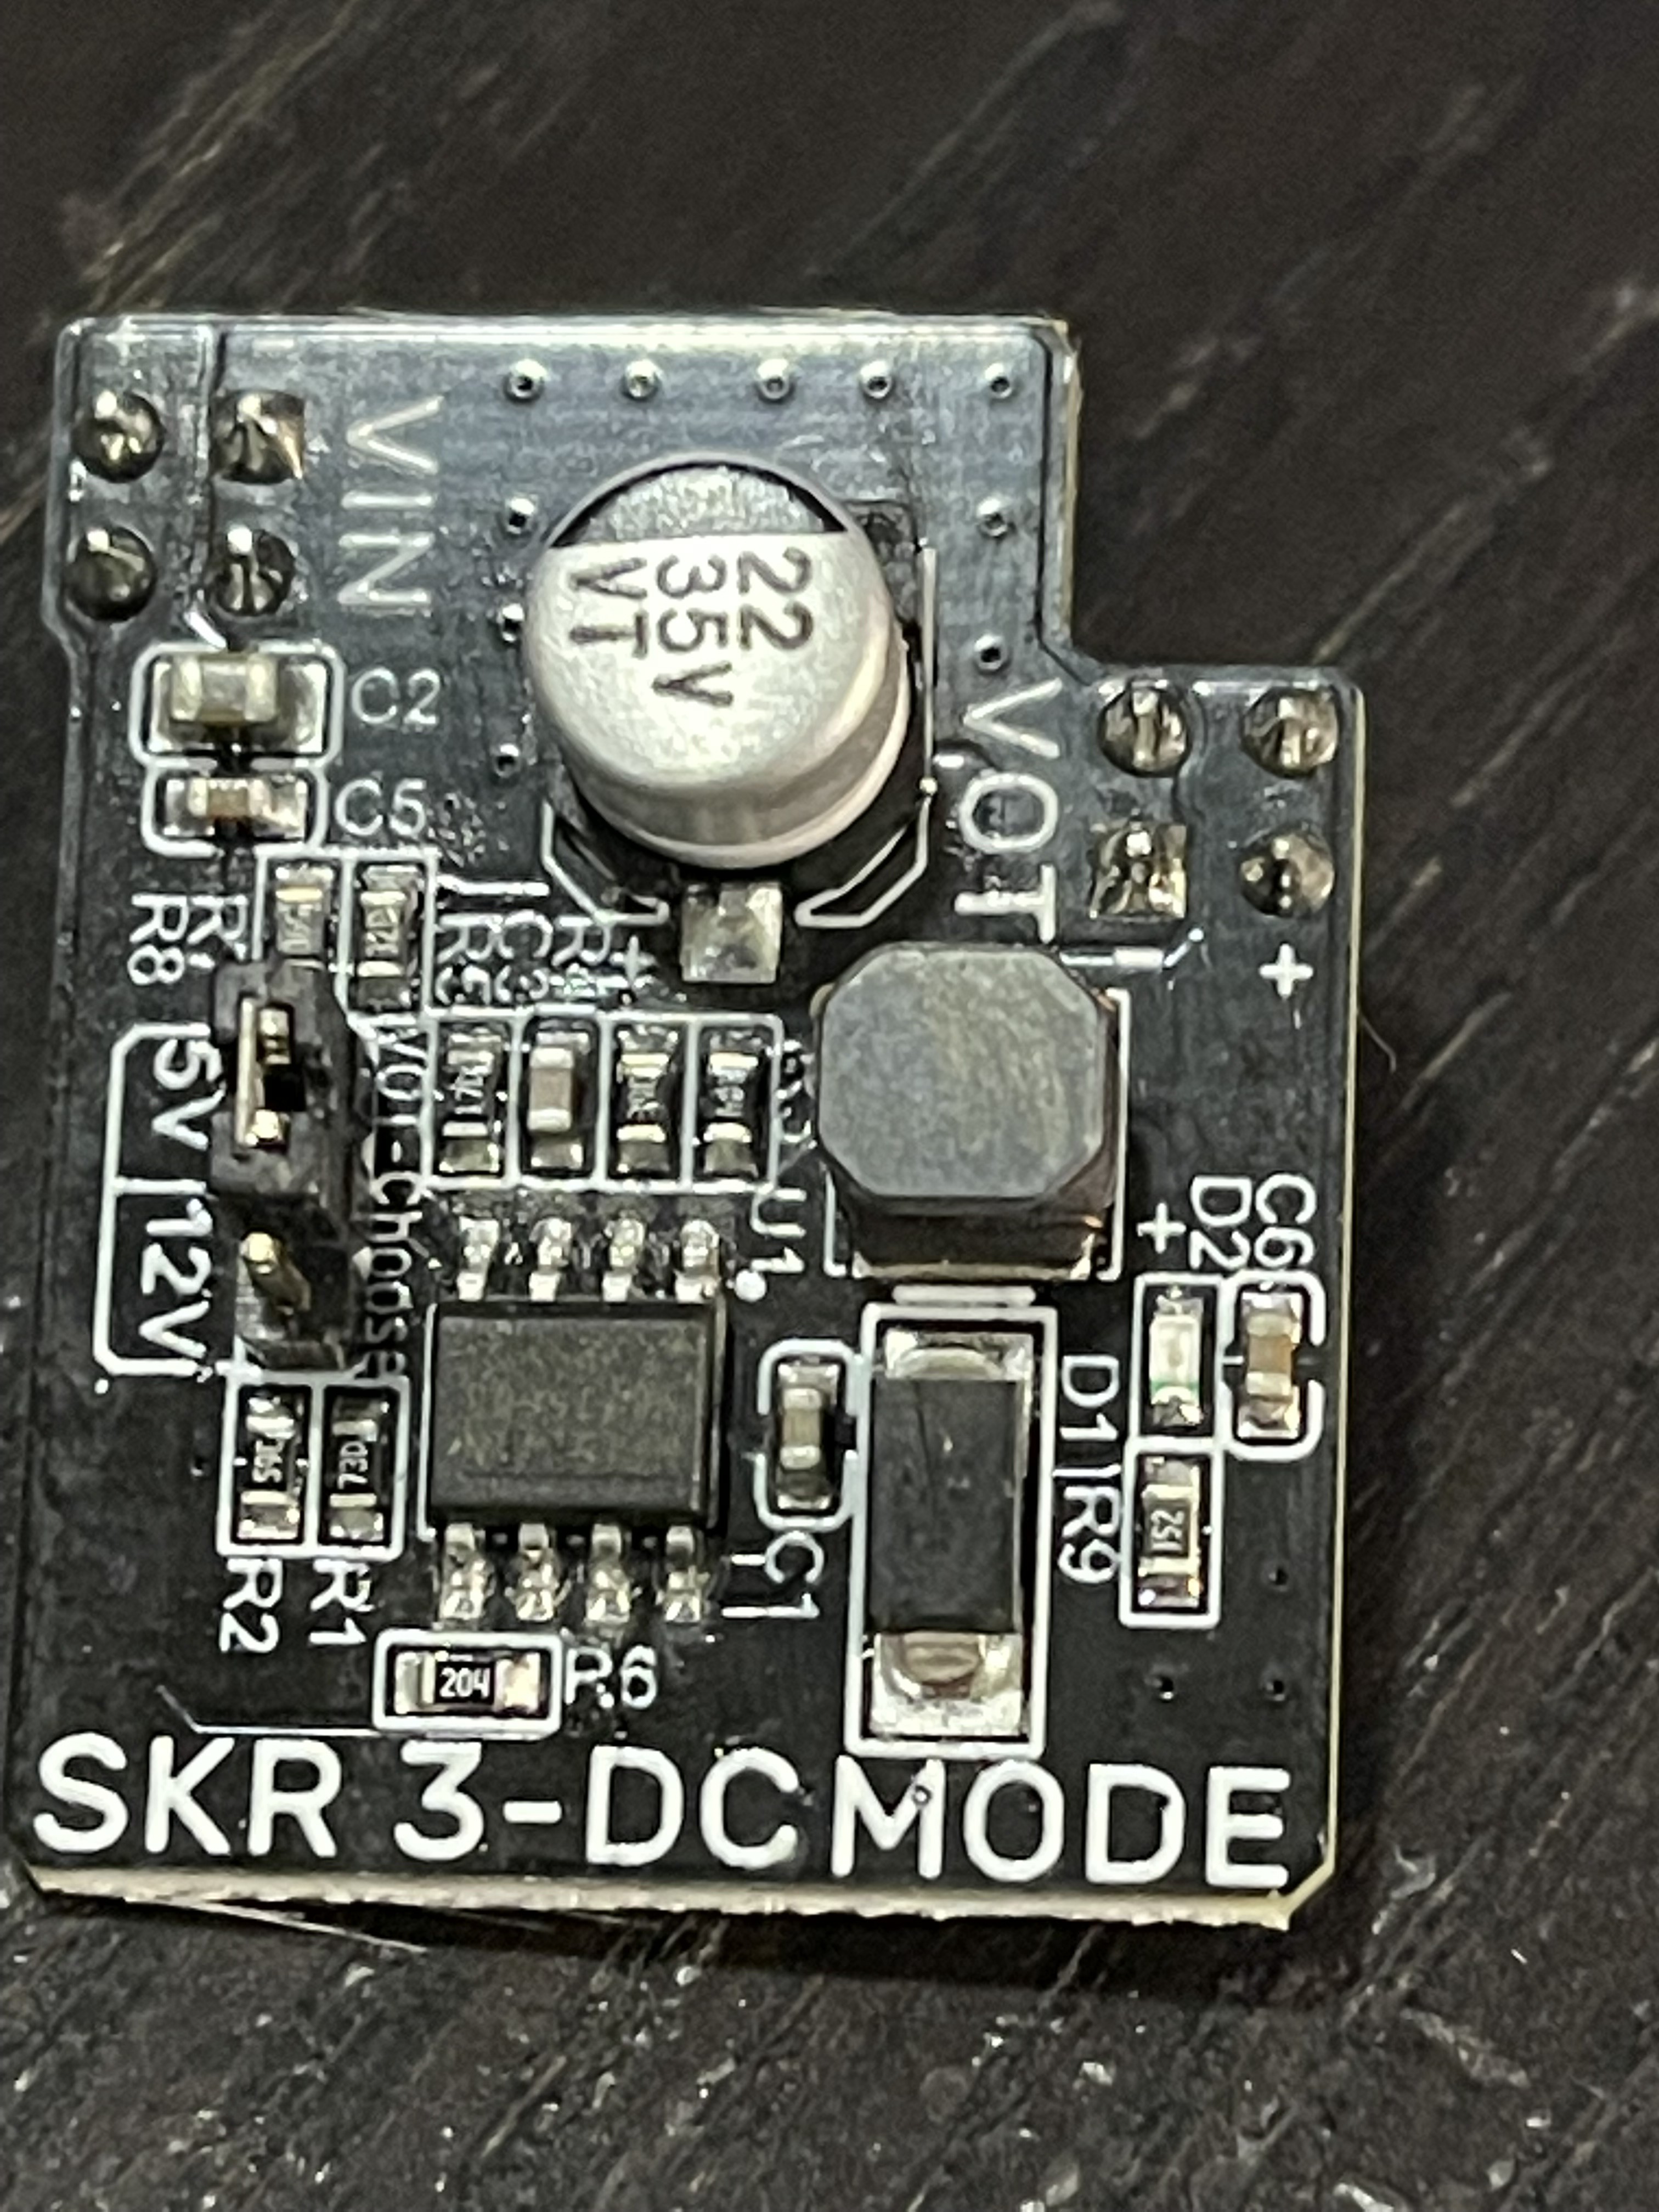
    There is also a crack in D1 on the DC Mode board. I'm not sure if the crack was there before or just a causality.

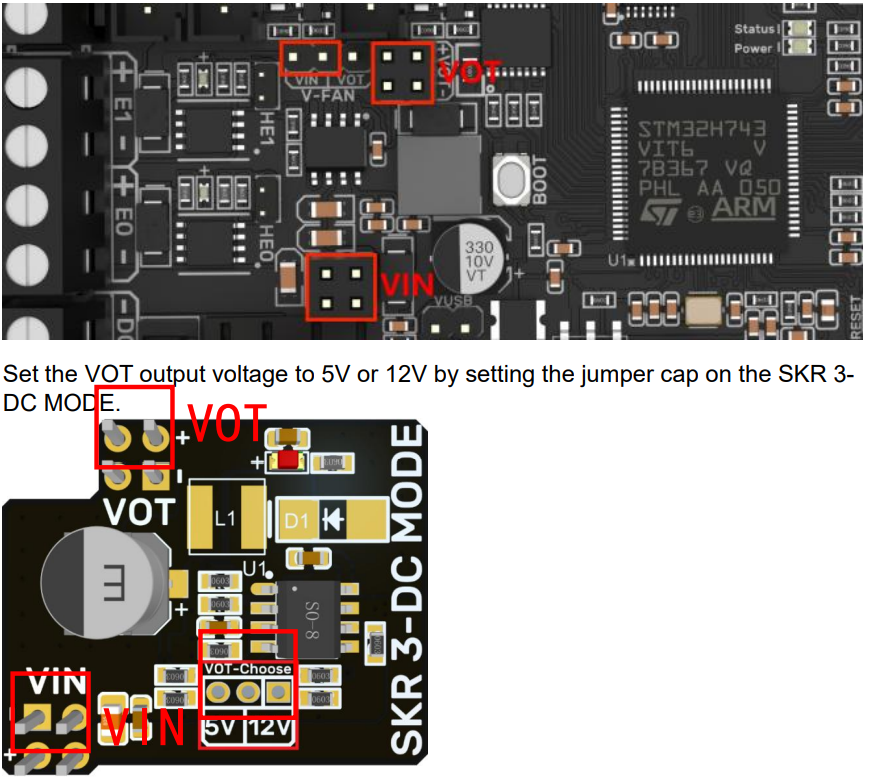
    I contacted Big Tree Tech Support and they identified my error. The SKR 3-DC Mode board will fit in forwards and backwards and installing it backwards will cause catastrophic damage to the mainboard. It is a bit of a design failure that the board can be installed backwards, and that backwards is destructive. In fact, installed the board correctly covers the BOOT button. By simply adding 2 dummy pins to one of the connectors would provide an indicator of the proper orientation without requiring much additional board work.

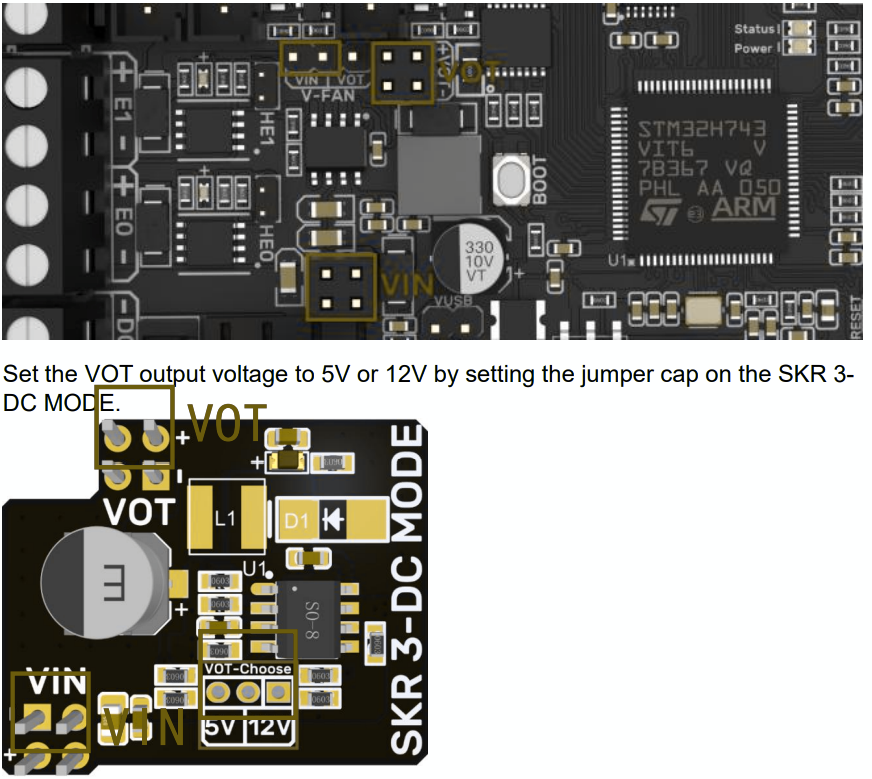
    Isn't it clear in the manual? Well, it is more complex then that. I suffer from Protanopia (red/green colorblindness). While the manual explaining the proper orientation of the board may be quite clear to you folks with normal color vision.

    It is quite a bit less clear to those with less than normal color vision. Here is an approximation of what I see:

    The board fit so perfectly in backwards I didn't even bother to try to figure out what was written in red on the diagram.

    Where does the responsibility lay in a case like this? Should manufactures be required to check that their manuals are clear for that 1% of us that can't see the colors properly? No, that would be silly, I've grown up with this condition, I know better, I have software on my computer to assist, this is not something we need a campaign to resolve.

    Should hardware be designed not to explode when a part that fits better backwards than forwards is installed incorrectly, I think that would be nice.

    Oh well, I know what went wrong. The problem is all between the chair and the work bench.

    I'll be ordering some replacement hardware in the next few weeks and give it another try.

  • Harness the Power

    Marcel Chabot09/24/2022 at 21:36 0 comments

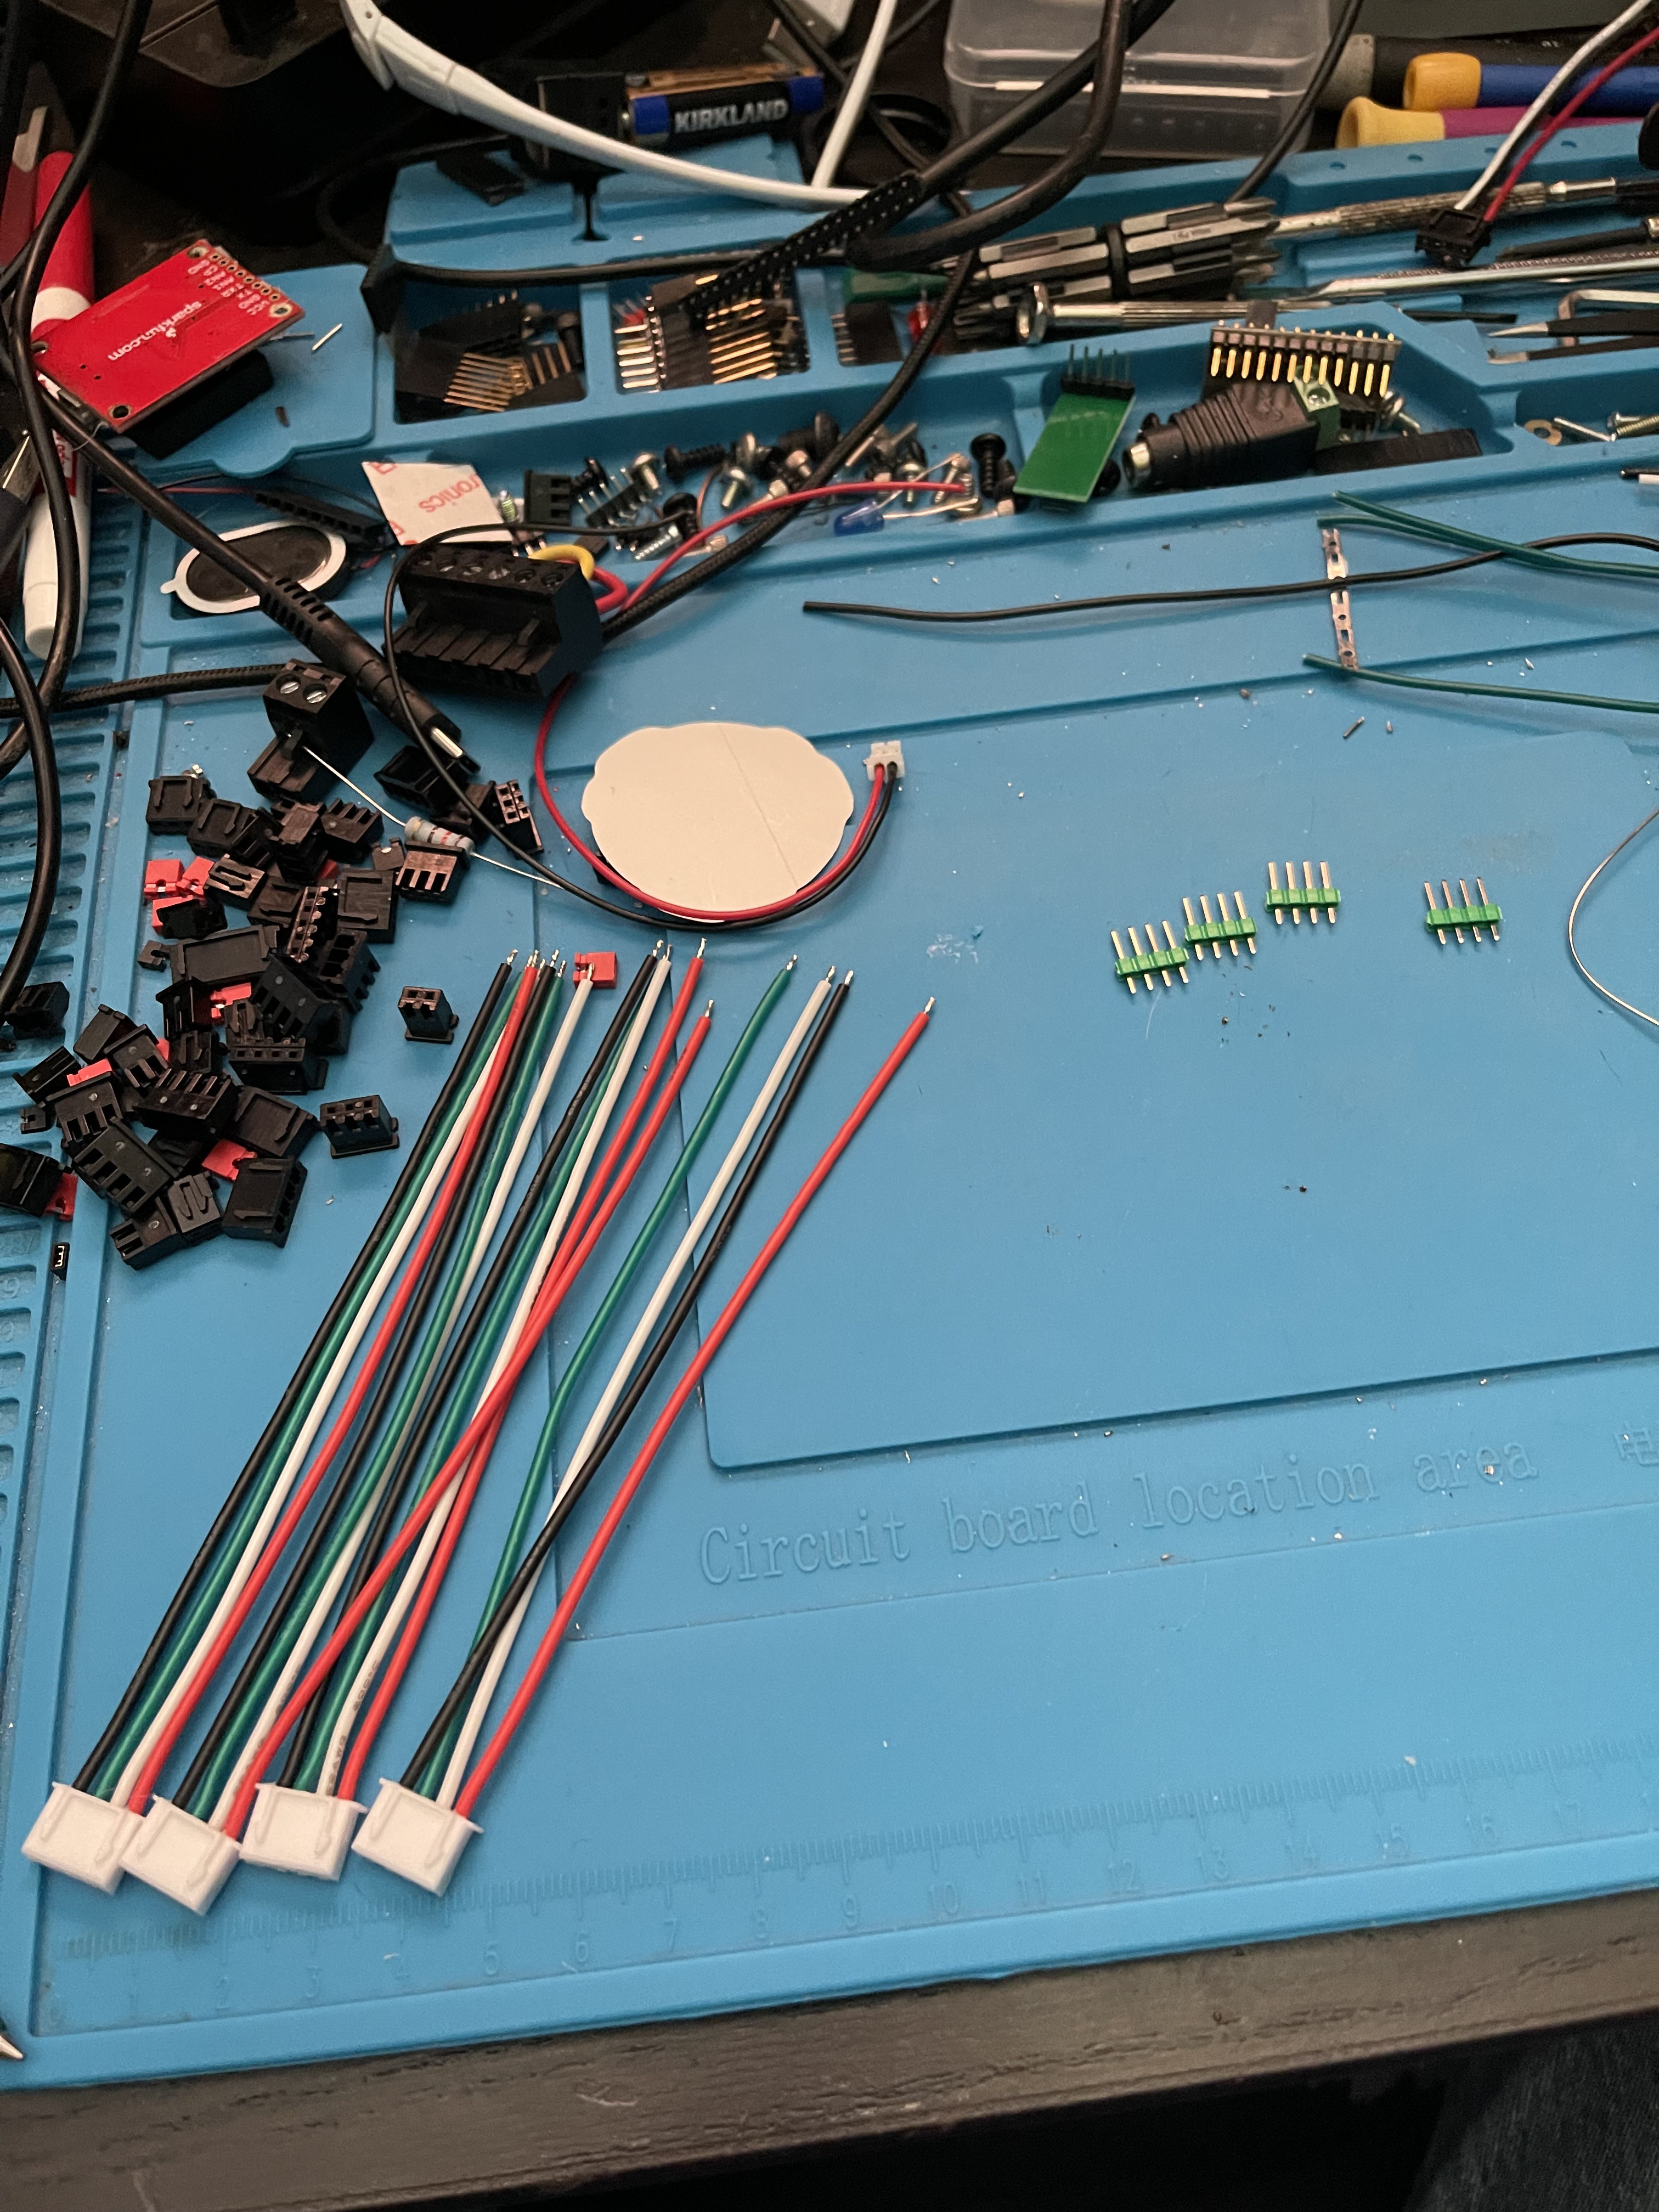
    I had several challenges now. One of which is that the wires from the Lulzbot Taz 5 box were too short to wire to the new SKR board. Another is that the RAMBo board used a different connector than the SKR. Lastly is that I didn't want to re-pin the entire connector.

    The answer is to make extension/adapter leads to go from the Lulzbot connectors to the SKR connects AND lengthen the wires.

    Stepper extenders, End Stop Extenders, Temperature sensor extenders. Using some headers as Male to Male adapters I was able to connect everything up nice and neat. Everything should fit where I expect and I am able to test each connection.

  • 10lbs of controller in a 5lb box

    Marcel Chabot09/11/2022 at 18:11 0 comments

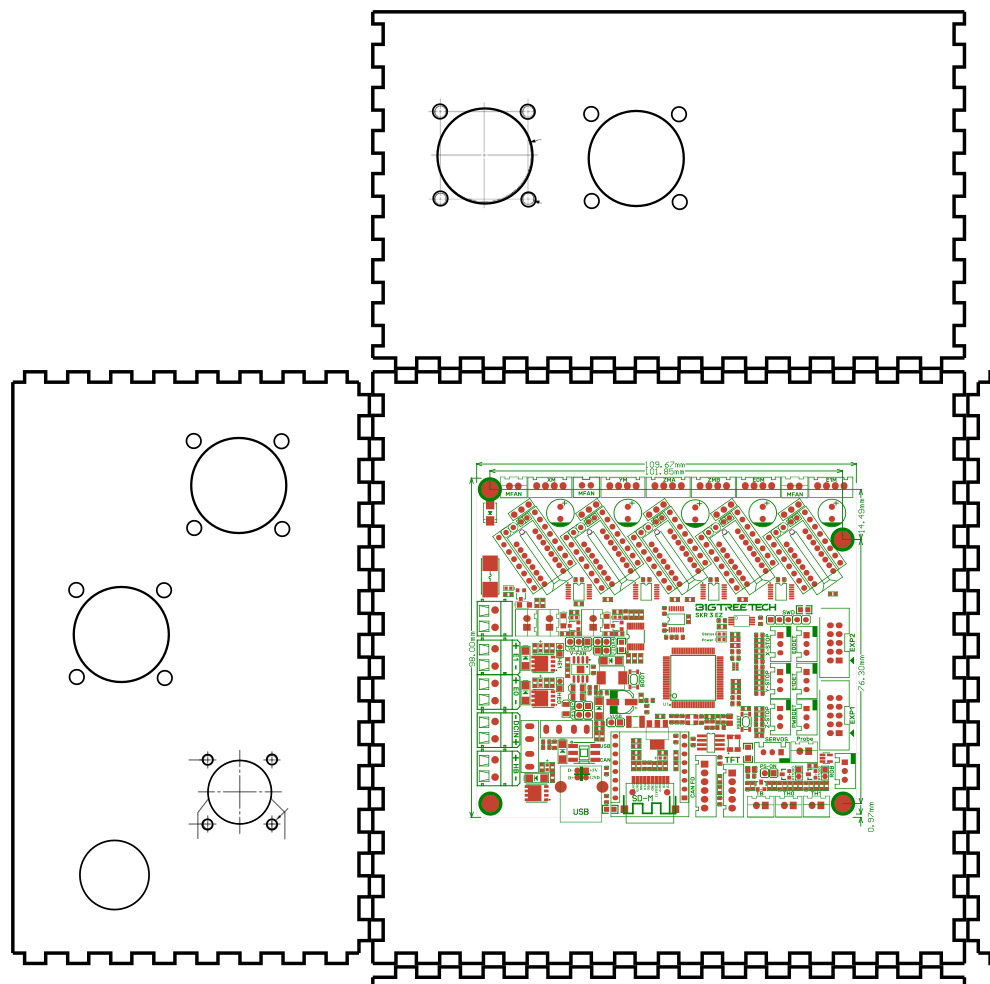
    The next challenge is the enclosure. The SKR 3 is a tiny bit larger than the RAMBO 1.3L it is replacing. Just enough so that none of the standoffs in the metal box created by Lulzbot will align. The RAMBO 1.3L is 104.5mm at the widest, where the SKR 3 is 109.76mm. Too much to fudge the numbers. Additionally the standoff pattern doesn't match up.

    To assist with this, I pulled the diagram PDF into Inkscape and scaled to a 1:1 mm on my canvas. Now I can draw boxes, and plan wiring with the board to scale.

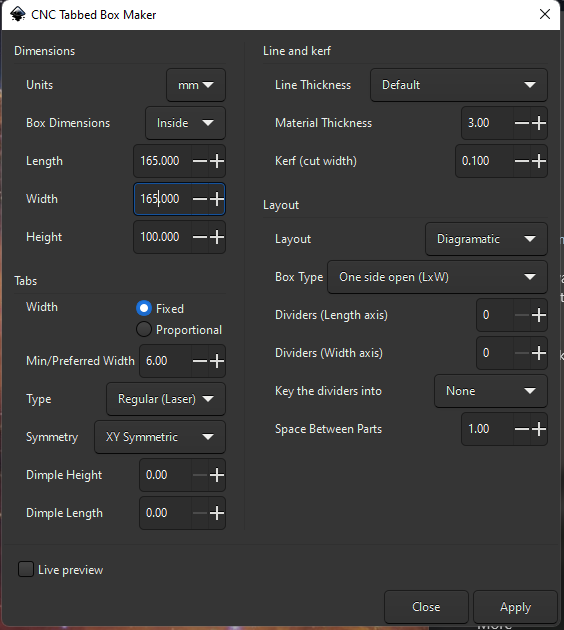
    I'm using the "CNC Tabbed Box Maker" to design the box and will glue the back and sides together.

    I scaled the board and the drawings for the connectors and started laying out the box.

    I'll laser cut it out of cardboard first then some acrylic. I plan to create a box a bit bigger than necessary, that way I can work inside with some comfort.

View all 12 project logs

  • 1
    Unplug

    First, unplug all the connectors from the box.

  • 2
    Dismount

    The box is held onto the frame with 4 hex head screws. Remove those and it should come off.

  • 3
    Remove the brains

    Mark the wires and where they go on the board, if you are unsure the purpose of a wire, refer to the RAMBO wiring charts available at Rambo - RepRap

View all 4 instructions

Enjoy this project?

Share

Discussions

sevenupspot wrote 02/20/2023 at 18:50 point

I switched to a BTT Octopus board with BLtouch and Klipper and Hemera Evo, it works beautifully.

  Are you sure? yes | no

Marcel Chabot wrote 01/30/2023 at 18:29 point

On the Taz 6 if you ditch the existing bed leveling routine with the metal disks and go with a BL Touch then everything I'm doing here will work for you. That includes the Marlin code I've linked.

  Are you sure? yes | no

sevenupspot wrote 01/01/2023 at 07:14 point

I'm doing this to a Taz 6 with the same board. Wish us both luck! 😁

  Are you sure? yes | no

Similar Projects

Does this project spark your interest?

Become a member to follow this project and never miss any updates