andrew.david.thaler
-
Two OpenCTDs programs that reshaped how I think about hardware development
10/23/2022 at 01:56 • 0 commentsFor my final update before the 2022 Hackaday Prize judging commences, I want to share the two programs we've conducted this year that have reshaped how I think about the OpenCTD and the direction we're going.
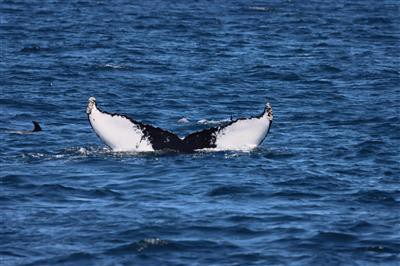
The first is Community Oceanography While Watching Whales. For the last two years, we've partnered with professional naturalists working on commercial whale watching boats to collect oceanographic data in conjunction with whale sightings. When a whale watching boat spots a whale, they have to stop. They can observe, but once a whale is within a few hundred yards (100 yards for most whales, 500 for North Atlantic Right Whales), you can't approach. So there's a nice moment of calm where an educator can talk about whales, describe the behavior that guest are seeing, and, if conditions permit, take some oceanographic measurements.
![]()
photo via Blue Ocean Society for Marine Conservation
We supplied the OpenCTDs, and learned a ton about how users interact with the devices. This led to several redesigns to make things easier and more clear for the end user. Up until this point, my vision was that the end user would build their own OpenCTD, but it became clear that not everyone who wants to study the ocean also wants to build their instruments. Sometimes, you just need a device that works. The ocean is a clever monster, and keeps finding new and wonderful ways to brake my instruments. The OpenCTD is now more robust, easier to use, and we have the begins of a pipeline to provide CTDs to people who want them, but don't want to build them.
The second is SEAoTech, a program developed through the Bureau of Ocean Energy Management to provide hands on ocean science experiences to students in Alaska. Originally envisioned as in-person workshops, the pandemic forced us to go remote. This was the first time I had to create an OpenCTD kit to be built without my direct involvement. A workshop is much easier if you're there to keep watch over every step. Teaching students to solder circuit boards over Zoom was a stressful, but enlightening endeavor.
That project really highlighted for me how much we need a viable, accessible OpenCTD kit that takes the guesswork out of sourcing tools, consumables, and components and provides the kind of detailed instructions you need if you've never held a soldering iron before.
-
So what do you actually do with CTD data?
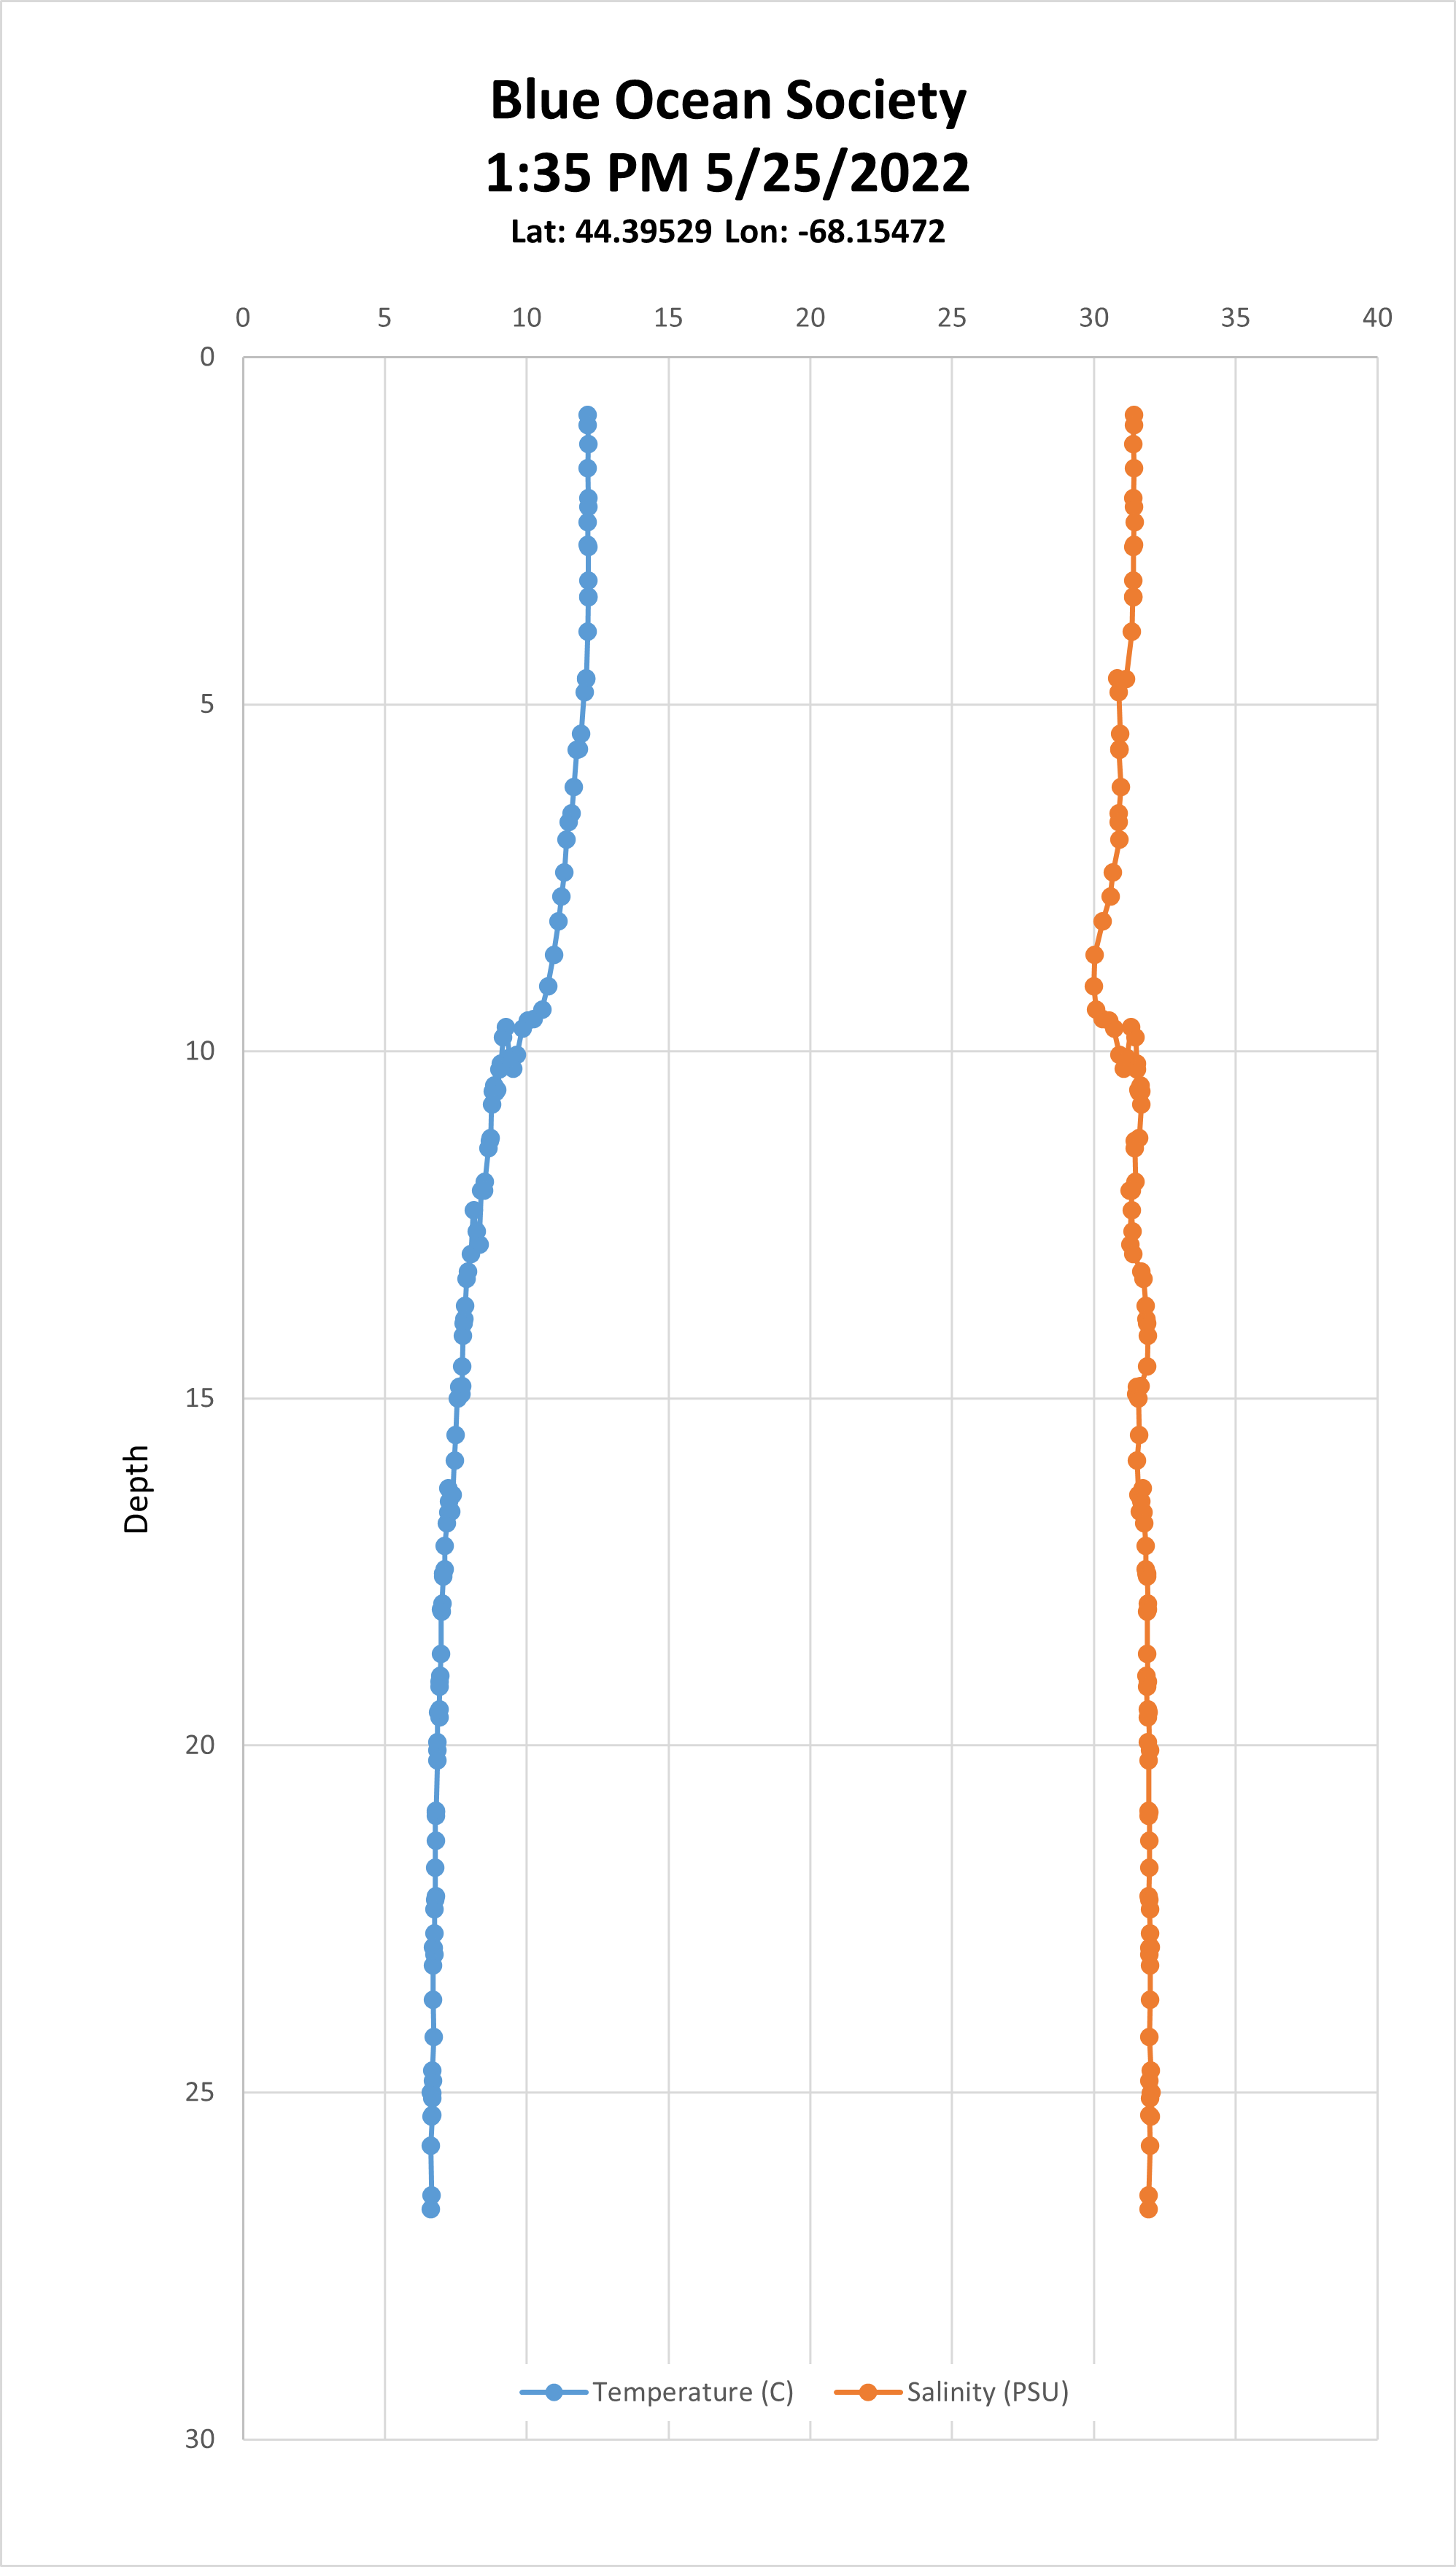
10/23/2022 at 01:19 • 0 commentsThis is a water column profile produced by an OpenCTD cast:
![]()
The Y-axis is depth (in meters). This is the information that comes from the pressure sensor. The X-axis is both temperature and salinity, in practical salinity units. When both temperature and salinity have relatively similar values, you can get away with one axis, otherwise you have to break them up.
The blue line show temperature decreasing with depth, and a slight thermocline around 10 meters. The orange line shows salinity very slightly increasing with depth, and a slight halocline, also around 10 meters.
So what?
On a base level, this data is useful for understanding ongoing water quality trends. How much less salty is the surface after a rain? Is it warmer now than it was this time last year? Is the mixing layer deeper or shallower than last week?
That information correlates to some important questions about how marine life interacts with water quality. Do fish like to hang out at the halocline? Do whales show up more often when the water column is more stratified? Do crabs leave the bay if it's too fresh? All very important questions that need a CTD to answer.
But there are also some more technical uses for this data. The speed of sound in water changes based on... you guessed it... salinity, temperature, and depth. So if you're mapping the seafloor, or tracking a submarine, or hunting for shipwrecks, you need to know this data to compensate SONAR readings.
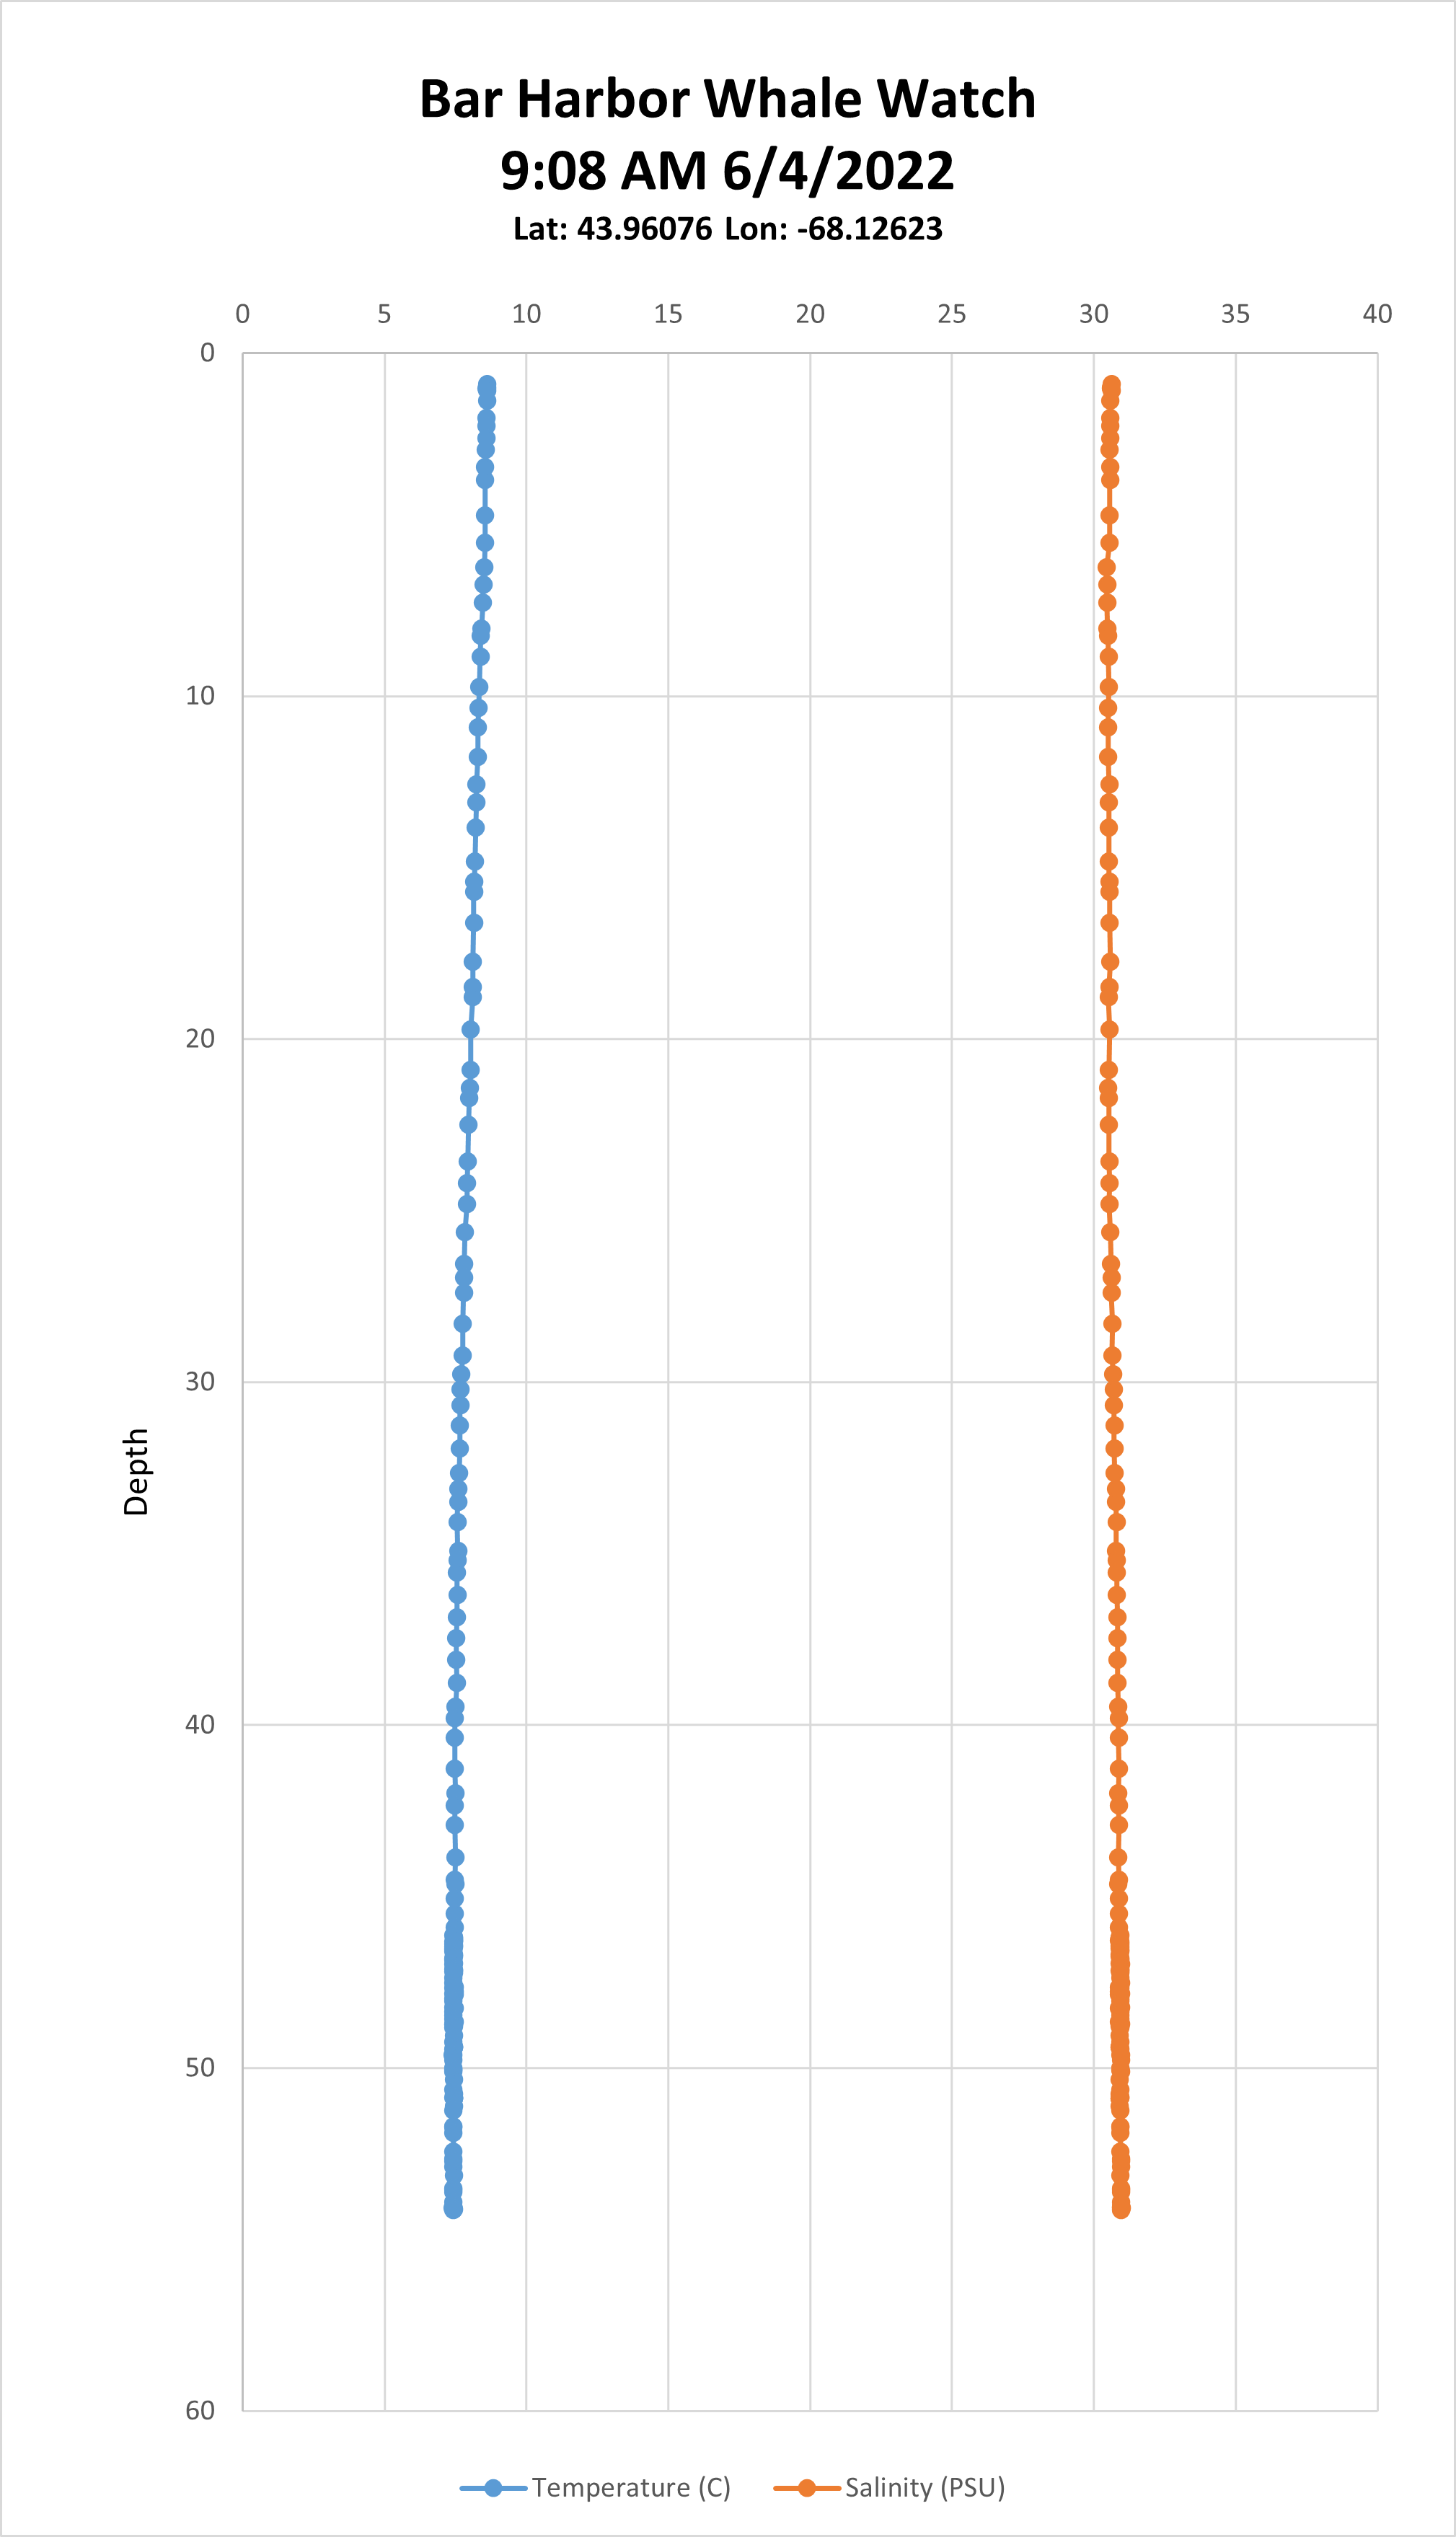
And you know. CTD profiles aren't always the most exciting thing in the world. This, for example, is an excellent cast of some very uniform conditions:
![]()
But the more data we have, the better equipped we'll be to be able to detect when something weird is happening in the ocean.
So, there's a phase 3 of the OpenCTD, which is currently beyond my capacity as an ecologist and hardware guy, and that's to build a global database of community oceanographic data that can be used to detect subtle deviations from ocean norms. But who knows? Maybe a boost from Hackaday will be just what we need to push this project to the next level.
-
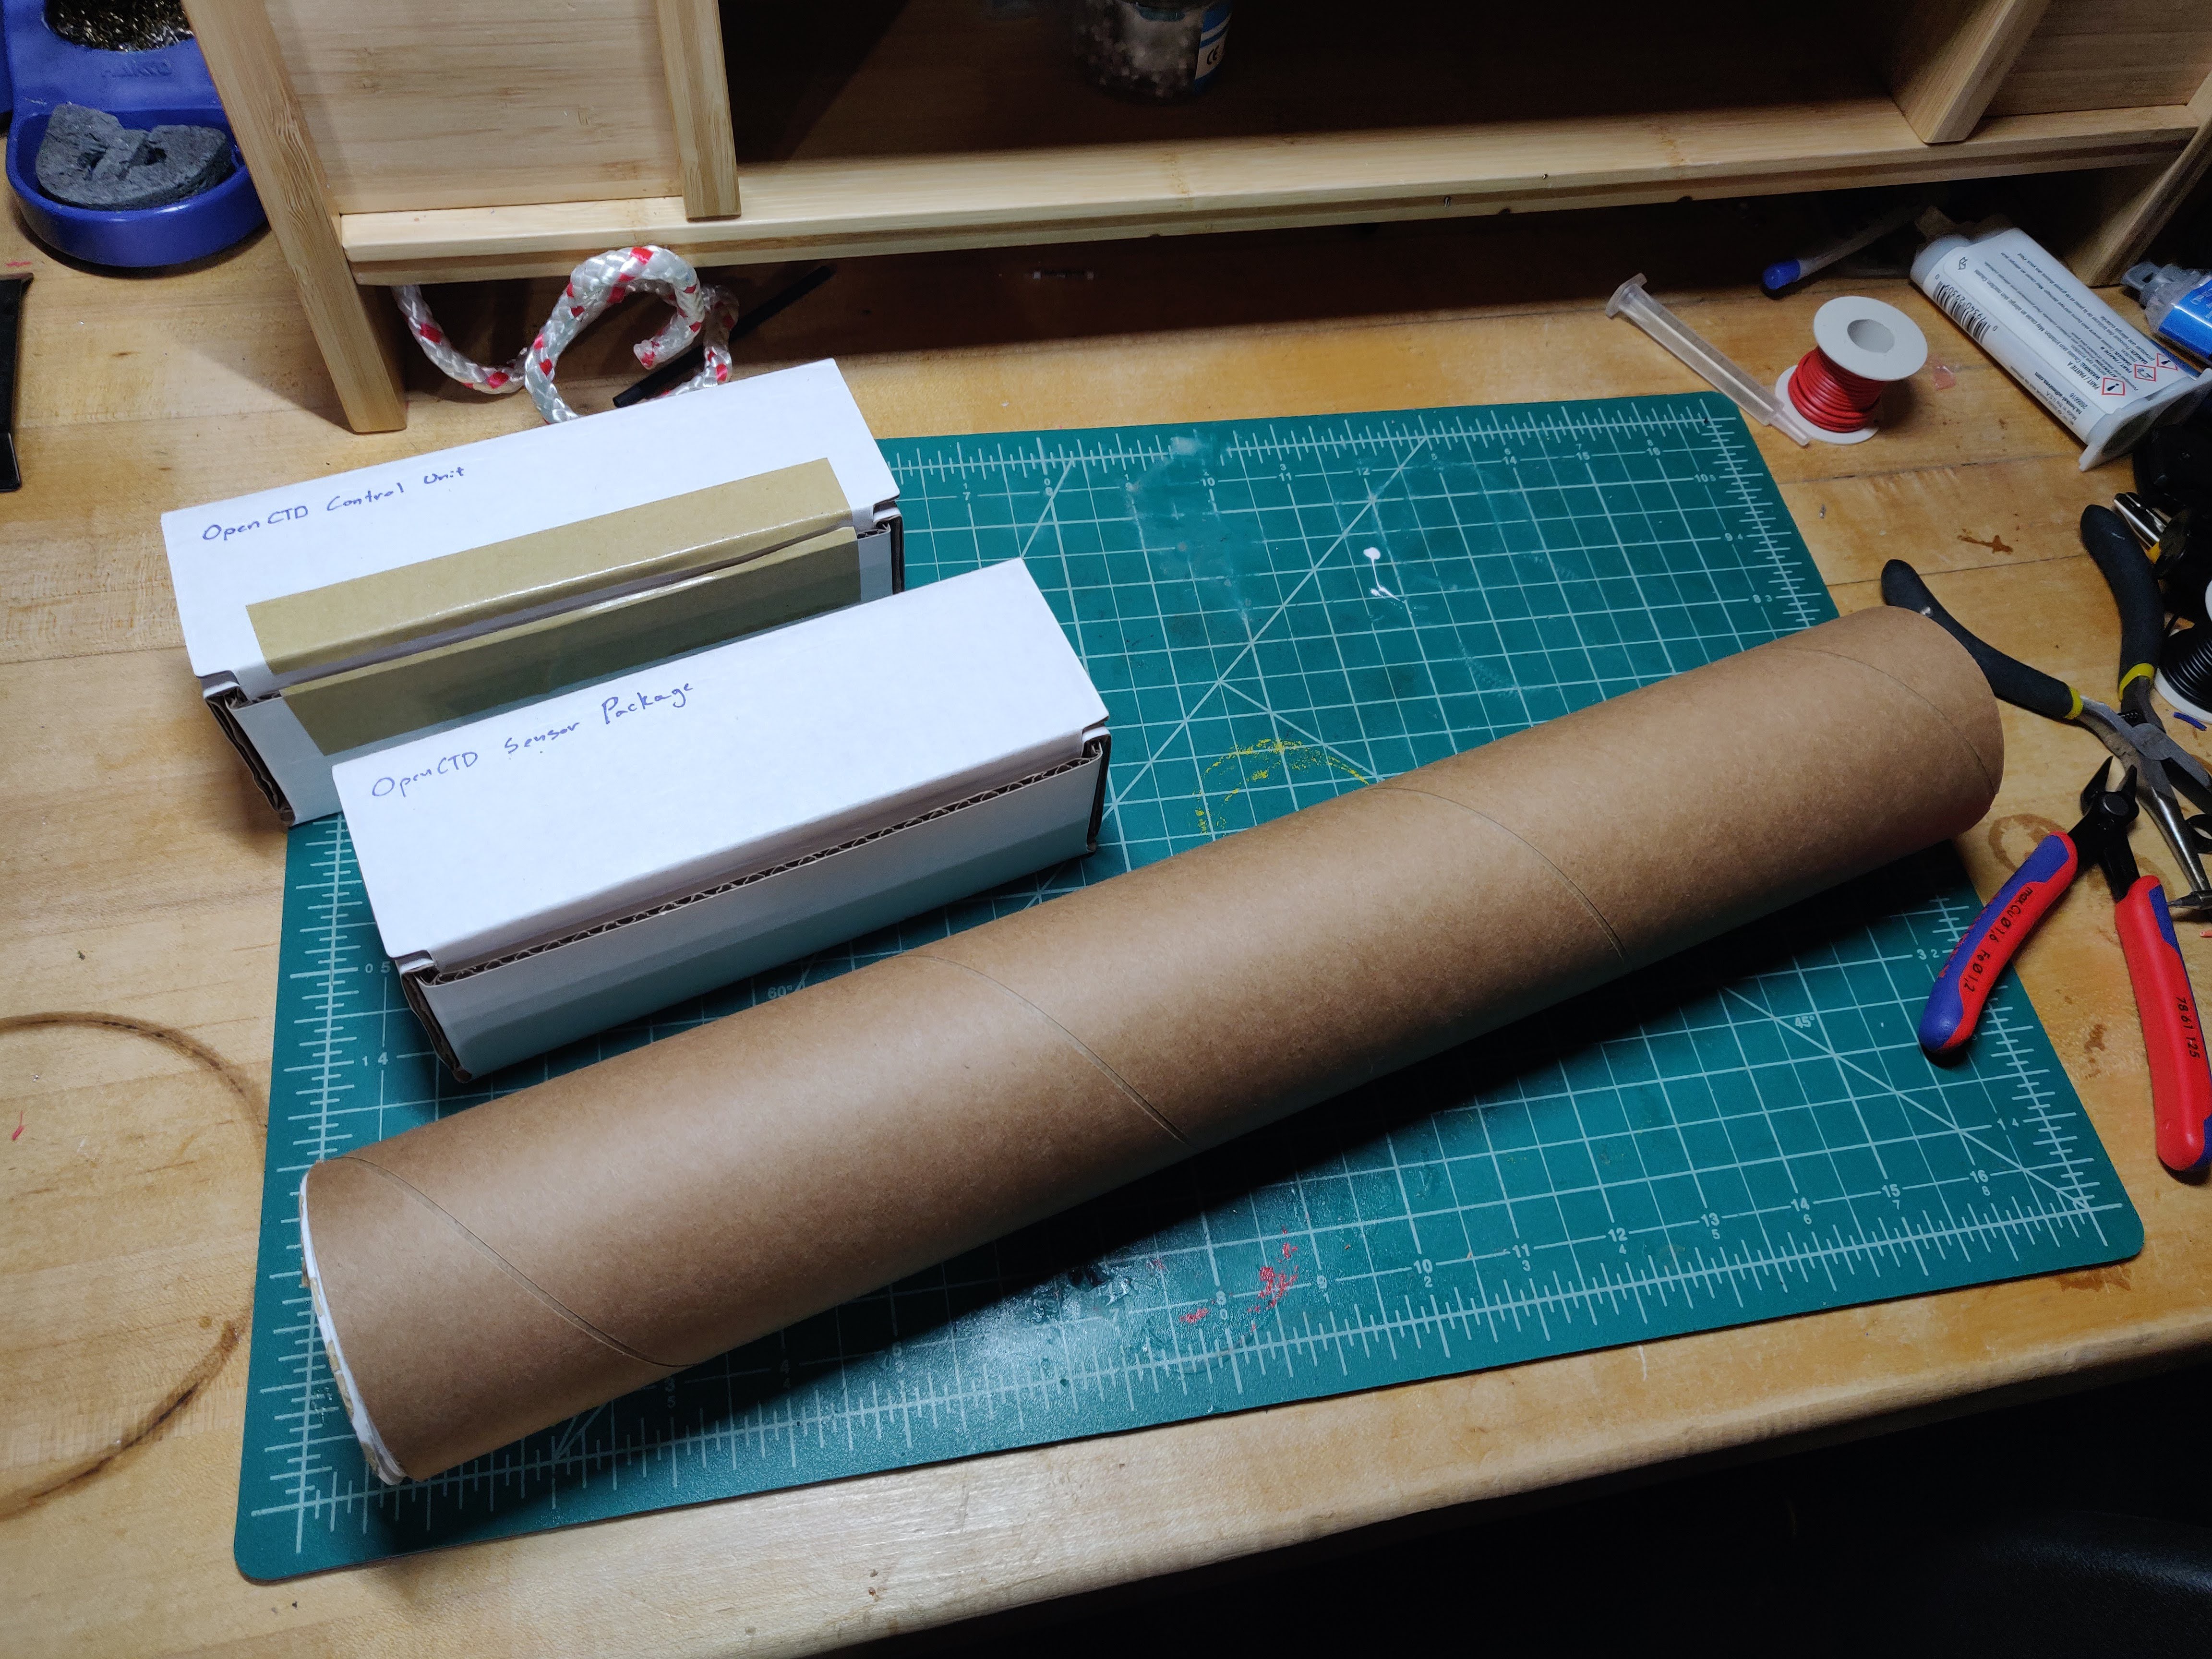
One Kit Ready to Ship
10/23/2022 at 01:00 • 0 commentsGetting the kit together for shipping has been a bit of a struggle. No one should be surprised to learn that supply chains are a mess. I found out this week that none of my normal suppliers had the right epoxy on hand and that the tool kits I had assembled for a robotics project I did in Saipan several years ago had scattered to the wild deep. But, barring one final delivery of an epoxy injector and some other consumables, the kit is ready to go.
![]()
-
Supplemental Working Prototype Video
10/23/2022 at 00:53 • 0 commentsBecause at the end of the day, tossing a PVC pipe into the Chesapeake Bay doesn't actually prove that the OpenCTD works. Here's a quick video of the OpenCTD open and logging data from a bowl of kind of salty water.
-
Calibration
10/23/2022 at 00:36 • 0 commentsOne of the biggest challenges with the OpenCTD and any DIY sensor platform is calibration. But not all calibration. Depth is actually dead simple to calibrate, because the absolute pressure sensor we use is self-calibrating. Temperature can be done using known standard temperatures, accurate temperature gauges in the range we need are readily available, and, in a pinch, you can use known temperatures like boiling and freezing points.
But salinity, which is a function of conductivity, temperature, and depth, is a beast.
You could mixed your own salinity standards, or bootstrap off of other instruments, but the easiest way to calibrate salinity is to use standard solutions. They're not too expensive and they're readily available, but they are only standard at a set temperature (usually 25C). So you need to either compensate for the temperature of your workshop (which only works if that temperature is stable throughout a calibration cycle) or create a thermal chamber that holds constant temperature.
![]()
So, of course, because we're hardware hackers, the solution was obvious. Our 3D printer's heated bed does a great job holding temperature, so we rigged up an old cooler and some concrete cups (not shown, but they're in the cooler), and let everything equilibrate to 25C. Somehow, this rig does an excellent job holding temperature. I've left it sitting over several days when I'm calibrating multiple CTDs.
Work with what you've got.
-
Kitbashing a fresh CTD
10/22/2022 at 01:05 • 0 comments![]()
I wasn't planning on making a fresh CTD this week, but with kit prep moving along, epoxy tests in the pipeline, and being named a finalist for the 2022 prize, I had to knock one together in order to make sure I have everything right and ready for the first kit to go out. That includes noting every tool and consumable I touched during the build, because those have to go in the kit, too.
So now I have a fresh, squeaky clean CTD, ready for calibration and deployment.
I feel like, in honor of Hackaday, I should paint it black and get some stickers.
-
What does a CTD look like in a hurricane?
10/22/2022 at 00:59 • 0 comments![]()
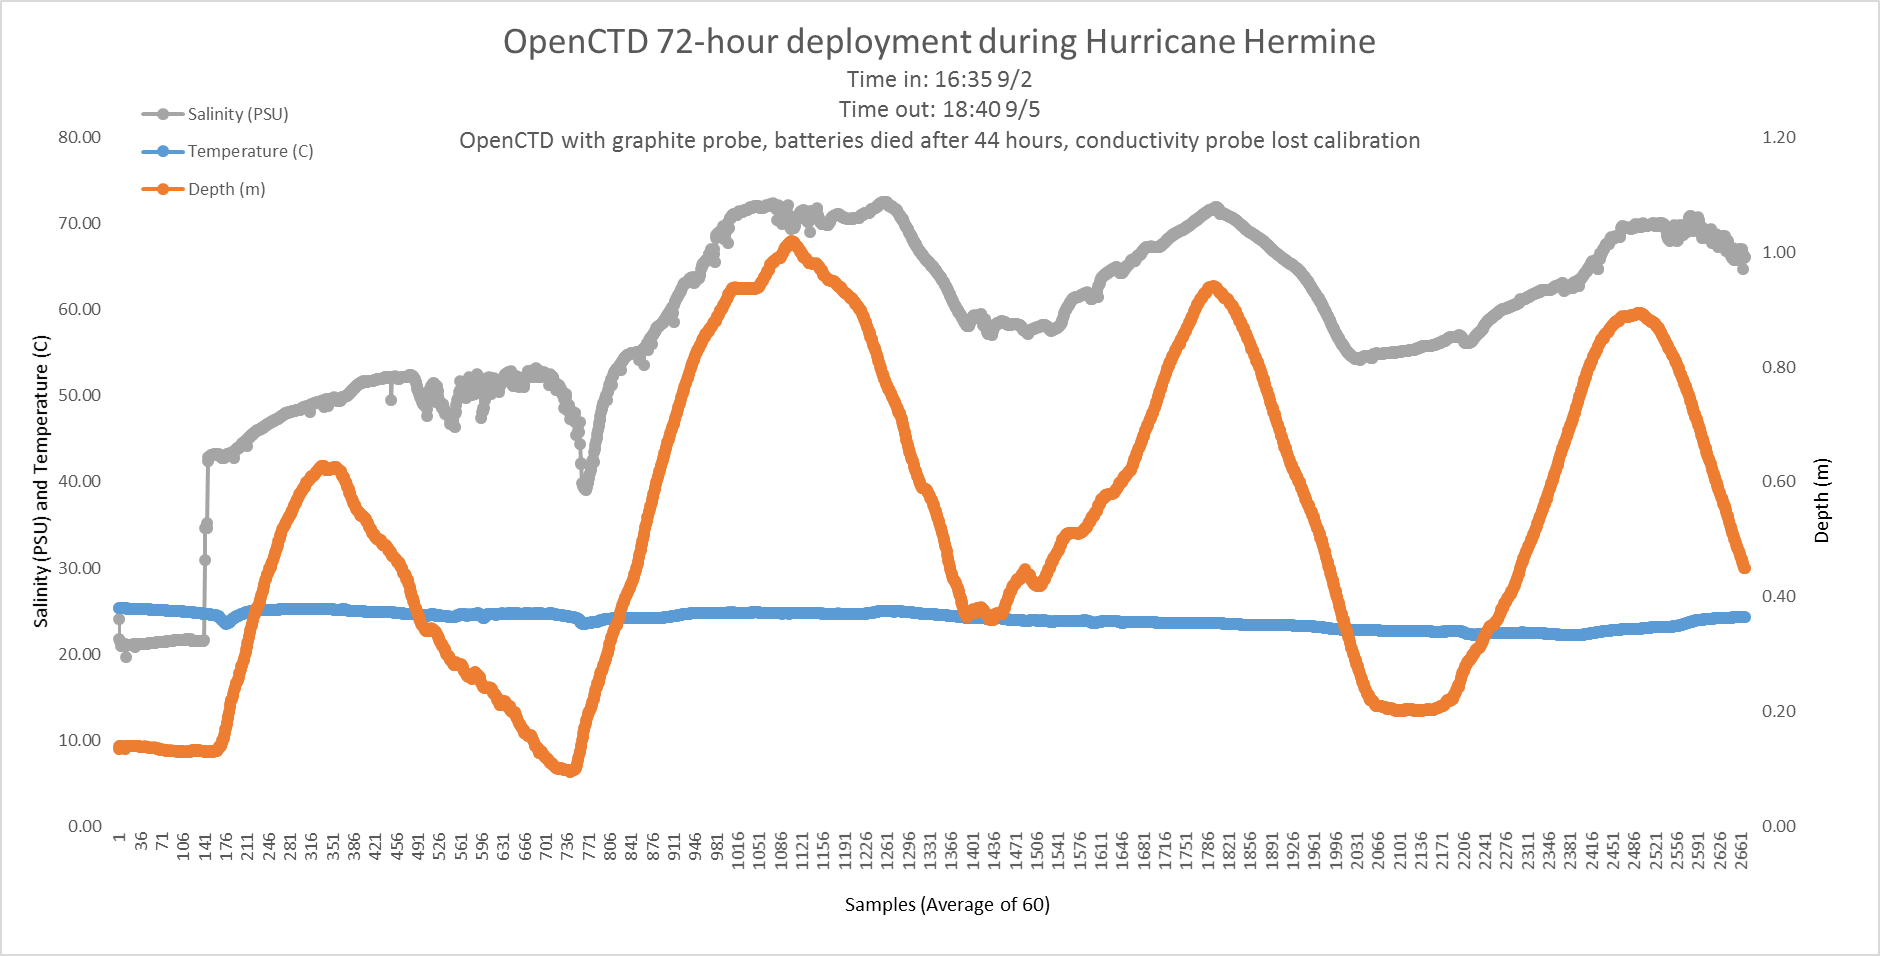
In 2016, Hurricane Hermine roared up the eastern seaboard and struck our little farm in Virginia as a Category 1. Which is great if the wind is all you have to worry about, but on the shores of the Chesapeake Bay, it pushed a huge wall of water up into the estuary.
So, of course, I dropped a CTD into our drainage ditch and watched the tide roll in.
There's a few cool things you can see from these two tidal cycles. The marsh by our farm was pretty fresh that September, so the first weird feature is a massive wall of very salty water coming though, in grey. This was an early prototype, so it lost calibration (or, more likely, I did a poor job calibrating it), but we confirmed with other instruments that, though the real salinity measurements are off, the trend holds.
You can see, just before the second peak, that it started to rain, hard, driving the salinity back down, quickly.
And, to the delight of my insurance agent, you can see the depth plateau for a moment before the highest high tied. This is what happens when a storm surge breaches a retaining wall and pours into the yard. This was also the hurricane where we got to deploy my own research ROV to inspect the damage under my house. It was a day.
And don't worry. I don't live there anymore. We got out of dodge soon after and NOAA now recognizes the region as a Habitat Focus Area: Middle Peninsula Habitat Focus Area. One day, probably soon, that old farm will return to the Bay.
-
Preparing the OpenCTD Kit Part 4: 3D Printed Parts
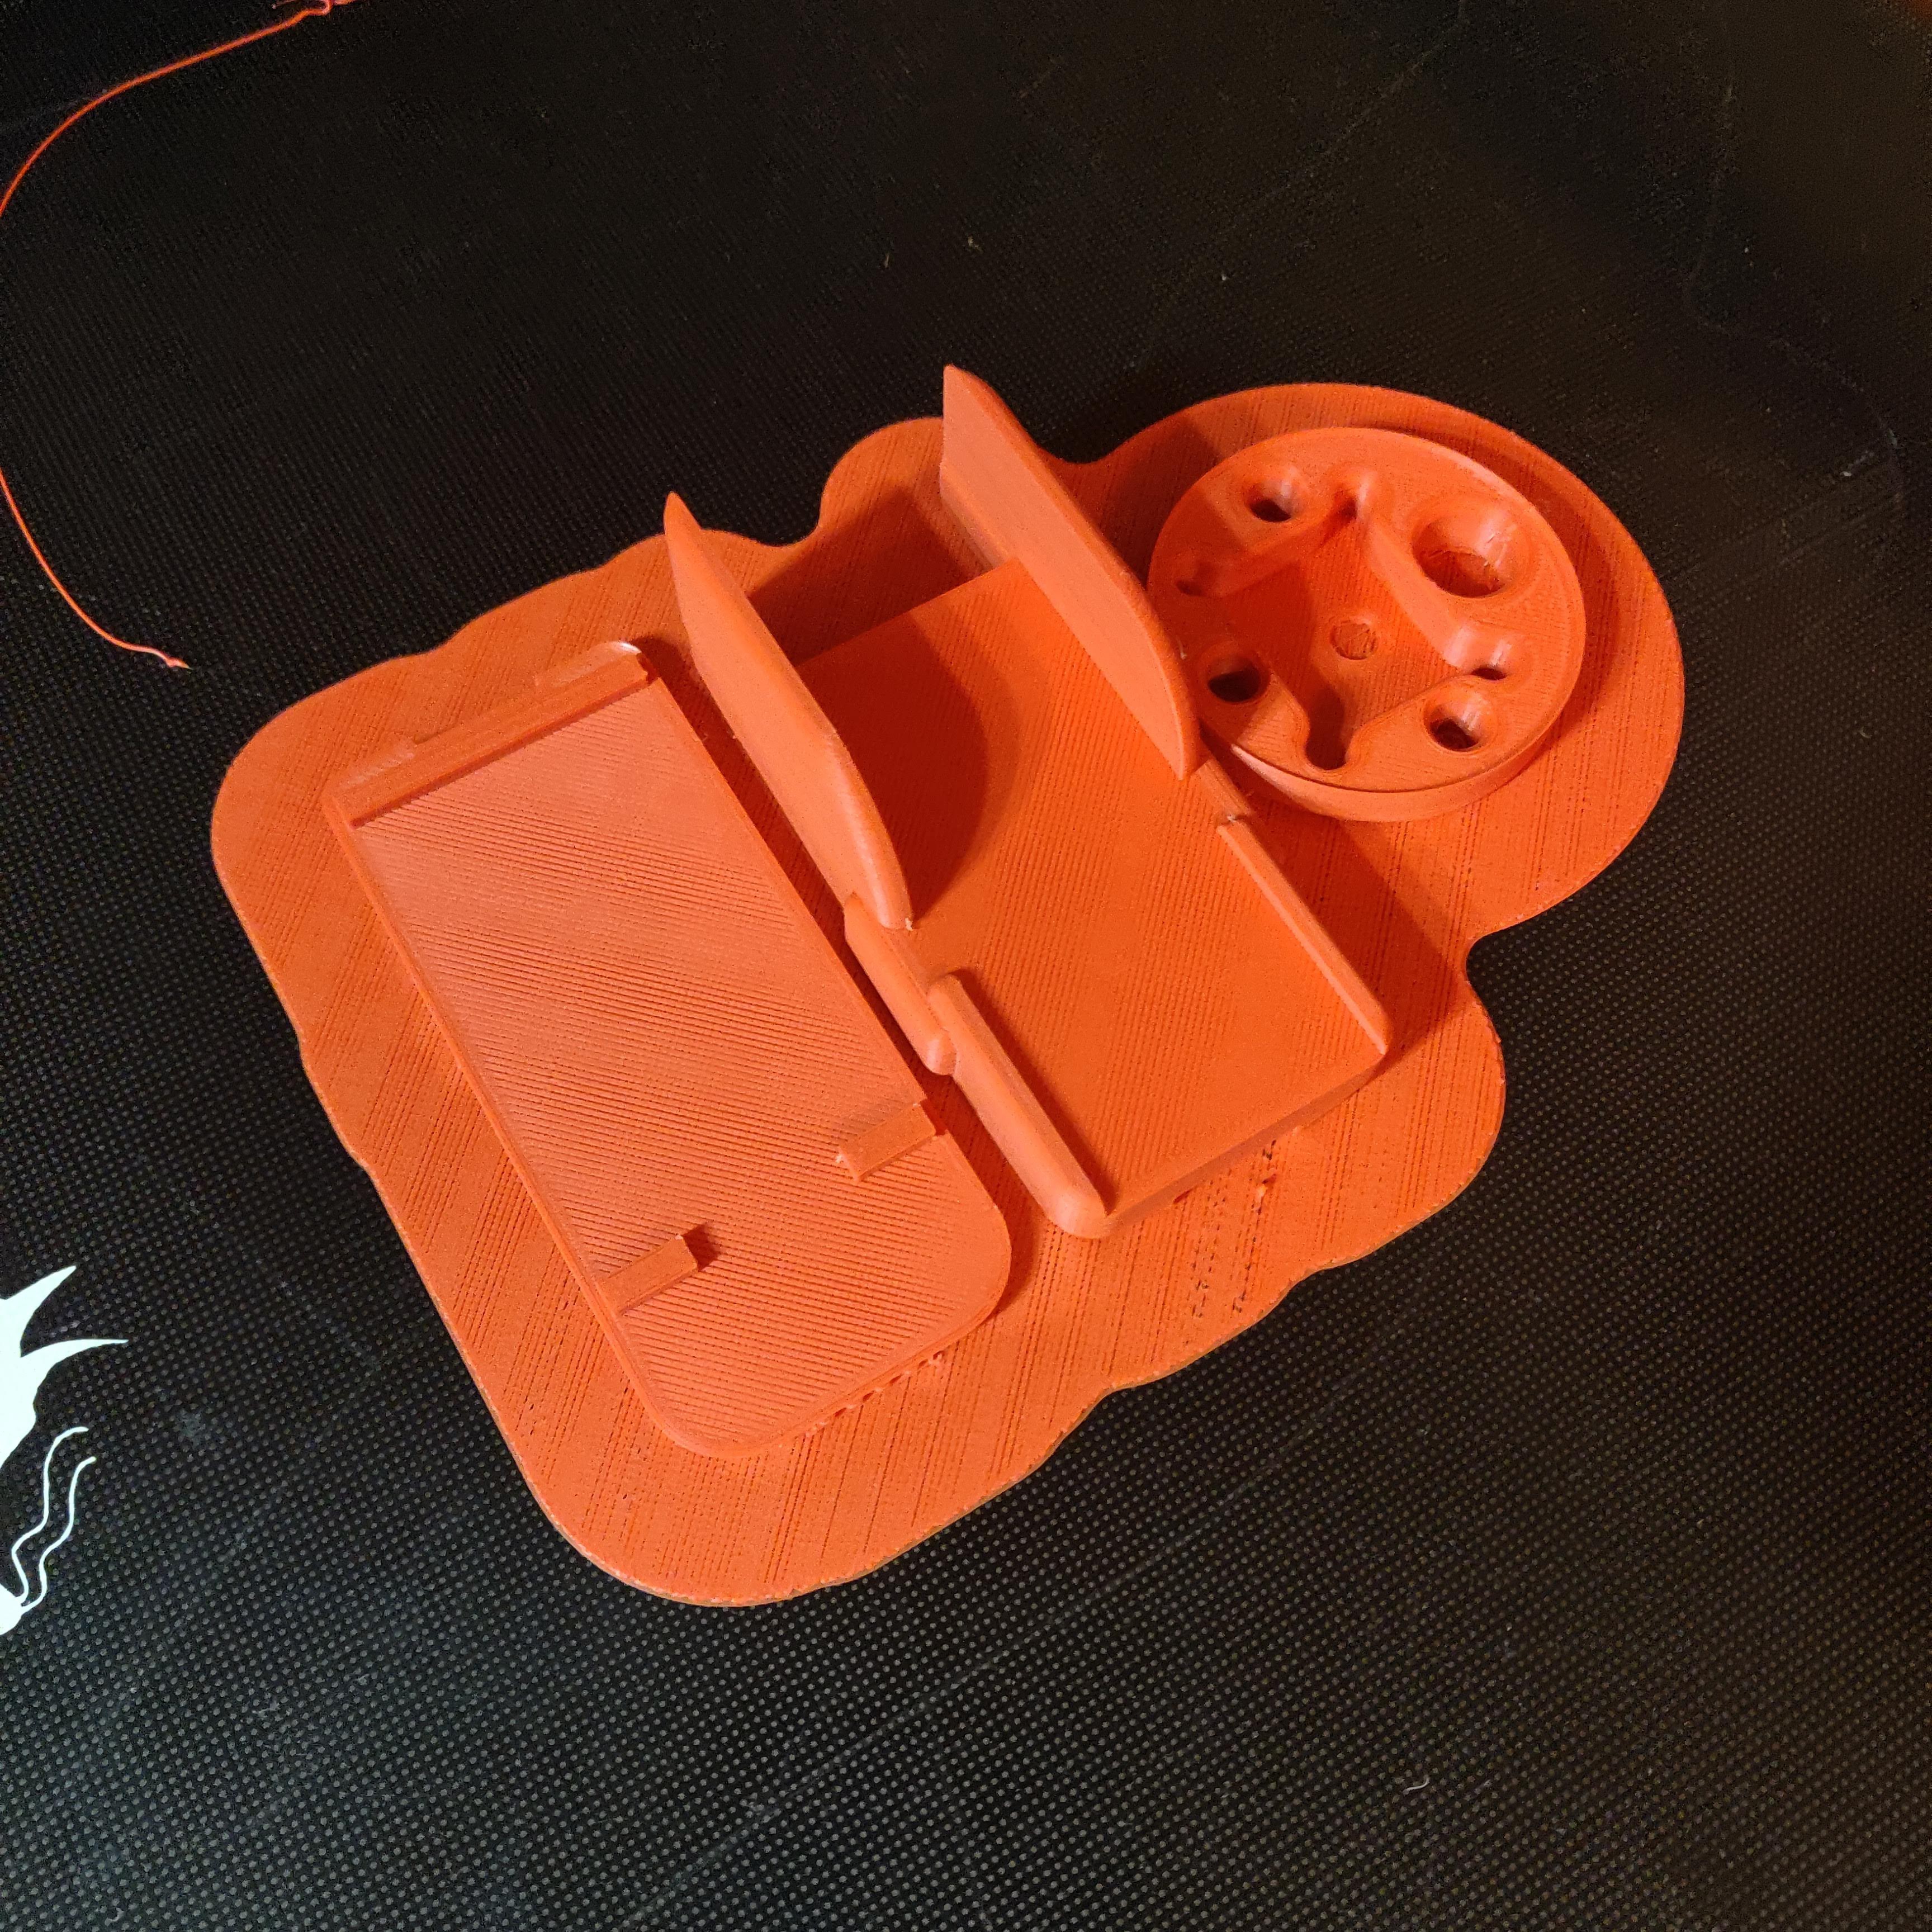
10/22/2022 at 00:42 • 0 comments![]()
Over the years, I've tried to reduce the number of 3D printed parts in the OpenCTD to just the bare essentials. Currently, there is only the baseplate, which guides the sensors into position before potting in epoxy, and a 2-part chassis that goes around the control unit, isolates the battery, and provides a bit of protection from incidental leaks. It keeps the electronics away from the walls of the housing so that drips and condensations don't contact the electronics.
Note: You can absolutely build an OpenCTD without any 3D printed parts, it just won't look quite as nice and may be a more vulnerable to flooding damage.
Also Note: this was a really ugly print. I'll have to clean my printer and redo it. Let us never speak of it again.
-
2022 Hackaday Prize Project Video
10/22/2022 at 00:14 • 0 commentsOur Hackaday Prize video is up. Full disclosure: making videos is one of my least favorite things to do. Publishing complete transcripts so you don't have to watch them, however, is a joy.
Full Transcript Below
I’m Andrew Thaler, and this is the OpenCTD
A CTD is an oceanographic instrument that measures salinity, temperature, and depth. It is the workhorse of ocean science. Almost every marine science project begins with a CTD cast. Almost every piece of ocean conservation data is tied to a CTD cast. Without CTDs, scientists, managers, and conservationists would be blind to the invisible patterns beneath the waves that shape our oceans.
But commercial CTDs are expensive. This means that the vast majority of ocean stakeholders lack access to this fundamental tool. Often the people most directly impacted by warming oceans and rising seas lack the tools necessary to measure those changes.
So, I created the OpenCTD, a low-cost, open-source CTD that can be built for a few hundred dollars, to help bring down this barrier to entry and put the tools of ocean science into the hands of anyone who wants to study, monitor, and understand their changing ocean.
The OpenCTD is assembled from relatively accessible components provided by major electronics manufactures and hardware available at most general hardware stores.
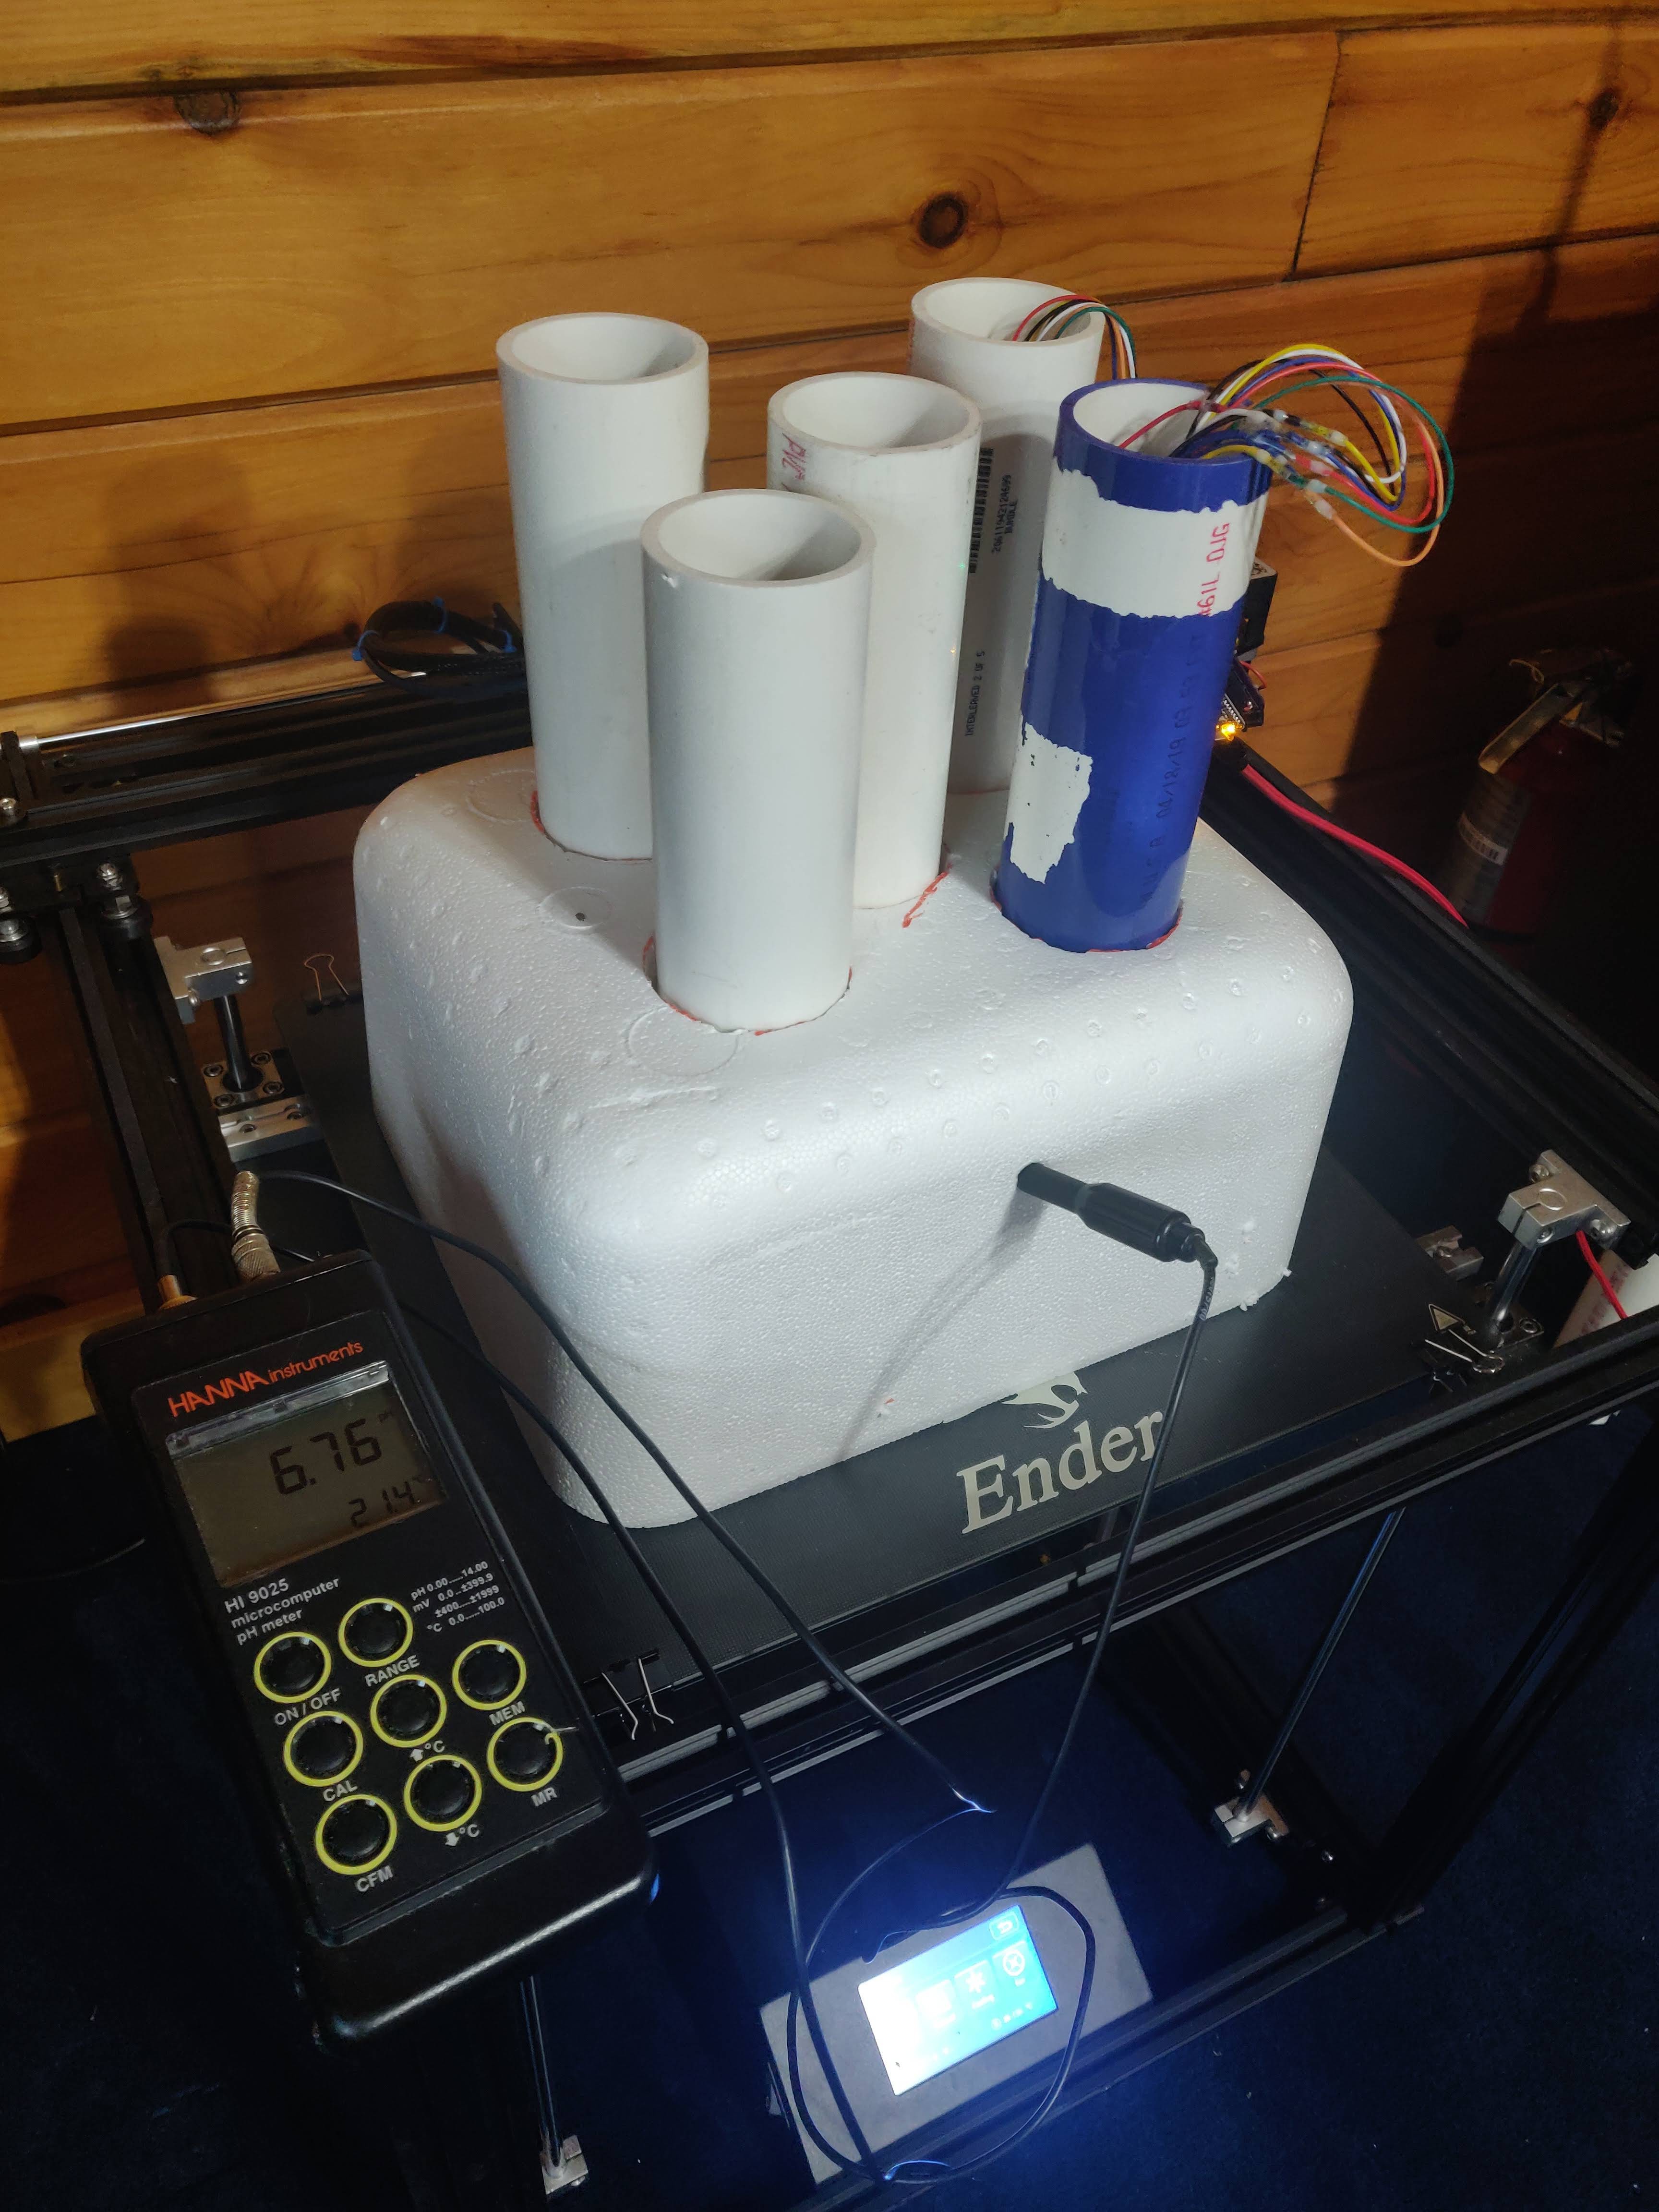
The brain of the OpenCTD is an Adafruit Adalogger M0 mounted on a custom PCB, combined with a real-time clock, and EZO conductivity circuit. The brain is protected inside a 3D printed chassis that also holds the battery. Everything runs on Arduino.
The sensors are made from a 14-bar pressure chip, DS18BA temperature sensors, and a graphite conductivity probe. Over a serial connection, they provide a real-time stream of environmental data, and in the field, the data is logged on a bog standard microSD card.
The housing is made from a 12 inch Schedule 40 PVC pipe, sealed at one end with high-shear strength epoxy, and capped at the other with a pressure test cap.
Casting the CTD is as simple as turning it on and lowering it slowly down into the water column. It can be submerged up to 140 meters. It can be cast by hand from a pier or boat, affixed to other equipment being deployed, or placed on a permanent fixed mooring.
We’ve launched CTDs via fishing rod, strapped them to lobster traps and trawl nets, anchored them to the seafloor, set them out in hurricanes, and, of course, tied them to commercial CTDs to assess data quality.
I can only build so many CTDs, and our goal has always been to create something that people can build themselves. So we’ve created an extensive, freely available, build guide, released all the source code and shape files online, and have been prototyping a classroom kit so that teachers can lead their students through an OpenCTD build.
I want the tools of ocean science to be available to anyone, regardless of funding. I believe that the ocean belongs to all of us and that the tools to study the ocean should be available to anyone with the curiosity and motivation to pursue that inquiry.
-
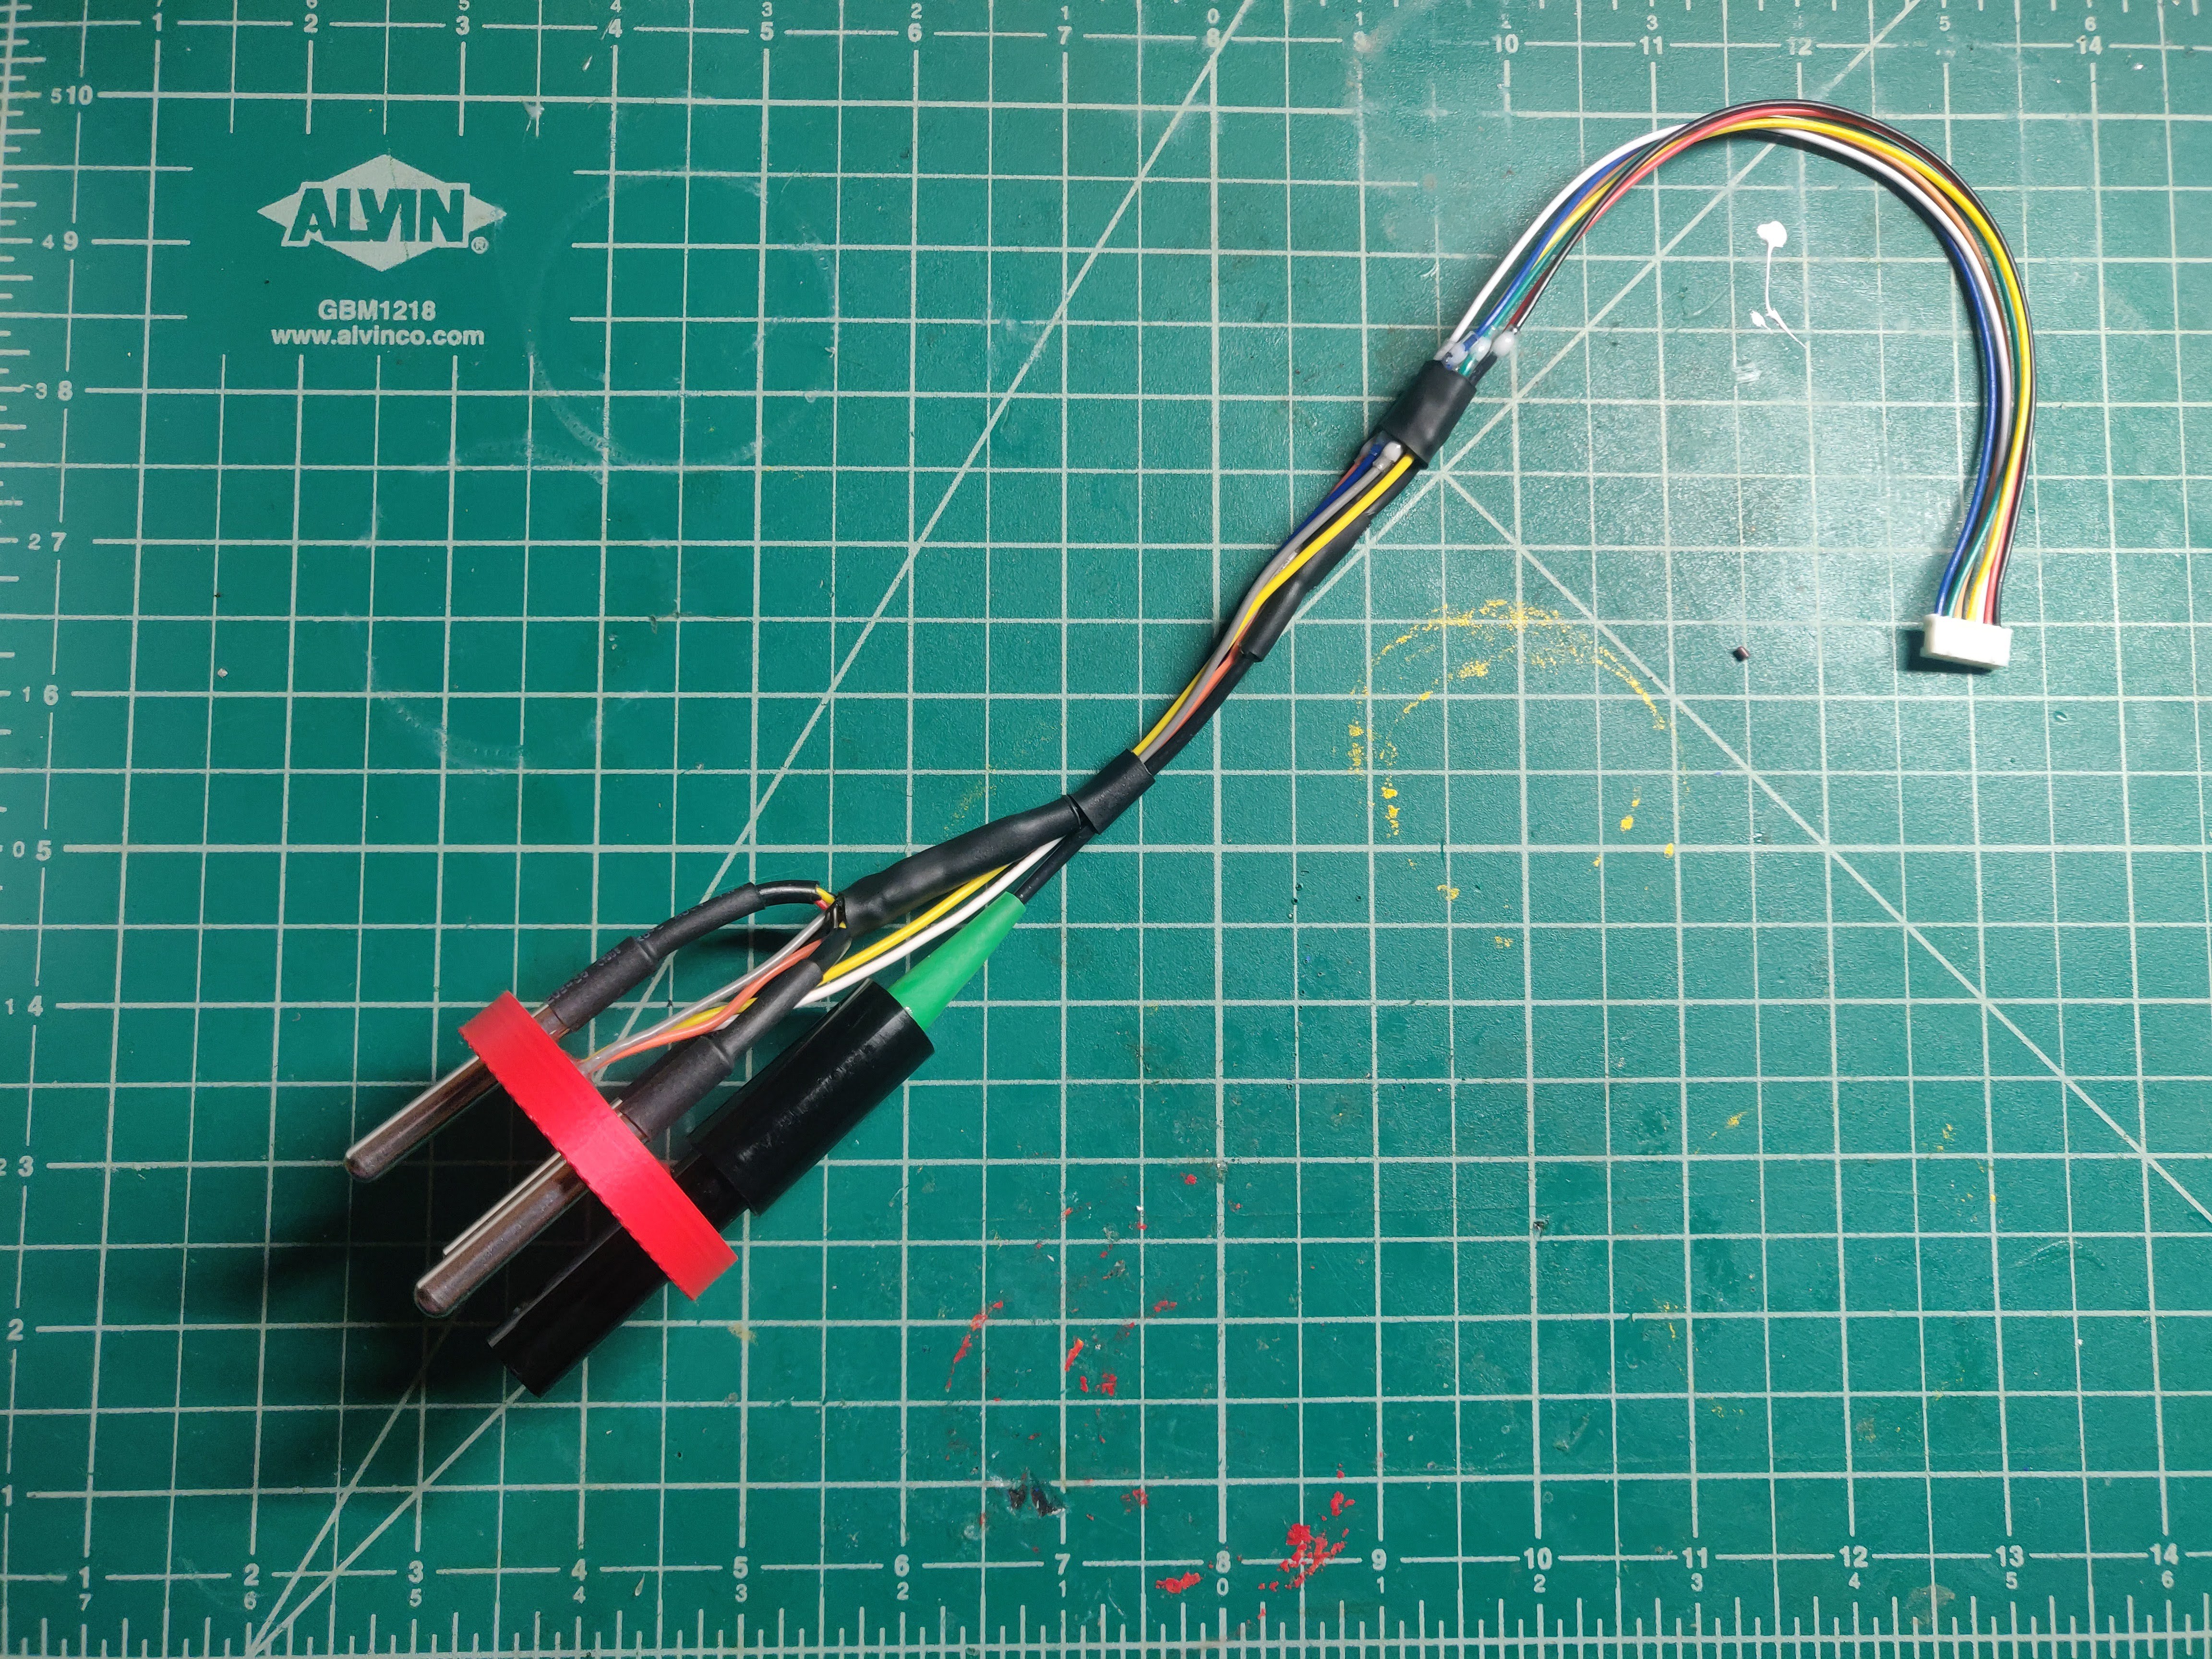
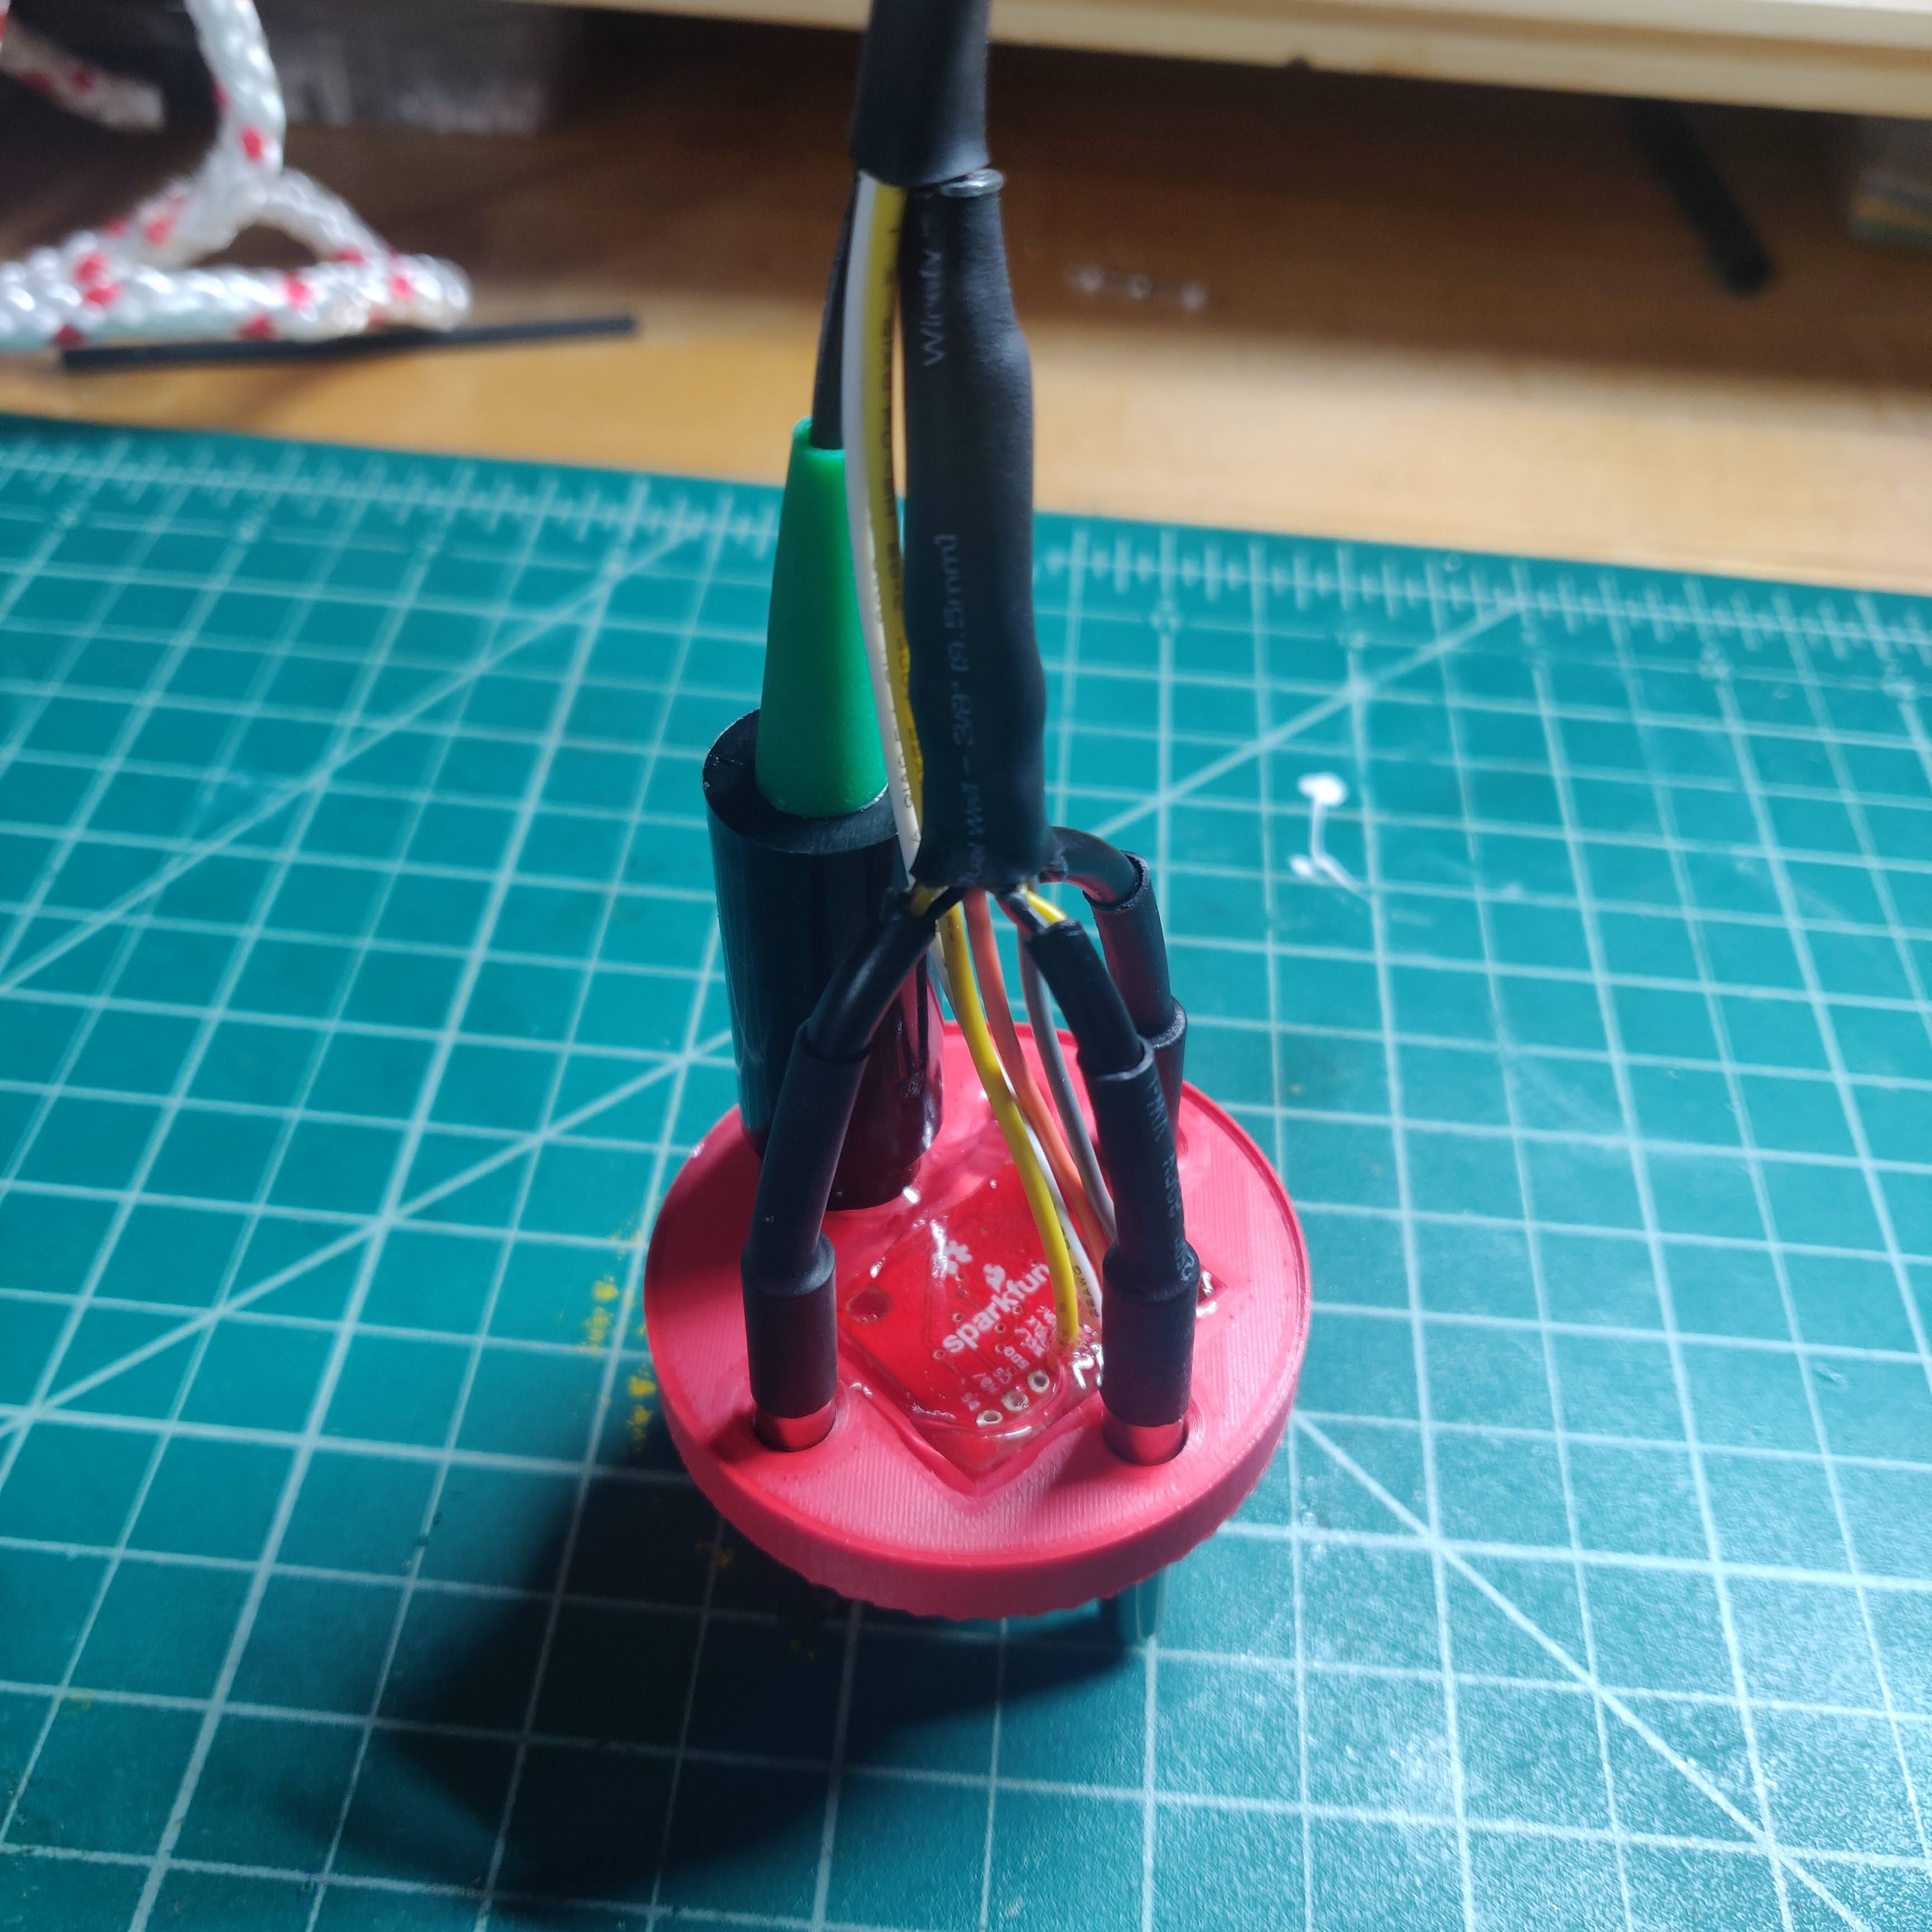
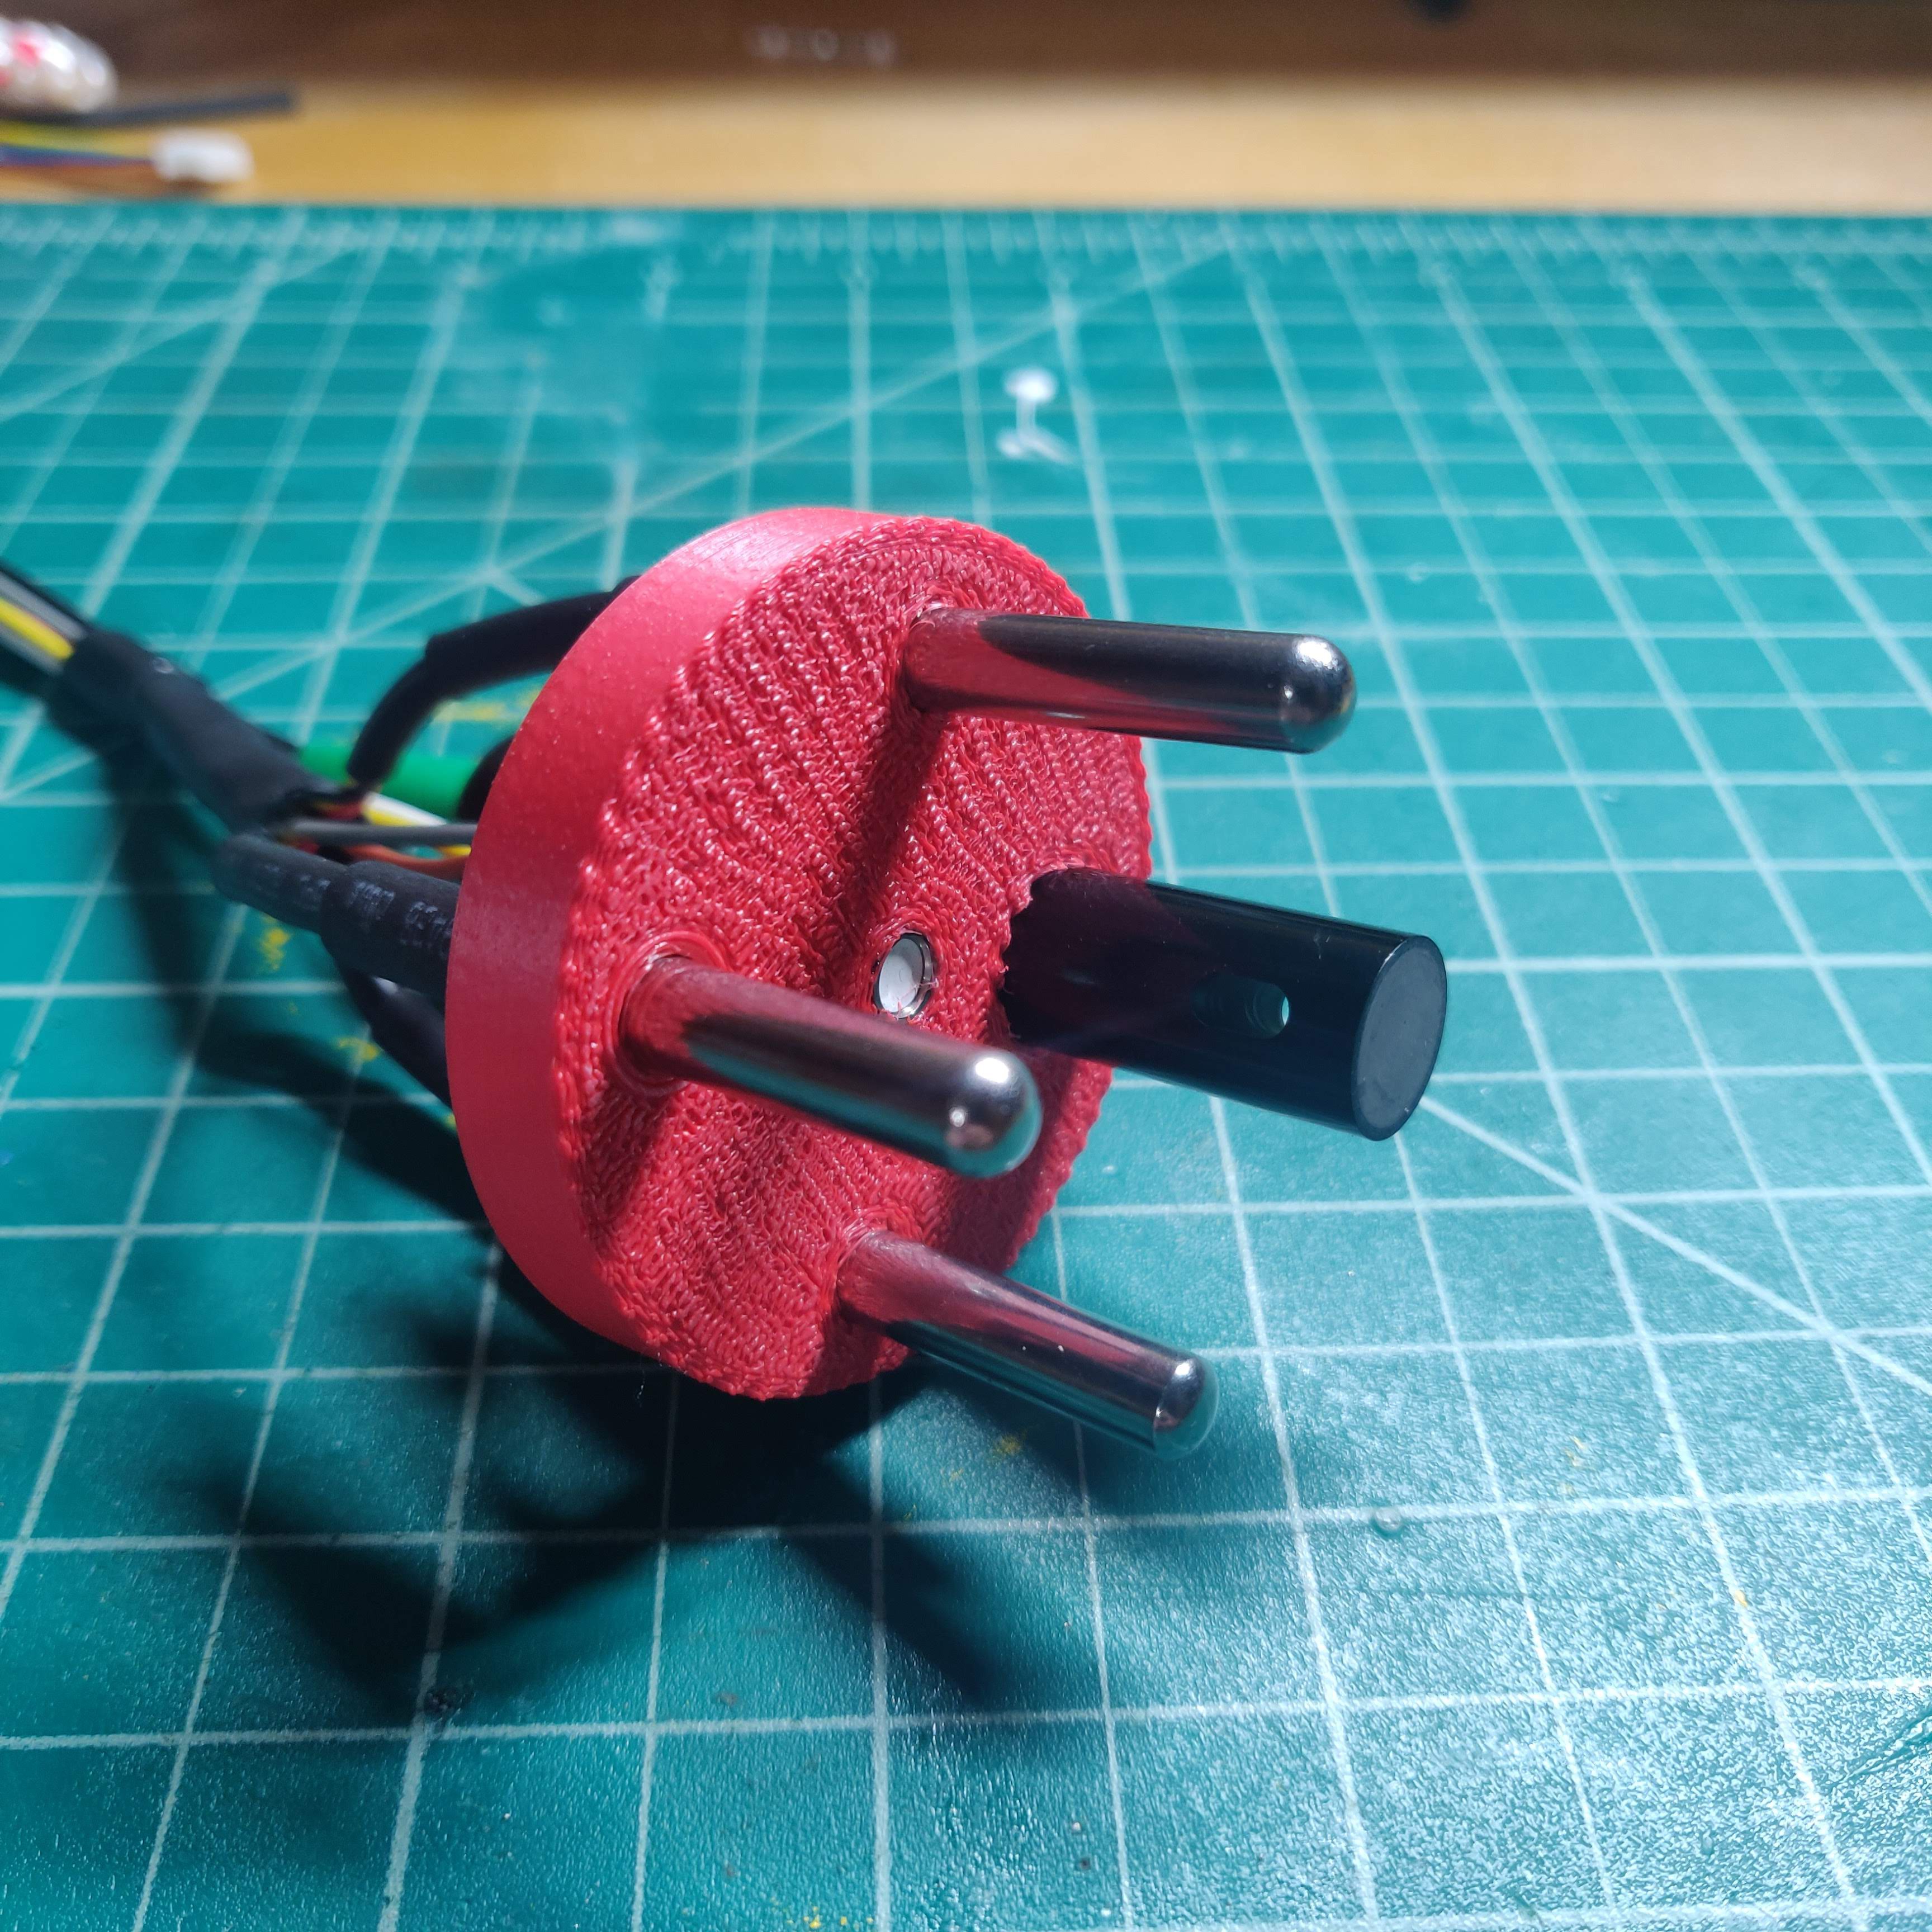
Preparing the OpenCTD Kit Part 3: The Sensor Package
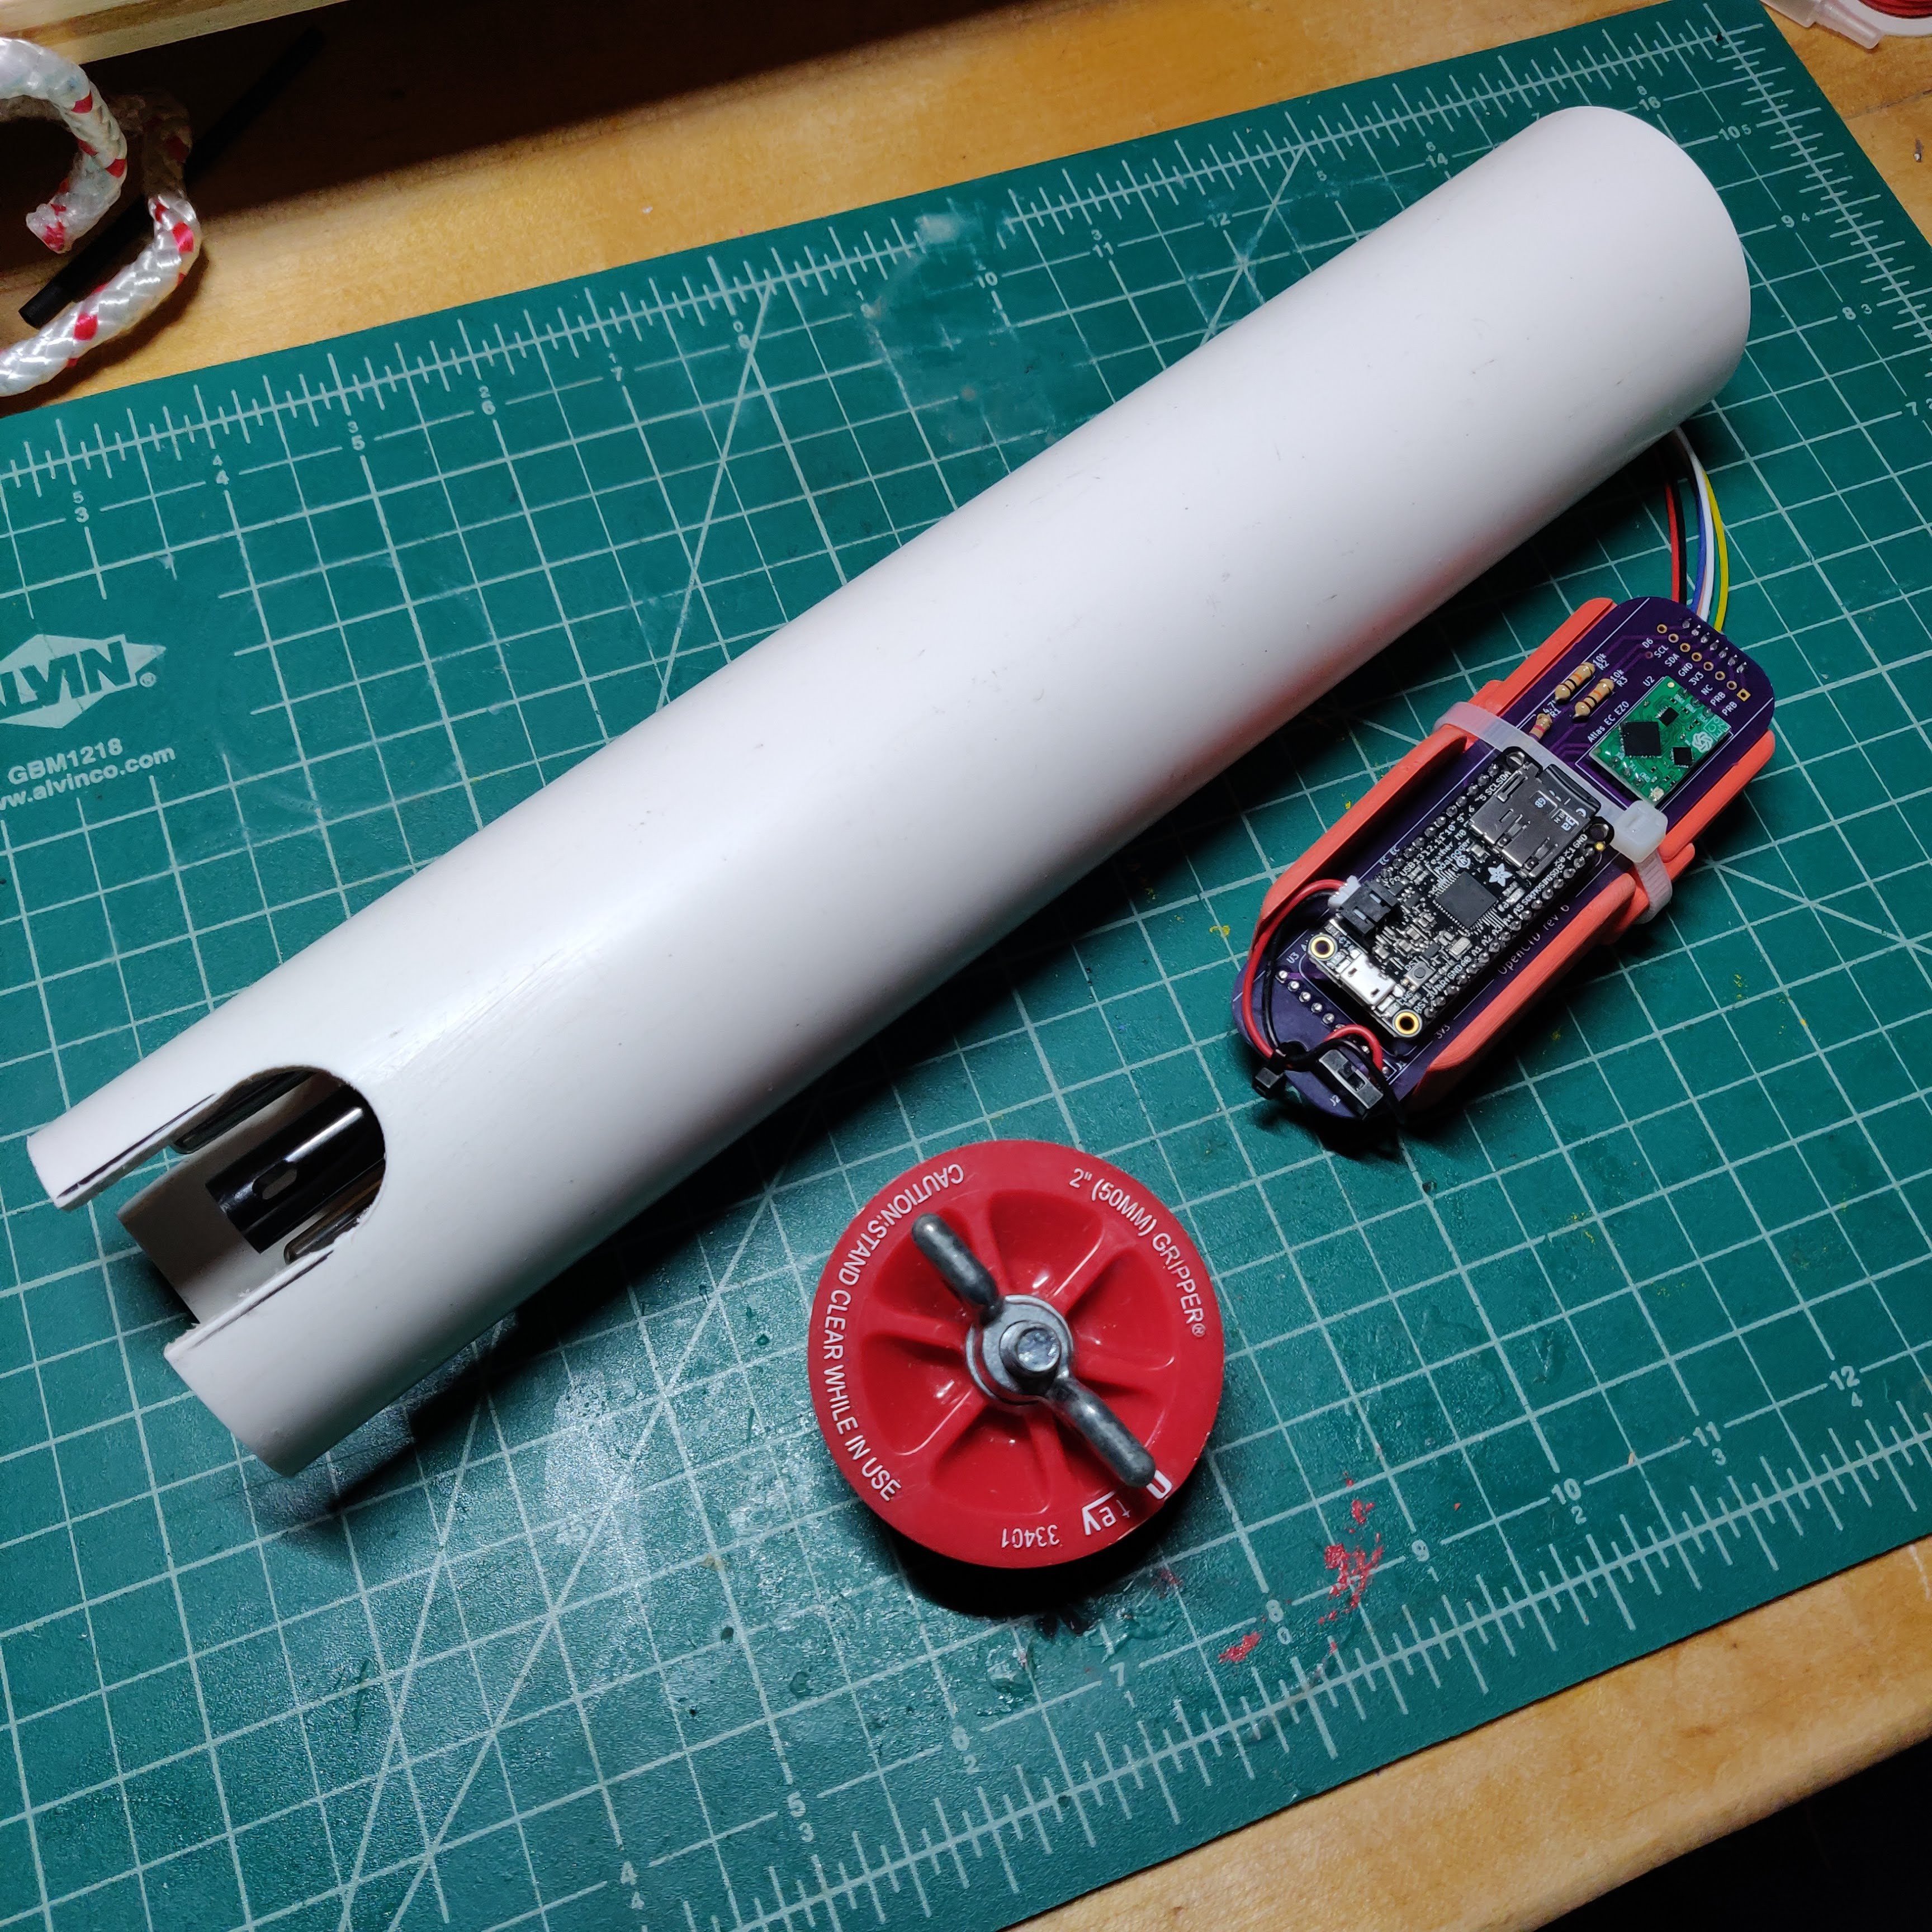
10/21/2022 at 01:22 • 0 comments![]()
One of the trickiest parts of assembling the OpenCTD is wiring up all the sensors. After several iterations, I've settled on a design that is fairly streamlined, minimizes potential failure points, and uses waterproofing heat shrink to seal each connector.
One of the cool things that we've seen in the field is that, when the OpenCTD does flood (when you throw something in the ocean, the ocean tends to throw it right back at you), the sensors almost always survived undamaged. Which is nice, since they're the most expensive component in the device.
![]()
The sensor packet presents and interesting challenge for the OpenCTD Kit, though. Building it is both very rewarding, but also fairly high risk. And without the full packet wired up, I can't QA/QC all the components. Which means, for students, this step is perhaps the most frustrating, and the most likely to fail.
In pilot workshops, I've tested a few different options. Sometimes I build the sensor packet, and the students build everything else. I've tried building most of the sensor packet and the students get to wire up the connector, which I think most can tell is just busy work. Or I give them the raw components and let the dice lie where they fall.
![]()
But workshops have an advantage in that I'm there to supervise. I can catch problems before they become unfixable. A student kit needs to work without an experienced instructor nearby.
What I've settled on, at the moment, is making both raw and finished sensor packages available, and let the user decide.
Ocean Sensing for Everyone: The OpenCTD
A low-cost, open-source oceanographic instrument kit to measure our changing oceans