-
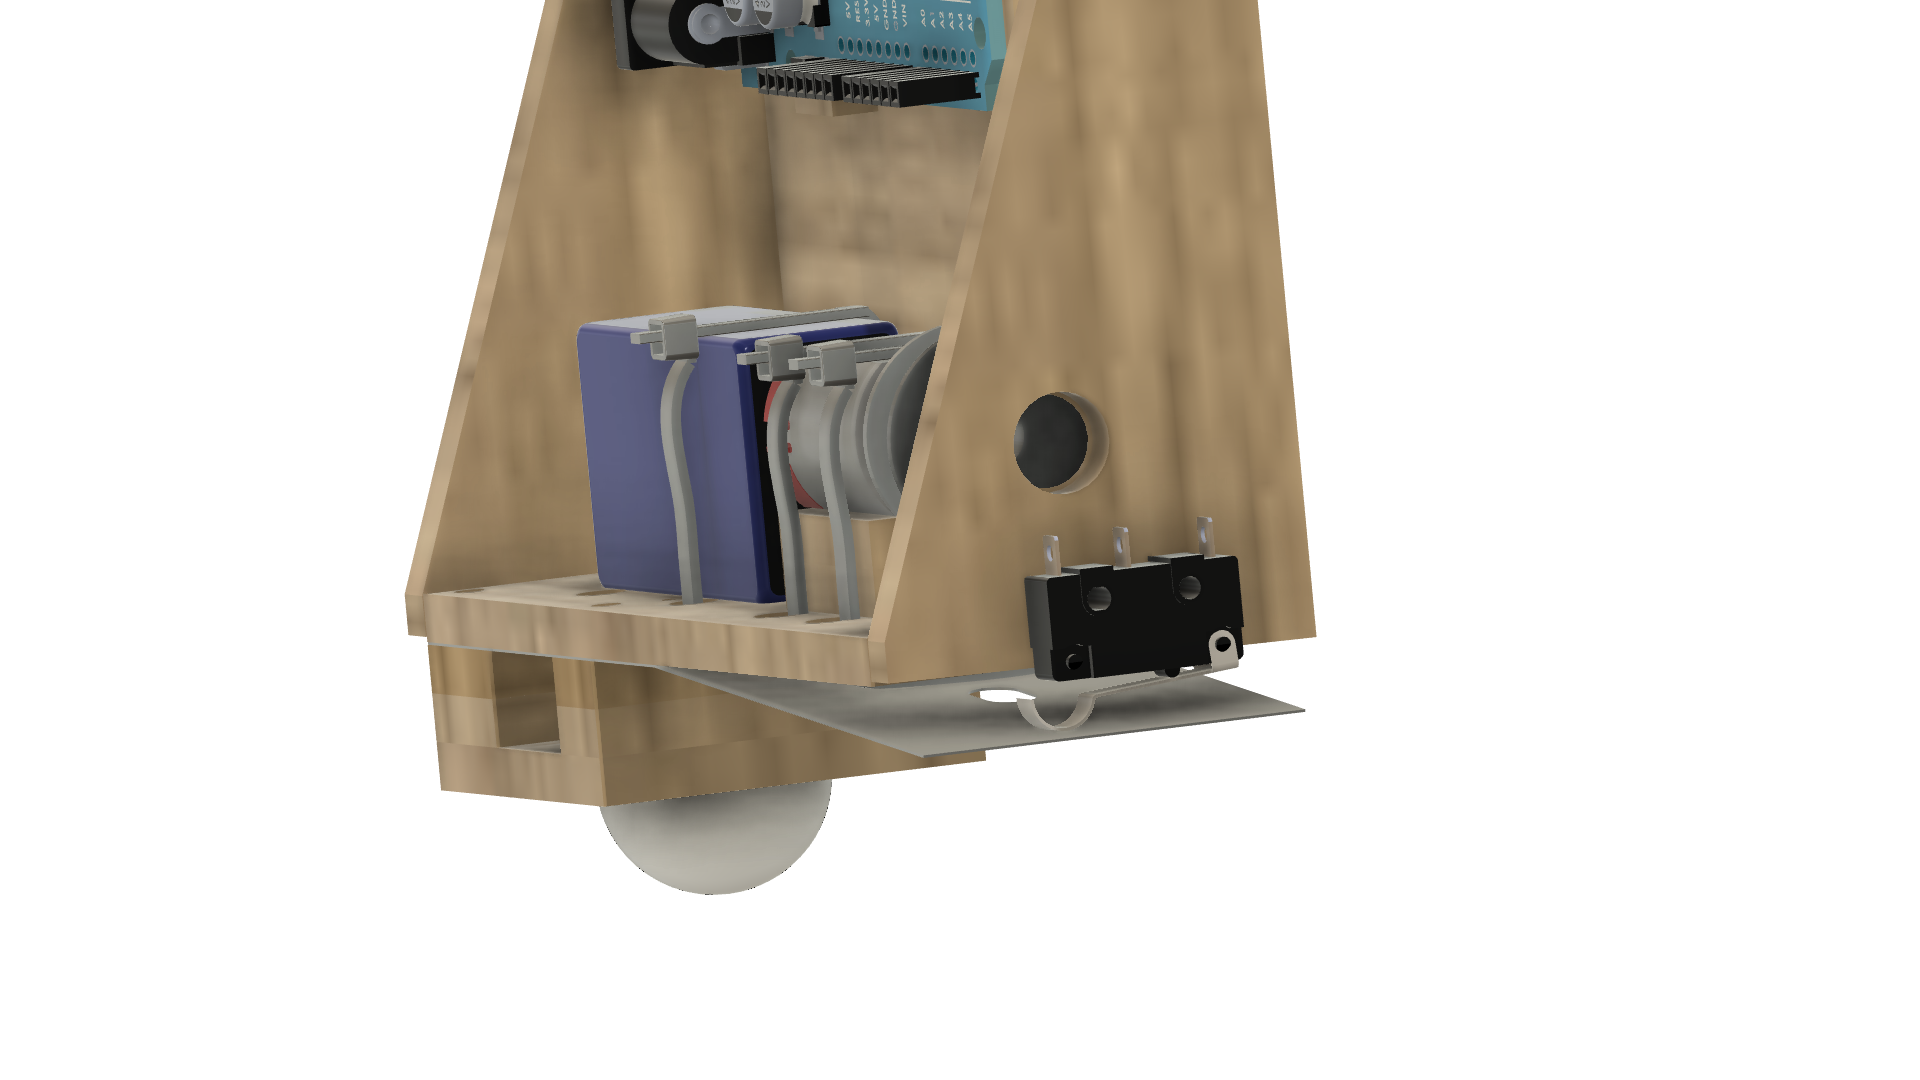
11Install the limit microswitch
On the right-hand side of the chassis screw in the micro switch with two 3x16 screws.
![]()
-
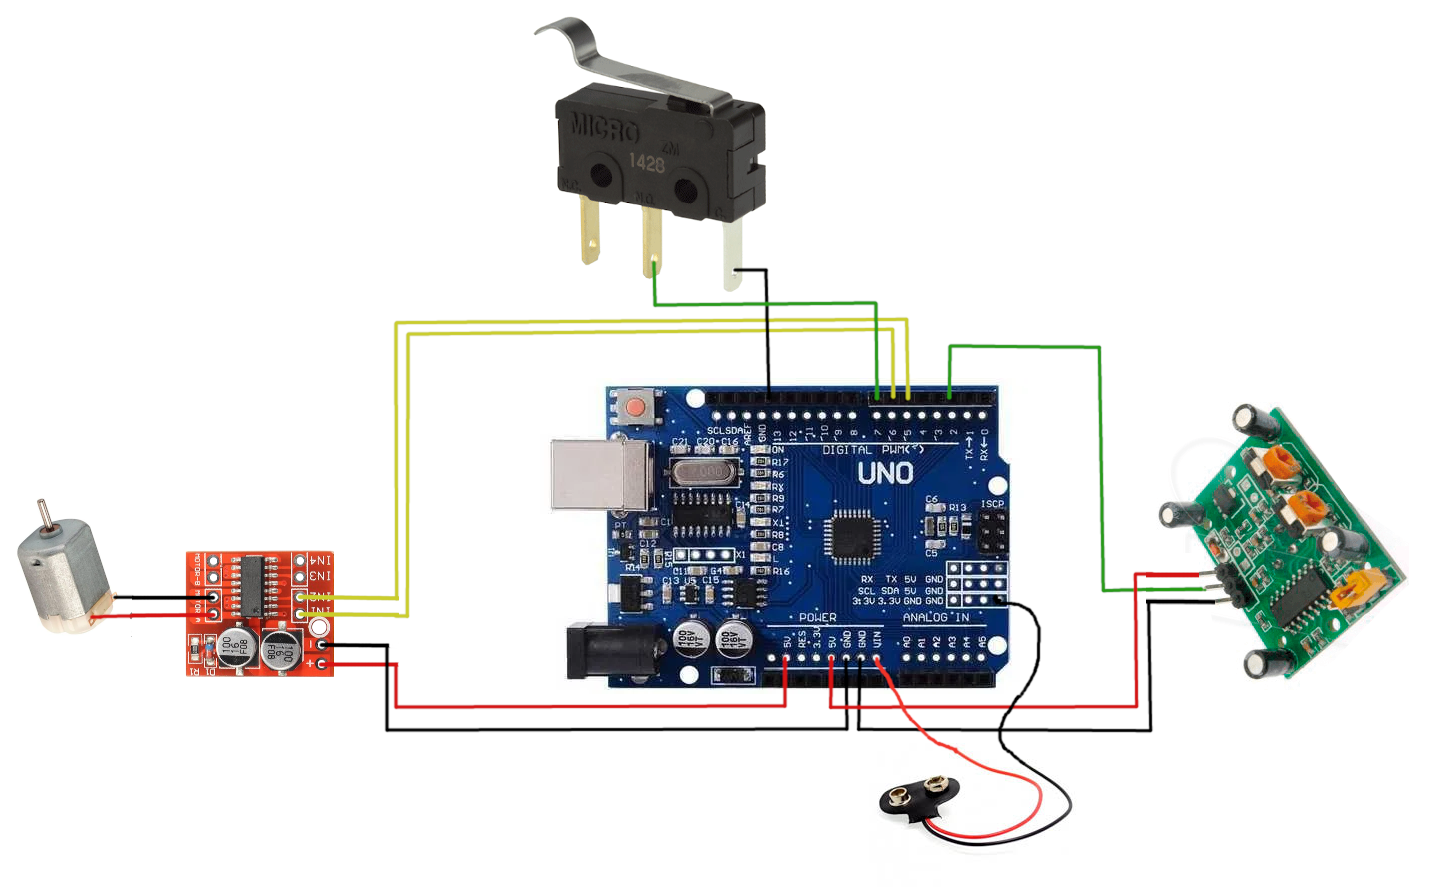
12Complete wiring
Following the diagram below pay careful attention to the polarity (red and black wires) wire the unit together, The color of the signal wires isn't important just use what you have laying around. The most important thing is to make sure you have the battery going to VIN, not to 5V otherwise you will cook your Arduino.
![]()
-
13Upload sketch
Copy and paste the following code into your Arduino IDE, no extra libraries are required.
// constants won't change. They're used here to set pin numbers: const int PIRpin = 2; //const int LEDpin =1; //digispark const int LEDpin =13; //UNO const int limitPin = 7; // the number of the pushbutton pin //const int motorFWD = 0; //digispark // const int motorREV = 4; //digispark const int motorFWD = 5; //UNO const int motorREV = 6; //UNO const int frightDelay = 10000; //delay between actions const int acceleration = 25; //how fast the motor starts to int acceleration delay in ms // variables will change: int limitState = 1; // variable for reading the pushbutton status int PIRstate = 0; int MOTdirection = 1; int PWMValue = 200; // starting PWM value void setup() { // initialize the LED pin as an output: pinMode(LEDpin, OUTPUT); pinMode(PIRpin, INPUT); pinMode(motorFWD, OUTPUT); pinMode(motorREV, OUTPUT); pinMode(limitPin, INPUT_PULLUP); } void loop() { PIRstate = digitalRead(PIRpin); if (PIRstate == HIGH ) { PWMValue=200; digitalWrite(LEDpin, HIGH); do { limitState = digitalRead(limitPin); driveMotor(); } while (limitState != 0); //state is 1 button is not activated if (MOTdirection ==0){MOTdirection = 1;} else { MOTdirection = 0;} stopMotor(); delay(500); lockMotor(); delay(1000); stopMotor(); delay(frightDelay); } digitalWrite(LEDpin, LOW); } void driveMotor(){ if (PWMValue < 255){++PWMValue;} delay(acceleration); if (MOTdirection ==1) { analogWrite(motorFWD, PWMValue); analogWrite(motorREV, 0); } else { analogWrite(motorFWD, 0); analogWrite(motorREV, PWMValue); } } void stopMotor(){ analogWrite(motorFWD, 0); analogWrite(motorREV, 0); } void lockMotor(){ digitalWrite(motorFWD, 1); digitalWrite(motorREV, 1); } -
14Testing
Once you upload the code the motor will probably try and drive immediately as the PIR is high when it turns on. For testing, I suggest you attach the unit to the roof somewhere to prevent the tangling of the cotton. Check my testing in the video here for some tips.
Depending on the length of your thread, the weight of the spider, and the speed of the motor it might take a bit of tweaking to get the spider to drop and return to the full length of the thread. I suggest you check the principle of operation here: to get a goof idea of what is happening.
There are three main variables you can change.
frighdelay This is the time the spider waits between dropping. This value is milliseconds so 10000 is 10 seconds. Increase or decrease to your desire.
PWMvalue If the motor starts spinning at full speed the thread will double up on itself and the spider will drop a very short distance. The value is between 0 and 255. If you find the spider does not always fully unravel LOWERING this value makes the motor start slower. Keep increasing this value until you don't have the cotton binding on itself. If the speed for the whole journey is too slow the spider will not have enough momentum to trigger the limit switch at the end of the run.
Acceleration This is how fast the Arduino will increase the speed. This is in milliseconds. Tweaking between this value and the PWMvalue you should be able to find the sweet spot for your spider.
Notes about your spider Not all spiders are created equal. The weight and size of your spider will greatly affect how the project behaves. If your spider is too heavy it will unravel the web due to its weight. If it is too light it might not activate the limit switch. In my testing, the spider weighed around 6 grams.
-
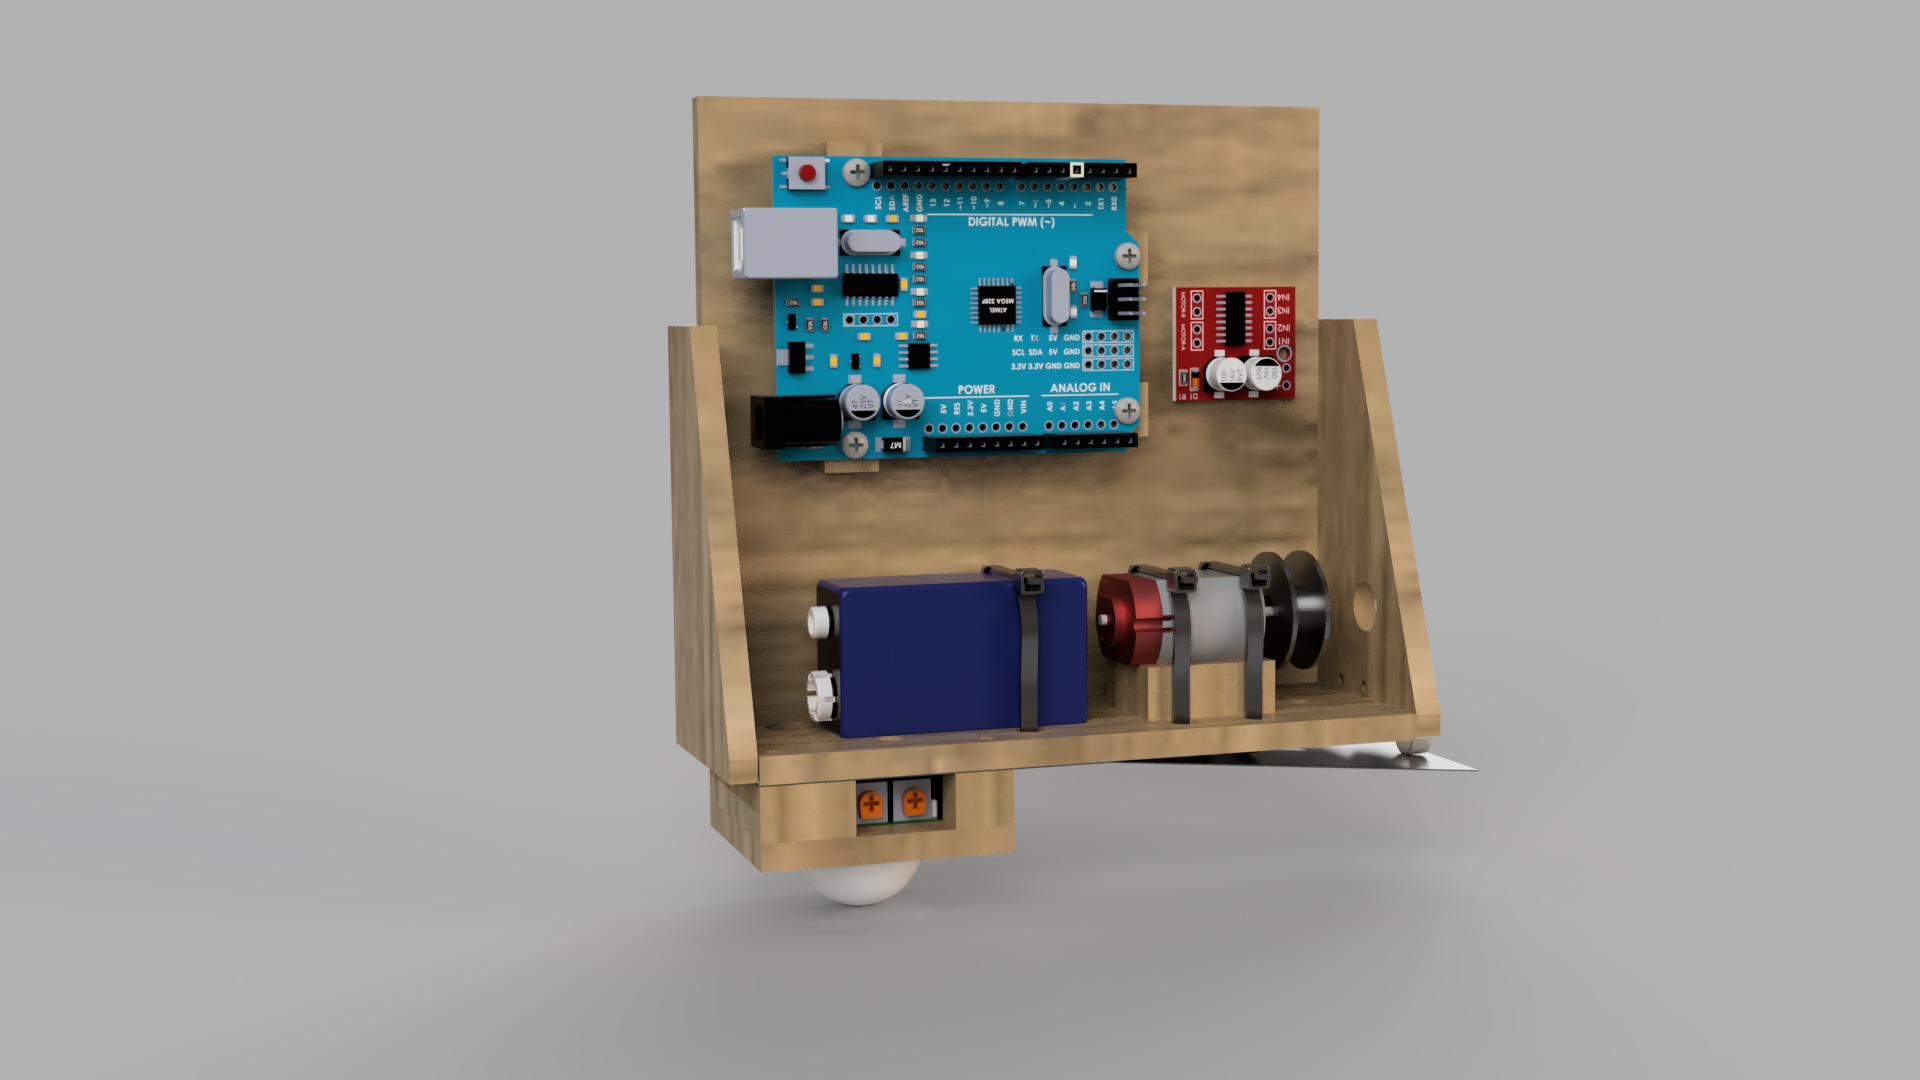
15Install the battery and start scaring!
The battery is cable tied to the base similar to the motor. There are two locations but you will probably only need one.
![]()
Sensing spider prank (Wood Edition)
In this project, you will learn multiple aspects of Arduino while building an automated sensing spider.
 jasonwinfieldnz


Discussions
Become a Hackaday.io Member
Create an account to leave a comment. Already have an account? Log In.