 Sam Ettinger
-
1How I assemble these (your mileage may vary)
If you want to make your own TO-92s in the same way as I'm doing it:
Get the 3d printed shell file from Printables and make a bunch of them. I printed them in clear resin on a Formlabs printer and dyed them in Jacquard Piñata alcohol inks. Nota bene for the alcohol inks: the inks are suspended in mostly ethanol, not isopropyl alcohol. The opaque "blanco" ink does not disperse in IPA! You have to add it to fairly concentrated ethanol, and even then you have to agitate it constantly to avoid getting big congealed lumps of pigment.
-
2Step 2
Get the little SOT-23 holder PCBs from the git repo or direct from OSH Park. Be sure to order a flex PCB, nothing else will work. The 4×4 array has score lines that make the boards easy to snap away from each other.
-
3Step 3
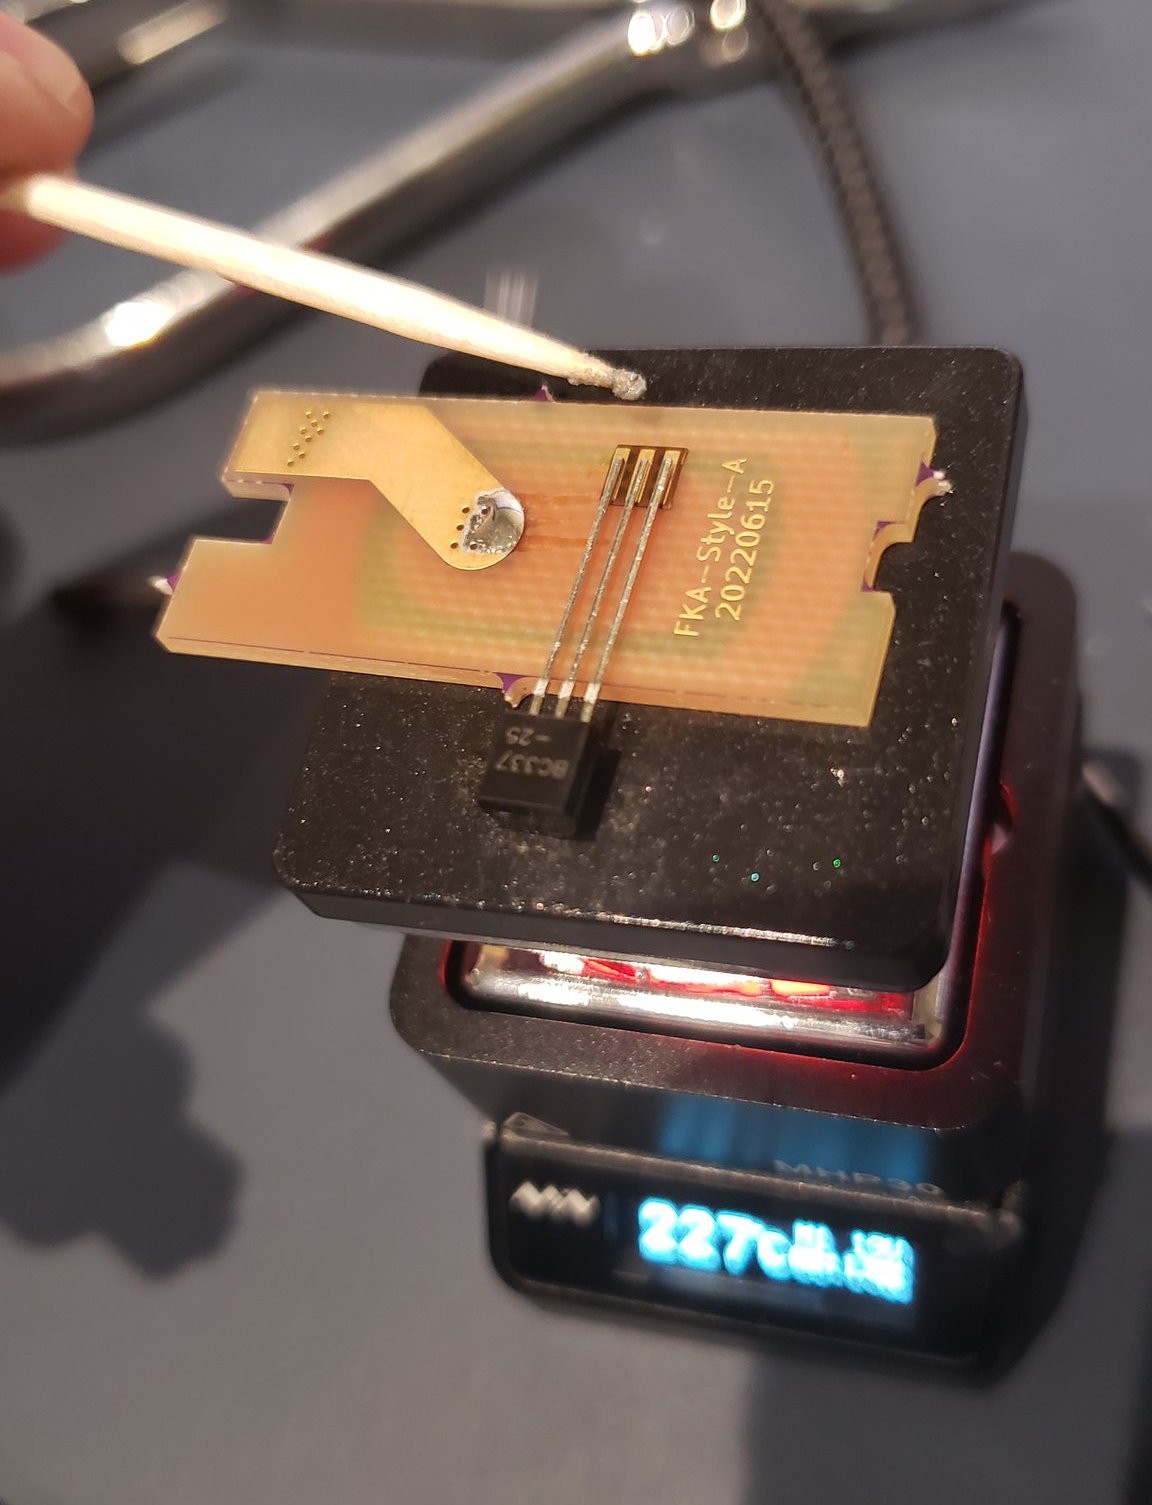
Find a sacrificial TO-92 to act as a leg donor, and line it up with the flex PCB on a hot plate, like so:
![]()
I'm using a spare PCB to keep the legs roughly coplanar with the PCB.
There's a via in the middle leg pad that can help you line up the PCB properly:
![]()
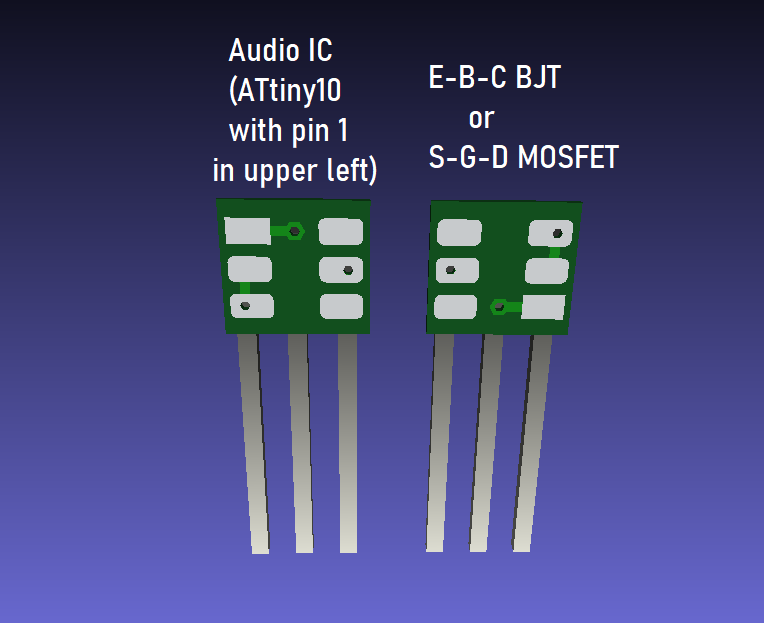
I realize now that the text is unclear. "E-B-C BJT" and "S-G-D MOSFET" mean that, if you attach a SOT-23 transistor with Base-Emitter-Collector pin arrangement, or a SOT-23 MOSFET with Gate-Source-Drain arrangement, you can produce an Emitter-Base-Collector TO-92 or a Source-Gate-Drain TO-92. These are the common SOT-23 and TO-92 pin arrangements here in North America.
![]()
As an aside, I have no idea what The "FKA-Style-A" PCB is supposed to be! It is not mine. Do you know what it does?
-
4Step 4
When the hot plate is up to temperature, drop a blob of solder paste onto each pad. Precision is not necessary here! I used crusty expired paste and it flowed into place quite well.
-
5Step 5
Trim the donor TO-92 and discard it. Are the legs unevenly soldered and unbalanced? Don't worry about it! Because now you're going to flip the board over, and the leg levels will self-correct.
![]()
-
6Step 6
Once the SOT-23 part is attached, pop the 3d printed cap on! It is a friction fit for me.
To make them permanent and to keep the legs from shearing off when you bend them, fill the rest of the cavity with resin and cure it.
![]()
Colorful Homemade TO-92s
Cursed sand and trans-istors! Messing around with one of electronics' most iconic form factors.


Discussions
Become a Hackaday.io Member
Create an account to leave a comment. Already have an account? Log In.